
Whether you want to add rounded corners to your shapes or images in Photoshop, it’s easily done in a couple of clicks. In more recent updates in Photoshop, this process became much easier since you simply click and drag your mouse to round the edges of a shape or path. Here’s how to do it.
Video Tutorial
How To Add Rounded Corners In Photoshop
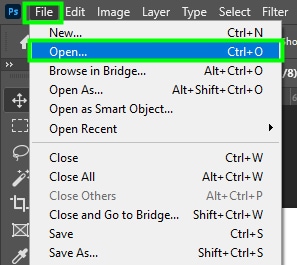
Step 1: Open The Image And Unlock The Image Layer
To round the corner of an image in Photoshop, first, bring the desired image to Photoshop. To do this, go to File > Open or press Control + O (Win) or Command + O (Mac).

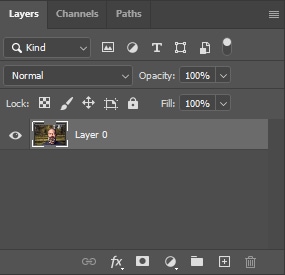
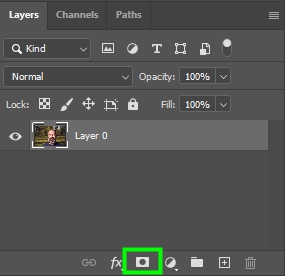
Next, go to the Layers Panel and double-click the image while holding Alt (Win) or Option (Mac) to unlock it.
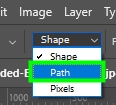
Step 2: Add A Rectangle Shape Using The Path Mode
After that, go to the toolbar and select the Rectangle Tool (U).
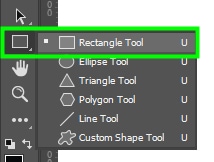
Then, change the drawing mode to Path in the Options Bar.
Next, click and drag across the image to draw a rectangular path. Try to draw the path close to the image edges, but not too close, otherwise, there won’t be enough space to round the corners of your image.
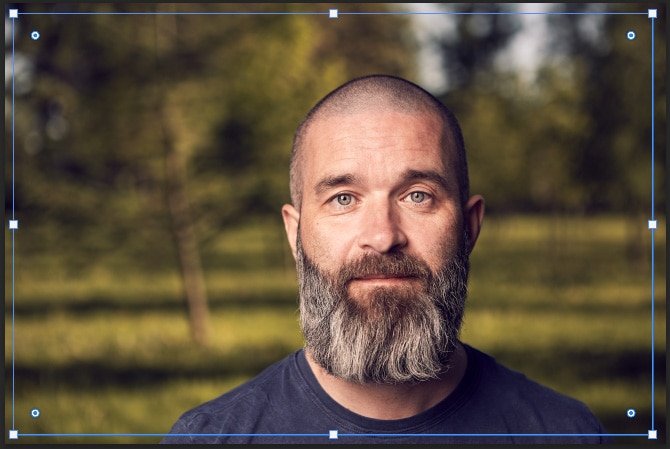
Step 3: Curve The Corners
After drawing the path, click and pull one of the blue dots inwards to curve all edges simultaneously.


The more you pull the blue dot down, the rounder the image borders will become.
Note: You can use this process to round the corners of shapes without needing the image behind it. You can keep the shape mode set to Shape as well.
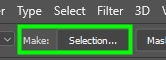
Step 4: Turn The Path Into A Selection
Once you’re happy with the result, go to the Options Bar and click Make Selection.
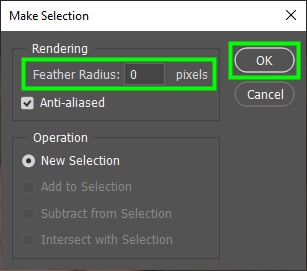
Next, choose a value for feather radius. Feather Radius softens the edges of brushes, images, shapes, and other elements in Photoshop. A high feather radius will blur the edges of your image, while a low feather radius will sharpen them.
For best results, I recommend setting the feather radius to zero since sharp edges are better than blurred edges when it comes to images with rounded corners. Click OK to confirm your choice.
This will result in a successful selection.
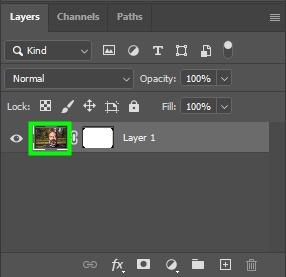
Step 5: Add The Selection To A Layer Mask
Now, go to the Layers Panel and click the layer mask icon.
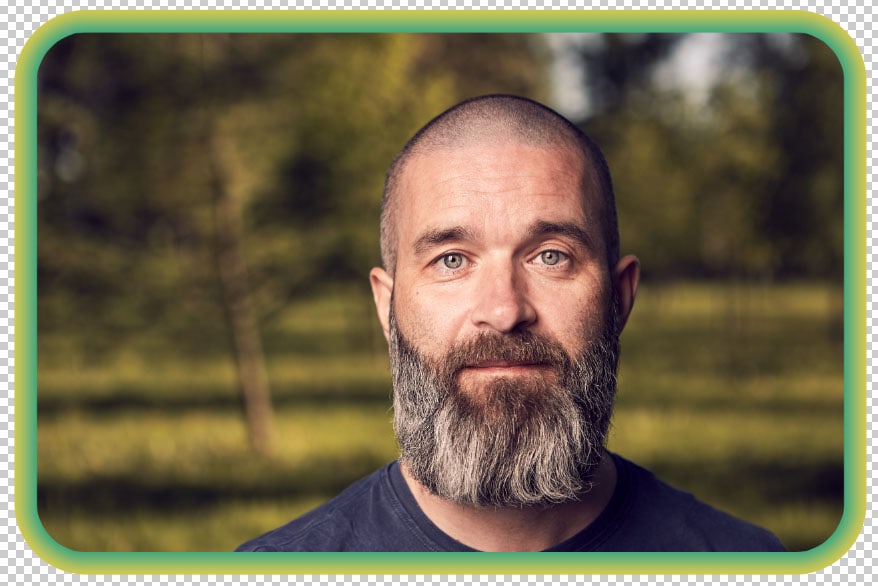
This will crop the image with rounded edges.
Step 6: Add A Border Using The Stroke Layer Style (Optional)
After rounding the corners of your image, you may want to add a border to it.
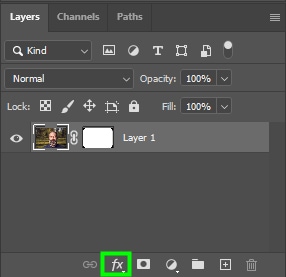
First, select the layer containing the image with rounded corners and click its thumbnail.
Next, click the fx button at the bottom of the Layers Panel.
Then, choose ‘Stroke’ from the flyout menu.
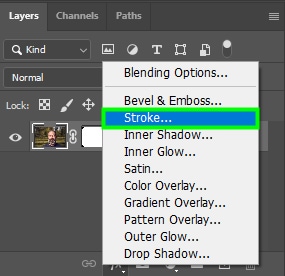
Many options will appear, which can be confusing at first. But don’t worry, I will tell you which settings are worth changing when it comes to image borders.
Step 7: Customize The Border (Optional)
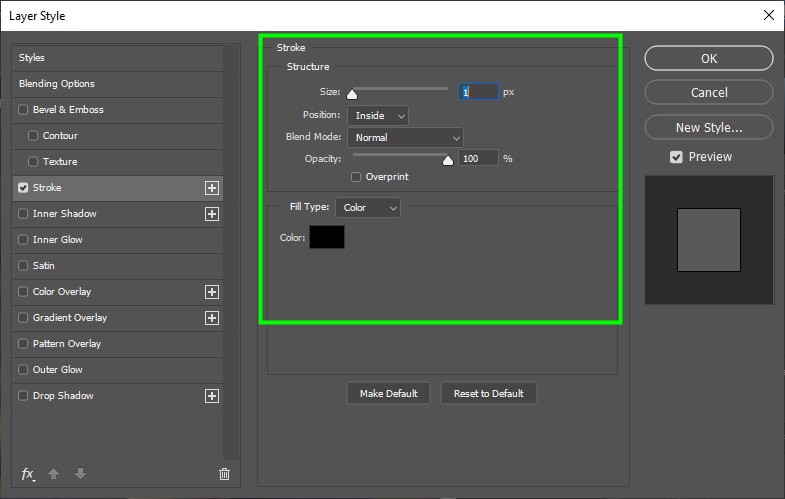
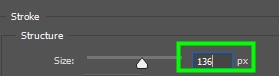
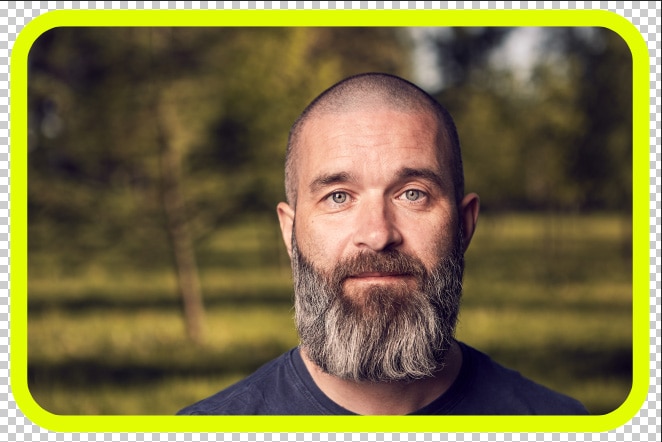
Once you have added the stroke, there are many ways to customize the border. Firstly, Size controls the stroke’s width. I recommend you choose a value over 30 to make the border effect more visible. In my case, I chose 136.
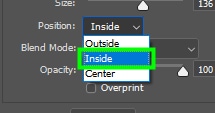
In Position, you can choose between Inside, Outside, or Center. I recommend you choose Inside, otherwise, the border effect will expand into the transparent area of the image, which can ruin the rounded effect.
As for Blend Mode, you should set it to normal since it’s not a good idea to blend the image with its border.
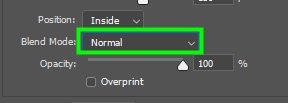
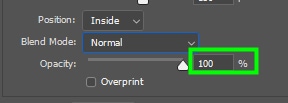
Opacity controls the level of transparency of the stroke. Set the border opacity to 100% since it’s best to make the border as visible as possible.
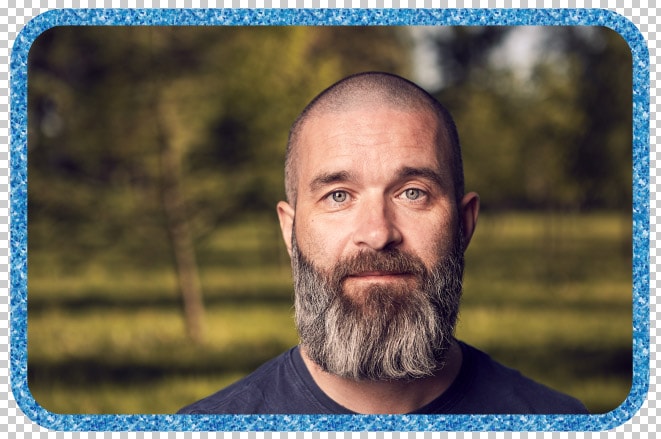
Moving down to Fill Type, there are some options that you can choose from. They are Color, Gradient, and Pattern.
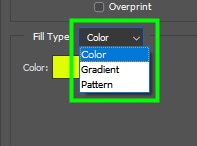
You can customize the border by selecting one of the Fill Types and adjusting the settings as needed.
Step 8: Export The Image With A Transparent Background
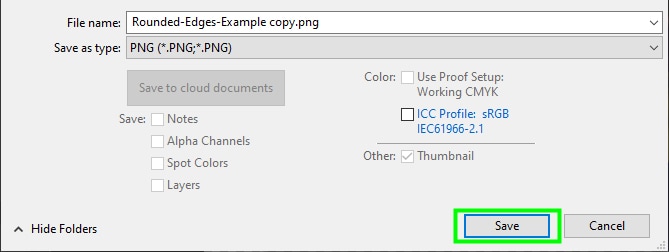
When you’re done rounding the corners of your image, you should export it as a PNG. Exporting as a PNG will ensure the image will be exported with transparency and, consequently, with rounded corners.
If you save your image as JPEG, for example, instead of getting rounded corners, your image will get a white background on the outside of the border.
To save your image, go to File > Save a Copy.
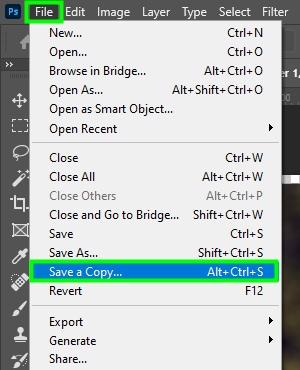
Then, choose a location on your computer to save your image. Make sure to set the file type to PNG.
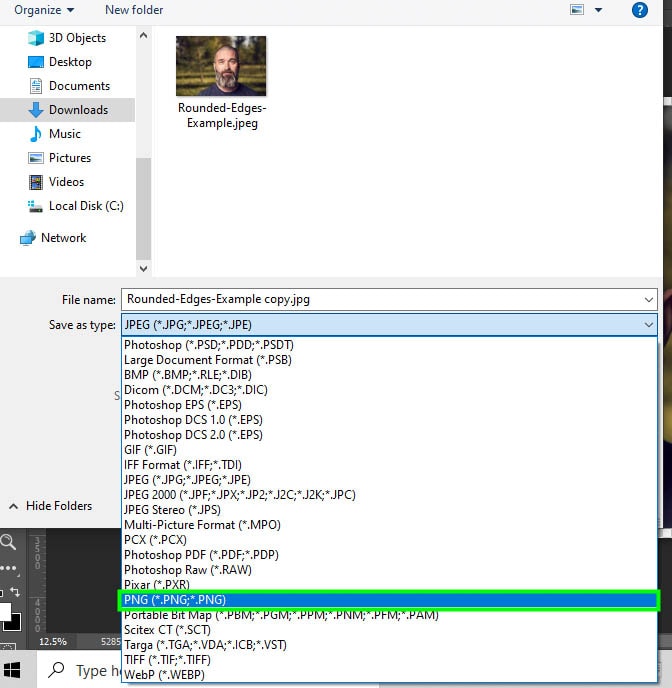
Lastly, click on the Save button to save the image.
How To Round The Edge Of A Single Corner In Photoshop
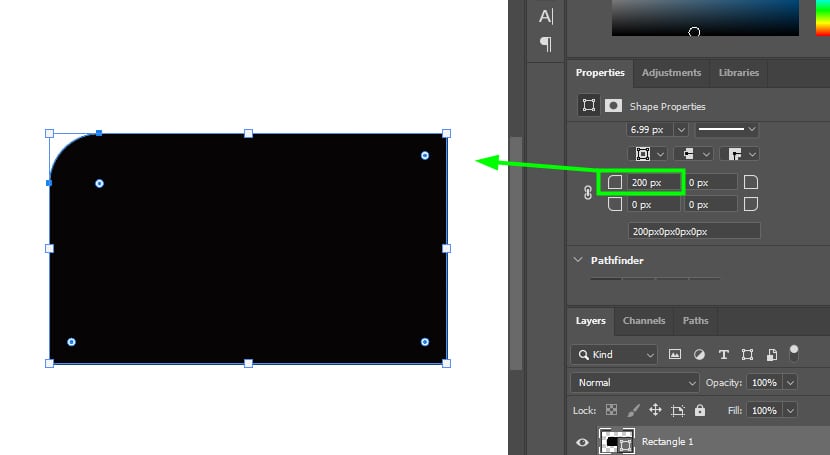
If you want to round a single corner of a shape or image, you can use the Properties Panel. To do this, create a shape using the Shape mode option in the Options Bar.
Then, find the corner radius icons in the Properties Panel.
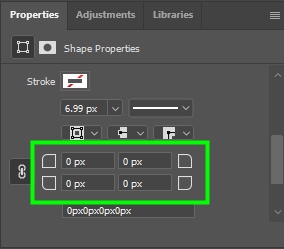
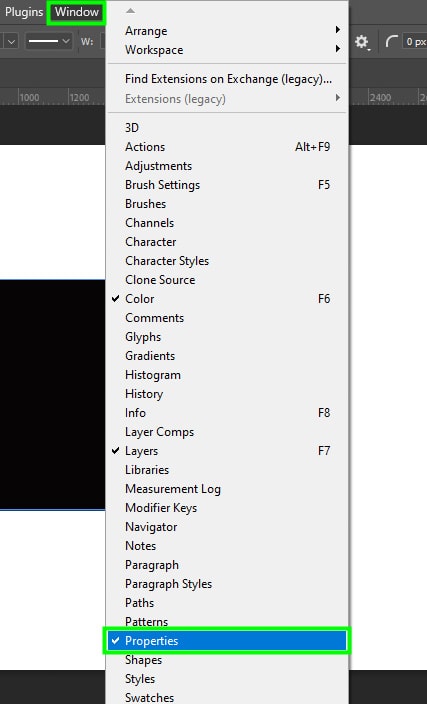
If you can’t see the properties panel, go to Window > Properties.
To modify the corner radius values in the Properties Panel, hover over one of the corner radius icons until your cursor turns into a hand icon.
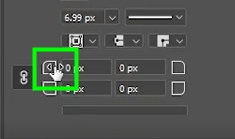
Then, drag with your mouse to the right to increase the corner radius or to the left to decrease it. Alternatively, type in any value in one of the corner radius boxes.
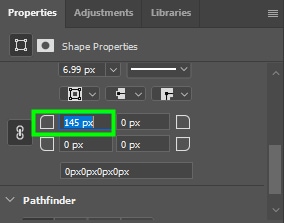
When you change one of the corners, Photoshop automatically changes the values of all the other corners.
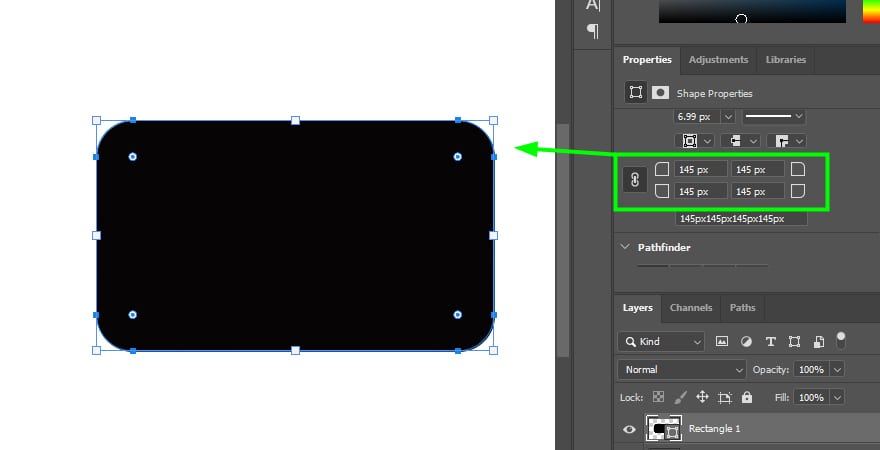
That’s because all the shape’s corners are linked to each other in the Properties Panel. You can see this by the chain icon next to them.
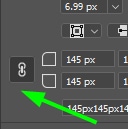
By clicking the chain icon, you can unchain the shape corners and adjust a specific corner without affecting the rest.
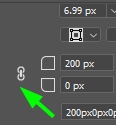
After unlinking the corners, type in a value in the corner radius box you want to alter.

Once you do this, the chosen corner radius will be altered.
You can use the methods learned here to round the corners of any shape you create in Photoshop.
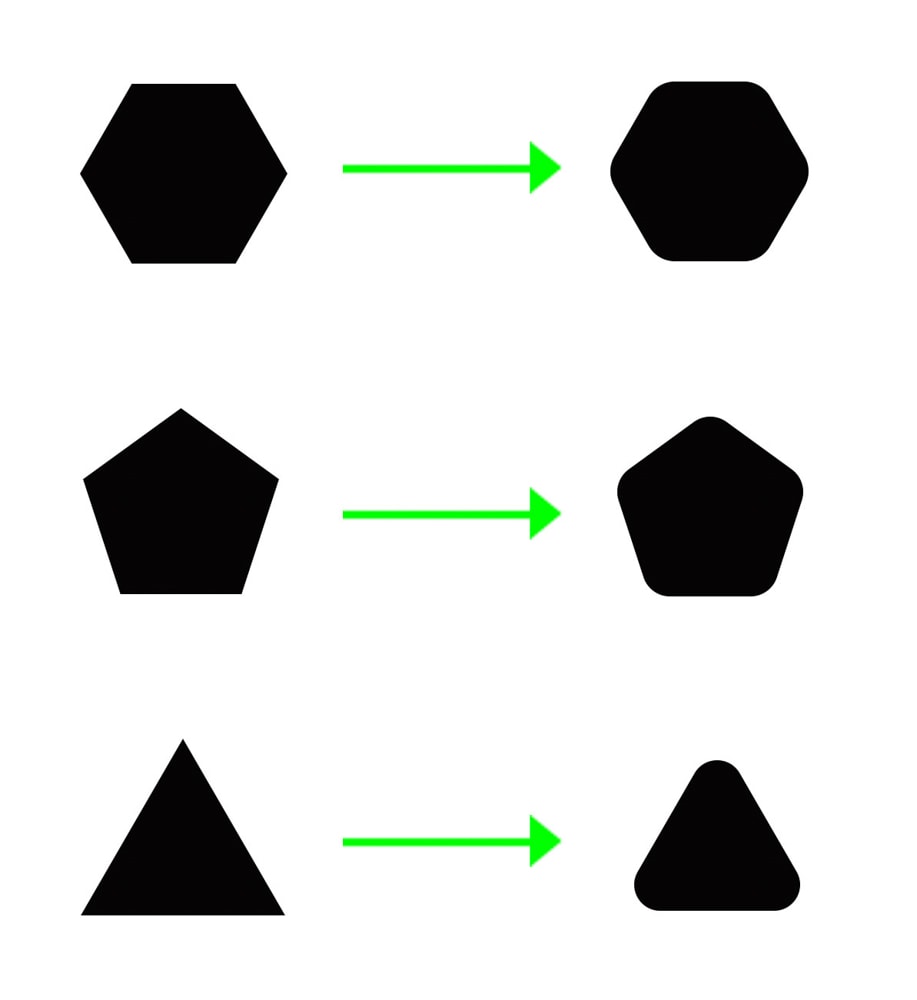
Using these methods, you can easily round the corners of any shape or image, whether you want to round all the corners or individual corners.
Happy Editing!


