
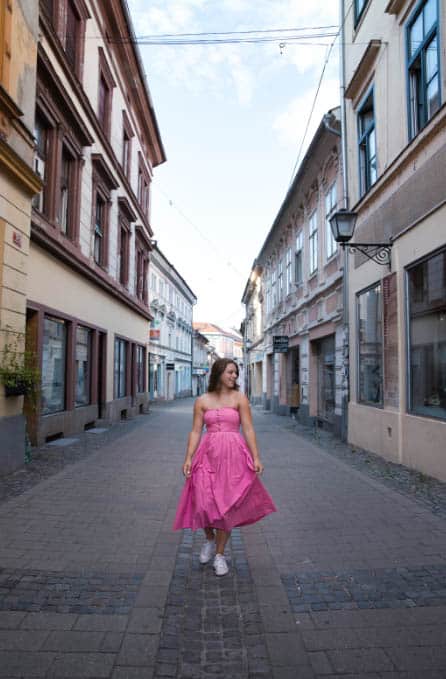
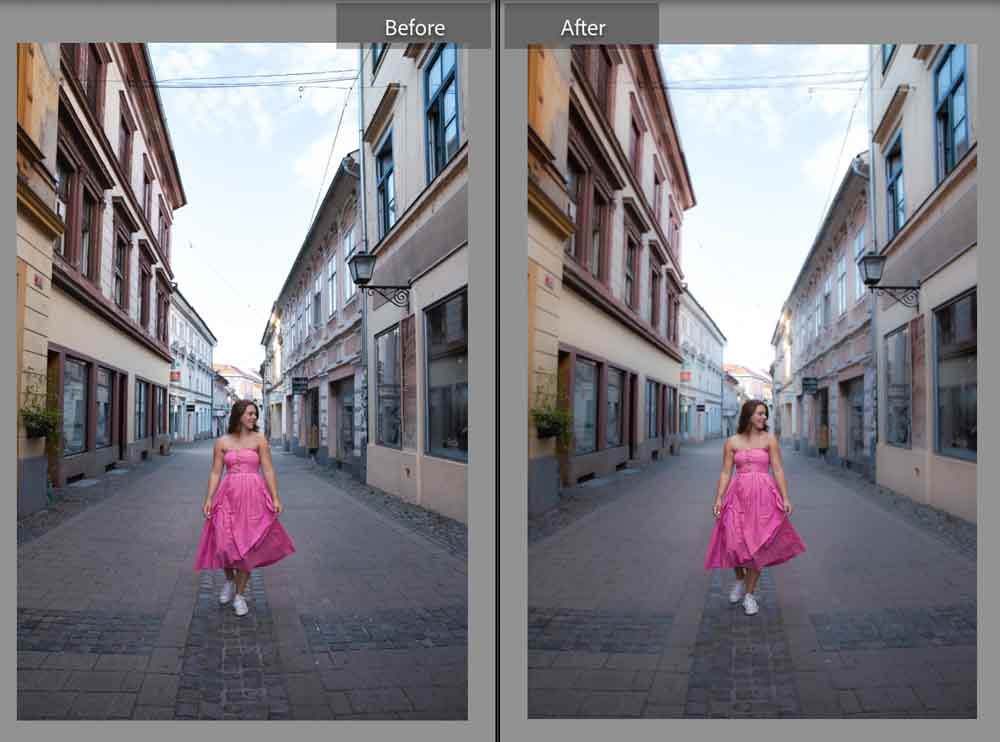
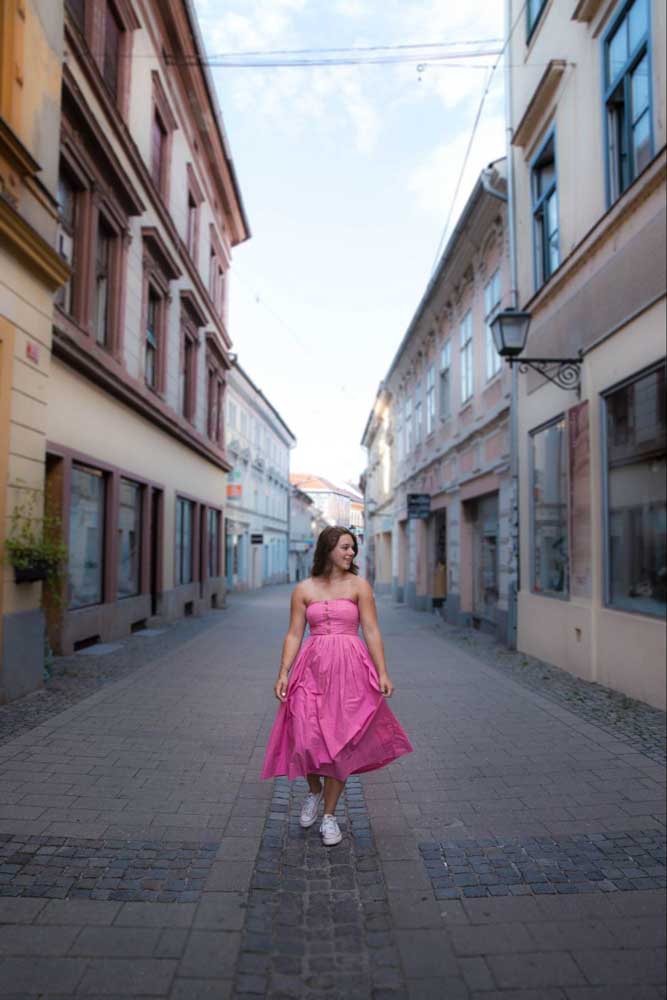
If you weren’t paying attention to the background in your shot or you don’t own a lens with a wide aperture, you can easily blur a background in Lightroom to remove the distractions and create a shallow depth of field effect.
Blurring the background can draw the eye to your subject and enhance the image as a whole by adding depth. Luckily, it is surprisingly easy to create a natural-looking background blur straight from Lightroom. These three methods work best to isolate your subject and blur the background (or foreground).
Method 1: Blur A Background In Lightroom Using Lens Blur
Step 1: Open The Image In The Develop Tab And Locate The Lens Blur Panel
The Lens Blur Panel can only be found under the Develop tab of Lightroom. Once in Develop, scroll down on the right side panels until you find Lens Blur.
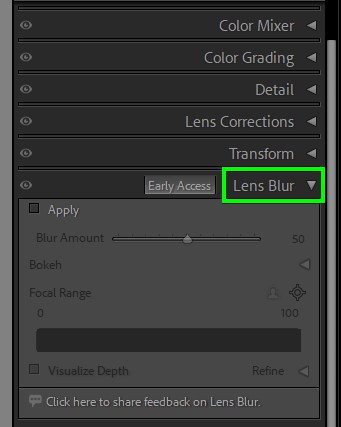
Step 2: Check The Apply Box In The Lens Blur Panel
In the Lens Blur Panel, check the box that states Apply.
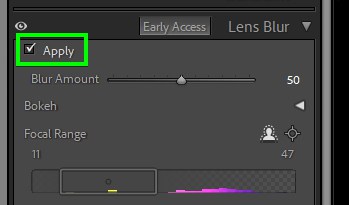
This will cause Lightroom to use AI to scan your image and apply the lens blur as realistically as possible.
Note: This feature is still in Early Access mode, so it is still being modified and improved upon.
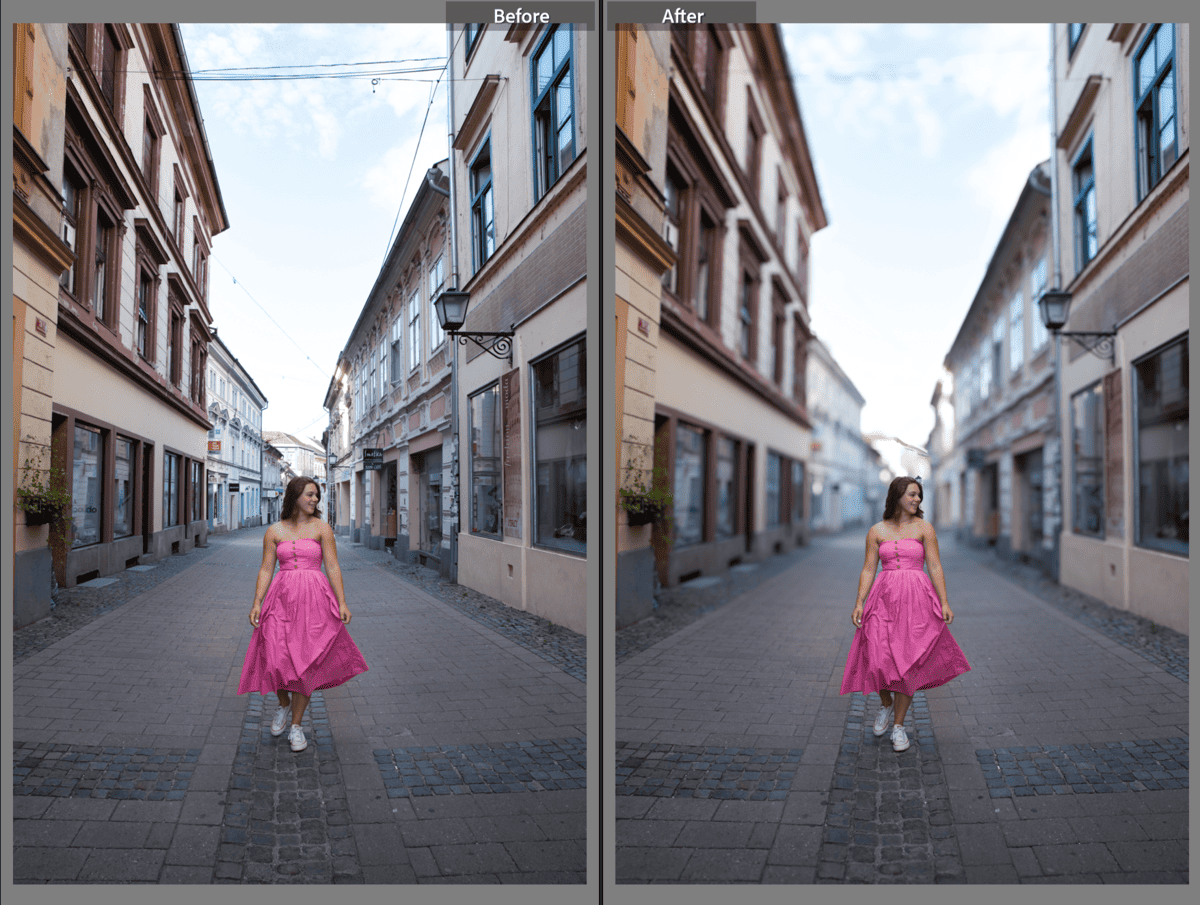
Step 3: Adjust The Lens Blur Settings As Needed
Once Lightroom has used AI to process your image, the result may not be perfect. You can use the Bokeh, Focal Range, and Depth settings to adjust the result.
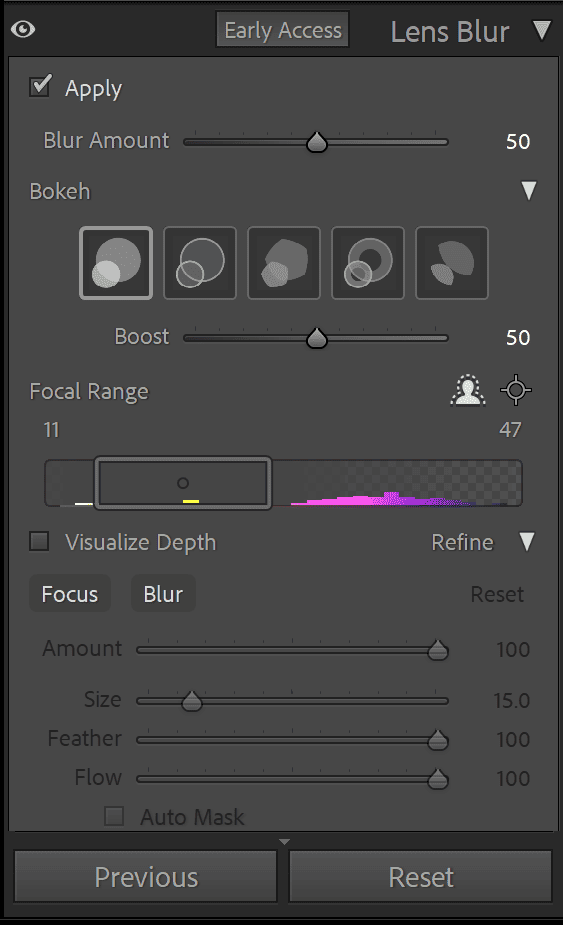
The Bokeh section refers to the type of blur the background experiences (whether circular, 5-blade, or other). The Focal Range adjusts the values of what is in focus, and the Depth controls the amount of focus and the amount of blur.
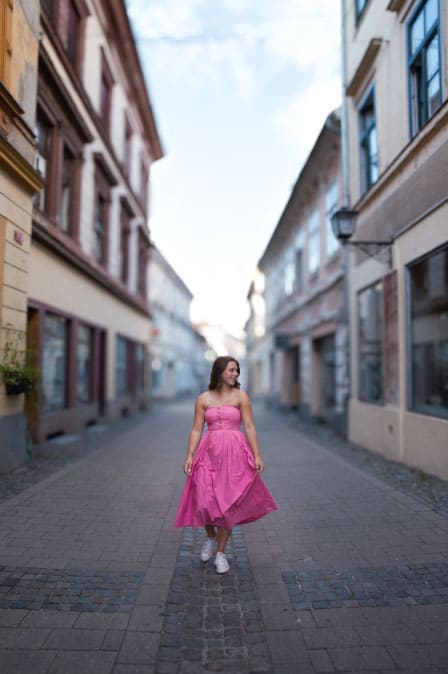
Once the settings are adjusted, you will have blurred the background creating a realistic lens blur effect.
Method 2: Blur A Background In Lightroom Using The Masking Tools
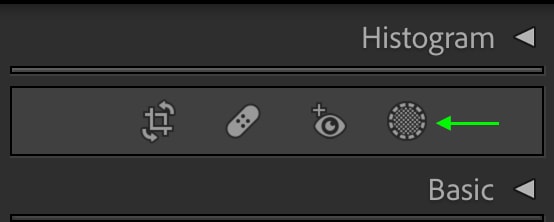
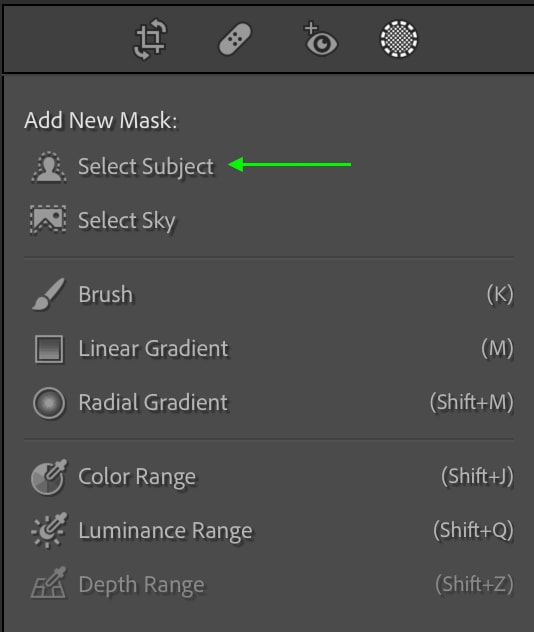
Step 1: Select The Mask Icon Under The Develop Tab
To start, open up the image you’d like to use in the Develop tab. You need to isolate the subject from the background so that you can edit around it. For this, I’ll use the masking tools. You can find the Mask icon between the Histogram and Basic tabs.
Step 2: Activate The Select Subject Mask Tool
This icon opens the masking panel, which features several tools you can use to create different kinds of masks. For images with a clear subject, use the Select Subject Tool.
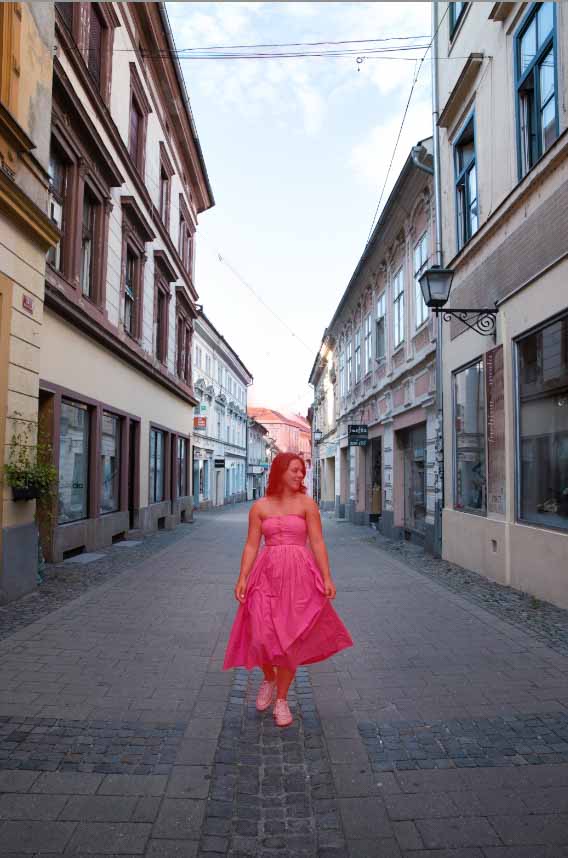
You’ll see the selection as a red highlight. If you don’t see the highlight, head to the Masks Panel, which comes up automatically when the mask is created. Make sure the box is checked next to Show Overlay.
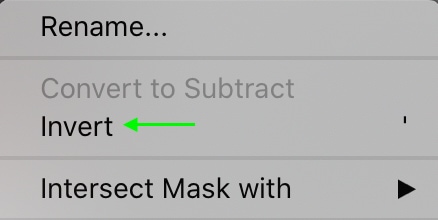
Step 3: Select the Three Dots Menu And Click Invert
You want the background, not the subject, selected. Invert the selection by heading to the Masks Panel and clicking the Ellipsis next to the Subject Mask. Then, select Invert.

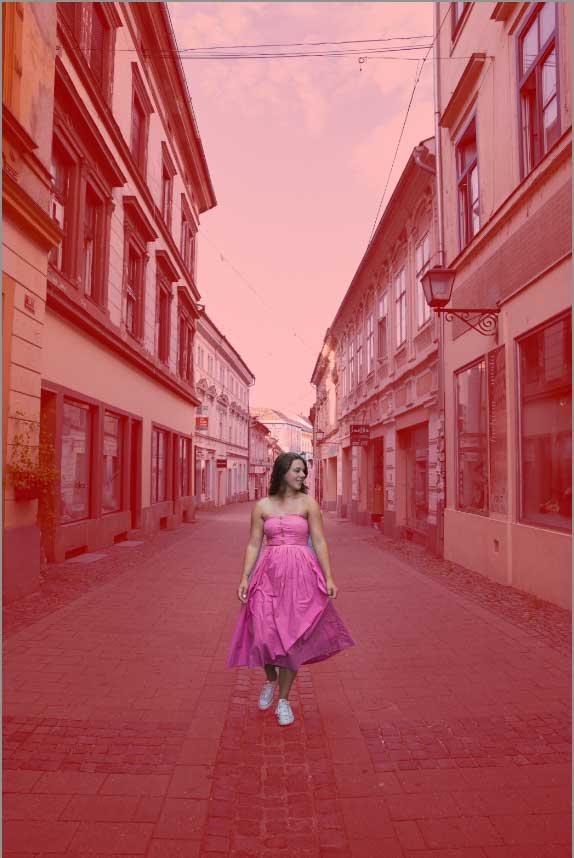
The overlay will now cover everything but the subject. Allowing you to edit the background separately.
Step 4: Reduce The Clarity And Sharpness Using The Adjustment Sliders
Head to the side panel, and you’ll see all the adjustments you can make to the mask. The ones you’ll be working with are Clarity and Sharpness. First, let’s begin with the Clarity slider and bring the toggle down a bit.
This will slightly blur the masked area, and you’ll be able to see the effect as you work. Drag the toggle until you’ve created a blur you like. You can also use the Sharpness slider to blur the background further by making it less sharp.
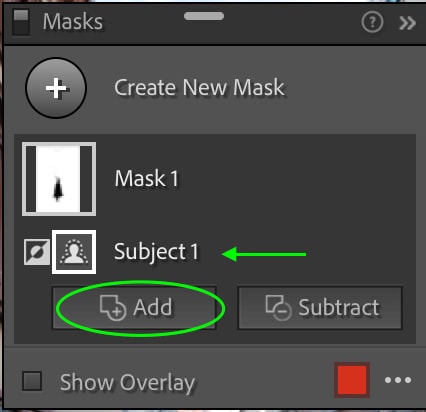
Step 5: Add A New Brush Mask To Extend The Effect
You may notice some areas of the image that aren’t entirely blurred, particularly around the subject. You can easily add back the blur by heading to the Masks Panel and, making sure the Subject 1 Mask is selected, click Add.
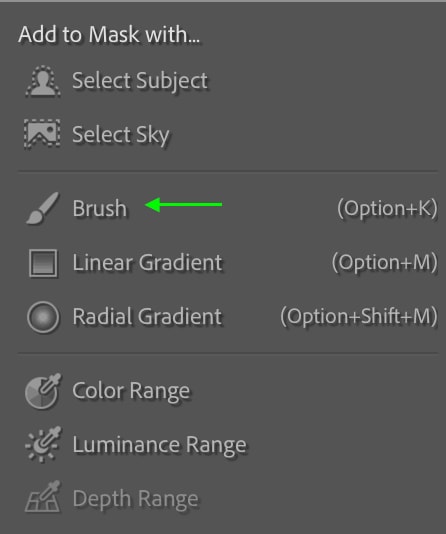
This will bring up the list of image masking tools and allow you to select another tool to use on your image and add to the current mask. The best one to use is the Brush, as it gives you the most control over where you’re drawing.
Step 6: Paint Over Areas To Extend The Blurred Effect
Now, use a soft brush to go around the areas that aren’t blurred yet. This will add these areas into the mask that creates a blur.
Method 3: Use A Linear Gradient Mask To Blur A Background In Lightroom
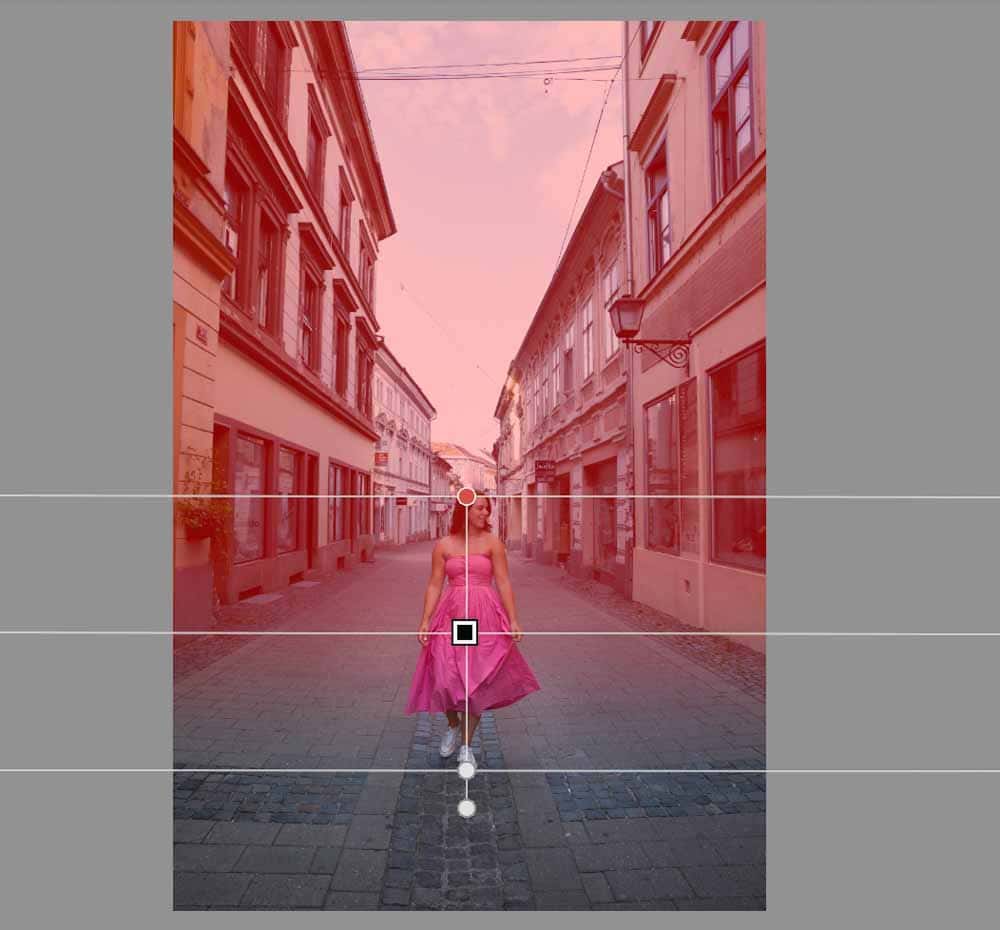
Step 1: Select The Linear Gradient Mask In The Develop Tab
Starting with the image open in the Develop tab, head to the Mask icon to view the different masking tools available. For this method, we’ll use the Linear Gradient.

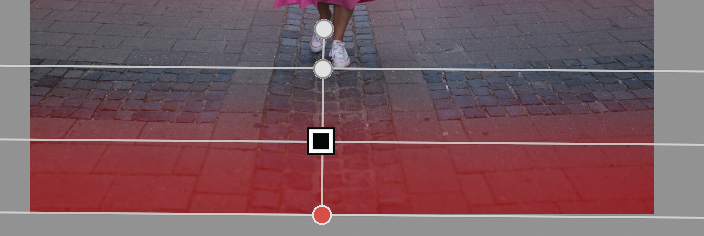
Step 2: Add The Linear Gradient Mask To The Image
Click the center of your image and drag it down as if mimicking the natural depth-of-field, with the masked part going towards the top of the picture. It is best to keep the center point right in the center of your subject and drag the bottom line to the bottom of your subject.
Step 3: Remove The Subject From The Mask
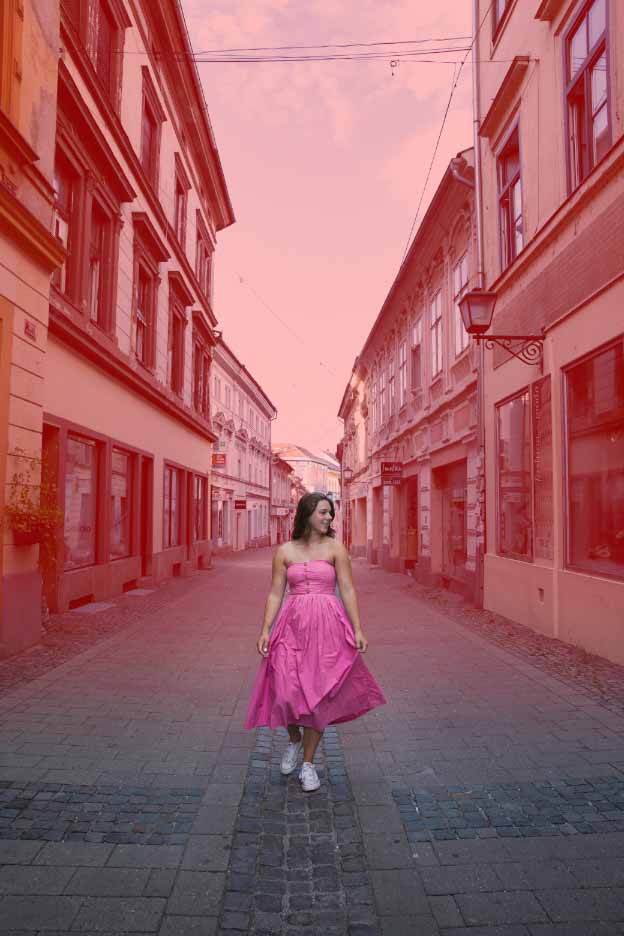
You’ll see the mask appear as you’ve set it up, but your subject will likely be inside the mask, and we don’t want that. So, you’ll now need to remove the subject from your mask.
The easiest and most accurate way to do this is to head to the Mask Panel and click Subtract. From the tool options that appear, click Select Subject.
Step 4: Reduce The Clarity And Sharpness Using The Adjustment Sliders
To create the blur effect, once you have your mask set up the way you’d like, head to the adjustments area and drag the toggles down for the Clarity and Sharpness settings. Play with these two adjustments until you’re happy with the amount of blur created.
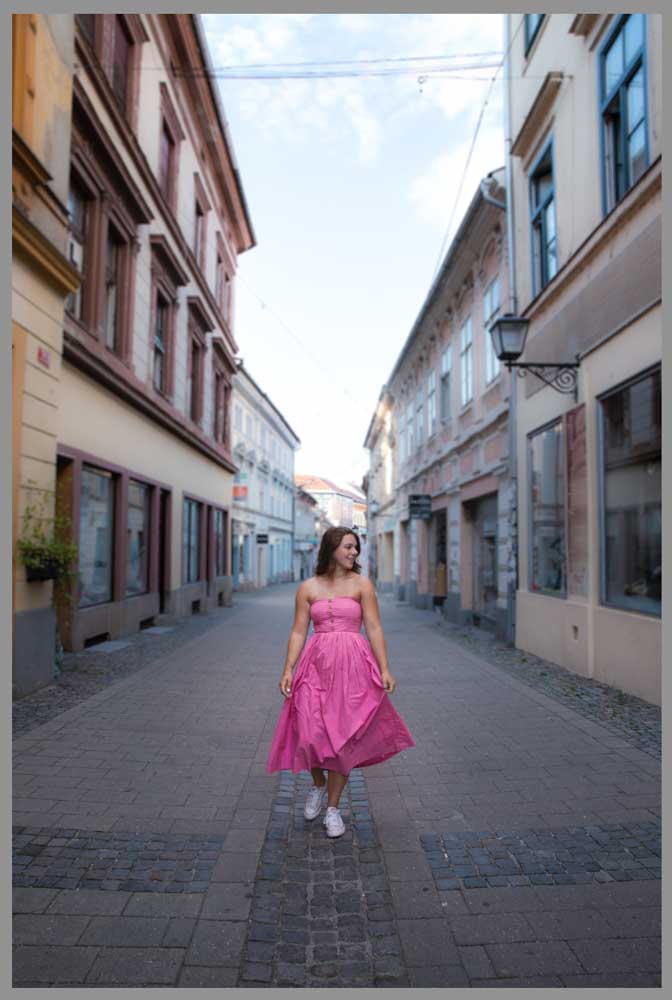
You’ll notice that the subject and the area in front of it will appear sharp and clear, while the areas farther away will be blurred. Because of the gradient effect, the blur will appear natural.
Step 5: Add A New Mask To Blur The Foreground (Optional)
If you’d like, you can add another gradient to the bottom to create a more realistic depth-of-field effect in the foreground. Simply click Add in the Mask Panel, then select Linear Gradient. Draw the linear gradient to start at the bottom of your subject.
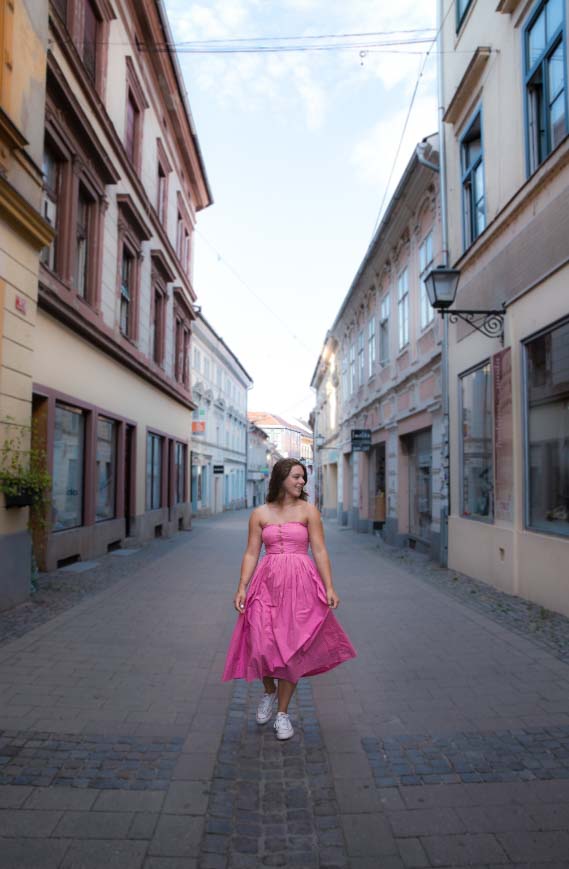
Now, you have an image with a natural-looking blurred foreground and background, leaving the subject in the center clear to draw the eye where you’d like it to go.
Now, if you’re the type of person who works between Lightroom and Photoshop regularly, learning how to do this in Photoshop can be worthwhile. I share the process of blurring a background in Photoshop in this tutorial.
Happy Editing!


