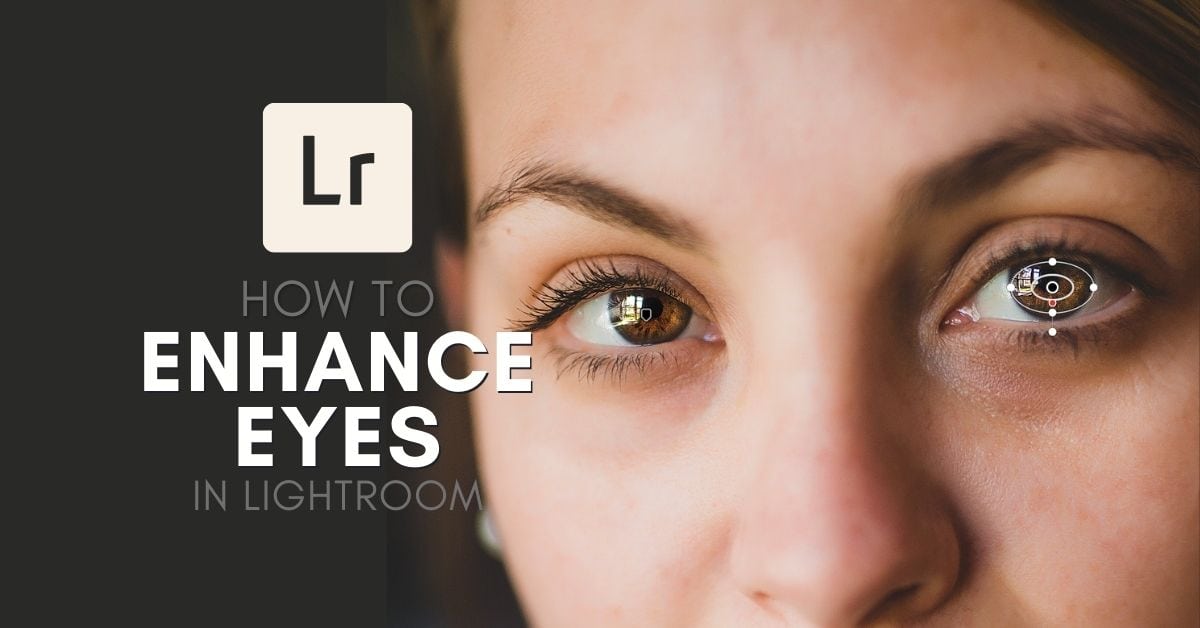

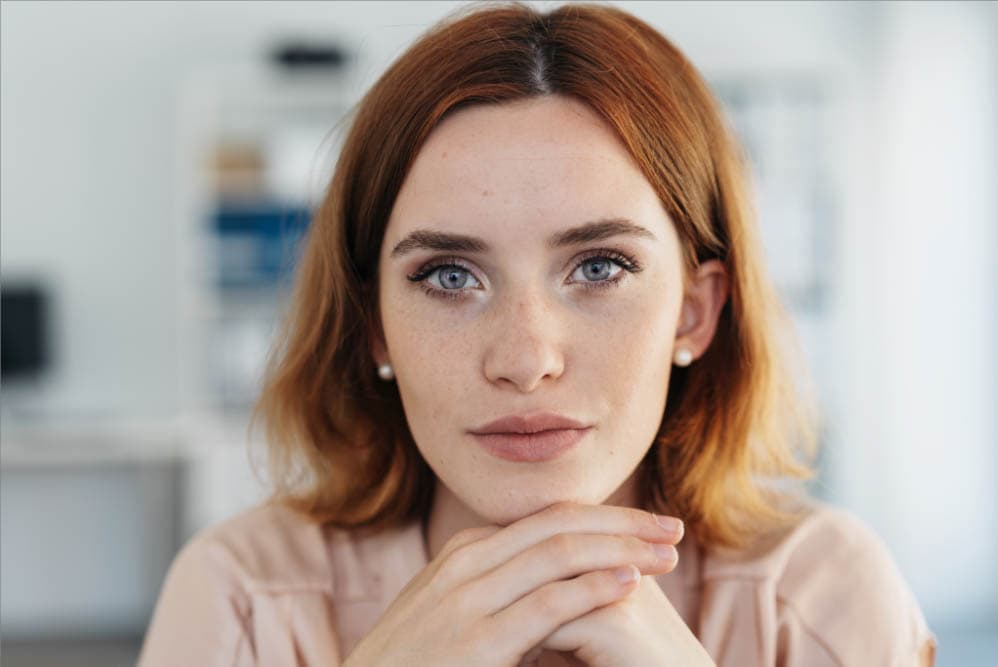
Eyes are the windows to the soul; making them pop can make your portrait photography even more attention-grabbing! However, the lighting may not always be on your side to highlight the eyes effectively which is where brightening and enhancing eyes in Lightroom comes into play.
Lightroom makes editing the eyes possible with a few strategic clicks. By using the adjustment brush or radial mask, you can quickly select the eyes and edit them independently of the rest of the image.
In this article, you’ll learn the easiest techniques to bring your subject’s eyes to life using Lightroom Classic’s various tools. I’ll reveal all the portrait editing secrets, so you’ll be an eye enhancement expert.
How To Brighten Eyes In Lightroom
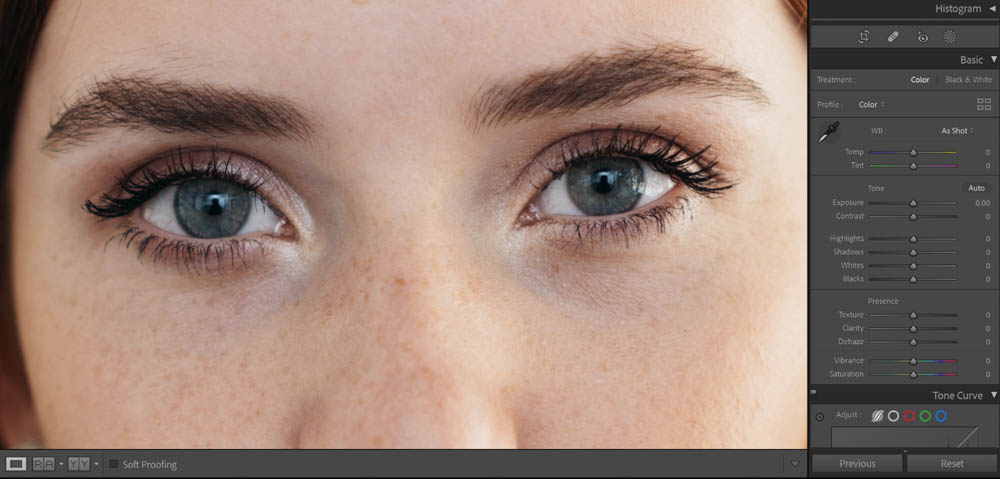
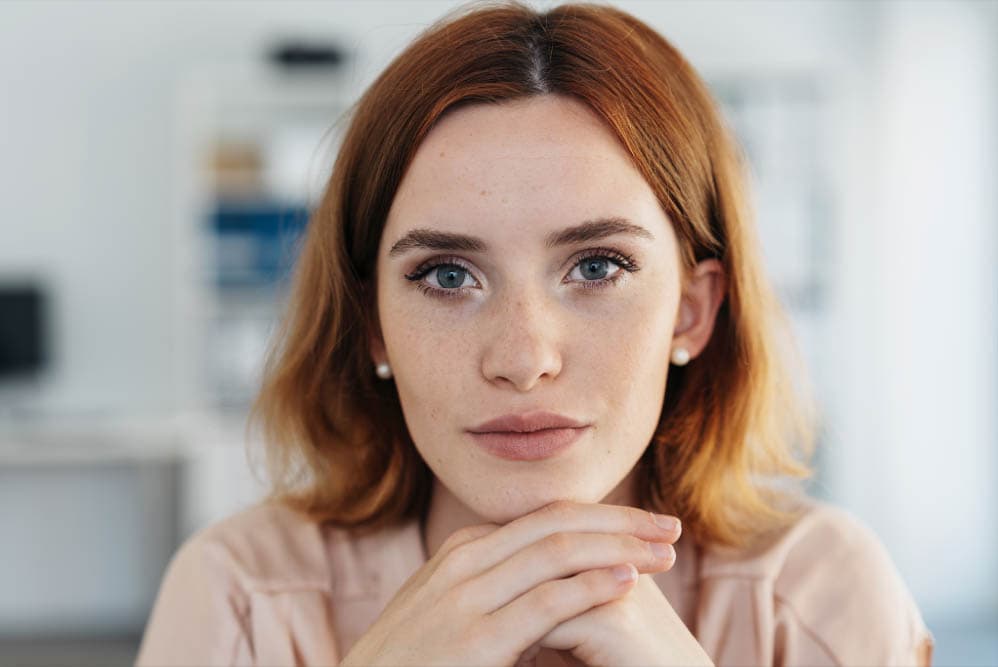
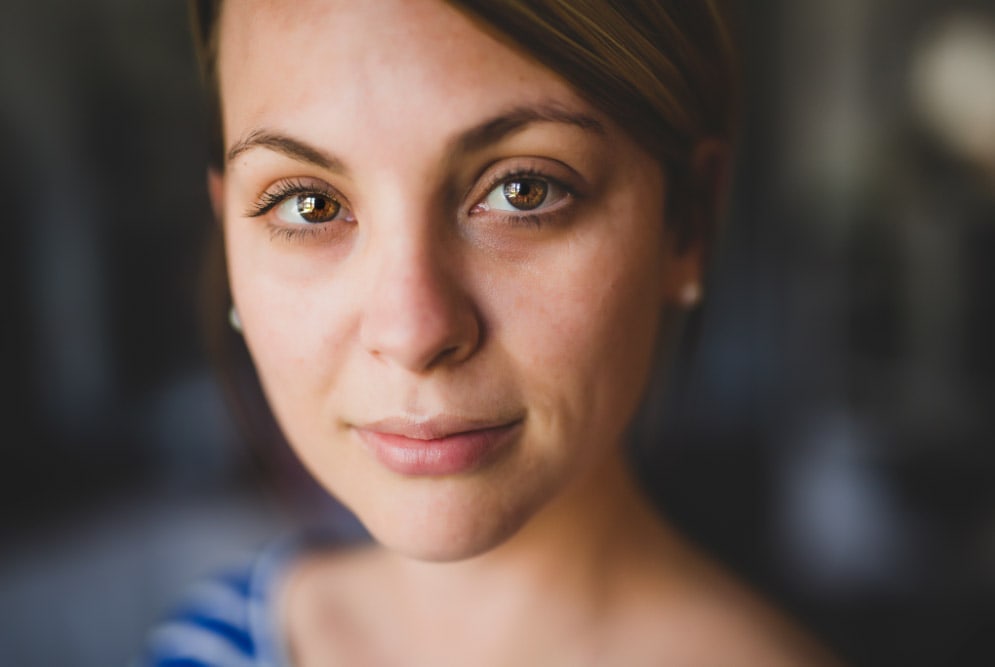
It’s not uncommon to photograph portraits and feel like the eyes appear too dark. Using Lightroom Classic’s adjustment sliders, you can make the eyes become the center of attention. In this example image, I’ll show you how to brighten this woman’s eyes.

Step 1: Load The Image Into Lightroom And Zoom In
First thing’s first: Open up Lightroom Classic and load the image. I highly suggest zooming close into the eyes so that it is easier to select them. You can zoom in quickly by pressing Control + +/= (Win) or Command + +/= (Mac). You can zoom out by pressing Control + -/_ (Win) or Command + -/_ (Mac).
Step 2: Select Masking
Next, look to your right-hand side and click the dotted circular symbol to access Masking.
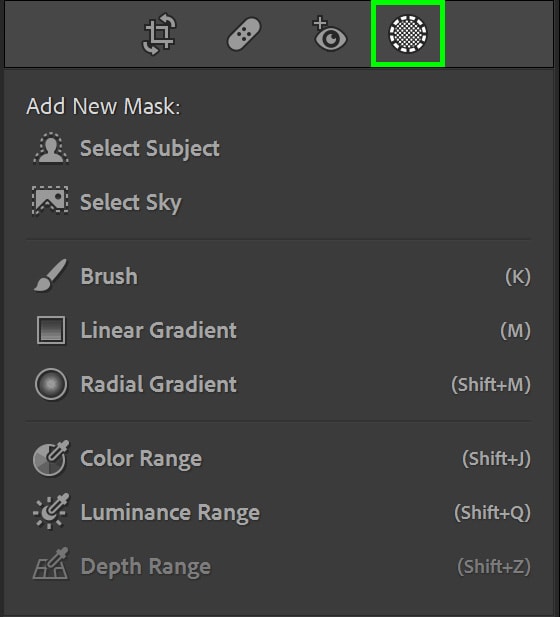
In Lightroom Classic, using the adjustment panel on the right-hand side does global adjustments to the entire image. Masking is an incredible way to do the same adjustment edits but to only select parts of your image rather than the whole thing.
Once I select the eyes, my slider adjustments will only apply to the eyes: the rest of the image remains untouched. If I decide that I don’t like my adjustment, I can easily delete it or continue altering it without having to start over entirely. This makes my edits reversible, so using a mask is called non-destructive editing.
Step 3: Use The Adjustment Brush
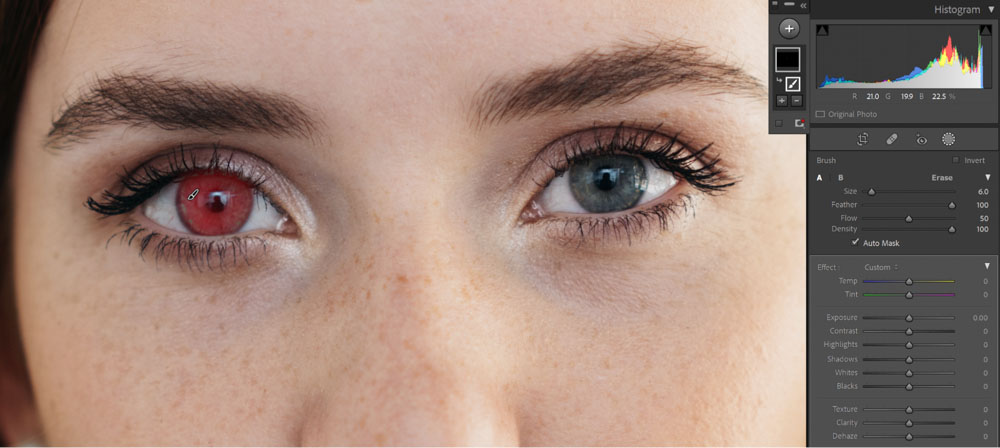
Once the Masking window is open, go ahead and click Brush (K).
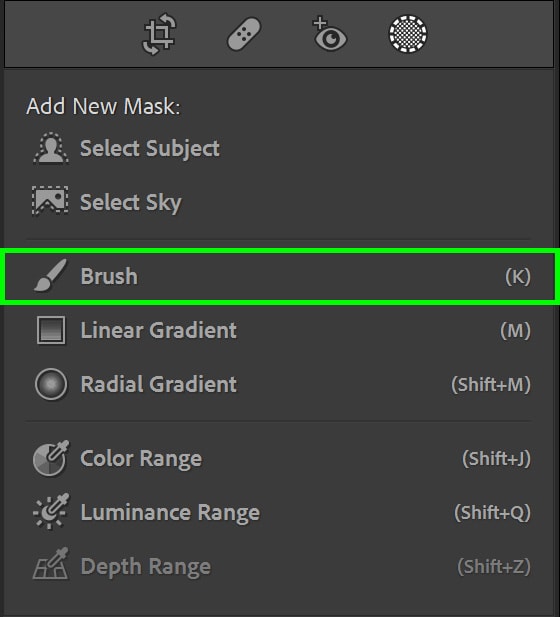
This tool is what we refer to as the Adjustment Brush because it only makes adjustments in the areas you paint. Because the Adjustment Brush is not bound to a specific shape, photographers often use this feature to add organic shadows, highlights, and even selective coloring to their photographs.
To use the Adjustment Brush, simply drag the cursor and paint over the area you wish to work on (in my case, the eyes). If the default size of the brush isn’t useful, you can use the brackets [ and ] to adjust the size of the brush. I suggest having Auto Mask selected to make it easier.
This tool can have its mask customized with a convenient slider box located on the right-hand side of the screen.
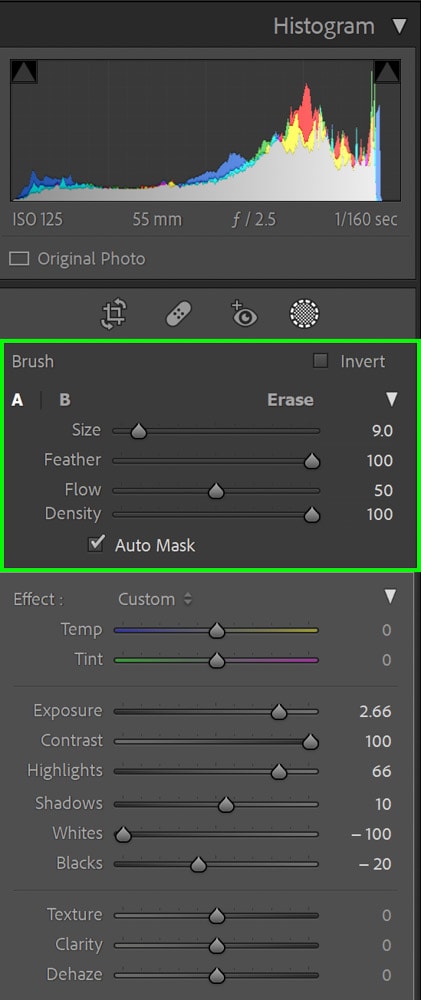
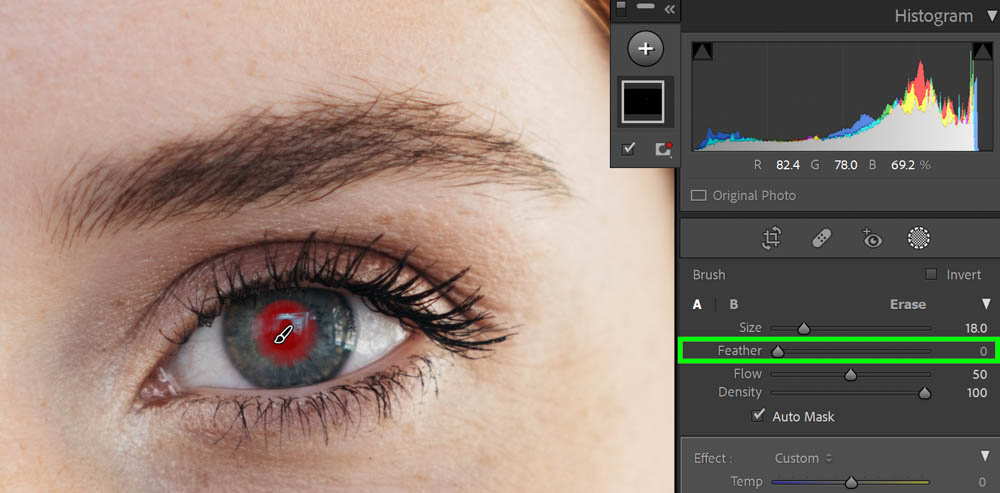
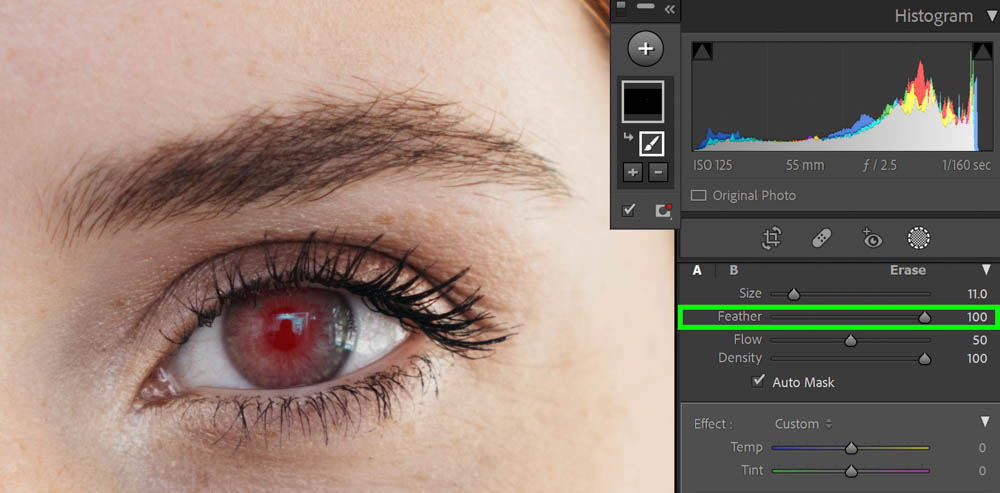
The Feather slider refers to whether the edge of your brush has a hard edge or a very soft one. For the eyes, I would suggest a feathered brush so that it seamlessly blends rather than look like a hard cut-out.
The Flow slider alters how much the brush paints every time you right-click and paint. A flow of 100% will fill the entire area while a flow of (for example) 25% will decrease how much is painted with each stroke. If you drag over the same area at 25% flow, it will increase how much is painted in increments. Do this four times and you’ll have 100% effect.

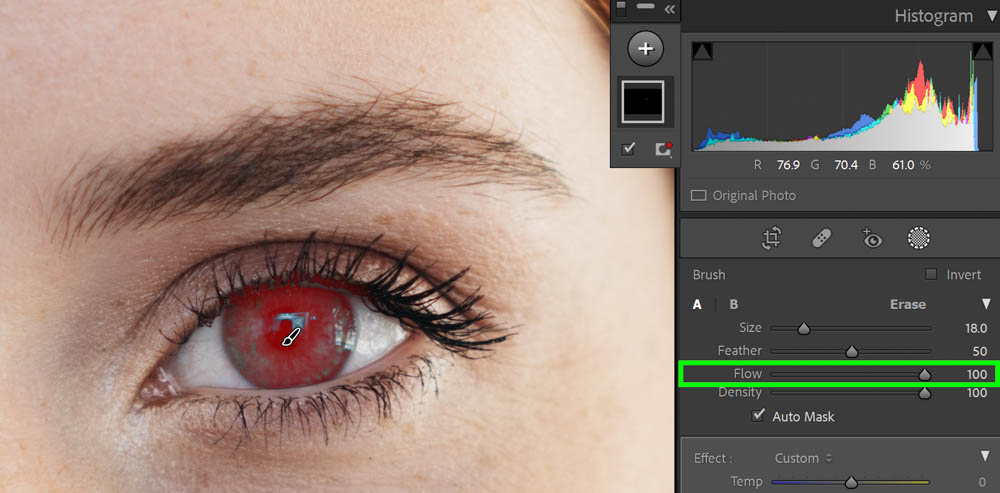
For eyes, I do suggest keeping the flow at around 25% – 50%. As you can see in my example image, one eye is already lighter than the other. With a 50% flow, I can add less of the masking effect to the lighter eye and a more significant effect to the darker eye.
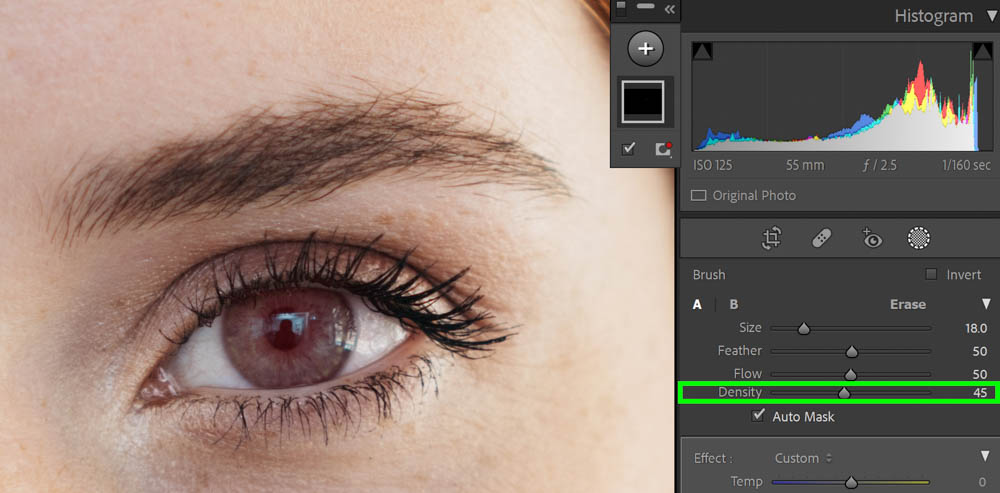
The Density slider is like an opacity slider. Opacity is how transparent something is. 100% density means you will see the effect in full. 50% density means you will see the effect only at 50%. No matter how many times you drag the adjustment brush over the same area, it will forever remain at 50%. Typically, I keep the density at 100%.

If you need to erase a part of your adjustment brush mask, just click Erase and paint over the area you wish to remove. You can also undo your last adjustment by clicking Control + Z (Win) or Command + Z (Mac).
Step 4: Adjust The Sliders
Once you’ve painted your selection, it’s time to brighten the eyes. On your right-hand side panel, use the sliders to make the necessary adjustments.
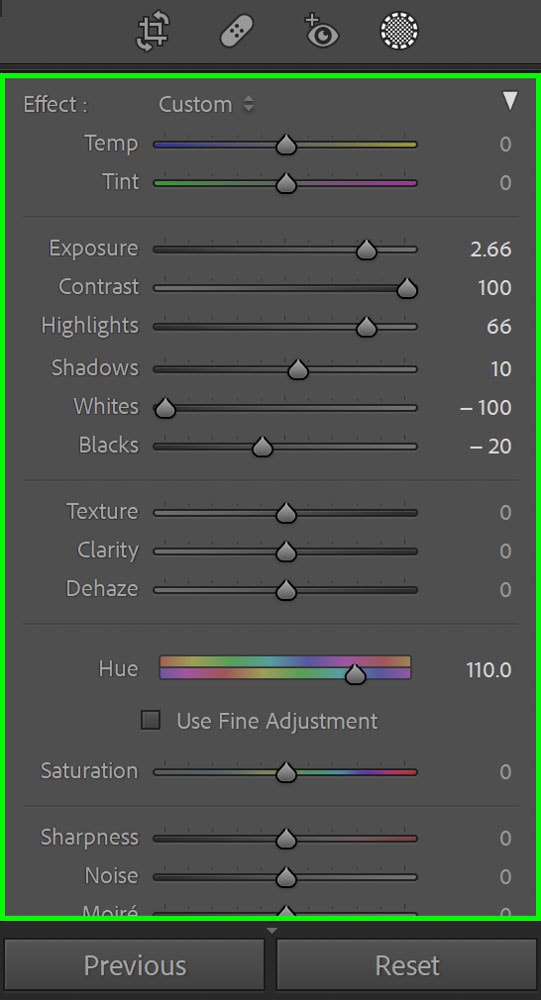
I suggest starting with the Exposure slider first and then going down the chain to alter the other sliders. Remember that when one slider is moved, it can impact the rest.
After the Exposure is pulled up, go ahead and pull up the Contrast as well. This helps settle the eye into place within the image, so it doesn’t look hazy. For lightening eyes, it can be worthwhile to also pull the Highlights up and then pull the Whites all the way down.
You want to pull the Whites down so that pulling the Highlights up doesn’t create ultra-bright white spots. If something is glaringly bright (like a white spot) in an image, the viewer’s eye immediately goes there.
If the image still doesn’t look bright enough, you can take the Shadows and pull that up as well. To add more contrast back in, pull the Blacks down a little bit.
A lot of the above is an experimental balancing act, so adjust the sliders according to what gives you the best result.
Step 5: Click ‘Done’ And Zoom Out
Once your adjustment is complete, go ahead and click Done on the bottom right-hand side of the image screen.
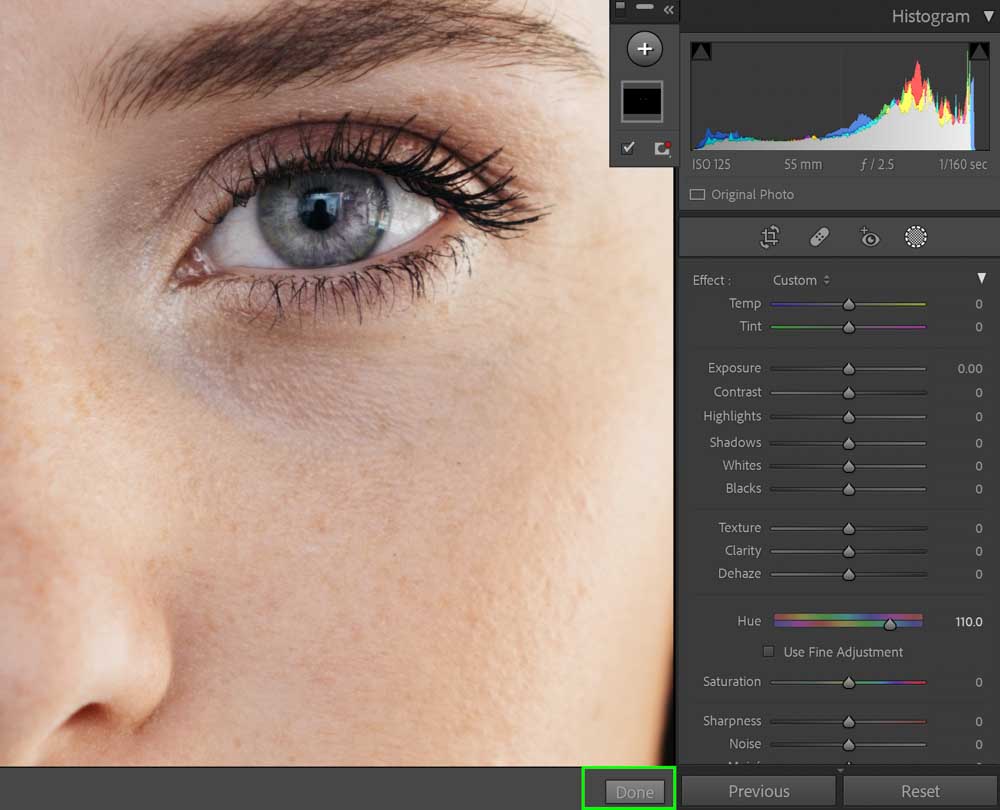
Zoom out of your image to see how the adjustment looks in the overall shot.
How To Enhance Eyes In Lightroom
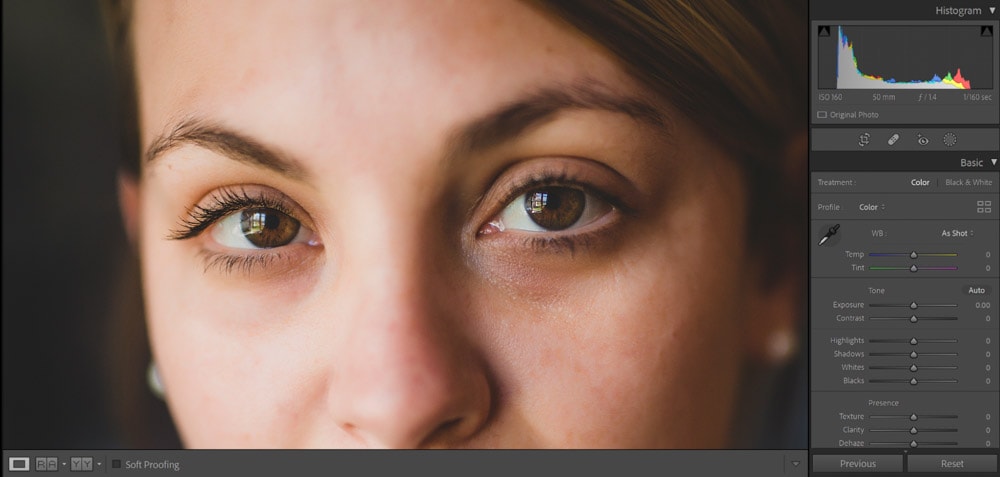
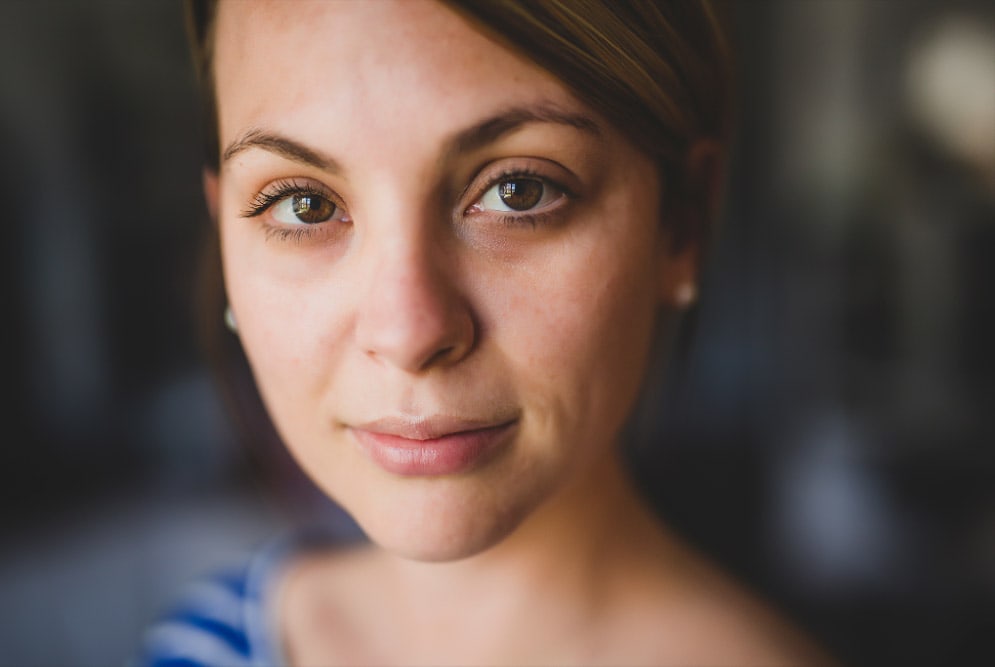
When photographers and editors talk about enhancing eyes, they tend to refer to making them pop. Aside from adjusting the brightness, adding more clarity tends to do the trick. In this example image, I’m going to make those brown eyes stand out even further.

Step 1: Load The Image Into Lightroom And Zoom In
Much like our steps for brightening eyes above, go ahead and zoom right in there.
Step 2: Select Masking
Click the circular icon to open up the Masking menu.
Step 3: Use The Radial Filter
Although the Adjustment Brush can be used to enhance eyes as well, I’m going to show you the Radial Filter for this. The Radial Filter is bound to a shape — circular or oval. The eyes happen to be of the same shape, so you can see why this mask option works so well.
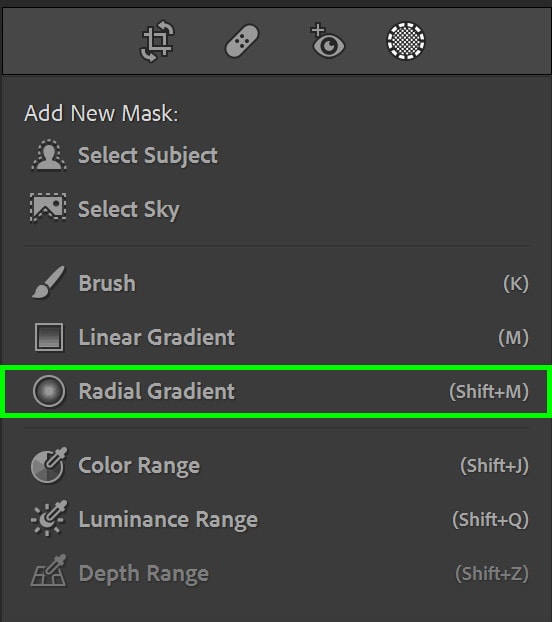
Once you click the Radial Filter, your cursor will change to a + icon. Simply click and drag to form a round shape. If you want the Radial Filter to constrain to a perfect circle, hold Shift while dragging. But remember, eyes don’t tend to be perfect circles.
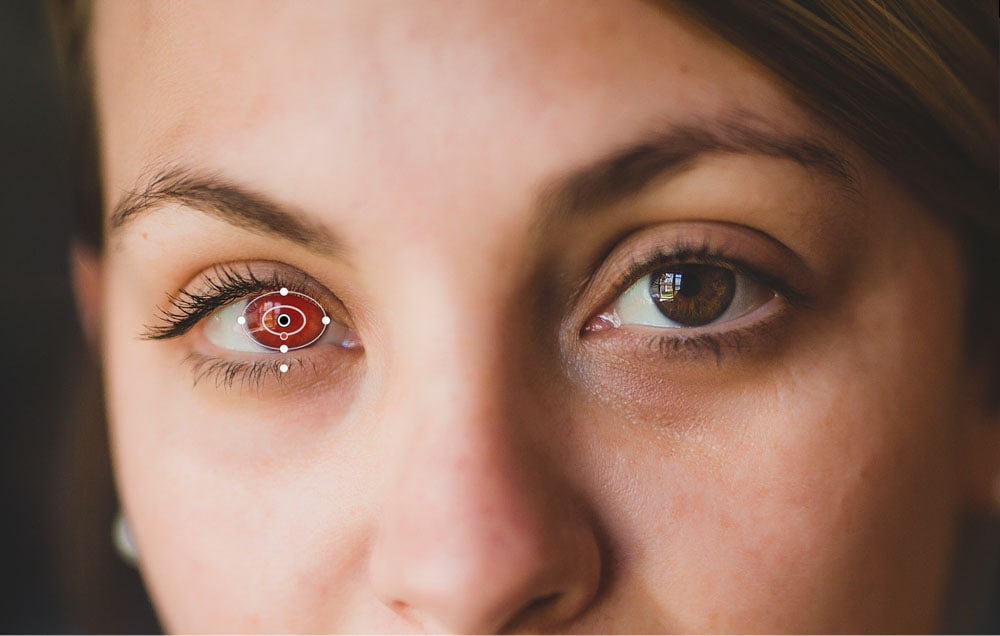
Don’t worry if your circle doesn’t land exactly on the eye. Hover over the radial mask until the cursor turns into a hand, left-click and drag it to the eye.
Step 4: Adjust The Sliders
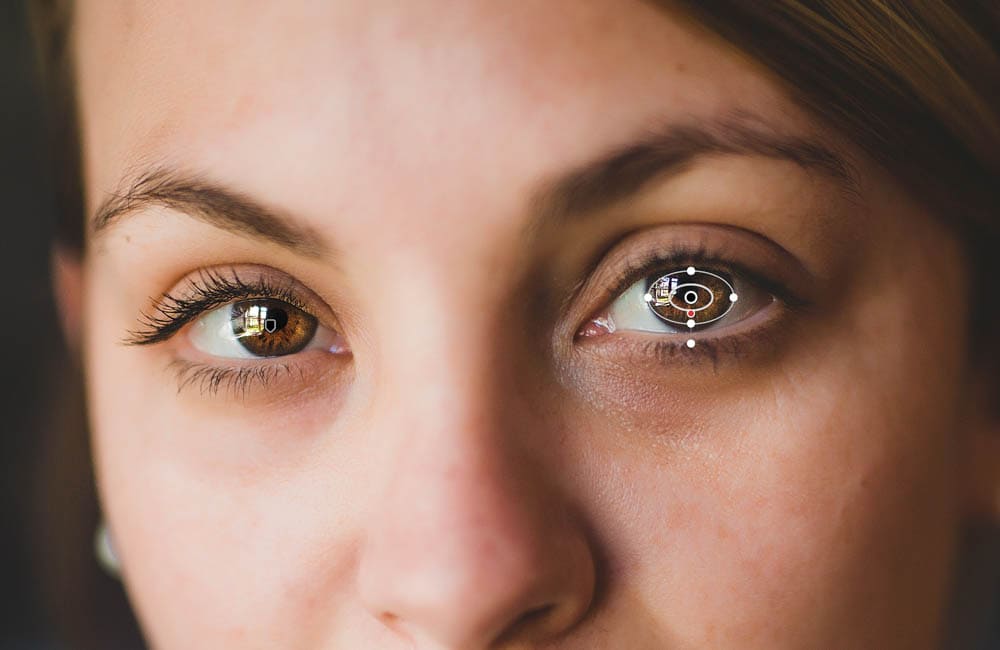
Once your Radial Filter is where it needs to be, it’s time to play with the sliders in the same way as brightening the eyes. However, in this case, I am focused heavily on bringing the details of the eye out rather than making them brighter.
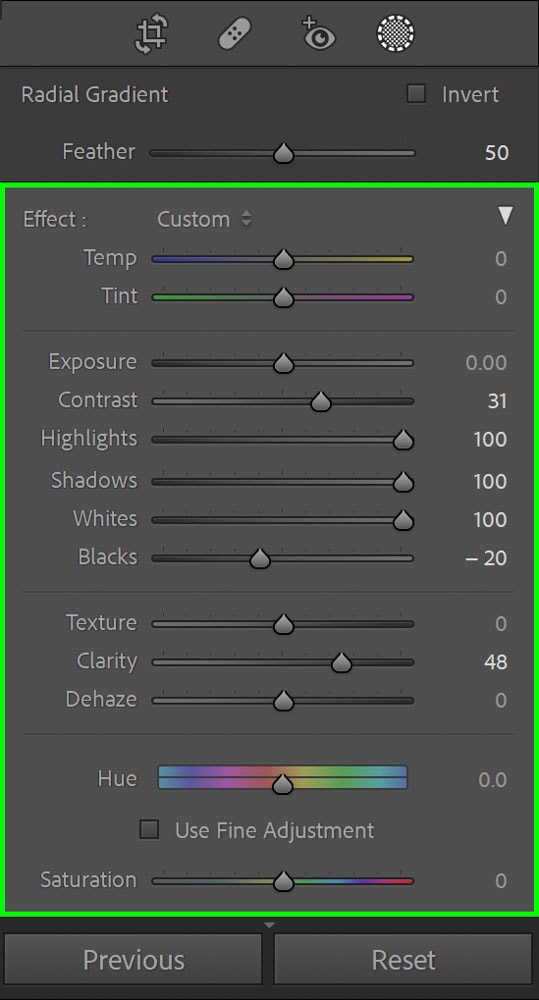
As such, I am primarily adjusting Clarity, Contrast, Highlights, Shadows, Whites, and Blacks. The Exposure slider remains untouched. My goal is to bring out the richness of the color and make the reflection very bold. Once more, keep in mind that every slider you adjust can impact the others, so it’s not unusual to jump back and forth on the sliders.
Step 5: Duplicate The Mask
The Radial Filter only makes one round mask at a time. For the other eye, simply right-click on the mask in the Masking Panel and select Duplicate.
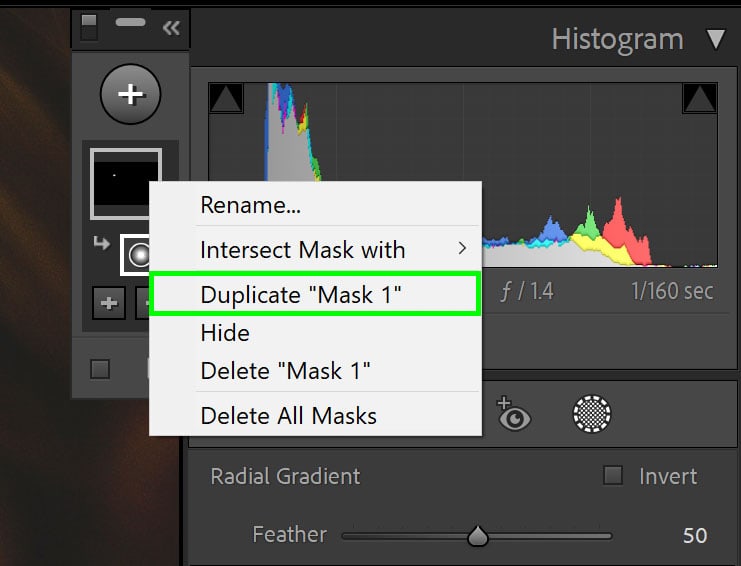
The copy will appear on top of the original circular mask. Hover over the mask until the hand symbol appears then drag over the other eye.
Step 6: Click ‘Done’ And Zoom Out
When finished, click Done and take an overall look at the image.
You don’t want the eyes to look too artificial. It’s a good idea to step away from the image for a few minutes. Having a fresh look can help you determine whether the edit is too much or just right.
These above steps put the power of enhancing eyes back in your hands. With the adjustment brush and radial filter at your disposal, the tools are bound to work with whatever photographs you have. Just remember to use your better judgment when enhancing eyes as you don’t want them to take away from the rest of the image!


