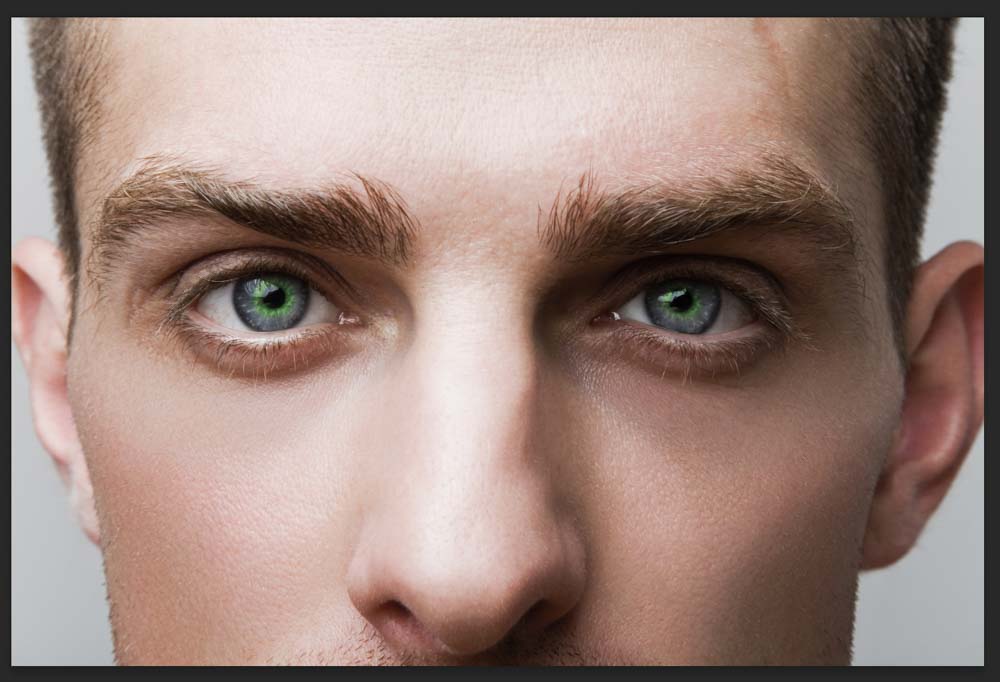

If you’ve been curious about what you or your subjects would look like with different eye color, it’s easy to do in Photoshop. With the help of a few basic selections, you can enhance or completely change the colors of someone’s eyes.
How To Quickly Change Eye Color in Photoshop
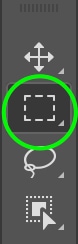
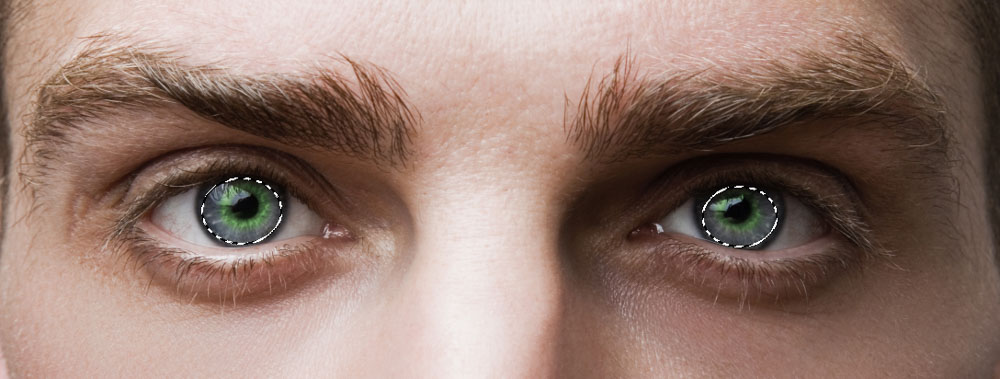
Step 1: Select The Eyes Using The Elliptical Marquee Tool
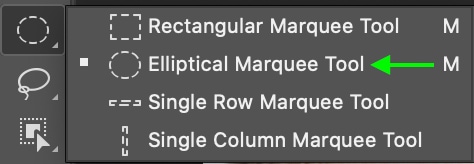
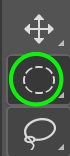
With your image open in Photoshop, head to the toolbar on the left and select the Elliptical Marquee tool (M). We’ll use this tool to create an active selection around the eyes. The Marquee icon may appear as a rectangle, so you can click and hold the icon and select the Elliptical Marquee.
In the upper settings bar, you can add a slight feather to the marquee selection. 5-10px should be enough depending on the size of your image.

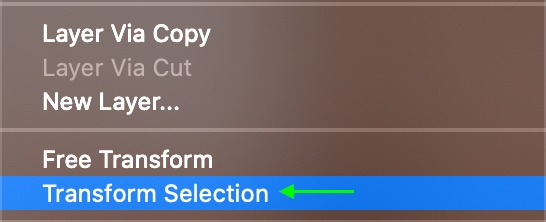
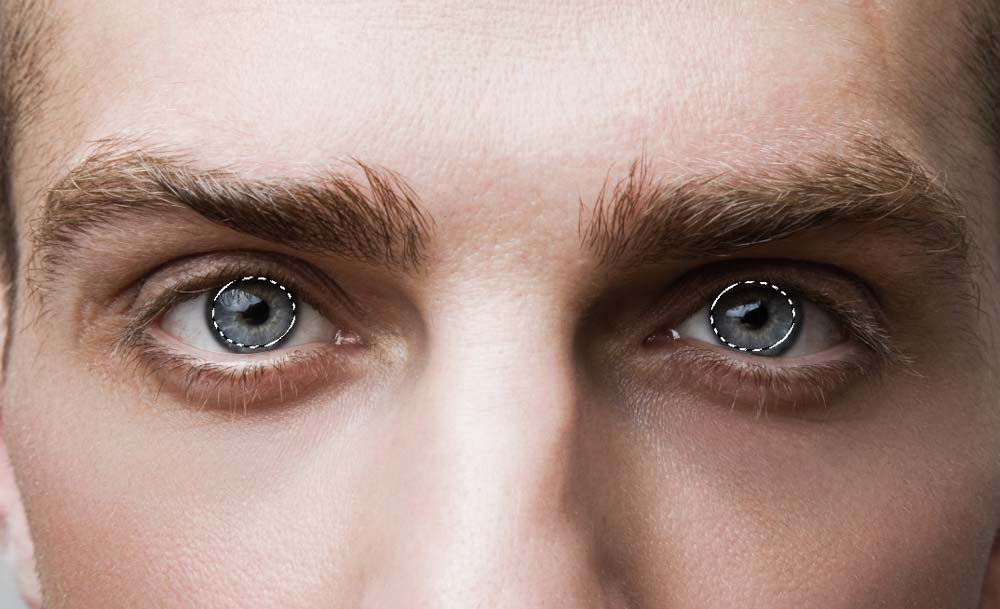
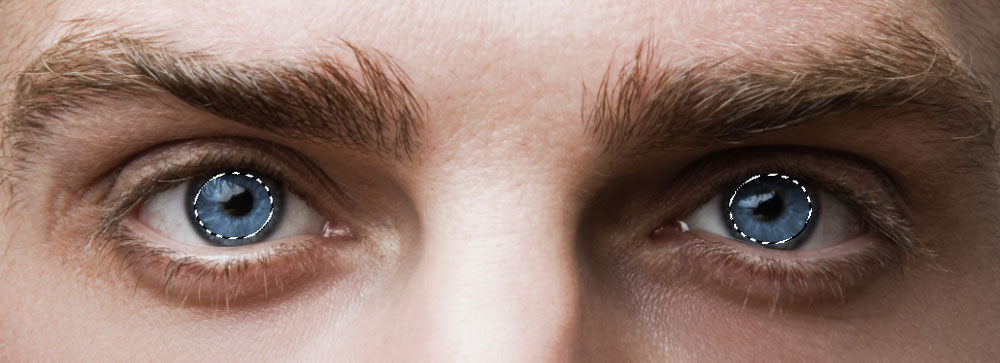
Now you can create your selection. Click and drag around one eye to create an elliptical marquee around it. If you make a mistake, or the Elliptical isn’t large enough to cover the eye, you can right-click or Control + click and select Transform Selection, then drag the toggles to adjust the size of the selection.
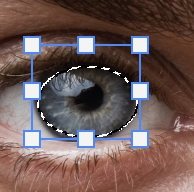
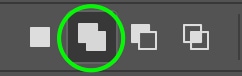
Once you’ve got the marquee around the eye, you can hold Shift while creating a marquee around the other eye to add this eye to the active selection. You can also add to the selection by clicking the Add To Selection icon in the upper settings bar.
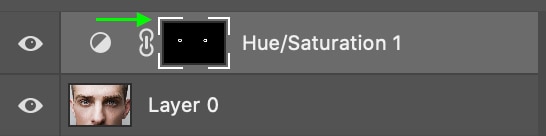
Step 2: Create A Hue Saturation Adjustment Layer
Once you have your active selections around each eye, you can change the eye color using a Hue/Saturation adjustment layer. This adjustment will add or change the color and saturation of a specific selection.
At the bottom of the Layers panel, click the New Fill or Adjustment Layer icon.

Find and select Hue/Saturation from the list.
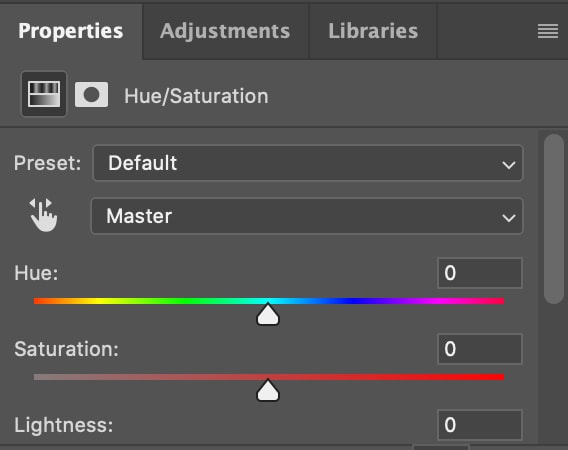
The Hue and Saturation adjustments are now visible in the Properties panel.
Step 3: Enable The Colorize Option
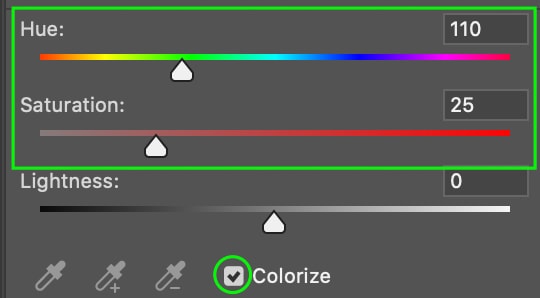
If you scroll down through the Hue/Saturation adjustments in the Properties panel, you’ll find the Colorize setting. Check this box.

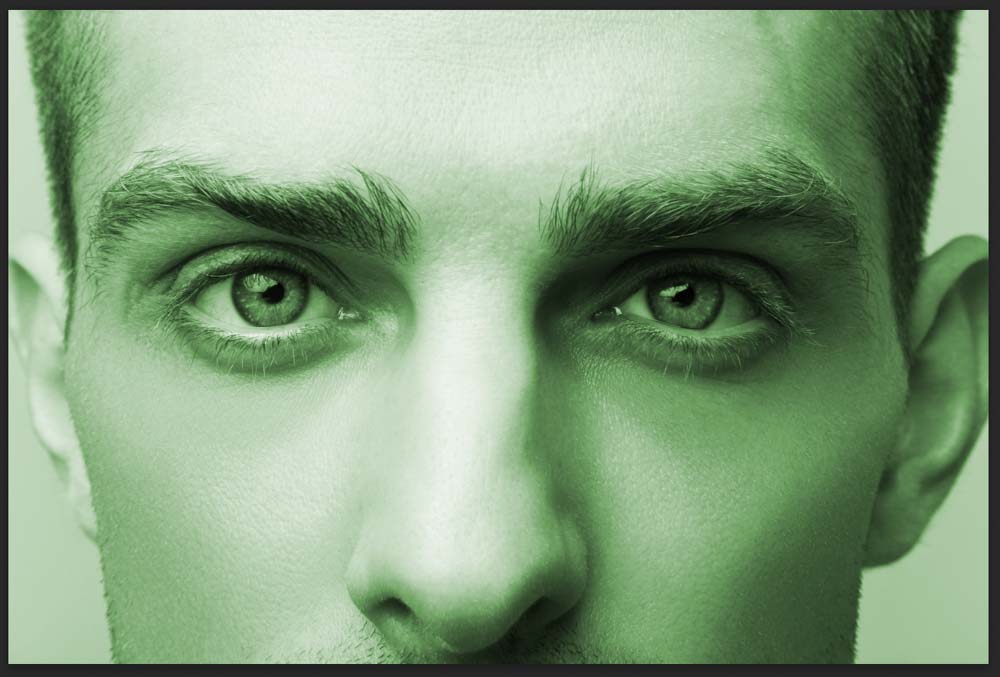
This will ensure the color is added to your image. You’ll notice that once Colorize is checked, the eyes you’ve selected in your photo will turn into a single color. That’s because colorize applies a single color to the entire area and overrides any previous colors. That’s why it’s such a useful tool for changing clothing color as well!
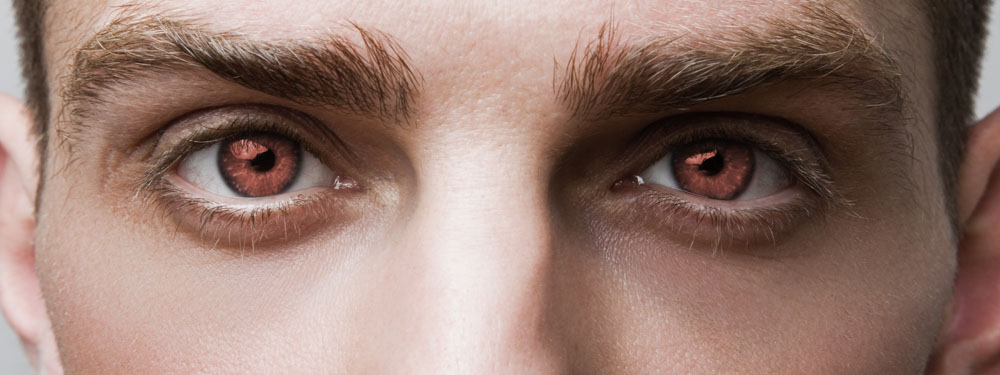
Don’t worry, as we can easily change this in the next section (unless red eyes were your intention, of course).
Step 4: Adjusting The Color & Saturation Of The Eyes
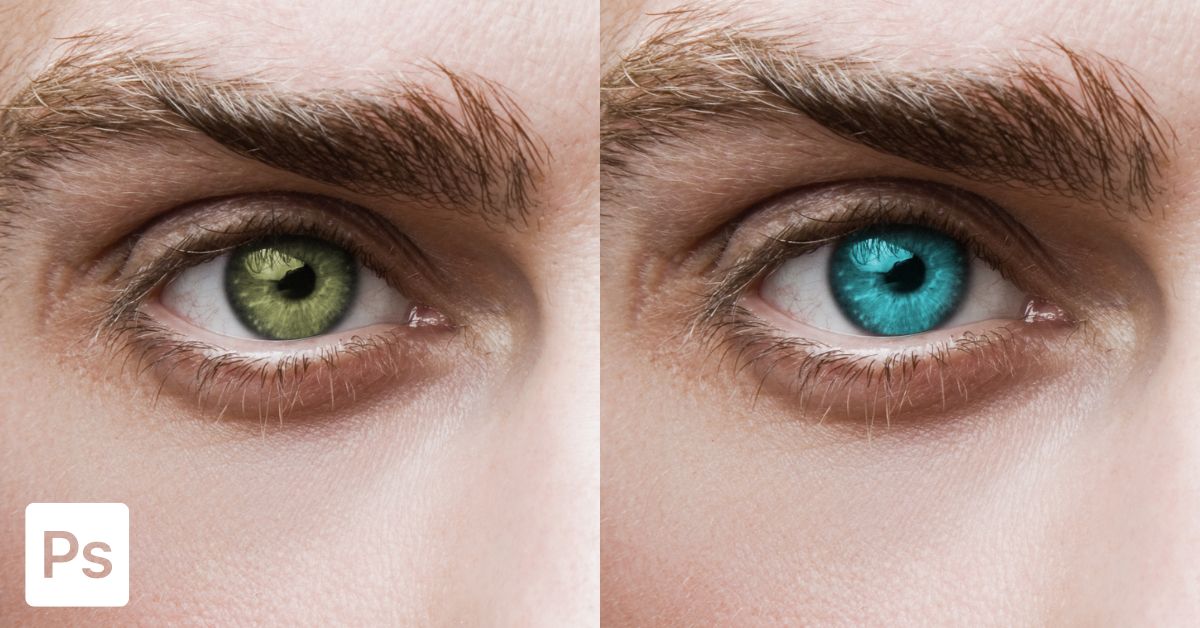
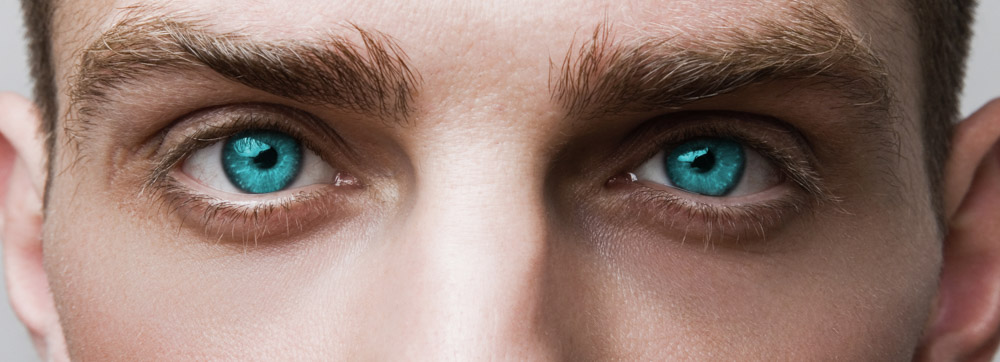
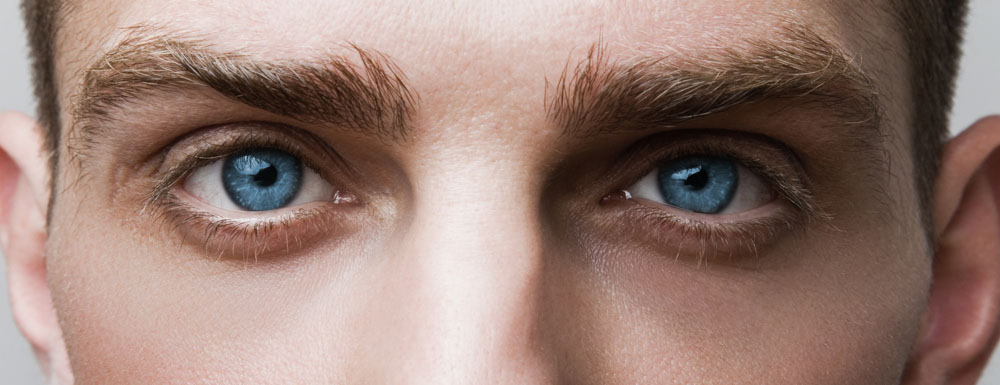
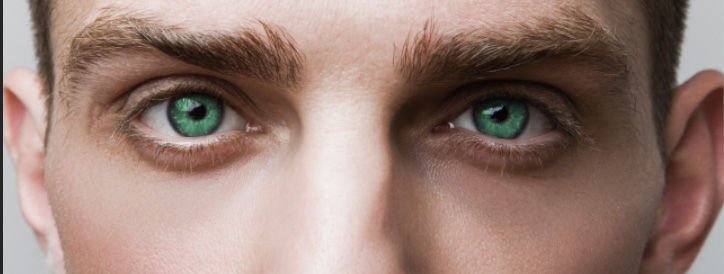
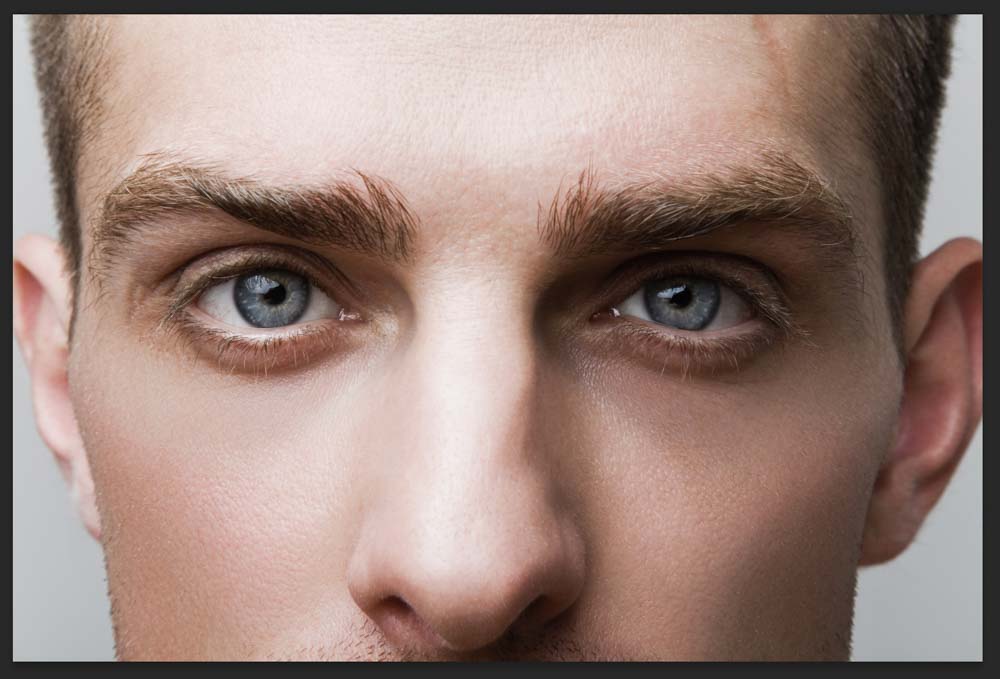
Now that you’ve got the Hue and Saturation sliders open, you can change the hue of the selections you’ve made around the eyes by dragging the toggle on the Hue slider. The slider contains the entire range of colors, so you can select whichever one you’d like and watch the color on the image change as you go. For this example, we will change the eye color below to a bright, icy blue.
If the color seems a bit extreme or unnatural, don’t worry. You can easily make it look more realistic using the Saturation slider. Most likely, the more saturated the color, the more unrealistic it will look. For this reason, it is suggested to keep the saturation set to around +25 or less for the most natural-looking results.

Step 5: Remove Any Color From The Pupil Using A Layer Mask
Once you’re happy with the color of the eye, it is a good idea to remove any color covering the pupil, as some hues may give the pupil an unnatural or discolored appearance. To do this, we’ll use a layer mask. Head to the Layers Panel and click the Hue/Saturation Layer Mask. A white border around the mask will tell you the mask has been selected.
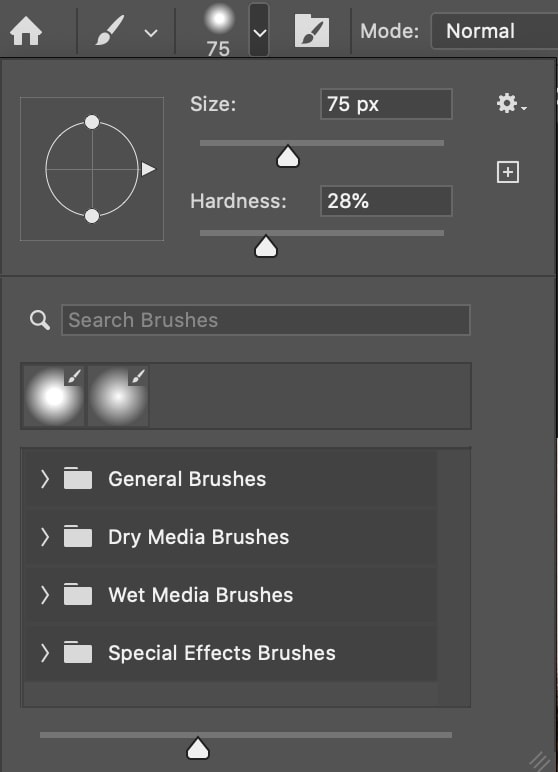
Now, we’ll select the Brush Tool so that we can paint on a layer mask over the pupils.

The foreground color will automatically be set to white, which would mean you are painting on the blue-hued layer mask. As you want to erase the layer mask, press the X key on your keyboard to switch the foreground and background colors, making the foreground black.

This is an excellent point to clean up the eye and erase any color that may have gotten into the white area of the eye. For this, it is best to use a small, round-tip brush and keep the hardness relatively low.
Paint over any areas you’d like to clean up and the pupil of the eye. You likely won’t notice much of a difference, but this is good practice, in general, to ensure you’re not getting any weird effects that others may notice.
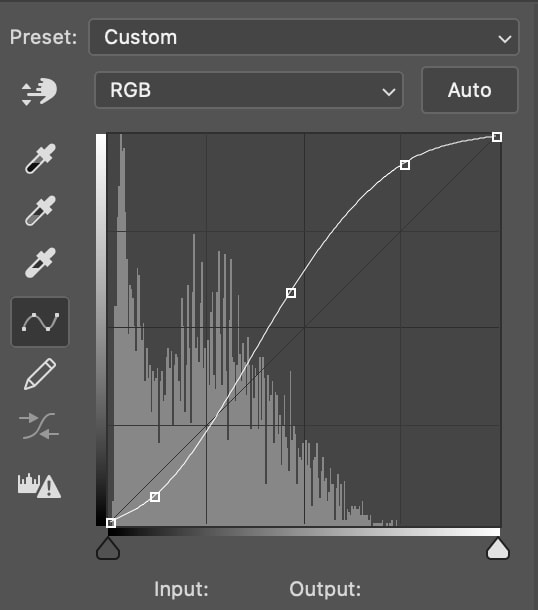
Step 6: Enhance The Eyes Using The Curves Adjustment (Optional)
The final step is to use the Curves adjustment to enhance the color and detail of the eyes. This is entirely optional, but it has the effect of really making eyes pop.
First, make sure there is still an active selection around the eyes.
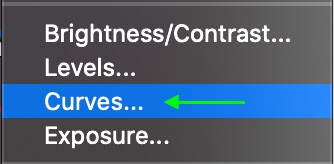
Head to the Layers Panel and click the New Fill or Adjustment Layer icon.
Select Curves from the list.
The Properties panel will now show the Curves adjustment and settings.
Now, we can play with the Curves to enhance the eye. Here, it is best to increase the highlights and shadows to brighten the eye and then decrease the blacks to enhance the eye’s details. Each image will require a slightly different curve, but below is an example of how I’ve adjusted the curve for the example image.
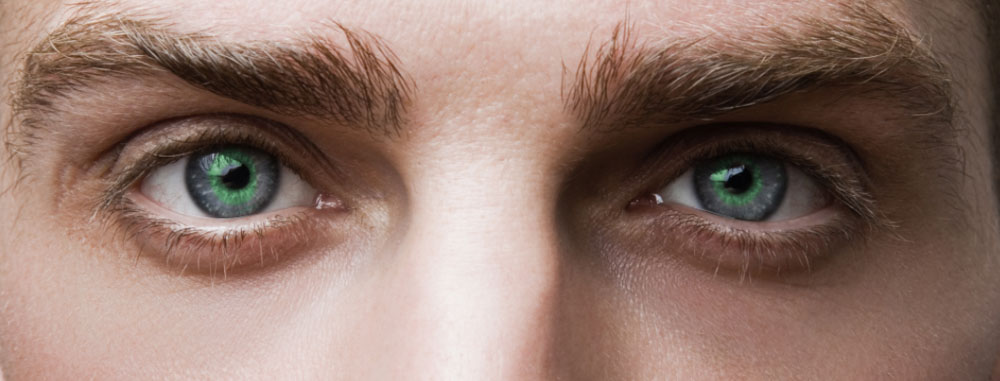
The difference is apparent in the before-and-after photos below; the eyes pop much more in the second image than in the first.

How To Selectively Change Eye Color In Photoshop
Using the steps above, you can also change the eye color selectively in Photoshop. For example, if you’d like to change the color directly around the pupil, follow the same steps above and use the brush tool to selectively erase and paint the mask in only the areas you’d like.
Option 1: Painting The Original Color Back In
So, let’s pick up when you’ve created the selections around the eyes and added the Hue/Saturation mask with a selected color. This time, we’ll use green. You want to make sure the layer mask is selected in the Layers panel to remove parts of the adjustment.

Now, select the Brush tool (B).
We want a small brush with a round, soft tip so we can paint only over the areas we need to.
Now, if you want to start by erasing the mask so that you can paint the original eye color back in, you’ll want the foreground color set to black. With your Hue/Saturation layer mask selected, press D to set your foreground color to black.
You can then paint on the layer mask to hide the unwanted areas of color.
Option 2: Painting The New Color In
Another way to selectively paint on the mask is to start without any selections and add a Hue/Saturation mask, then invert the mask and selectively paint it back on. This requires a few extra steps but will give you the most accurate results.
To start, head to the Layers Panel and add a Hue/Saturation adjustment layer, but without any active selections around the eyes.
Now you’ll see the Hue and Saturation adjustments in the Properties panel. Enable Colorize and set the color and saturation that you’d like to selectively paint on the eyes.
The whole image will turn that color, but don’t worry, it won’t stay that way for long.
Now you can invert the mask by pressing Control + I (Win) or Command + I (Mac). The image will appear normal again, and in the Layers panel, the mask thumbnail will turn black.

Now, use the previous method to create a selection of the iris with the Elliptical Marquee tool.
With the selection active, select the Hue/Saturation layer mask in the Layers panel. The thumbnail will have a white border around it when selected.
Grab the brush tool and make sure the foreground color is set to white.
Now you can paint over the area of the eye you want to change selectively. Because you’ve made a selection around the eyes, you can ensure the area you paint will stay within that selection, giving you more accuracy.
When you’re finished, right-click or Control + click the selection and choose Deselect or press Control + D (Win) or Command + D (Mac) to deselect the selection.

Your image is now ready to go!