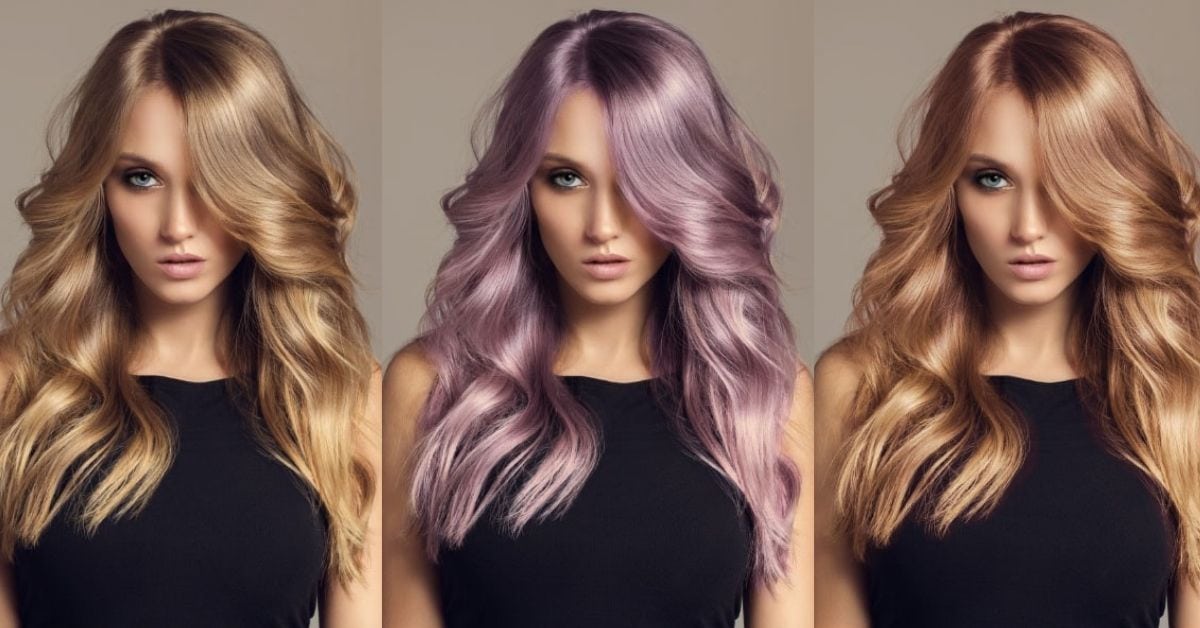

Whether you want to test out a new hair color or you want to add creative edits for a client, you can learn how to change hair color in Photoshop. Although changing the color of hair seems difficult because of its different tones, textures, and shapes, it is surprisingly easy.
This technique teaches you to easily change the color of hair in an image to any color you would like. Certain colors will work better on different hair colors, so you might have to adjust the changes to suit your image.


How To Change Hair Color In Photoshop
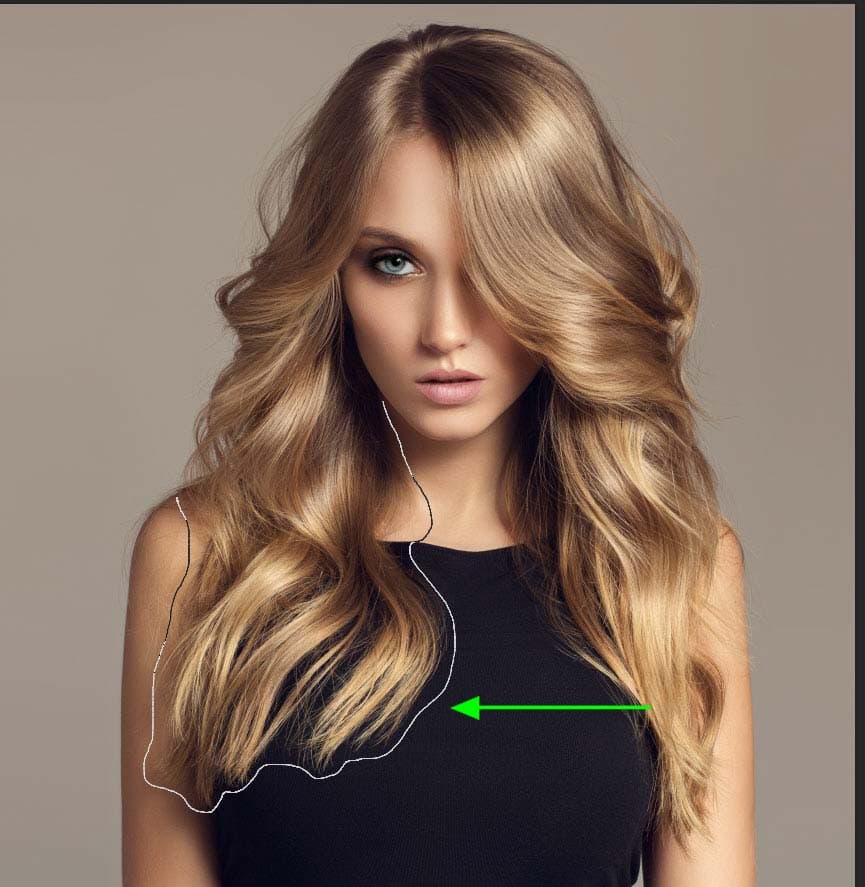
Step 1: Select The Lasso Tool (L) And Click And Drag Around The Hair
Select the Lasso Tool (L) from the toolbar, then make a rough selection around the hair using the Lasso Tool. To do this, click on an area close to the hair and drag the mouse, following the hair until you reach the starting point again.
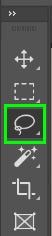
Let go of the mouse once you connect the line to the starting point. The hair will now be surrounded by a marching ants pattern to show the selection you have made.
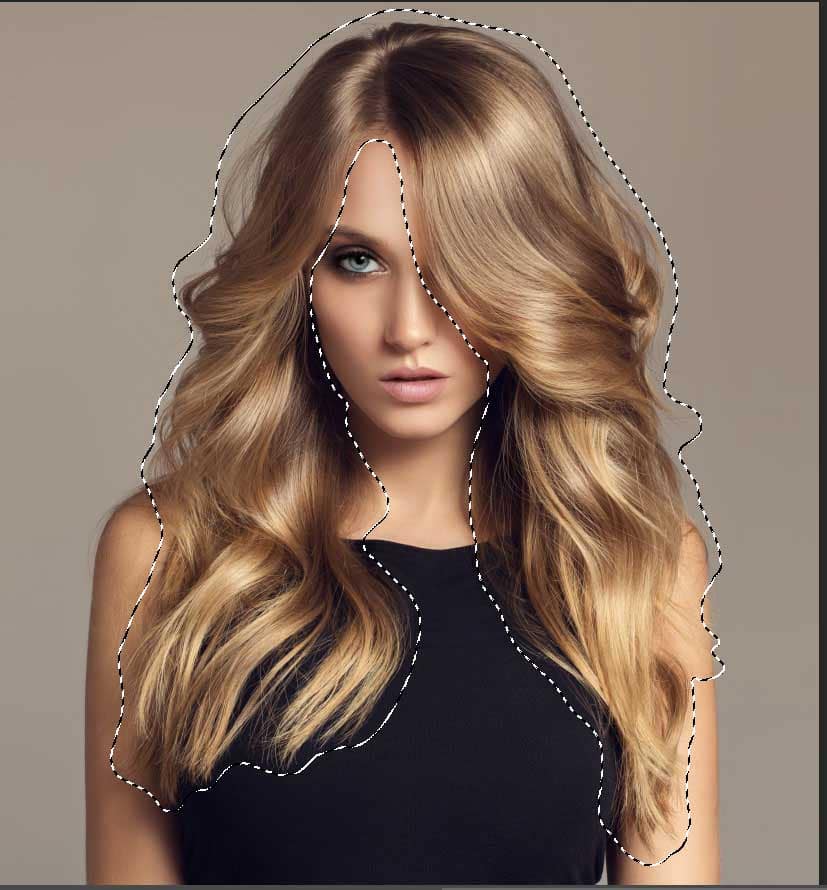
Step 2: Go To Select > Select And Mask To Refine The Selection
Once you have made the selection, navigate to Select > Select and Mask or press Alt + Control + R (Win) or Option + Command + R (Mac).
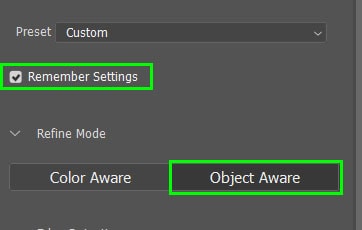
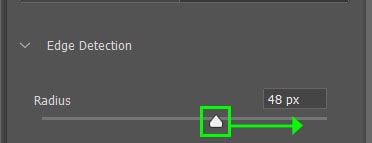
Before you begin, check the box next to Remember Settings. Then, choose the Object Aware option in the Refine Mode tab. If your selection still has a lot of area around the hair selected, start by shifting the Radius closer to the hair outline. Do this by dragging the slider to the right.
Click the Refine Hair button on the Options Bar to let Photoshop tighten up the selection as much as possible.

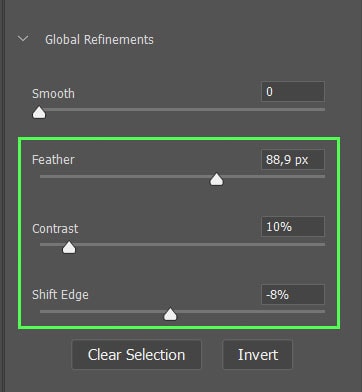
To further refine the selection, head to the Global Refinements Tab and adjust a few of the sliders to get as close to the hair as possible.
- Increase the Feather slider by dragging it to the right. This softens the selection, making the selection more blurred without a clearly defined edge. This helps to pick up the stray pieces of hair and blend the new hair color into the rest of the image.
- Increase the Contrast slider slightly. This does the opposite of the Feather adjustment by defining the edge a bit more. Adjusting this helps with the bottom of the hair to set it apart from the shirt.
- Adjust the Shift Edge slider to move the selection inwards by sliding the bar to the left or outwards by sliding to the right to position the edge of the selection better.
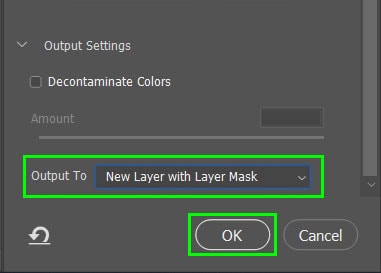
To further refine the selection in specific areas, select the tools in the left panel. This will allow you to shift the edge of the selection inwards or outwards only in specific areas. Lastly, at the bottom of the Properties Panel, make sure the Output is set to New Layer with Layer Mask and select OK.
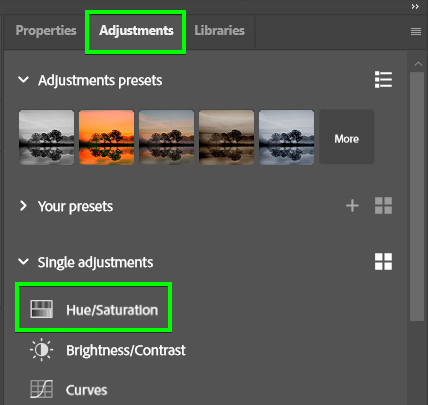
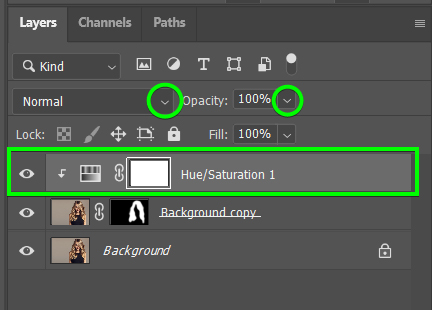
Step 3: Add A Hue/Saturation Layer From The Adjustments Panel
Add a new Hue/Saturation Adjustment layer by selecting the option from the Adjustments Panel.
Right-click (Win) or Control + Click (Mac) on the adjustment layer and select Create Clipping Mask to ensure that the adjustment is only added to the layer directly below.
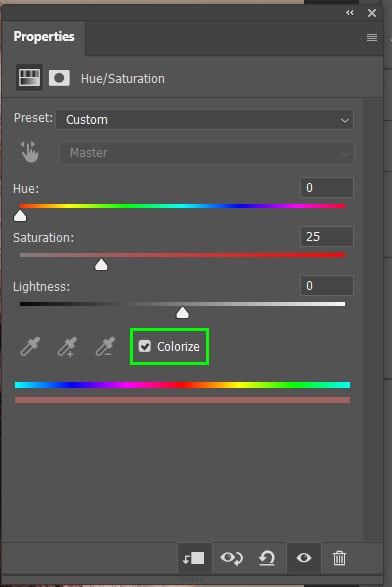
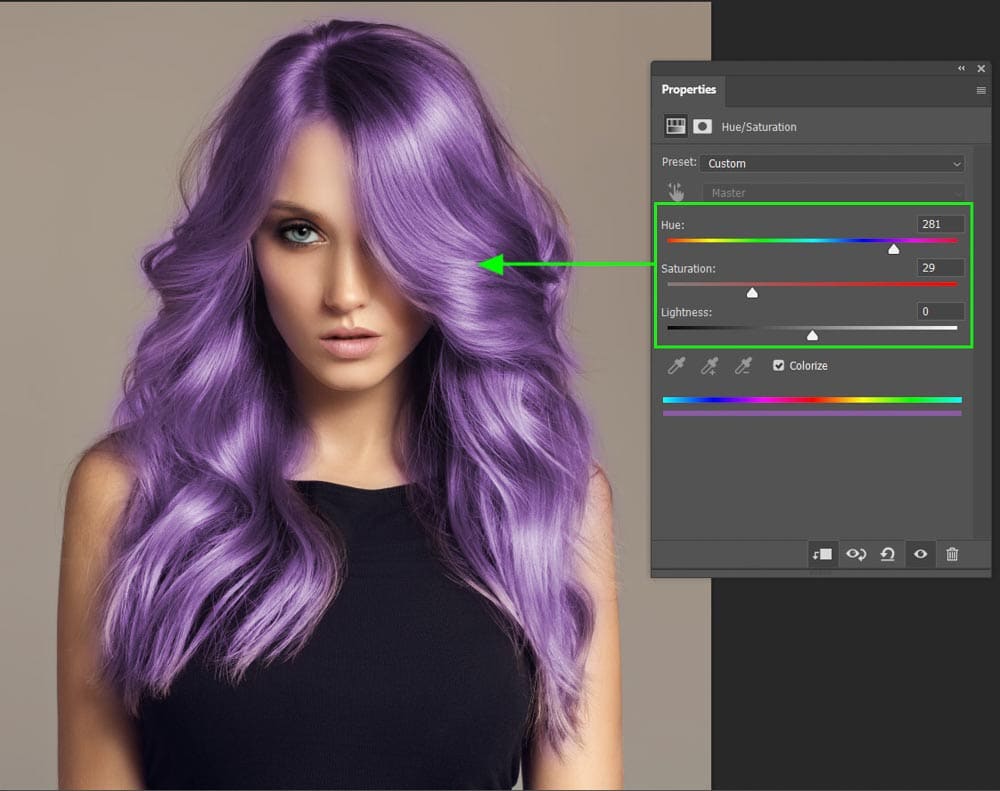
In the Properties Panel, enable the Colorize option to enable the adjustment of the color in the image. You can now adjust the various sliders to add the right color.
- You can use the Hue slider to change the actual color of the hair by dragging the slider to the color of your choice.
- Use the Saturation slider to make the new color more vibrant or to tone it down slightly.
- Use the Lightness slider to make the hair lighter or darker.
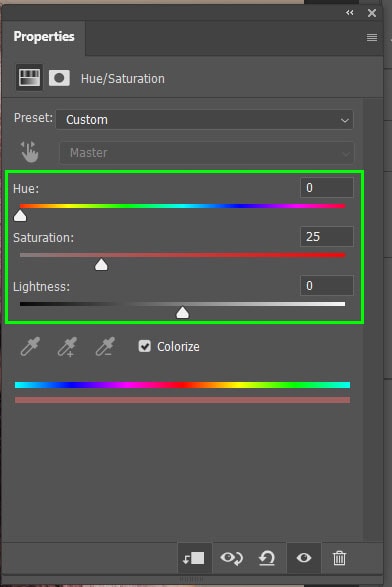
As you adjust the sliders, the hair’s color will change, allowing you to easily choose the right color and tone.
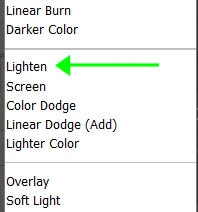
Step 4: Change The Blend Mode To Lighten To Blend The Hair Color Into The Image
To add a blend mode, make sure the Hue/Saturation layer is selected and click on the drop-down Blend Mode menu at the top of the Layers Panel.
Then, choose the blend mode that works best on your image, such as the Multiply or Lighten option. In this case, the Lighten option works better. Then reduce the Opacity of the layer to further blend the new color into the image.
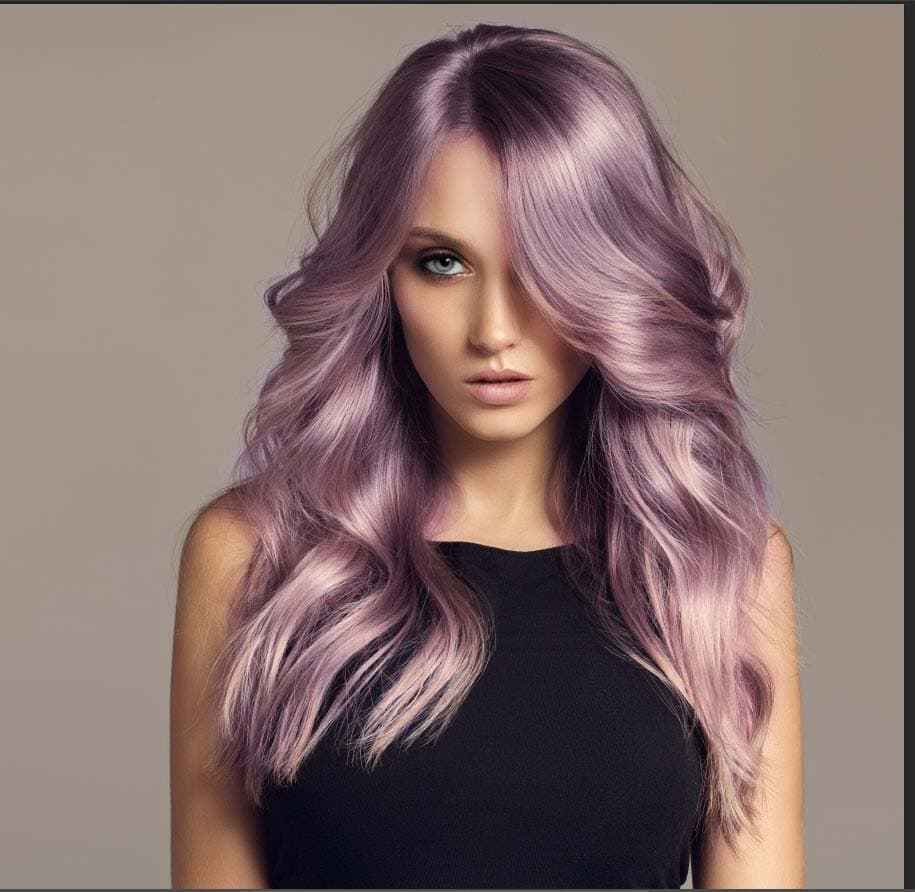
You will notice the hair color has toned down and looks more natural.
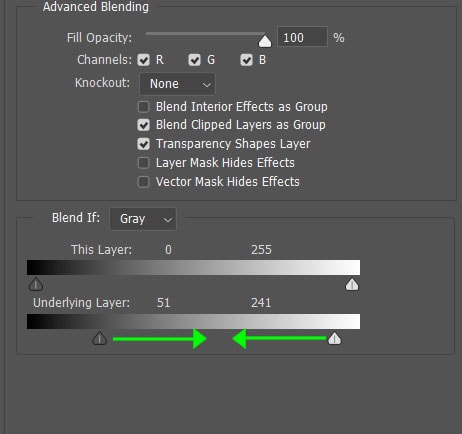
Step 5: Use Blend If To Remove Any Color Bleed From The Hair (Optional)
Double-click on the thumbnail of the image on the layer that contains the layer mask to open the Layer Styles panel.
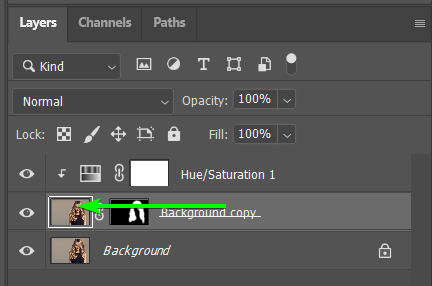
Move to the bottom of the window to the Blend If section and make sure that Gray is selected from the drop-down menu. Then, drag both the black and white arrows underneath the Underlying Layer section to fix the selection as needed for your image.
To adjust the blending with feathering, hold in Alt (Win) or Option (Mac) when dragging one of the sliders. It will be split into two to create a softer blend.

Once you are happy with the fixes to the selection, you will have successfully changed the hair color without color leaking into other areas of the image.
So whether you want to slightly change the hue of your subject’s hair or try something completely different, following these steps makes it all possible!
Happy editing!


