

While you’re likely familiar with the Library and Develop modules in Lightroom, there is another feature that you might find quite helpful, which is the Slideshow module. This allows you to create stunning slideshows of your images that can have various uses, from acting as a portfolio to presenting images to friends and family.
Creating a Slideshow may seem like a daunting task, especially as there is so much you can customize to your needs such as editing transitions and effects, adding text overlays and branding, and even including an audio track to play during the slideshow.
How To Create A Slideshow In Lightroom
Follow these steps to create your own customized slideshow in Lightroom, using the photos of your choice.
Step 1: Select The Photos For Your Slideshow
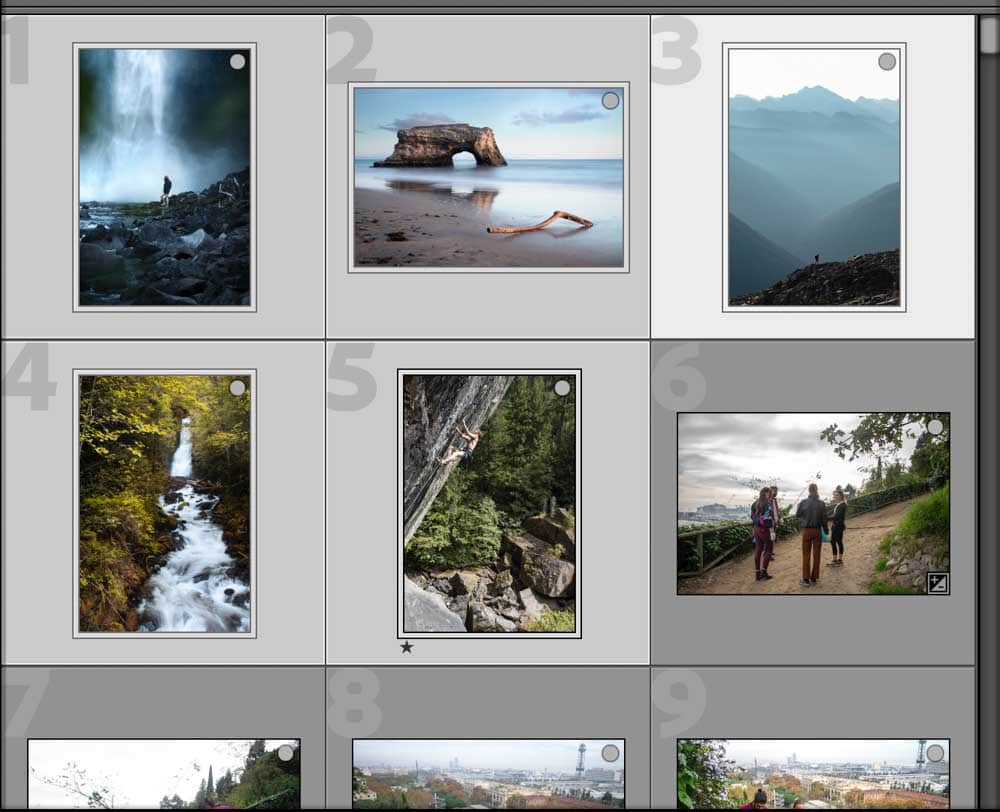
The first thing you’ll need to do before creating your slideshow is select the images you’d like to present. To do this, first, make sure you’ve uploaded all your images. Then, in the Library module, go through and select the photos you’d like to include.

Now you can either select images from the grid or in the filmstrip below. Selected photos will turn a lighter gray than the rest.
Once you’ve selected your chosen images, head to the Slideshow module to create the slideshow.

Step 2: Choose The Playback Order For Your Photos
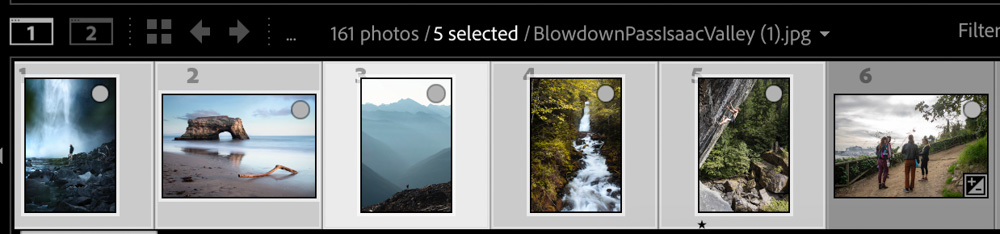
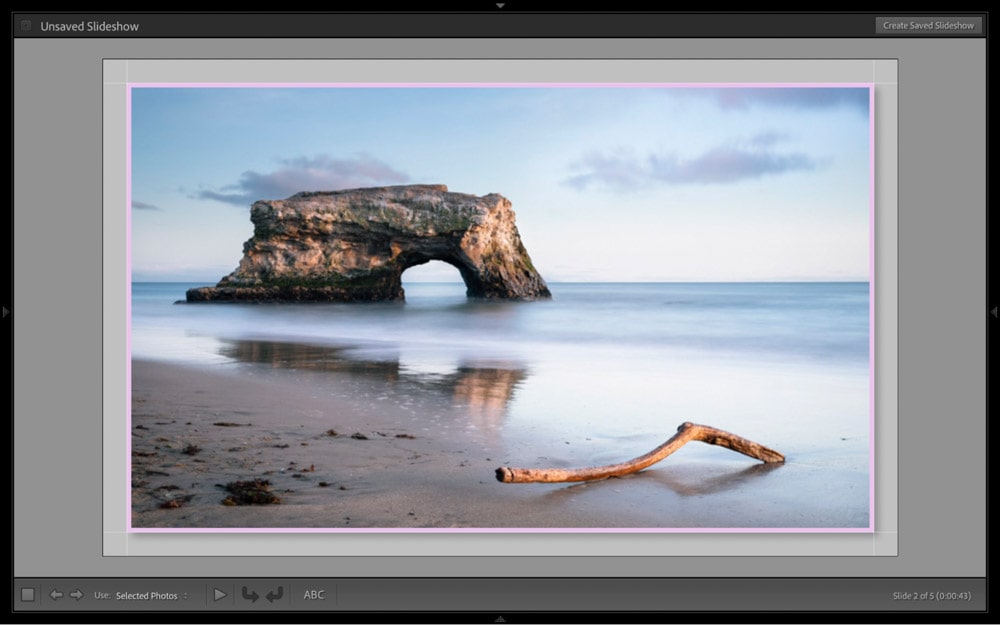
Here, the images you chose appear selected in the film strip below. You’ll see other similar images to the ones you selected images if you go through the slideshow using the left and right arrow keys. Lightroom includes these as options to add to your slideshow. To arrange the order you’d like the photos to be presented, drag the photos around the filmstrip.
You can also randomize the order of slides by heading to the Playback panel on the right and checking Random Order.

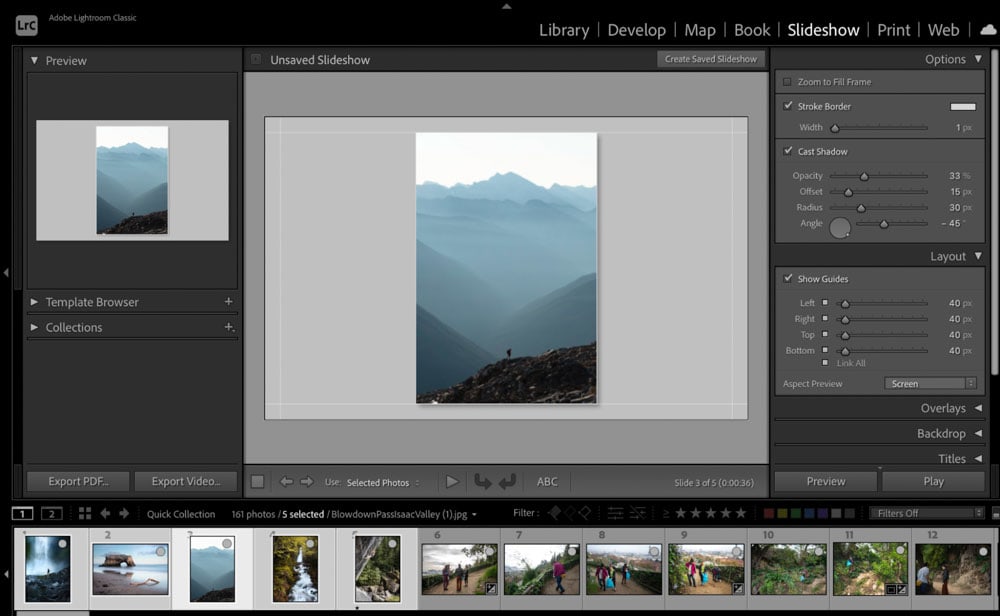
Step 3: Add A Frame To Your Slideshow (Optional)
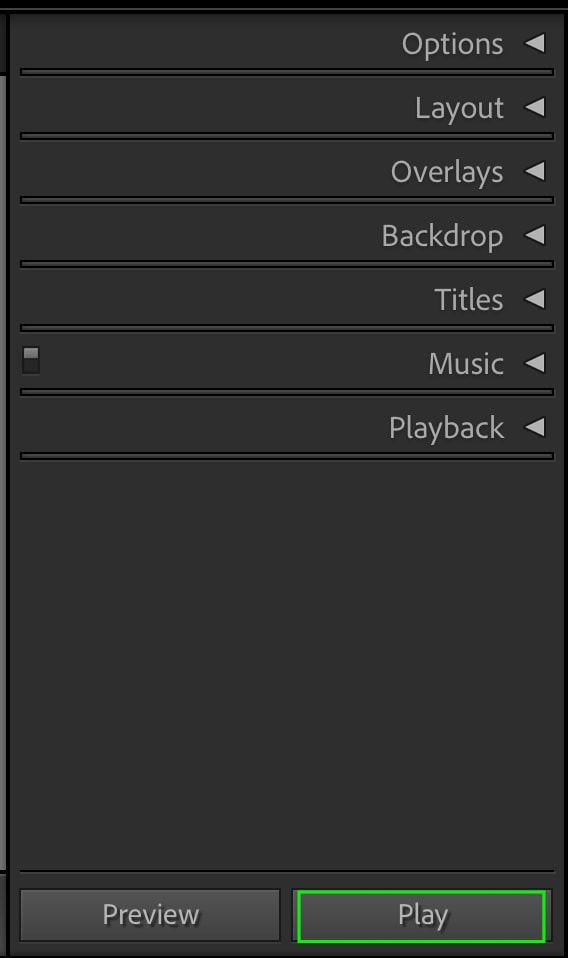
This step is optional, but you’ll notice that a border sits around your images in the slideshow, and you can choose to customize this border if you’d like. Head to the Options panel on the right.
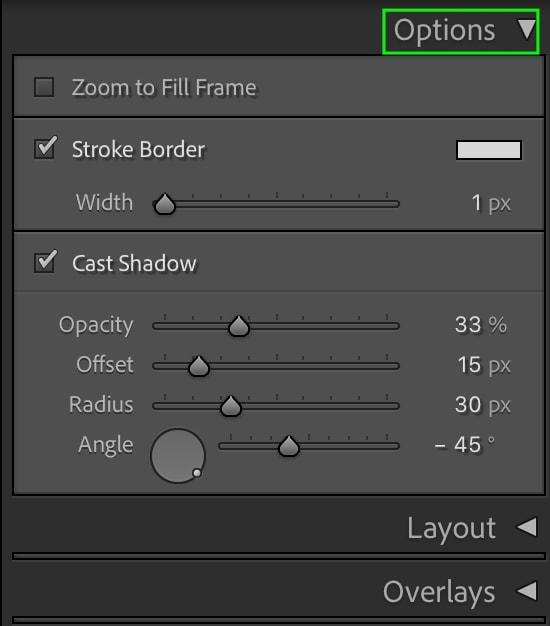
If you’d like your images to fill the frame, check Zoom to Fill Frame.
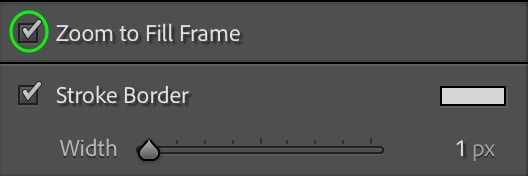
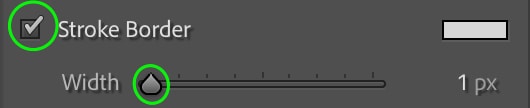
Underneath, you can check whether or not you’d like a border around your images. Drag the toggle to increase the width of the border’s stroke.
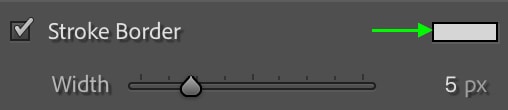
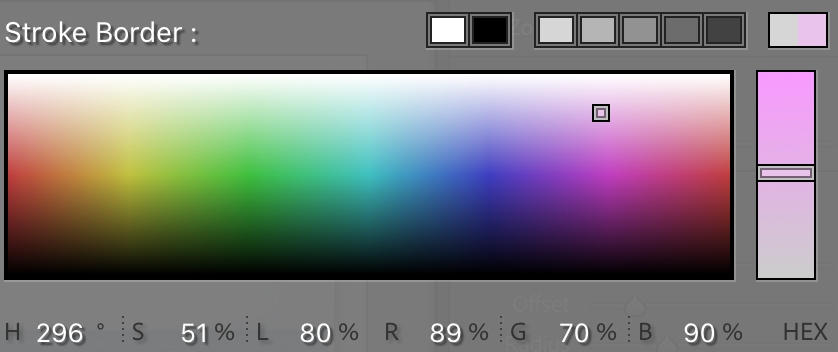
To set the color, click the box to the right of Stroke Border and find the color you’d like in the box that opens.
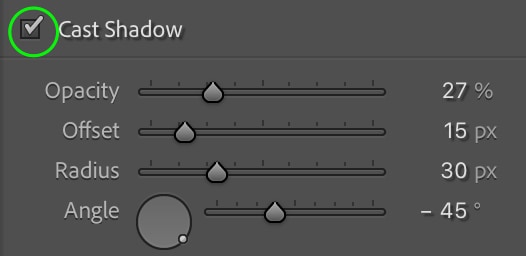
Below, you can set whether or not you’d like the image to cast a shadow by checking Cast Shadow. Then, set the shadow’s Opacity, Offset (the distance from the image where the shadow sits), Radius, and Angle.
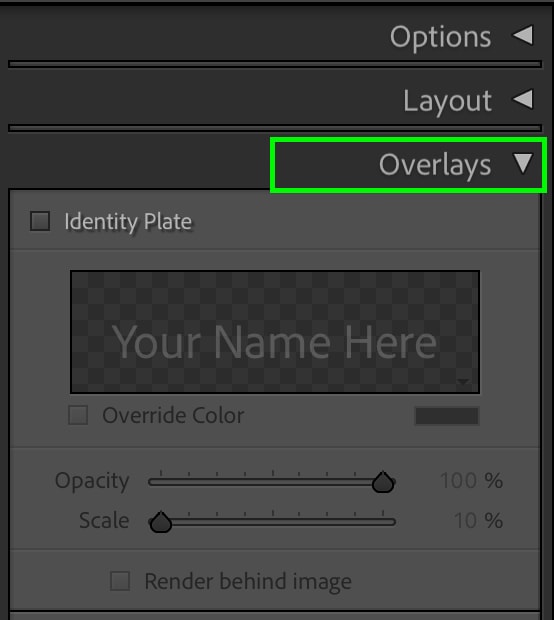
Step 4: Add Text To Your Slideshow In The Overlays Panel
The next step is to add any overlays, such as text or a watermark, that you’d like to your images. This is useful if you’d like to display a caption on each slide or if you’d like to add personal branding to the slideshow. For this, we’ll work in the Overlays tab.
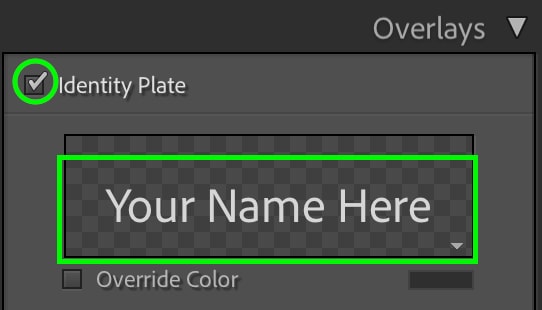
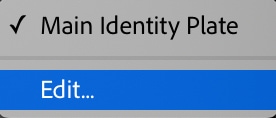
First, you can select whether or not you’d like your identity plate to show by checking the box. Click the plate to set which identity plate you’d like to show from the options, or click Edit to make one.
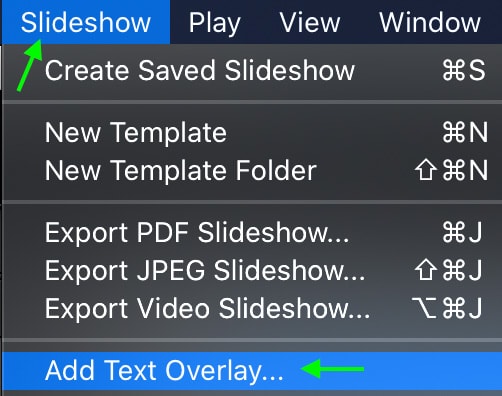
To add text that will show on every slide, head to the top to Slideshow > Add Text Overlay.
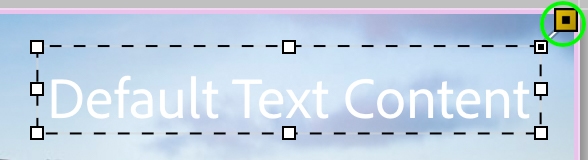
The text box will automatically appear at the corner of your image. Drag to move the box and click any anchor points to set it to stay fixed in its location. It will then turn yellow.
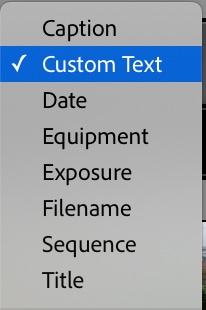
Then you can click either the ABC icon or the box next to Custom Text (this area is found just below the image preview) and enter the text you’d like to display on the slides.

You can also click Custom Text to open the pop-up menu in which you can choose the type of text displayed; you can choose to show a caption, for instance, or the date of the image.

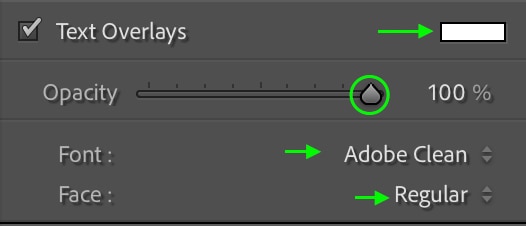
Head back to the Overlays panel and the Text Overlays area. Here, click the box next to Text Overlays to edit the color, drag the toggle to set the Opacity, and select the font and font face.
To make the overlays invisible, uncheck Text Overlays. To delete a text box, click it and press the Delete key.
Step 5: Choose Your Transitions & Transition Speed
The next way you can customize your slideshow is by setting the rate at which your slides and transitions will play. To do this, head to the Playback panel.
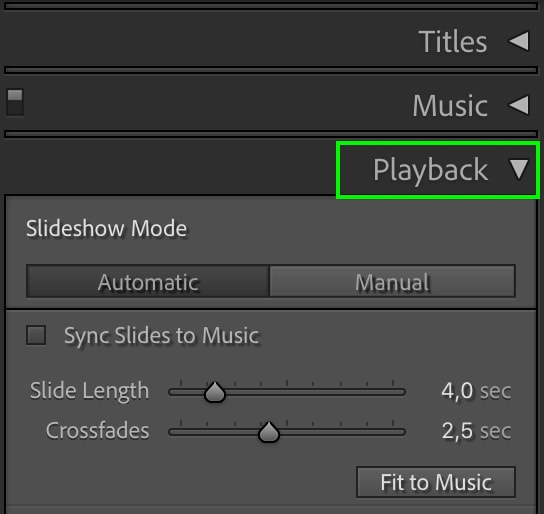
Drag to increase or decrease the Slide Length and the length of the Crossfade transition between slides.

Keep in mind that if you export your slideshow as a PDF, the playback settings like slide duration and transitions will not apply. The slide duration and transitions are used when exporting the slideshow as a video.
Step 6: Add Music In The Music Panel
You can also add background music to your slideshow by heading to the Music tab. Click the plus sign icon and select the audio you’d like to use from your files. The files recognized are .mp3, .m4a, and m4b.
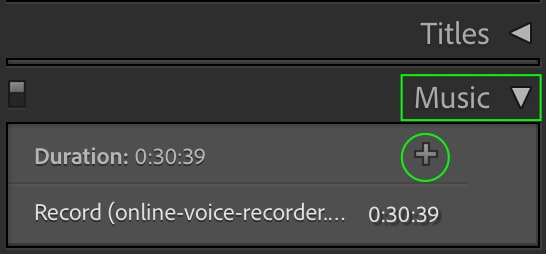
You can select up to 10 files to play, and they’ll play sequentially in the order you selected the files. You can add, reorder, or remove the tracks in the Music panel.
Step 7: Add An Intro & Outro Title Card (Optional)
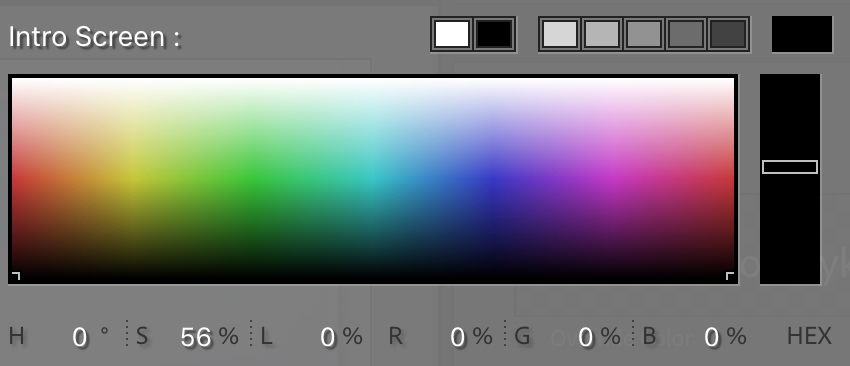
To add an intro or outro, head to the Titles tab, and set a plain colored slide as the first and/or last slide of the slideshow, with or without an identity plate. Check the Intro Screen and/or Ending Screen to set these up.
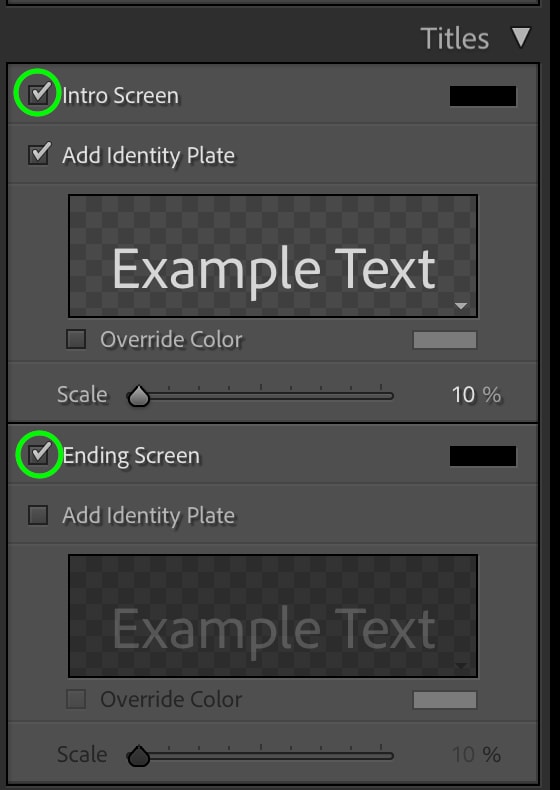
Click the color box to the right to choose the color you’d like your intro and ending screens to show.

Then, check whether or not you’d like your identity plate to show on the screens, and then set which Identity Plate you’d like to show by clicking the plate and selecting from the options or clicking Edit to make a new one.
Step 8: Play Your Slideshow
Once you’re happy with your slideshow, you can play it by clicking Play at the bottom of the panel.
You can press the spacebar to pause and resume the slideshow and use the left and right arrow keys to move the slideshow forward or backward.
How To Create A Slideshow Template In Lightroom
A template is a set of preselected settings that act as a layout for your slideshow. You can create a template out of a slideshow you’ve made to use again in the future.
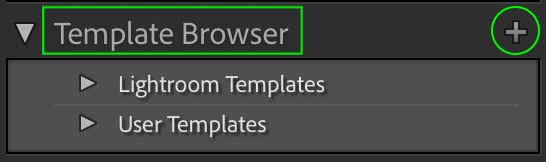
Once you’re happy with the Slideshow you’ve made, head to the Template Browser on the right, and click the plus sign to create a new template.
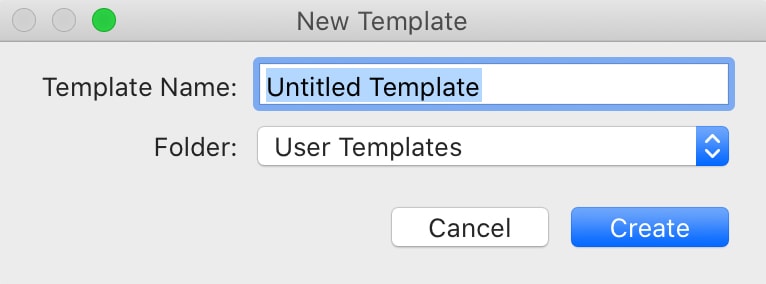
In the window that appears, you can name your template and choose which folder the template will sit in, then click Create when you’re done.
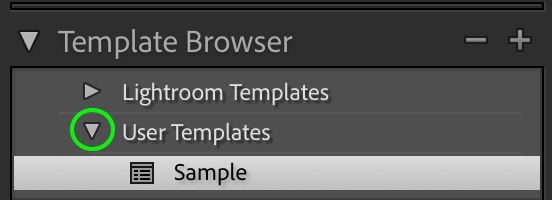
To find your template again, just head to the Template Browser and click the arrow next to User Templates to see the templates you’ve saved.
How To View A Slideshow In Full Screen In Lightroom
To view your slideshow in full screen, click the arrows on the sides of each panel, which will make the panels invisible and give the slideshow itself more room.
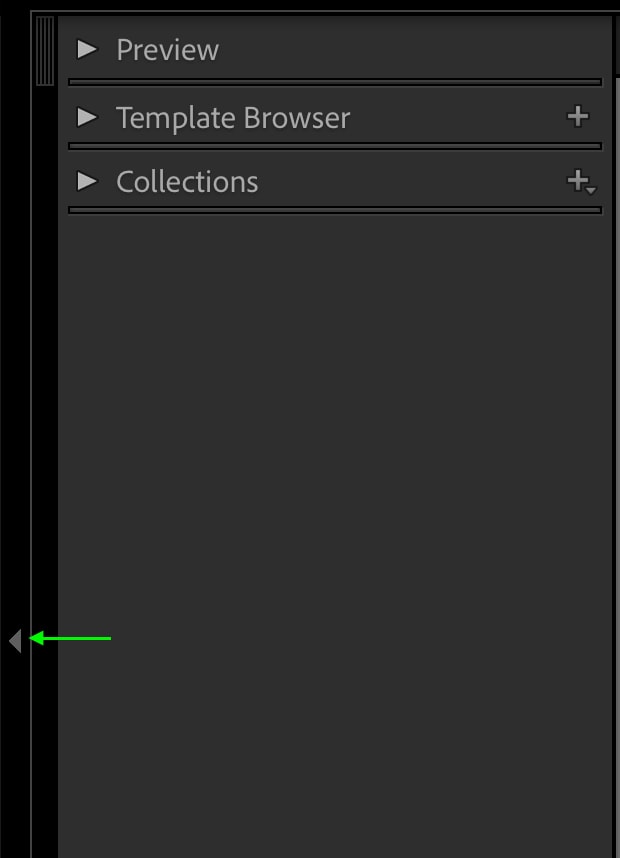
Do this for each panel, and make sure you’re working in full screen already. The slideshow will then take up as much of the screen as possible. You can also press Shift + Tab to toggle the view of all panels.
This only matters when you are still adjusting the settings of your slideshow since it automatically goes to full screen when you press Play on your slideshow.
How To Export A Slideshow From Lightroom
There are different options for exporting your slideshow, and it’s important to know what features come with each. All options are available while working in the Slideshow module.
To export your slideshow as PDF, so that you can easily view it digitally, you can click Export PDF on the bottom left of the module.

You can name your slideshow in the Save As box and select a location you’d like the PDF to save in the Where box. You can also set the quality of each slide — the lower the quality, the smaller the size of the file will be. You can also set the width and height of the slideshow. Click Save (Win) or Export (Mac) when you’re finished.
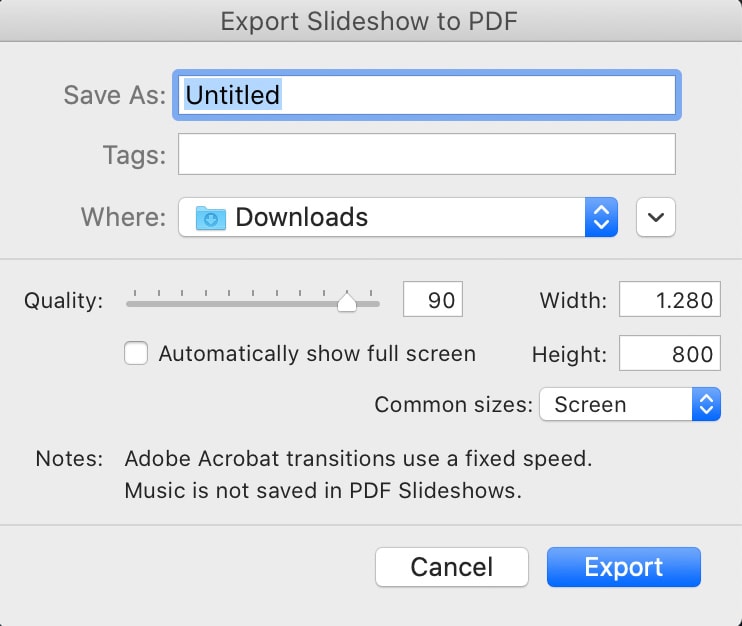
Remember that slideshows exported as PDFs will not include the music, randomized images, or any duration settings.
You can also export your slideshow as a series of JPEG files, including everything you see in each specific slide, including the layout, background, and any overlays. Again, Lightroom will not export transitions, playback options, and music.
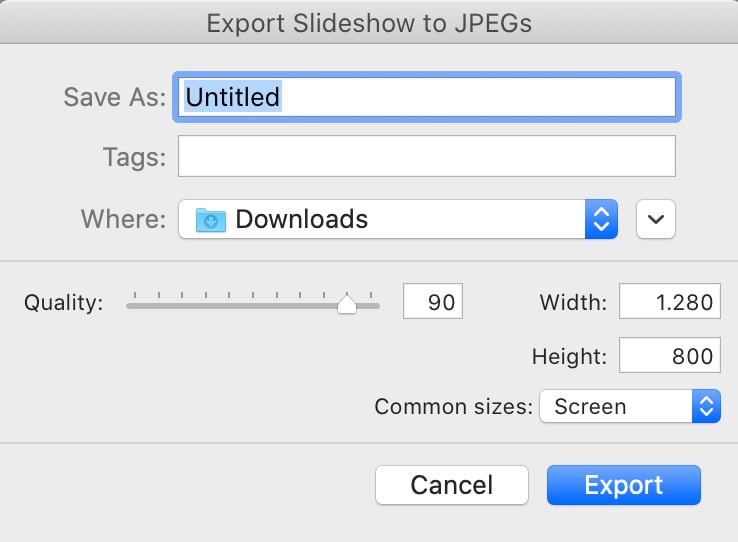
To export your slide as a JPEG, hold Alt (Win) or Option (Mac), and you’ll see the Export PDF button change to Export JPEG. Click Export JPEG, and then in the window, name your file — this will be the folder’s name that the exporting process will create where the JPEG images will sit. Choose where to save your file, then set the quality settings if you’d like, and click Save (Win) or Export (Mac) when you’re finished.
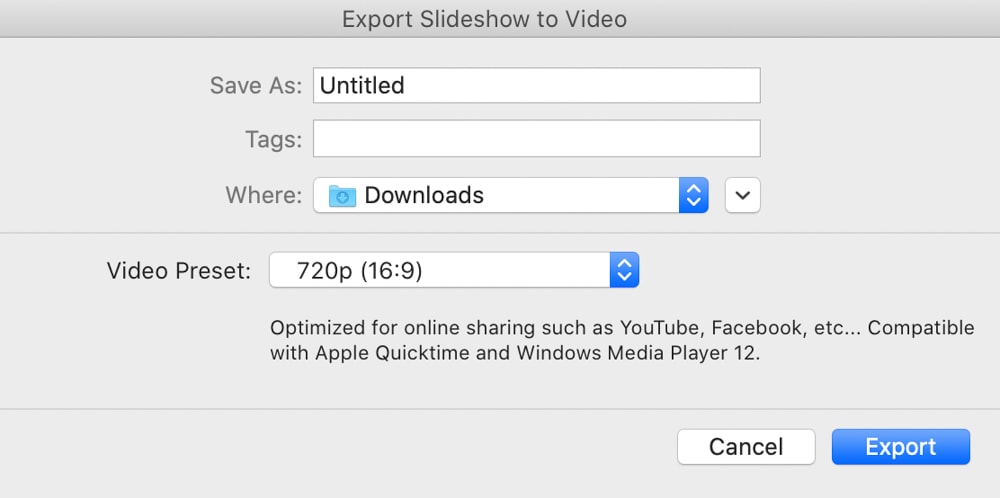
The final way you can export your slideshow is as a video. This is useful as it will include any music or transitions you’ve set. To do this, click Export Video.

In the window, name your file and select a location. You can set your video’s pixel size and frame rate from the options in the Video Preset dropdown. Click Save (Win) or Export (Mac) when you’re finished.
Want A Fast Way To Edit Your Slideshow Images In Lightroom?
Creating the slideshow is only half of the work you need to do. Before the slideshow is ever made, you need to edit all the photos beforehand to make them picture perfect. Depending on how many photos are in your slideshow, the editing process can take a lot longer than you hoped for. So to help speed up your photo editing, be sure to download my free Lightroom Starter Kit preset bundle that includes 12 Lightroom presets for faster photo editing!


