
The chrome effect in Photoshop utilizes a variety of layer styles to make a basic graphic or piece of text take on a shiny, metal-like appearance. In this tutorial, you’ll learn how to create this effect for yourself and how to save it as a layer style for your future projects.
Use this technique on logos, website headers, and other digital marketing materials to make a brand stand out from the rest.
How To Create The Chrome Effect In Photoshop
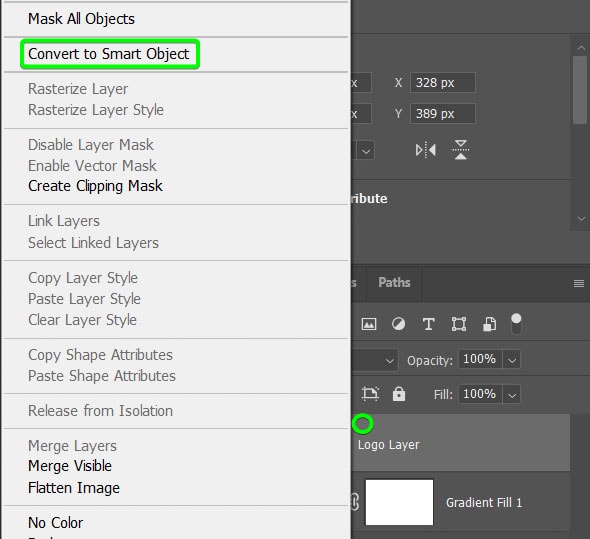
Step 1: Right-Click On The Object Layer And Select Convert To Smart Object
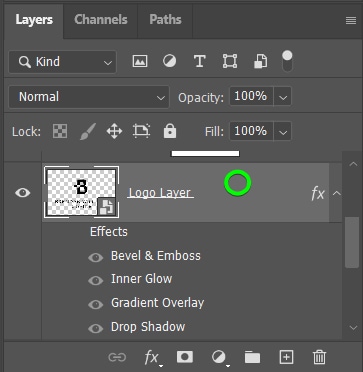
Add your logo or text on a dark background and convert the object layer to a Smart Object by selecting it, and then right-click or Control + click and select Convert to Smart Object.
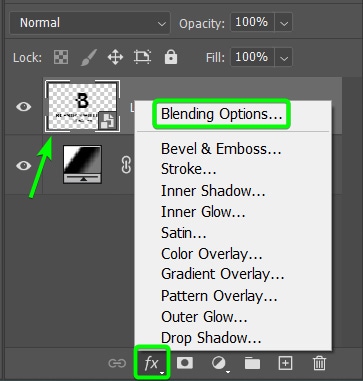
Step 2: Go to Layer > Layer Style > Blending Option > Color Overlay
Double-click on the layer in the Layers Panel or click on the Add a layer style icon at the bottom of the panel and select Blending Options.
Note: As with any effect you add using Layer Styles, each style and its settings may need to be adjusted slightly for your text, logo, or symbol. Using the same settings will help you achieve a basic chrome effect, but you can always take this further by adding your own creativity to it.
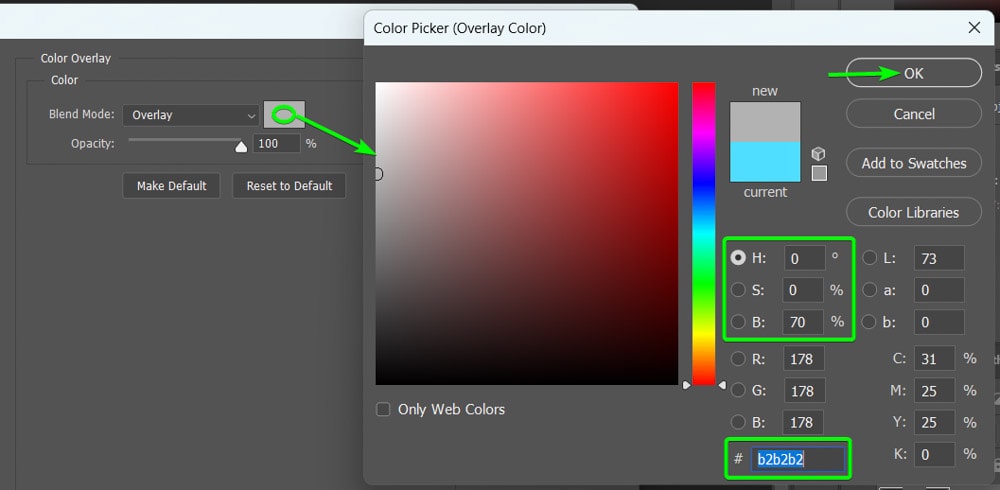
Click on the Color Overlay effect in the left-hand panel and change the overlay color by clicking on the color box. Inside the color picker, set the HSB values as follows: H = 0, S = 0, and B = 70. The hexadecimal code should be #b2b2b2. Click OK to confirm the color change.
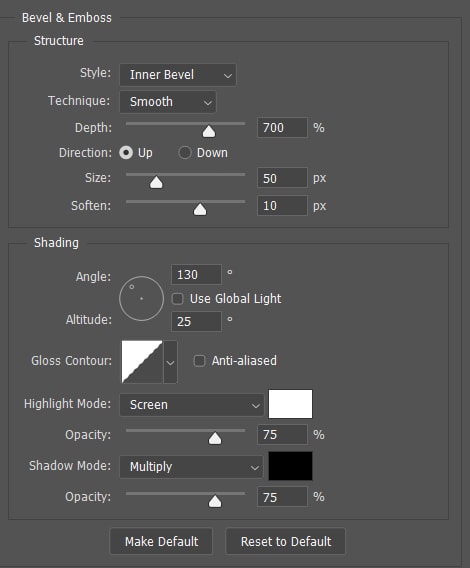
Step 3: Add A Bevel And Emboss
Next, move straight to the Bevel and Emboss effect by clicking on it in the left-hand panel. Adjust the settings to the following:
- Style to Inner Bevel
- Technique to Smooth
- Depth at 700%
- Direction set to Up
- Size at 50 pixels
- Soften set to 10 pixels
- Uncheck the box next to Use Global Light
- Angle set to 130 degrees
- Altitude at 25 degrees
- Gloss Contour is Linear
- Highlight Mode set to Screen, with the color at white, and the Opacity at 75%
- Shadow Mode set to Multiply, with the color at black, and the Opacity at 75%
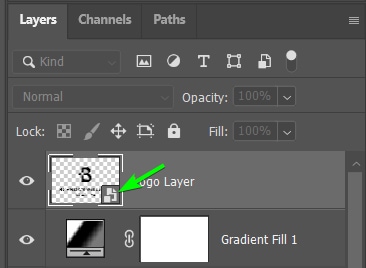
Step 4: Create A New Smart Object
Convert your object layer to a new smart object to flatten the effects and keep them saved in the smart object while allowing you to add new layer-style effects to the object. Convert the layer by selecting it and then right-clicking or Control + clicking and selecting Convert to Smart Object.
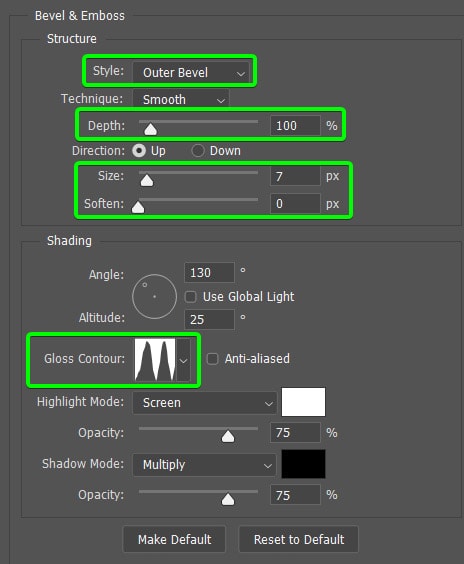
Step 5: Add A Bevel And Emboss In The Layer Styles Panel
Open the Layer Styles window again and add a new Bevel and Emboss effect. Adjust the following settings:
- Style set to Outer Bevel
- Depth at 100%
- Size set to 7 pixels
- Soften is 0 pixels
- Set the Gloss Contour to Ring – Double
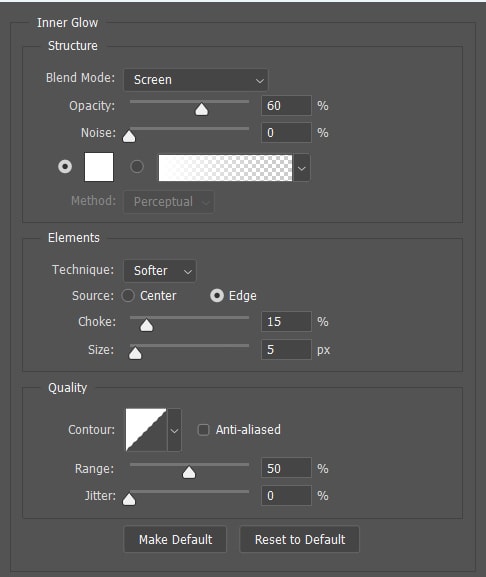
Step 6: Add An Inner Glow In The Layer Styles Panel
Next, add an Inner Glow effect to the object by selecting the option on the left. Then adjust the settings as follows:
- Set the Blend Mode to Screen with the color white and Opacity at 60%
- Keep Noise at 0%
- Change Technique to Softer
- Set Source to Edge
- Choke is set to 15%
- Size at 5 pixels
- Keep the Contour as Linear
- Set the Range to 50%
- Leave the Jitter at 0%
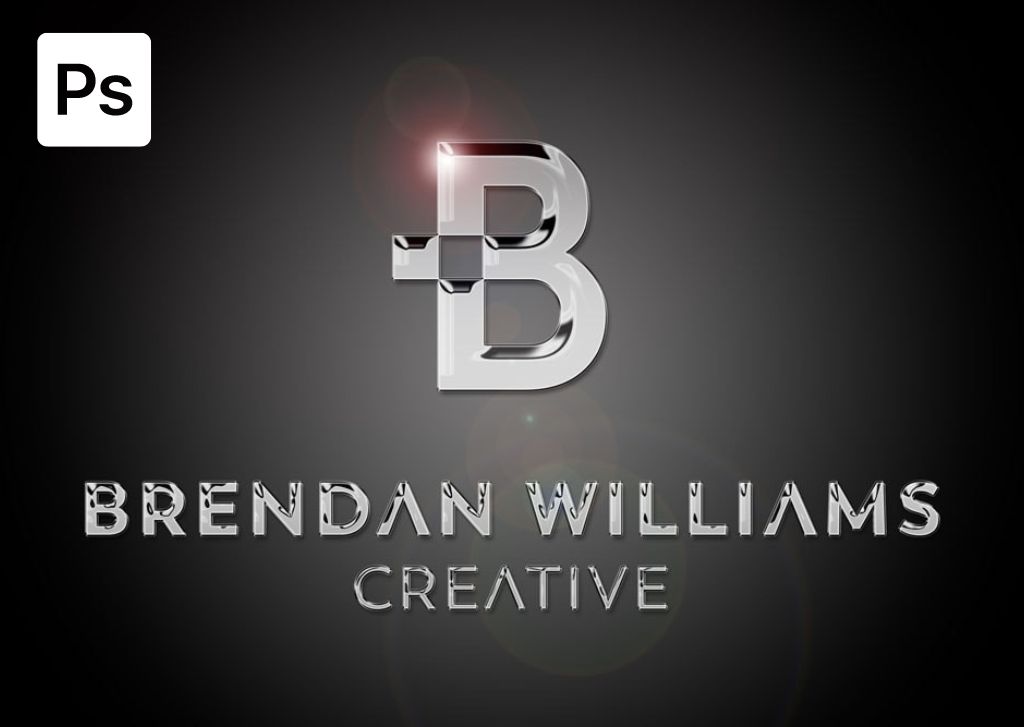
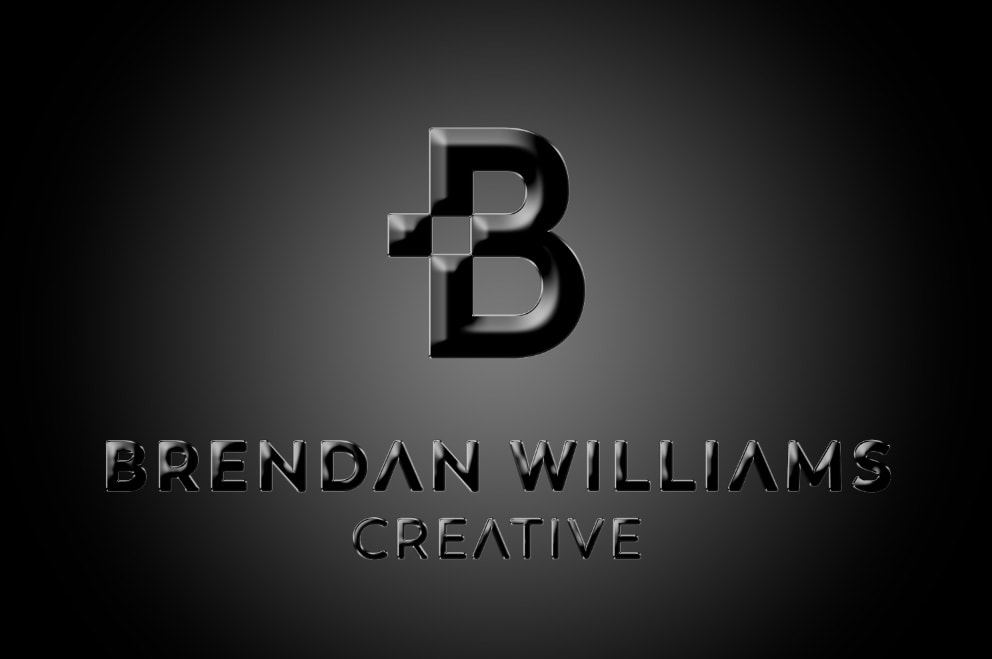
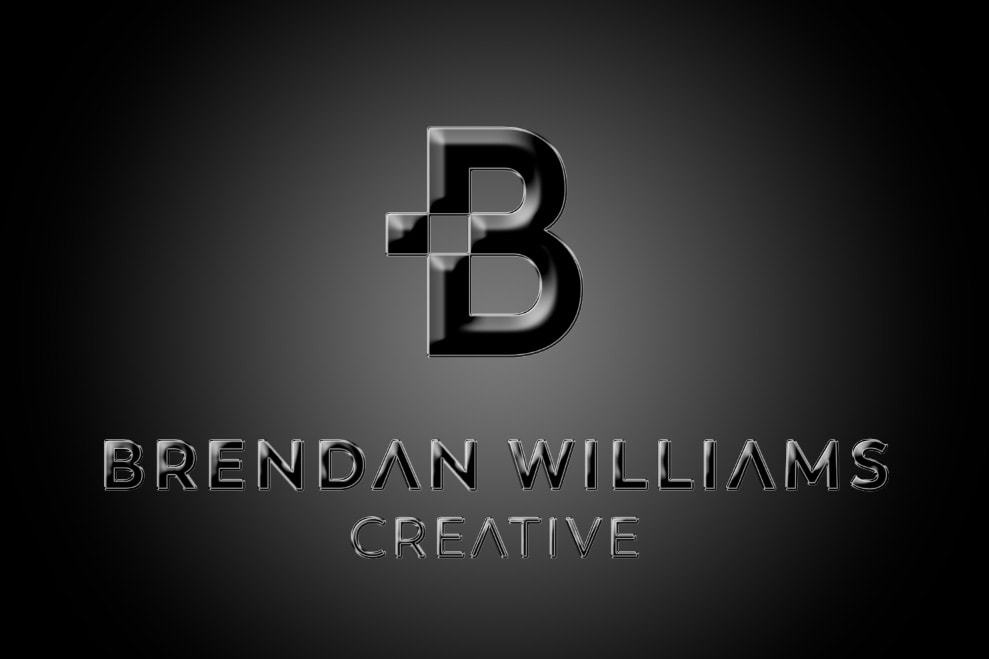
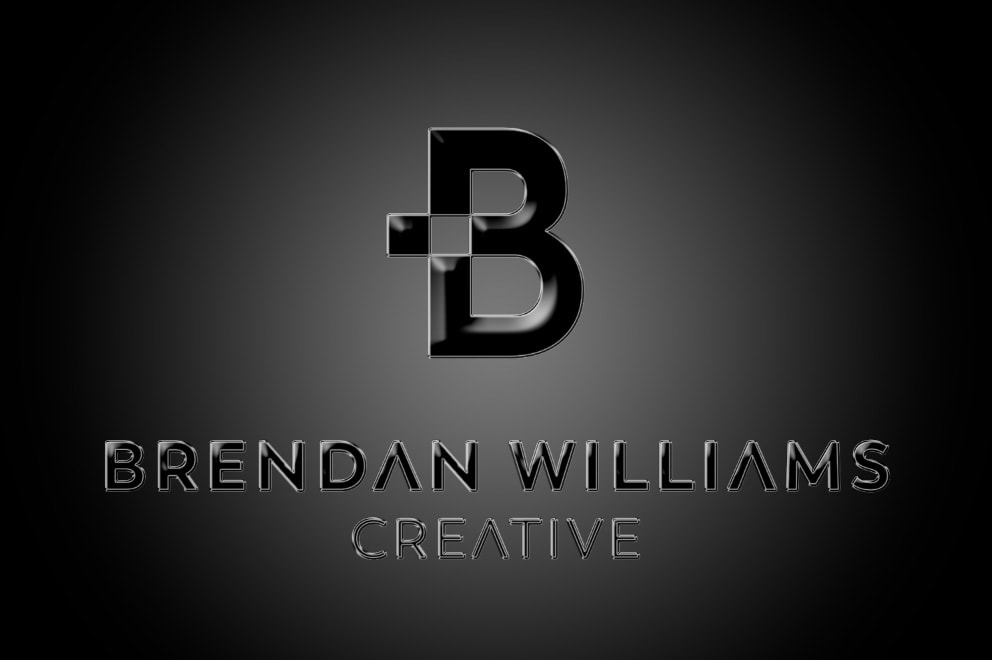
Your object should look something similar to my logo at this stage.
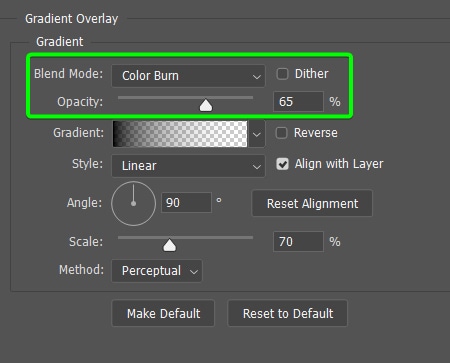
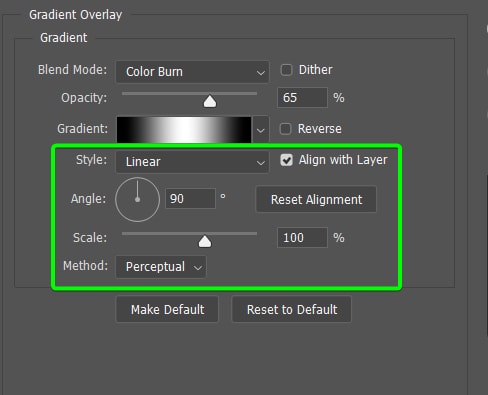
Step 7: Add A Gradient Overlay In The Layer Styles Panel
Now, you can add a Gradient Overlay by clicking on the option in the left-hand panel. This effect is slightly more complicated as you need to set a custom gradient in the effect settings. First, set the Blend Mode to Color Burn, the Opacity to 65%, and leave Dither unchecked.
To adjust the gradient, click on the gradient bar, which opens the Gradient Editor.
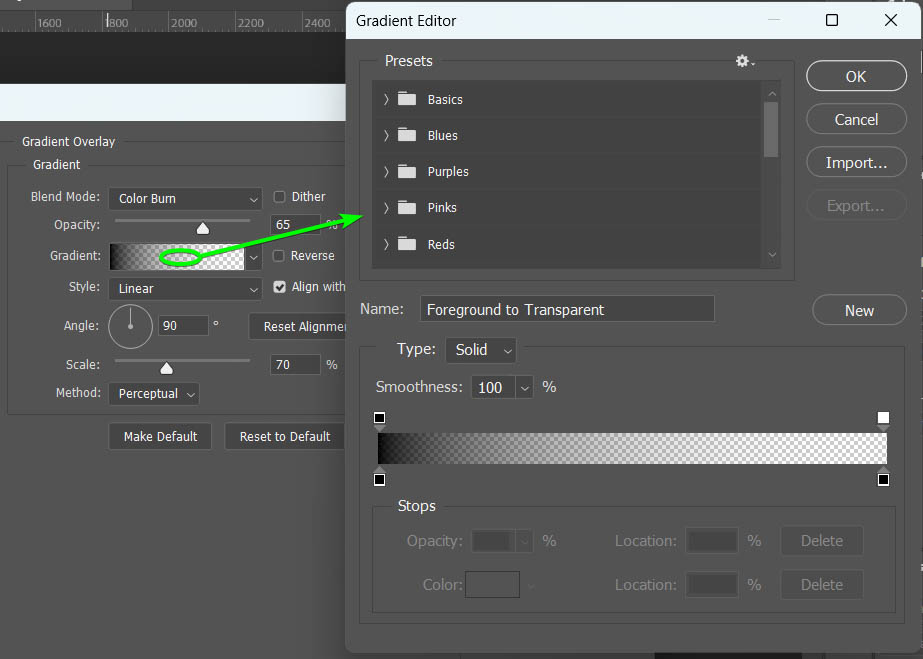
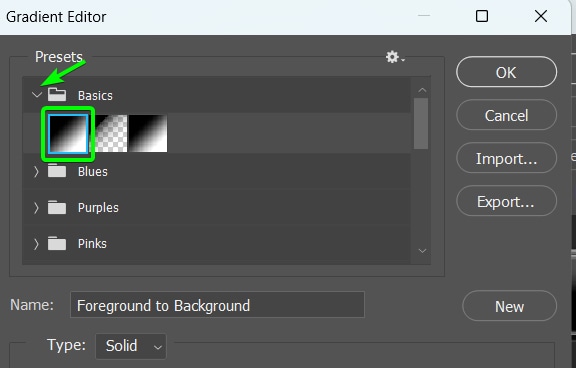
In the Gradient Editor, open the Basic tab and select the Black-to-White gradient.
Next, you can use the technique of changing the gradient color to create a custom gradient. To do this, click on a color stop (the block) beneath the gradient bar to select it, then click on the color block at the bottom to open the Color Picker and choose the color. Click OK to accept the color.
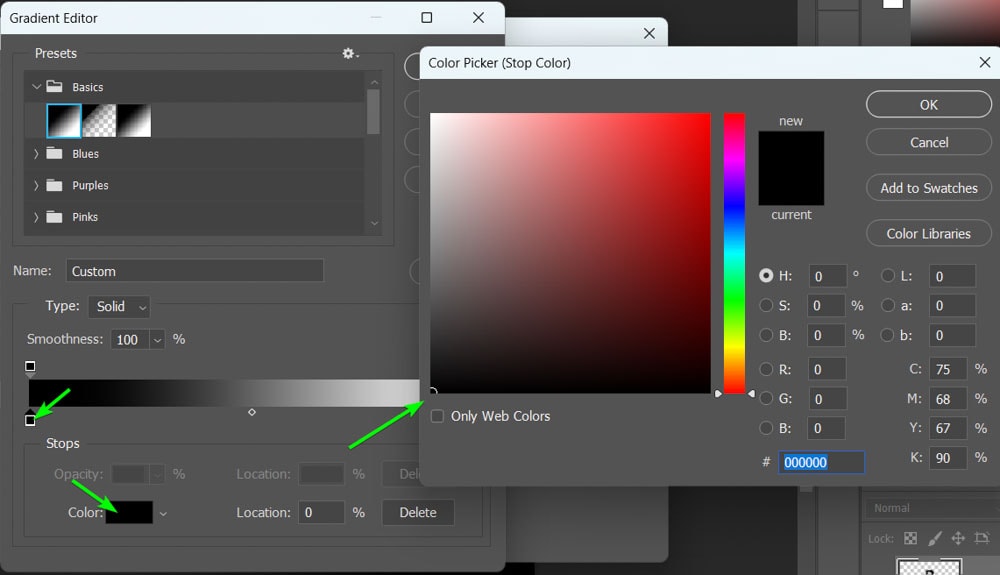
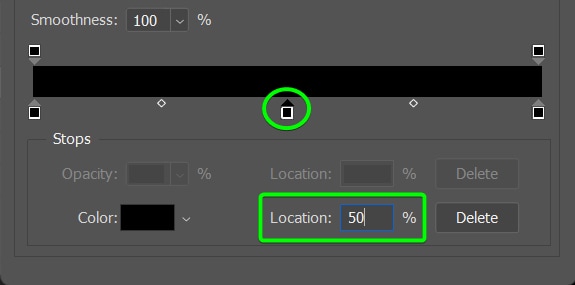
Set the color stop on the far left and the far right to black. Then, add a new color stop in the middle of the bar by clicking on a spot below the gradient bar. Then, use the location bar at the bottom to place it at 50%. Change the center color stop to white and click OK to accept the new gradient.
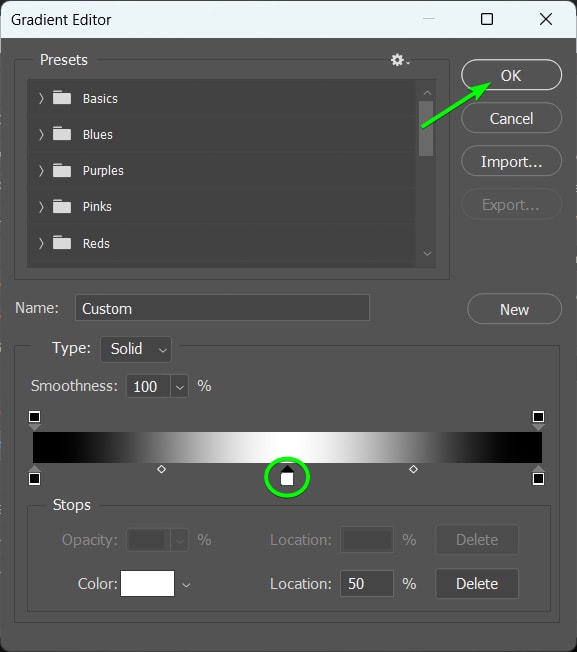
Back in the Layer Styles window, keep the Style set to Linear, the angle at 90 degrees, and change the scale to 100%. Lastly, leave the Method at Perceptual. Ensure your object looks similar to my logo at this point.
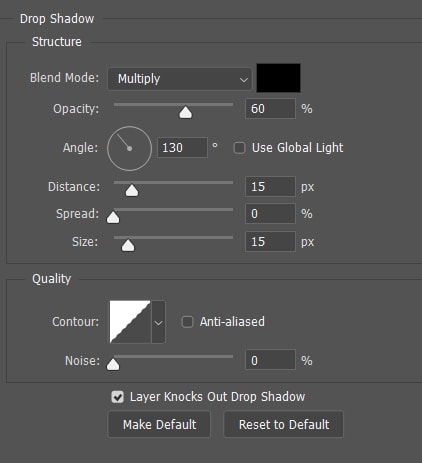
Step 8: Add A Drop Shadow In The Layer Styles Panel
The last Layer Style effect you need to add is a Drop Shadow. To do this, click on the option in the effects panel. Then, adjust the settings to match mine as follows:
- Set the Blend Mode to Multiply and color to black
- Opacity at 60%.
- Leave Global Light unchecked
- Angle at 130 degrees
- Distance set to 15 pixels
- Spread at 0
- Size set to 15 pixels
- Leave the Quality settings as they are
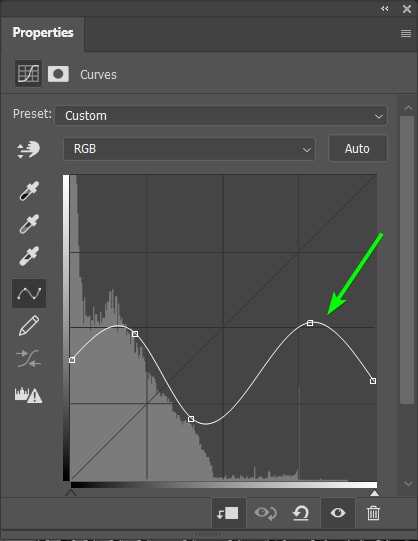
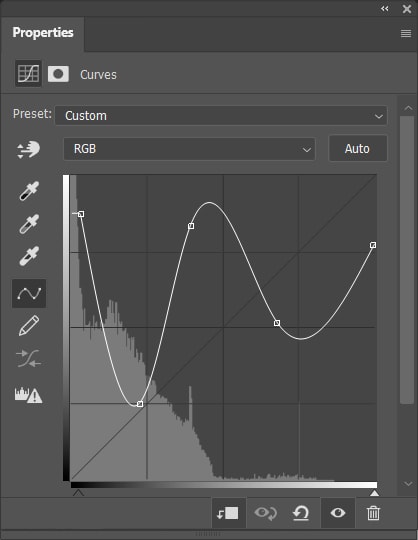
Step 9: Add A Clipped Curves Adjustment Layer
Now, to start adding the final touches for the chrome effect, you need to add a Curves Adjustment Layer that only affects the object. To do this, click on the Curves icon in the Adjustments Panel.

Next, ensure the Curves layer is directly above the object layer, then press Alt + Control + G (Win) or Option + Command + G (Mac).
How you adjust the curve will depend on your object and the settings you used when modifying the Layer Styles. However, it should take some form of an up, down, up, down pattern. In the Properties Panel, Click on the line, drag it to create new points, and curve the line until you have something similar to my graph.
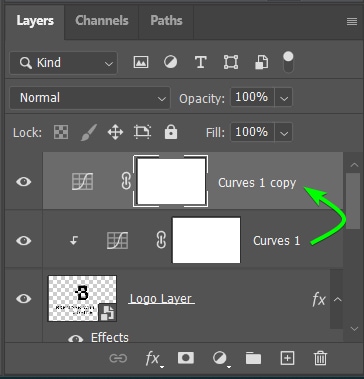
Step 10: Press Control/Command + J To Copy The Curves Adjustment Layer
Duplicate the curves adjustment layer you added previously by selecting the layer and pressing Control + J (Win) or Command + J (Mac).
Then, click on the clipping icon to clip the layer as you did previously. Now, you can adjust the graph again while watching your object in the document. Move the curves around to change the tone of your object until it looks like chrome.
Your object should now look like chrome. While it may be slightly different from my example, it should be close. You can go back to the first curves graph and adjust it as needed until you find the right balance.


How To Save The Chrome Effect As A Layer Style Preset
Step 1: Open The Smart Object And The First Layer Style Effects
Since the process used two separate layer style processes, you need to go back to the initial effects you added to the object. To do this, open the smart object by double-clicking on the object layer’s thumbnail.

The object will open in a new tab. Then, double-click on the layer to open the Layer Styles window.
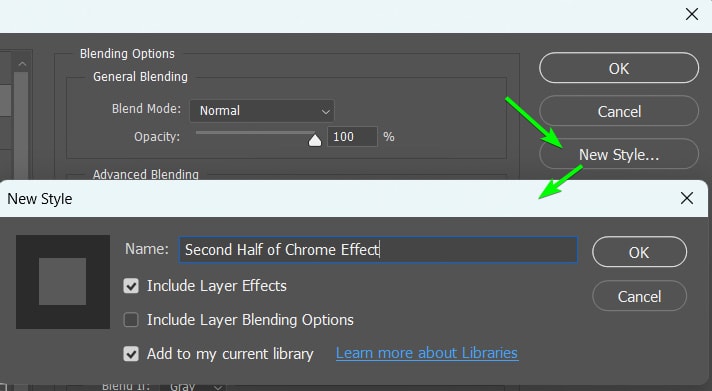
Step 2: Create A Preset By Clicking On New Style In The Layer Style Window
You can create a new preset in the Layer Style window by clicking on New Style.
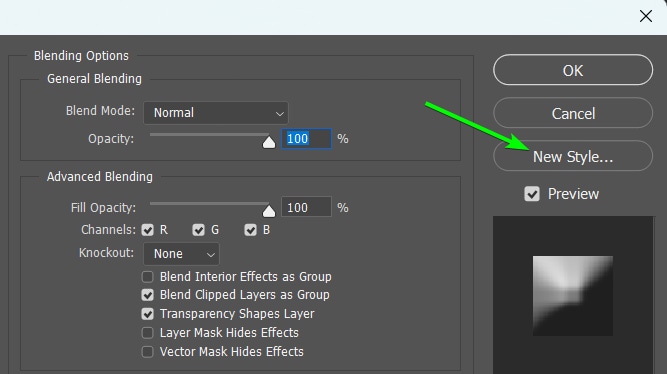
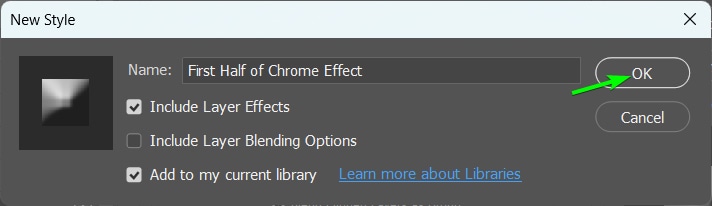
Then, add a name for the style, make sure the Include Layer Effects and Add to my Current library are enabled, and click OK.
Step 3: Close The Smart Object And Open The Second Layer Styles Panel
Close the smart object tab and go back to the original document. You can repeat the process above by double clicking on the layer to open the Layer Styles panel.
Step 4: Create A Preset Of The Second Half Of The Process
Create a second preset using the same method you used for the first. Click on New Style, add a name, check the relevant boxes, and then click OK.
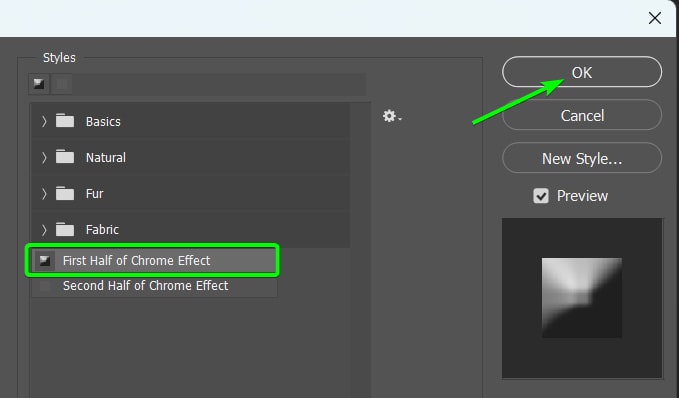
Step 5: Apply The Layer Style Presets
First, add your object to a different background. Convert the object layer to a smart object by right-clicking or Control + clicking and choosing Convert to Smart object as you did in the previous section.
Then, open the Layer Styles window by double-clicking on the layer. In the window, open the Styles panel at the top left to find your saved presets. Select the First Half preset and click OK to add it to the object.
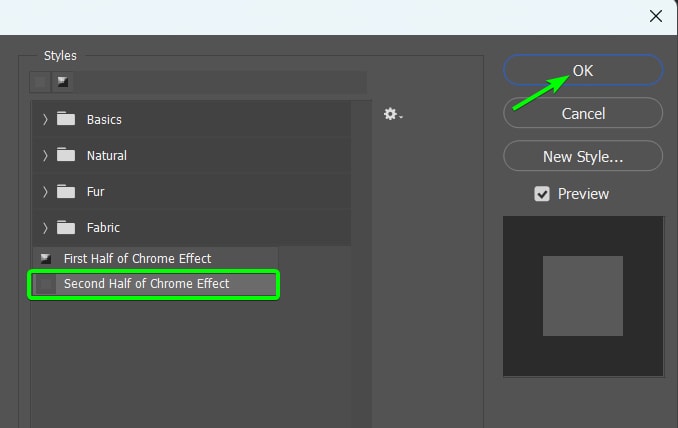
Create a new smart object using the same process as before. Then, open the Layer Styles window, select the Second Half preset, and click OK.
You will have now added the layer style effects necessary for the chrome effect. You will need to manually add in the Curves adjustment layer or copy it from the previous document.


