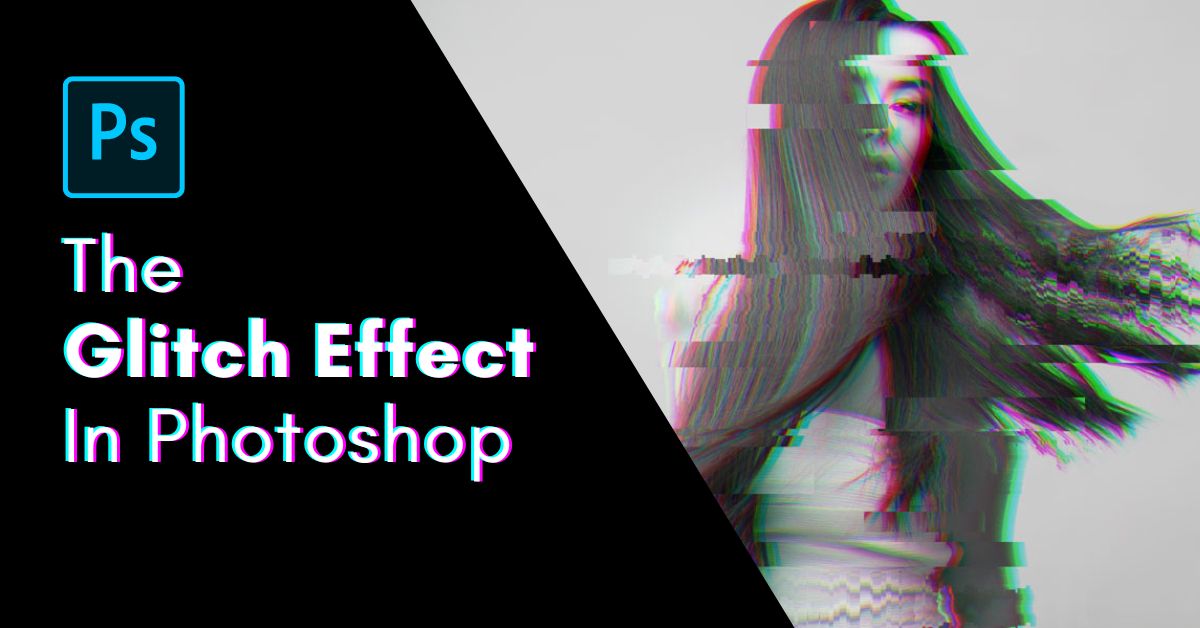

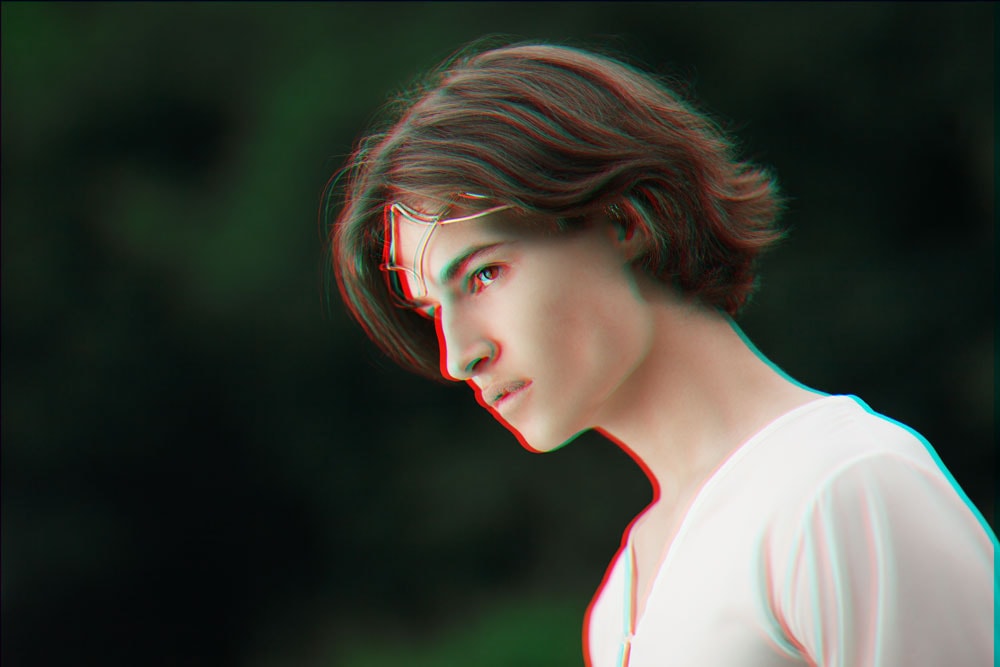
The glitch effect is a creative effect that makes a photo look as though there was a glitch when it was being processed. This effect also changes the RGB channels on the image to create colored halos around the image. While all this sounds like expert-level editing, it’s easy to learn how to create the glitch effect in Photoshop.
There are several ways to make the glitch effect, with two methods of changing the RGB color and a few ways to move the pieces of the image around. You can also add faint lines to the photo by adding a pattern.
I will show you all these options along with how to make the glitch effect on text to set you up on your creative editing journey.
How To Make The Glitch Effect On Photos
Step 1: Desaturate (Optional) And Duplicate The Image Layer
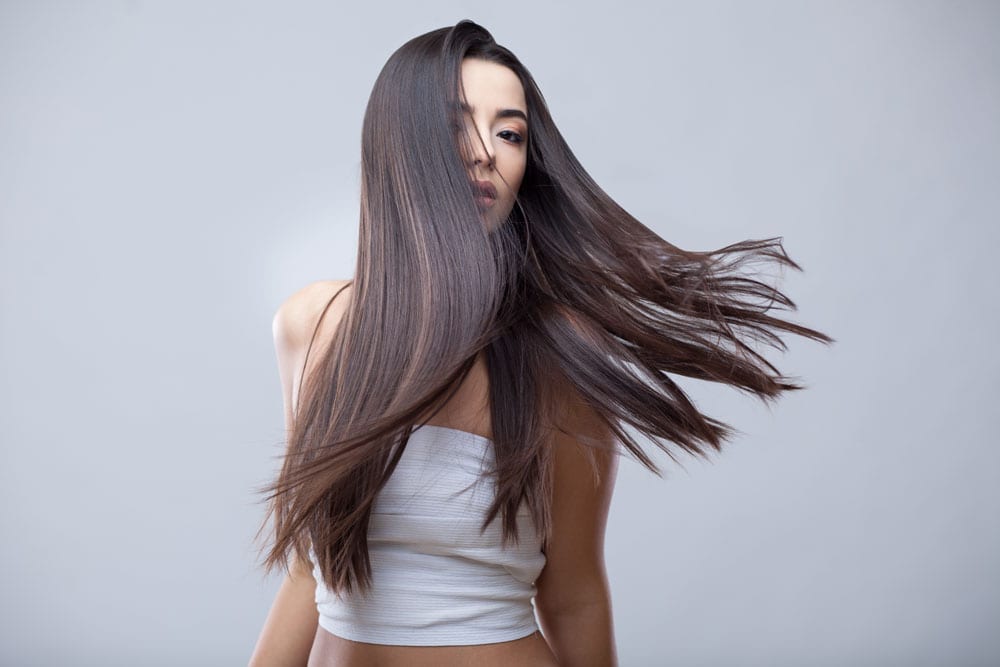
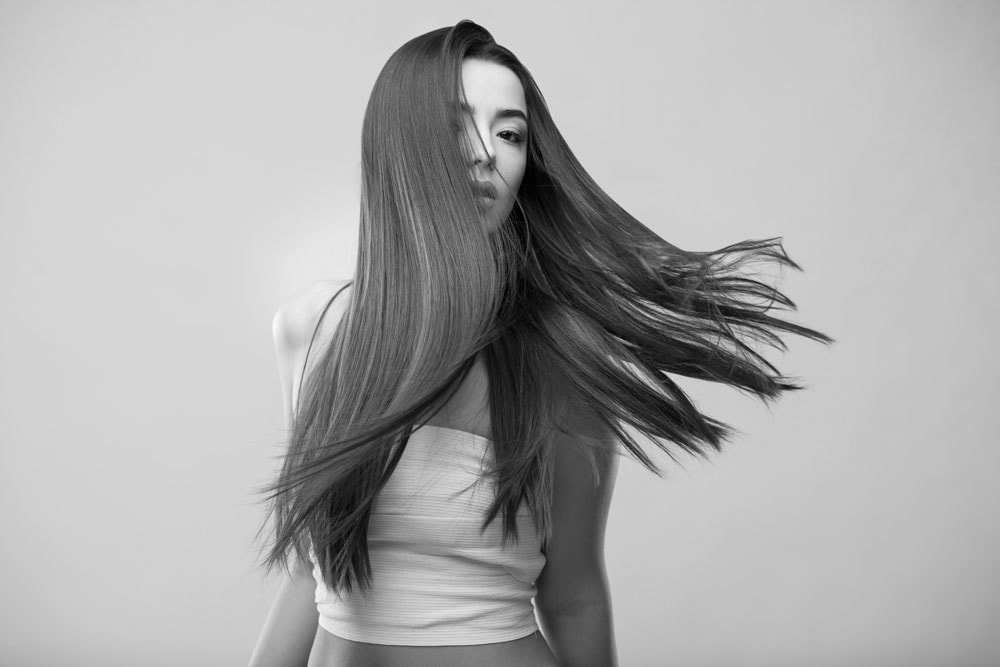
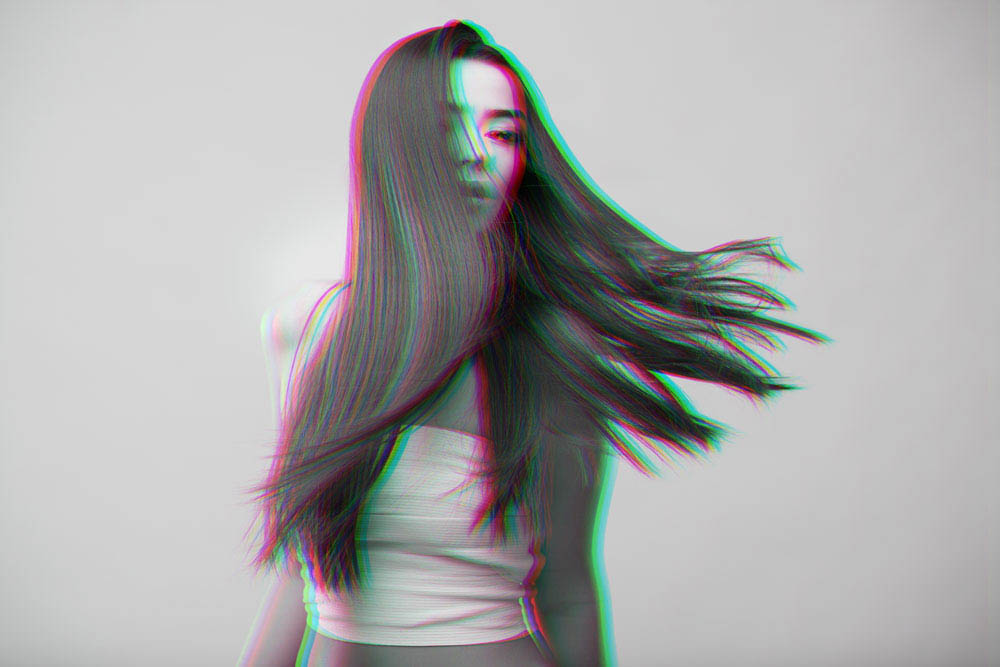
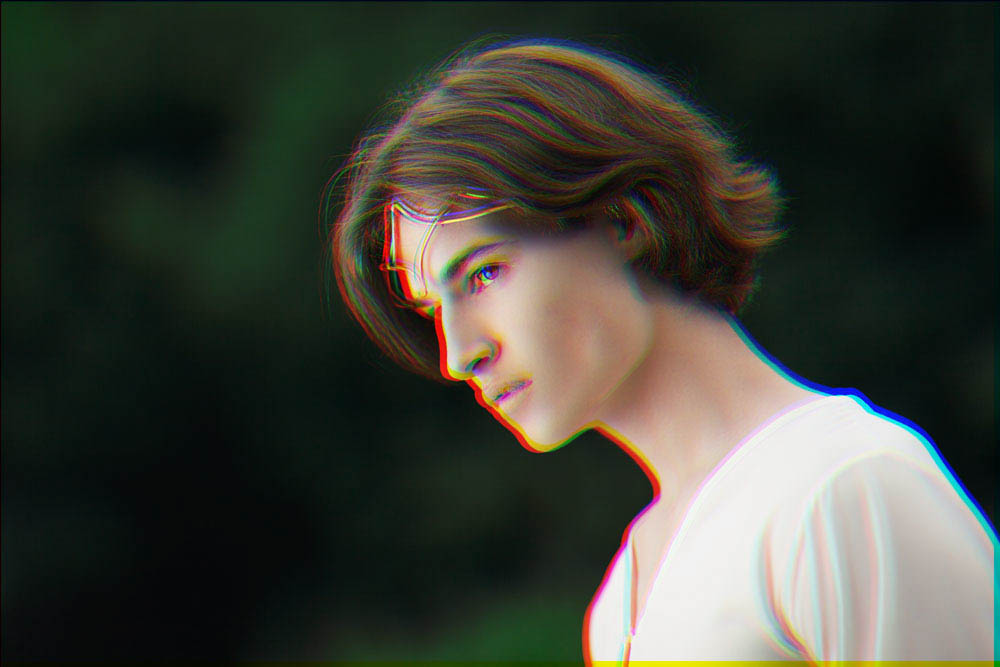
Once your image is open in Photoshop, you can choose whether you want to desaturate the photo or not. For this example, I will be using the following picture:
To desaturate the image navigate to Image > Adjustments > Desaturate or press Shift + Control + U (Win) or Shift + Command + U (Mac).
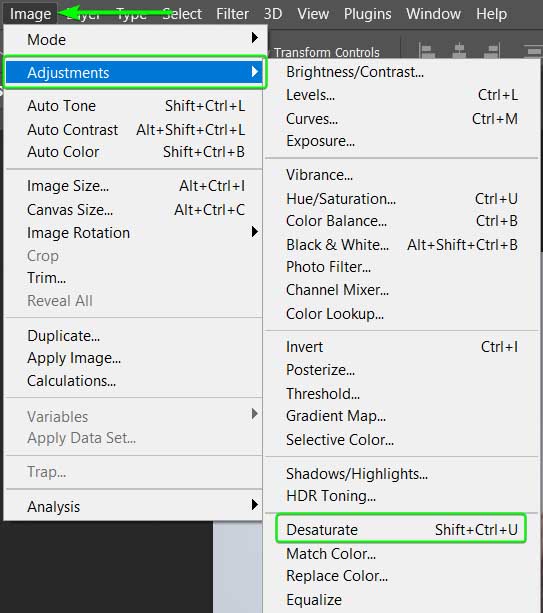
Your image will automatically change to black and white.
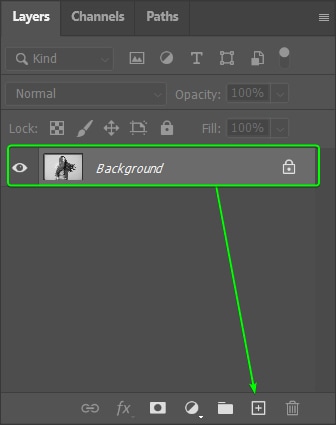
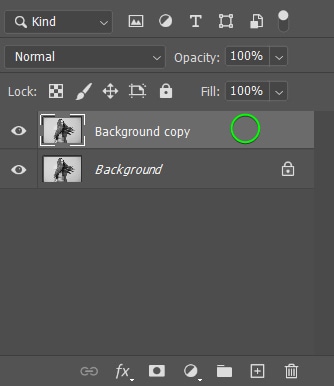
Next, duplicate the image layer by dragging the layer to the Create a new layer icon at the bottom of the Layers panel, or press Control + J (Win) or Command + J (Mac).
Step 2: Shift The RGB Channels Using Layer Styles Or Channels
Once your image layer is duplicated, there are two ways to create the shifted color glitch effect. These methods add colored halos around your subject, which is the starting point of the glitch effect. You can use both ways on a full-color or a desaturated image.
Option 1: Using Layer Styles
The first option uses advanced layer styles to separate the RGB channels and shift them on the image. Start by double-clicking on your duplicated layer.
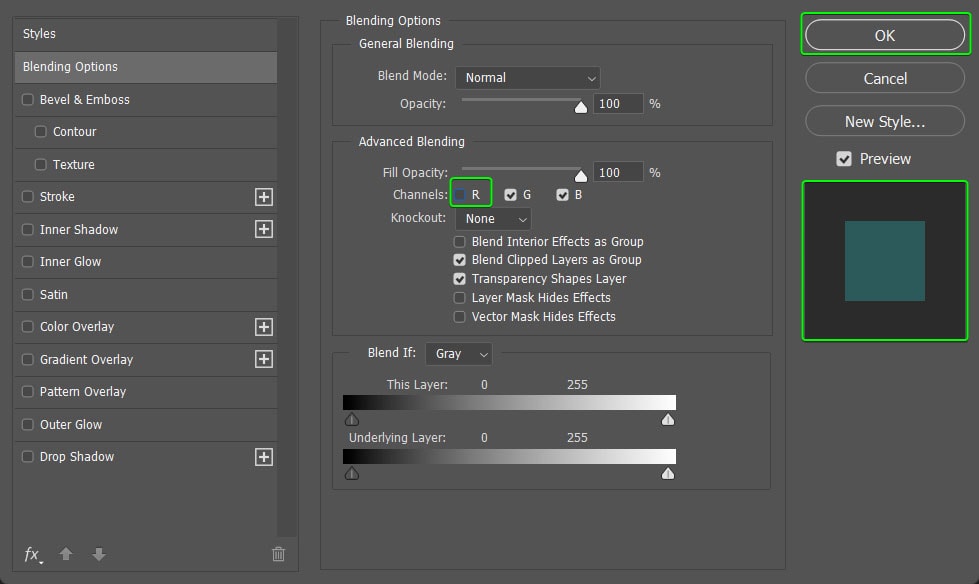
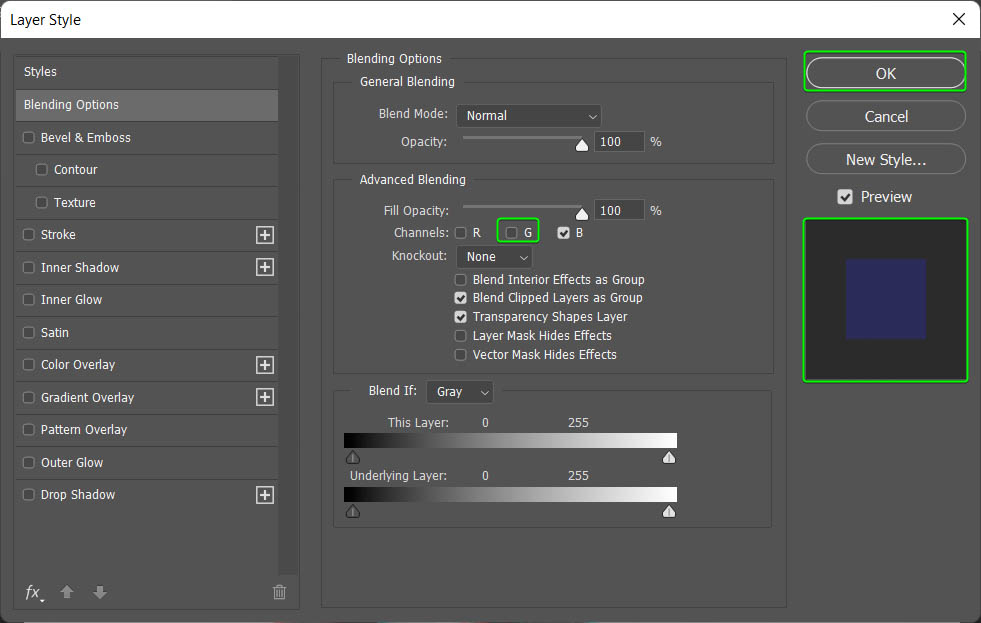
Double-clicking on the layer opens up the Layer Style window in the Blending Options tab. Stay in this tab and find the Channels under Advanced Blending.
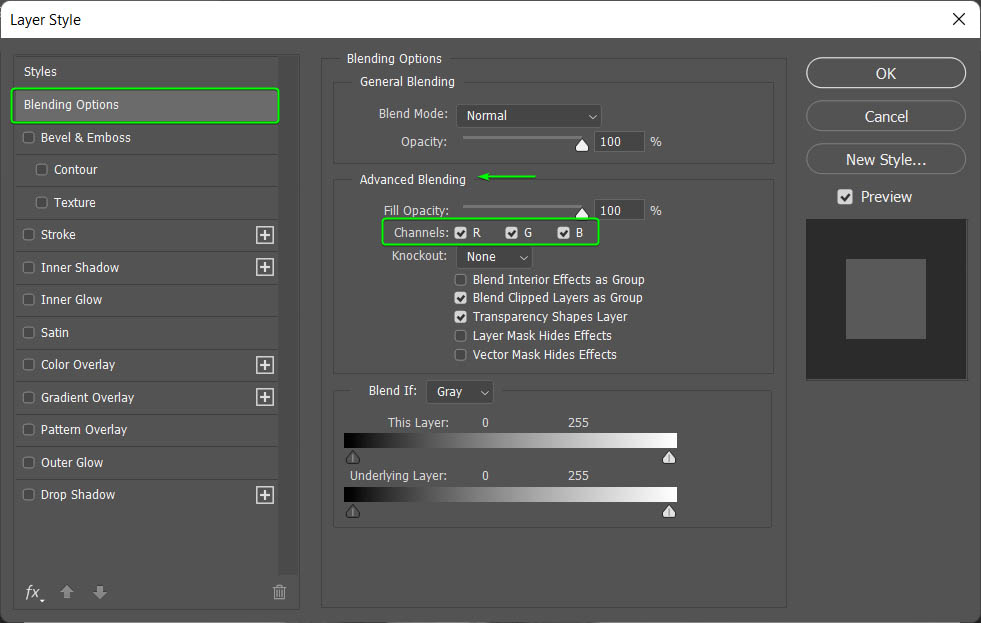
Turn the Red channel off by unchecking the box next to R. You will notice that the box under preview changes. Click OK at the top right to accept the blending change.
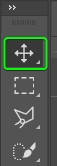
Then, ensure that the Move Tool (V) is selected.
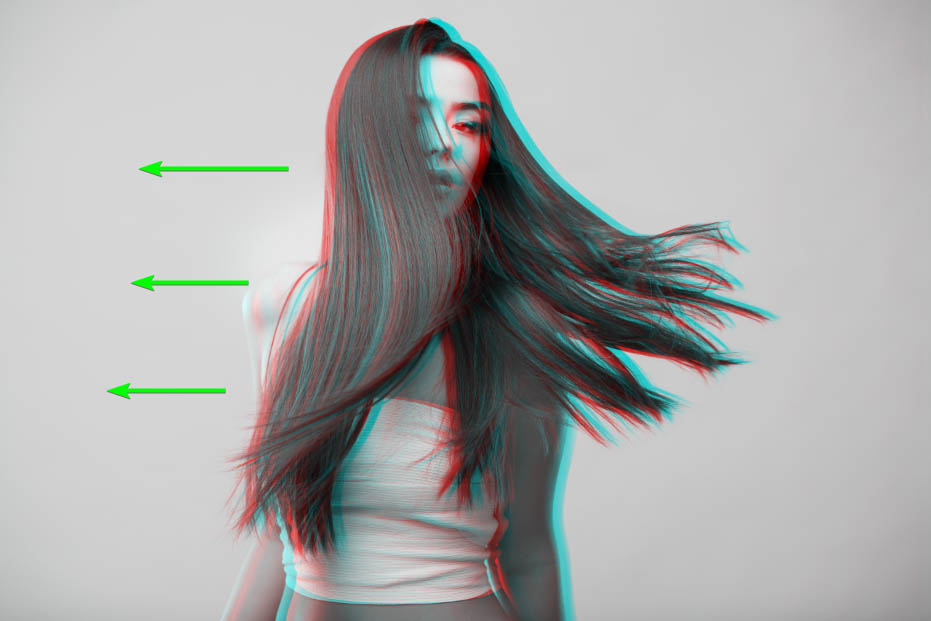
Next, click on the canvas and drag the image left or right. A blue and red halo appears around the picture because you pull the color channel away from your base image.
Blue appears on the right, red on the left when you drag the image to the left, and vice versa. You can drag the layer as much as you want to create a small or large halo.
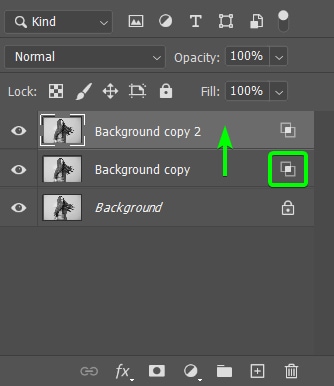
You will notice that the layer has an icon indicating the layer has advanced blending options. Duplicate this layer by pressing Control + J (Win) or Command + J (Mac) to create a new layer above it.
Double-click on the new layer to open the Layers Styles window, and this time, turn off the Green channel by unchecking the box next to G. Then click OK to apply the change.
Repeat the step above to ensure the Move Tool (V) is selected, and click and drag the image to the left or right to create a yellow or green and purple halo around the subject.
Option 2: Using The RGB Channel
Another method of shifting the RGB channels is using the Channels panel. For this method, you don’t need to duplicate any layers, and you must use the locked background layer as soon as you open your image.
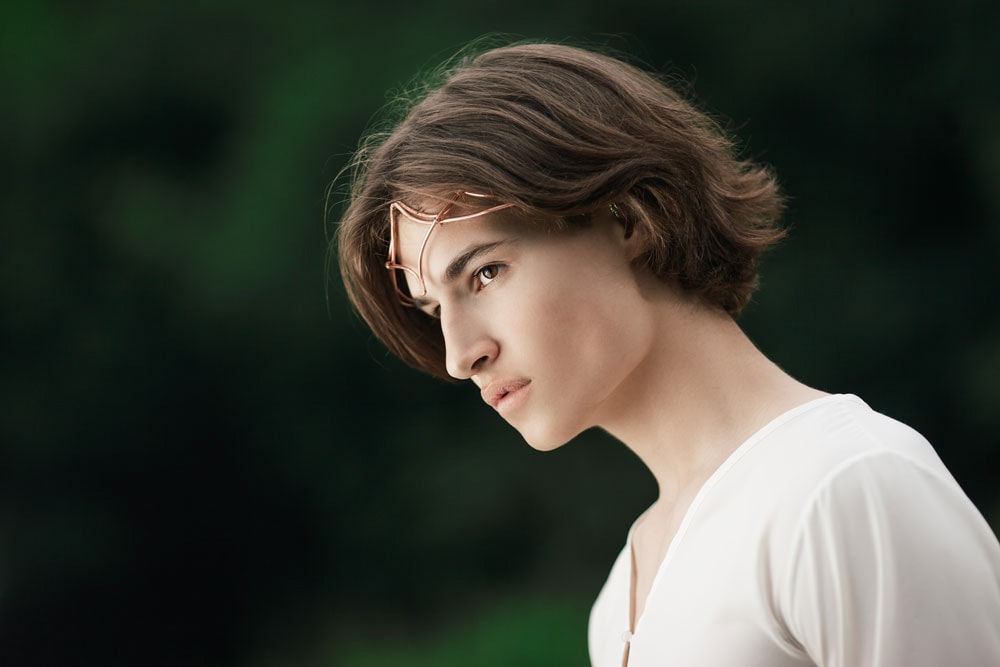
I will quickly show you this method using a different image. You can keep the image in color or desaturate it for the black and white effect.
Once your image is open, navigate to the Channels panel, which should be the tab next to the Layers panel. If you don’t see the panel, navigate to Window > Channels to open it. You will find a complete RGB channel and separate channels for each color in the panel.
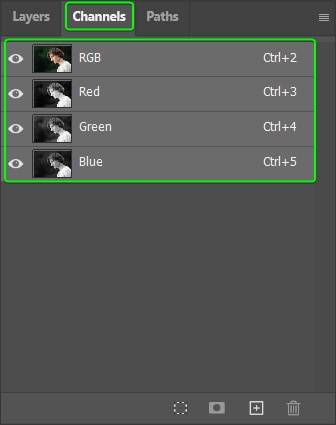
First, select the Red channel by clicking on it. When you click on a channel, the other channels are hidden, which you can see by the lack of the eye icon on the different channels.
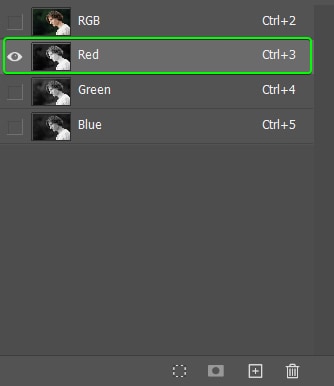
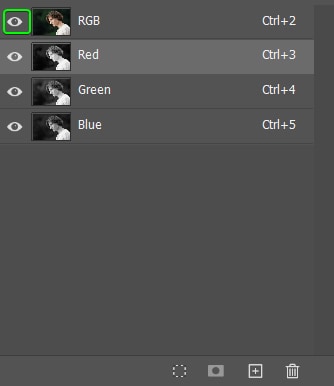
Reveal the channels by clicking on the box next to the RGB channel. All the eye icons will appear again to show the channels are visible.
Make sure the Move Tool (V) is selected, and click and drag left or right on the image.
Repeat this step using the Blue channel to add more blue to the halo. You can also slightly drag the image up or down to create a more dynamic effect.
Step 3: Group The Layers And Duplicate The Group
The next step is to duplicate the layer or layers to shift areas of the image for the glitch effect. If you used the second method above, duplicate the background layer by pressing Control + J (Win) or Command + J (Mac).
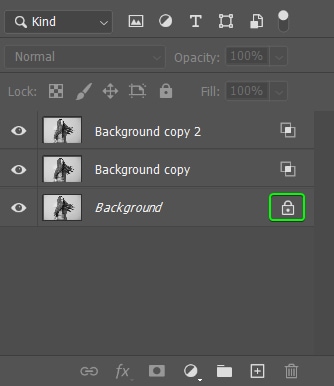
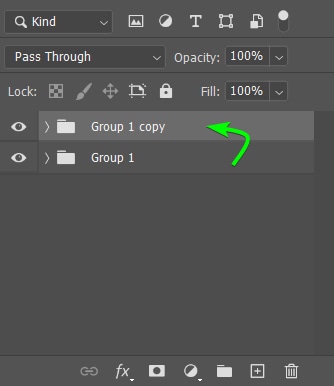
I will go back to the first image, and since I created several layers for the effect, I will group the layers before duplicating them. First, unlock the Background layer by clicking on the Lock icon next to the layer’s thumbnail.
Then, to group the layers, hold in Shift and select the first and last layer to select them all.
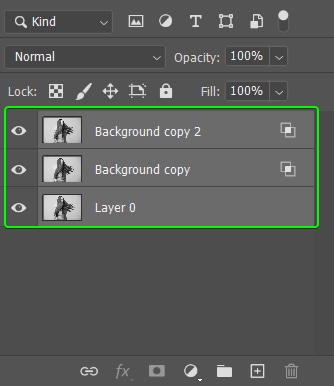
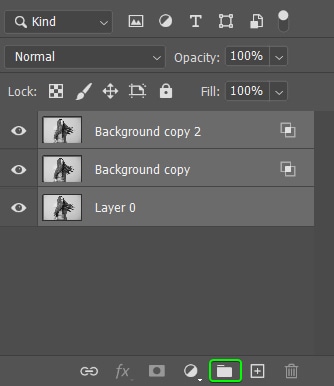
Next, click on the Create a new group icon at the bottom of the Layers panel.
Once you’ve created the group, duplicate it by pressing Control + J (Win) or Command + J (Mac).
Then, merge the duplicated group to create a single image layer by right-clicking (Win) or Control + clicking (Mac) on the group and selecting Merge Group.
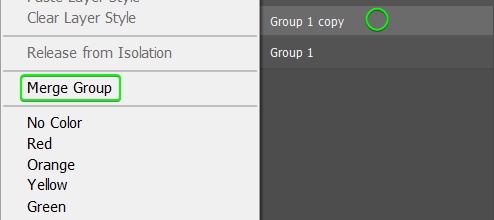
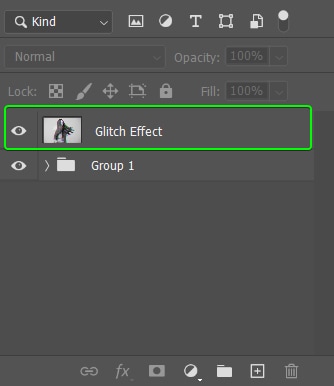
You will now have a rasterized image layer that you can rename and then work on to create the jagged glitch effect.
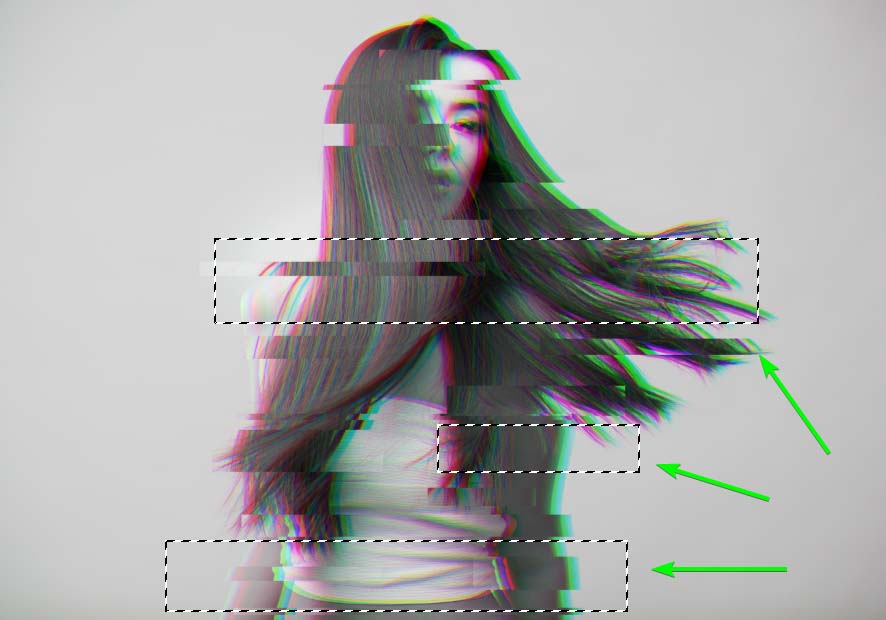
Step 4: Shift Sections Of The Image Using The Rectangular Marquee Tool
It’s now time to create the jagged effect on the image using the Rectangular Marquee Tool to select and move sections of the photo around.
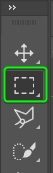
First, select the Rectangular Marquee Tool from the Toolbar or press M.
Then, create a rectangular block anywhere on the image by clicking and dragging to make the selection. The area you select will be shifted away from the rest of the picture.

Next, click inside the box while holding Control (Win) or Command (Mac) and drag it left or right. You can also use the left and right arrow keys to move the box in small increments.
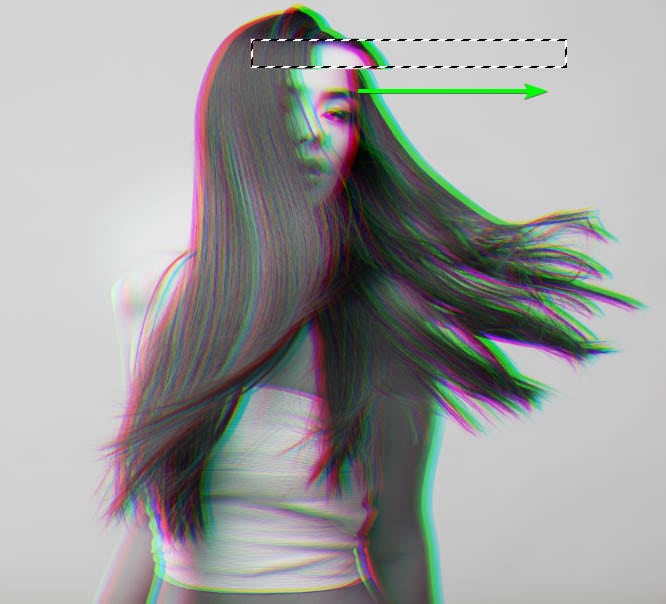
Once you let go of Control/Command, the Rectangular Marquee Tool is active again. Create a new block in a new place on the image, hold in Control/Command again and drag the new area away from the image.
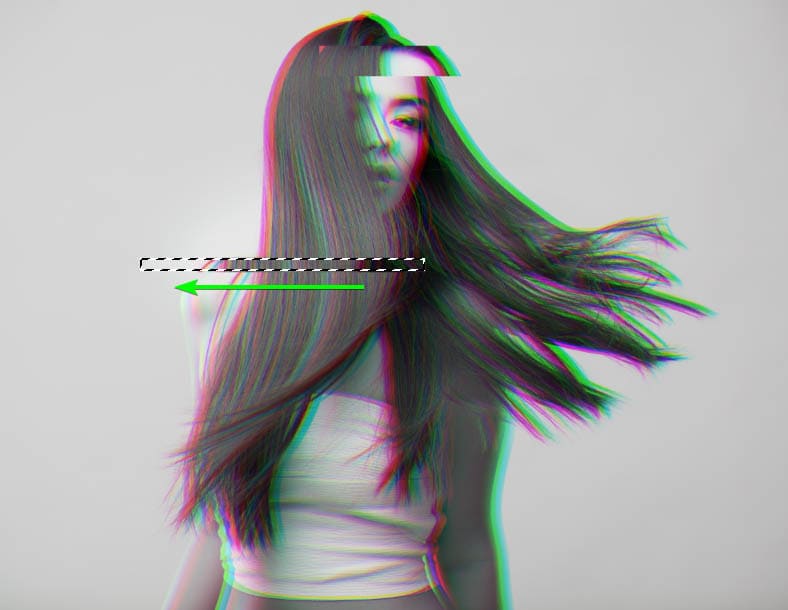
Repeat the steps of creating the selection and dragging it left or right to create multiple “glitches.” Keep varying the size of the selection to create a dynamic effect. You can add as many “glitches” as you’d like. After the last selection, press Control + D (Win) or Command + D (Mac) to deselect the selection.
Step 5: Create Waves Using The Distort Filter
If you’re happy with how glitchy your image looks, you can skip this step. However, if you want more disruption in the picture, you can add some waves to the photo.
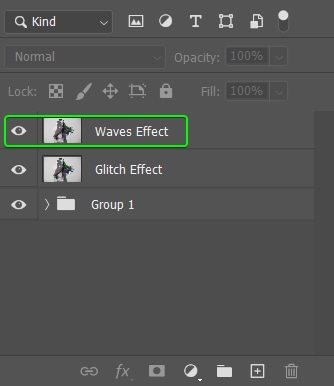
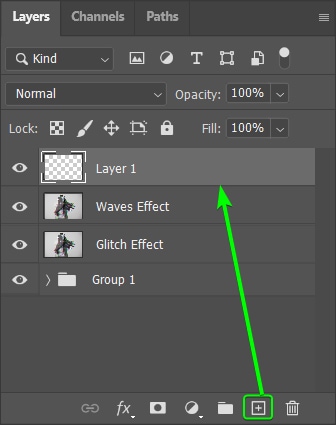
To add waves to the image, duplicate the layer you’ve been working on by pressing Control + J (Win) or Command + J (Mac) and rename it to Waves Effect. Duplicating the layer lets you delete the new edits later in case you are unhappy with the new effect.
Next, activate the Rectangular Marquee Tool (M) and select a few areas on the image where you want to distort the photo further. Hold in Shift to add a new selection while keeping the initial selection.
Select the new layer and head to Filter > Distort > Wave. This menu path opens the Wave Filter dialogue box.
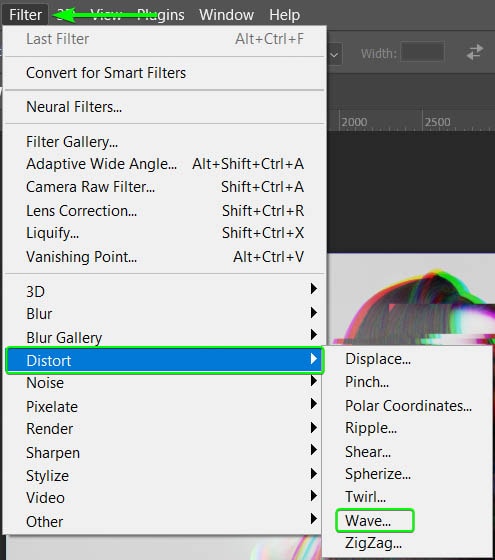
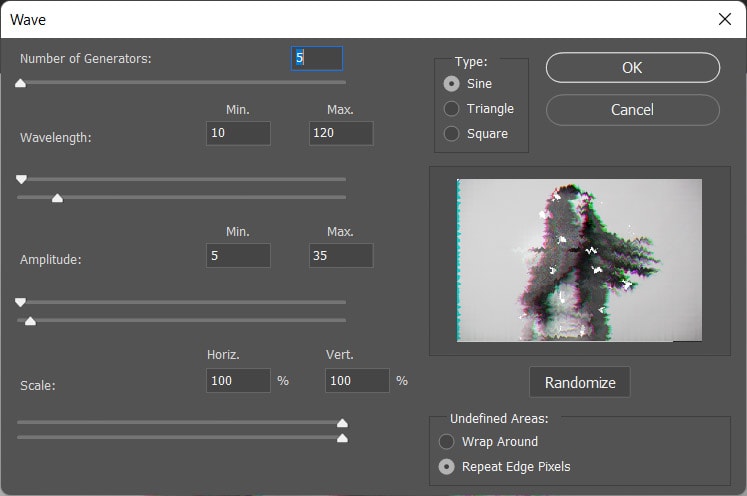
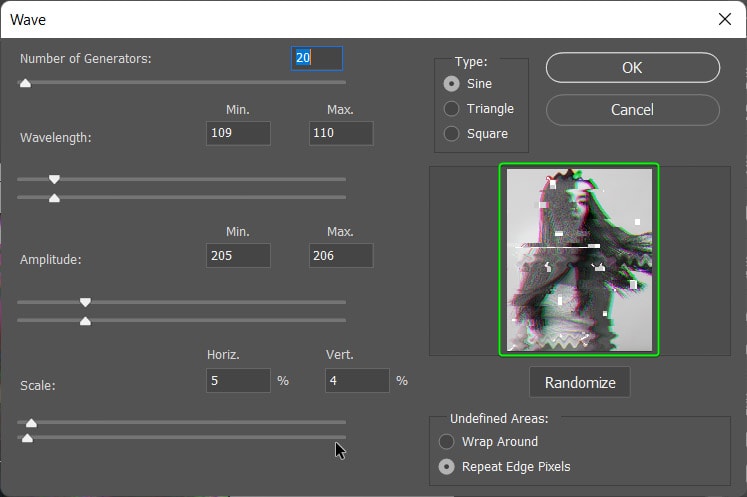
Now, you can play around with the settings in the Wave Filter to create the effect you want while watching the changes in the Preview panel.
Since I already have block-type glitches on my image, I want to create a vertical glitch effect in the selected areas. For this, I will adjust the settings as follows:
- Set the Number of Generators to 2
- The Type to Square
- The Wavelength to a Minimum of 105 and a Maximum of 160
- The Amplitude to a Minimum of 51 and a Maximum of 110
- The Horizontal Scale at 7% and the Vertical Scale at 18%
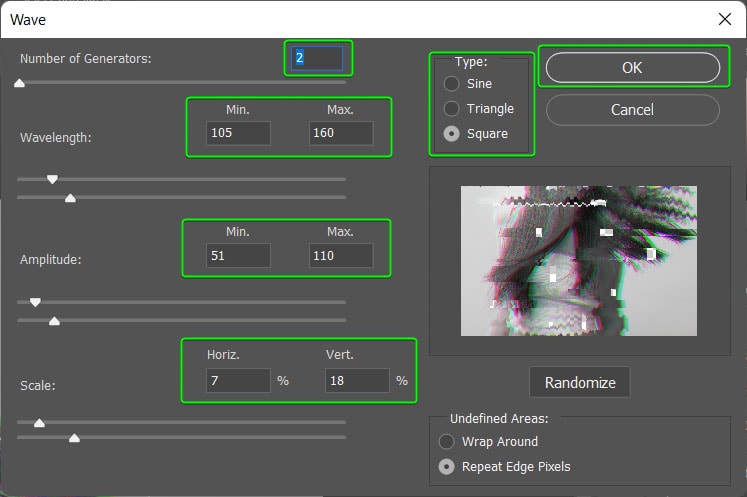
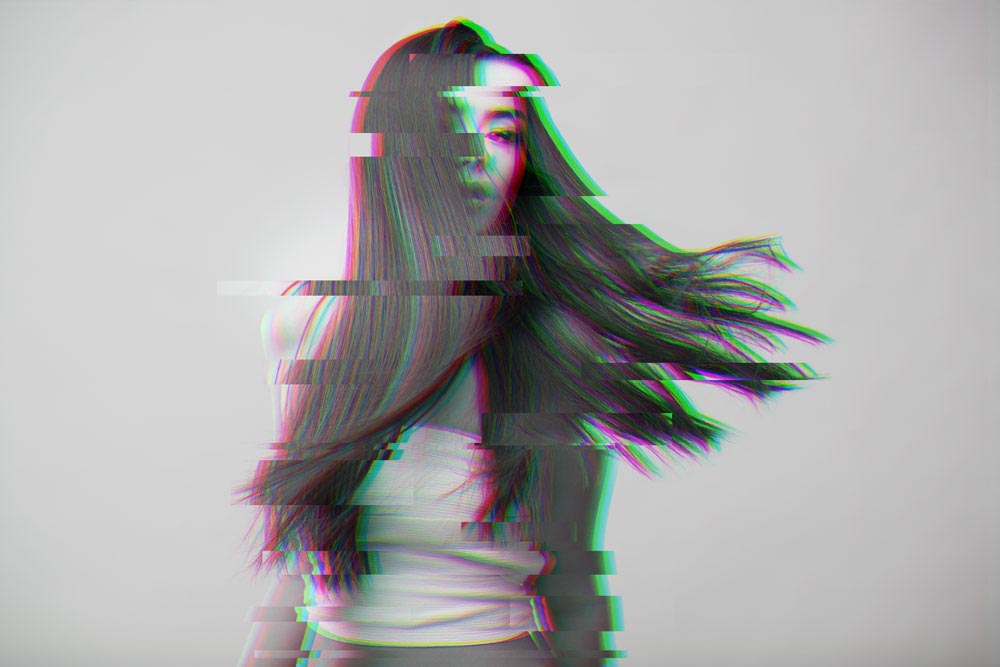
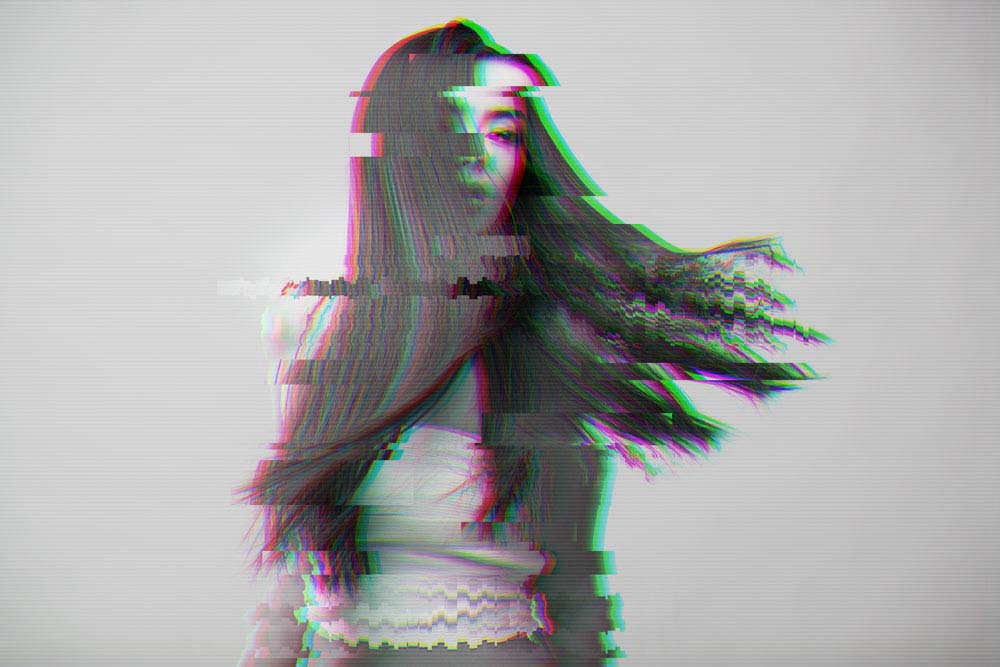
Click OK once you have changed the settings. You can repeat this step to add different waves to various parts of the image depending on how distorted you want the result. Here is how my image looks after changing the above settings.

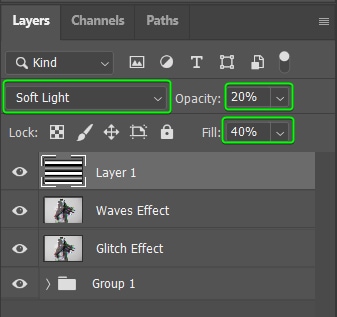
Step 6: Add Lines Over The Image Using The Filter Gallery
The final step is to add a line pattern overlay on top of the image to give the photo a more textured look.
To add the line pattern overlay, create a new layer by clicking on the Create a new layer icon at the bottom of the Layers panel.
Then fill the layer with white by changing the background color to white and pressing Control + Delete (Win) or Command + Delete (Mac).
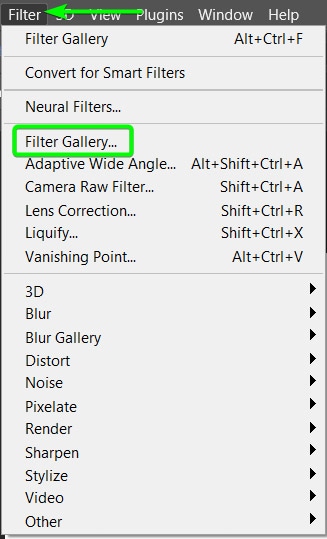
Then open the Filter Gallery by heading to Filter > Filter Gallery.
The Filter Gallery workspace will open.
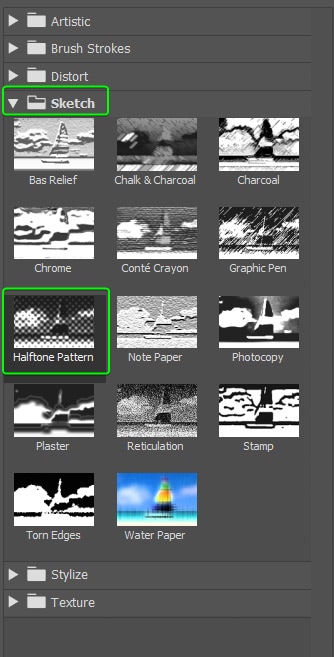
Open the Sketch tab and select the Halftone Pattern.
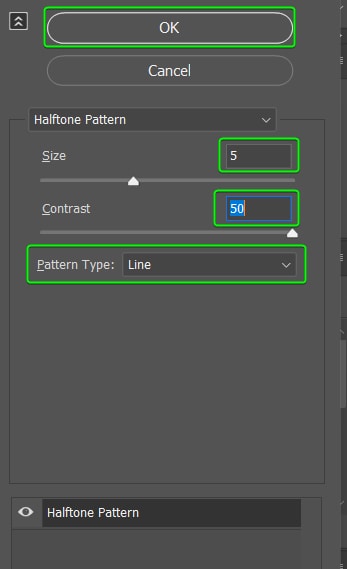
Then, adjust the settings in the right-hand panel. Increase the Size to about 5 or 8, set the Contrast to 50, and select Line as the Pattern Type. Then click OK once the settings are correct.
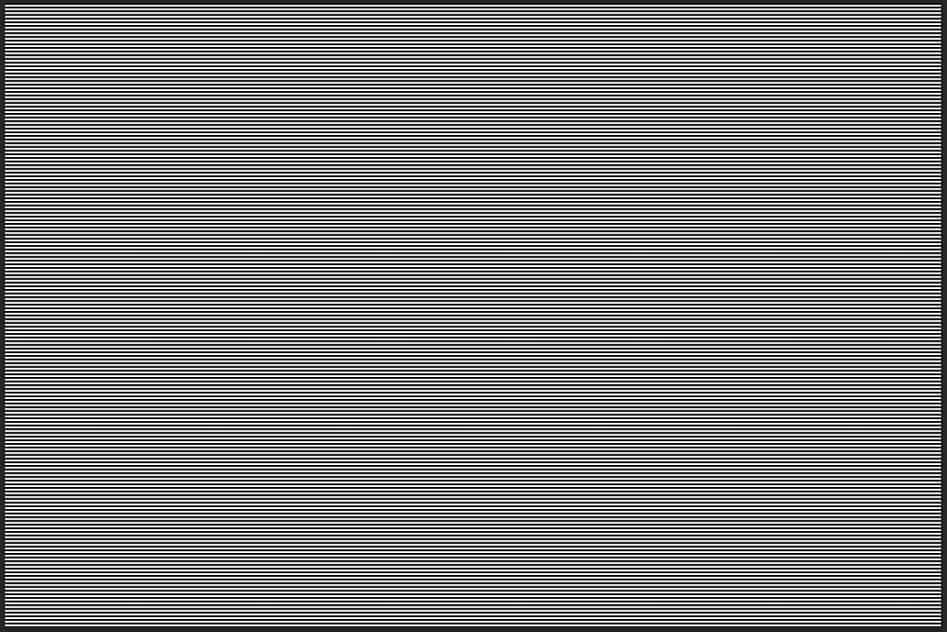
You now have a line pattern covering the entire image.
Add a Blend Mode to the pattern layer to blend it into the image. You can choose whichever Blend Mode works on your photo, but I recommend choosing Soft Light for this effect. Then reduce the Opacity slightly to about 20% and the Fill to 40%.
The photo now has a glitch effect, with a textured line pattern completing the look.
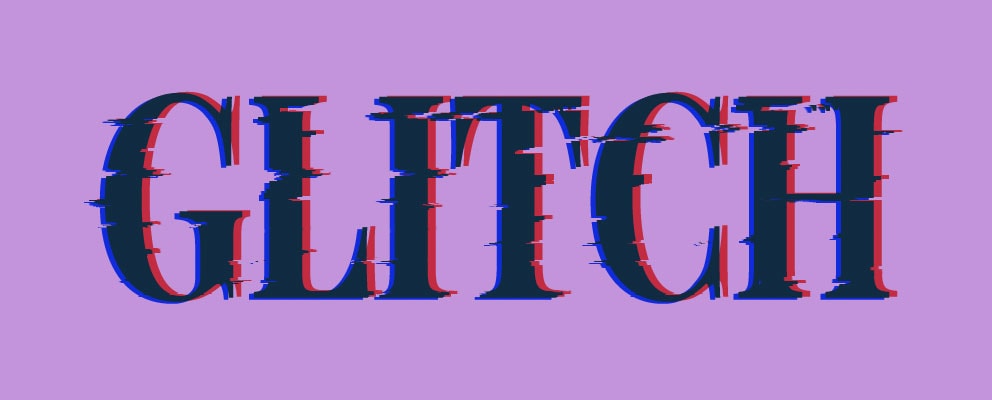
How To Make The Glitch Effect On Text
Adding the glitch effect on text is similar to adding the effect on an image. Much like the glitch process on a picture, there are various ways to add the effect to text. Here is a quick and easy way to make the effect on text.
Step 1: Add Text To Your Canvas
First, add a text box to your canvas and type in the text you want to glitch.

You can manipulate the text further if you’d like. In my case, I want to stretch the text so that the glitch effect is more prominent. To do this, I press Control + T (Win) or Command + T (Mac) to open the transform box on the text and use the handles to stretch the text.

Step 2: Duplicate And Rasterize The Text Layer
Duplicate your text layer by pressing Control + J (Win) or Command + J (Mac) to ensure you can come back to adjust the text if necessary. Then switch off the layer visibility of the original layer by clicking the eye icon.
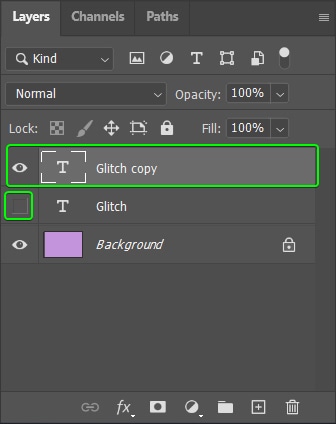
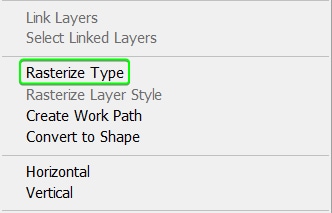
Next, rasterize the duplicated text layer by right-clicking on the layer and selecting Rasterize Type from the menu.
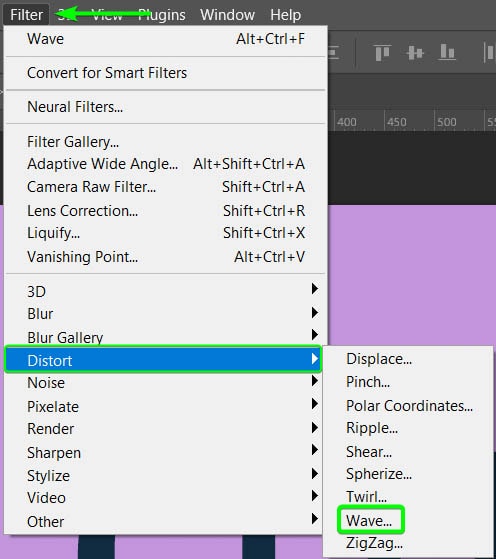
Step 3: Add Selections And The Wave Filter
Grab the Marquee Selection Tool (M) and make selections on your text as you did in the previous section while holding Shift in the areas you want the glitches to appear. Try to make lots of thin selections for the best effect.
Once the selections are made, open up the Wave filter by heading to Filter > Distort > Wave.
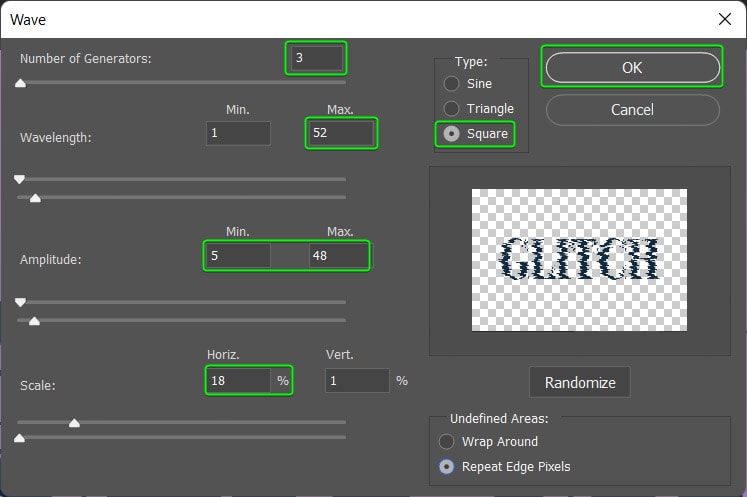
Adjust the settings in the Wave filter panel to create the desired effect. I changed the settings as follows:
- Generators to 3
- Wavelength Maximum to 52
- Amplitude Minimum to 5 and the Maximum to 48
- Horizontal Scale to 18%
- Type to Square
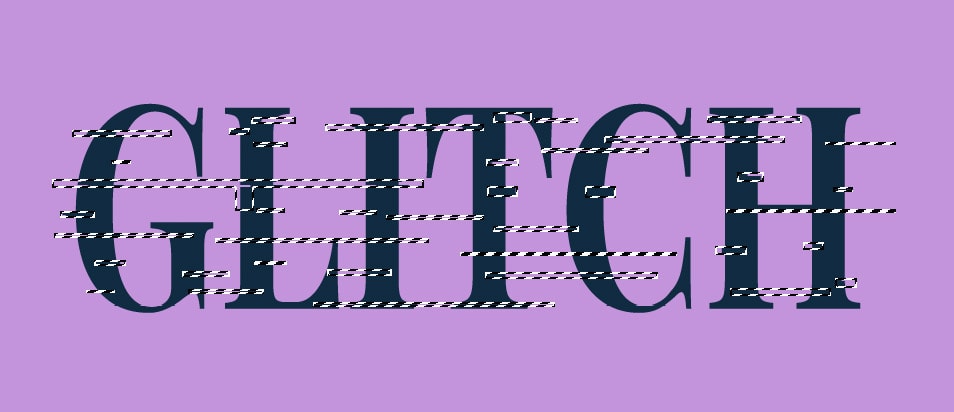
Click OK to add the filter to your text. You will see the glitchy effect on your canvas.

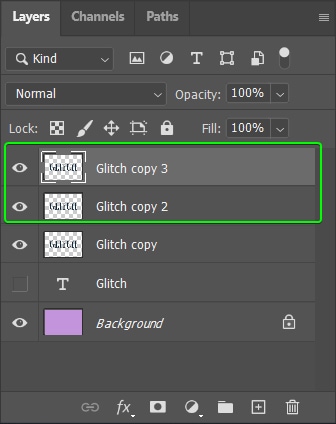
Step 4: Duplicate The Glitch Layer Twice
You must create two duplicates of the rasterized text layer to manipulate the RGB channels. Press Control + J (Win) or Command + J (Mac) twice when the rasterized text layer is selected. You now have two extra layers in the Layers panel.
Step 5: Adjust The RGB Channels
Next, adjust the RGB channels using the Layer Styles panel as you did when adding the glitch effect to an image.
Double-click on the first copy and deselect the R channel. Then, use the Move Tool (V) to shift the text layer.

Then deselect the B channel and shift the next duplicated layer.

You now have a quick glitch effect added to your text.