

There are a few easy ways to flip images and layers in Photoshop for both creative effect and compositional enhancements. To help get you started, the following method is the easiest way to flip an image for fast results.
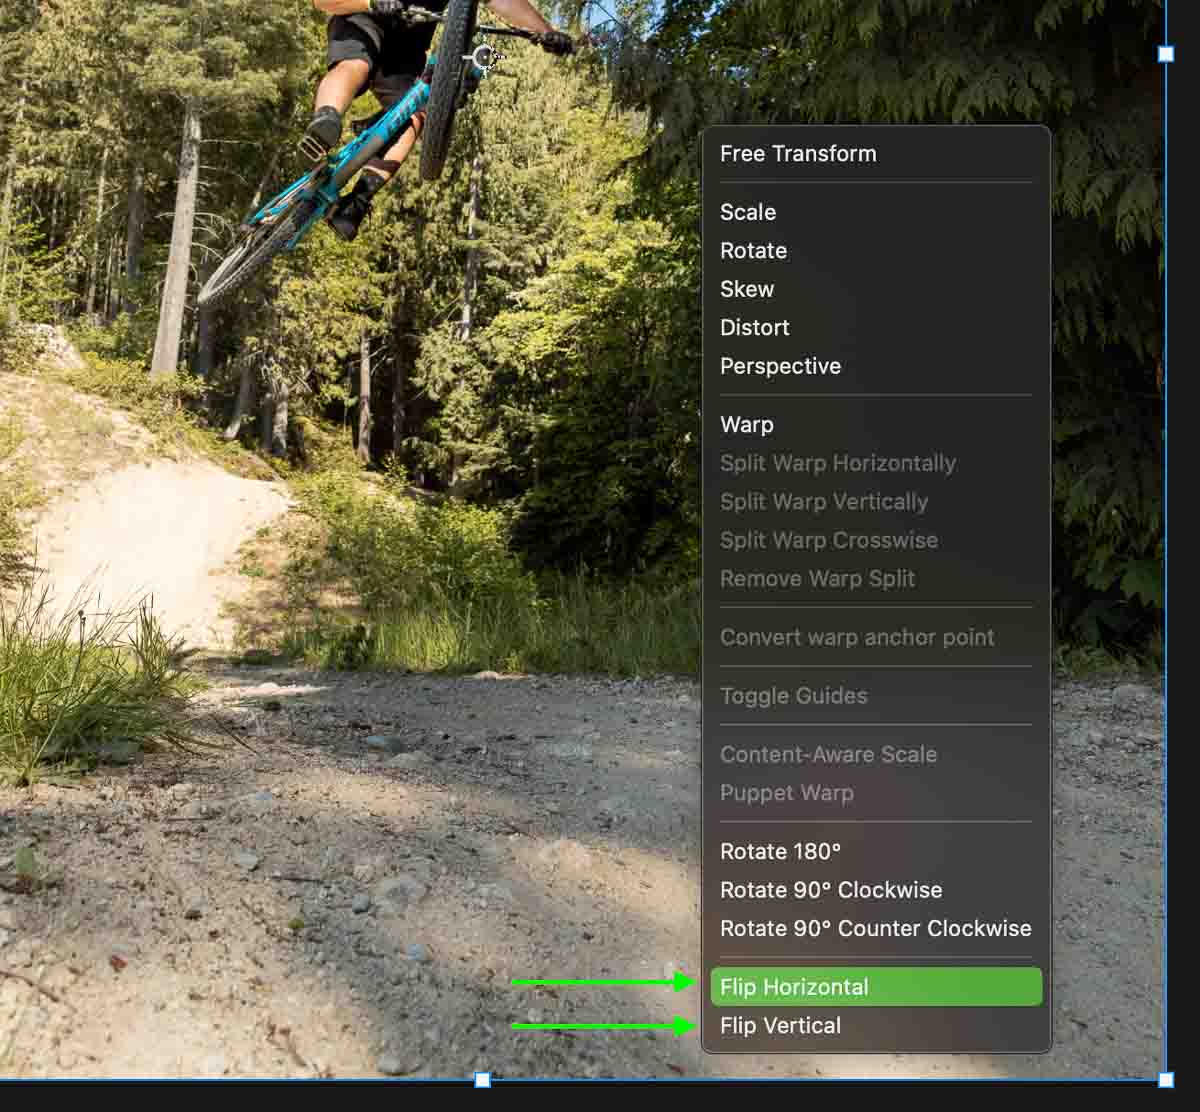
To flip a layer in Photoshop, select the layer from the Layers Panel, then press Command + T (Mac) or Control + T (Windows) to access the Transform Tool. Once activated, right-click on your canvas and choose “Flip Horizontal” or “Flip Vertical” to flip the selected layer.
This technique works well for flipping one layer at a time, but what if you wanted more options than that? Perhaps you want to flip your entire canvas or make your flip adjustments in Camera Raw.
To help make sure you have all the bases covered with flipping images in Photoshop, this tutorial will serve as your ultimate guide with 5 different options to suit any project! Let’s get started.
How To Flip A Layer In Photoshop – 2 Easy Ways
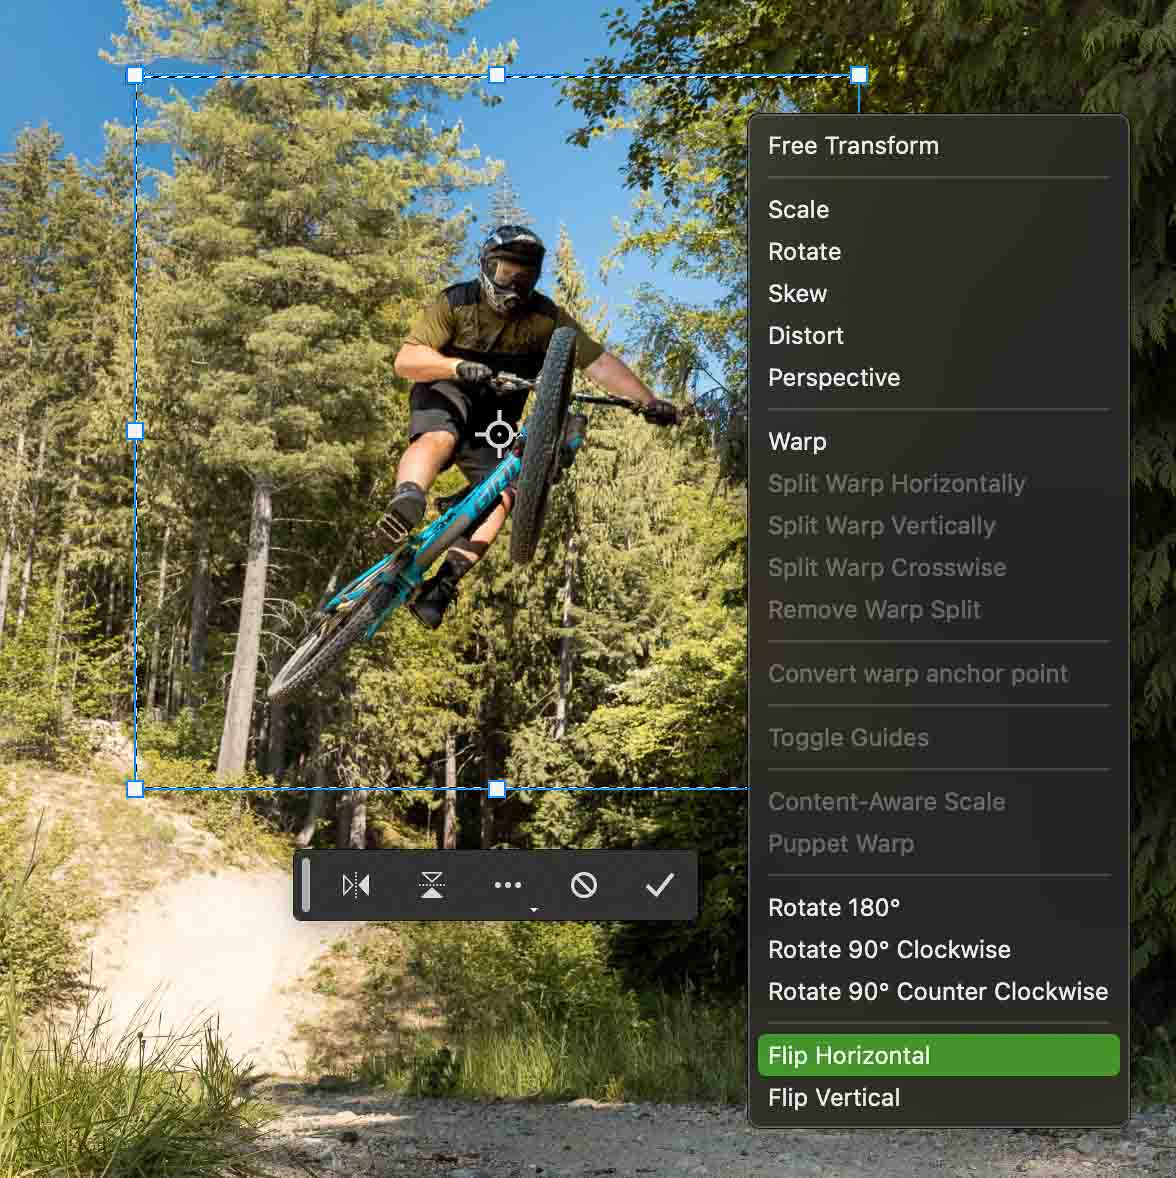
Option 1: Using The Contextual Task Bar
In Photoshop CC, the Contextual Task Bar was introduced to help make flipping images much easier. Although it should be available by default, if you don’t see it, go to Window > Contextual Task Bar to reveal it.
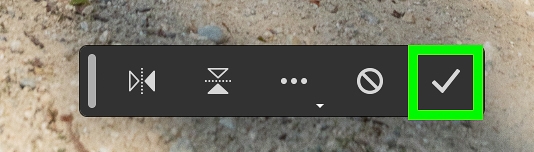
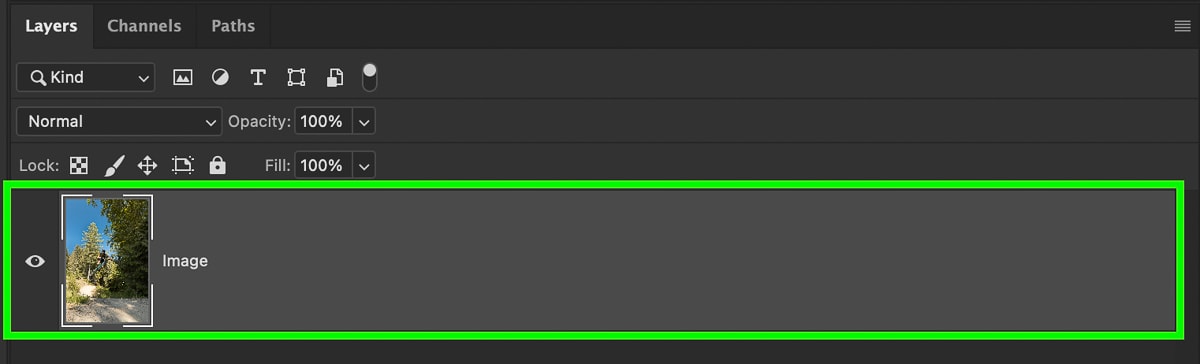
Now with your image layer highlighted in the Layers Panel, click on the Transform Option in the Contextual Task Bar.

Then click the Flip Horizontal or Flip Vertical buttons to flip your selected layer.


Press the checkmark to save your changes once you’re happy with the adjustment.
Option 2: Using The Transform Tool
If you are using older versions of Photoshop, you can also flip a layer by first selecting your image in the Layers Panel. Then press Command + T (Mac) or Control + T (Win) to activate the Transform Tool. Once this tool is active, right-click on your canvas and choose Flip Horizontal or Flip Vertical.
How To Flip An Entire Image In Photoshop
To flip your entire canvas horizontally or vertically in Photoshop, go to Image > Image Rotation and choose the “Flip Canvas Horizontally” or “Flip Canvas Vertically” option. This will flip your canvas and all its contents according to your selected flip adjustment.

This method will flip all the layers in your project regardless of whether they are selected. This method is better if you want to flip everything in your project rather than individual layers. For example, in the project below I have a text layer and an image layer that were flipped at the same time when the entire canvas is flipped.


Flipping the entire canvas is different from flipping individual or grouped layers because when you flip the canvas, you flip everything on it at once. You don’t even need to have any layers selected to do that.
When you flip layers, on the other hand, you need to select them first.
This technique is very useful when you need to take a quick look at how your project looks from a different angle. You can easily flip it back to its original position by repeating the same steps.
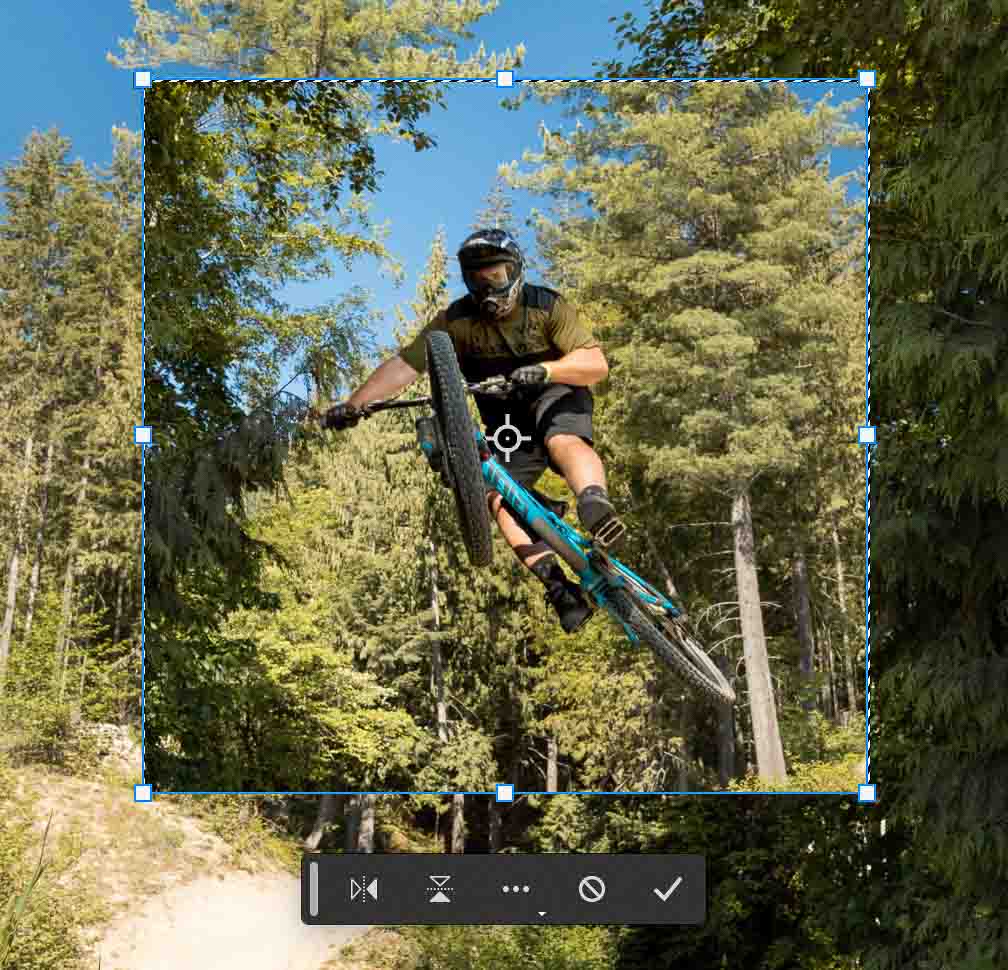
How To Flip The Contents Of A Selection In Photoshop
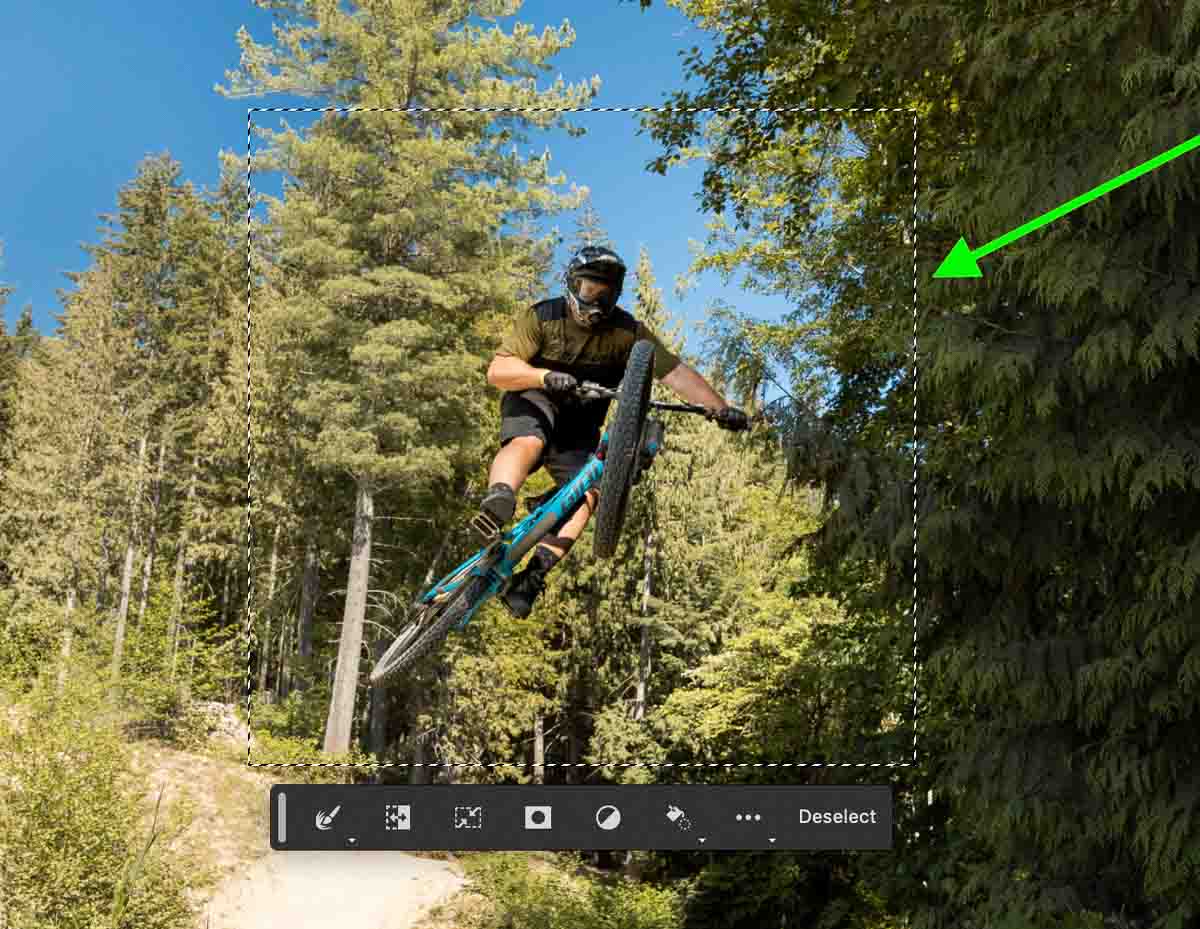
If you only want to flip a specific area of your photo, such as your subject, you can create a selection of the desired area and flip the contents. You can use any selection tool in Photoshop for this technique, but for this example, I will keep it simple with a Rectangular Marquee Selection (M).
Step 1: Create A Selection
With your selection tool of choice selected, create a selection around the area you want to flip.
Step 2: Press Command + T (Mac) or Control + T (Win) On The Active Selection
Now press Command + T (Mac) or Control + T (Win) while the selection is active to activate the Transform tool. Then right-click in the selection area and choose Flip Horizontal or Flip Vertical to flip the contents of the selection. Make sure that your image layer is highlighted in the layer panel during this step or it will not work.


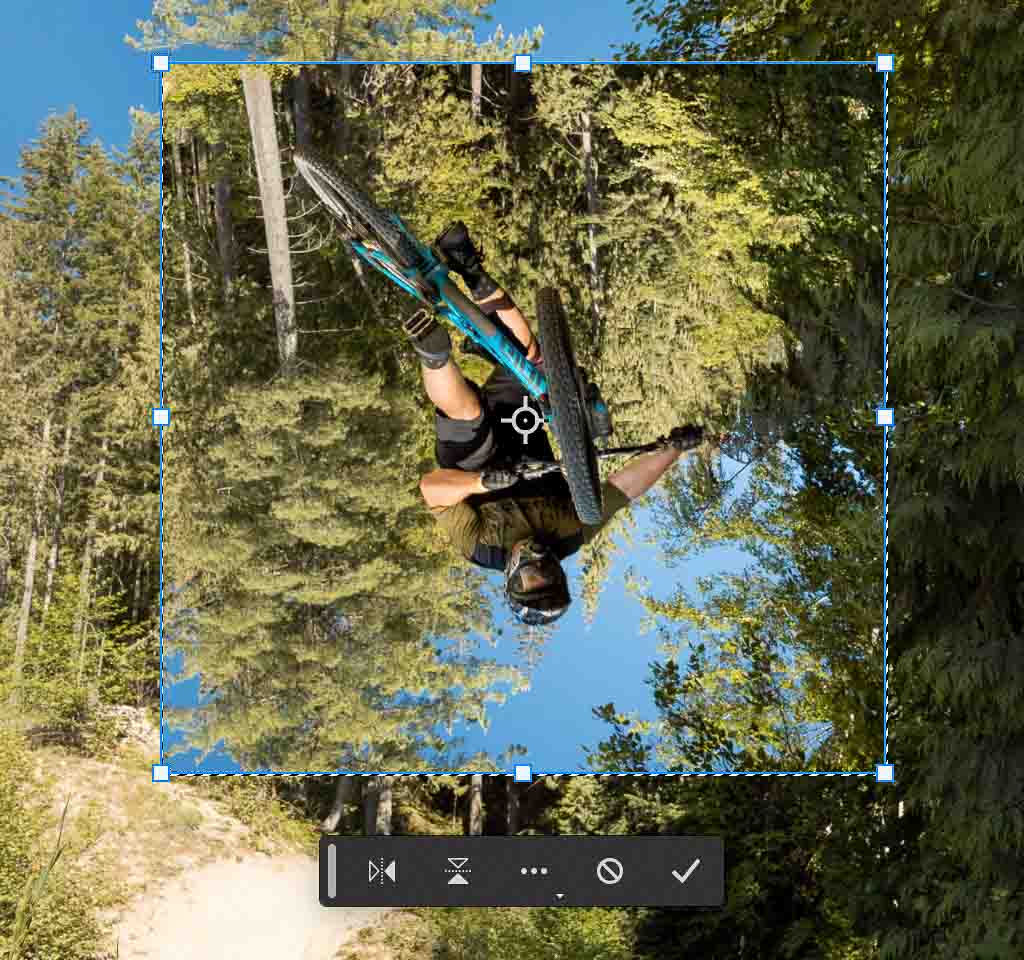
Press the checkmark in the Options Bar or Contextual Task Bar to commit to your changes.
Step 3: Deselect The Active Selection
Once the selection contents of your selected layer have been flipped, deselect the selection by pressing Command + D (Mac) or Control + D (Win). You can also press Deselect in the Contextual Task Bar.


How To Flip An Image In Camera Raw
To flip an image in Camera Raw, first, open a RAW image into Photoshop so that Camera Raw will automatically open. In Camera Raw, click the Crop Adjustment, then click the Flip Horizontal or Flip Vertical option within the ‘Rotate & Flip’ settings to flip the image in one click.
If you try to import a RAW file into Photoshop, you will notice that it will be opened in Camera Raw first. You can make many edits there, including flipping the photo.
However, the option of flipping an image with Camera Raw is only available when you open the image directly into Photoshop. If you open an image as a layer and apply the Camera Raw filter, the flip image option will not be available.
So with that in mind, make sure to follow these next steps to ensure everything works!
First, open your RAW file by pressing Control+O (on Windows) or Command+O (on Mac) or dragging it into Photoshop.
After that, you will see that the image will be directly imported into Camera Raw.
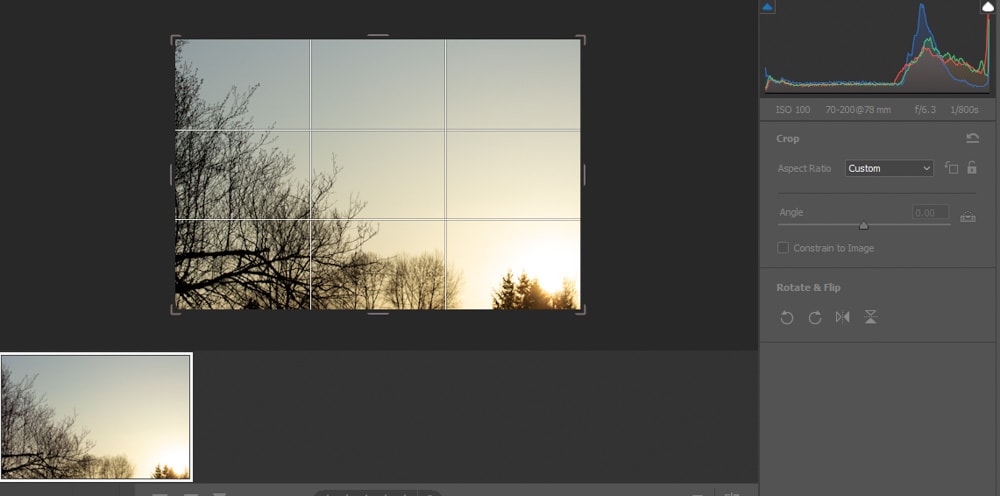
Inside Camera Raw, click the Crop Tool on the right side of the panel.

You can make any type of crop adjustment here along with, straightening and flipping adjustments.
Since we’re focused on flipping the image, let’s go to the ‘Rotate & Flip’ section.

By clicking either of these options shown above, the image will be flipped instantly.


Flipping layers and images in Photoshop is easy with the different techniques you learned here in this tutorial. In most cases, the free transform tool will get the job done since you can flip the image in just a couple of clicks. However, the Contextual Taskbar can also be a great way to speed up the process if you’re using a more recent version of Photoshop.
Happy Editing!


