

The black tones editing style in Lightroom helps give any photo a moody, high-class feel. If you want to create this look in your photos, you can follow a few simple steps.
To edit black tones in Lightroom, you need to use the HSL adjustment. Selecting the Saturation option within the HSL, desaturate every color range to -100 except orange and red. Then adjust the orange and red ranges accordingly for the skin tones in your photo. Now you have edited black tones!
Bringing down the saturation of different colors in your photo helps create black tones that weren’t previously there. However, using HSL alone won’t give you the best results for this editing style. Instead, you need to use other adjustments such as the exposure, white balance, and color grading to help this editing style pop.
If you have yet to download Lightroom, I highly recommend the Photography Plan since it’s the most affordable option. However, you can also create this look in the free Lightroom Mobile app, which I will share later in this post!
How To Get Black Tones In Your Photos Using Lightroom
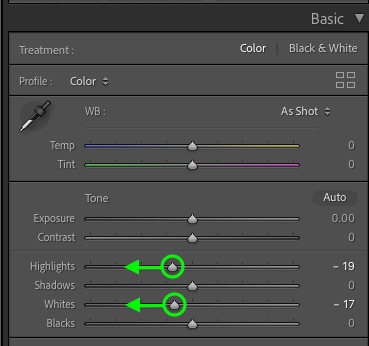
Step 1: Reduce The Whites & Highlights
With your photo imported into Lightroom and opened in the Develop Module, you need to start within the Basic Panel. Here you need to darken the whites and highlights sliders by dragging them left. The amount you reduce these sliders will depend on your image. Photos with more bright exposures will need a more drastic adjustment.
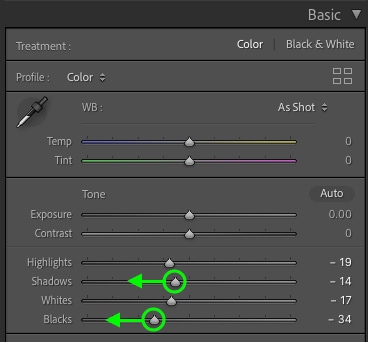
Step 2: Reduce The Blacks & Shadows
Within the Basic panel, reduce the shadows and blacks sliders to darken your photo further. The goal here isn’t to lose details in your image but to add a bit of moody contrast to it. Similar to the previous step, the amount you adjust these sliders will depend on the exposure ranges in your photo.
This time the photo has taken on a much more moody feel than what I started with. For an extra moody look, you can darken the blacks and shadows even further.
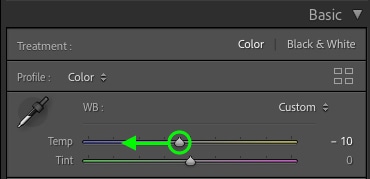
Step 3: Make Your White Balance More Blue
A bluer white balance goes a long way to help the black tones you are about to create. Clicking on the Temp slider, drag it left to add some cooler tones to your photo.
Here’s how my photo looks after that adjustment:
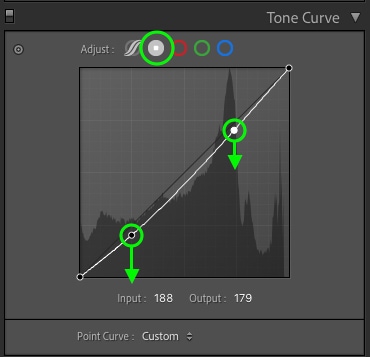
Step 4: Reduce The Vibrance To -10
At the bottom of the Basic panel, reduce the Vibrance adjustment to -10 to desaturate your entire image. The reason you are using vibrance instead of saturation is to protect the skin tones in your photo. The vibrance adjustment tends to affect the orange and red tones less aggressively than saturation. This way, your subject’s skin doesn’t look grey and zombie-like.
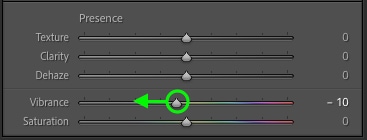
Here’s the edit after reducing the vibrance slightly:
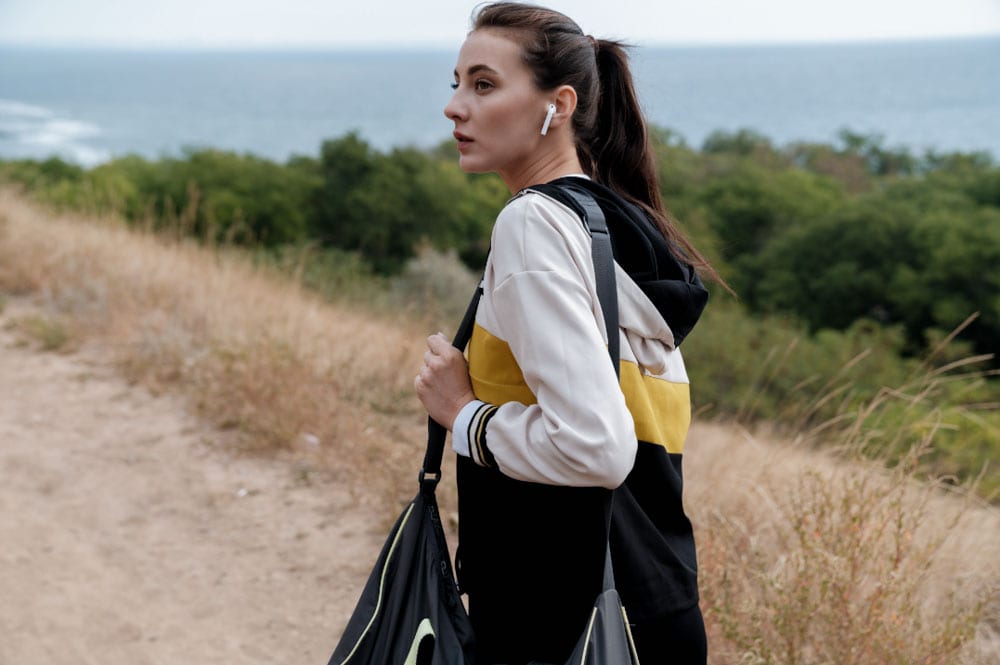
Step 5: Drag Down The Tone Curve
Going down to the Tone Curve adjustment, it’s time to darken the highlights and shadows exposure range. First, click in the highlights range and drag down slightly.
Then click in the shadows range and drag down slightly again.
Editing these two ranges independently will help to give your image a darker feel and sets up your edit well for the next step.
Step 6: Desaturate Every HSL Color To -100 Except Orange And Red
Within the HSL adjustment, click on the Saturation option. Then drag down every color to -100 except for orange and red. That’s because orange and red will represent the skin tones and should be edited independently.
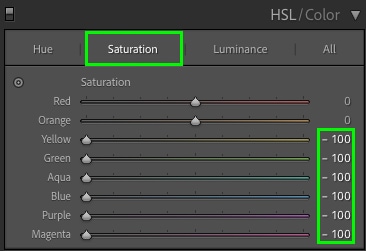
If you want a fully black tones look, -100 for every color except orange and red will work best. However, you can experiment with something around -90 for some color ranges to leave a hint of color throughout your photo.
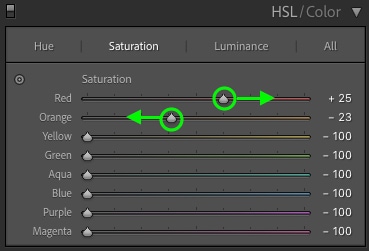
Now adjust the orange and red saturation to suit your image. In most cases, desaturating the oranges slightly while increasing the saturation of the reds works well.
Here’s how the edit looks after the HSL adjustments:

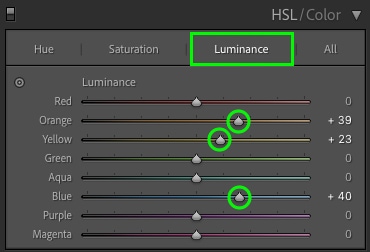
Step 7: Increase The Luminance Of Any Dominant Colors
With the saturation adjustments complete, click on the Luminance option within the HSL. The luminance controls the brightness of each color range and works well to make certain colors stand out. Taking note of any dominant colors in your photo, increase the luminance of those colors. In my image, that will be the Blues, Oranges, and Yellows.
Now my photo has a little more life added to it with the Luminance adjustments.
Step 8: Boost The Midtones Luminance In The Color Range Adjustment
For the final step in this edit, go to the Color Grading adjustment and drag up the mid-tones luminance slider. This will brighten all the mid-tones in your photo while leaving the shadows and highlights untouched. This is a nice final touch to improve your black tones edit in Lightroom!
The Result


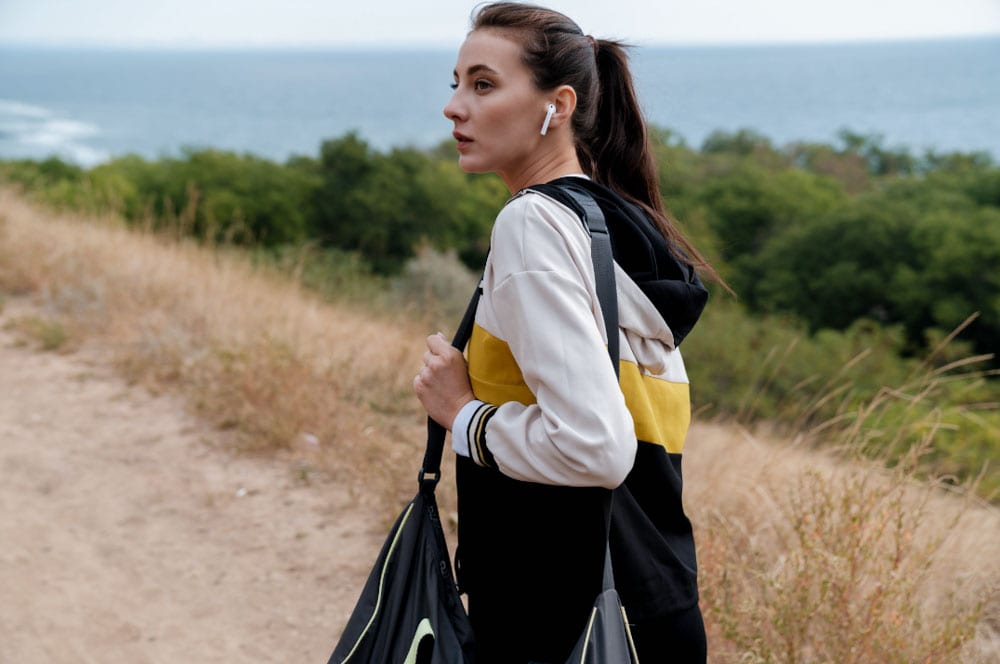
Before 
After

With these eight easy steps, you have successfully created a black tones look in Lightroom! Of course, the HSL adjustment is the star of the show in this process, but the other tools we discussed help take your edit to the next level.
How To Edit Black Tones In Lightroom Mobile
Instead of using Lightroom desktop, which requires you to subscribe to the Adobe Creative Cloud, you can create this editing style in Lightroom Mobile for free. If you are brand new to this app, be sure to read this guide sharing everything you need to know before using it!
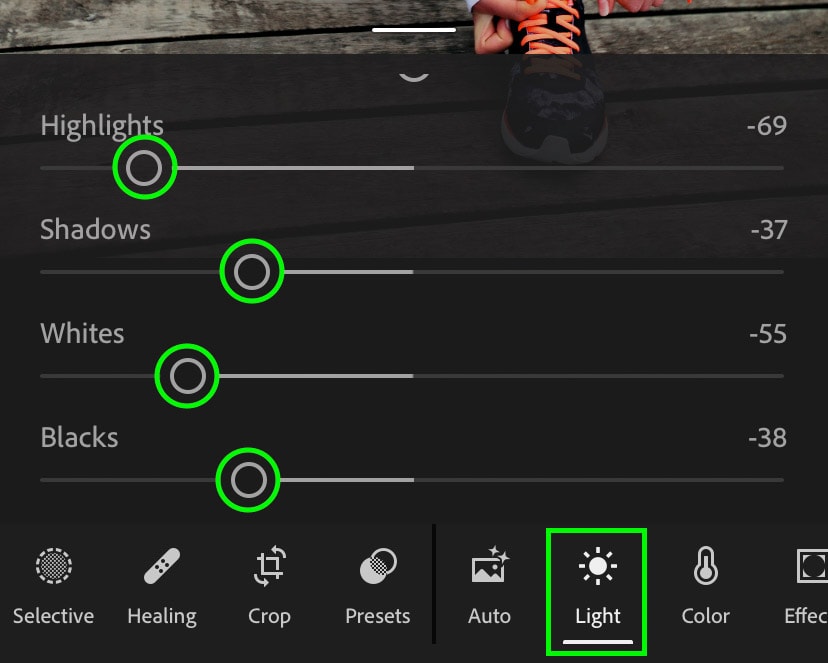
Step 1: Reduce The Highlights, Shadows, Whites, And Blacks
Click on the Light Adjustment and drag the highlights, shadows, whites, and blacks sliders to the left to start things off. This will darken your overall photo and give it a more moody feel. If your image becomes too dark, you can increase the shadows and blacks sliders to solve this problem!
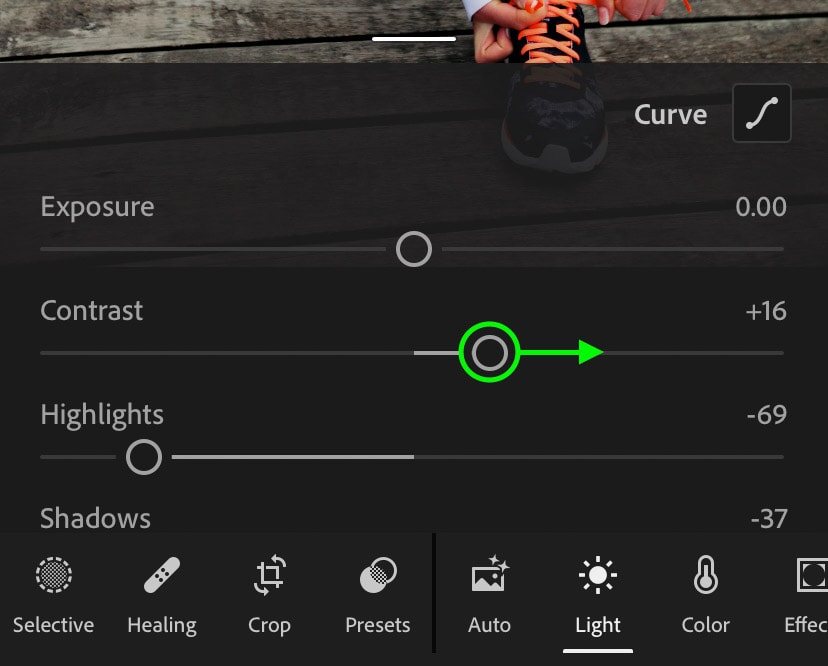
Step 2: Increase The Contrast Slider
Once again, within the Lights adjustment, increase the contrast slider to enhance the moody feel of your image.
Step 3: Drag Down The Tone Curve Slightly
To access the Tone Curve in Lightroom Mobile, look for the Curve button at the top of the Light adjustment.
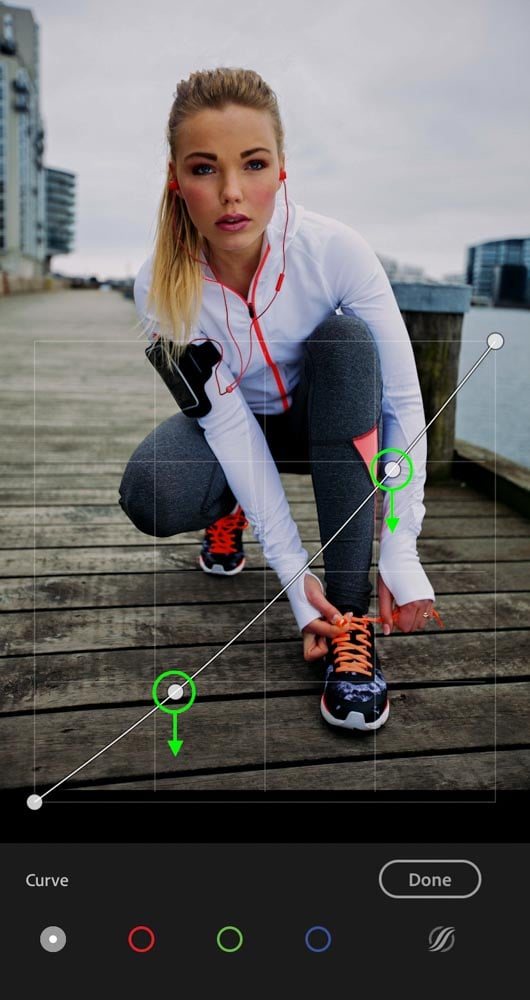
Once opened, click in the highlights and drag down slightly to darken.
Then do the same thing in the shadows, clicking on the curve and dragging down. These two adjustments will improve the dark look of your edit.
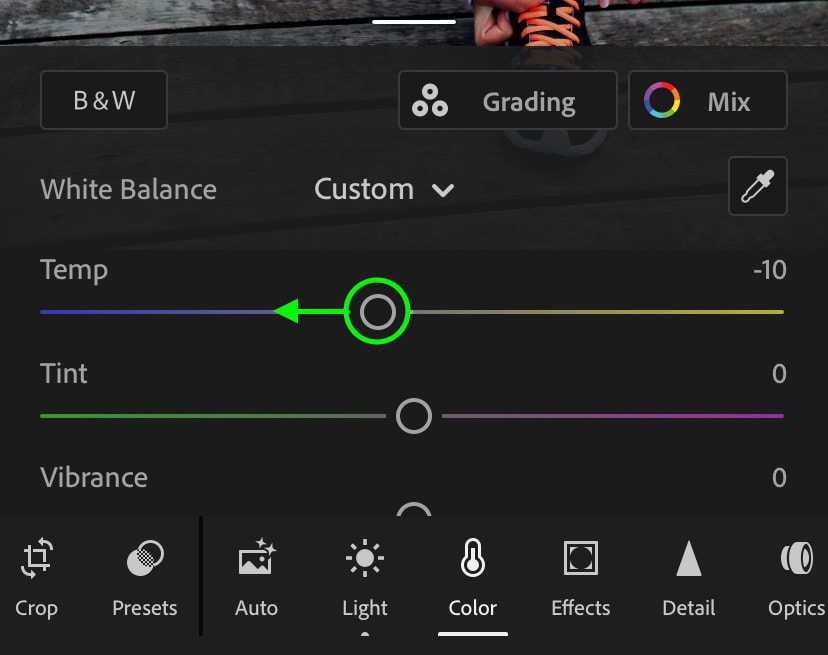
Step 4: Set The White Balance Temp To -10
Now you are done with the Light adjustment, and it’s time to switch over to the Color Adjustment. Within the Color adjustment, set the Temp slider to -10. This gives your photo a more blue feel that will improve your black tones in later steps.
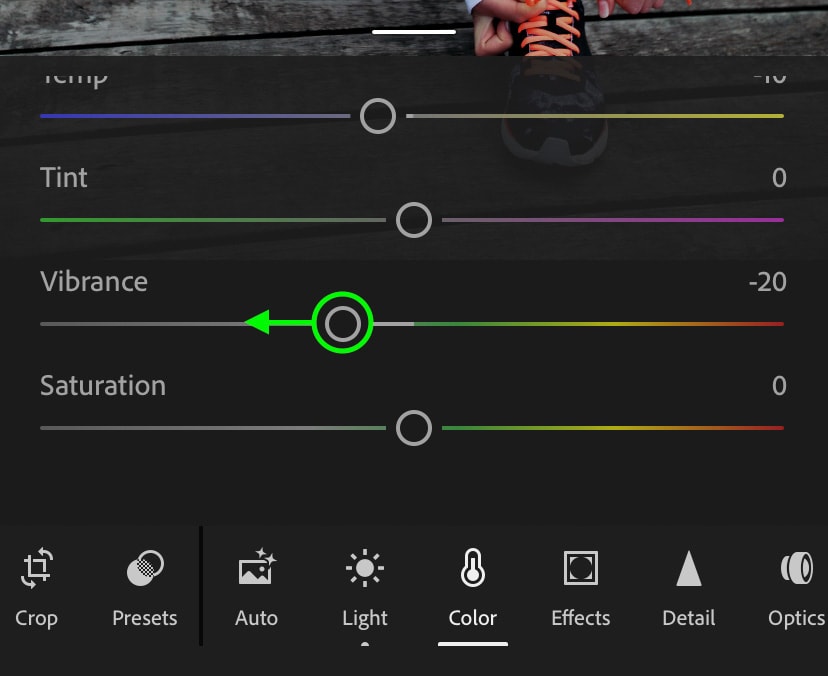
Step 5: Bring Down The Vibrance Slider
Just below the white balance adjustment, move the Vibrance slider to the left to desaturate your entire photo. You want to be sparing with this, so a small adjustment will do. More dramatic desaturation will take place in the next step!
Step 6: Desaturate Every Color Except For Orange And Red To -100
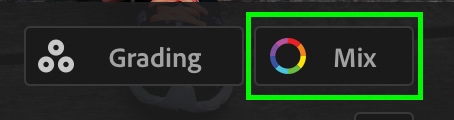
At the top of the Color adjustment window, click on the Mix option.
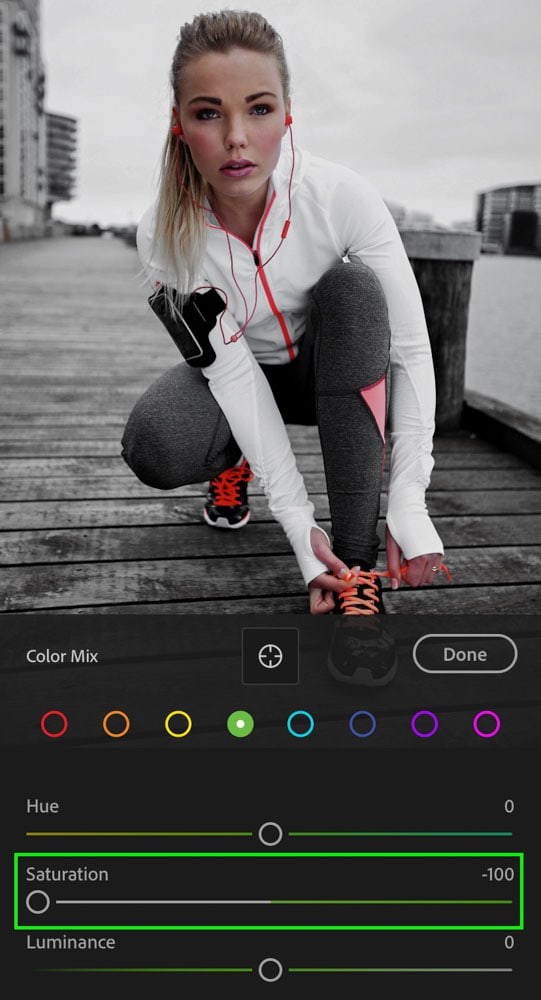
Here you need to click through each color range (represented by the outlined circles) and set the saturation to -100. The only two colors you will not adjust are orange and red since they represent the skin tones.
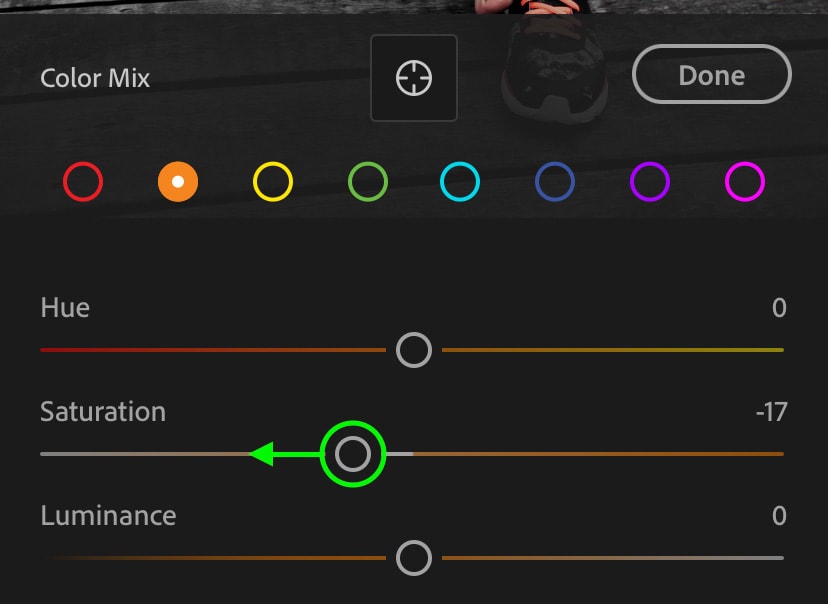
With all the color desaturated, slightly reduce the saturation of the orange color range.
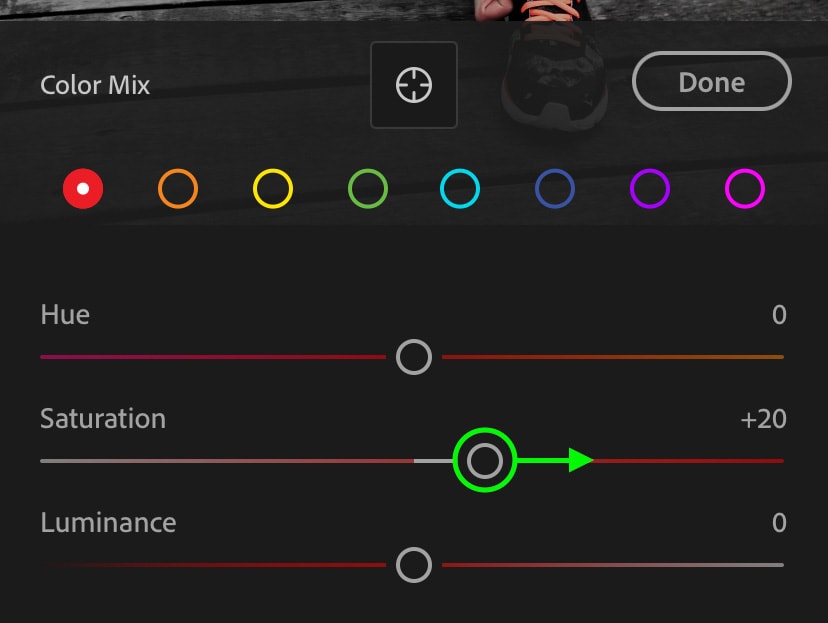
Then boost the saturation of the reds color range.
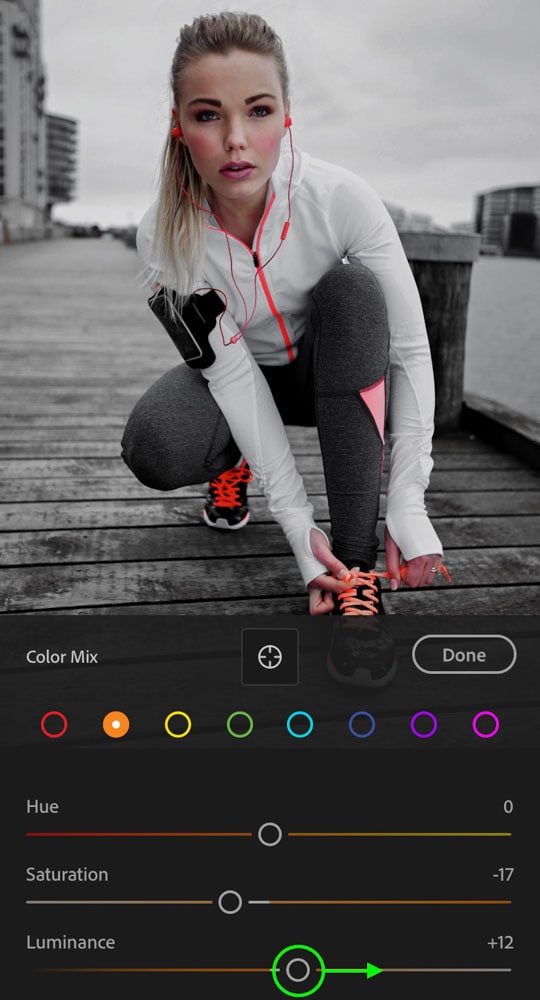
Step 7: Increase The Luminance Of Any Dominant Colors
To finish off the Mix adjustment, increase the luminance of any dominant colors in your photo. This helps add a bit more life to the image and prevents it from becoming a bland dark photo.
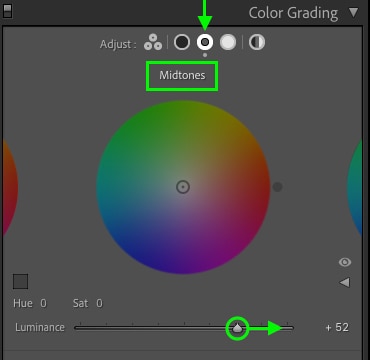
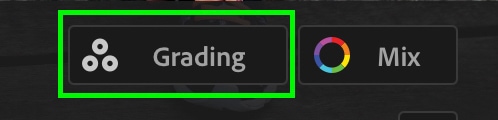
Step 8: Increase The Mid-Tones Luminance In The Grading Tool
From the Color adjustment window, click on the Grading tool.
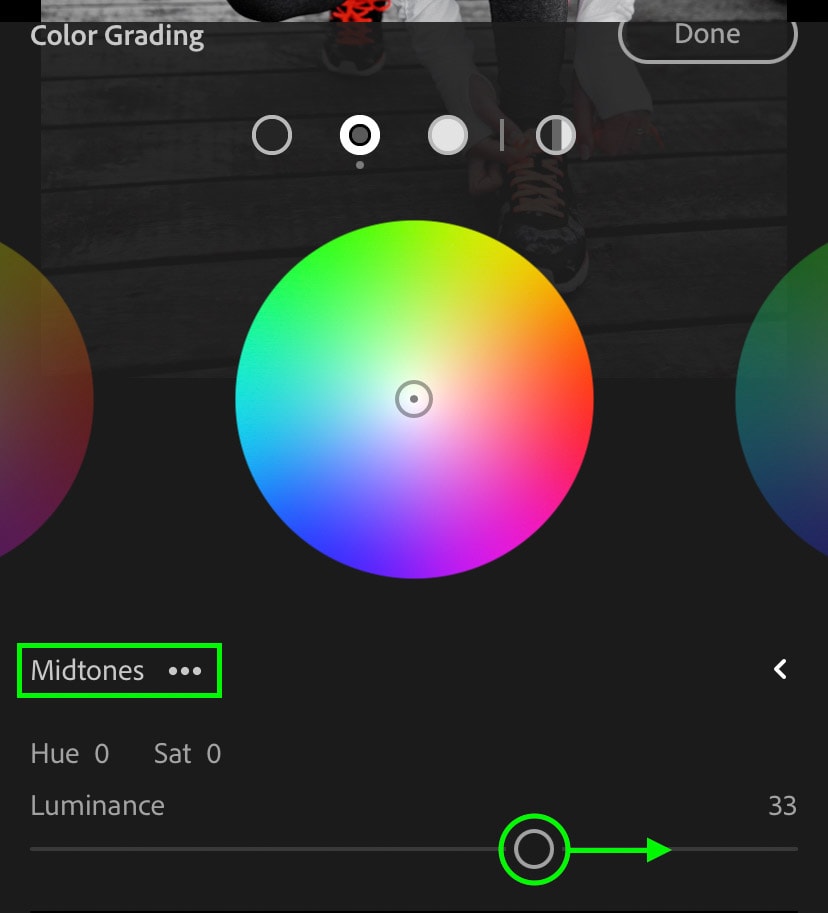
Then find the mid-tones color wheel, and increase the luminance slider to brighten the mid-tones. This slight adjustment can help to make your image pop with the black tones!
The Result
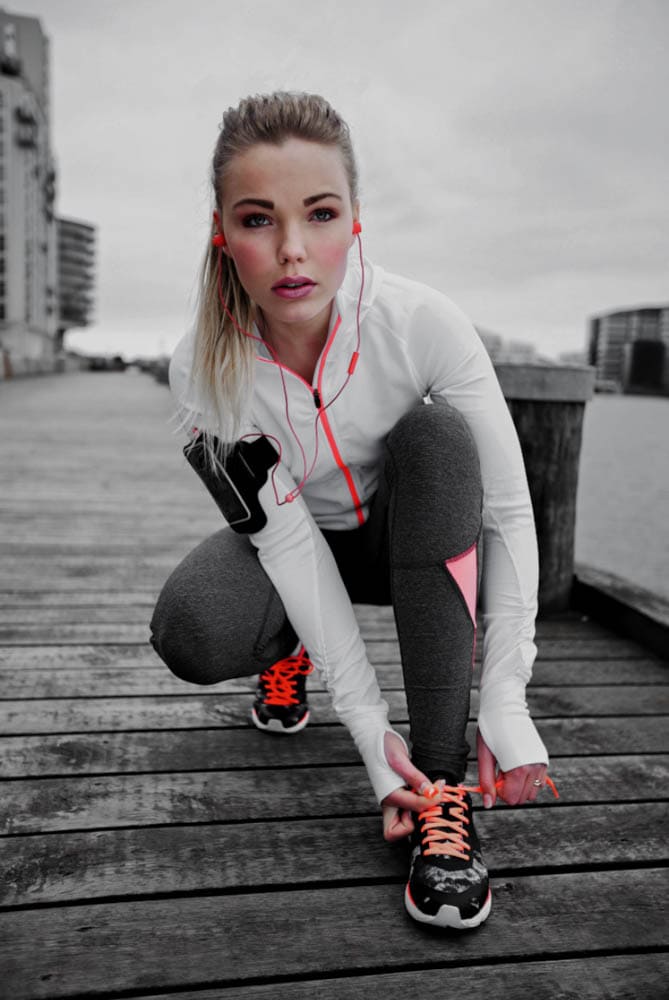

Before 
After
This time you have successfully created the black tones editing style in Lightroom Mobile with eight easy steps! Even if you’re new to this app, this editing style is simple to make and gives any photo a unique style.
Now that you are a master at editing black tones in Lightroom and Lightroom Mobile check out this next editing style to create awesome muted tones in your images!
Happy editing,
Brendan 🙂


