
Actions streamline your workflow and help you save a ton of time on your work, so it’s helpful to know how to install Photoshop actions.
Let’s take a look at how to install any set of actions, along with some useful tips to get the most out of the process.
How To Install Photoshop Actions
Step 1: Download The Action (If You Haven’t Already)
Before installing an action in Photoshop, you must have it stored on your computer. If you don’t have any actions yet, I have several available in my store here.
In addition, I recommend you look for more actions from Envato Elements or Creative Market. These websites offer you actions that produce incredible effects.
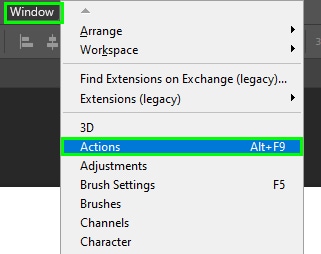
Step 2: Go To Window > Actions
Once you have an action on your computer, open Photoshop to install it. Typically, the Action Panel appears on the right side of the Photoshop workspace, represented by a play button icon.
Click on the icon to view the Action Panel. If you can’t see the Action Panel in your workspace, go to Window > Actions. Alternatively, press Alt + F9 (Win) or Option + F9 (Mac).
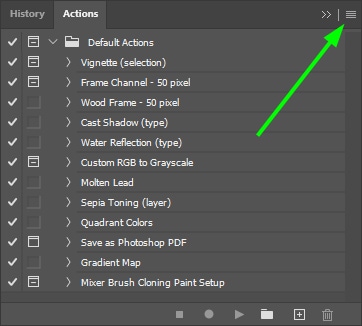
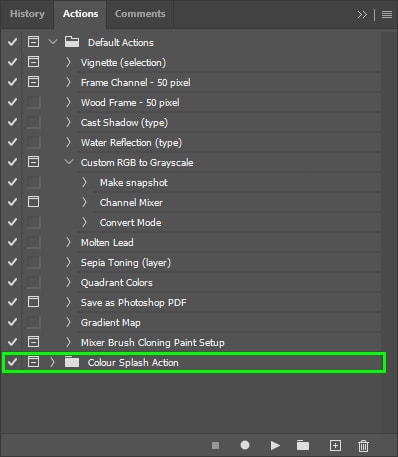
The Actions Panel will appear, containing default actions that come with Photoshop and actions you have created if you have any.
Step 3: Open The Menu In The Actions Panel
To install an action saved on your computer, click the Options Menu within the Actions panel.
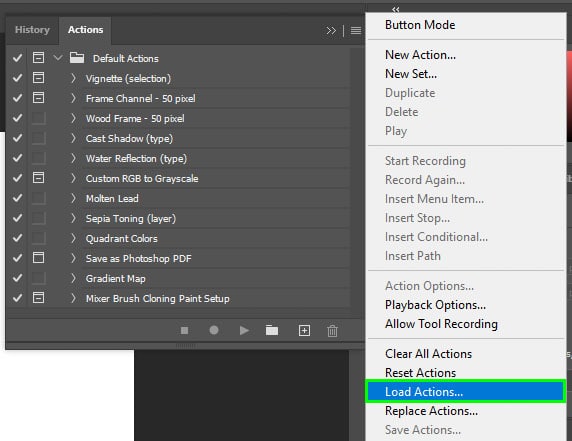
Step 4: Select Load Actions From The Menu
Scroll down the menu and click on Load Actions.
Step 5: Locate The Action On Your Device
When your Explorer or Finder window opens, you must look for an .ATN file in the folder you saved the action. Once you find it, click Load to import it into Photoshop. The action or set of actions you loaded will appear under other existing actions.
How To Use Photoshop Actions
Step 1: Open The Action Set In The Actions Panel
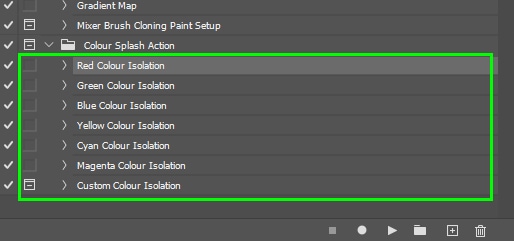
First, open the image you want to apply an action to. Then, open the Actions Panel and locate the action set of your choice. Click the arrow beside the folder to reveal the list of actions within the action set.
Step 2: Click The Play Button To Run The Action
To run an action, click on it and then click the Play button in the Actions Panel.
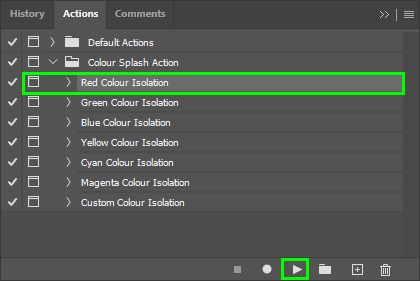
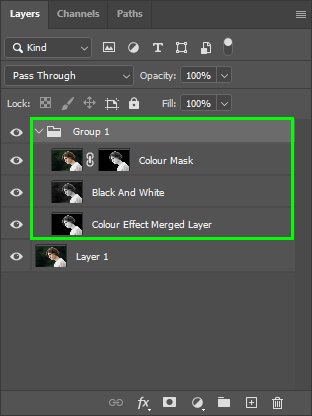
The action will be instantly applied to your photo.


Several layers appear in the Layers Panel when the process is completed. These layers correspond to each step of the action. These layers will be grouped together, as in the example below.
Step 3: Modify The Action (Optional)
Modifying an action is very simple, and you can do it in many ways. To delete a step from an action or an entire action, click it and press Delete. Alternatively, click the trash bin icon at the bottom of the Actions Panel.
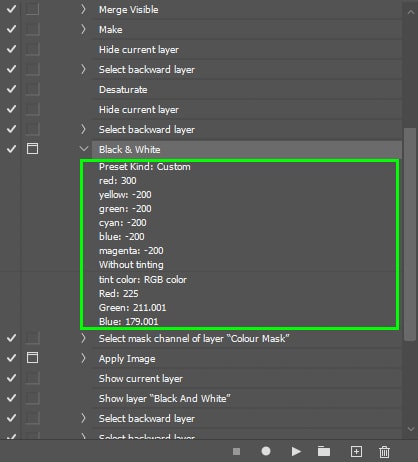
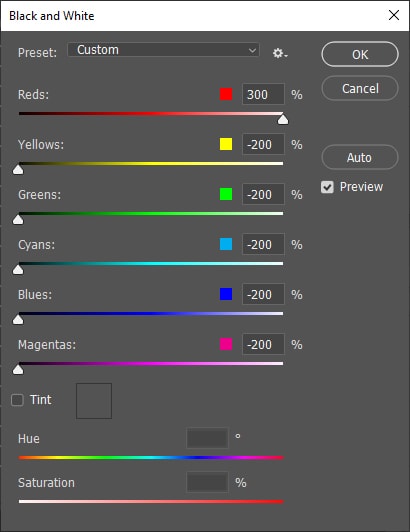
Click the arrow next to an action or step to see which effects have been applied to it. Double-click the applied effect to adjust its values within the action, so any time you use it, the new settings are applied. For example, Photoshop opened the black-and-white adjustment panel when I double-clicked the corresponding effect.
You can also modify an effect applied by an action in the Layers Panel, such as adjusting a layer opacity. These changes will only affect your image in the workspace and won’t alter the action.
As you saw here, using Actions is a great way to streamline your workflow. With Actions, I don’t waste time on repetitive processes that I’m already familiar with and can instead focus on developing new ones. Once you find the right ones to use in your projects, they are a super valuable addition to Photoshop!


