
Camera Raw allows you to make basic edits to photos quickly and non-destructively in Photoshop, meaning the image file doesn’t change. But many users might not realize that Camera Raw also has the capabilities to add presets to an image or multiple images, without leaving Photoshop.
Over the years, Photoshop’s updates have sharpened this process and made it simpler to add presets. Now the process is pretty fast and easy. Here’s how to install and use presets in Camera Raw.
How To Install Presets In Camera Raw In Photoshop
To install presets in Camera Raw, first go to Filter > Camera Raw Filter. Next, click on the Presets icon on the right-hand side of the window. At the top of the Presets panel, click the ellipse icon and select Import Profiles & Presets. Locate the XMP file on your computer and click install.
Let’s break that down more in-depth.
When you locate presets in Camera Raw, you’ll find that Adobe has pre-installed presets that come with Photoshop. However, many photographers find excellent preset packs online that offer a variety of edits, moods, and styles. Therefore, you will likely need to know how to install third-party presets onto Photoshop’s Camera Raw.
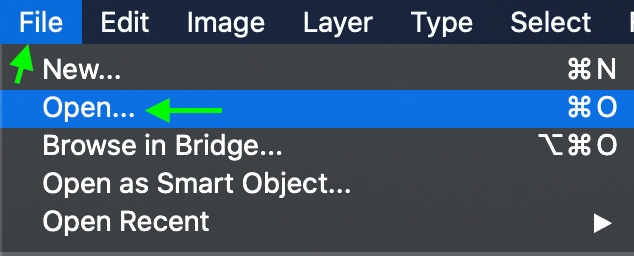
First, you’ll need to navigate to Camera Raw. The program is built seamlessly into Photoshop, so you can access it by opening a raw image in Photoshop. Head to File > Open and select the raw file you’d like to edit.
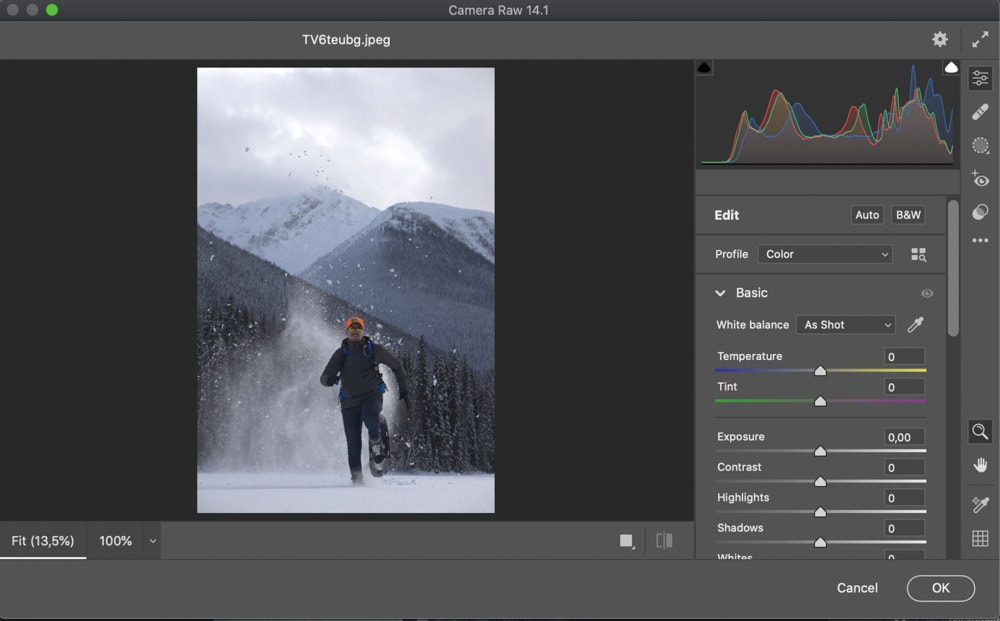
Camera Raw will open automatically in a new window.

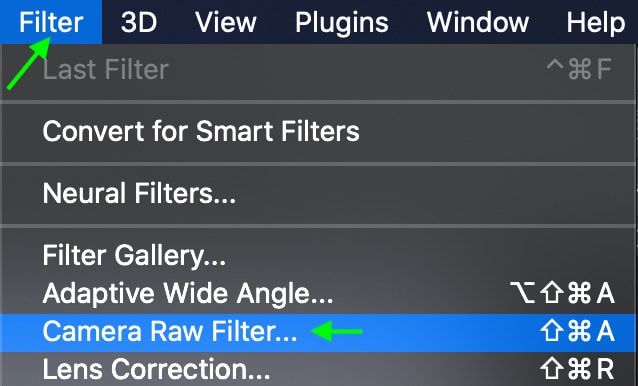
However, if you’re working with non-raw file formats like jpg files, you can still access Camera Raw, but you will need an extra step here. Open your file and apply the Camera Raw Filter by heading to Filter > Camera Raw Filter.
Camera Raw will open automatically as the image can now be edited. Unfortunately editing compressed files like a jpg will leave far less information to recover in the shadows and highlights compared to a RAW file. However, you can still make adjustments to improve the photo.
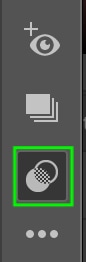
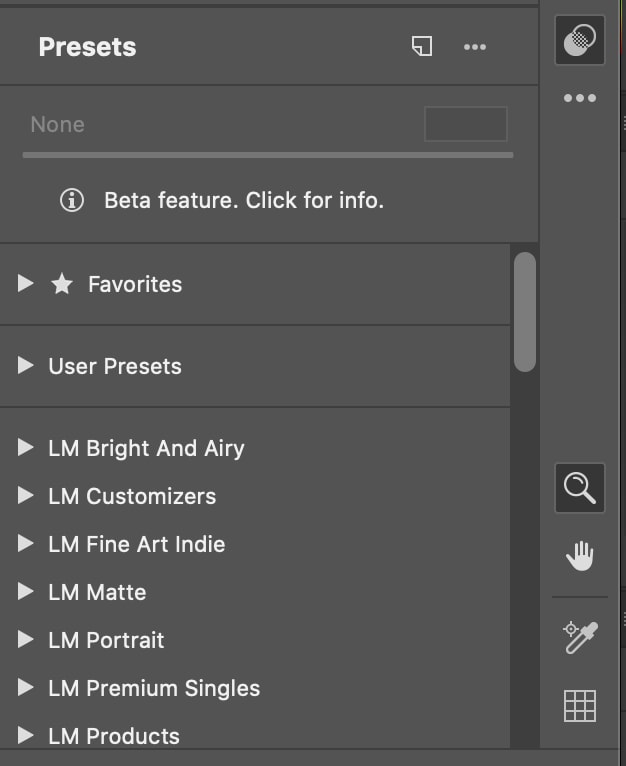
With the Camera Raw window open, you can add your new presets by heading to the presets section, clicking the icon in the toolbar.
You’ll see the various presets that come with Photoshop in this tab, as well as any you’ve downloaded from third parties at the top.
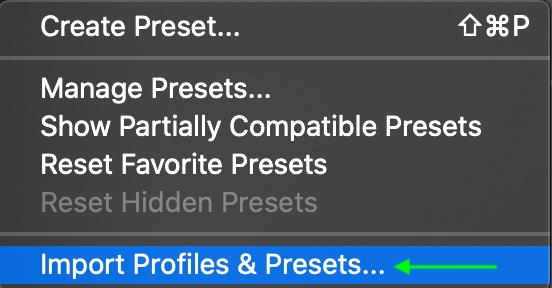
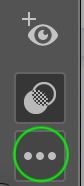
From here, head to the preset settings icon represented by an ellipsis.

Then, click Import Profiles & Presets.
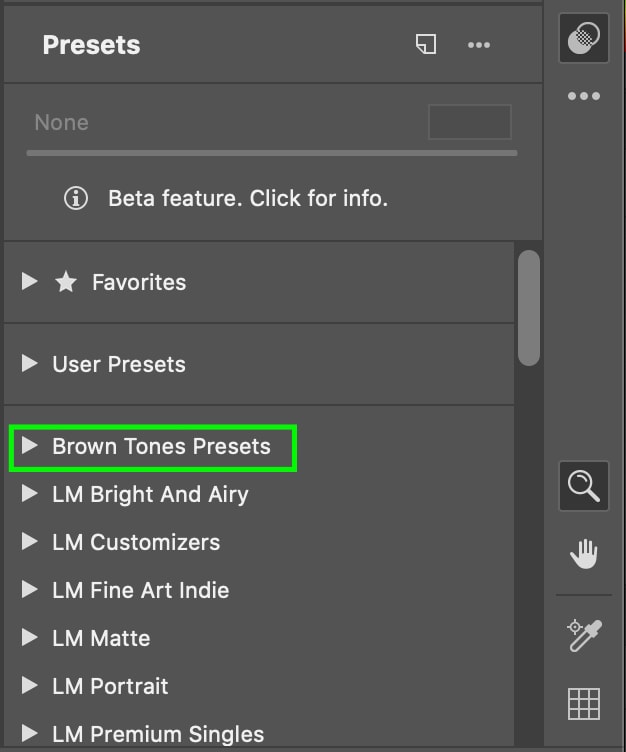
Select the preset(s) you’d like in the form of an XMP file and click open. The preset(s) will appear with the others in the same tab.
How To Locate & Use Newly Installed Presets
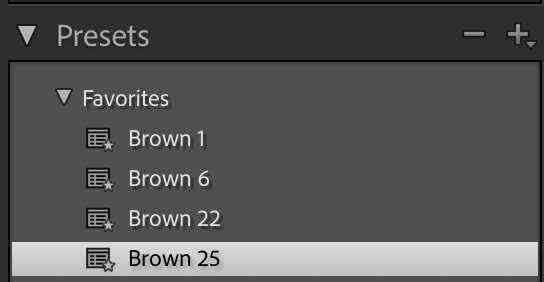
Once you’ve installed your presets in Camera Raw, you can find them easily whenever you need them by navigating to the preset tab.
Here, you’ll see the presets you’ve installed yourself. Click the preset pack you’d like to use to see the presets within.
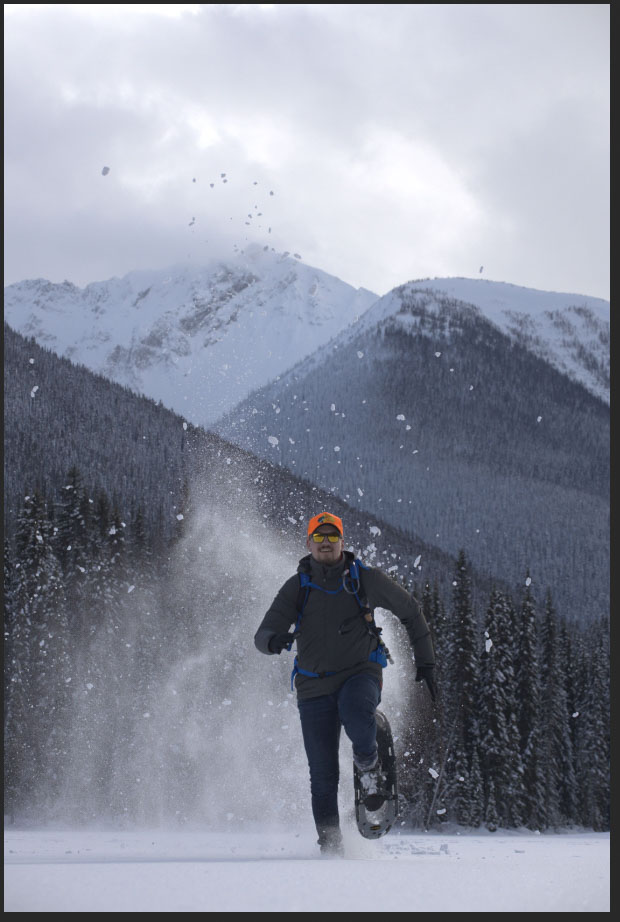
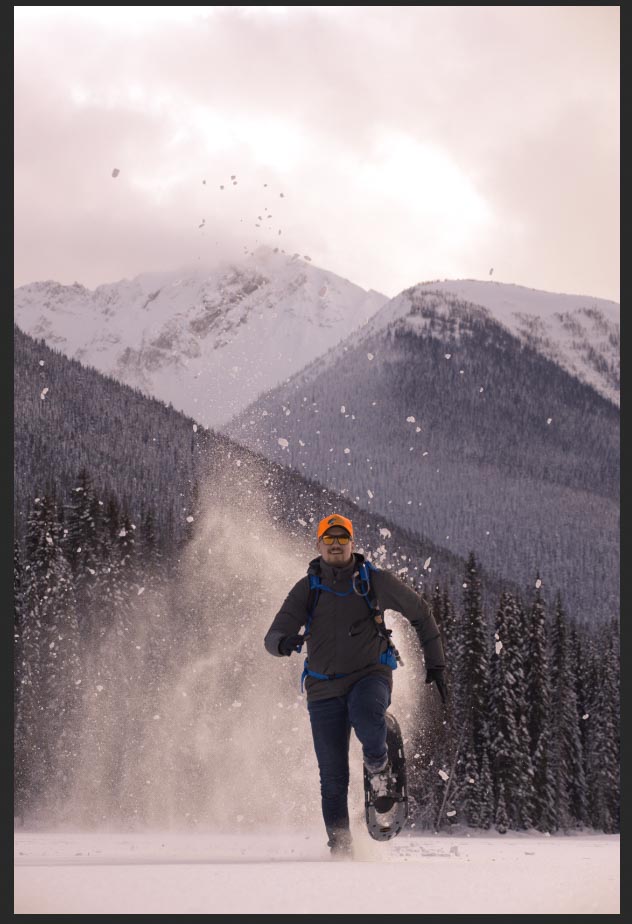
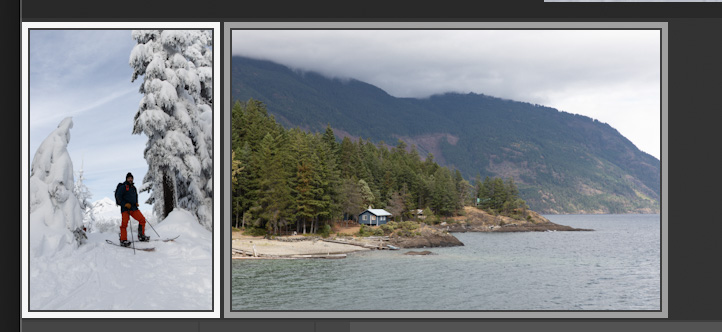
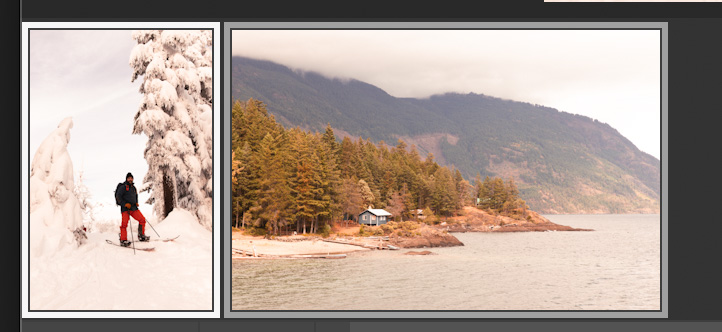
Click the one you’d like to apply. The preset will automatically be applied to the image the moment you click. Below, is the image before and after applying the preset.
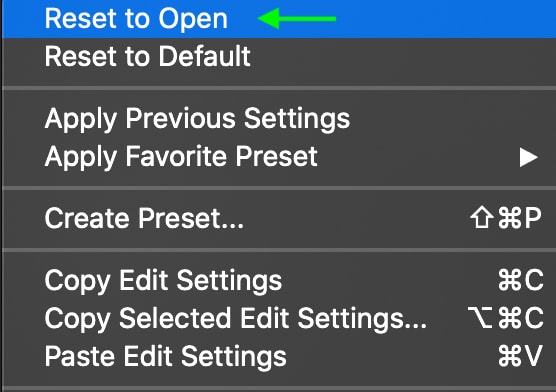
To change the preset to a new one, simply click the preset you’d like to replace it with. To get rid of the preset completely and change the image to how it was originally, click the ellipsis icon under the preset icon and select Reset to Open.
You can also tap Control + Z (Win) or Command + Z (Mac) repeatedly until the image is back to its original form.
If you’d like to apply the same preset to multiple images at once, you can also do this in Camera Raw. Simply navigate to File > Open in Photoshop and select multiple raw images you’d like to apply the same preset to.
Camera Raw will open, and you can make sure both photos are selected by holding Shift + clicking both. With both selected, they will have a white and gray border around them.
Now head to the preset tab and select the one you want.
When you click on a preset, it will apply to all the selected images.
How To Use Lightroom Presets In Camera Raw
You may have a few presets in Lightroom that you want to use in Photoshop. Some Lightroom presets, specifically older ones, have a file format that is not supported in Camera Raw. In some cases, it might just be easier to move a preset from Lightroom to Camera Raw – if you cannot find the preset file on your computer, for instance.
The easiest way to convert Lightroom presets to be readable by Camera Raw is to export an image that contains the preset from Lightroom, and then open the image with Photoshop’s Camera Raw.
When the image opens in Camera Raw, all the settings of the preset will appear. From there, you can save those settings as a preset in Camera Raw.
To start, head over to Lightroom. Select an unedited image from your Library and head to the Develop tab.

Find your presets on the left-hand sidebar and click the one you’d like to export to Camera Raw to apply it to your photo.
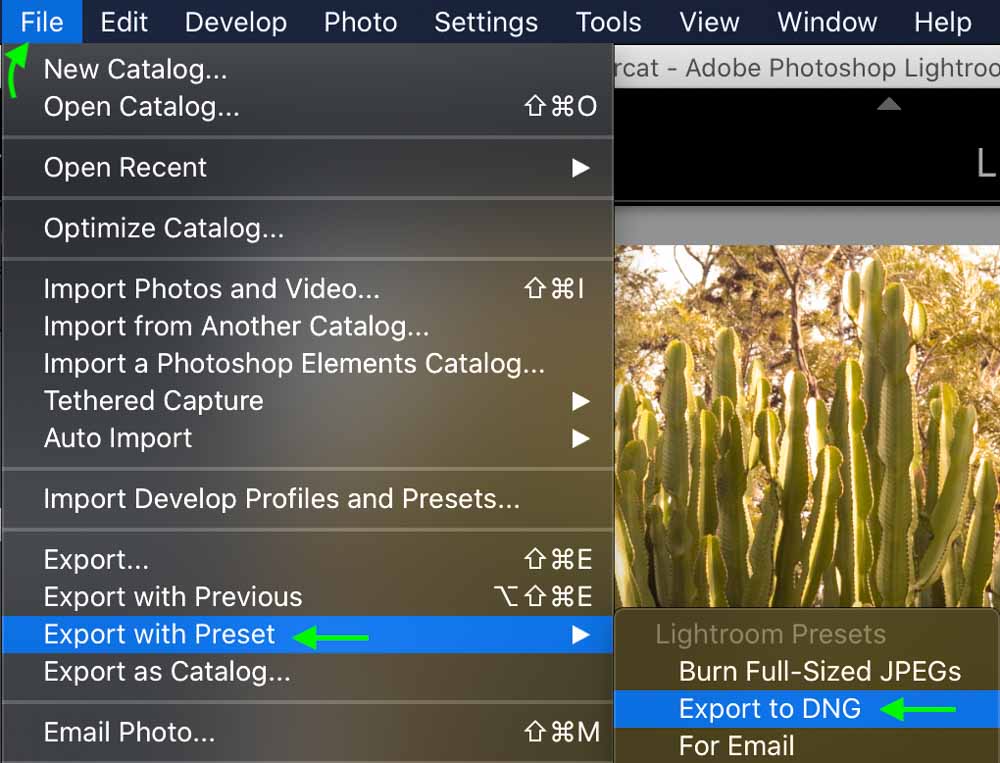
Now, without making further edits to the photo, head to File > Export with Preset > Export to DNG.
Find the image in your files and right-click (Win) or Control + click (Mac). Select Open With > Adobe Photoshop.

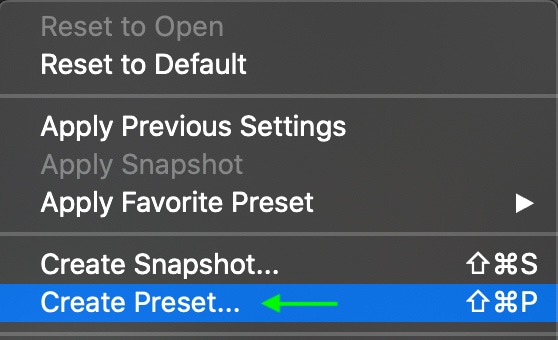
The image will automatically open in Camera Raw, with all the settings used to create the Lightroom preset. Now, you can save the settings as a new preset by heading to the ellipsis icon and selecting Create Preset.

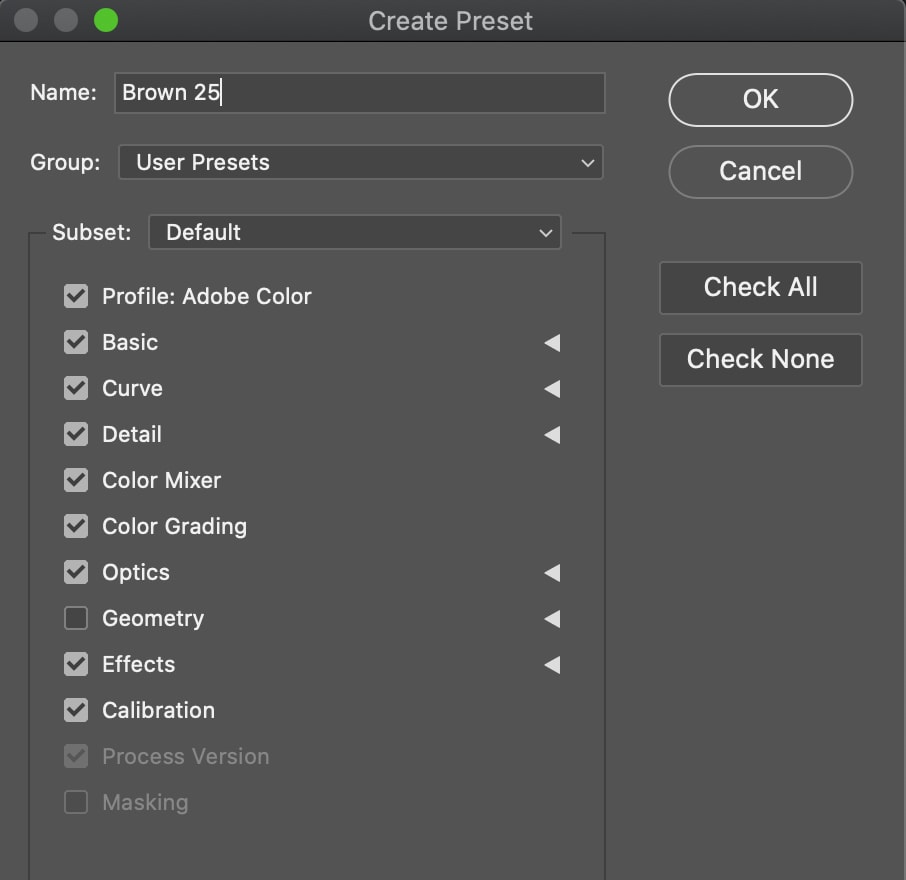
The preset window will appear, and here you can rename the preset to match the original name in Lightroom. You can also choose which settings from the preset you would like to keep. When you’re finished, click OK.
Once you’ve figured out how to take advantage of Camera Raw’s ability to edit images using presets, you’ll find a world of possibilities.
Using presets not only saves time while editing multiple photos in Photoshop but also allows you to play around with the different creative possibilities of each photo. The best part is, the editing doesn’t damage the file, so there’s always room to go back and change the edits. To learn more ways to edit images in Photoshop, check out this 10-step workflow perfect for all skill levels!


