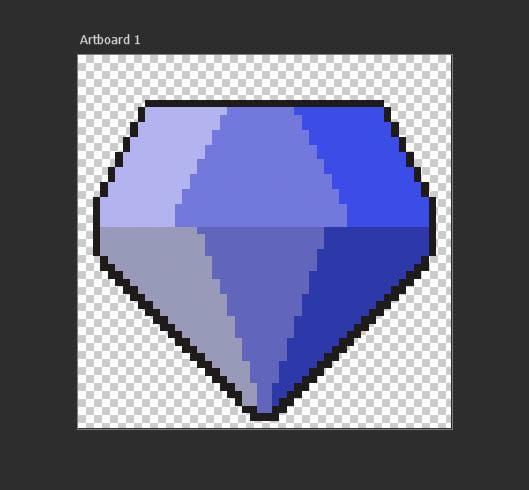
In a gaming landscape filled with HD graphics, 3D headsets, and photo-realistic ray tracing, it’s good to know there are still people out there craving the nostalgic pixel art of the old days. Pixel art that you can make in Photoshop! It takes some setup to get things started, but once you’re ready to go, you’ll create the next Mario Bros. in no time!
Today you will learn the basics and beyond when it comes to creating pixel art. You will learn how to set up your canvas correctly and the best settings for your grid. I’ll explain the importance of changing your image interpolation and setting up your brush and eraser tools for pixel art.
You will get a crash course on forming a three-dimensional look for your art using shadows and highlights. Finally, I’ll show you how to export your final image so that you don’t have to worry about losing that jagged pixel art feel when scaling your image.
Step 1: Create A Transparent Canvas Or Artboard
To ensure your pixel art has that classic blocky feel, consider the number of pixels you will have on your canvas. The more pixels you have on your canvas, the more detail your final piece will have. Depending on the type of pixel art you want to create, this can be a good or bad thing.
A 50 x 50 px or 40 x 40 px sized canvas will allow a good amount of detail if you’re making a character or item. Think about the graphics for a 16-bit gaming console like the Super Nintendo or Sega Genisis. A 20 x 20 px sized canvas or artboart allows less detail, similar to an 8-bit console like the original Nintendo Entertainment System.
I’m going to go with a 50 x 50 px sized canvas. To do this, enter 50 for the Width and 50 for the Height while creating a new document. Make sure to select Pixels under the Drop Down Menu as well.
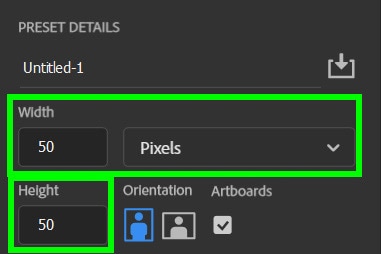
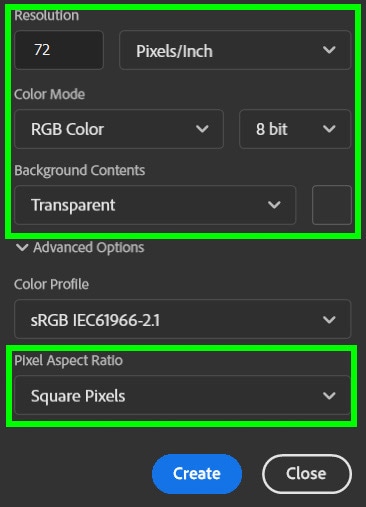
For the rest of the options:
- Bring the Resolution down to 72. It’s important that your resolution is low to keep your pixel density low.
- Keep your Color Mode at RGB Color and 8 Bit.
- The Background Contents should be Transparent. This is important for exporting your pixel art later.
- It’s important to ensure your Pixel Aspect Ratio is set to Square Pixels.
When you’re done selecting your options, click Create.
Your canvas is now created, and the first thing you will notice is that you can barely see it.
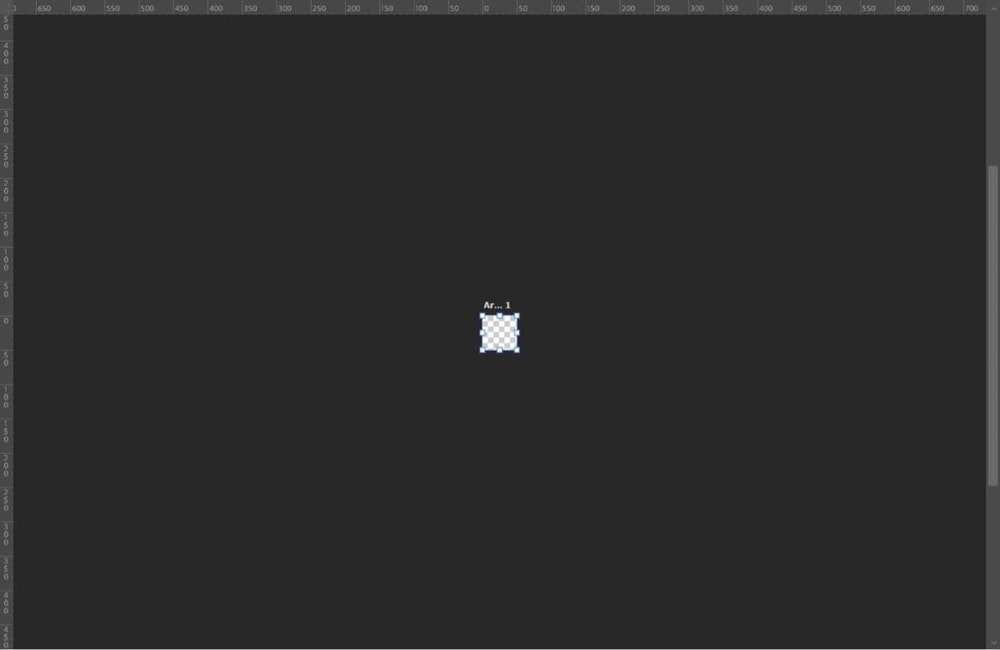
You created a very small canvas, so this is normal. You can zoom in and out by pressing Control + “+” and Control + – (Win) or Command + “+” and Command + – (Mac).
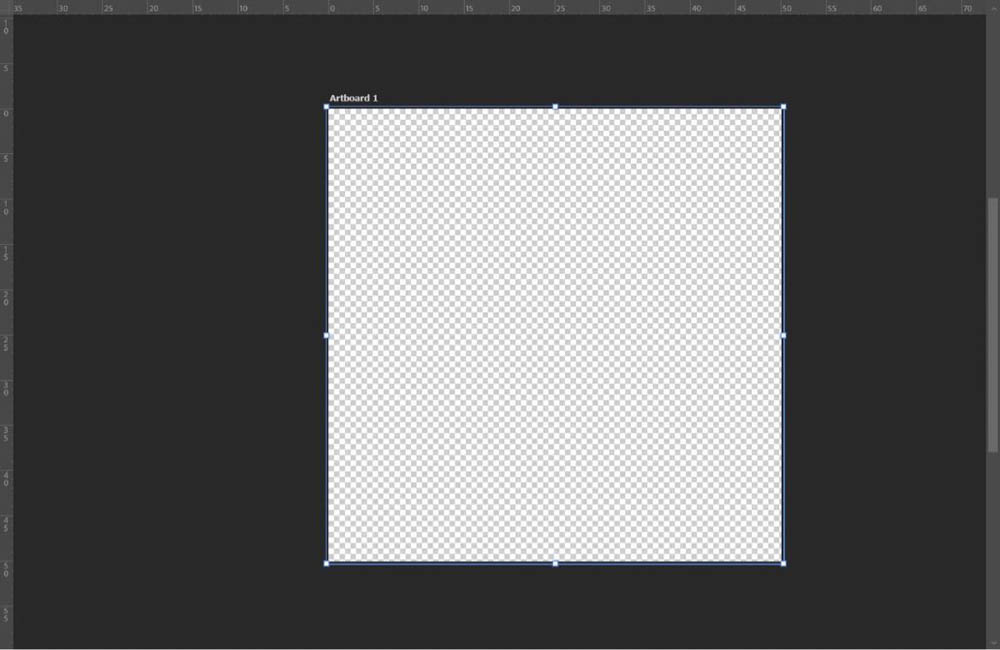
To finish setting up your canvas, you need to add a background to make it easier to see your art. You also need to ensure you can easily turn the background off when exporting your image later.
First, add a new layer by clicking on the New Layer Button in the Layers panel.
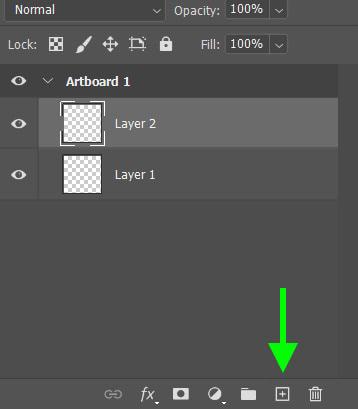
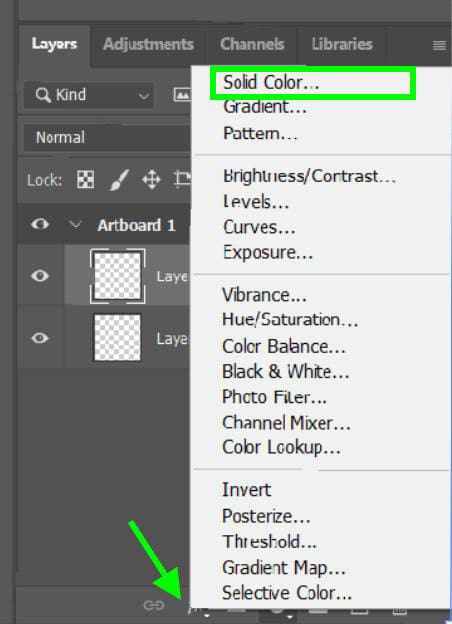
With the new layer selected, click on the Adjustment Layer icon and select Solid Color.
You can select any color you want for your background. White is a good baseline color, making it easy to spot any mistakes. When you’ve selected your color, click OK.
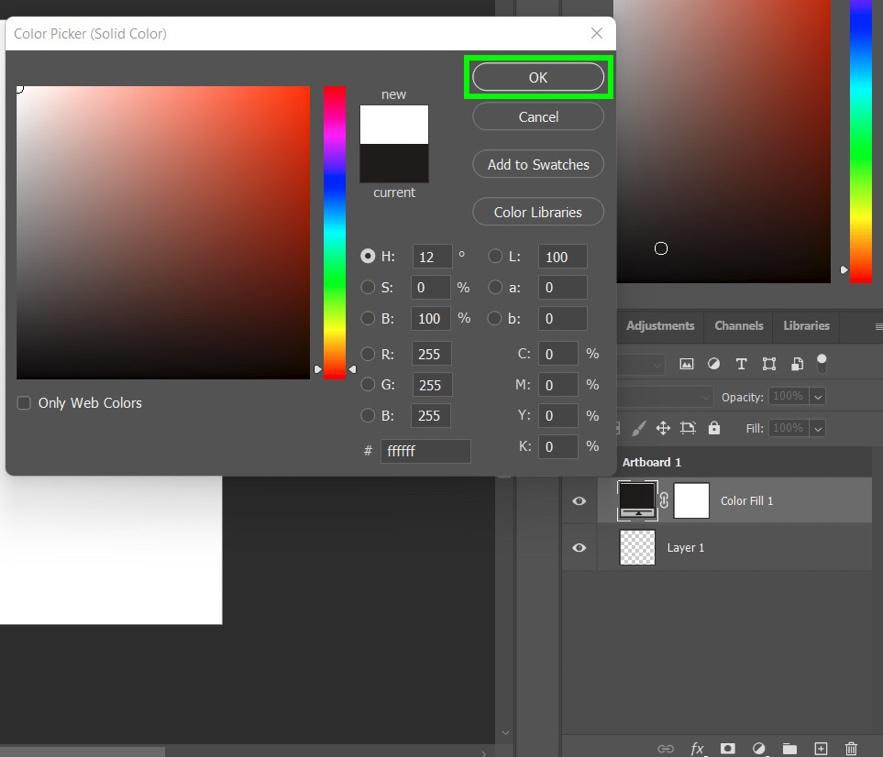
Move the new layer below your original layer, and you now have a background that you can turn off later before exporting.
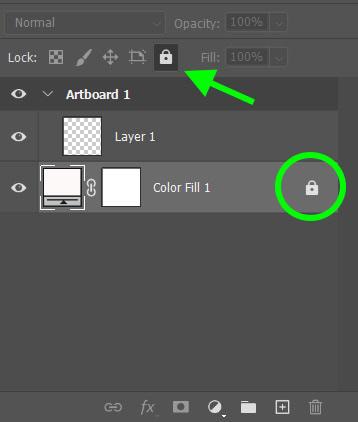
Make sure not to draw at all on this layer. To ensure you don’t accidentally draw on it, click the Lock Button above the layer. A Lock icon will pop up to show that it’s locked.
Step 2: Add A 1×1 Grid Layout To The Canvas
Your life as a pixel art artist will be much easier with a grid. This art form demands accuracy with every pixel, so showing the grid is essential.
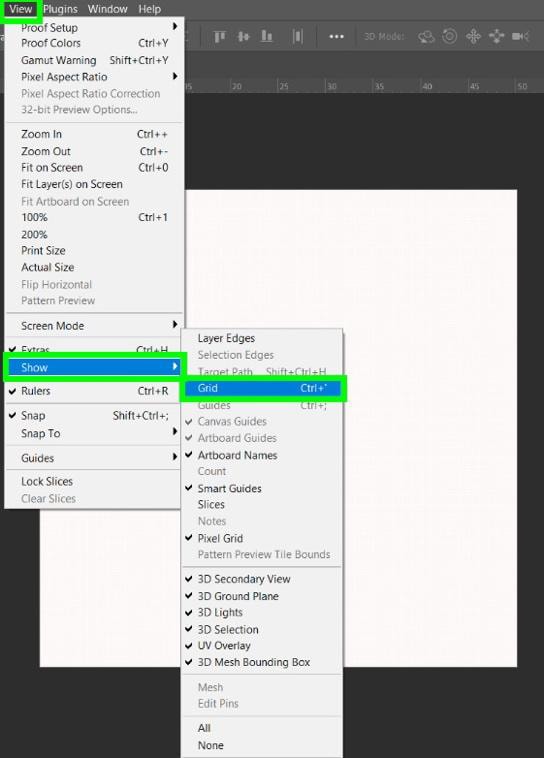
First, make sure the grid is visible by going to View > Show > Grid.
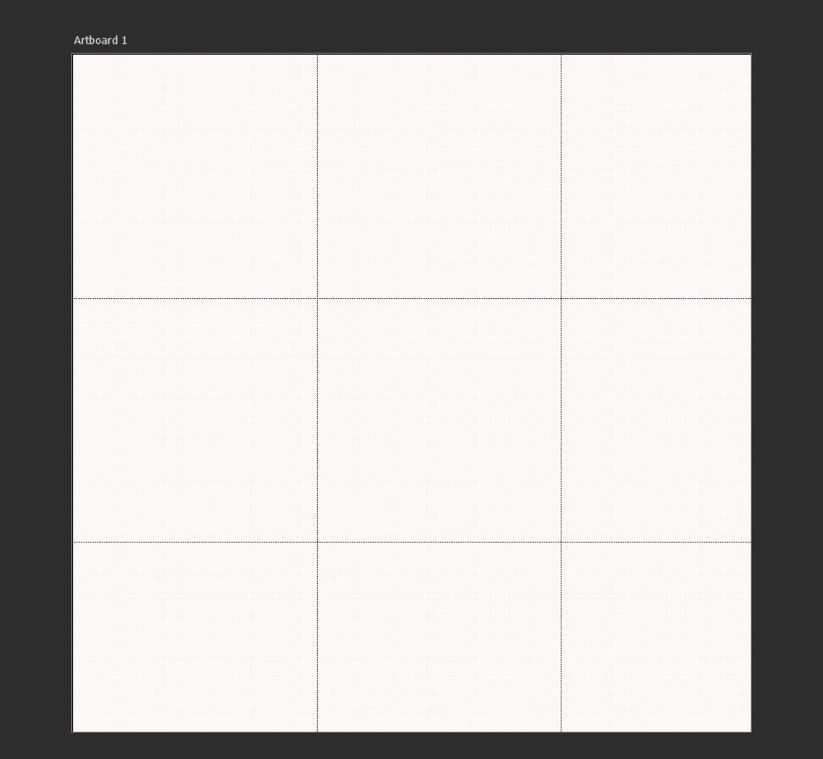
The grid size will most likely be too big for pixel art at first, but now it’s time to go into the grid’s settings.
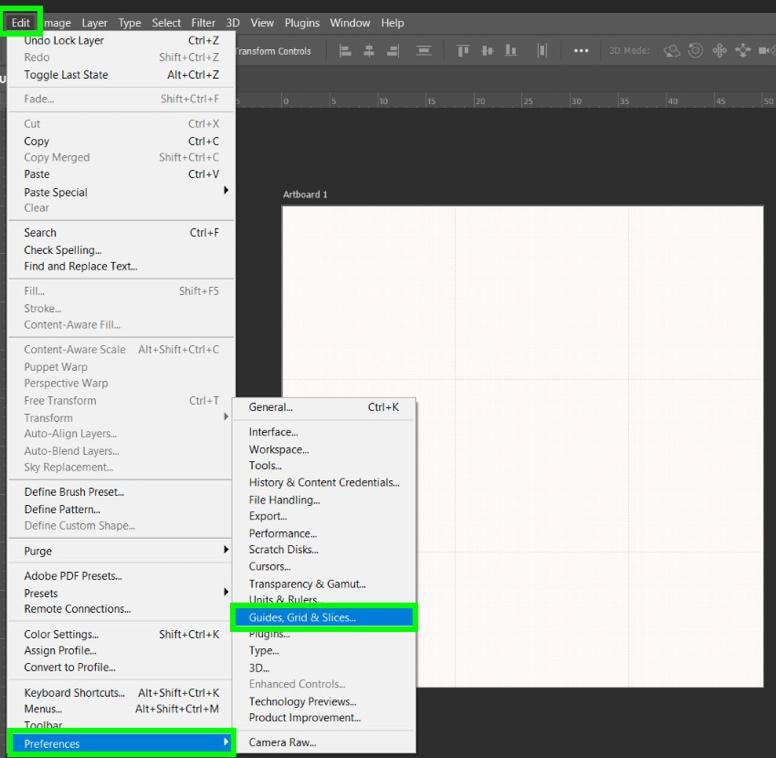
Go to Edit > Perferences > Guides, Grid & Slices.
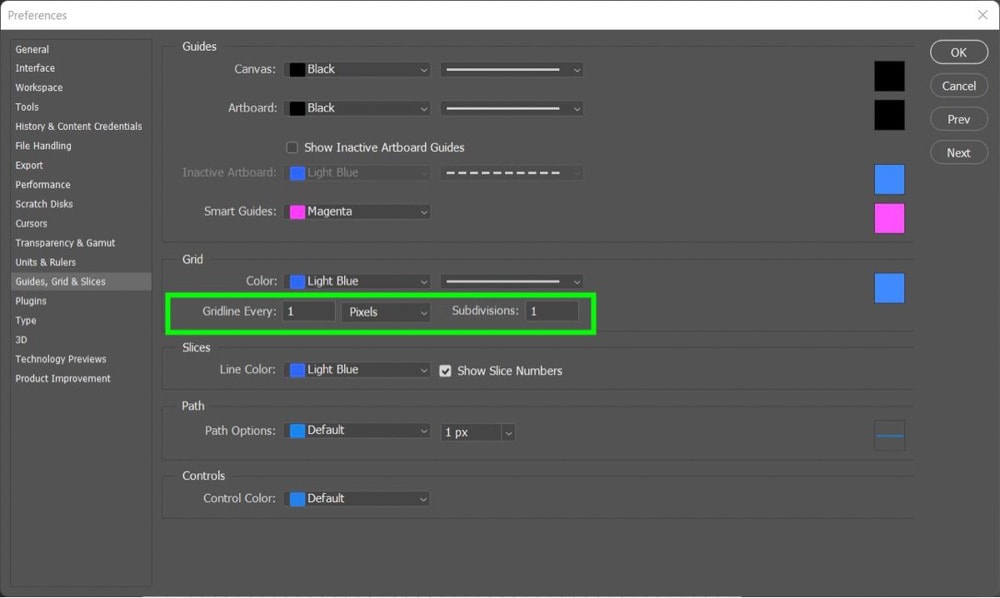
The options you need to change are in the middle of the settings.
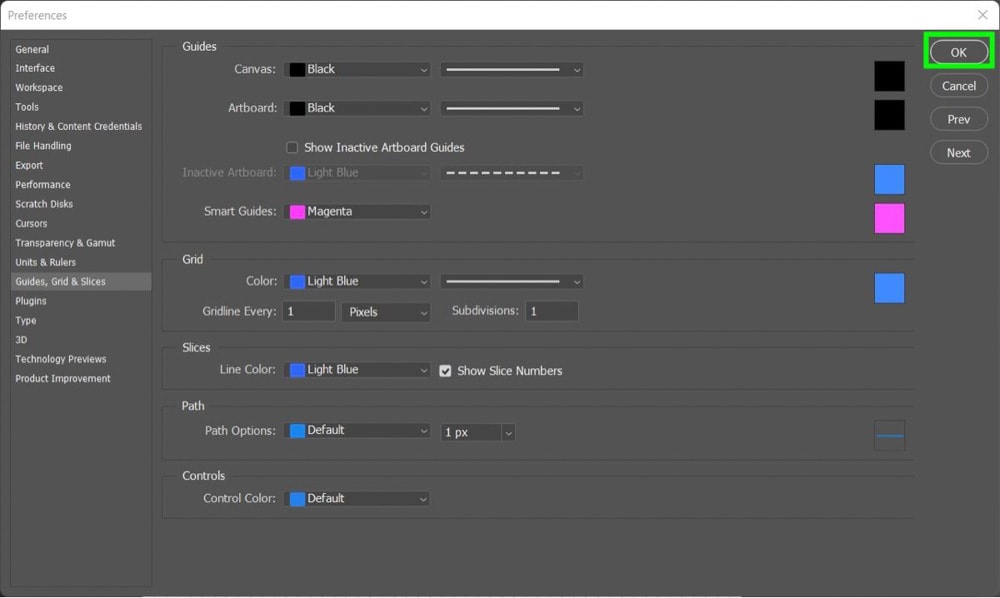
For Gridline Every, make sure you have 1 with Pixels selected under the Drop Down Menu and for Subdivisions, type in 1.
After you change the size of your grid, consider changing the color of your grid as well. This is optional, but there’s a Drop Down Menu with plenty of color options to make your grid easier to see depending on the project you’re creating.
If the colors under the Drop Down Menu don’t work for you, you can pick your custom color by clicking the Grid Color Picker. Hit OK when you’ve selected your color.
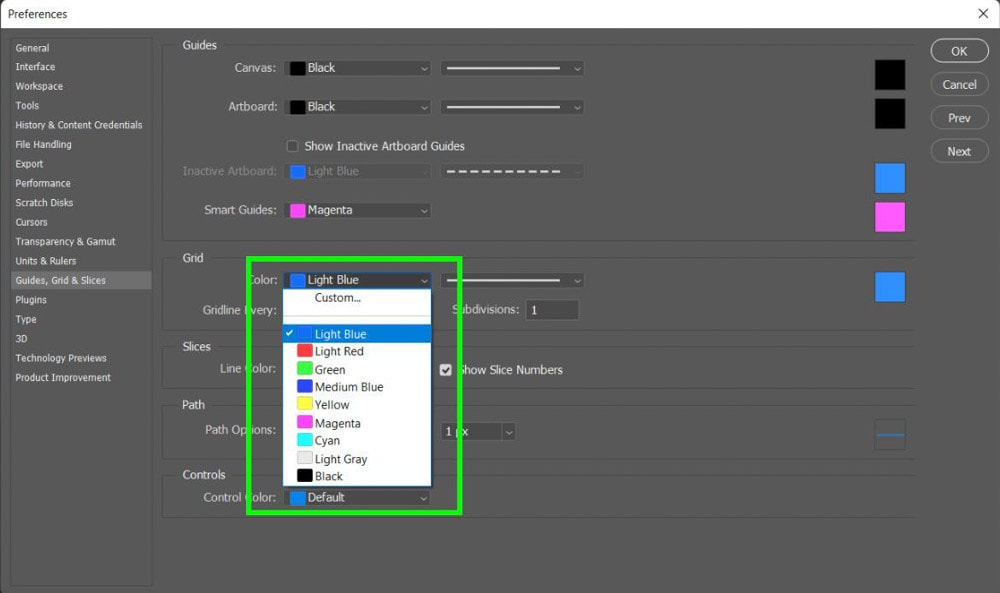
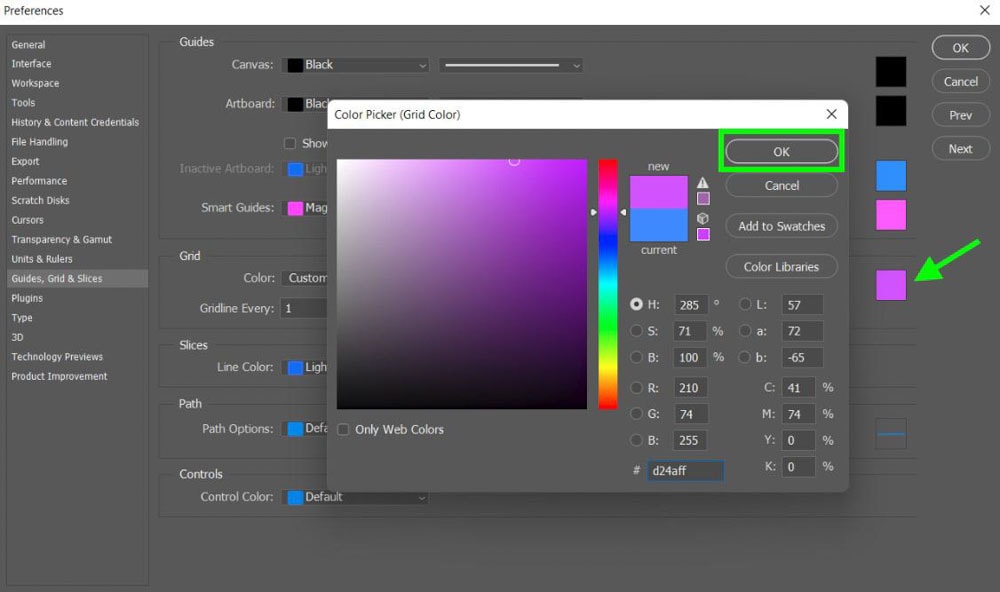
When you’ve selected all your options, click OK to apply them to your grid. You will now have a grid that’s made for pixel art.
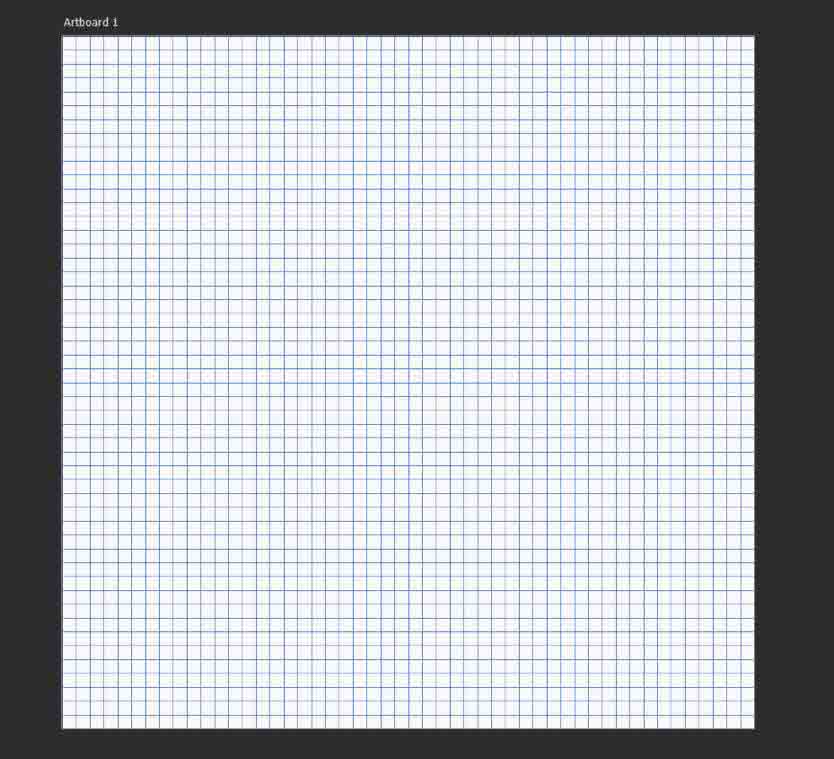
If you feel the grid is in your way at any point, you can turn it off by pressing Control + ‘ (Win) or Command + ‘ (Mac).
Step 3: Set The Image Interpolation To “Nearest Neighbor”
The entire point of creating pixel art is maintaining that jagged edge look to your final image, no matter how much you scale that image. Your goal needs to be to preserve the hard edges of your work and not smooth out any of your pixels.
To do this, first, go to Edit > Preferences > General. Or press Control + K (Win) or Command + K (Mac).
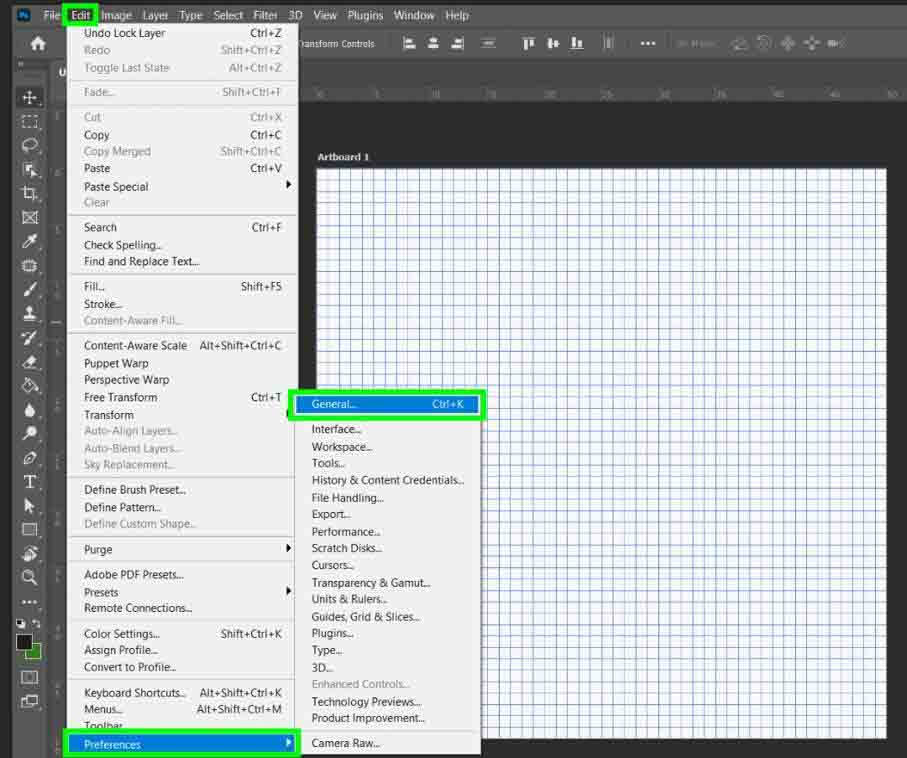
Set the Image Interpolation to Nearest Neighbor (Preserve Hard Edges). Then click OK.
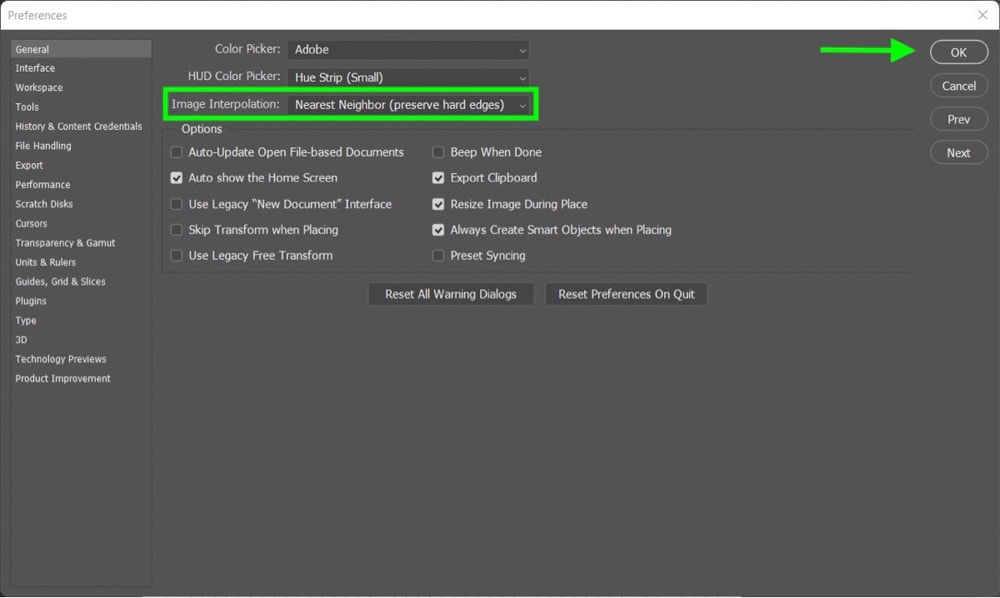
This may seem like a small step, but it’s not. Forgetting this will lead to blurry pixel art later if you need to resize your image.
Step 4: Set The Pencil And Eraser Size To 1px
The final thing you need to do before you can start your painting is to set up the brush you’re going to use and your eraser.
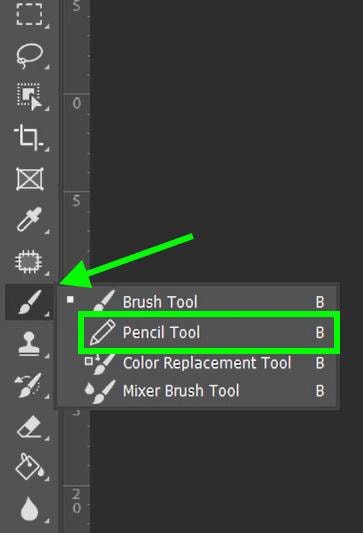
In the Toolbar, find the Brush Tool. Click and hold on to the Brush Tool until the sub-menu pops up, then choose the Pencil Tool.
As long as the Pencil Tool icon is visible in your Toolbar, you can press B to select it.

With your Pencil Tool selected, click on the Brush Size Drop Down Menu to bring up your options. The goal is to create a brush capable of painting on a single 1 x 1 pixel square at a time. You’ll do that by modifying one of Photoshop’s preset brushes.
The best baseline brush to modify is the Hard Round Brush. To find it quickly, type in “Hard Round” in the Search Bar, and it should be the first one that pops up.
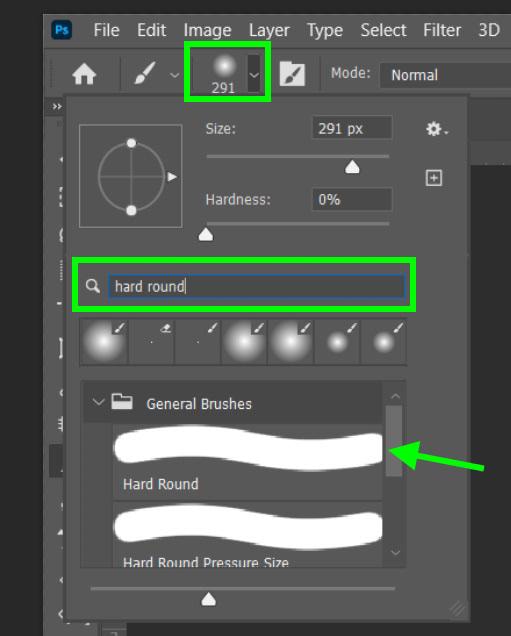
After you’ve selected the Hard Round Brush, bring the Size down to 1 px and make sure the Hardness is at 100%. This is the exact brush you need for pixel art.
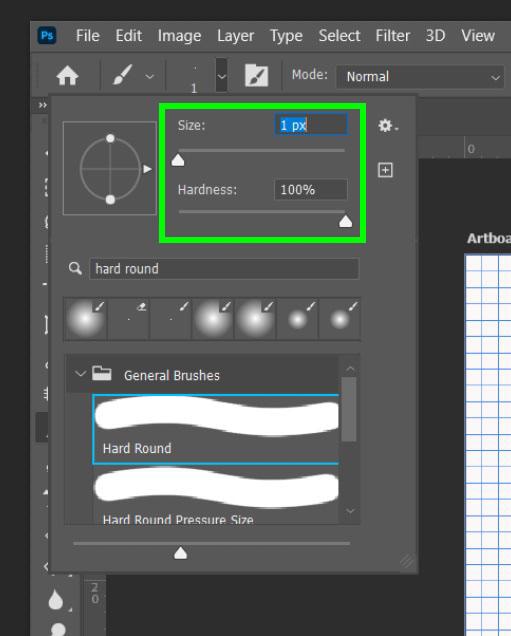
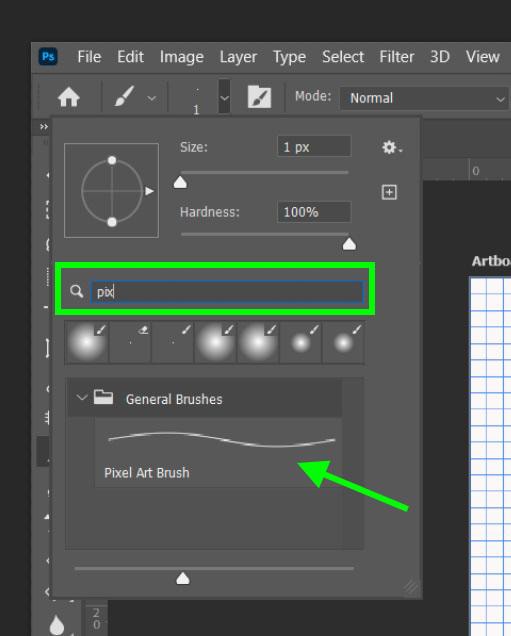
To make things easier for future projects, you can save this brush as a preset by clicking the Plus Button in the Brush Options Menu. Enter a unique name for your brush, ensure Include Tool Settings is checked, and hit OK when you’re finished.

Next time you need your Pixel Art Brush, you can type in the first few letters in the Search Bar and find it immediately.
Now that your brush is set up, you just need to set up your eraser. Click on the Eraser Tool (E) in the Toolbar.
In the Options Bar, set your eraser to Pencil and your Opacity to 100%. This will ensure that your eraser can delete a single 1 x 1 pixel with one click.


Step 5: Draw An Outline For Your Art Piece
Now you’re ready to make some art. Click once anywhere on your canvas to drop a single pixel.
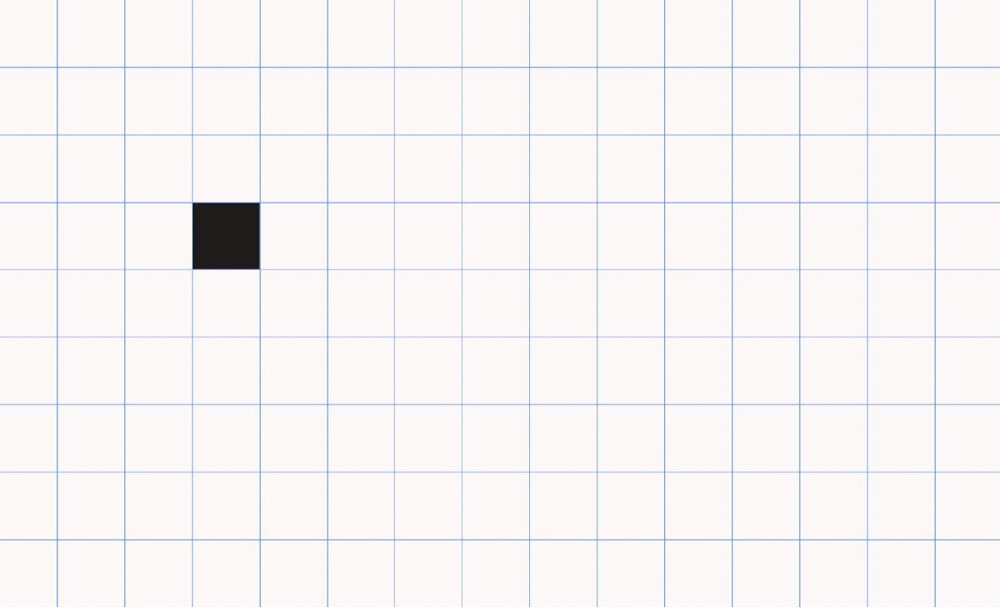
If you want to make a straight line, hold the Shift Key, then click and drag to where you want your line to end.
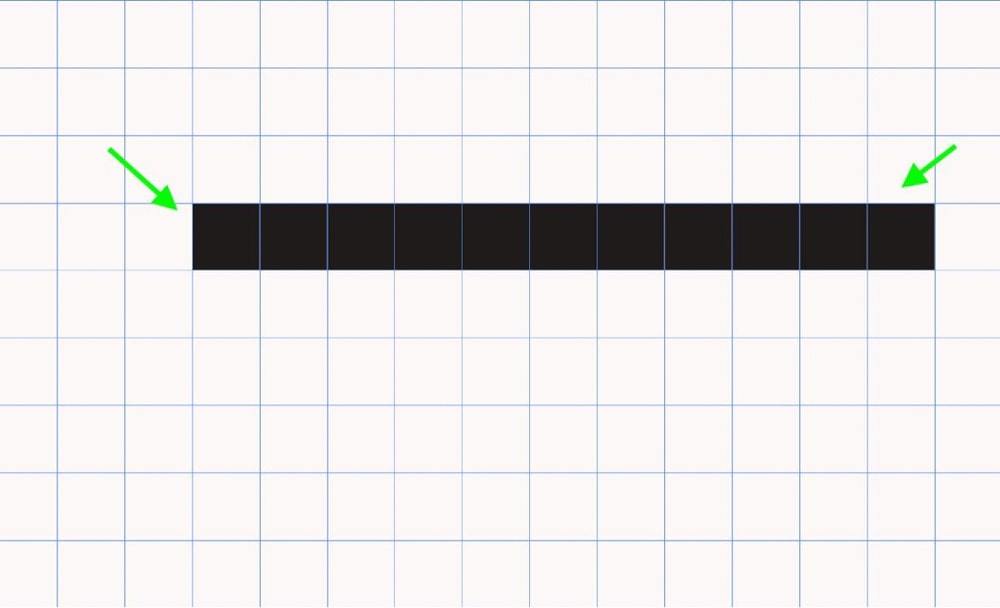
Another thing to remember is that all of Photoshop’s powerful tools are still at your disposal. For example, let’s say you know you need a line that’s 30 pixels long. You can make a line 10 pixels long, grab the Lasso Tool (L ), and select your entire line.

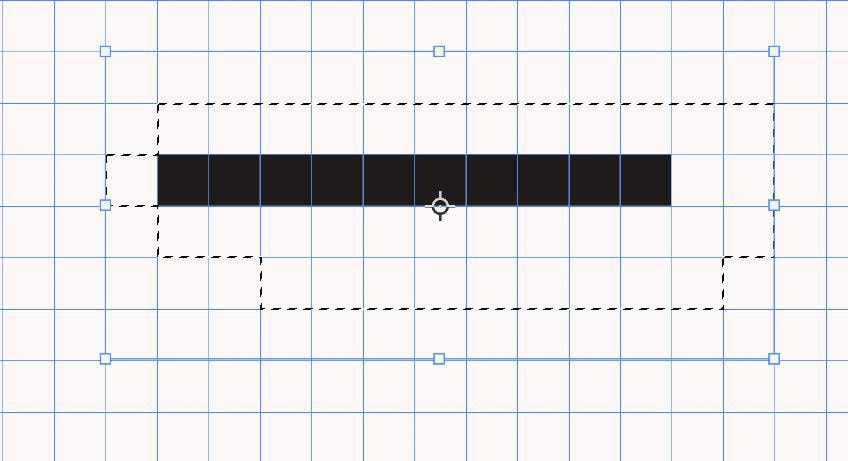
Next, grab the Move Tool (V) and click on your selection while holding Alt (Win) or Option (Mac) to duplicate it. Place the duplicated line next to the original, duplicate the 10 pixels again, and place it at the end.

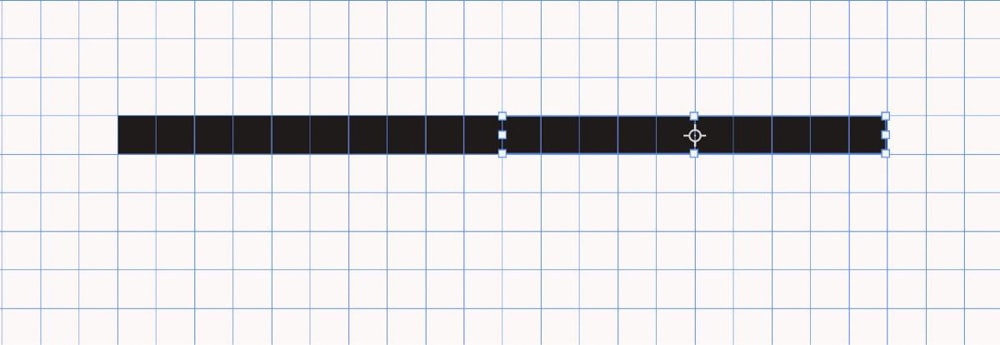
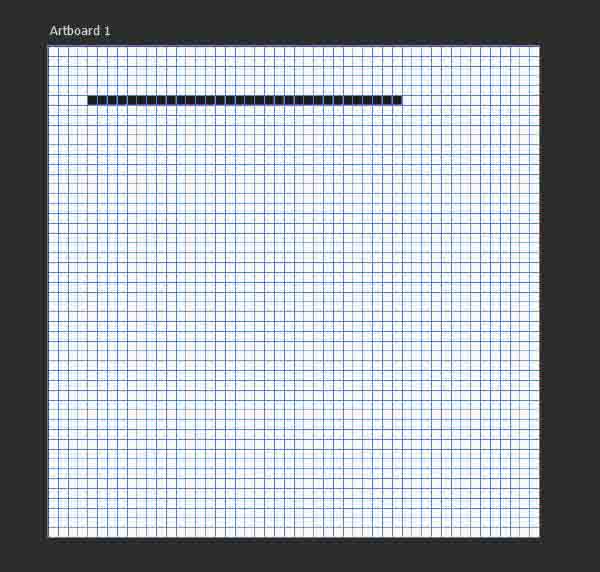
You can also move the line to the center of the canvas. But don’t forget to press Control + D (Win) or Command + D (Mac) to deselect your selection when you’re done.
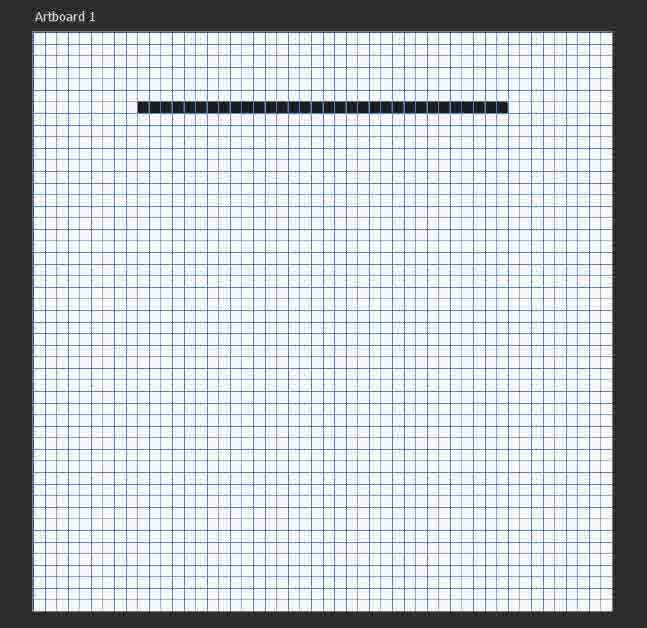
If you add too many blocks while creating your outline, use Control + Z (Win) or Command + Z (Mac) to undo any recent blocks you laid down. Use the Eraser Tool you set up earlier to erase multiple blocks or when the undo shortcut is no longer an option.
Use these best practices to form the outline of your pixel art while using the grid to help guide you.
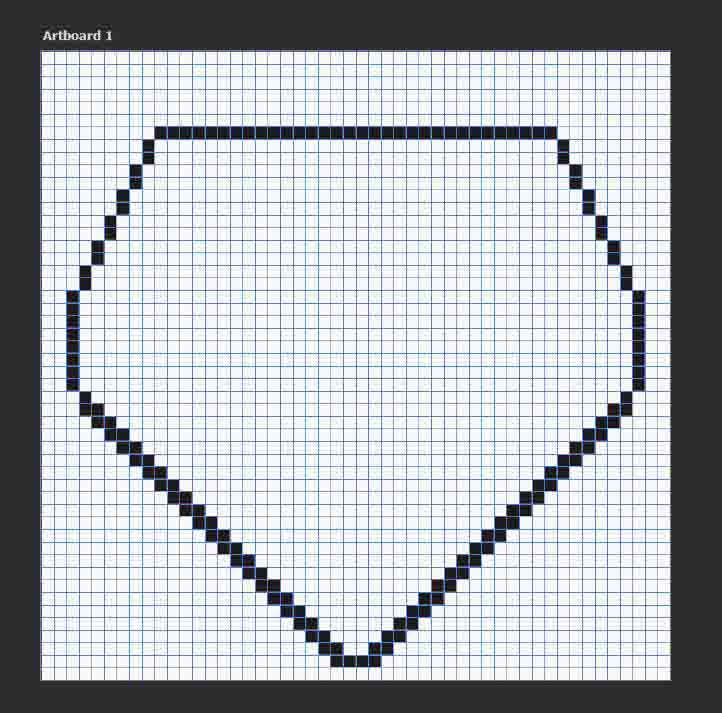
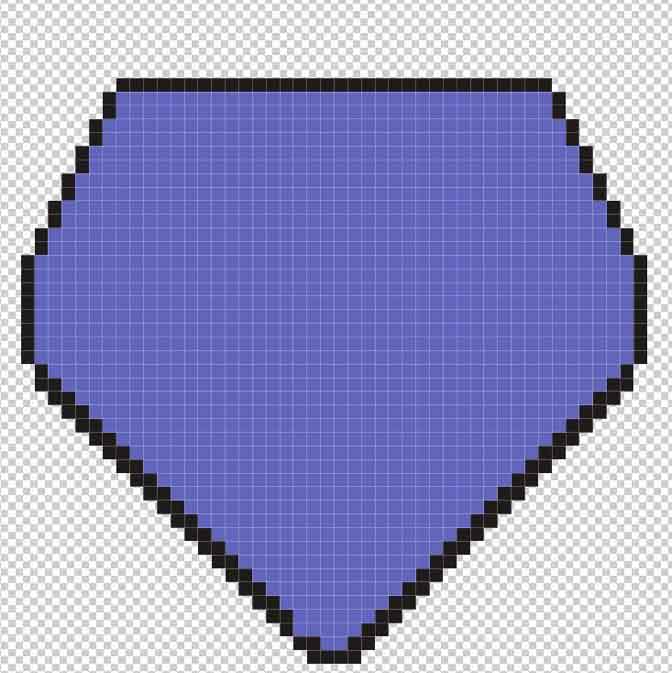
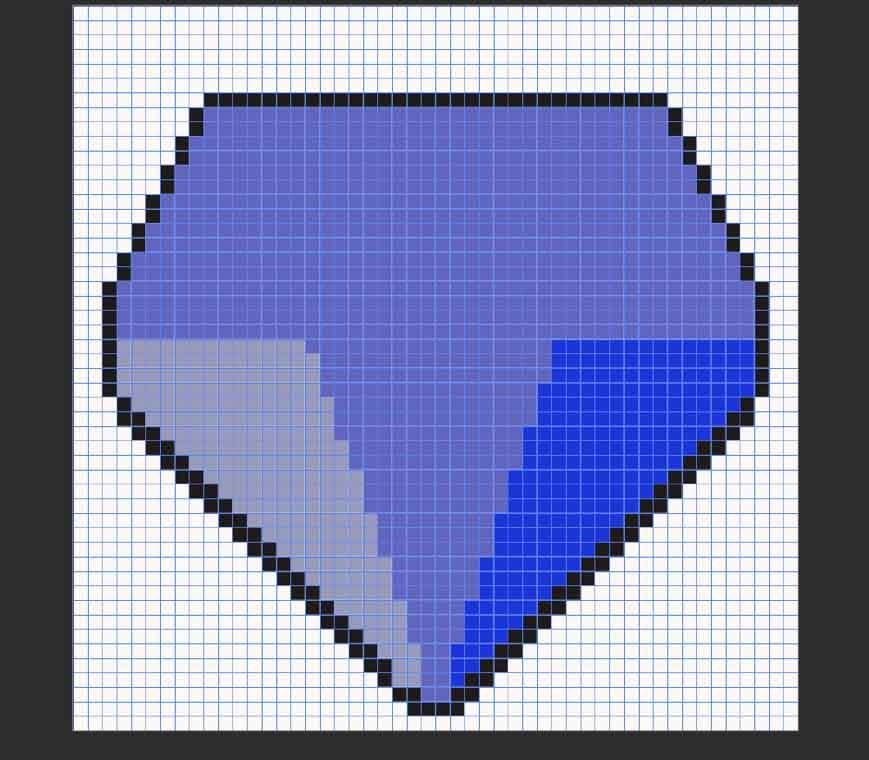
Step 6: Add A Base Color Using The Paint Bucket Tool (G)
Next up, you should fill in the base color(s) of your pixel art. Stay calm because you don’t need to fill in large areas one pixel at a time!
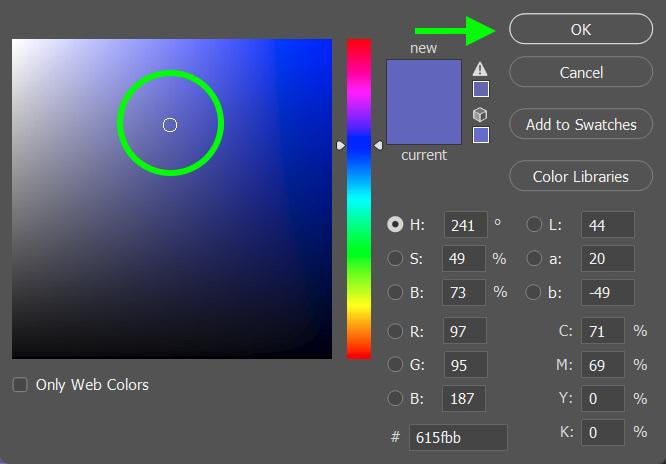
First, pick out your base color. Double-click the Foreground Color Picker and pick a color that’s toward the middle of the Color Picker. Hit OK when you’re done.
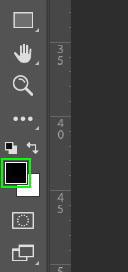
With your foreground color set, click on the Paint Bucket Tool (G). In the Options Bar, make sure Anti-alias is checked off. This will ensure that no random pixels will spill out when using the paint bucket.


To fill in a large area, simply click on the area with the Paint Bucket Tool.
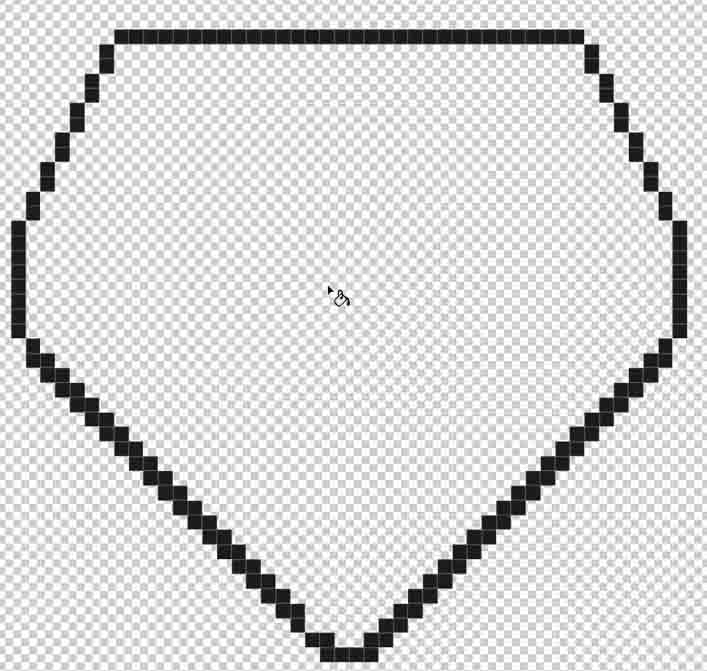
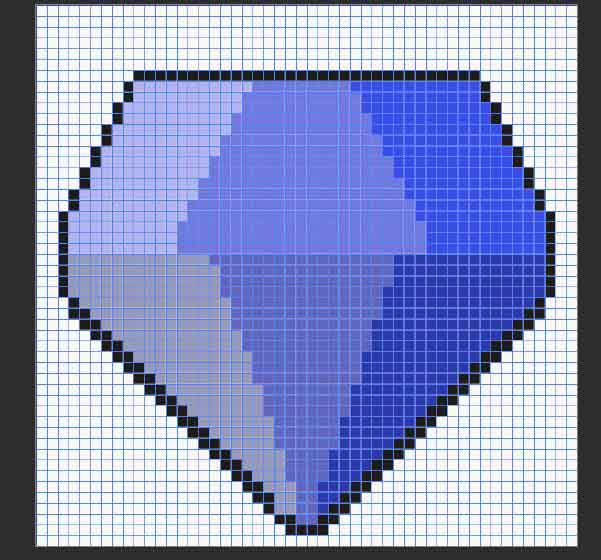
Step 7: Add Shadows And Highlights With The Pencil Tool (B)
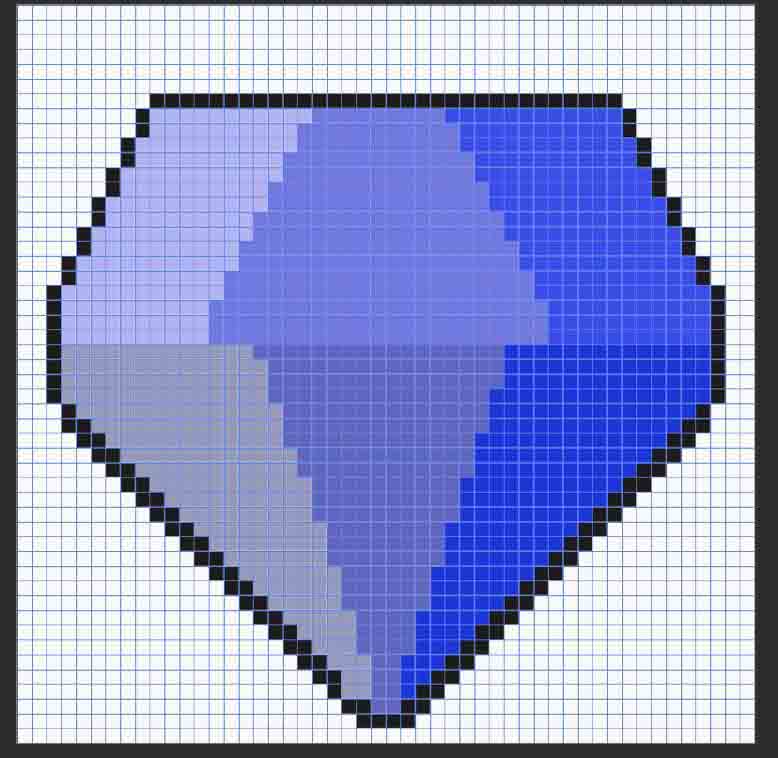
Just like any art, the key to a three-dimensional effect is in the shadows and highlights.
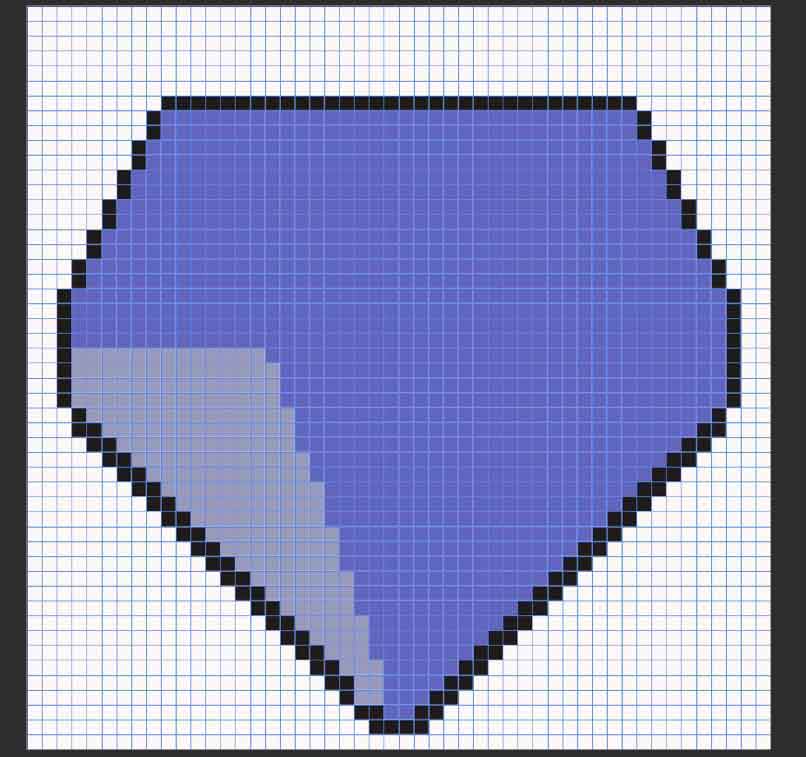
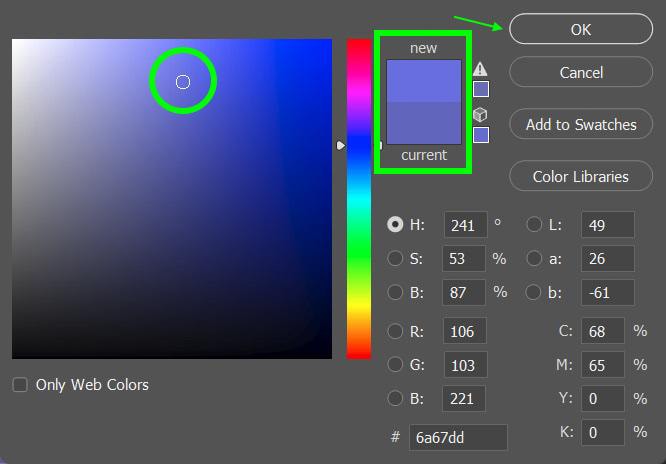
To add a highlight color, double-click your Foreground Color and use your Color Picker to find a color lighter than your base color. You will find the lighter colors on the left-hand side of the Color Picker.

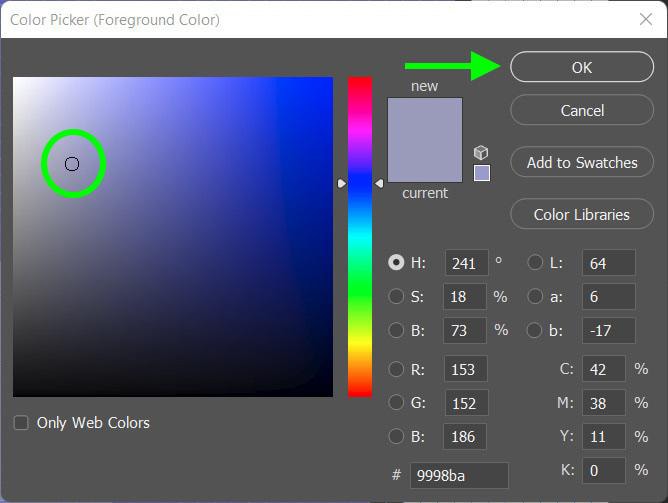
Select the Pencil Tool (B) and click on the blocks where you want to add the highlights to your art. To clarify, you are painting over the base color pixels with your new highlight color. Don’t use the Paint Bucket Tool, as this will paint over too many pixels.
The Pencil Tool is the exact precision you need here. To make it easier, adjust the size of the tool temporarily with [ and ] to cover more ground. Make sure to bring the Pencil Tool back down to 1 px when you need to be precise.
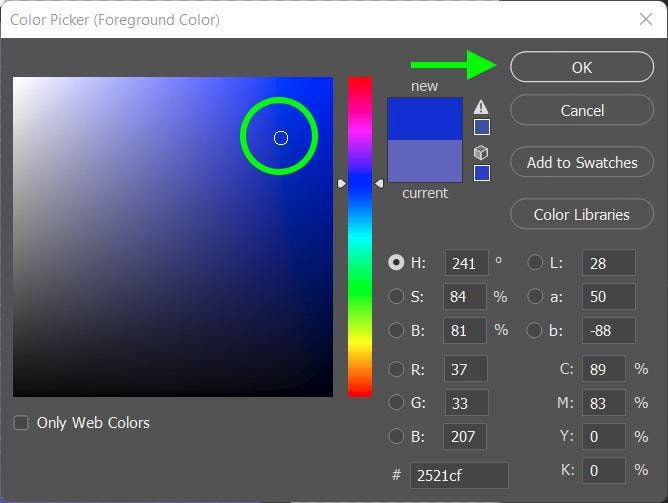
For Shadows, choose a color that is darker than your base color. These colors will be on the right-hand side of the Color Picker. Paint the shadows on the canvas using the Pencil Tool (B).
Use [ and ] to resize your Pencil Tool to cover more ground. Bringing it back down to 1 px, to be precise.
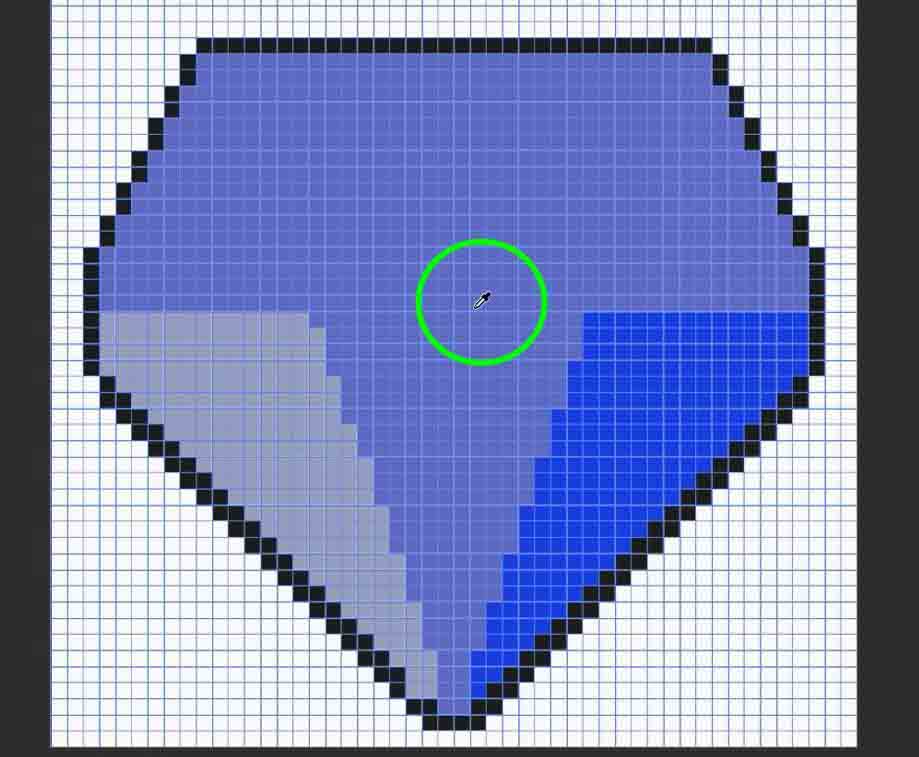
If you have trouble remembering your base color, you can always grab the Eyedropper Tool (I) and sample the area where your base color is.


When deciding on your highlight and shadow colors, you can use the Preview Window as a guide.
Step 8: Correct Any Colors On Your Design
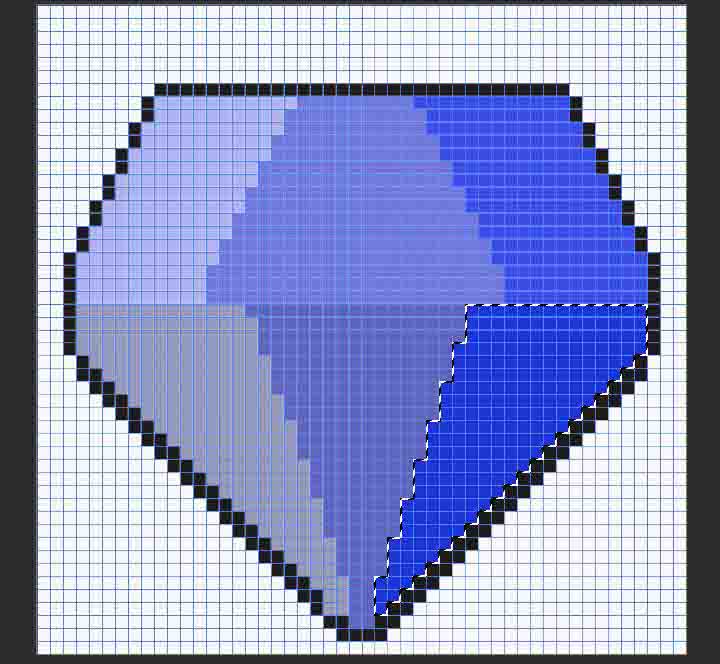
Once you’re done painting your shadows and highlights, you may notice a flaw or two. This can be fixed quickly with the aid of the Magic Wand Tool.
First, select the Magic Wand Tool (W) and in the Options Bar, set your sample size to Point Sample, your Tolerance to 0, and uncheck Anti-alias. This way, when you click on a color with the Magic Wand, you will only select that shade and that shade alone.
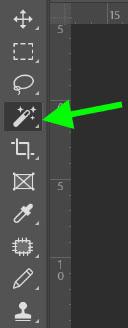

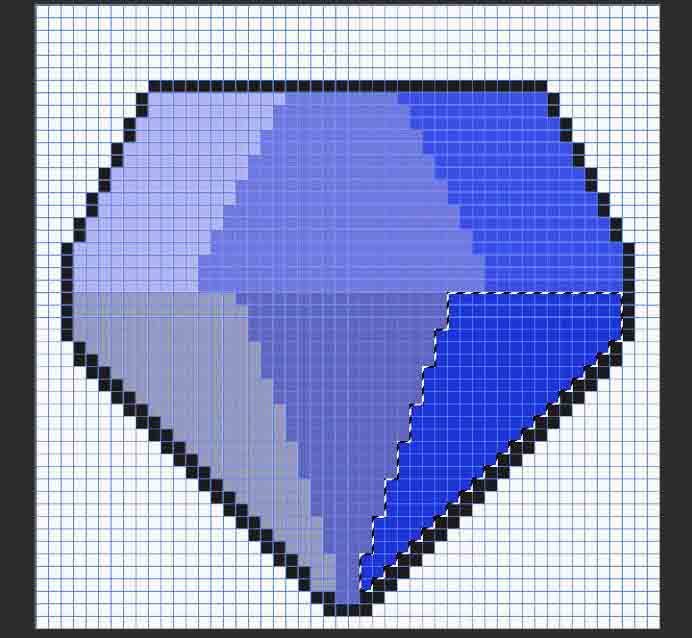
After you select your problem area, pick out your new color in the Foreground Color Picker and select the Brush Tool (B). Change the size of your brush to something that will cover the entire area you selected. Then, paint over your selected area with the new color.
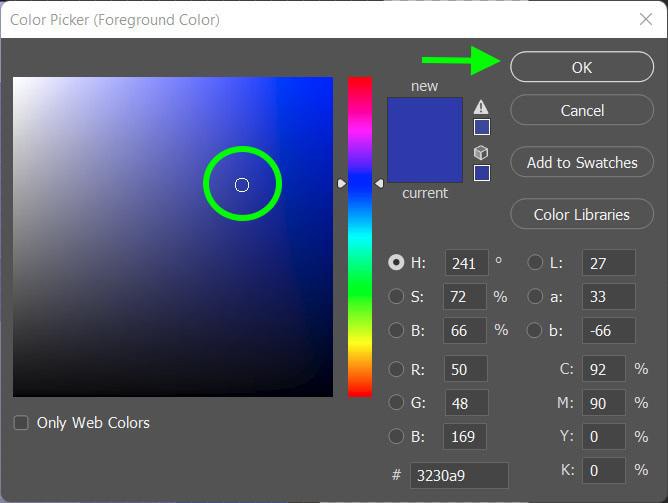
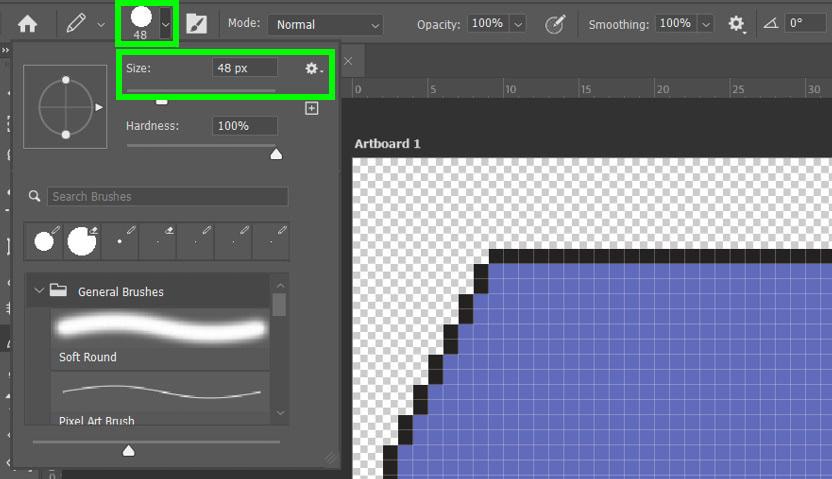
Step 9: Export Your Pixel Art As A PNG
Your pixel art masterpiece is now ready to go. Before you export it, though, there are a few small steps to remember.
Turn off the grid by pressing Control + ‘ (Win) or Command + ‘ (Mac). This way, you can see your image better, and doing this prevents any new documents you open with Photoshop from displaying the grid.
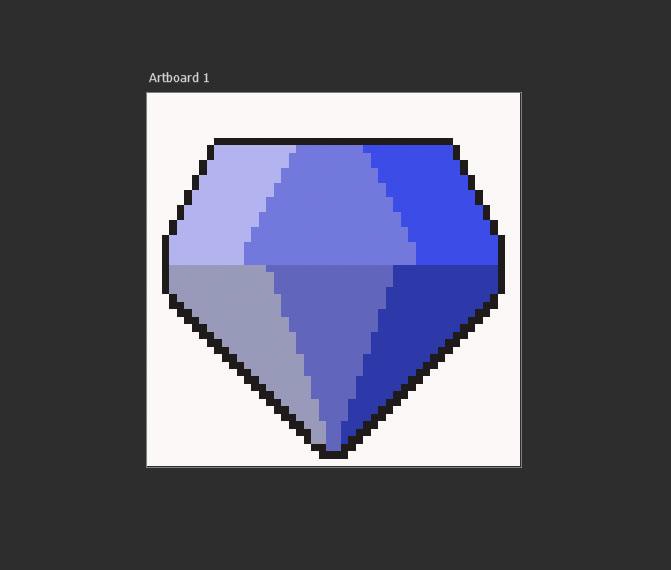
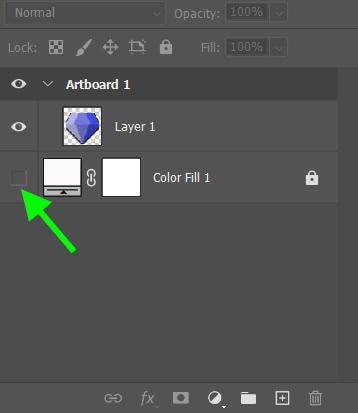
Also, don’t forget to turn off your background. Click on the Eye icon next to your background layer in the Layers panel to turn it off.
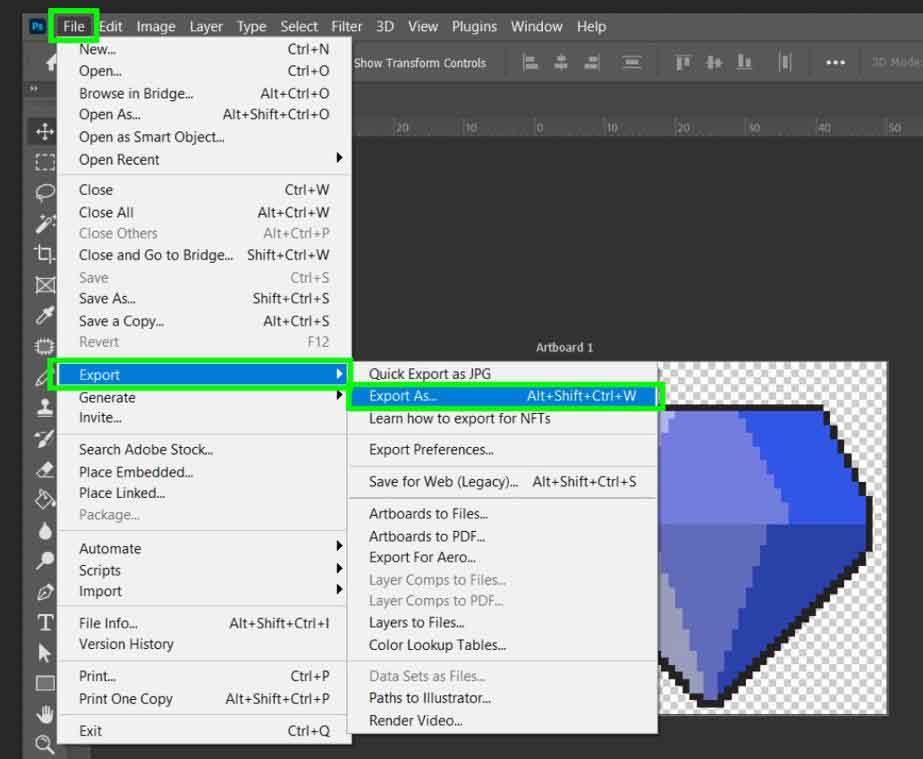
Now you’re ready to export. Go to File > Export > Export As.
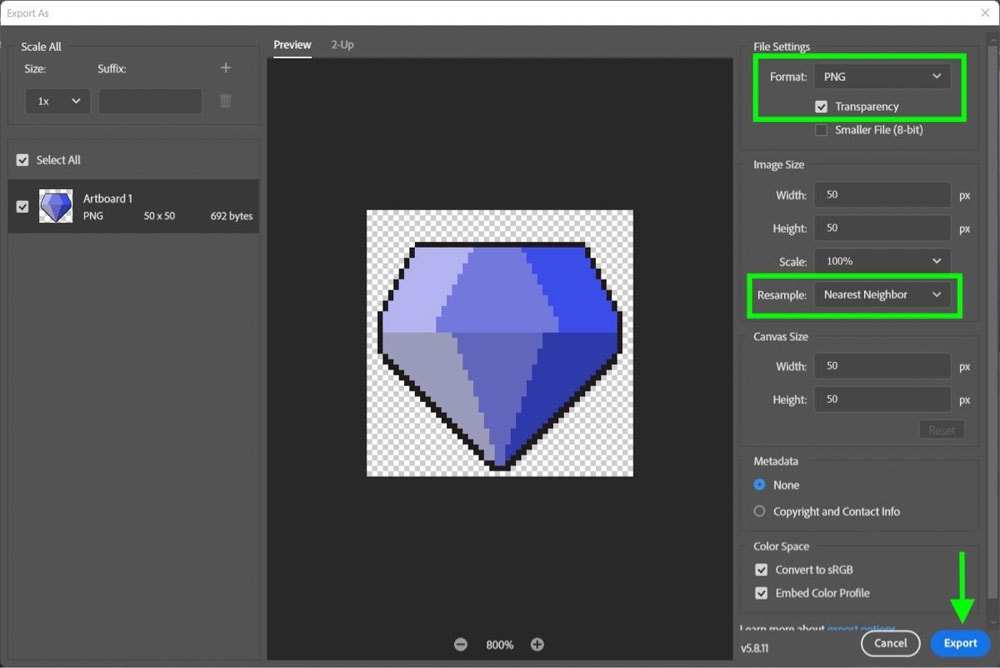
The settings you choose here are essential and specific for pixel art.
You want to be able to preserve your transparent background, so make sure not to save your file as a JPG or any similar format. Save your pixel art as a PNG. Make certain Transparency is checked as well.
You also want to preserve the jagged edges, so under Resample, choose Nearest Neighbor. You did this before you started painting, but this is to ensure no problems occur here.
When you’re done, click Export to download your file to your computer.
That’s it!
You have now created a piece of pixel art gold that any old-school gamer would applaud.
When you add your art to a new project, you’ll notice that it is quite small. Luckily you can scale it relatively easily without losing quality since it is a PNG file. However, if you’re unfamiliar with scaling images and layers in Photoshop, I explain the whole process here.


