
When creating a layout design using text, images, and other elements, a neat trick to learn is placing text behind an image in Photoshop. This technique is often used on magazine covers, but you can use this eye-catching technique for almost any type of layout you’re designing.
Once you have completed the simple steps to place the text behind an object or the subject of the photo, you don’t need to repeat the steps when adding more text. There is a way to save time when adding additional text to the layout without re-doing the entire process, which I will detail in the last section.
Follow along with your own photo to complete this layout technique.
How To Place Text Behind An Object In Photoshop
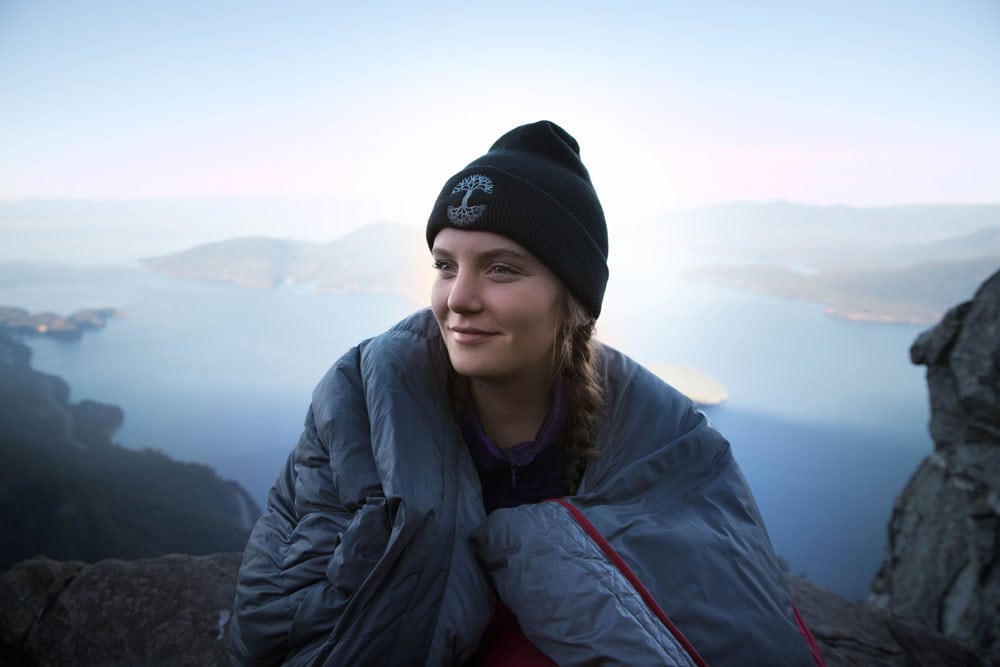
Before you begin the process, you must open your photo in Photoshop. You can complete this effect on an image or the layout document if you have started a design. I will show you the technique on this image I have open in Photoshop.
Step 1: Add Text Onto The Image
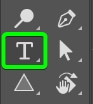
Once your image is open, add text to the document by selecting the Type Tool from the Toolbar or pressing T.
Click and drag to add a text box to the canvas, and type in the text you want to place behind parts of your image.

Step 2: Format The Text And Add Effects
While you won’t need to rasterize the text and will be able to edit it throughout the process, it’s still a good idea to format your text at this stage. You can use the settings in the Options Bar to select a font, weight, and color and set the text size.
When you partially cover text with parts of an image, it’s a good idea to use a bold font so that people can still read the text. There are plenty of free fonts you can use in Photoshop. I am using Franklin Gothic Demi at a size of 377 points to fit the image.

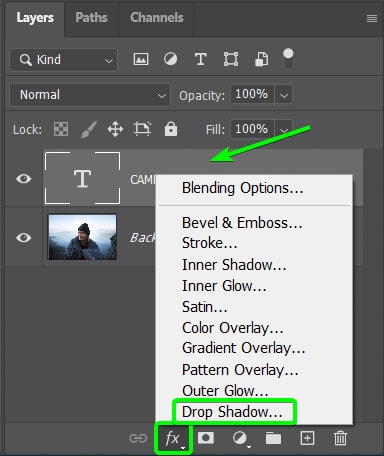
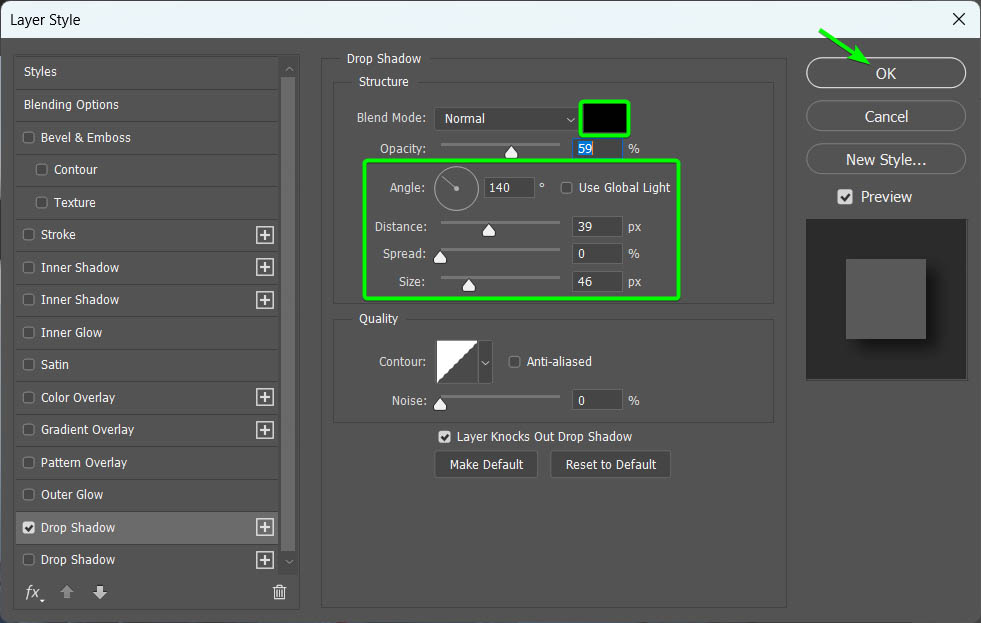
To further enhance the text, you can add various Layer Styles to make it stand out. A Drop Shadow is one of my favorite quick and easy effects to add.
To add a drop-shadow, select the text layer in the Layers Panel, then click on the Add a Layer Style icon and choose Drop Shadow.
Next, adjust the settings to create a drop shadow that works for your layout. Focus on the Color, Angle, Distance, Spread, and Size settings. Click OK once you have adjusted the settings to apply the effect.
Add any other effects you want to complete the text. I am happy with the drop shadow and changing the text color to white.
Step 3: Select The Subject Using The Select Subject Function
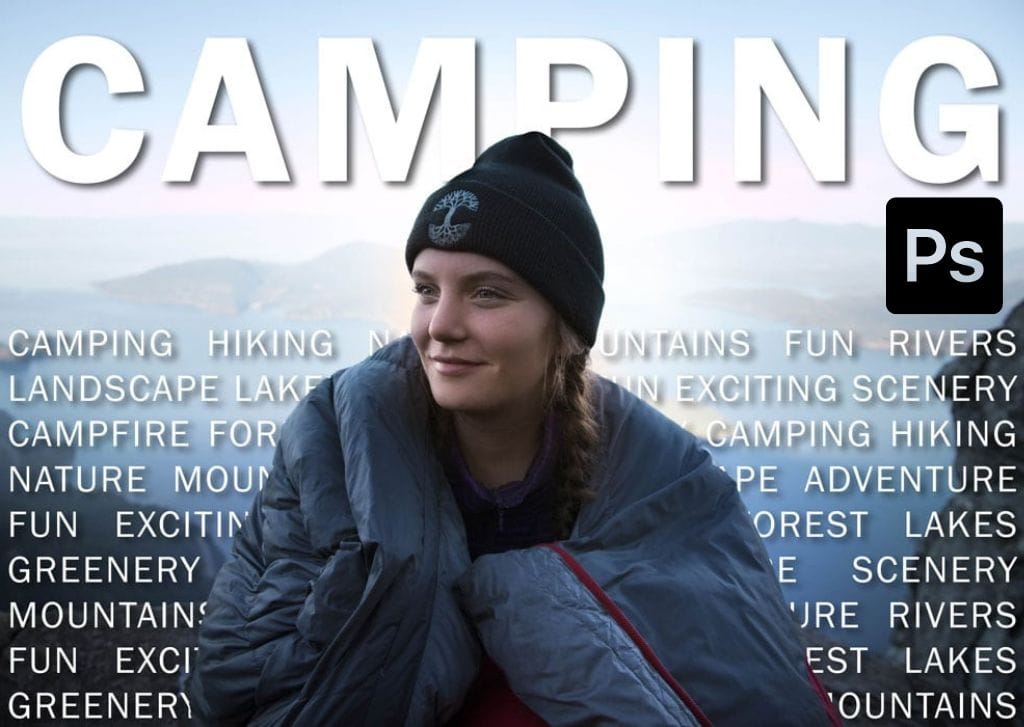
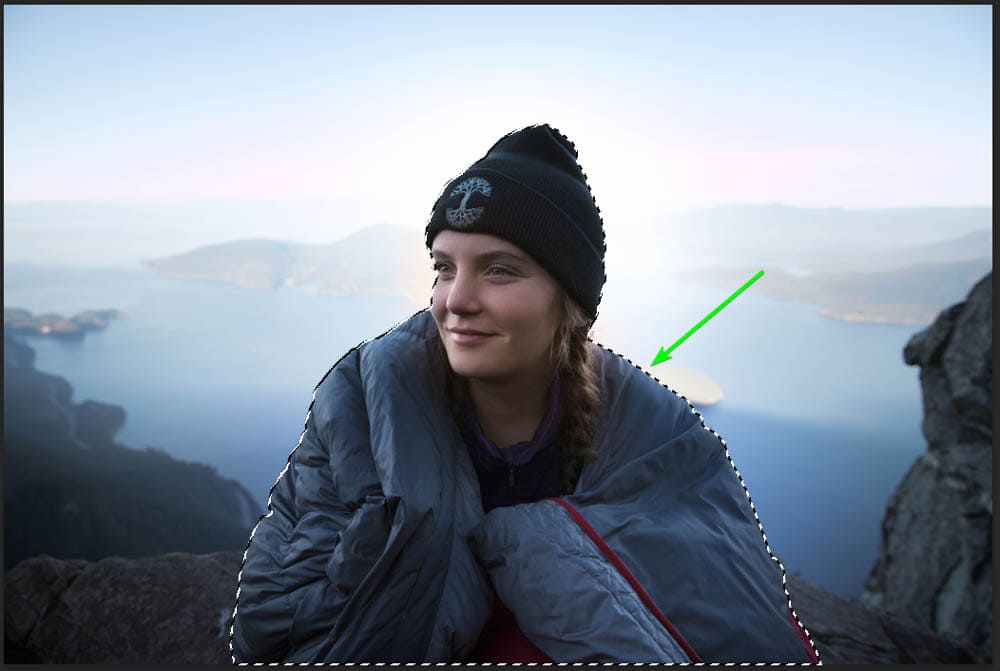
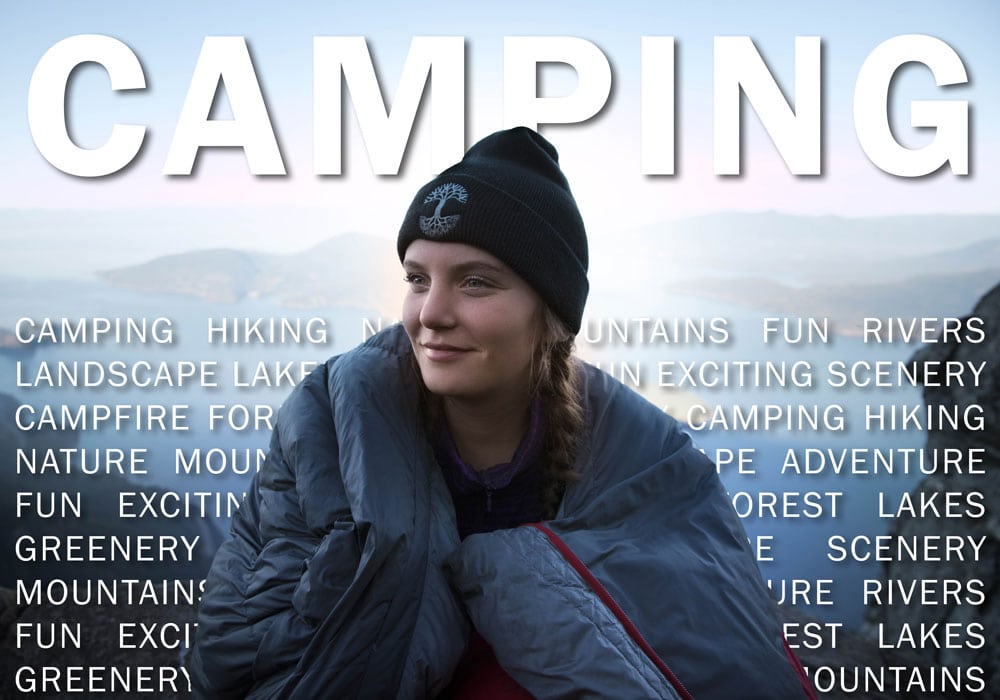
To place the text behind parts of the image, you must decide what objects or subjects you want to be above the text. In my case, I want the text to sit behind the photo’s subject, which is the woman in the sleeping bag.
To select the subject (or an object in the image), you must first turn off the text layer’s visibility. This will prevent Photoshop from including the text in the selection you create. Turn the visibility off by clicking on the eye icon in the Layers Panel.

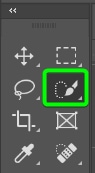
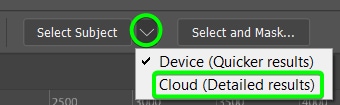
Then, use one of the selection tools to select the area you want to cover the text. You can use the Object Selection Tool for objects or the Select Subject function, as I will. First, activate the Quick Selection Tool (W) to find the Select Subject option.
Once the Quick Selection Tool is activated, find the Select Subject button in the Options Bar, open the drop-down menu next to it, and click on Cloud (Detailed results). The cloud method is much more accurate when selecting a complex subject but requires an internet connection.
After setting the method to Cloud, click on the Select Subject button and give Photoshop a moment to create the selection.

Once the process is complete, the subject will be surrounded by marching ants to show the selection is complete.
If you have a complex subject and the selection isn’t as accurate as you want, you can open the Select and Mask workspace from the Options Bar to refine the selection. I detail how to use the workspace in the Quick Selection Tool article linked above.

Once you have refined the selection, you can move on to the next step.
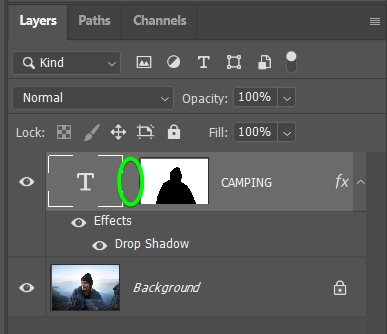
Step 4: Add A Layer Mask To The Text Layer
With the selection still active, turn the text layer’s visibility back on and select the text layer.
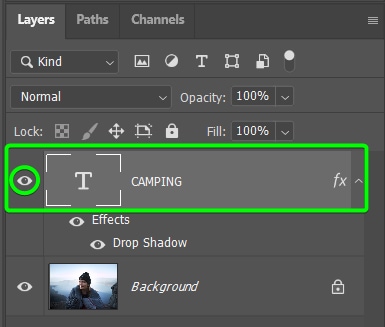
Then, add a layer mask to the text layer by clicking on the Add layer mask icon at the bottom of the Layers Panel. You will see the black and white mask added to the layer.
On the canvas, you will notice that all the text is hidden except for the parts of the text that were placed over the selected area. This isn’t the desired result, but you will fix this in the next step.
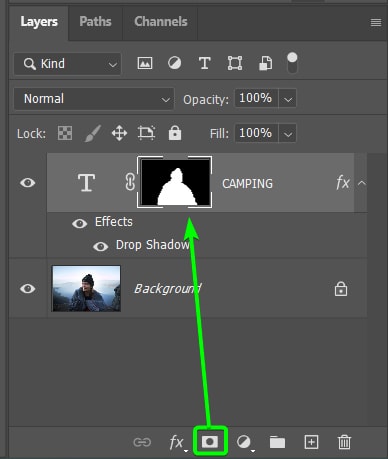
Step 5: Invert The Layer Mask
To correct the layer mask, you need to invert it. Keep the layer mask selected, indicated by the white border around the mask.
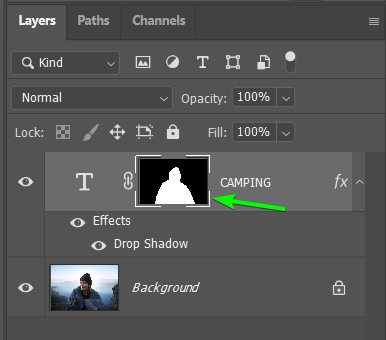
Then, press Control + I (Win) or Command + I (Mac) to invert the mask. You will notice the mask change in the Layers Panel, now showing the subject in black and the background in white.

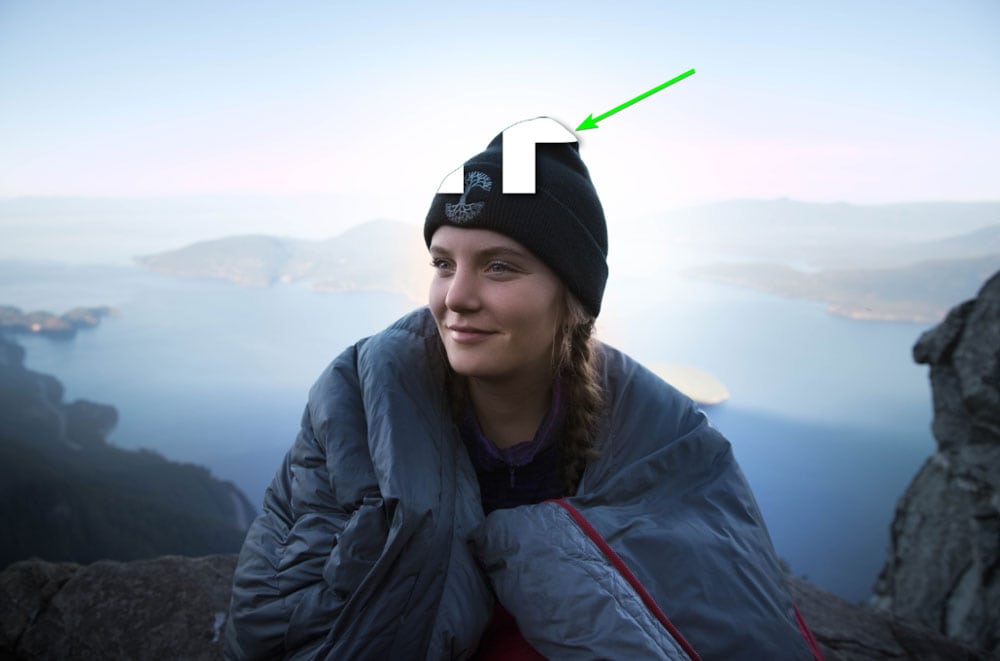
The text will now be partially hidden on the canvas by the subject (or areas you selected). This is more the look you are after.
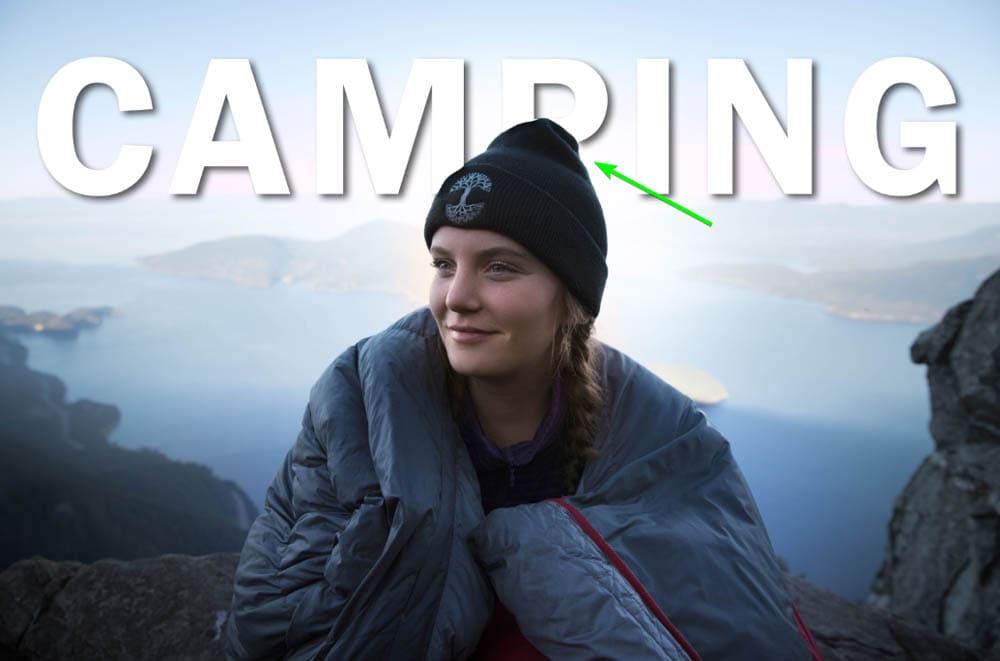
Step 6: Unlink The Text Layer And The Layer Mask
There is one problem at this stage. If you were to select the Move Tool (V) and move the text layer to a new position on the canvas, you would notice that a part of the text is missing where it was sitting behind the object.

You must unlink the text layer from the layer mask to correct this problem. To do this, click on the link icon between the layer thumbnail and the layer mask thumbnail.
Note: Don’t move the text layer before clicking the link icon. If the text layer is moved, as I did for the example above, the cut-off area will form part of the mask.

The link icon will disappear between the two thumbnails. If you want to re-link them, you can just click in the area where the link icon was previously.
Now that the two elements are separated, you can move the text anywhere, and it will be hidden when it’s behind the subject, but it won’t show pieces cut off. Just make sure the T icon of your text layer is surrounded by the white box in the layers panel, and not your layer mask!

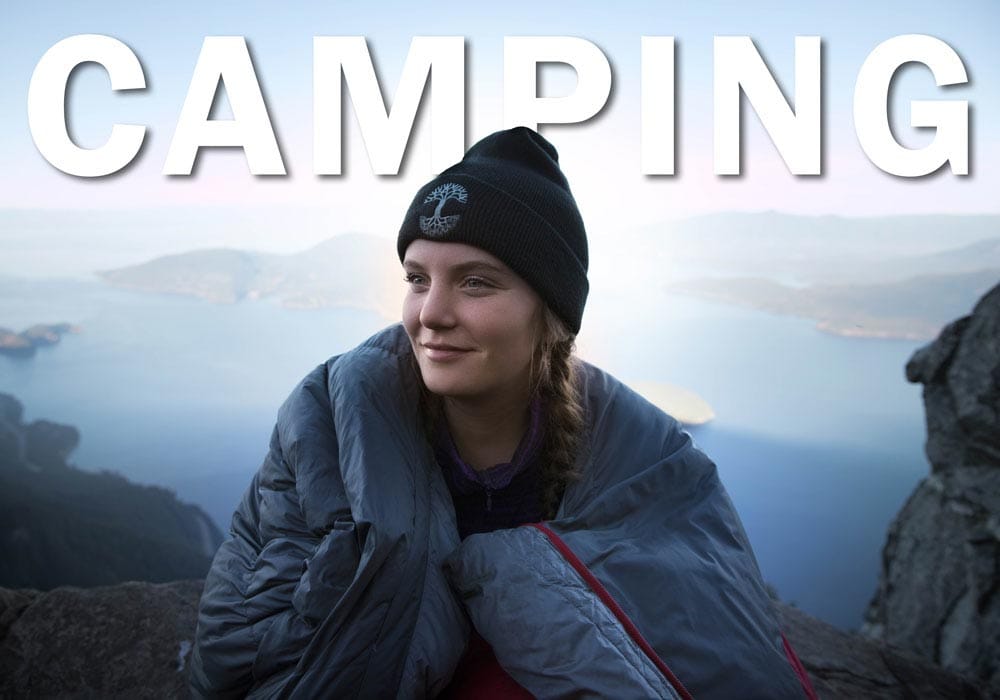
Step 7: Move The Text Around To Find The Correct Placement
You can now move the text around the canvas to find the best placement. Remember not to hide too much of the text behind the subject, as the reader still needs to be able to make sense of the word.
For instance, placing the text too low creates confusion, and the reader will have to think about what the word is. If the word isn’t obvious, readers may be unable to determine what the headline is saying since too much of it is hidden.

Placing the word with just a few pieces of some letters missing is ideal as readers automatically know what the word says and can enjoy the entire layout without getting stuck on the word. You have now placed text behind an image.
How To Save Time Adding Additional Text Behind An Image In Photoshop
When continuing with your layout, you may want to add additional text. If you also want this text to be partially hidden behind the subject, you don’t need to repeat all the steps above. You can easily copy the effect.
First, add your additional text to the layout. Remember to format and style it as you’d like and place it where important words or letters aren’t hidden.
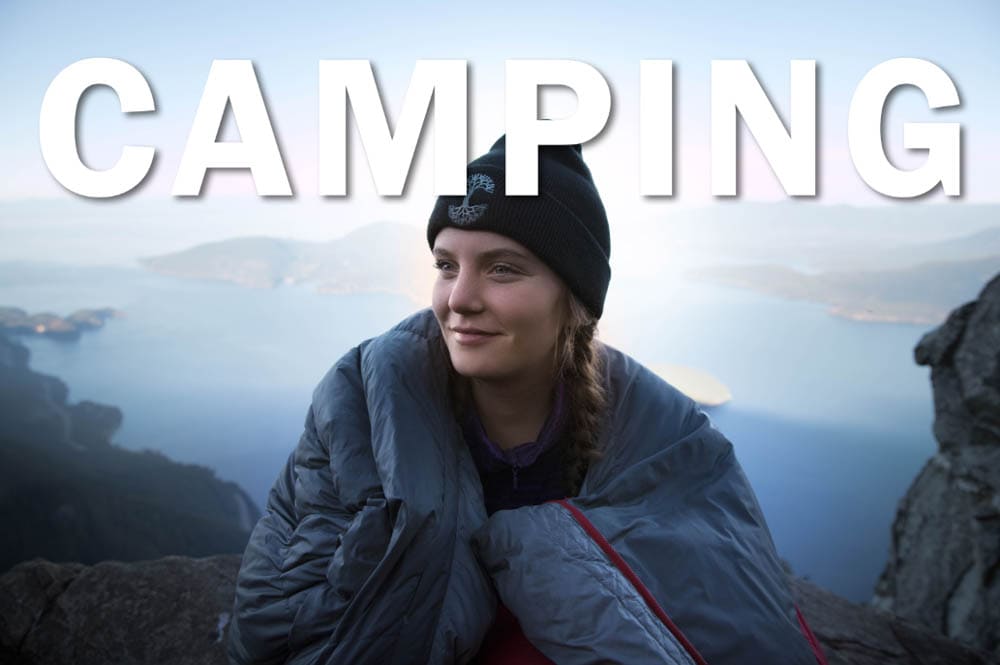
I have written a block of text containing words that describe camping. I kept the color white with a drop shadow. Since this copy isn’t too important and is more for the layout’s aesthetic, it doesn’t matter if the subject covers the bulk of the text.

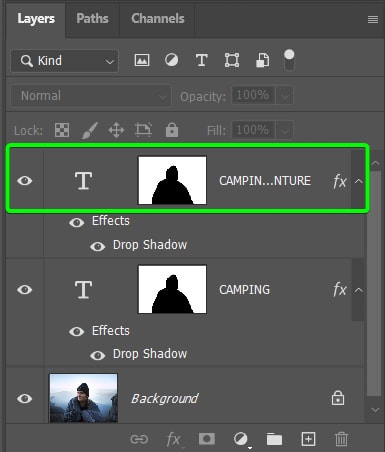
Once you have added your text, you can copy the layer mask from the previous text layer onto your new text layer. To do this, hold in Alt (Win) or Option (Mac), click on the layer mask, and then drag it over the new text layer. When the layer mask is hovering over the new text layer, let go of the mouse.
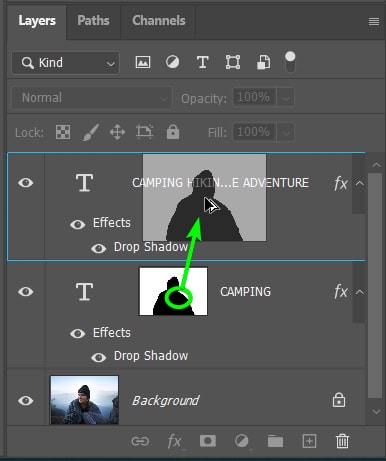
The layer mask will be added to the new text layer without it linked, so you don’t need to worry about unlinking it from the new text.
On your canvas, the new text layer will sit behind your subject or area you previously masked out. You can move the text around to re-position it if needed using the Move Tool (V).
You have successfully placed text behind parts of your image in a way that allows you to edit the text and move it around as needed. You can apply this technique to any type of layout design to add depth and creativity to the project. This method is perfect for blog post feature images, magazine covers, invitations, or poster designs.


