

A photo directly out of a camera may be different from the dimensions you need — luckily, you can resize a photo in Lightroom pretty easily! From utilizing custom measurements to size presets, one of Lightroom’s brilliant perks is the ability to modify your image dimensions with ease.
This is especially useful for photographers looking to print their photographs or ensure that images look great when uploaded to the web.
How To Check Your Current Image Size In Lightroom
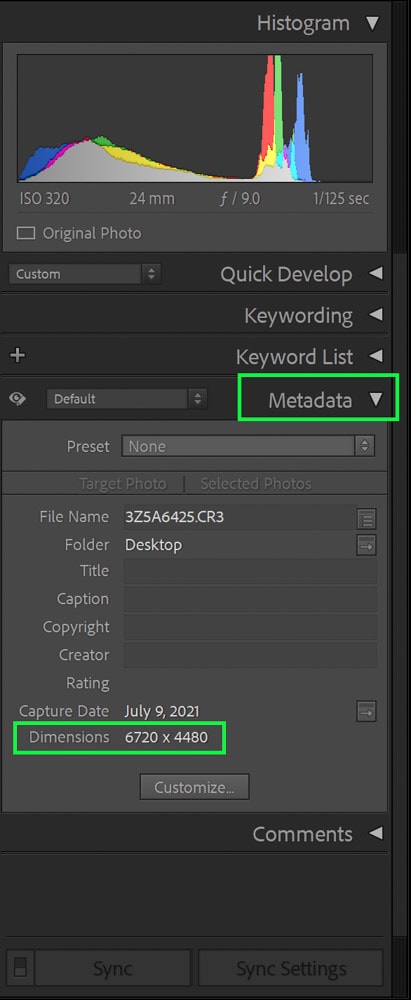
First things first, you should know what your current image size is before resizing. In the Library module, go to the panels on the right side of your screen. Make sure the Metadata tab is fully open. Here, you can see Dimensions.
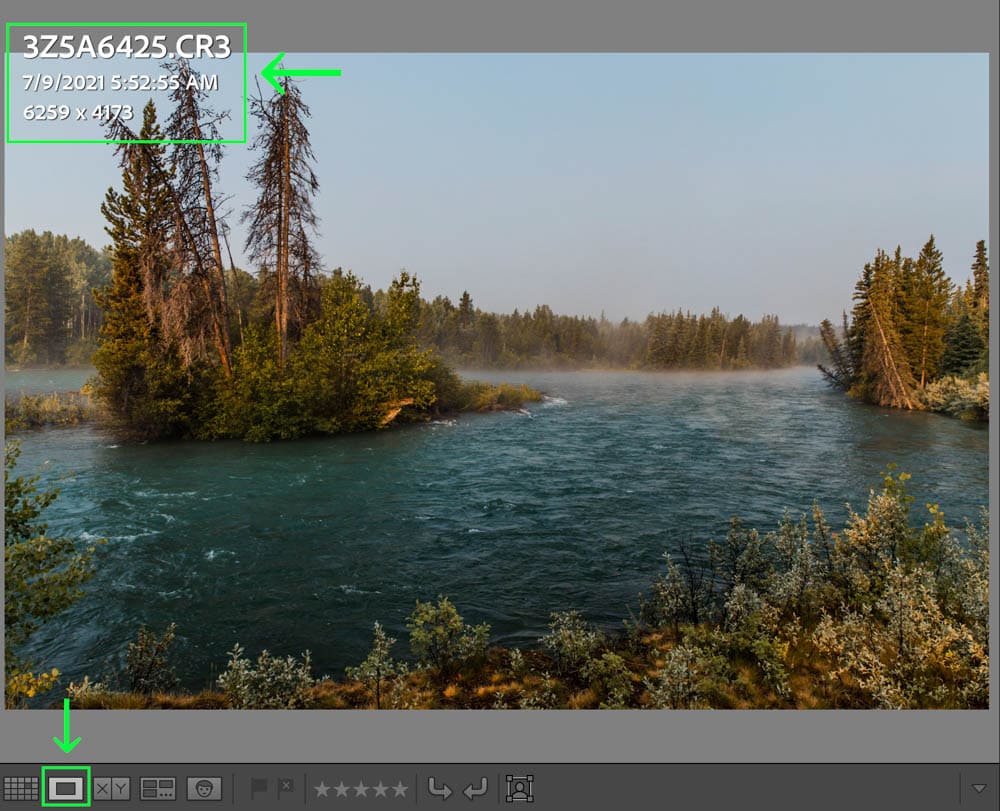
You can also view your image’s size by looking at the picture in Loupe View by pressing I on your keyboard. Pressing “I” will cycle through image data, the first being your photo’s title, date taken, and dimensions!
How To Resize An Image In Lightroom
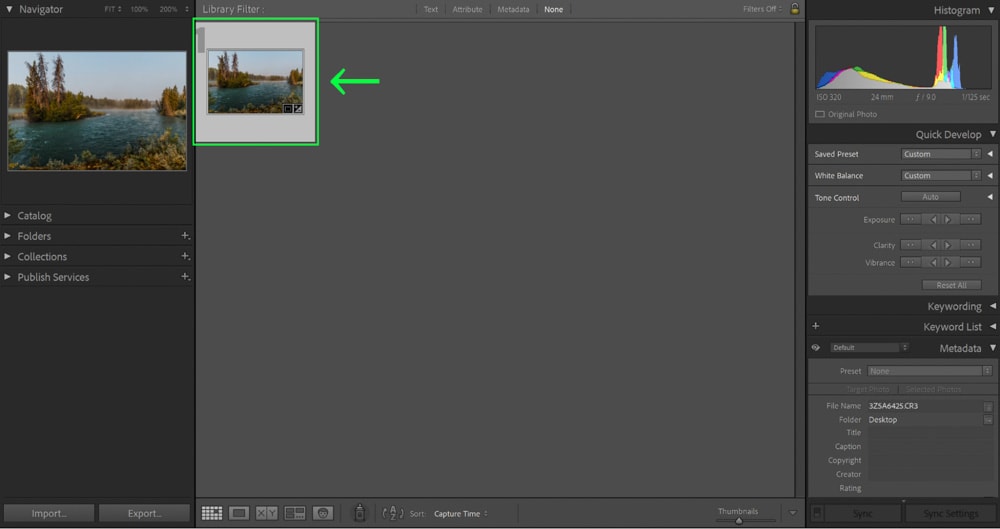
With the Lightroom program open, select multiple images or the one image you wish to resize.
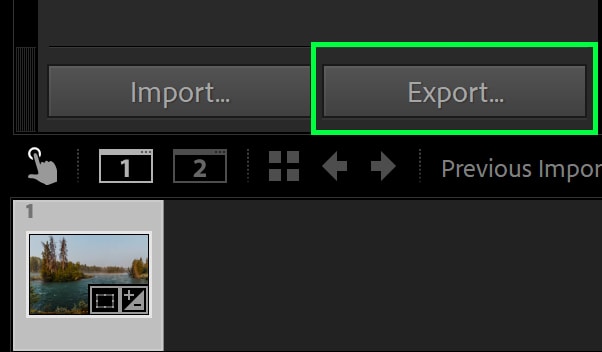
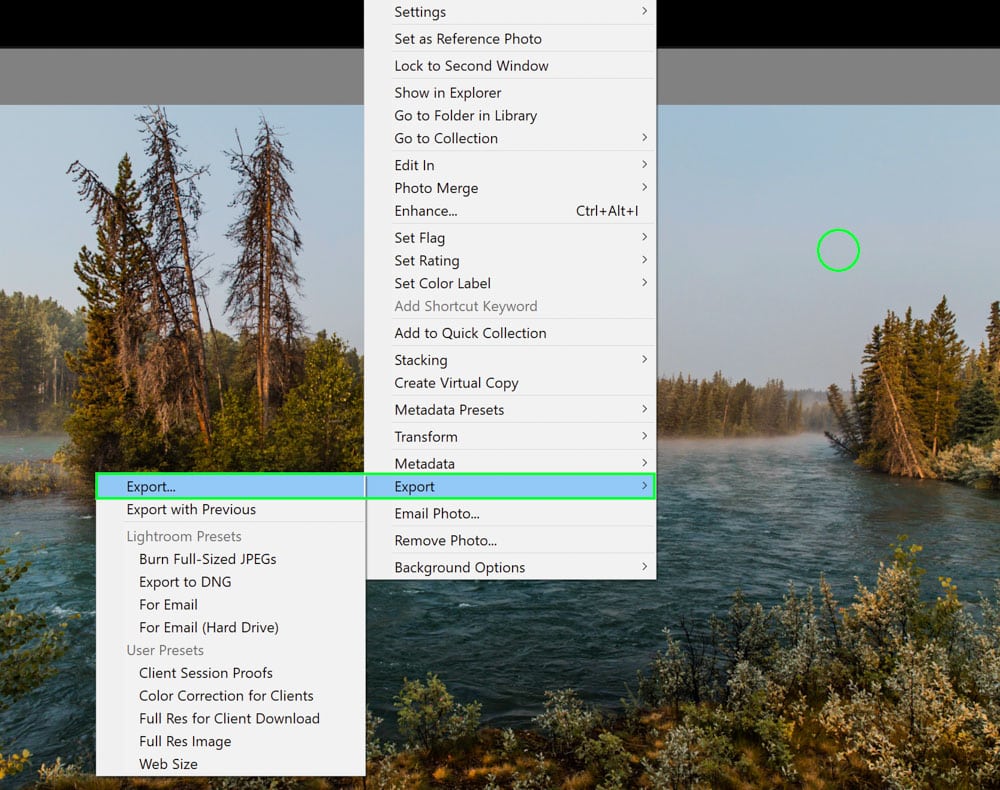
Lightroom only resizes in the Export window, so go ahead and press Export in either the Library module or right-click on the image in the Develop module.
Press Export in the Library Module in the lower left-hand corner, right above the Film Strip.
In the Develop module, right-click anywhere on the image and press Export > Export.
Once you’ve done this, the Export Settings window will appear. From here, go down to Image Sizing. This is the tab where all of the magic happens!
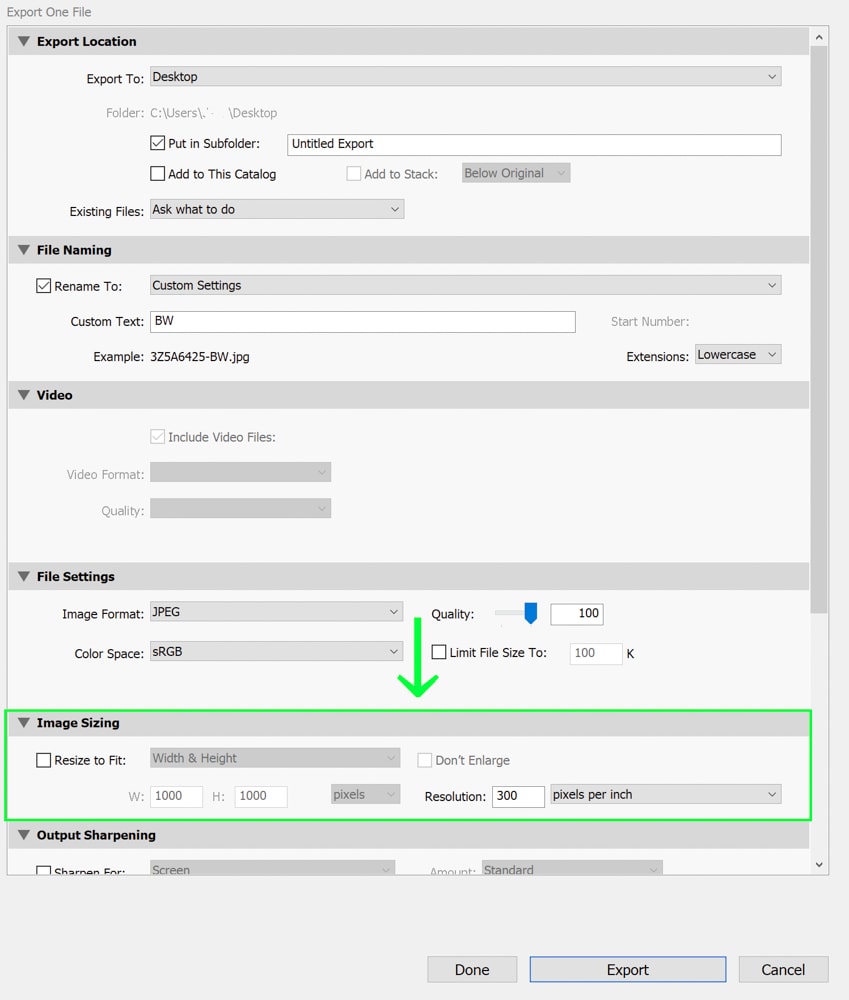
In the Image Sizing tab, ensure the Resize to Fit box is checked to make adjustments.

I also want to bring your attention to two other parts of this same window. The Don’t Enlarge checkbox and the Resolution option in the Image Sizing tab.
I’ll get into upscaling images later, but generally speaking, you want the Don’t Enlarge checkbox checked because if the image is enlarged, it could lose a lot of its quality. The program will stretch the pixels, making the image fuzzy.
As for the resolution, cameras usually create images at 72 DPI. 72 DPI is excellent for showcasing photos on the web but not very good for printing. If you want to print, you’ll want to change this to 300 DPI. However, it’s best to follow the resizing steps in the next section before upscaling the DPI to avoid creating a fuzzy image.
If you press the tab that says Width & Height, you’ll see various options for resizing your photo.
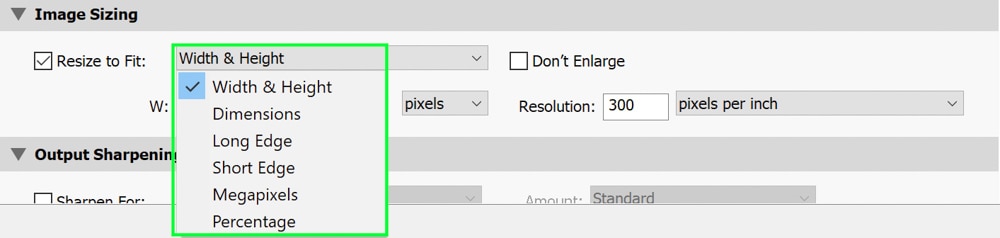
Lightroom offers a few different ways to resize photos to make it easier for you. Understanding what each option does can help you decide which one is right for what you need.
Resizing To Preset Width And Height Dimensions
The default option that appears is to resize an image to a width and height that you set. You can choose the width and height based on pixels, inches, or centimeters! This is great if you’re resizing to fit a print size, such as an 11” x 14”.
Just remember that if the ratio of your photograph does not align with the width and height you set, Lightroom will attempt to get the image as close to that size as possible. However, it may be a different size.
Resizing To Custom Dimensions
The Dimensions, Long Edge, and Short Edge are ways to resize an image to your custom sizing. This is an excellent idea if you are batch-resizing many photographs that are horizontal (landscape) and vertical (portrait). Just set the size of one edge, and Lightroom will ignore the other edge and adjust the rest proportionately to the edge size you set.
Resizing Based On Megapixels
Megapixels make up the constitution of an image, as these represent the tiny dots of color that create the photo. This option is brilliant if you are resizing a picture because you have a file size limit but not a dimensions limitation. When using the megapixels option, you must choose the file size and resolution you want, and Lightroom will resize the image appropriately!
Resizing Based On A Percent Of The Current Size
The last option is to resize based on a percentage. If you need a photo to be 50% smaller, you would just input that value, and Lightroom does the rest. This tends to be the least commonly used option but can be helpful in select cases.
Recommended Image Size For Printing
Although it only takes about eight megapixels to make a print, your print won’t be very large (or very good). Much of resizing photos in Lightroom has to do with ensuring the print looks right!
As such, I recommend resizing your photo to fit the exact size of the print you want. For example, if an 8” x 10” print is on the agenda, resize the image to fit 8 inches by 10 inches at 300 DPI. 300 DPI is the resolution of most printers.
You can learn more about photo sizes for printing in this standard photo sizes guide.
Recommended Image Size For Web
The web is a bit more lenient than print sizes because you don’t have to worry about making images larger. Most of the time, you’re making the image smaller! Most websites, such as Instagram, Facebook, blogs, and others, require photos to be significantly smaller than their original versions.
Most web-based images range in the 1024 pixels range, which is the standard. However, some could get as big as 2500 pixels! The larger the picture, the longer it takes to load, so keep that in mind. 72 DPI is the resolution of most screens.
You can learn more about photo sizes for the web in this standard photo sizes guide.
What About Upscaling A Photo In Lightroom?
Once upon a time, upscaling a photo in Lightroom didn’t yield the best results, and you had to use Photoshop. However, the software has recently (in 2022) been updated to include a feature called Super Resolution to remedy this problem.
Super Resolution uses AI technology to enhance an image. Once upon a time, making a photograph larger than it originally was would cause a lot of pixelation, distortion, and overall bad quality.
With Super Resolution, the program significantly increases the megapixel amount, so the quality is preserved (as much as possible, anyway). As a result, the enlarged image will have four times as many pixels overall and will be twice as wide and tall as the original image. This is even better than what Photoshop can achieve in many cases.
To access Super Resolution, simply right-click anywhere on your photograph and click Enhance or Control + Alt + I (Win) or Command + Alt + I (Mac).
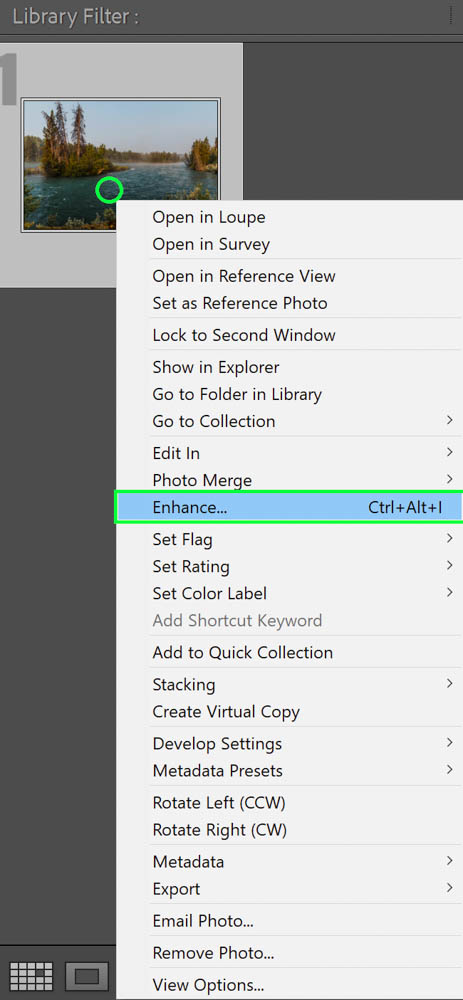
Then, the Super Resolution window will appear.
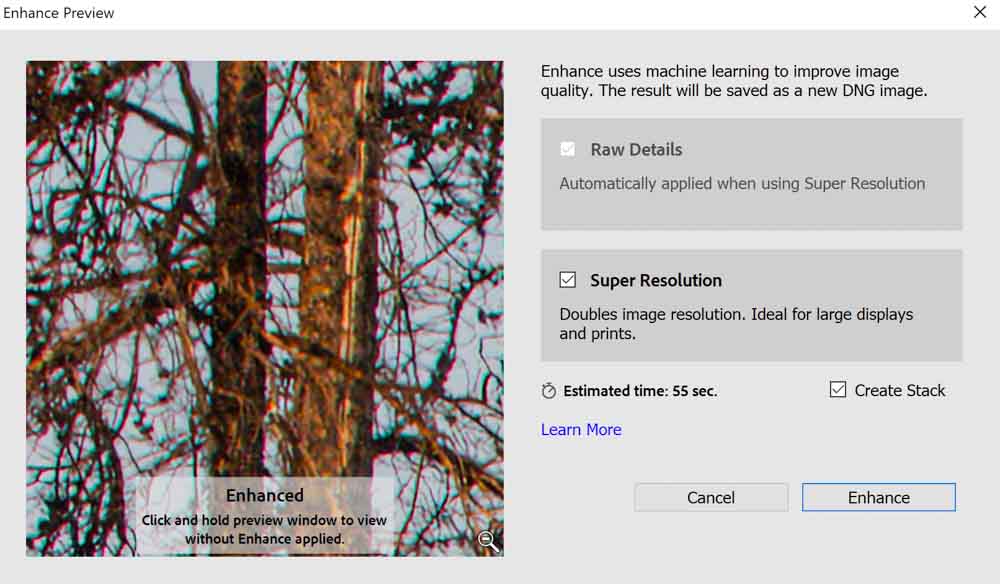
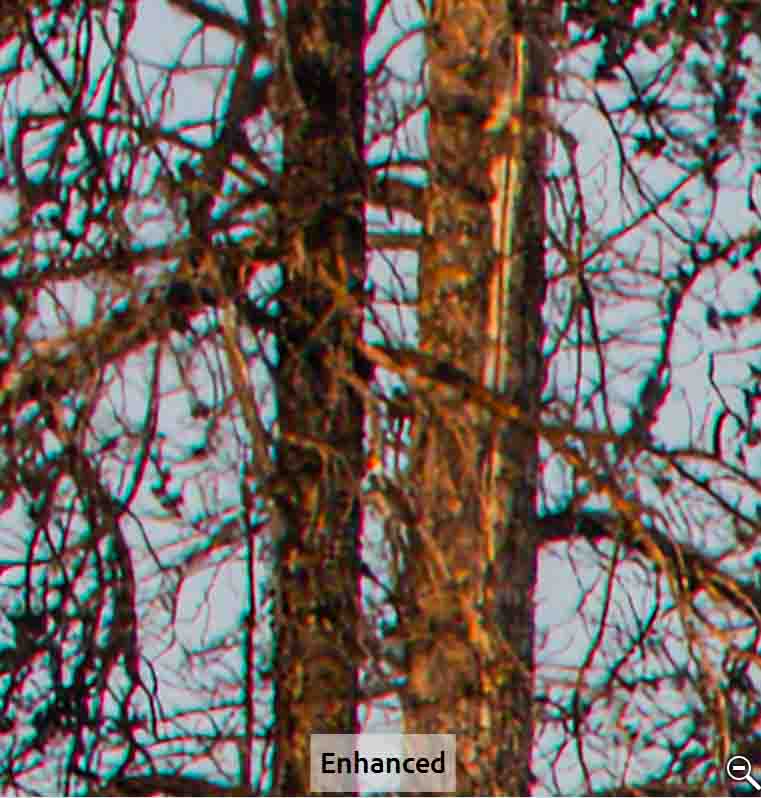
Just press Enhance, and the program will do the rest. The difference is pretty significant!

Super Resolution allows you to double the size of your original file, opening up more doors for printing without sacrificing quality. So if you need a print dimension that is larger than your original image, definitely put Super Resolution to work for you!


