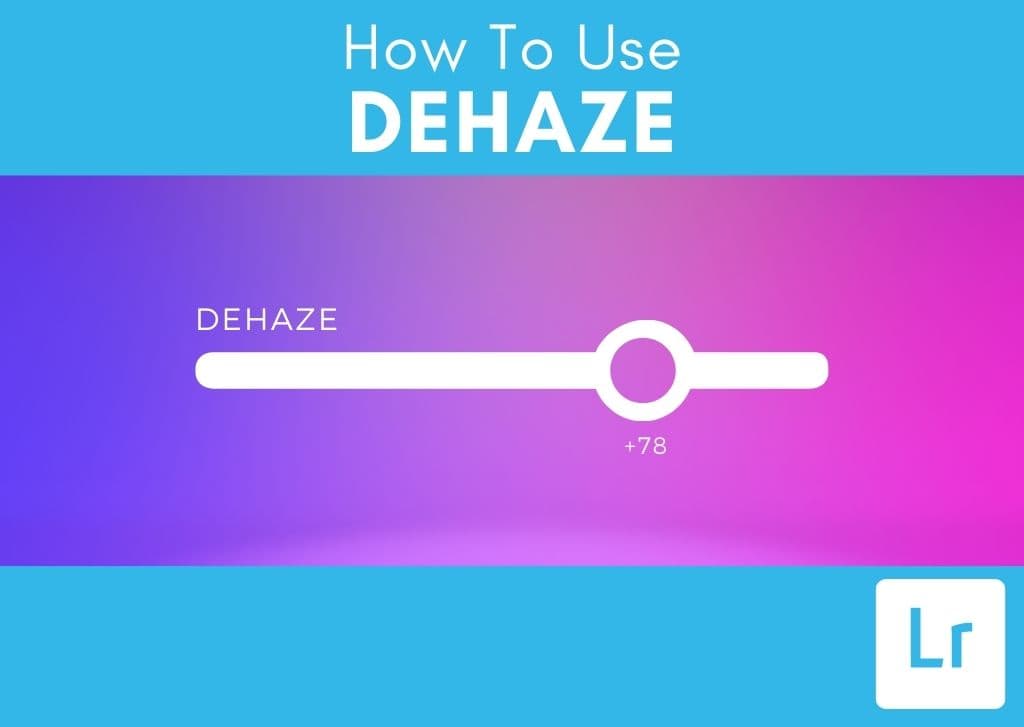

If you’ve ever taken a photo that came out foggy or hazy, you’re likely familiar with the Dehaze setting in Lightroom. Dehaze can reduce (or add) the misty effect in a picture and bring out more details, but there are also some creative ways to use dehaze in Lightroom that you might not have thought of yet.
Read on to learn everything you’ll need to know about this tool.
What Is Dehaze In Lightroom?
As its name implies, the Dehaze slider can reduce or add haze to an image, making it less foggy and clearer or adding a hazy effect. The Dehaze effect works by increasing the contrast only in areas where the image appears flat, making it the perfect tool for reducing fog and other flat areas without increasing the overall contrast of an image.
Where To Find The Dehaze Slider In Lightroom
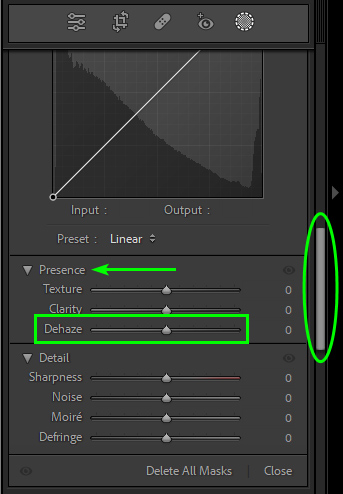
The Dehaze slider is primarily used in two situations, either globally across the entire image or locally on a masked area. When looking for the Dehaze Slider in Lightroom, it depends on how you use the feature.
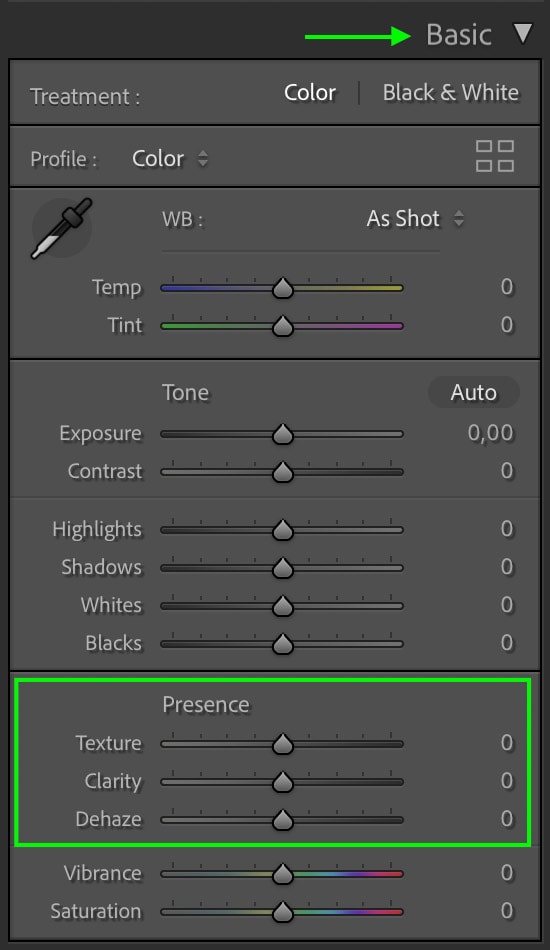
To access the Dehaze Slider to edit the entire image, you will find it by opening the Develop Module.

In the Develop Module, open the Basic Panel by clicking on the arrow.
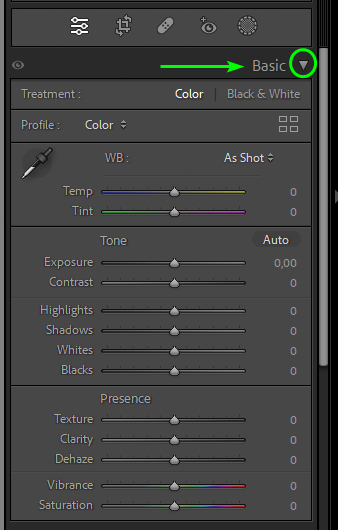
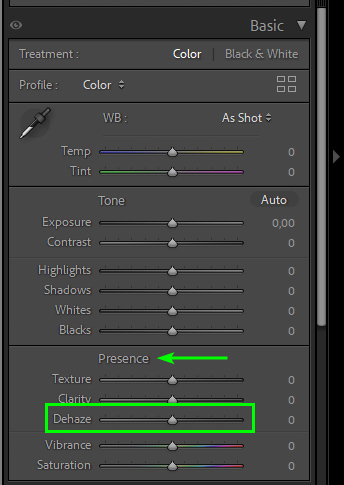
Near the bottom of the Basic Panel, you will find the Dehaze Slider in the Presence section.
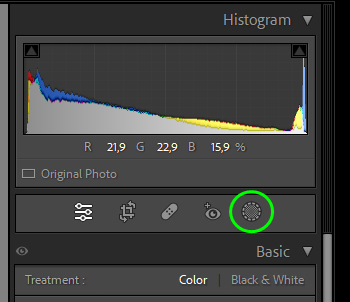
When using the Dehaze Slider on a section of the image, you will find it in the Masking Panel. To access it, open the Mask options by clicking on the Mask icon above the Basic Panel.
Then, select your masking tool of choice. The Dehaze Slider is available with all the making tools.

Once you have masked the area you want to edit, scroll down the adjustment options to find the Dehaze Slider under the Presence Section.
When To Use The Dehaze Slider In Lightroom
The Dehaze Slider is not as commonly used as other adjustment tools, such as exposure and contrast. However, it is useful in many situations as long as you practice restraint and don’t overdo the effect.
Use the slider whenever you find your image has foggy areas that detract from it rather than enhance it. Often landscape and aerial photographers need to remove mist, fog, and other weather elements to highlight the subject of the photo better. You may also use the feature on food and drink images to remove condensation, reflections, and glare from glasses.
In certain cases, portraiture is done outside to capture a different scene, and these photos may have a foggy look due to bright sunlight that wasn’t filtered out with a lens hood. In these cases, use the Dehaze Slider to reduce the sun flare and enhance your subject.
The Dehaze Slider can also be used to increase contrast in flat images. The dehaze feature increases the contrast in flat areas while ignoring the areas that already have contrast, which works as a more selective edit when you don’t want to add contrast across the entire image using the Contrast Slider. The slider is useful for recovering lost details in the sky or enhancing your images.
The slider can also create the opposite effect by increasing haze in images when moving the slider to the left. This enhances foggy pictures when you are creating a moody and dramatic effect.
Dehaze Vs Contrast In Lightroom – Differences Explained
Lightroom features several methods to adjust the contrast in your images, such as the contrast sliders or the tone curve. While the Dehaze slider also affects contrast, dehaze only adjusts the areas with low contrast to begin with, leaving higher contrast areas untouched.
Therefore, the contrast sliders are a better option to use when trying to adjust the contrast globally across the entire image. This is because the sliders will increase the overall separation between the light and dark values. In other words, lights become lighter, and darks become darker
However, when you only want to target areas of soft contrast (such as mist or fog), then the dehaze slider is a better tool for the job.
Comparing The Dehaze Vs Texture Vs Clarity Sliders
Within Lightroom’s Basic adjustments below the Presence section, you’ll notice a few other sliders next to the Dehaze slider: Clarity and Texture. The Dehaze, Clarity, and Texture adjustments will all change the contrast and detail in an image, but in different ways.
Each slider also targets different frequencies. Areas that have more of a variety of colors, textures, and contrasts are generally high-frequency. In comparison, smoother and more consistent areas with less variety of colors and textures are low-frequency.
For example, an area with lots of trees and flowers would be high-frequency, while a clear blue sky would be lower frequency.
As mentioned, the Dehaze slider increases the contrast primarily in low-frequency areas, which are often the haziest and need the most contrast. It won’t have much of an effect on smaller, more detailed (high-frequency) areas of a photo. For this, the Texture or Clarity sliders would be best. With a stronger dehaze application, you can see more details in the image, but the saturation will also increase.
The Clarity slider deals in the midtones and is primarily used to make images look sharper. Increasing the Clarity makes photos look clearer because the contrast increase helps remove haze, and the specific attention to contrast along edges makes the image look sharper and more focused. Still, it is best not to go overboard with the Clarity slider because too much Clarity can make the saturation and the amount of texture in the image look too strong and unnatural.
The Texture slider will mainly affect the edges and finer details of a photo, either making them more or less sharp. The effect will be more subtle than the Dehaze or Clarity sliders and won’t really affect the saturation. The overall contrast won’t be affected as much as with the other sliders as well. Texture is the best slider to work with if your goal is to enhance details.
5 Creative Ways To Use Dehaze In Lightroom
The Dehaze slider isn’t only used to decrease haze in an image. You can also use the tool to enhance nighttime or black-and-white photography and make creative adjustments to your photos.
1. To Enhance Moody Fog Effects In Lightroom
It may seem counter-intuitive, but a foggy look can actually enhance images edited in a moody or dramatic style. It is particularly useful for images that already have quite a bit of fog that you’d like to retain as part of the image, like the example I’m using below.
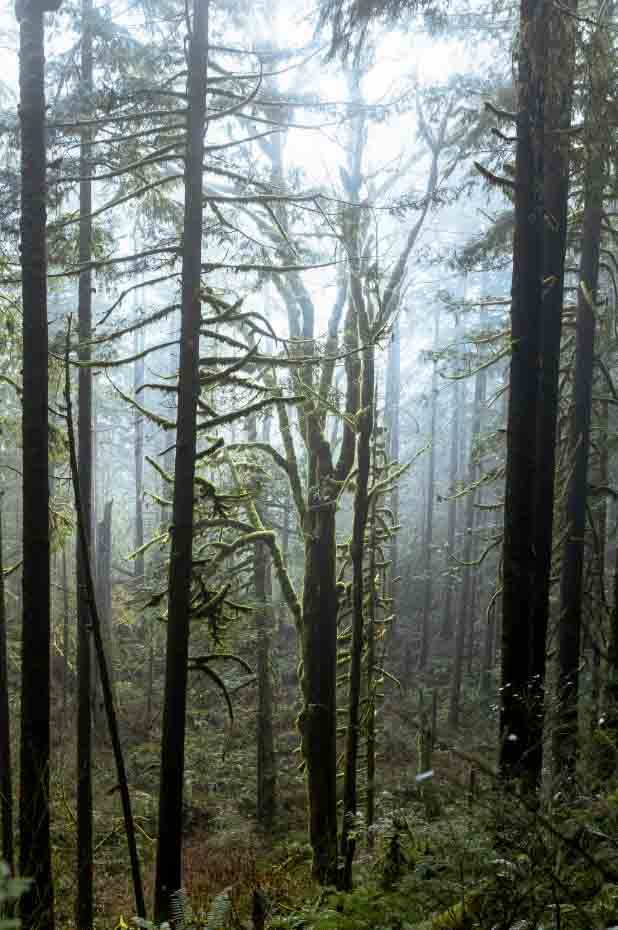
So, to complement a moody or hazy image, you can move the slider to the left, reducing the dehaze effect and adding a more hazy appearance to your image.


This won’t work with all photos, but it can really help create a misty, dramatic look for some images.
2. To Improve Black And White Photos
As beautiful as black-and-white images are, it can be tough to find the proper contrast when you edit a black-and-white photo. Simply increasing the contrast can sometimes make the black areas too dark and the white areas too white. An easy trick to make black-and-white images more dramatic and vivid without losing the midtones is to use the dehaze slider.
Take the following image as an example.
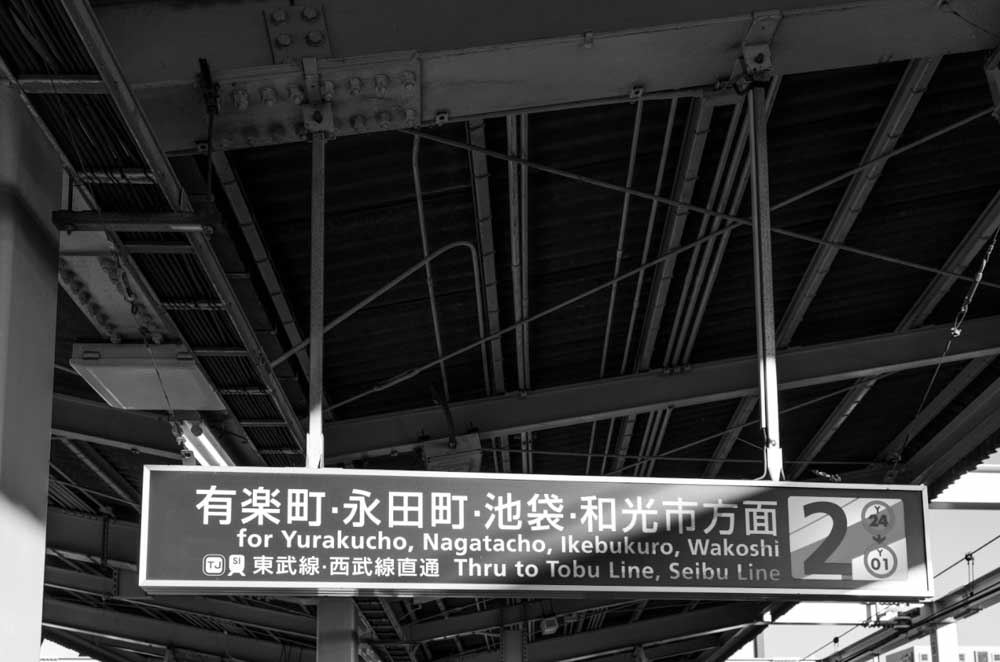
The contrast is a bit flat, so I can make the photo bolder by slightly increasing the dehaze slider.

The photo instantly pops more than it did before.
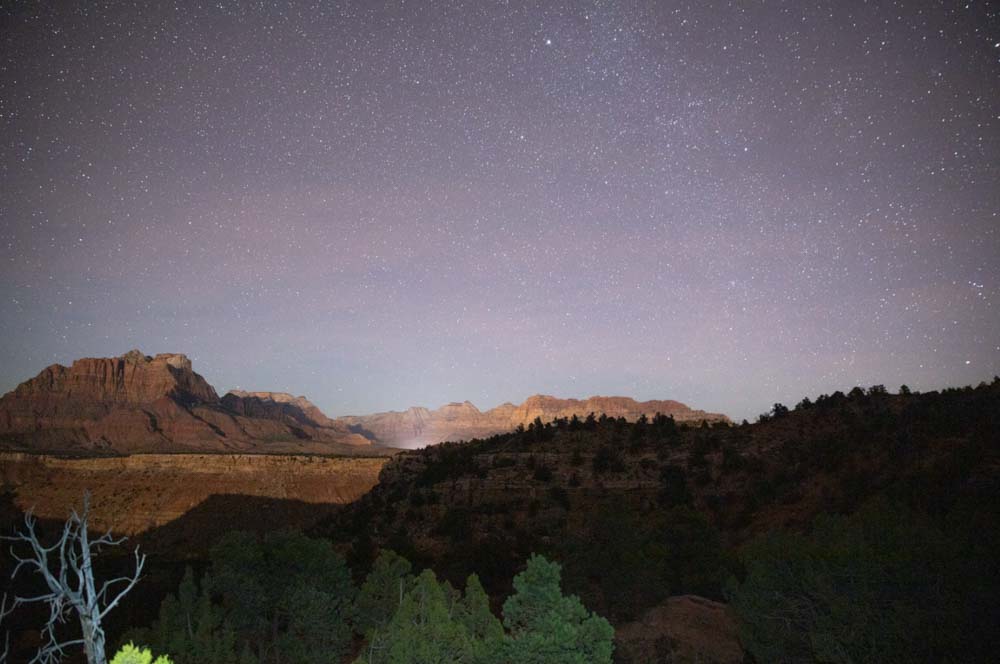
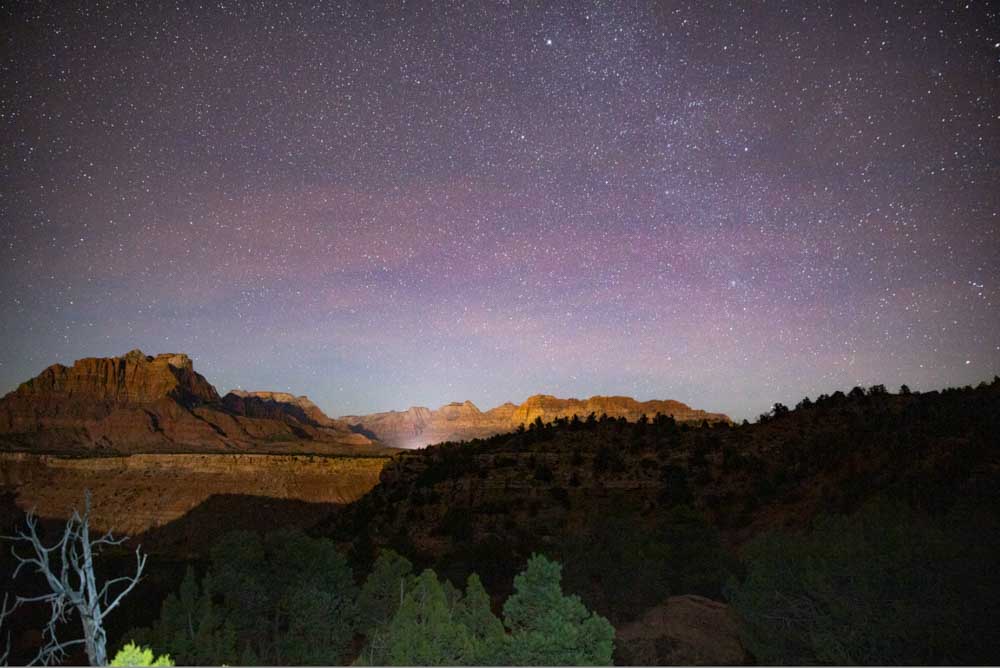
3. To Enhance Stars In Your Night Photos
Night photography is generally tricky, but the dehaze slider can help bring out the sky and the stars in night photos. To bring out a night sky using dehaze, make the basic edits to the exposure and color tone, and then head to the dehaze slider and bring the toggle up to the right slightly.

You’ll notice the stars appear much brighter and more vivid than in the original. Even the foreground has cleared up a bit.
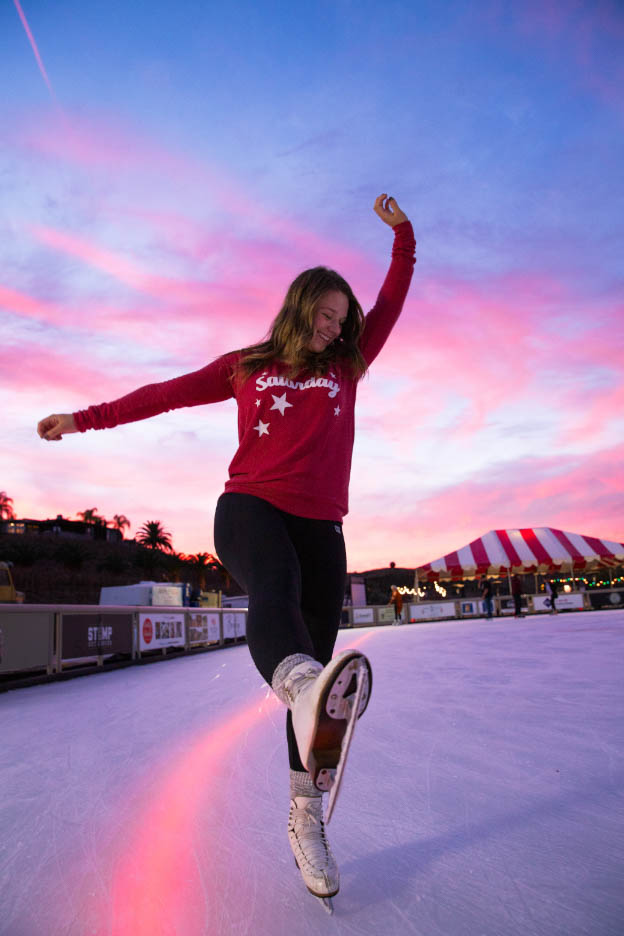
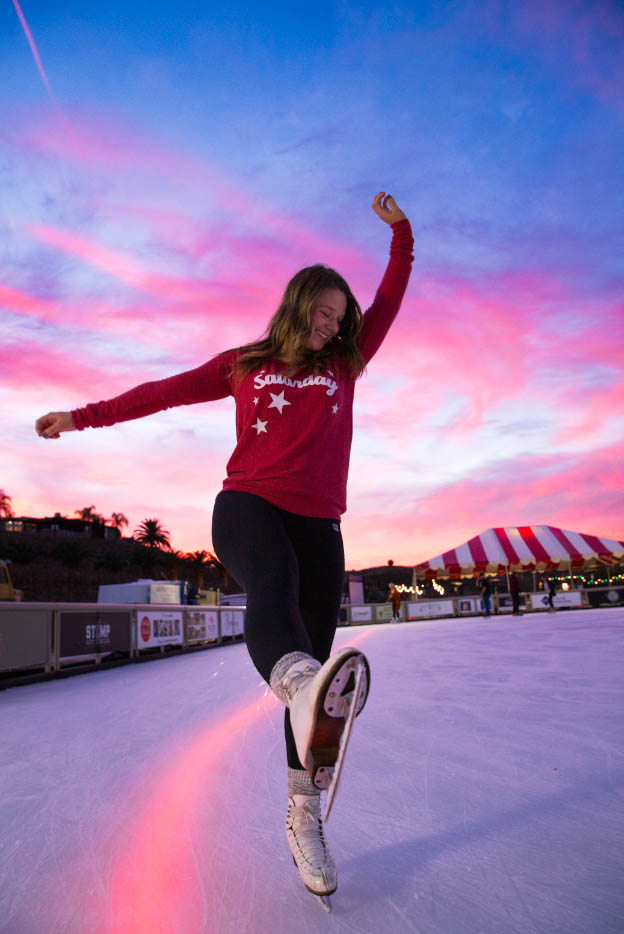
4. To Enhance A Sunset Sky
You can also use the dehaze slider to enhance sunset skies, making them not only more vivid and colorful but also more detailed and contrasted. However, it is best to only apply the dehaze adjustment to the sky, as the rest of the image may already be set to the contrast and saturation you want.
Mask the sky by clicking the Masking Icon and selecting Sky from the options.
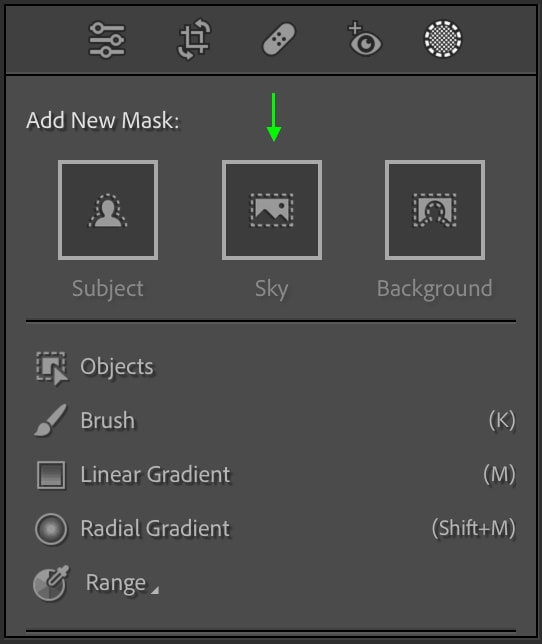
After a moment, Lightroom will apply the mask only to the sky.

You can then head to the adjustments panel and increase the Dehaze slider.
The effect will only be applied to the sky, increasing the contrast, detail, and vibrance while the rest of the image is left alone.
5. To Fix Washed Out Colors Taken At Midday
The lighting in the middle of the day, when the sun is at its highest, can be so strong that it washes out colors and flattens contrast. The below example, for instance, was shot at midday and thus could use a little boost.
The dehaze slider is an excellent tool to add back some of the contrast and vibrancy lost in landscape scenes when shooting at midday. Just drag the toggle slightly to the right, and you’ll notice the image improves.
The dehaze slider in Lightroom is one you may not always use in your edits but is a useful tool to remember when you are dealing with washed-out colors or contrast in your photos.


