

There is only so much you can control when taking a picture, and sometimes there might be elements you’d like to fix or remove. Luckily, the Healing Brush in Lightroom can help remove those unwanted distractions.
The tool features several different modes that you can choose from depending on your needs. Each one allows you to cover up an area of your image in a way that looks natural and realistic to viewers.
While larger or more difficult fixes may require a bit more precision, the healing tool and its various settings are user-friendly enough, even for true beginners.
How To Access The Healing Brush Tool In Lightroom
With the image you plan to edit open, head to Lightroom’s Develop module.

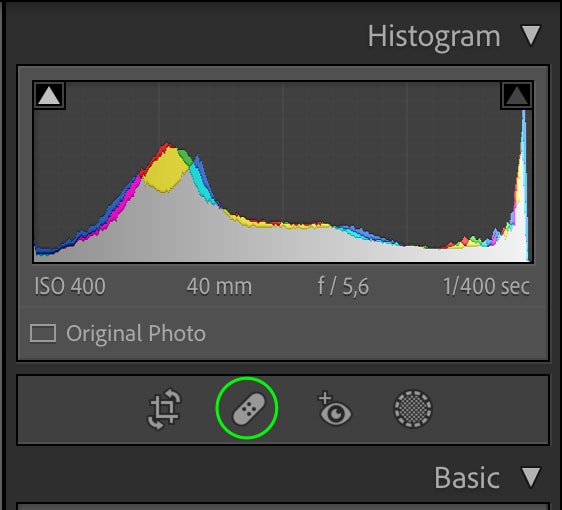
Then go to the panels on the right, and you’ll find the healing brush icon between the Histogram and Basic tabs.

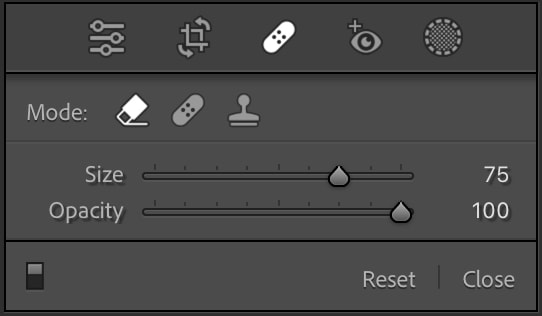
Click the icon, and the panel will open. Here, you’ll see three different types of modes for the healing brush, as well as a few different settings you can adjust.
Types Of Healing Brush Modes Explained
1. Content-Aware Remove Mode
The content-aware mode is the first icon from the set.
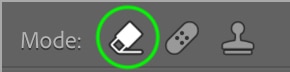
The content-aware mode is a newer addition to Lightroom that users of Photoshop may recognize. Content-aware means Lightroom uses AI technology to determine the best way to cover an area of the image and make it blend in with the outer area.
2. Heal Mode
The heal mode is the center icon in the set.
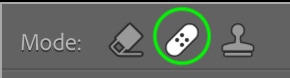
The heal mode will use an area of the image with a similar appearance as the sample. This sample will replace the area you brush over. Lightroom will blend the color and exposure of this area as you go in order to maintain the most realistic appearance. The heal mode is best used for adjustments on skin.
3. Clone Mode
The clone mode is the last icon in the set.
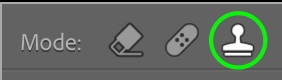
The clone mode does exactly what it says: it pulls an exact copy of one part of the image and places it over the area you’re brushing over. This can be very useful when trying to replace large objects and can have a very realistic appearance when there is a clear area to replace your sample with. However, this won’t blend different colors and exposures as well as the heal mode.
Healing Brush Settings Explained
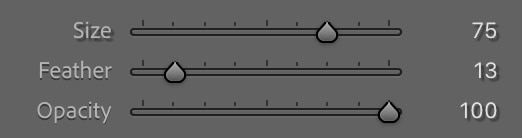
Besides the brush modes, you can also set a few different brush settings that will affect how the brush works. These settings are Opacity, Feather, and Size. To adjust these settings, all you need to do is click the toggle in the center of the bar and drag it left or right.
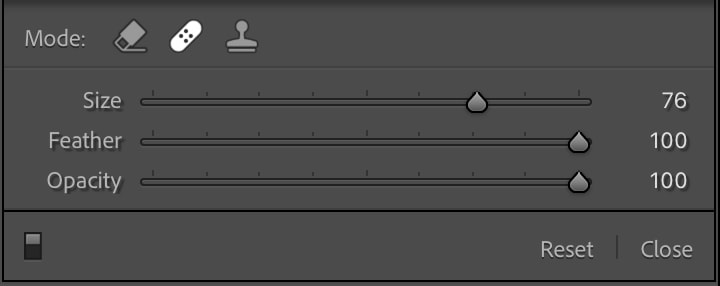
Opacity controls the visibility of the brush effect. Having the opacity set to 0 will not show any of the brush effects, while opacity set to 100 will show the full strength of the effect.
In the image below, the healing brush stroke on the left is set to 100% opacity, while the brush stroke on the right is set to 20% opacity. The lower opacity stroke shows less of the effect and more of the original image.
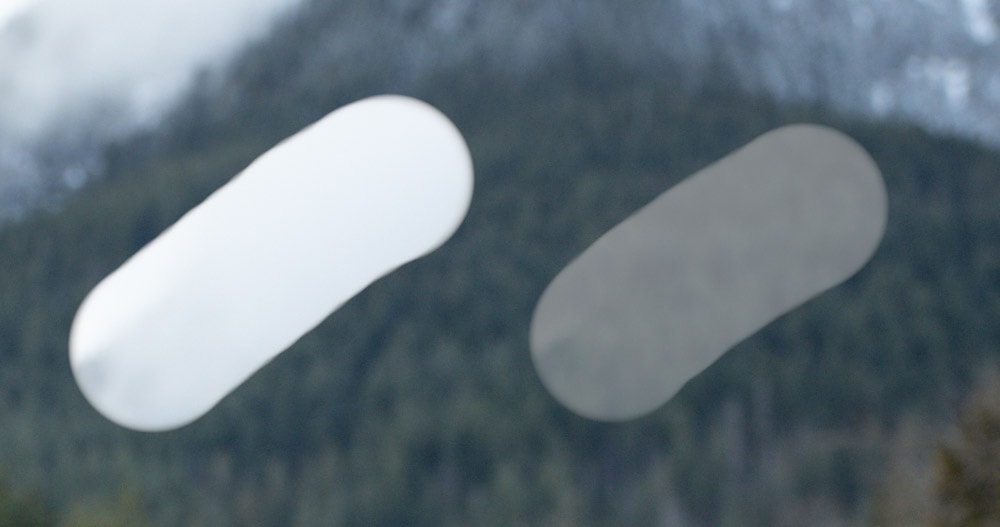
It’s a good idea to keep the Opacity set to 100 unless you want some of the detail of the original area showing through the healed brush stroke.
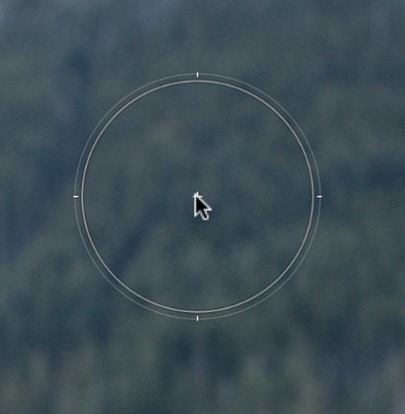
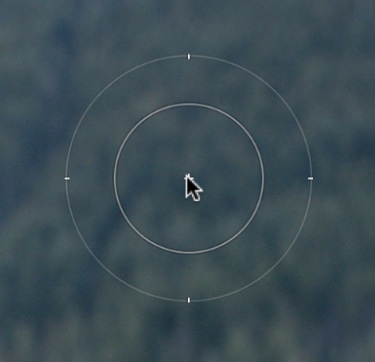
The Feather slider will adjust the amount of feathering on the edge of the brush. A higher number means the edges of the brush gradually fade out, while a smaller number will create a sharper brush edge. Different situations will call for different levels of feathering.
Increase the feather amount if you want a gradual fade from the healed area into the original area around it, or reduce the feather when working around defined edges.
The feather is represented by the distance between the outer two circles in the brush. You can see the difference between the feather amounts below.
Keep in mind you won’t have the feather slider in Content-Aware mode, as the brush tool is represented by a crosshair rather than a circle tip.
Finally, the brush Size is pretty self-explanatory. You want the size of your brush to be a bit larger than the area you’d like to heal, but not too large, as you don’t want to affect more area than necessary. It’s often useful to change the brush size as you heal. You’ll just have different size strokes covering the area.
How To Remove An Object In Lightroom Using The Healing Brush
Step 1: Locate The Healing Brush
Again, the healing brush can be found by clicking the Healing icon between the Histogram and Basic panels.
The healing panel will open.
Step 2: Select The Healing Mode You Want To Use
The healing mode you use will depend on what kind of healing you want to do, the appearance of the area you want to heal, and the space around it.
To remove an object completely from an image, it is usually best to either use the Clone or Content-Aware modes. Because the area I want to heal contains a multitude of colors, I’d like to maintain the most control possible over the correction and use the Clone mode.
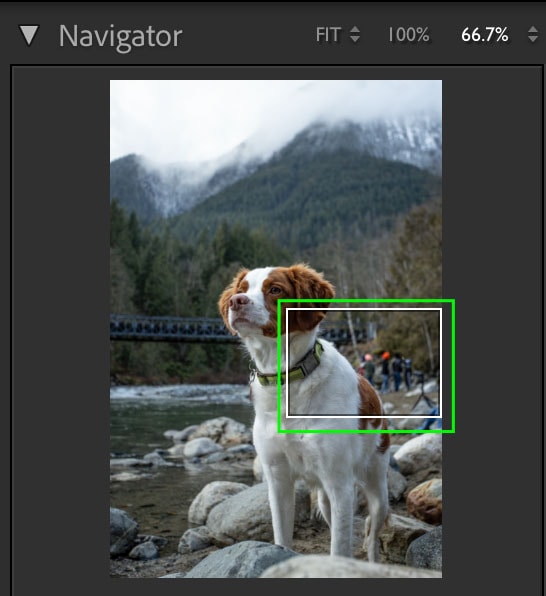
Step 3: Zoom In On The Area You Want To Heal
The next step is important: you want to zoom into the area of the image you plan to heal. This will increase the size of the pixels you can see and allow you more control over the accuracy while you heal.
To zoom, you can use the Control and + (Win) or Command and + (Mac) keys until you reach the desired zoom. You can also click a certain area of the image to immediately zoom to that section and drag the rectangle in the Navigator panel to move the zoomed area.
Step 4: Set The Brush Settings
Once you have the image zoomed in to show the exact area you want to heal in detail, you can set your brush settings. This can be done as you work, as well, but it is best to start with full opacity, a very slight feather, and whatever size you think will cover the area you want to heal without going outside of it. To heal the people in the above image, I’ll use the following settings.
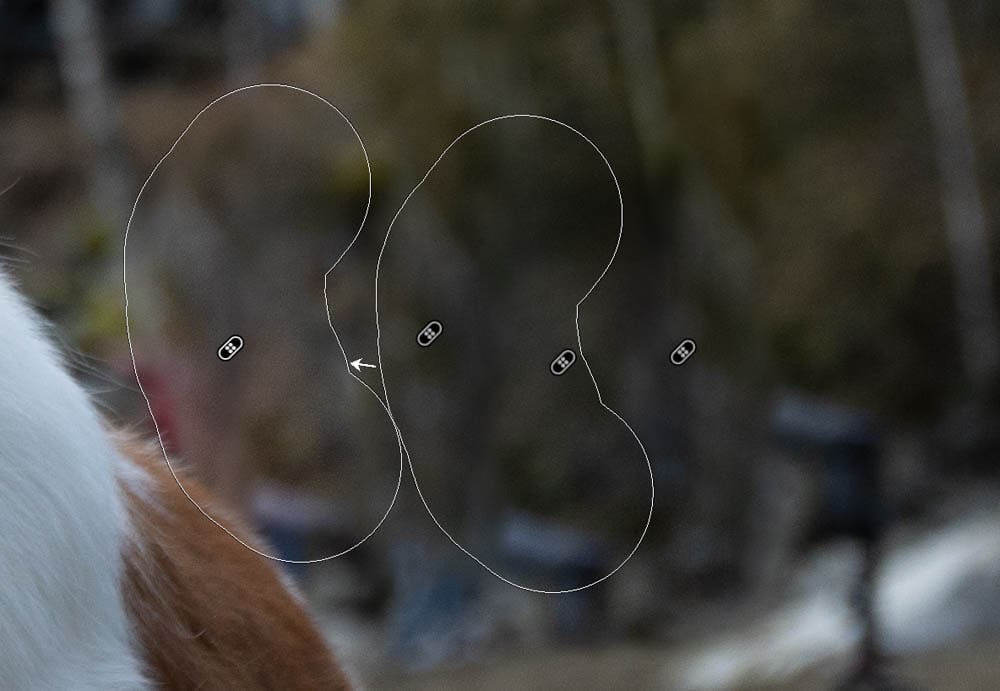
Step 5: Click Or Paint The Area You Want To Heal
Begin by painting over the areas you’d like to remove in small sections so you can easily refine them. After painting over an area, Lightroom will automatically sample another section of the image to remove your unwanted distractions.

Repeat as needed until all of your distractions have been removed.
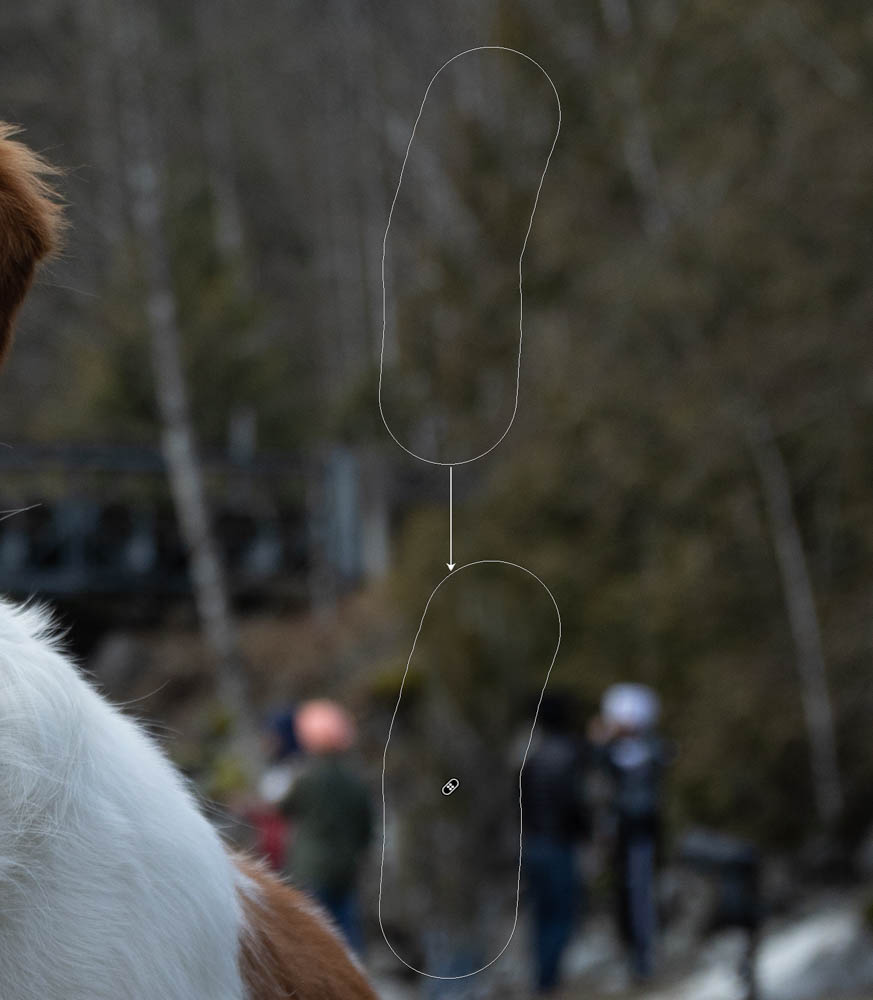
Step 6: Refine The Sampled Area If Needed
In some cases, you will need to adjust the sampling area to get a better result. As you can see below, Lightroom didn’t do a good job here.
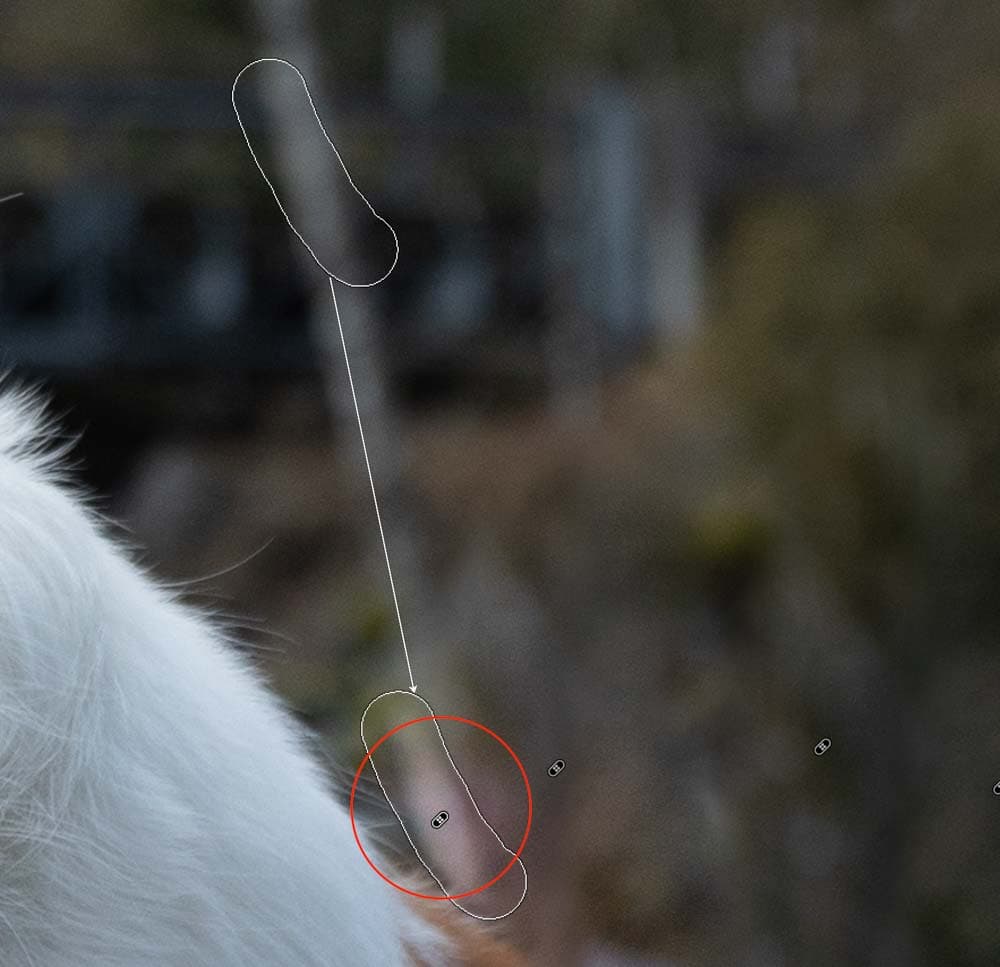
So you can adjust this by clicking on the sample area and moving it to a more suitable location.
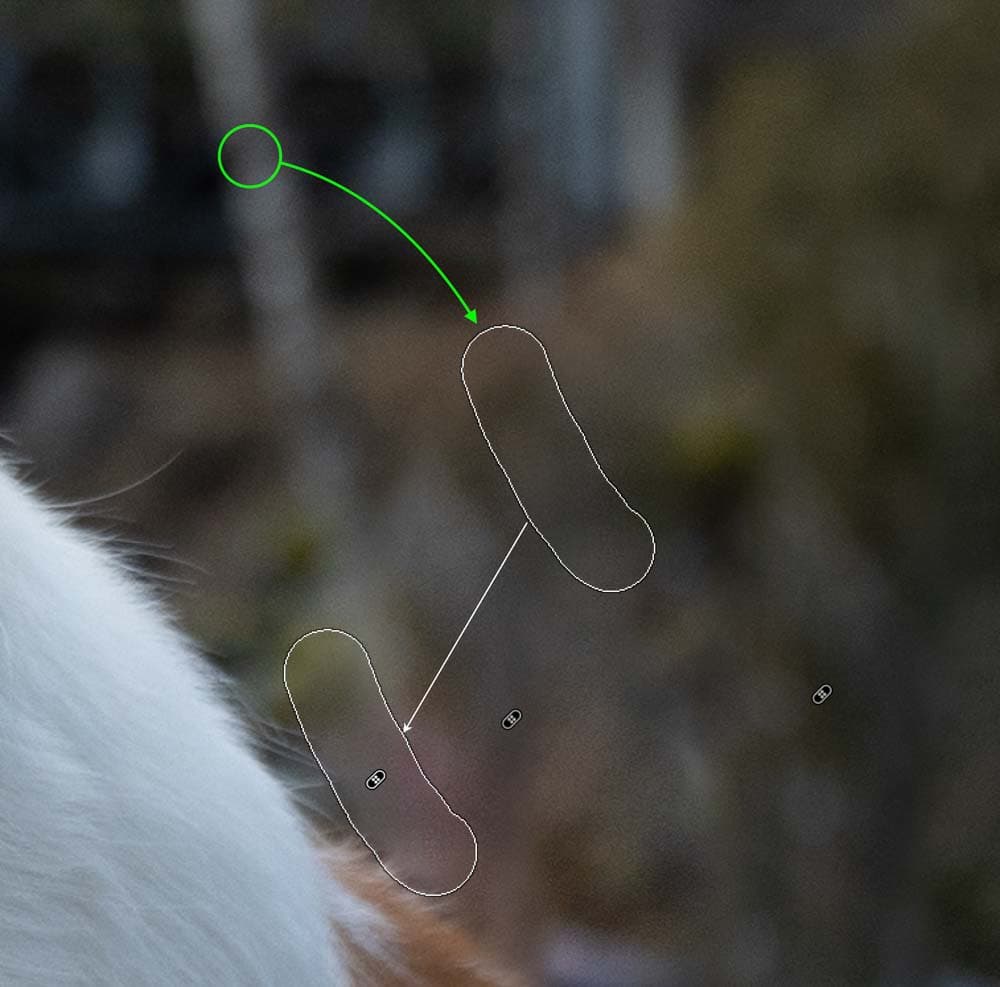
Step 7: Repeat The Process
Now that you know how to cover up an area of the image continue the process until the entire zone is covered. In the end, you may have many different brush strokes, particularly if the area you’re covering up contains many different colors and exposures. But the final product will have the unwelcome area removed.
Lightroom often does a good job of removing small objects from images or larger objects that are out of focus or against a simple texture. However, for more complex spot removal adjustments, you’ll need to use a few tools in Photoshop to get the best result. I share the best tools to remove objects in Photoshop here if you’d like to learn more about what’s available beyond Lightroom.


