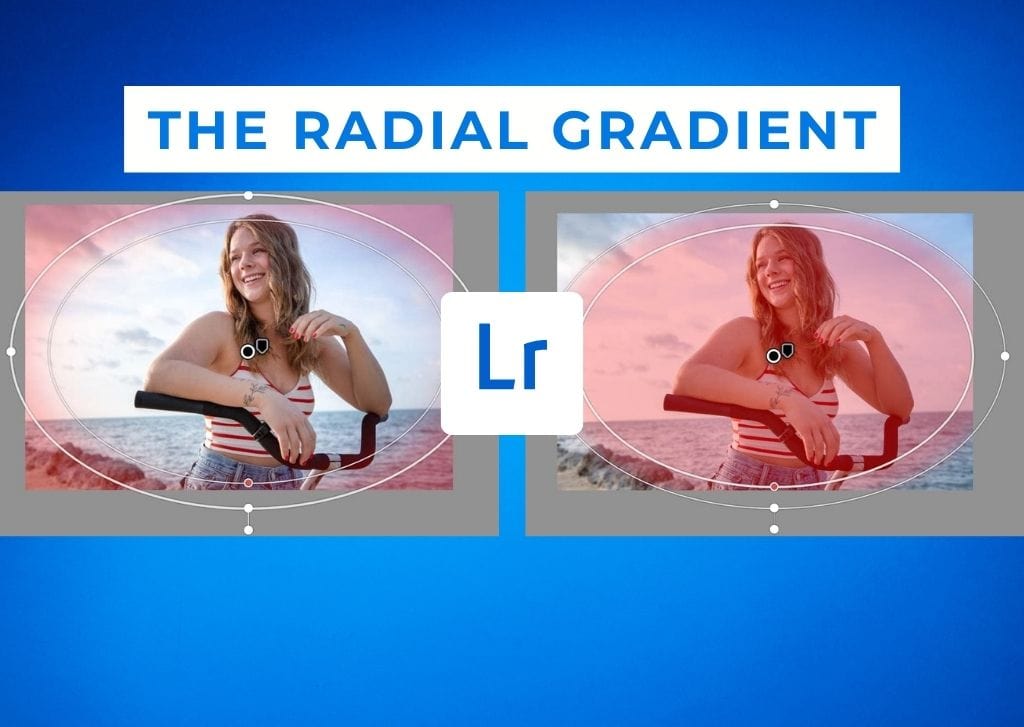

If you’ve got a specific focal point in your image that you’re trying to highlight, you may benefit from using a radial filter in Lightroom. Radial filters create a round mask that you can place over a subject and adjust the inside or outside of the radius. These can be useful to create vignettes or to use adjustments like exposure or sharpness to draw the viewer’s eye to a specific area.
Let’s look at how to use them to enhance your photos in Lightroom Classic. Just remember the same ideas apply to Lightroom CC and Lightroom Mobile as well!
What Is The Radial Filter For In Lightroom?
The radial filter is one of Lightroom’s masking tools, which allows you to create adjustments on a portion of the image. The filter is a circular-shaped gradient, so the adjustments will fade into or out of a round-shaped focal point depending on how you set the gradient. You can create multiple radial filters to draw attention to or adjust several areas.
You can use radial filters to make tonal adjustments, adjust colors, sharpen areas, or create a vignette on the image. The end result is a targeted effect on a specific area that seamlessly blends into the rest of the image.
How To Access The Radial Filter
You can find the radial filter within Lightroom’s masking tools. Head to the Develop module and click the Masking icon, which sits between the Histogram and the Basic panels.

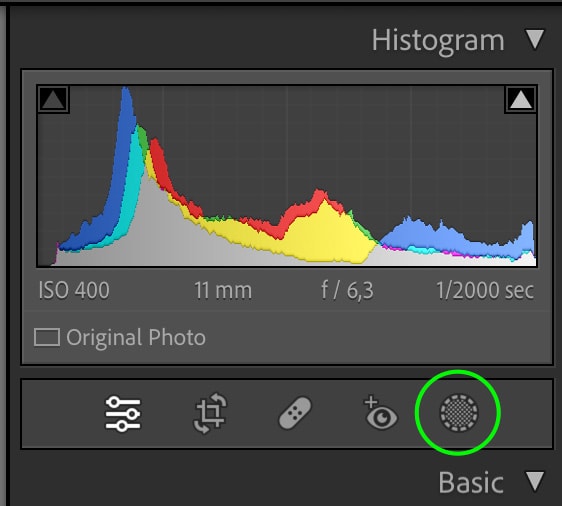
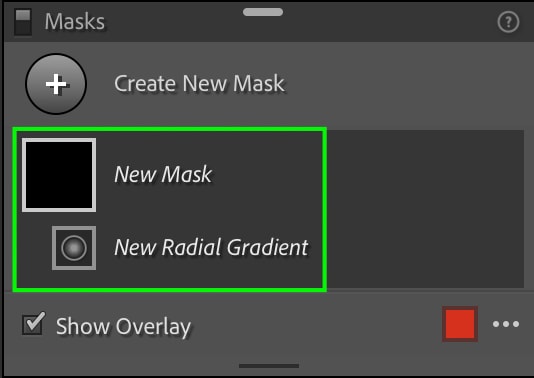
The masking panel will open, showing different types of masks you can create. One of these is the Radial Gradient. You can also press Shift + M (Win and Mac) to quickly access the radial filter.

Click the icon and a new mask with the radial gradient will be created in the Masks Panel.
How To Use The Radial Filter In Lightroom
There are many different ways you can use the radial gradient to draw the viewer’s eye toward a certain area of the image, as well as create effects like vignettes. To customize the mask, use the adjustment options in the next section after adding the radial gradient to your image.
Step 1: Access The Radial Filter From The Masking Panel
First, select the Radial Gradient from the Masking Panel or click Shift + M (Win and Mac) to access it.
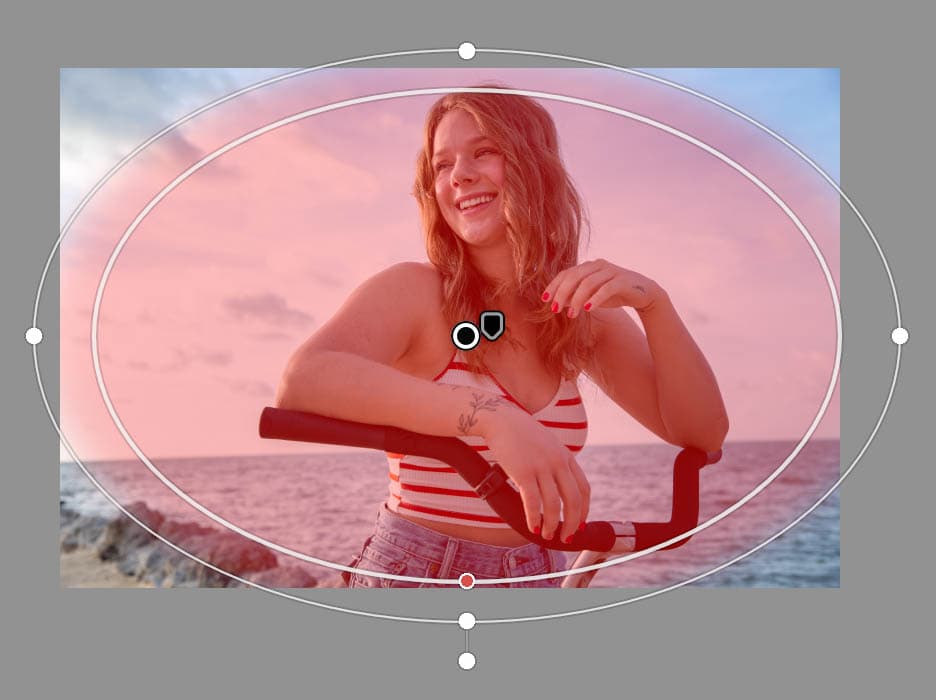
Step 2: Click And Drag On The Image To Add The Mask
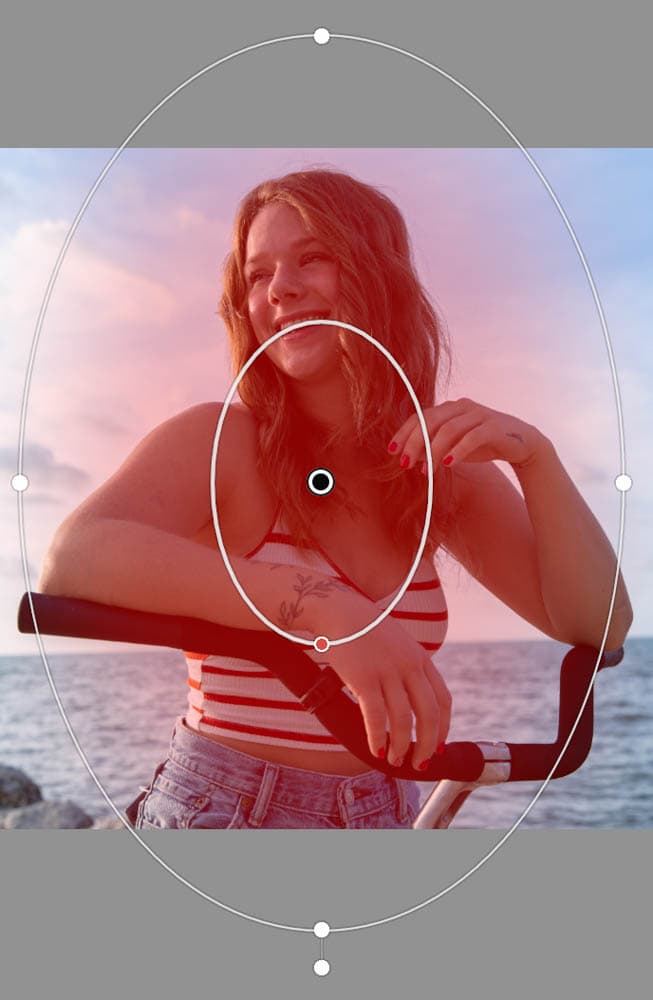
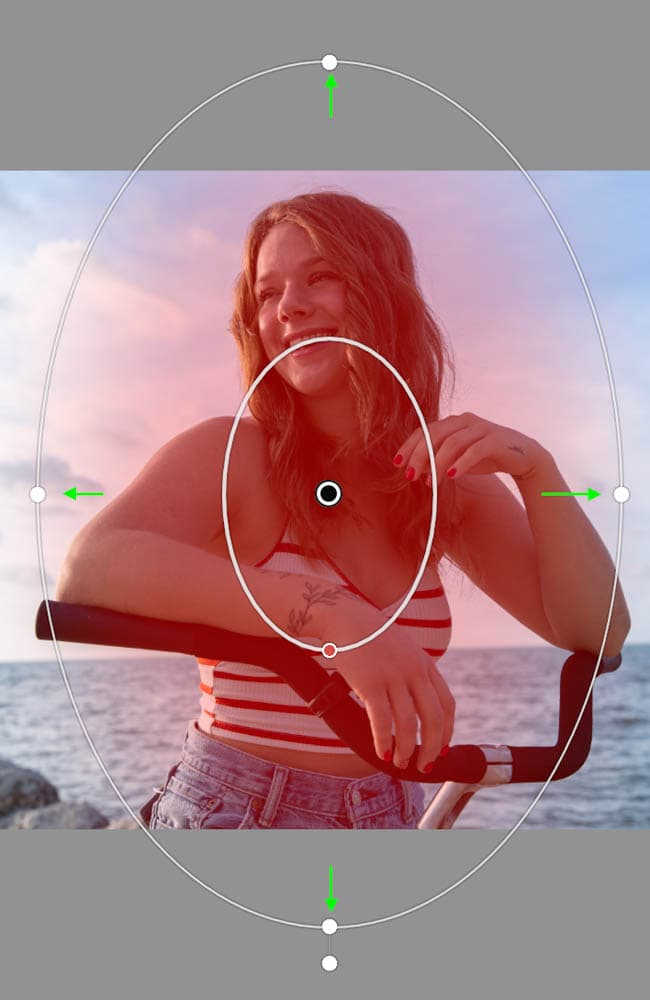
Simply click and drag on the photo to create the mask. You will see the masked area as a red overlay with two white circles, which indicate the size and the feathering of the mask.

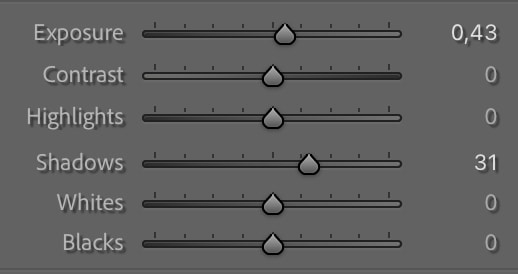
Step 3: Add Adjustments To The Area
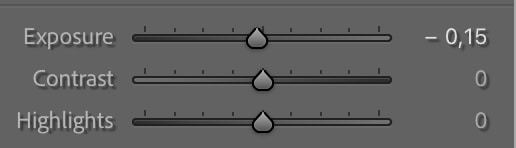
You can now add any adjustments you’d like. For instance, you can brighten the area by slightly increasing the exposure or the shadows, or both. The subject will appear slightly brighter.

Step 4: Add Additional Radial Gradients For Extra Effects (Optional)
You can compound this highlighting effect by adding a vignette to the edges of the image. To do this, drag a larger, oval-shaped gradient across the image, leaving the corners out. If you’re creating an effect that is only supposed to apply around the subject, you want to drag the inside radius to the outside of your subject.
Then, invert the gradient so that the effect is applied to the outside rather than the inside of the gradient. You can do this by checking the Invert box in the Gradient panel.
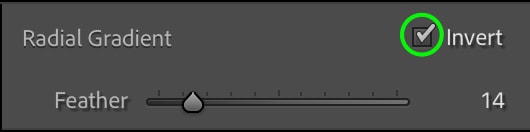
You’ll see the masked part of the effect, the red highlight, switch to the outside of the gradient.
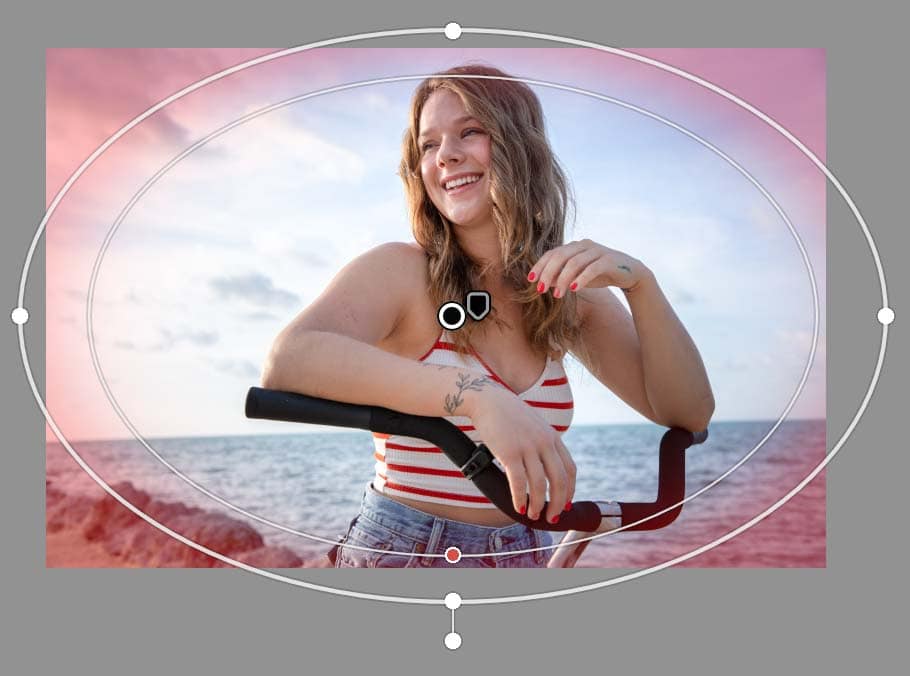
Then, bring the exposure down slightly.
The result will be a slight vignette effect around the edges of the image. You can notice the difference when you compare the two images.


How To Adjust The Radial Filter In Lightroom
The Radial Filter works a bit differently from the other masking tools. You won’t see a size slider setting. The only setting you’ll see for this mask is the Feather setting. It is important to ensure the radius has the correct size and feathering for the adjustment you want.
– Adjusting The Filter Size
Rather than adjust the size using a bar and toggle, you have to size the radial filter by clicking and dragging on your image when you create it.
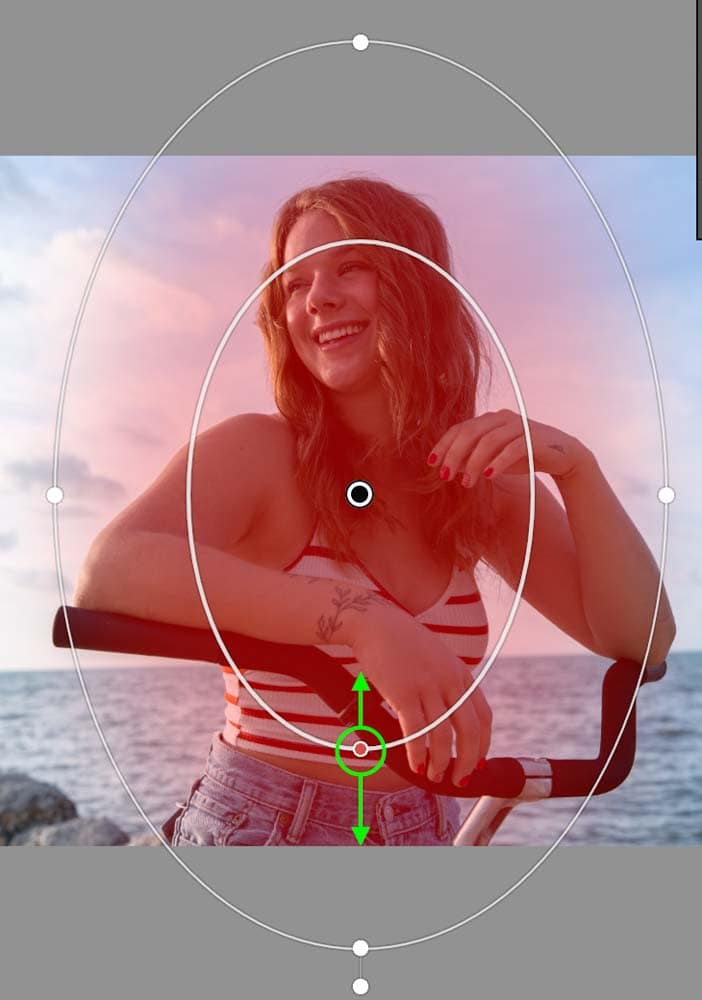
The point you click initially will act as the center of your mask, and the radius will grow the farther out you drag. You can drag up or down or left and right while creating the filter to make a vertical or horizontal oval shape. Otherwise, to keep the filter a perfect circle as you drag, hold the Shift key.

You want the filter size to fit the subject or area where you want to apply the mask, if not a bit outside the area. To change the size of the filter after you’ve applied it to an image, press the H key to show the toggles and drag them to adjust the size and shape.
– Adjusting The Feather
When you’ve created the filter, you’ll notice that there are two circles: an inner and an outer circle. If you do not see the circles, press the H key, and they will appear.
Inside the inner circle is where the adjustments will be concentrated, while the outer circle marks the true edge of the filter after the feathering effect.
The space between the inner and outer circles is the feathered part of the radius. You can click and drag the toggles on the inner circle to increase or decrease the amount of feathering.
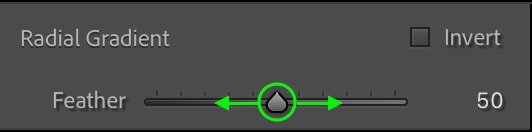
You can also adjust the feathering by dragging the toggle in the Masks Panel, left for less and right for more.
Adjusting the feather of the radius will adjust the softness of the edge. A higher percentage of feathering will lead to softer edges that blend well with the rest of the image, while a lower feathering will set a hard, more precise edge.


For most adjustments, I recommend leaving the feather at 100% so that the effect fades naturally into the background creating a more realistic result.
Lightroom’s radial gradient mask is uniquely useful as it can act as a stand-in for the viewer’s line of sight. The radial shape is perfect for highlighting a specific area of the image or adding an effect to only the corners or edges of an image.
Now that you understand how the radial gradient works play around with the tool to see how it can enhance your image.


