

Love it or hate it, Skylum released Luminar Neo relatively soon after Luminar AI which left a lot of photographers feeling confused, cheated, and a bit frustrated. Many people I spoke to felt unsure if Luminar Neo would be worth it, and admittedly, I felt the same. How could something be released so soon after a previous program and be considered an “upgrade”?
Although I was once skeptical, after several months of using Luminar Neo in my workflow I’ve realized that this program is actually one of my new favorites.
BUT
It’s certainly not for everyone.
There are some serious strengths to this program, but it has its fair share of weaknesses too. Depending on how you intend to use the program, either as your primary editing software or as a plug-in to Lightroom and Photoshop, there are a few things you’ll want to know about.
So rather than making it all sound like sunshine and rainbows, let’s get real about Luminar Neo and if it’s actually worth it for you.
What Is Luminar Neo?
Luminar Neo is an AI-powered photo editing program that can be used as a standalone platform, or as a plugin to other popular programs such as Adobe Lightroom and Photoshop. Using AI-powered tools to enhance scenes, retouch skin, or remove objects, this program makes complex photo editing easy.
The big highlight of this program is that it boils down previously complex adjustments in Lightroom or Photoshop, into the work of a single slider. For example, Sky AI allows you to replace skies in any photo with a click, or Portrait Bokeh AI adds a realistic blur to the background with a slider. To do similar adjustments in Photoshop would take far more steps, and not to mention more experience in the program.
A good way to think of Luminar Neo is like an editing program that makes professional adjustments accessible to all. Whether you’re a beginner or a professional, you can still get impressive results without needing to spend months or years trying to master the program.
And if you’ve ever tried learning Photoshop, you’ll know what I mean.
The most advanced AI-powered editing program to save time and unlock your creativity. Perfect as a stand-alone program or as a plugin to Lightroom & Photoshop.
Use coupon code BRNWILLS to save $10
Who Is Luminar Neo For?
Before you waste your time reading this post just to realize this program isn’t really for you, let’s make it abundantly clear.
Luminar Neo Is For:
- Photographers who want a more streamlined editing process and don’t mind giving up some control
- Beginners and intermediates who feel overwhelmed by programs like Lightroom, Photoshop, or Capture One.
- Advanced photographers looking for a faster way to accomplish complex tasks like skin retouching, sky replacements, or basic object removal.
Luminar Neo Is Not For:
- Photographers who feel like all their needs are met with their current editing software.
- Aren’t interested in creative editing effects like overlays or sky replacements.
Ultimately if you want to get more creative in your photo editing with tools to streamline the process, Luminar Neo is an incredible program to have. However, if you feel like there’s not much more you need from your current editing program, then you likely won’t be blown away by what Luminar Neo offers.
As someone who uses Luminar Neo as a plugin for Lightroom and Photoshop, I find it fits as a nice addition to what the other programs lack. That way I get the best of both worlds and have the option to streamline certain steps in my editing process.
How Is Luminar Neo Different Than Luminar AI?
Whether you purchased Luminar AI in the past or have heard about it through your research of Luminar Neo, there are a few key differences. The primary differences are the addition of Layers in Luminar Neo, an upgraded core engine for better performance, additional AI adjustments such as Relight AI, and the replacement of Templates with Presets.
I highlight all of these differences in another article comparing Luminar AI vs Luminar Neo. If you are looking to upgrade from Luminar AI to Luminar Neo, that article will prove more useful than this one.
So now that you know the basics of Luminar Neo and what it’s all about, let’s get into what the program actually has to offer, starting with file management.
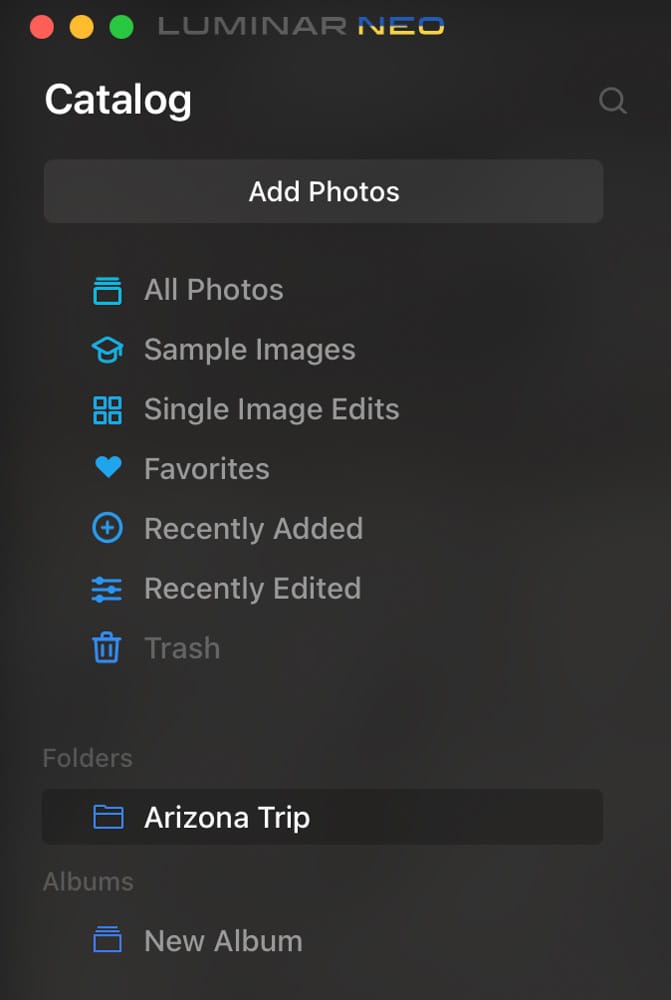
Importing & File Management In Luminar Neo
If you plan to use Luminar Neo as your standalone editing program, the file management portion is extremely important. Although Luminar Neo does have a similar library functionality to other editing programs, it’s not necessarily the right fit for everyone.
The importing process in Luminar Neo is very simple. By clicking the Add Photos within the Catalog Module you can choose single images or upload an entire folder. A nice perk of uploading single images into Luminar Neo is that they are automatically added to a group called Single Image Edits. In other programs I have used, single images frequently get lost in the shuffle of thousands of other images.
Meanwhile, when you upload an entire folder, it appears as a new folder in your Luminar Catalog making it easy to locate and view your images.
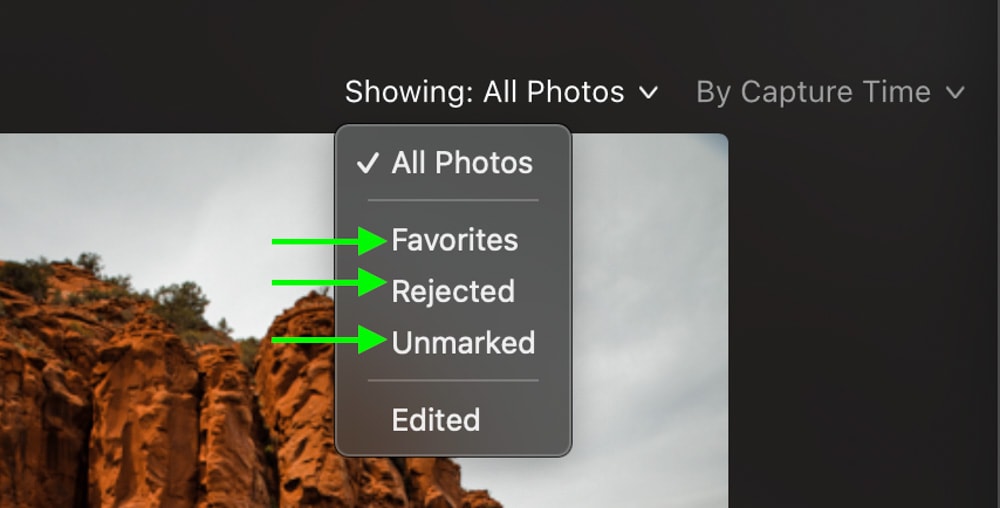
When it comes to image sorting, Luminar Neo has a pretty basic set of options. You can either favorite or reject images, but there are no additional sorting methods beyond that. This will cut it for basic image culling needs, but for many advanced or professional photographers, this simply isn’t enough for an in-depth sort.
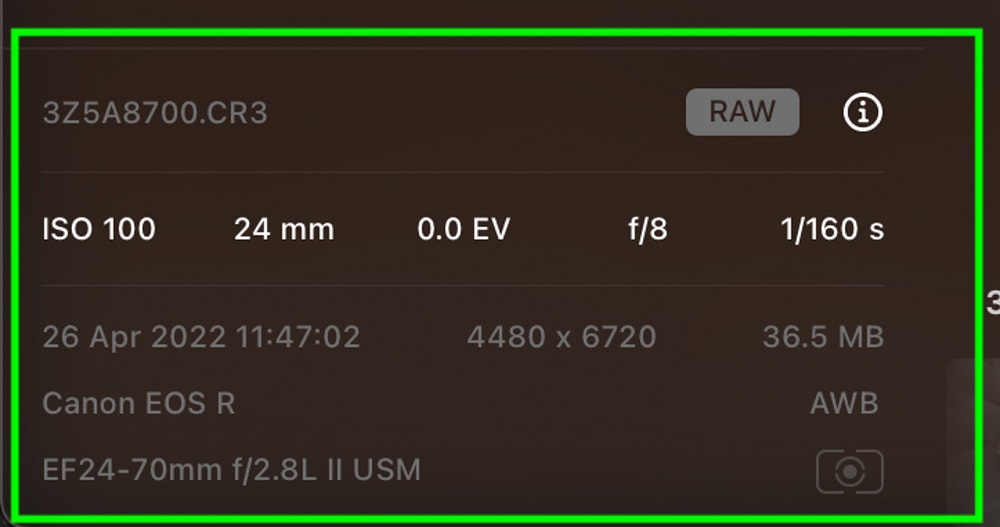
To add to this, you can view image metadata in the program, but you cannot edit it to add location or copyright info to your files. This point is not as important for beginner and intermediate photographers but may be a sticking point for those more advanced.
This is a big reason why I don’t use Luminar Neo as my primary editing program because it doesn’t have the level of image organization I need. When editing thousands of photos, dealing with multiple galleries from clients, and bouncing images between different editing software, I find it hard to manage with just a “favorited” and “reject” option. In Lightroom, for example, I have flags, star ratings, and color labels for more in-depth sorting.
Ultimately if you’re a beginner, intermediate, or hobbyist photographer, these things may not play an important role in your decision. However, anyone who is shooting professionally (or aspiring to) will find this portion of Luminar Neo functional, but uninspiring.
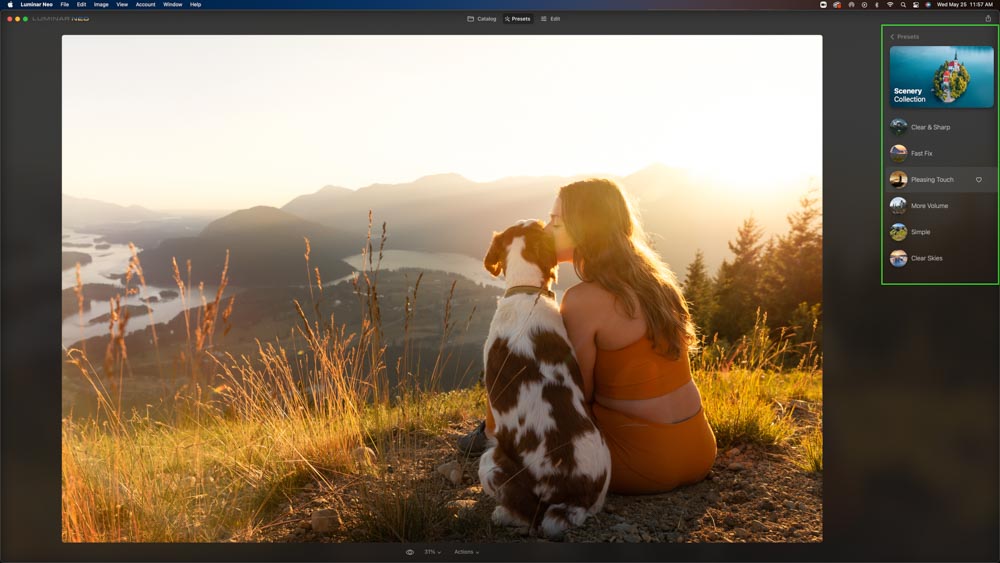
Luminar Neo Presets

A new feature in Luminar Neo is the replacement of Templates from Luminar AI, to what is now known as Presets. Unlike a template, presets can be applied separately from your manual adjustments. With a template, your manual adjustments and your preset adjustments would be linked. This separation of Presets in Luminar Neo is a big upgrade and is extremely useful for quick edits on any photo.
In the Presets Panel, Luminar scans your photo to see what types of features are in it such as people, buildings, landscapes, or epic skies. From there it automatically recommends a handful of presets that will work best for your images. I have found these recommendations to be spot on and save a lot of time when hunting through the preset options.
For example, if you brought a portrait photo into the Presets Panel, Luminar Neo would suggest portrait-related presets that refine skin, add background blur, or simply enhance your photo.
Luminar isn’t restricted to basic exposure, contrast, and color adjustments in its presets like Lightroom presets are. Due to the many AI-powered tools in Neo, you can take advantage of advanced adjustments included in one-click presets.
The presets in Luminar Neo are a huge win in my books and prove useful for all levels of photographers.
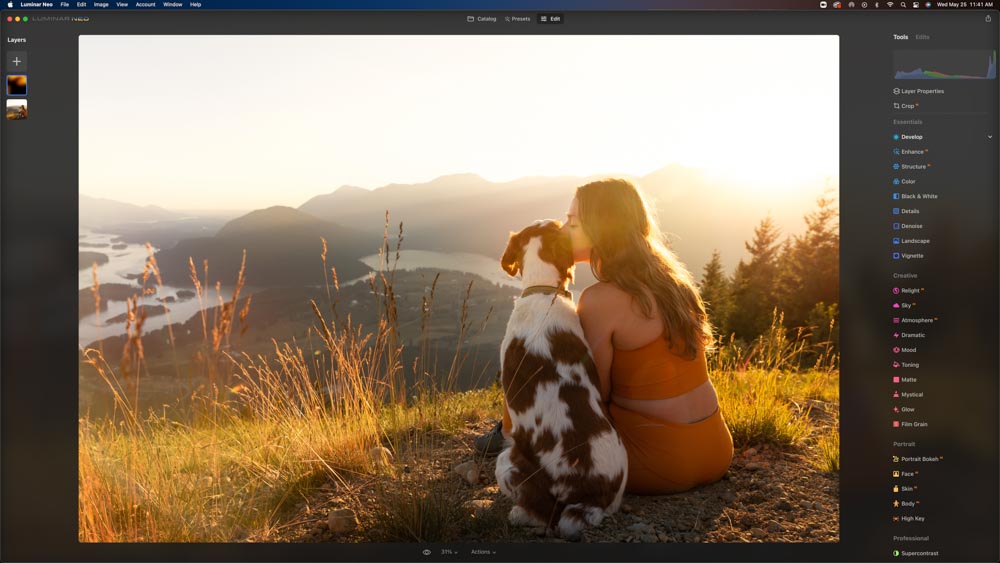
Other Key Features Of Luminar Neo Explained
Luminar Neo includes all the standard editing adjustments you know and love. Exposure, whites, blacks, tone curve, HSL, white balance, and so on. So rather than boring you with the tools you are likely already familiar with, let’s focus on the key editing tools and features that make the program stand out.
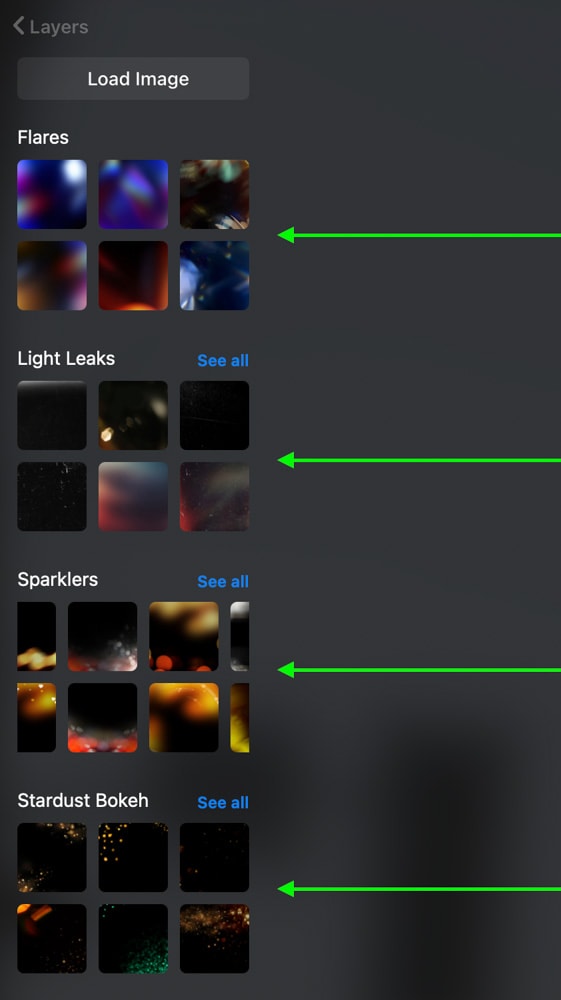
– Layers
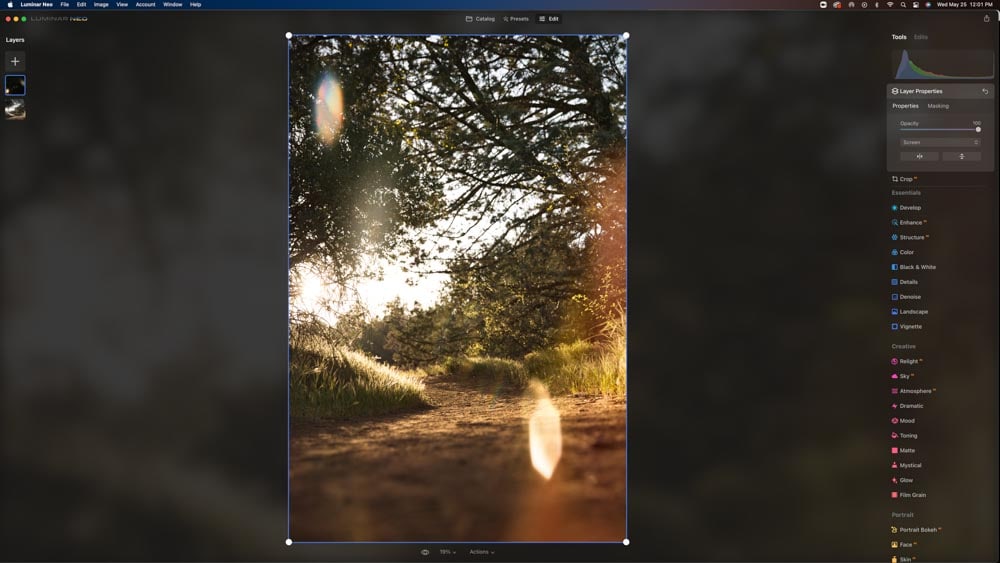
The layer system in Luminar Neo allows you to add overlays to your images separate from your other editing adjustments. These are a serious advantage over what’s available in Luminar AI and make it easy to apply multiple creative effects to your photos with ease.
For example, you can add a new layer and choose one of the many overlays built into the program. In one click you can apply the overlay and do basic opacity adjustments to blend the effect.


It’s important to put emphasis on the fact that this layer system allows you to add overlays, but not much else. If you are expecting this layer system to be like that of Photoshop, you will be sadly mistaken.
You cannot edit any layer individually and have limited blending options beyond the layer opacity. It’s also worth noting that you can’t use this layer system to add graphics or illustrations to your images for basic design work. It’s strictly limited to overlay effects and very limited beyond that.
Ultimately they serve their purpose well for adding creative looks without messing with your original adjustments. However, they are a far cry from what’s possible customization-wise in a program like Photoshop.
– Relight AI
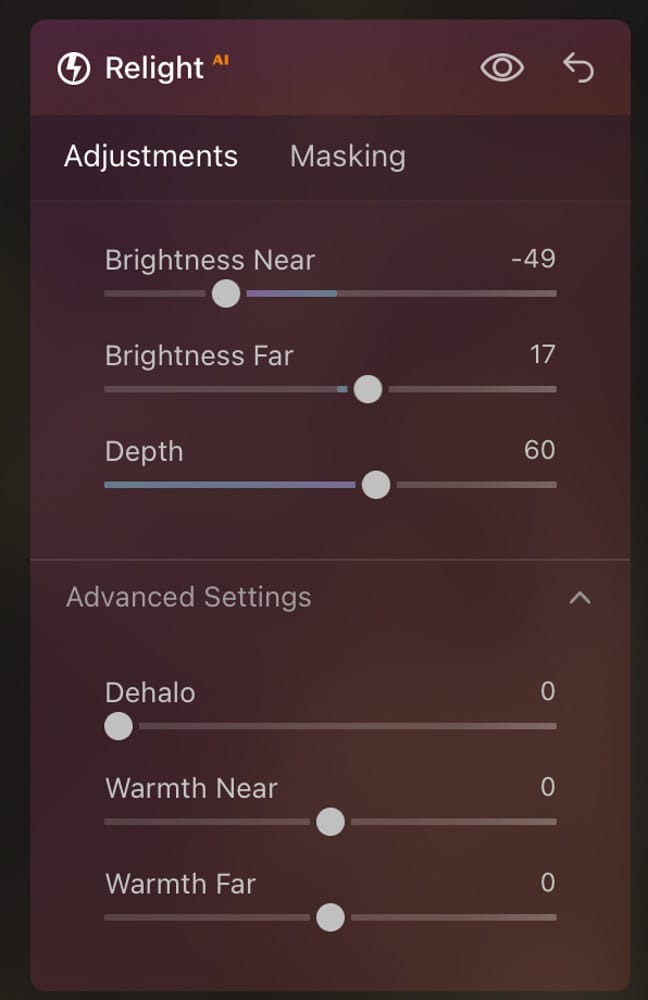
Relight AI allows you to edit your background and foreground independently without creating a mask. Using AI to scan your photo, Luminar Neo automatically selects the foreground and background for you, while giving you the option to control the depth of the adjustments.
Although it would be cool to see more adjustments in this tool such as HSL or the tone curve, you can only adjust the brightness and white balance.


This tool is meant to balance the exposure in your image without masks or bring back details in sections of your photos. For the purpose it’s built for, it does a great job in addition to any primary adjustments.
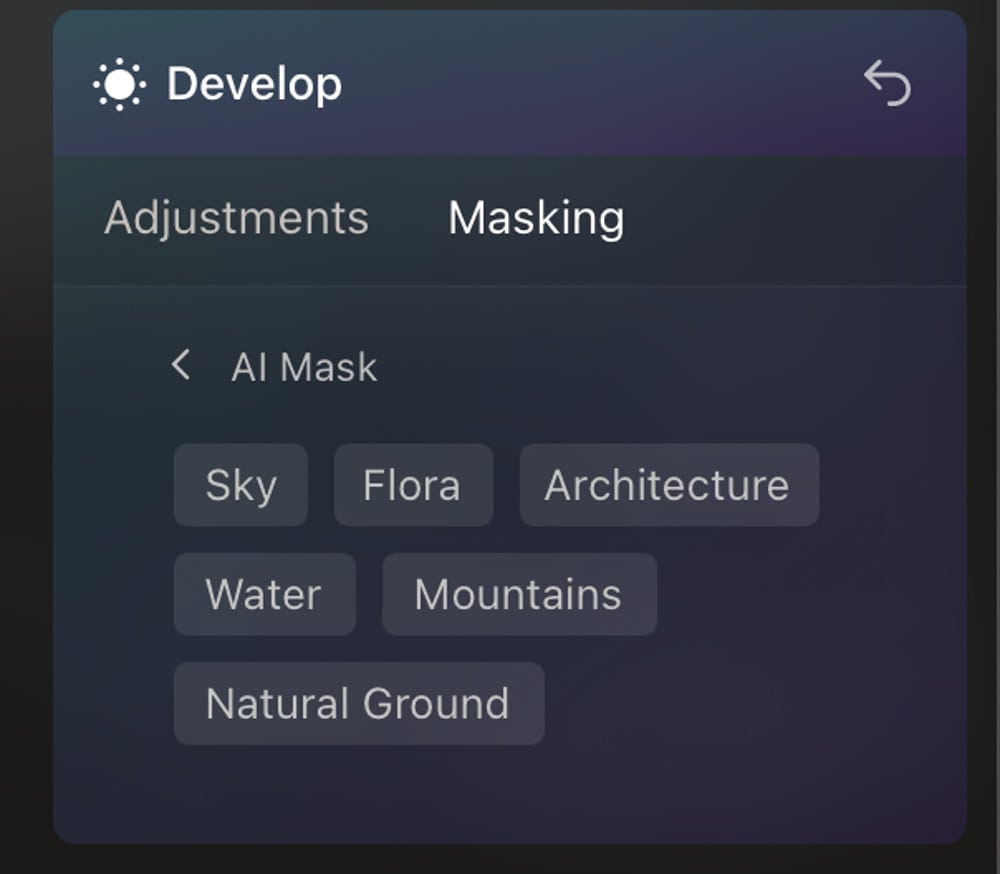
– Mask AI
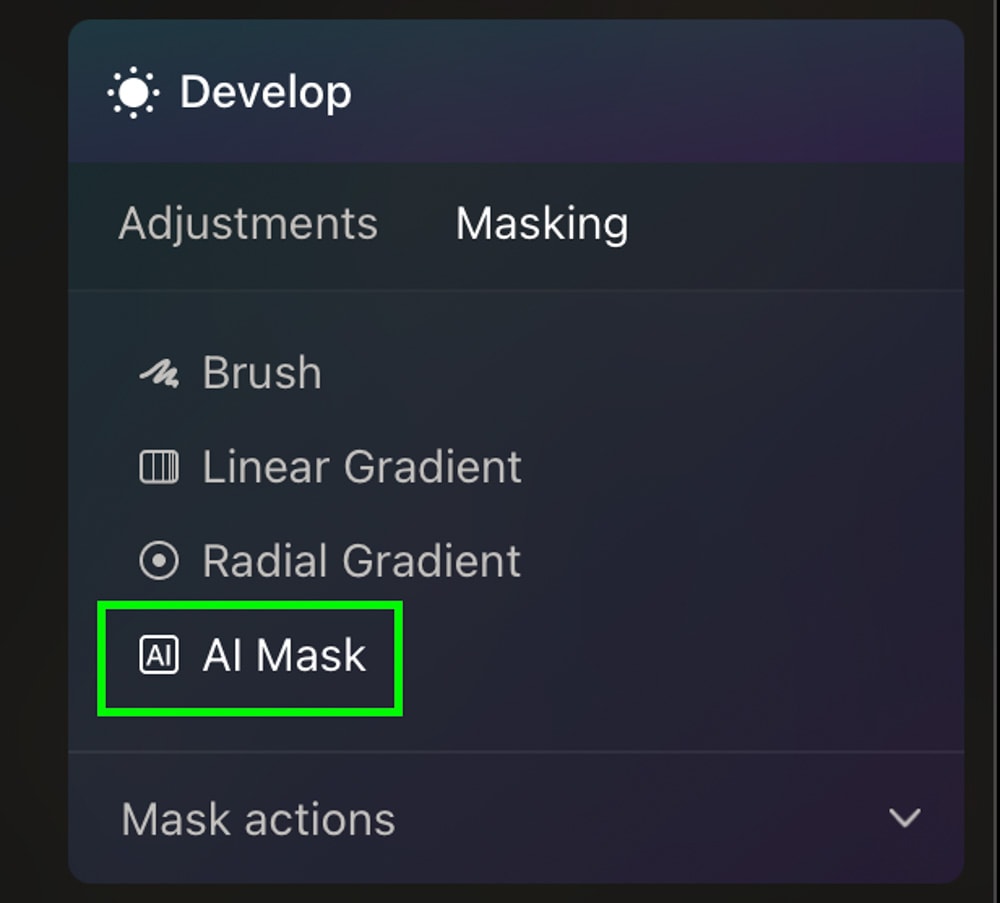
Mask AI is a masking tool on steroids since it does all the work for you. Simply by clicking Mask AI within your masking options, Luminar Neo scans your photo to break it down into different features for adjustments.
For example, you could click Mask AI and get mask options for the sky, mountains, architecture, people, natural ground, man-made ground, and more.
Although this tool usually works wonders, it does give some pretty bad mask suggestions from time to time. I’ve used this tool on a mountain landscape photo and it suggested “architecture” as one of the mask selections.
Luckily this is a small issue that doesn’t really get in the way since you can click the mask options that apply best to you. From there you can add your selective adjustments as normal.
I find this tool extremely useful when creating a lot of my masks. It saves the time and headache of making brush adjustments or creating gradient and radial filters all over an image.

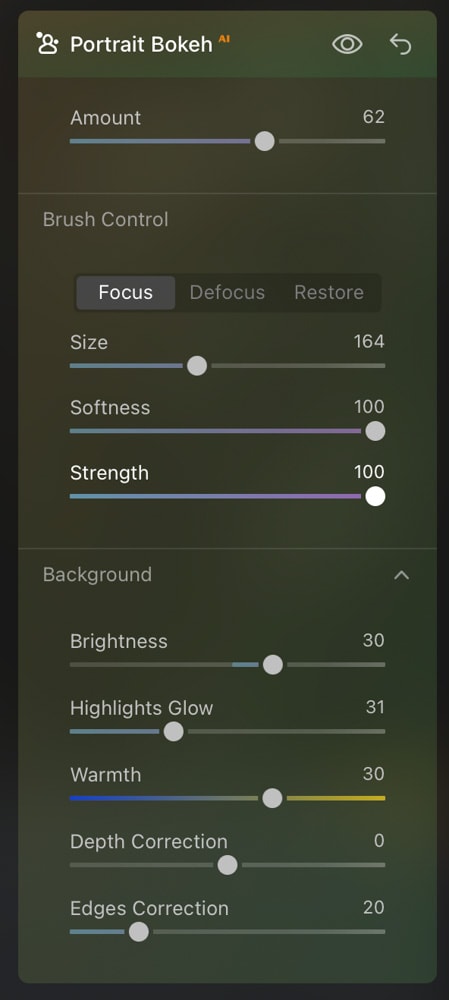
– Portrait Bokeh AI
Portrait Bokeh AI creates a realistic background blur (or an enhancement of existing blur) to portrait photos. Unlike blur effects I’ve used in other editing programs, the results from this tool do a great job at matching that of a wide-open aperture.


A nice feature of this tool is that there are many customization options to make the effect perfect. Luminar automatically selects your subject to exclude from the effect, but you can manually paint additional areas to exclude as well.
From there, it’s easy to adjust the blend of the effect if you see any weird results around the edges of your subject. You can also add basic adjustments to the newly blurred background such as highlight glows or white balance adjustments.
Although this tool is only useful for those shooting portraits, it’s an impressive adjustment that is unique to Luminar Neo.
– Remove Dust Spots
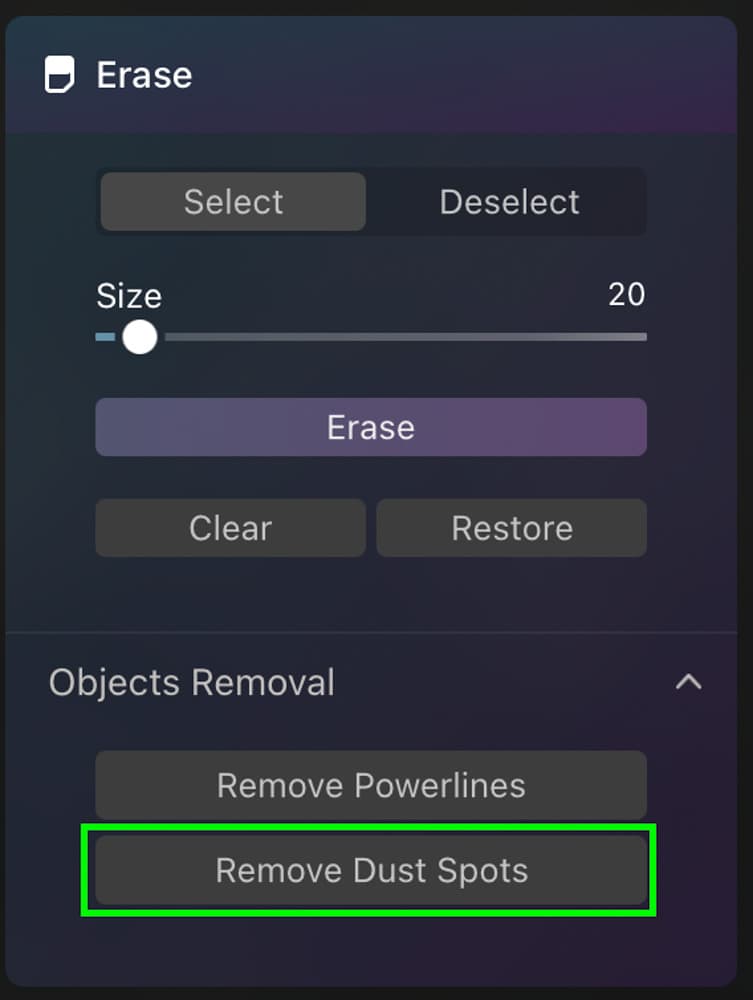
Dust spots (or sensor spots depending on what you want to call them) are a massive pain to remove one by one. Especially if you have a large set of photos captured with a dirty sensor, the time it takes to remove them adds up quickly. Luminar Neo makes this process incredibly easy with a one-click removal of them with, you guessed it, AI-powered tools.
Simply by clicking “Remove Dust Spots” within the Eraser tool, all of them are removed from your photo and you can get back to editing. This is a simple tool, but one that proves exceptionally useful for all photographers.
– Remove Power Lines
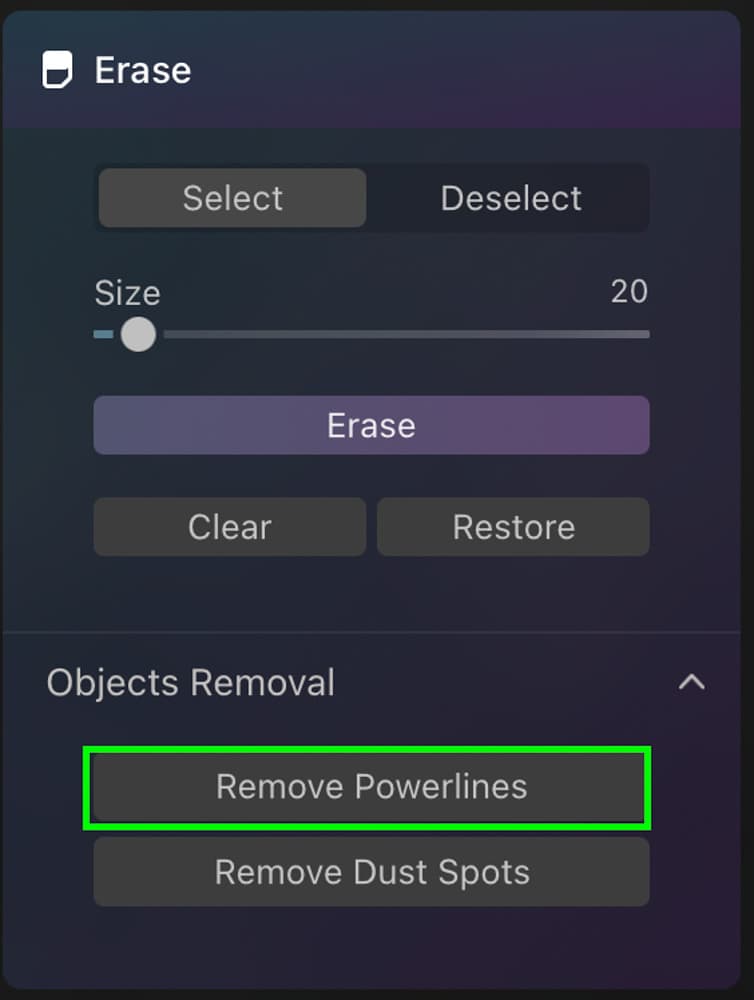
Whether it’s a single distracting powerline or a web of them in your city photos, the Remove Powerlines adjustment does an impressive job to fix this. Similar to Remove Dust Spots, you can click the Remove Powerlines adjustment and Luminar will automatically remove them.


This tool does a very good job of powerline removal against basic backgrounds without many textures or lines. However, against complex backgrounds, it does leave many remnants that will need to be touched up manually after the AI adjustment.
Although this isn’t necessarily a feature that all photographers will find useful (depending on where you shoot), it’s another unique tool to Luminar Neo that’s definitely worthwhile.
– Sky AI

To turn any photo from average to mind-blowing, a sky replacement can go a long way. In Luminar Neo, the Sky AI tool allows you to replace your sky with a click. No complicated steps, no complicated masking, no experience required.
With this tool, you can choose between a variety of built-in sky templates, or add your own templates if you want to. From there, simply click the sky you like and Luminar does the rest.

In most cases, the results are spot on and don’t need refinements. However, in the times that they do, there are a handful of easy sliders to adjust your masking settings for the perfect blend.
I have noticed that this tool doesn’t work well against hazy horizons where edges aren’t perfectly clear. For the vast majority of images though, this tool works wonders and is my go-to for sky replacements.
– Sky Enhancer AI

If sky replacements aren’t your thing and you simply want to enhance an existing sky, this tool does just that. By darkening and increasing the contrast in your sky, it brings to life the clouds on a sunny day, makes a sunset look more captivating, or a storm cloud become more dramatic.
Since this tool uses AI to select the sky, you can make adjustments without fear of editing other parts of your photo. I have yet to have an issue with this tool not working as it should. It always nails the masking and does an impressive job to improve details in the sky.
Between the Sky Enhancer and the Sky AI tools, there isn’t a better set of sky adjustment tools available elsewhere that I’ve seen.
– Luminar Share
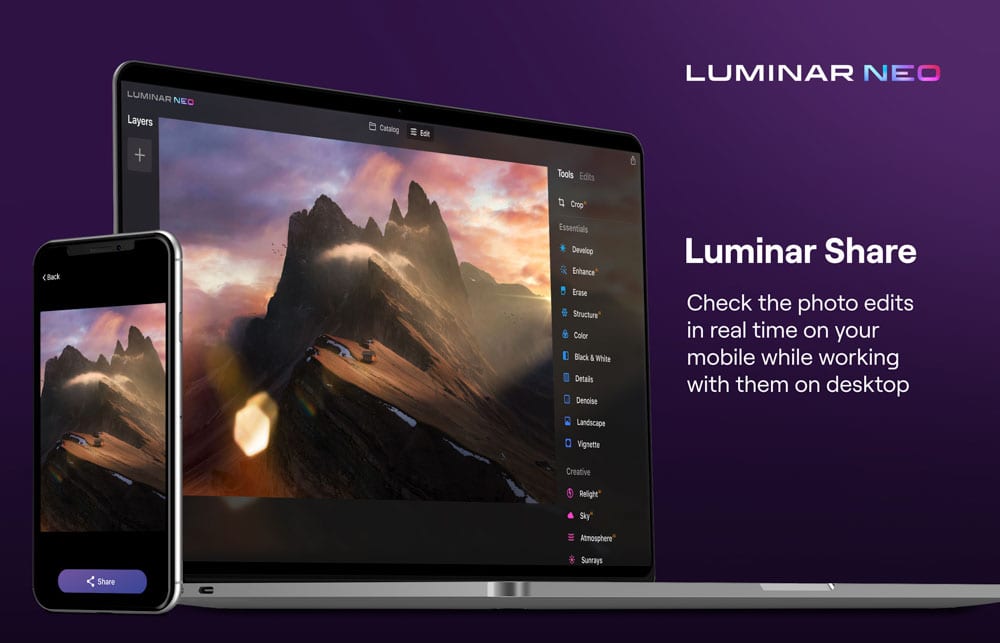
Although this isn’t necessarily a “tool”, it is a feature of Luminar Neo that’s pretty awesome. You can export from Luminar straight to your computer, or you can export to Luminar Share which automatically syncs your export to the Luminar Share app on your phone. That way you can quickly export and share to your favorite social media platform in no time.
Compared to what I’d previously do with exporting to my computer, Luminar Share saves me so much time. Rather than uploading to my cloud folder, accessing it on my phone, then (finally) sharing on social media, Luminar Share lets me do it in essentially one step.
How Much Does Luminar Neo Cost?
Luminar Neo costs $59 for a one-year subscription plan or $79 for lifetime access. The primary difference between the subscription and lifetime access is that the subscription gives you all future upgrades and add ons while the lifetime only includes performance, stability, and Mask AI updates.
There are also options to buy two seats of Luminar Neo if you plan to use it on multiple computers. For two seats, you’re looking at $79 per year on the subscription plan or $99 for lifetime access.
Now to get a better view of the differences between the subscription and lifetime purchase model, here’s a breakdown:
Yearly Subscription (Starting at $59/year)
- All future updates
- All new feature add-ons
- Workflow designed for creative photo editing
- Unique AI tools to simplify repetitive tasks
- Built-in library of Textures & Overlays
- 30-day money-back guarantee
- 24/7 technical support
Lifetime Purchase (Starting at $79)
- Update with AI Masking and Portrait Background Removal
- Performance and stability updates
- Workflow designed for creative photo editing
- Built-in library of Textures & Overlays
- Unique AI tools to simplify repetitive tasks
- Lifetime license
- 30-day money-back guarantee
- 24/7 technical support
Should You Buy Luminar Neo?
The most advanced AI-powered editing program to save time and unlock your creativity. Perfect as a stand-alone program or as a plugin to Lightroom & Photoshop.
Use coupon code BRNWILLS to save $10
There are two camps of people to consider with this question. The first are those who are completely new to Skylums software, and the second are those who are current users of Luminar AI.
For those new to Skylum and who don’t own Luminar AI, I believe Luminar Neo is absolutely worth the money. Whether you plan to use it as a standalone editing program or as a plugin in Lightroom and Photoshop (like I do), it has options for everyone. The catalog interface is better than any basic image editing software and works well for beginners, intermediates, and hobbyists.
For professionals, you can use your regular library in Lightroom while still taking advantage of the many AI-powered tools unique to Luminar Neo.
Regardless of your skill level, the tools in Luminar Neo are something that will save everyone time and help open new doors in your photography.
Now for those who are current users of Luminar AI and trying to decide if you should upgrade, I don’t believe it’s worthwhile. Luminar AI has a lot of similar tools to Luminar Neo, with the exception of a few that I outline in my Luminar Neo vs Luminar AI comparison.
I thought that there would be more to the program when I switched over and it felt more like a paid update than an all-new program. If you are happy with Luminar AI, I don’t think you’ll notice a huge difference when you upgrade. However, if you feel limited by certain tools in Luminar AI, the use of Layers and the replacement of Templates with Presets are noticeable differences you’ll enjoy.
Try Luminar Neo For Free
If you’re still on the fence about whether Luminar Neo is right for you, they offer a 7-day free trial of the program. I’d definitely suggest giving it a shot and seeing everything I talked about here for yourself.
Happy Editing!
Brendan 🙂


