
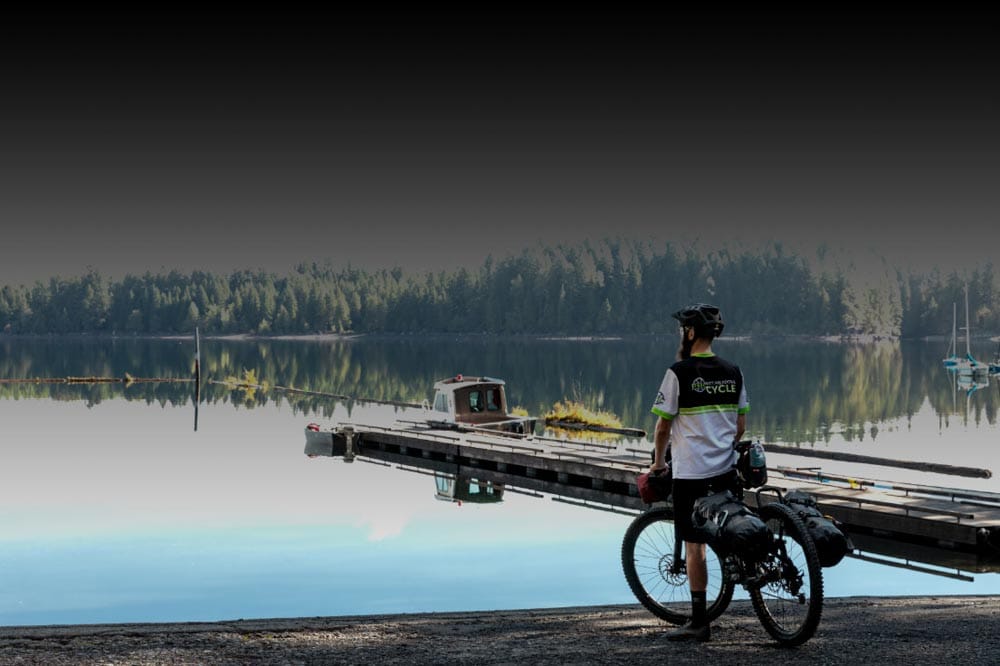
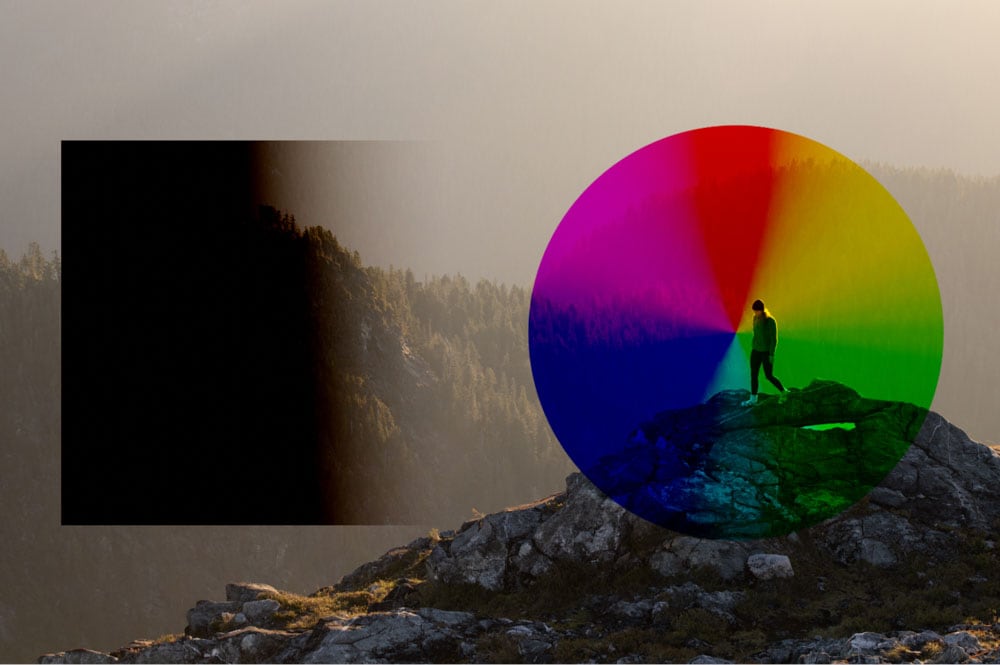
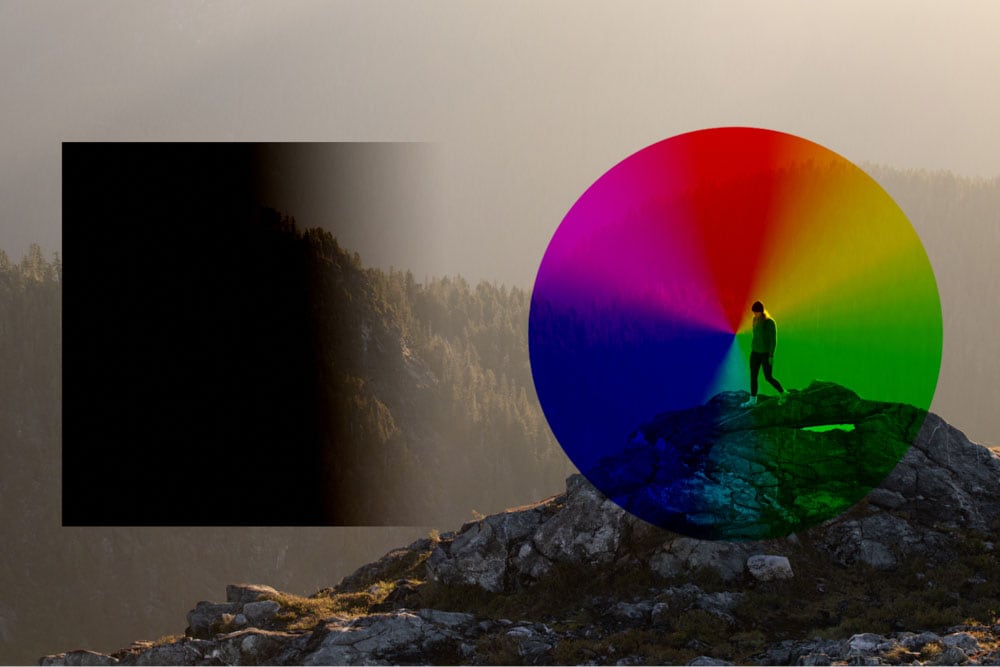
When first working with Blend modes in Photoshop, it’s almost an experiment of scrolling through the 27 modes to see what works on your image. While this method works, it’s time-consuming, and you never truly know what each blending mode can offer besides thinking, “ya, that looks good enough.” Luckily, this tutorial will break down and explain every blend mode in Photoshop to help you better understand which to use and why.
What Are Blending Modes In Photoshop?
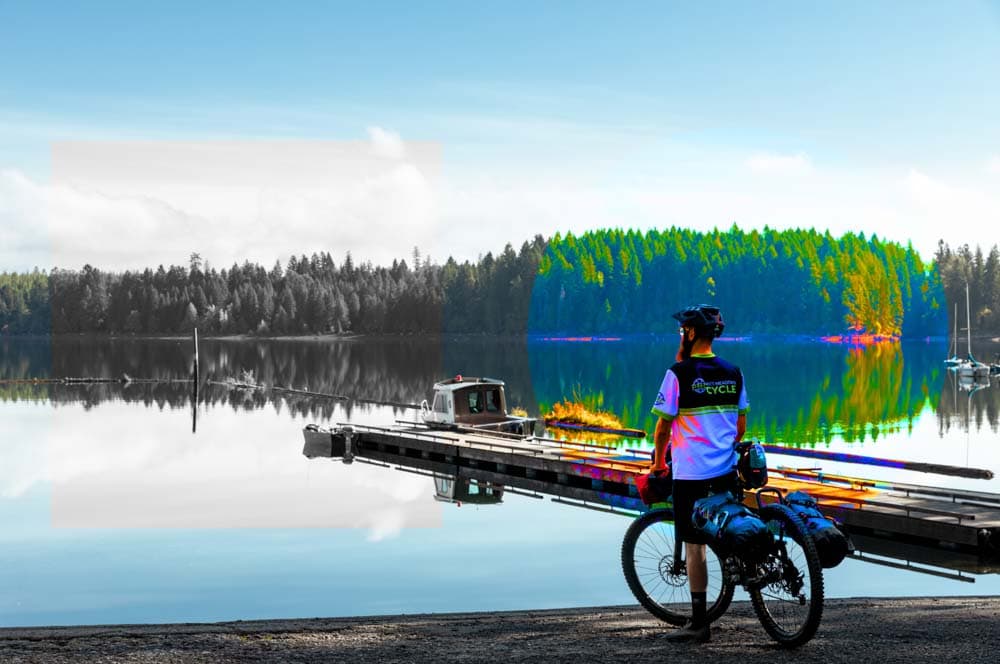
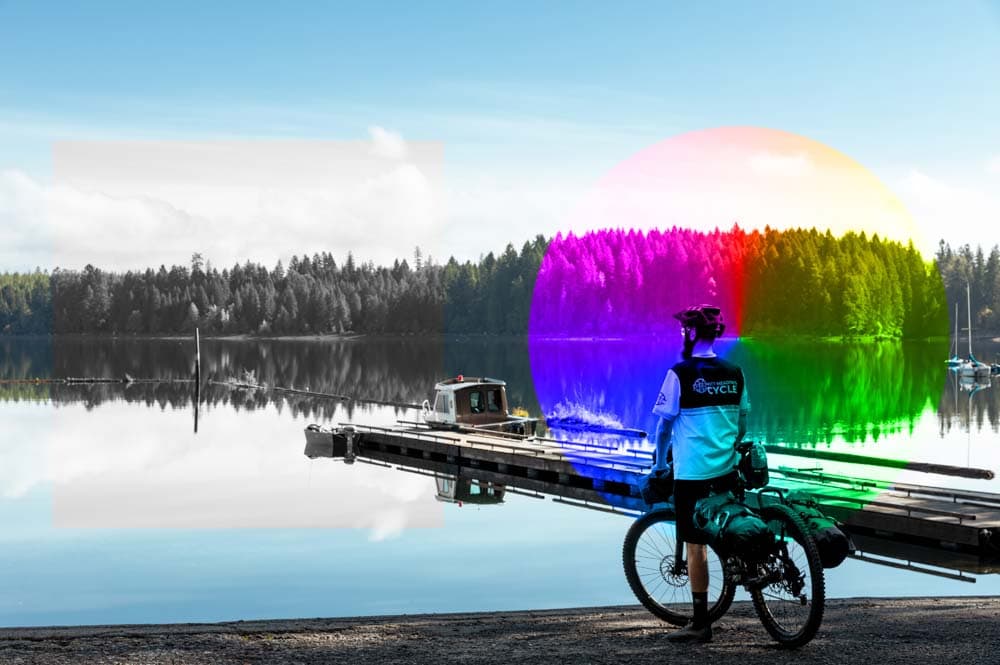
Blending modes affect how a layer’s colors and exposure values are blended with the layers beneath it. With 27 different blend modes available in Photoshop, changing the blend mode can help with creative edits, blending brush adjustments, removing black backgrounds, and more.
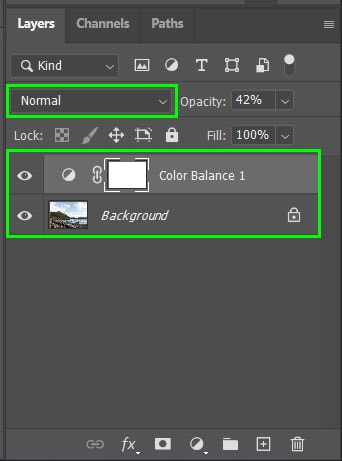
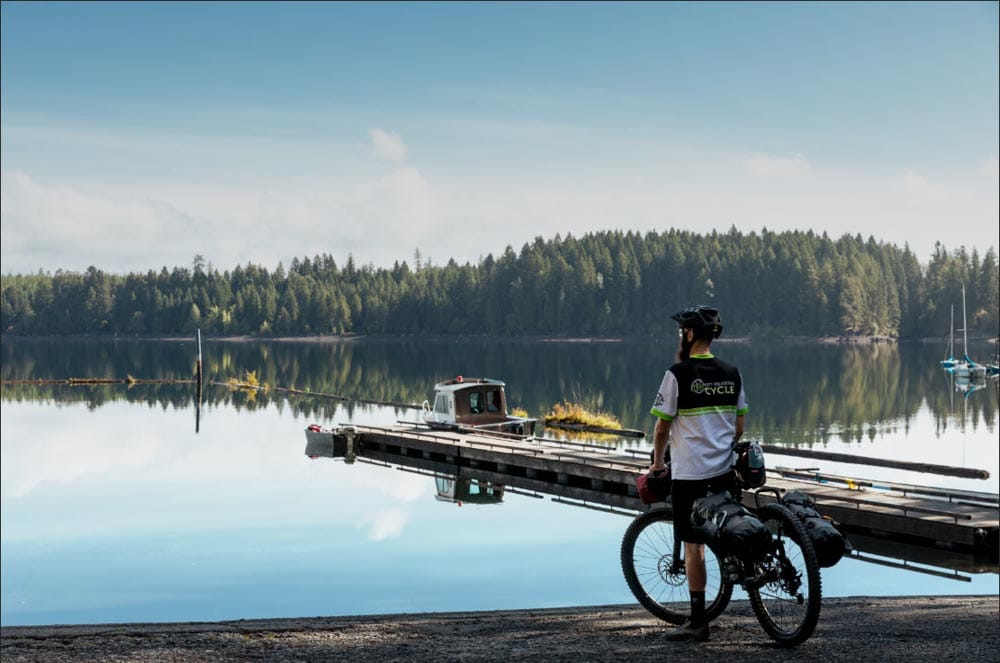
By default, each layer’s blend mode is set to Normal, which means the layer will stay how it originally looked. You also need to have at least two layers before it’s possible to change the blend mode.
Simply put, these blending modes work similarly to the Opacity function. When you lower the Opacity of a layer, you allow parts of the layer below it to show through. Blend modes also show details of the layer beneath it. However, it’s more complicated than simply adding transparency to the layer. Instead, different blend modes change how certain exposures and colors of a layer blend with the one below it.
Luckily, you don’t need to know the technical aspects of how the modes work but rather how they interact with the layer(s) below.
Blending modes can not only be added to layers but also to smart filters, layer styles, brush adjustments, and more. Once you understand how the modes interact with layers, you can use the different modes with other tools as well.
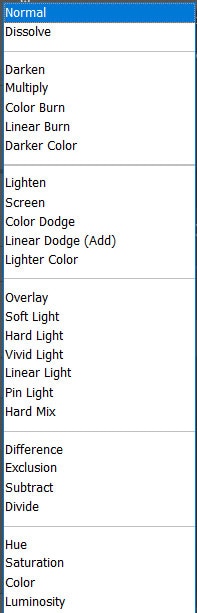
After clicking the drop-down menu next to Normal in the Layers panel, you will see all 27 blend modes. Let’s break down what they all do.
Photoshop Blending Modes At A Glance


Photoshop Blending Modes Explained
There are 27 blend modes in total that each fall into one of six categories. Here is how each mode works with examples based on their categories.
1. Normal Blending Modes
The first group is the Normal Blending Modes, which blend the layer using degrees of Opacity rather than blending the layers.

– Normal
The blend mode of any layer, whether an image, shape, text, or any other layer, is set to Normal by default. This means that the layer is fully visible and has the normal characteristics of the adjustment, fill, or pixels. Any layer added contains opaque pixels that cover the pixels on the layer below.
For example, if you add a new solid color fill layer to your picture and select the color blue, the new layer will fully cover the image in the Normal blending mode.

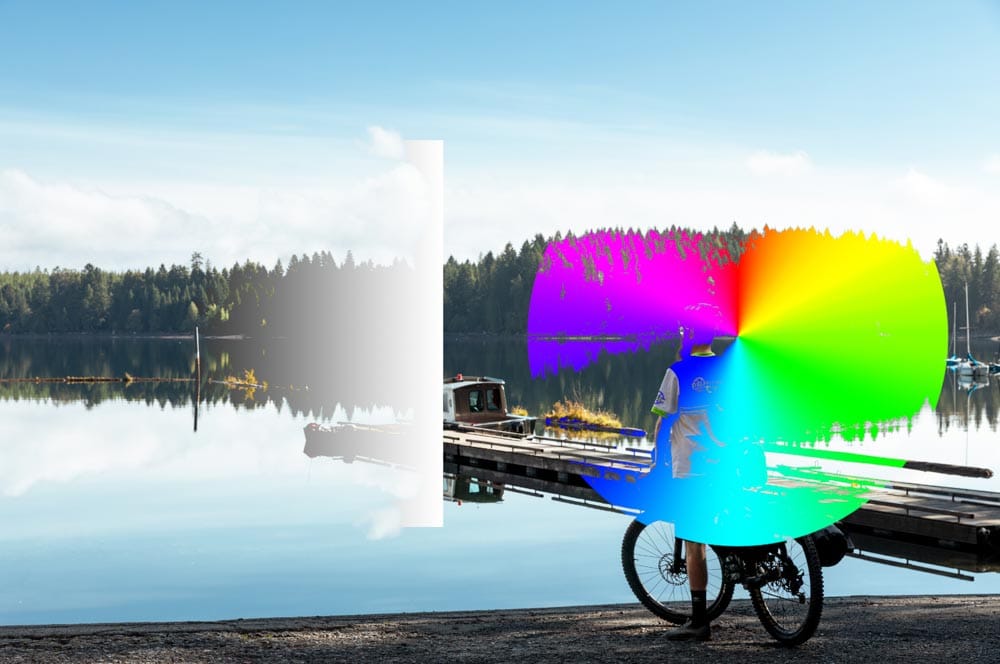
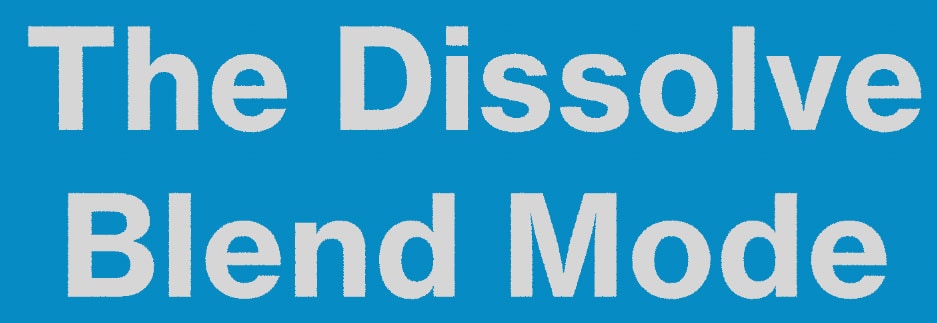
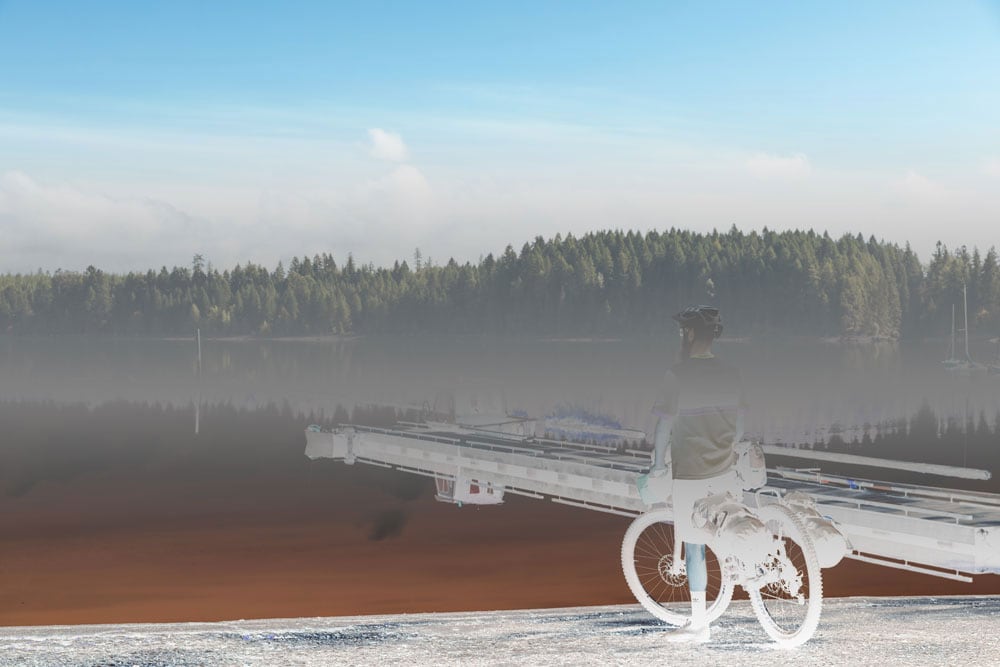
– Dissolve
The next mode in the group is Dissolve, which reveals specific pixels in the layer below once the top layer’s Opacity is reduced. The Dissolve blend mode portrays the pixels in a dither pattern, which gives a noise effect to the layer.
This blend mode is used for creative effects, such as creating stars or a haze effect. In this case, I will add a text layer to the blue background.
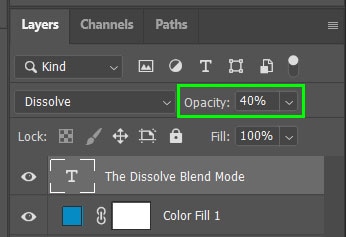
Once the blend mode is changed to Dissolve, the text looks almost unchanged, although it has a slight fuzziness.
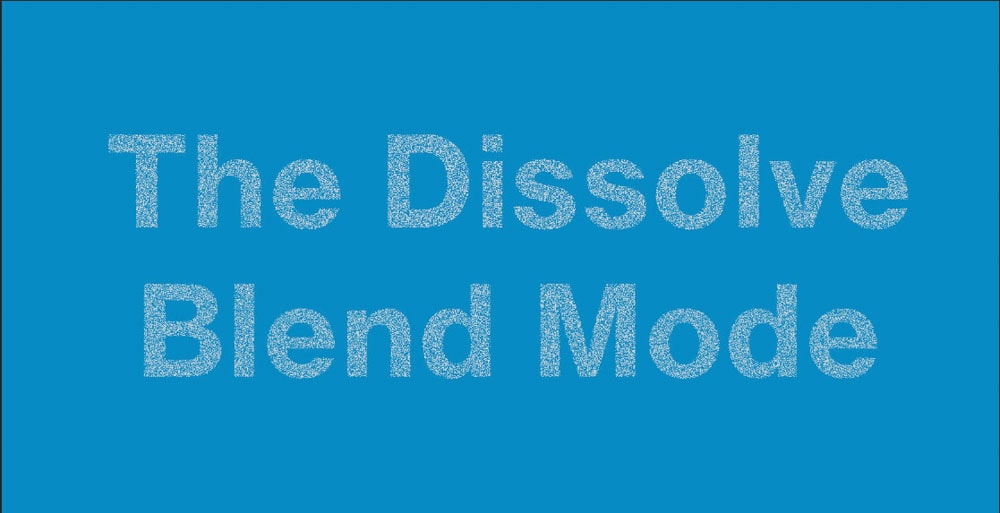
To fully see the effect of the Dissolve blend mode, I will reduce the Opacity of the layer to 40% at the top of the Layers panel.
Now, you can see the effect of the blend mode as specific pixels from the blue fill layer are visible through the text in a dither pattern.
2. Darken Blending Modes
These five blend modes darken the base layer and hide white areas from the active layer.

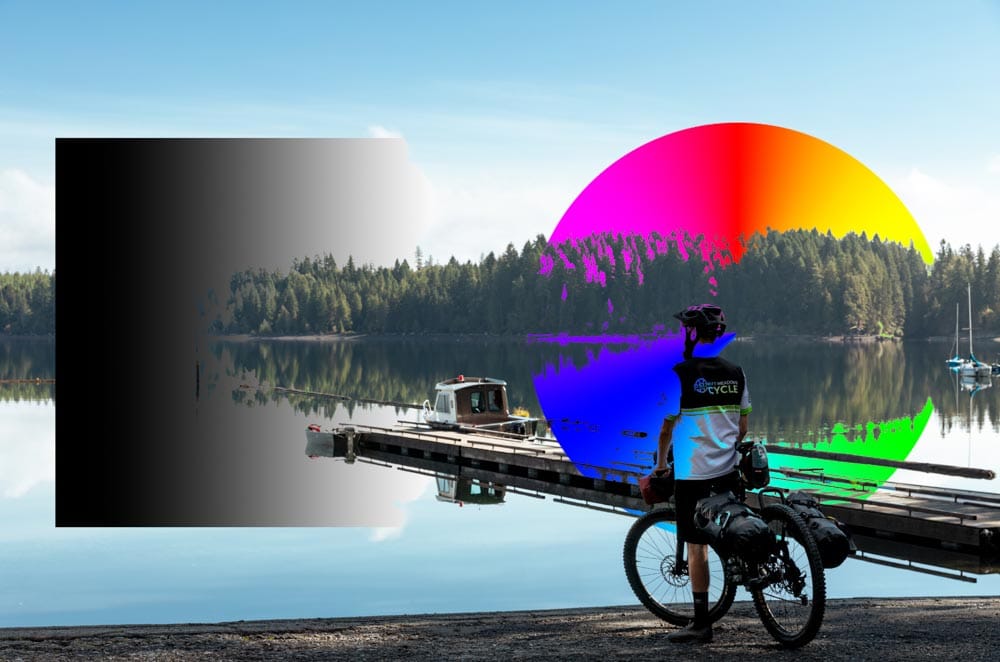
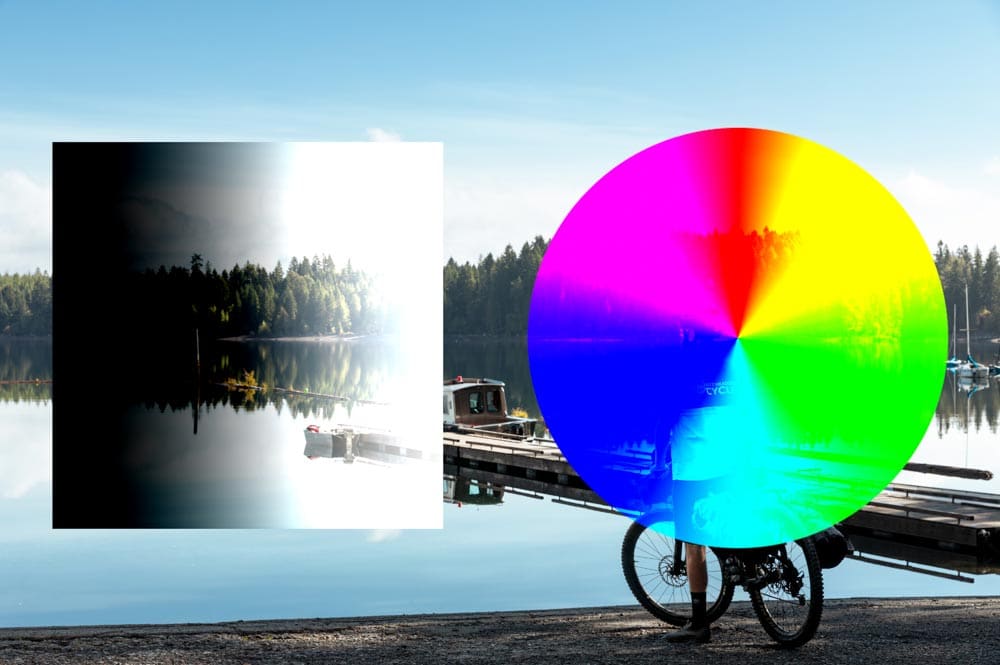
– Darken
The Darken blend mode doesn’t affect the opacity of the layer. Instead, this blending mode compares the color of the pixels from the base layer to the layer on top. Photoshop then selects the darker pixels and keeps those visible while removing the lighter pixels from either the base or the blend layer, based on each RGB channel.
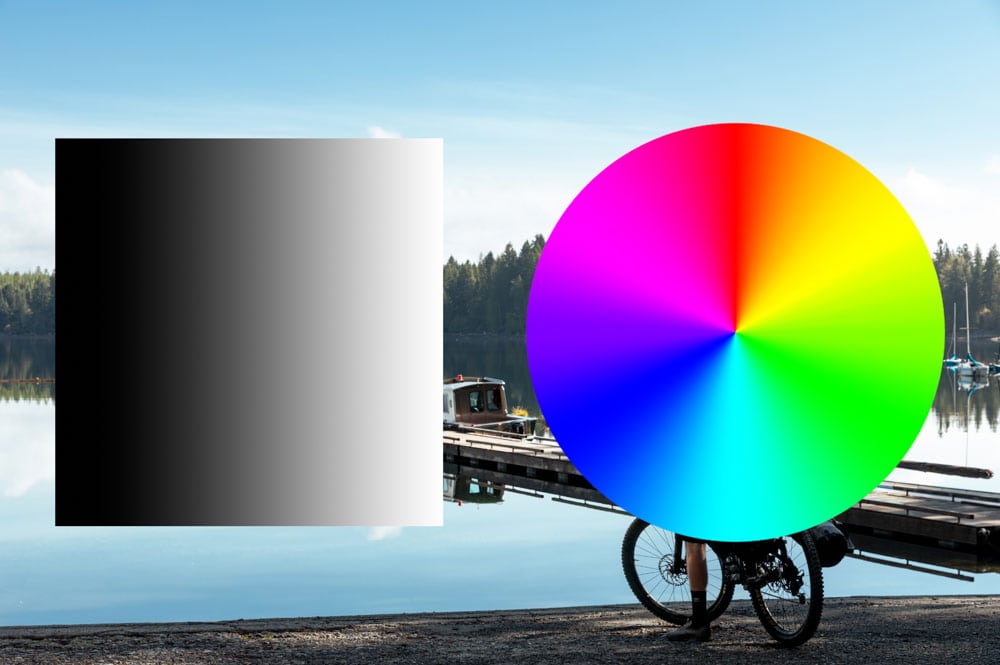
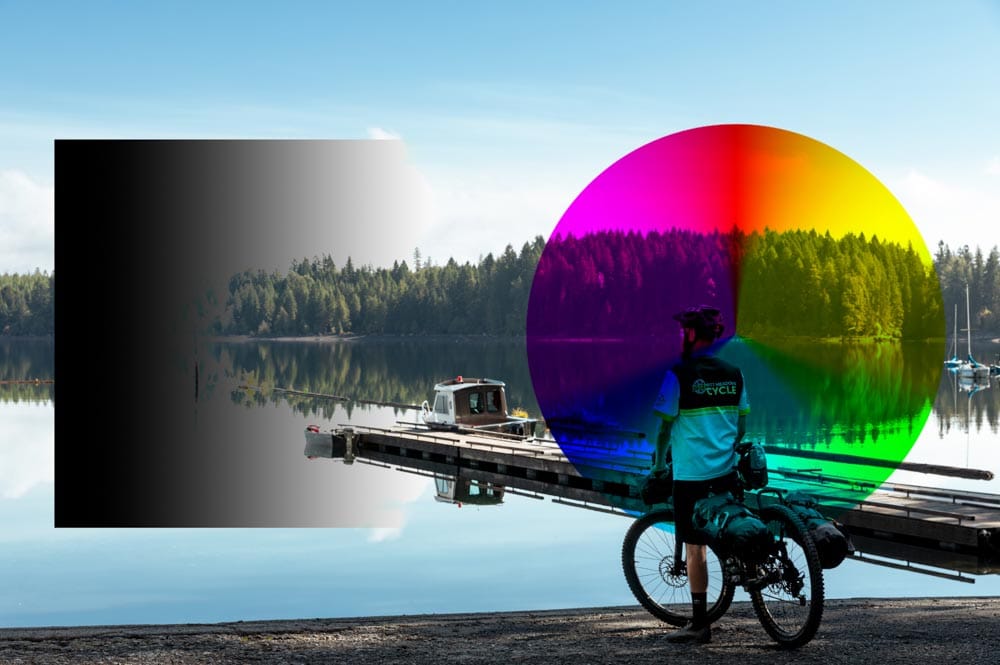
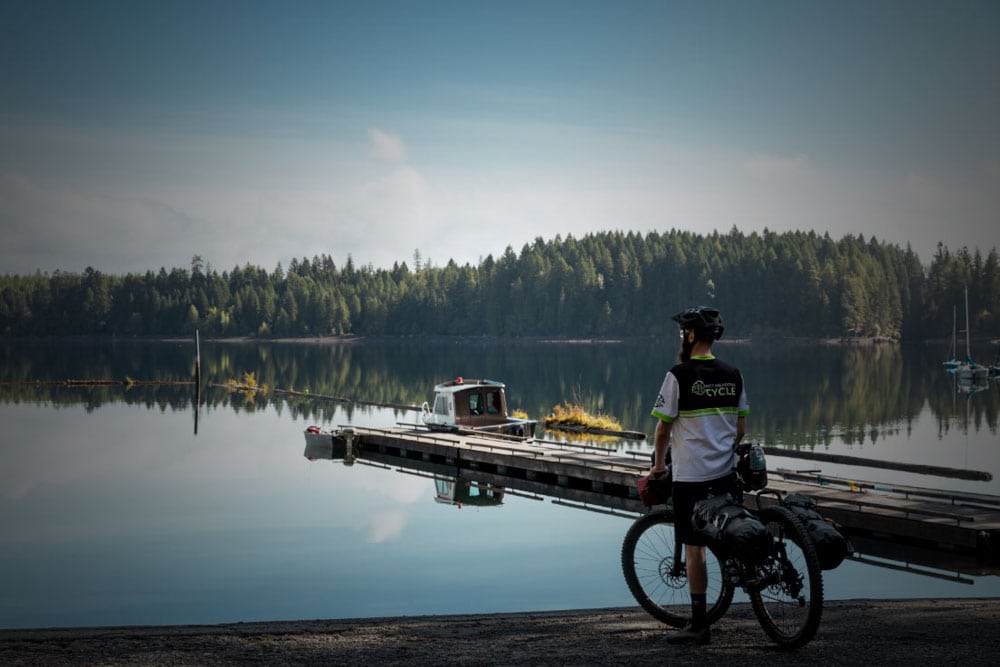
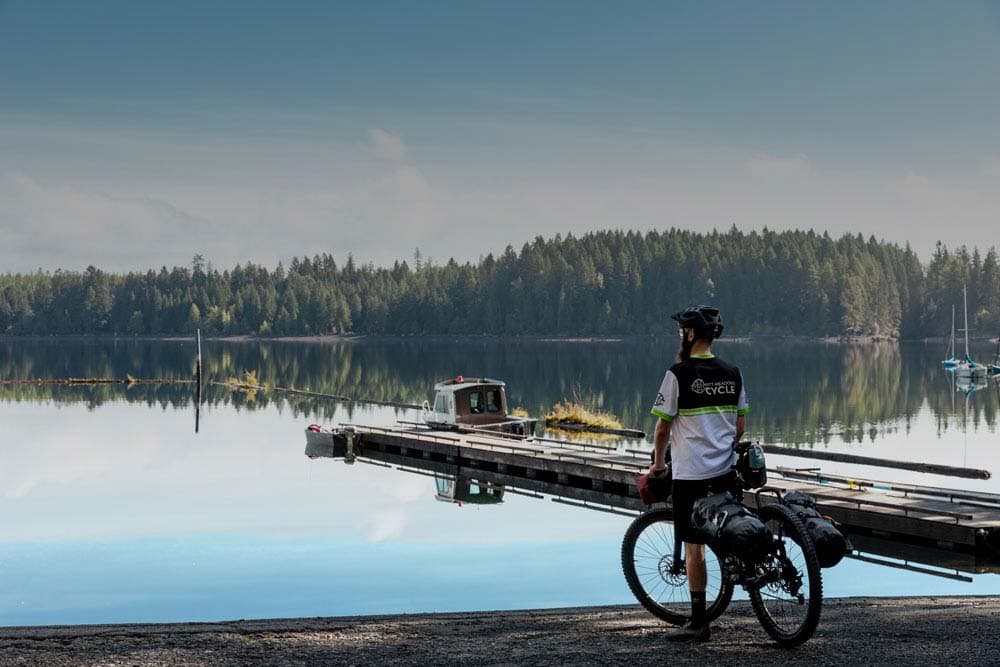
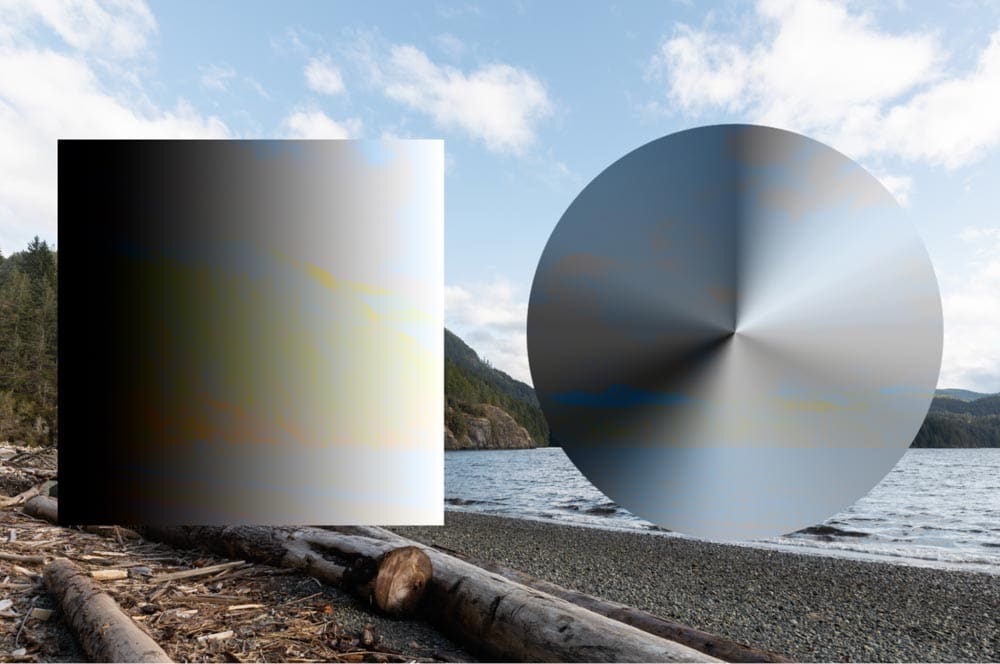
For instance, if we add a white and black gradient over an image, all you see is the gradient in Normal mode.
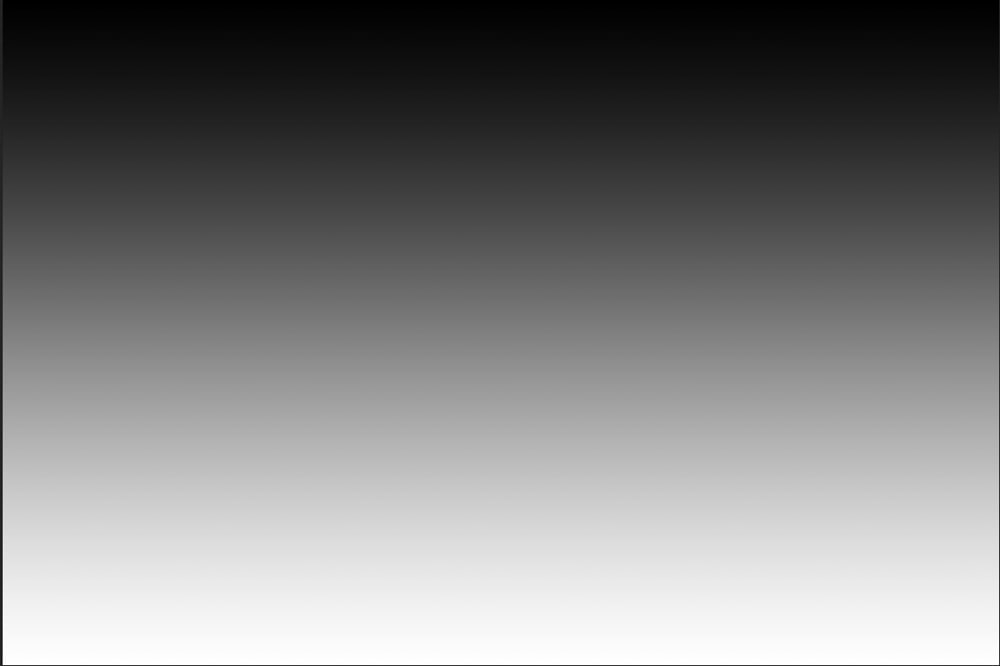
Once you add the Darken blend mode, the white areas of the gradient disappear, and the darker regions remain.
If the aim was to darken the sky slightly, you should lower the Opacity of the gradient fill layer to about 20% for a more subtle effect.
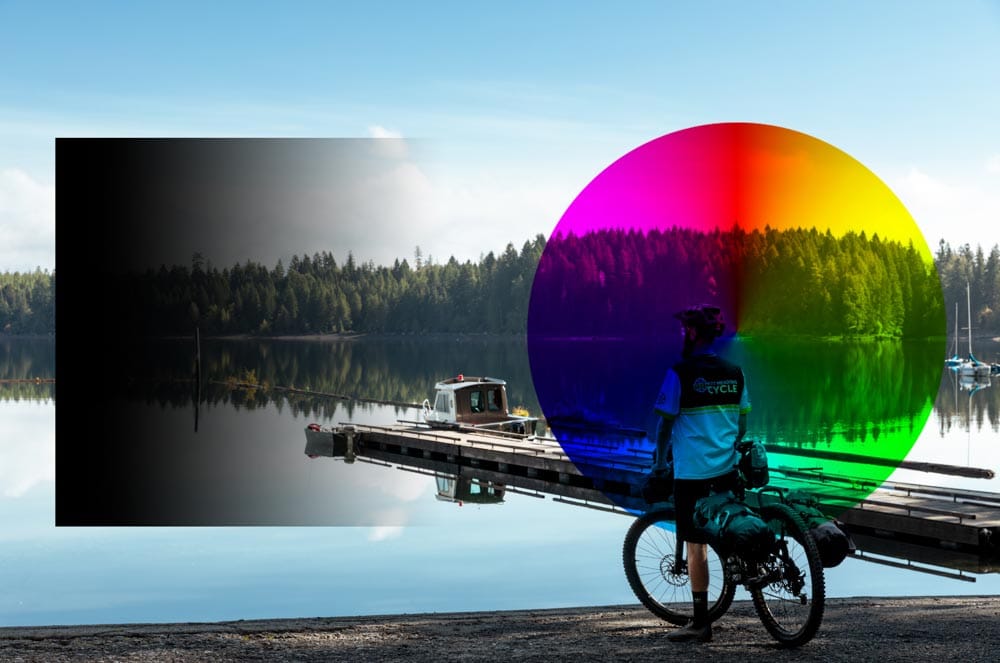
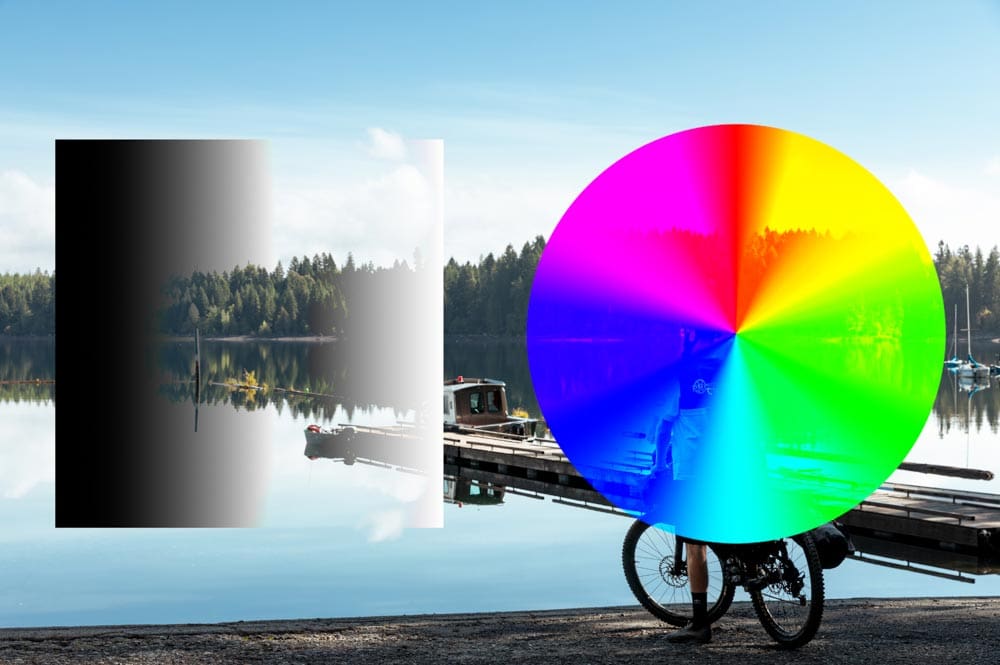
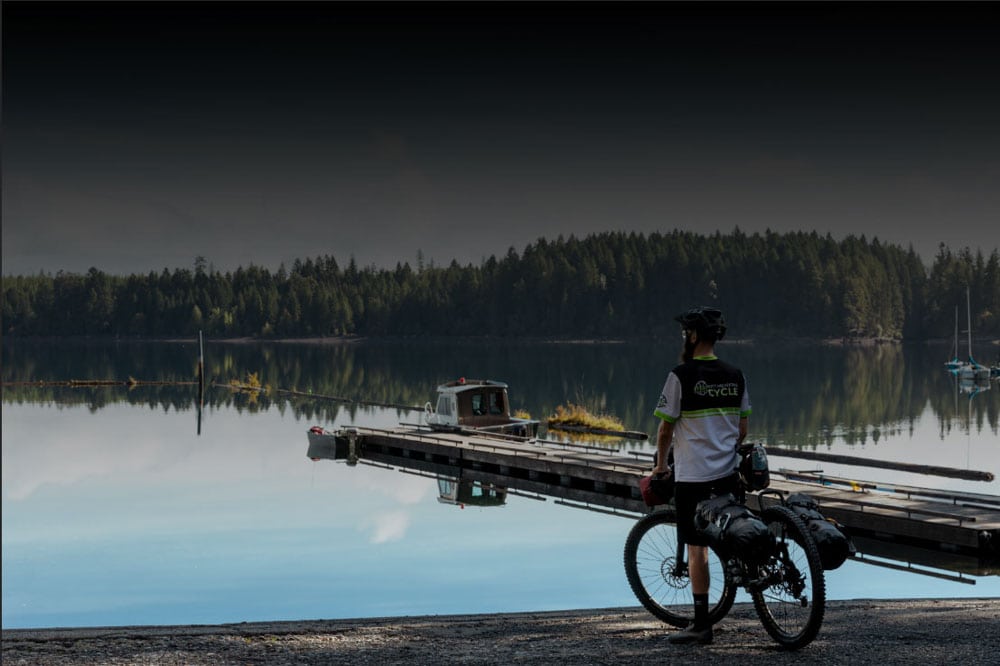
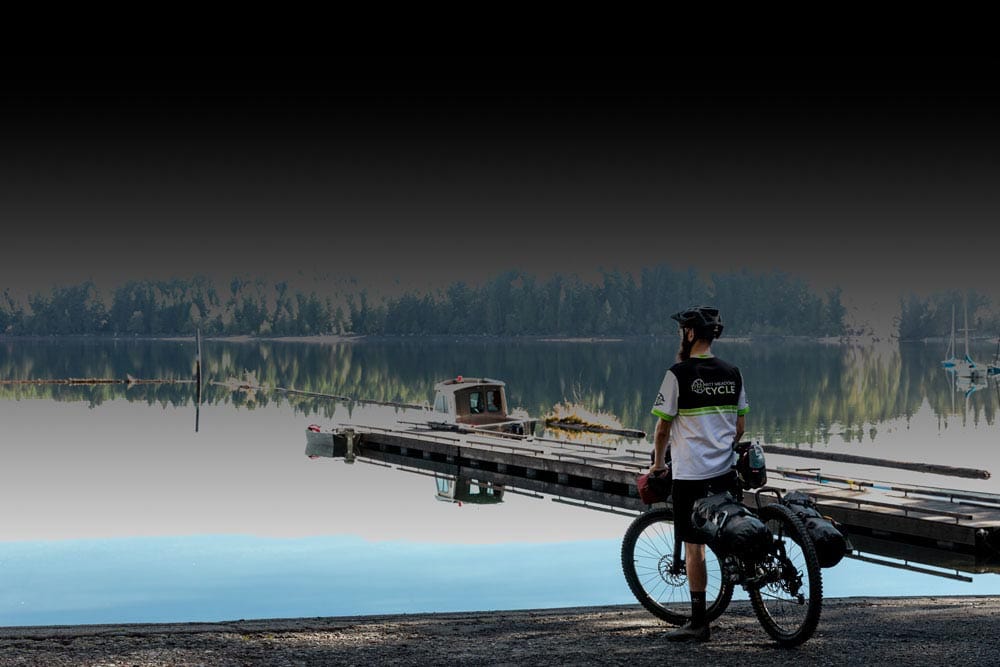
– Multiply
Multiply is a commonly used blend mode and is an excellent way to darken images. The blending mode works by multiplying the luminosity value of the pixels on the base layer with the active layer’s pixels. This darkens all the photo’s colors while ignoring white and leaving black.
If we use the Multiply blend mode on the same gradient layer as above, the result will be similar to the Darken effect, but with a better blend.
You can use Multiply in many different ways for creative results or more subtle changes. In this instance, I changed the Gradient to a Radial pattern and used Multiply with a slightly lower Opacity to create a vignette around the image.
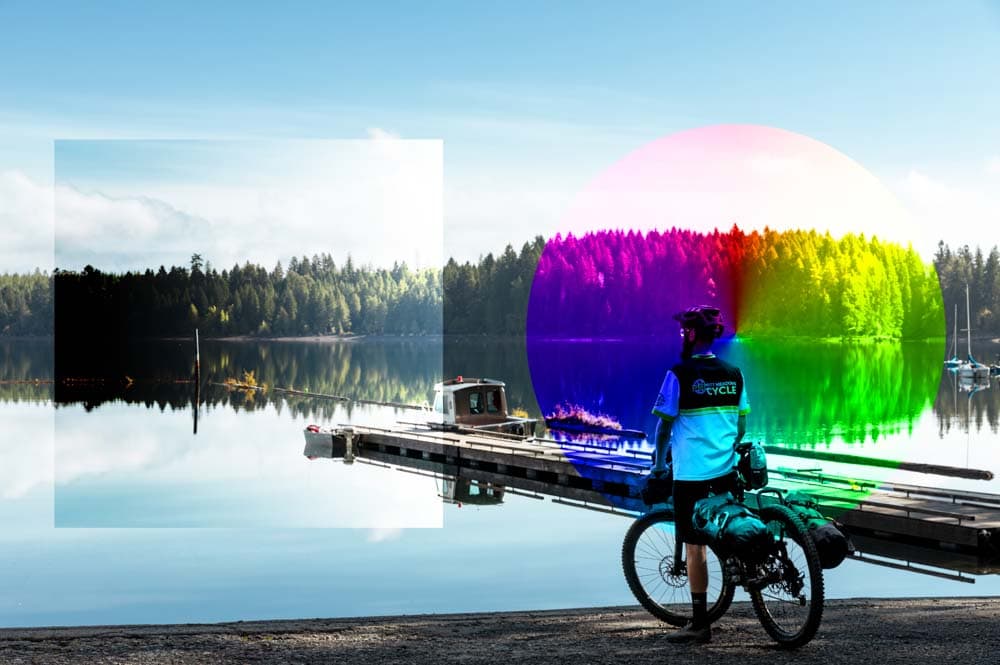
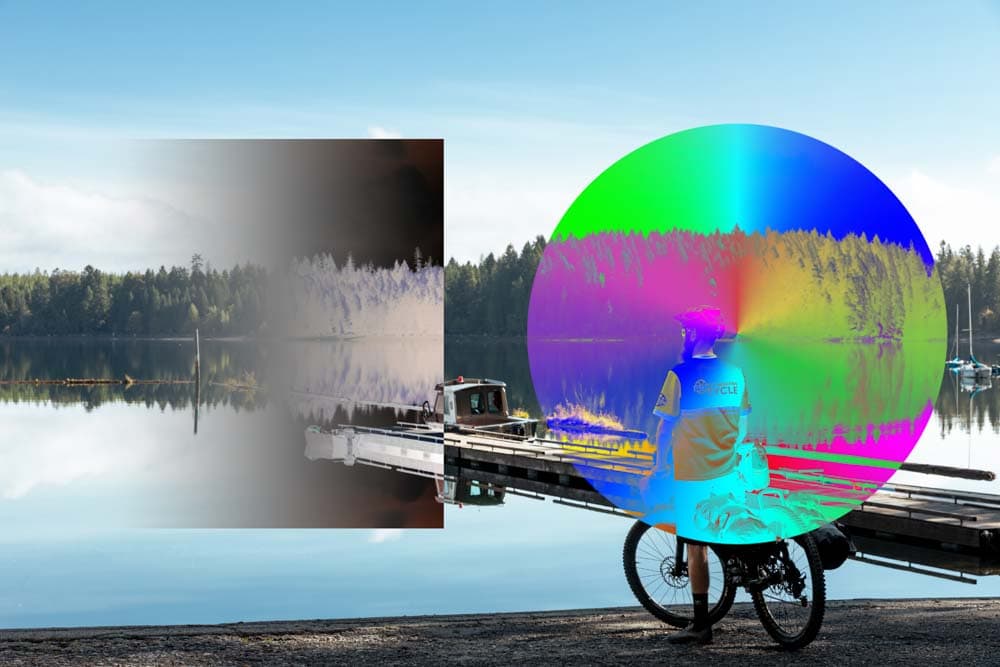
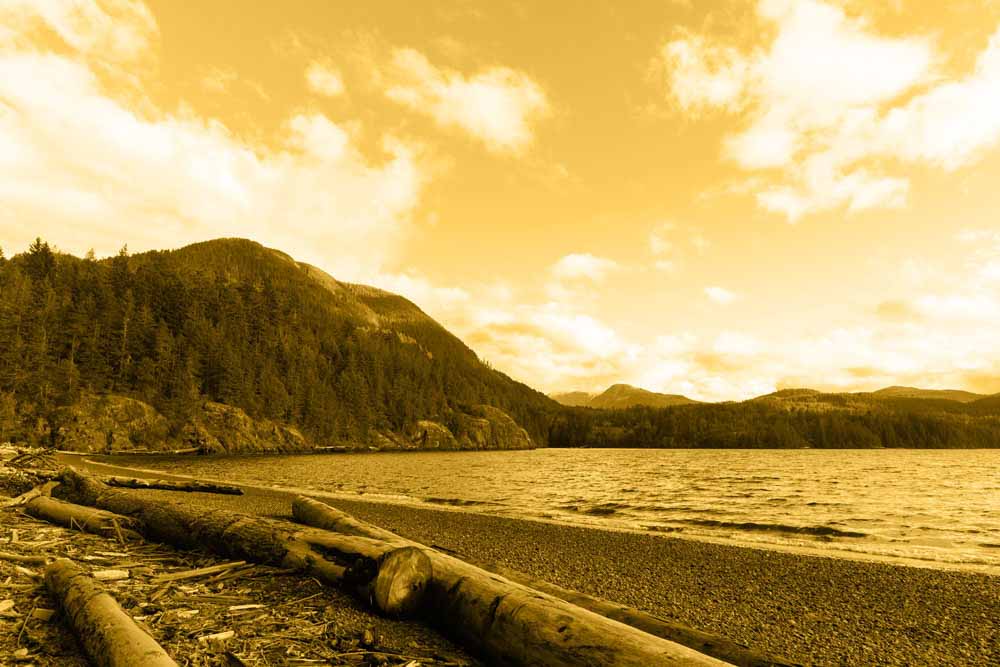
– Color Burn
The Color Burn blend mode works like when you use the Burn Tool. The blend mode increases the contrast and saturation of the image by darkening the base colors to match the blend colors.
You can use Color Burn to add warmth to photos. In this instance, I added an orange fill layer to a picture, changed the blend mode of the fill layer to Color Burn, and reduced the Opacity.
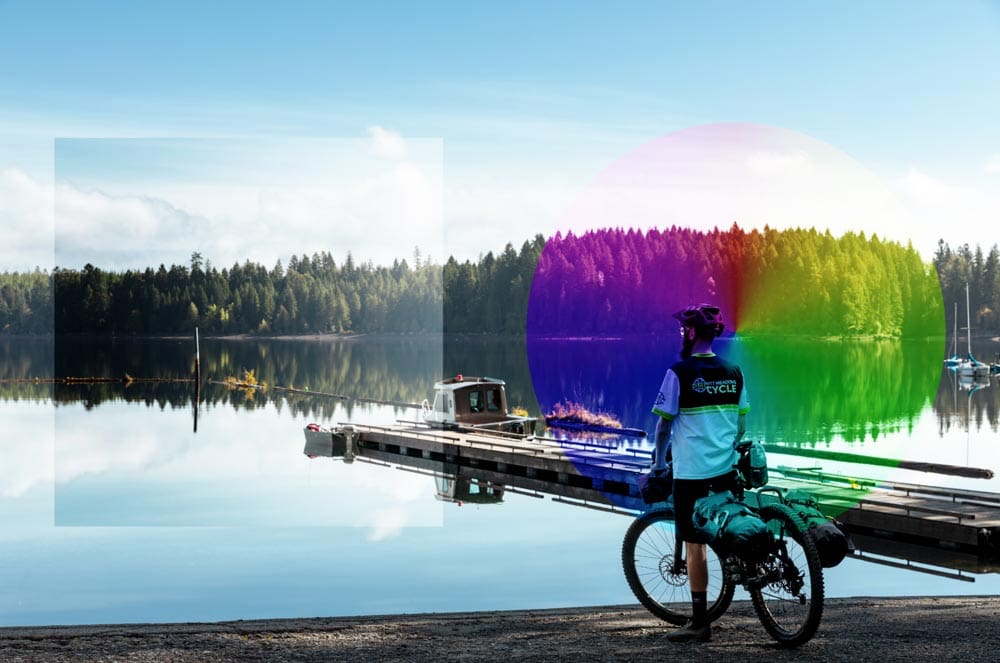
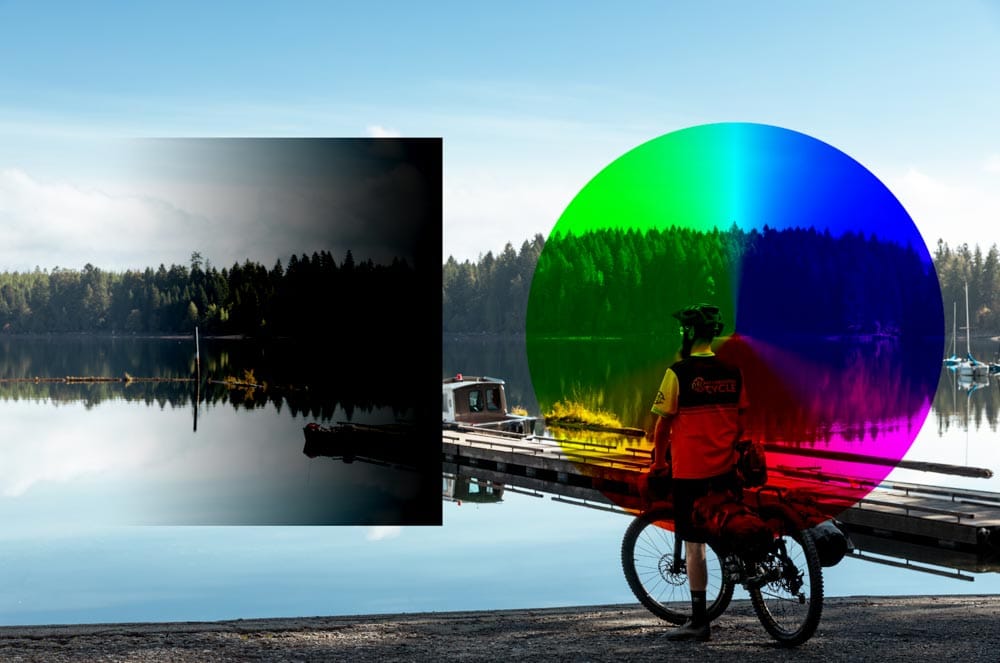
– Linear Burn
The Linear Burn blend mode works similarly to the Color Burn mode because Linear Burn darkens the base color to match the blend colors as well. However, this blend mode achieves this by decreasing the brightness of the base color. The result is less saturated than Color Burn.
Using the same image as before, I have just changed the blend mode to Linear Burn. The result is less saturated than in the previous example.
– Darker Color
The Darker Color blend mode compares the pixels in the base and blend layer and portrays only the darker colors. This mode works similarly to the Darken mode. However, in this case, Photoshop looks at the composite of the RGB channels as a whole rather than individually. This mode is not used often.
If I were to add it to the same image as I did with the Darken mode, you would notice the difference.
If I drop the Opacity down to 30%, I get a better result with the Darker Color blend mode.
3. Lighten Blending Modes
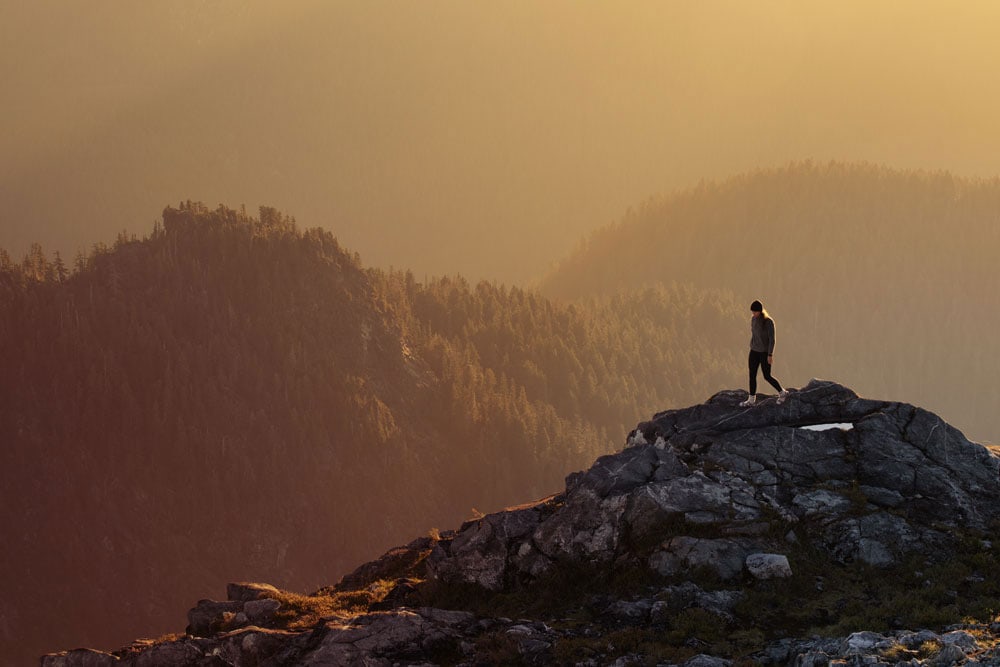
The Lighten Blend Modes work to brighten and remove black, and these modes are direct opposites to the Darken Blending Modes.
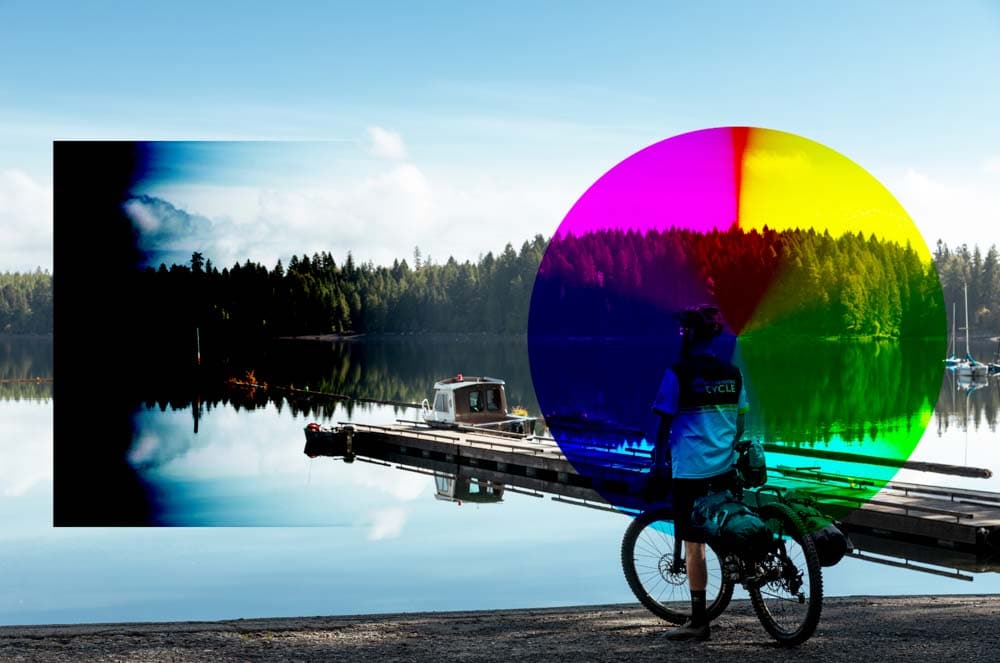
– Lighten
The Lighten blend mode compares the pixels from the base layer and the blended layer and keeps the lighter pixels. This mode considers the RGB channels separately when comparing colors. Suppose I use the same gradient fill as in the Darker mode example. The black area of the gradient is ignored, and the white region is blended.

I then need to reduce the opacity to lighten the bottom areas naturally.

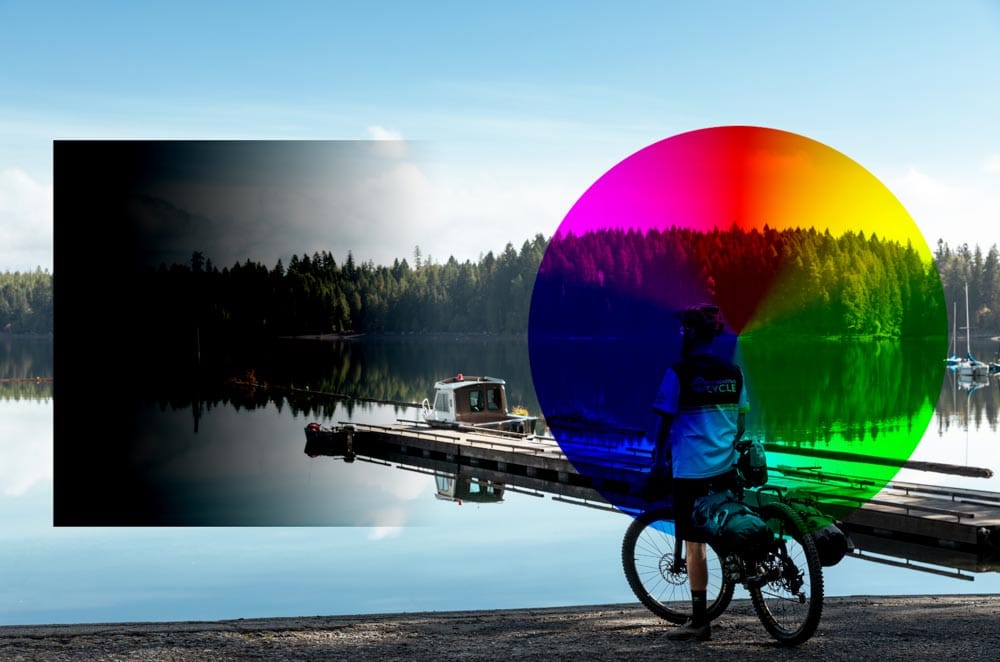
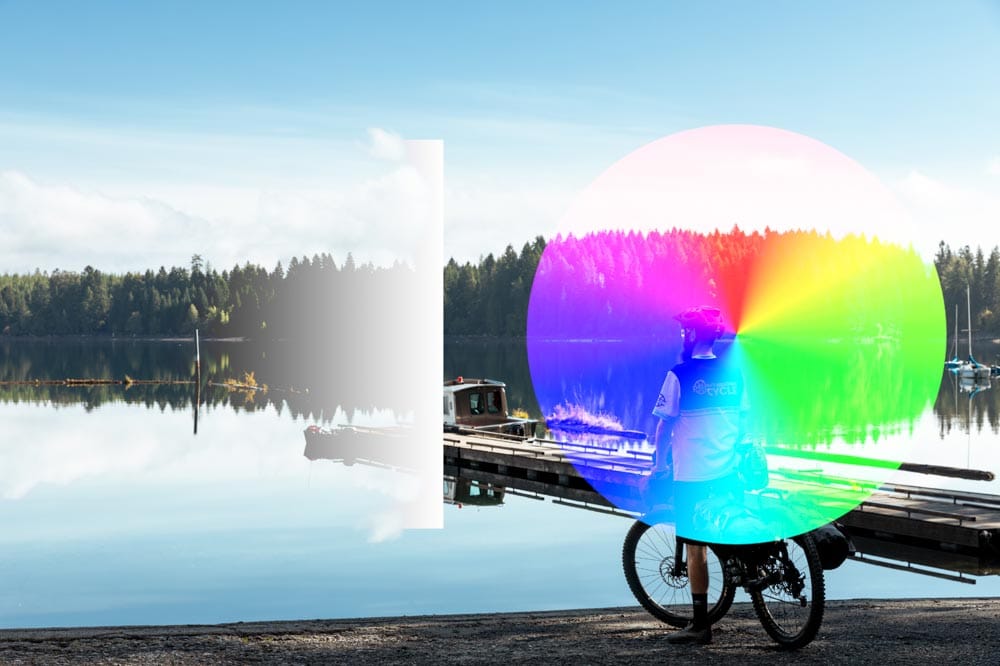
– Screen
The Screen mode produces the opposite effect of Multiply by multiplying the inverse of the colors from the two layers. The result is a brighter photo where the black areas of the blend layer are ignored, and the white regions are blended.
Using the same picture, the blend mode affects the bottom of the image (as opposed to the top half from the Multiply example).

Using the Radial gradient, I can now lighten the center of the image rather than adding a vignette around the edges.
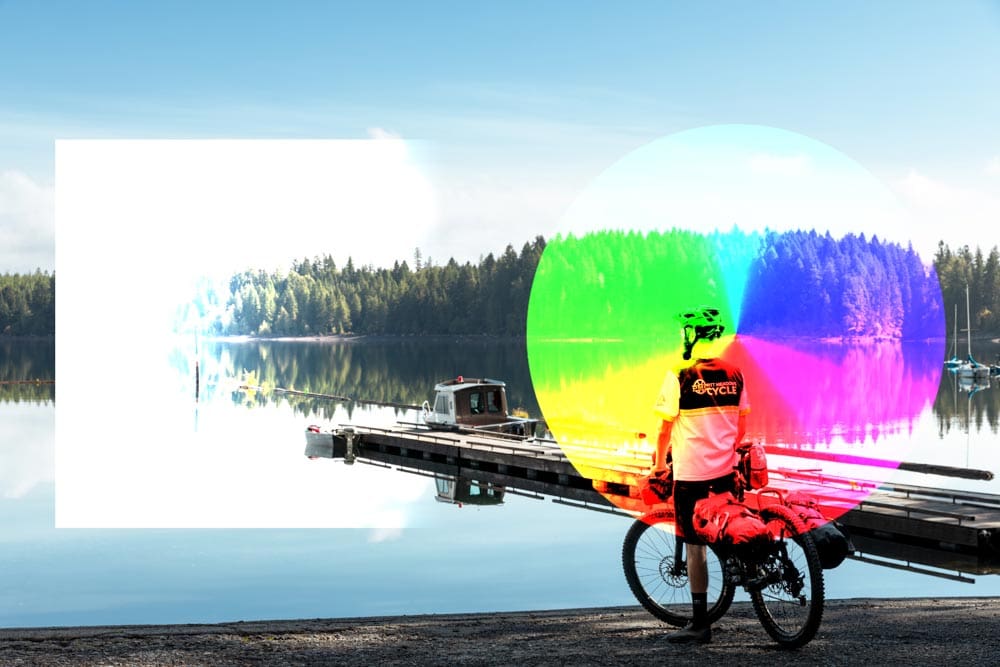
– Color Dodge
The Color Dodge mode works in opposition to the Color Burn mode as this mode decreases the contrast to lighten the base colors to reflect the blend layer’s colors. The result is highly saturated.
Using the same example as the Color Dodge example, I now have a brighter color added to the image.
– Linear Dodge (Add)
The Linear Dodge mode works like the Color Dodge mode but brightens the base layer by increasing the brightness to reflect the blend layer. Black areas of the blend layer are ignored. The result is less saturated than the Color Dodge mode.
– Lighter Color
The Lighter Color mode compares the pixels from the base and blend layers and only portrays the lighter colors rather than blending the darker colors. The function is similar to the Lighten Mode. However, Photoshop considers the composite of the RGB channels as a whole rather than individually.
Changing the blend mode to Lighter Color on the same image as Lighten mode gives a different result.
Now, I drop the Opacity to 30% for a better result.
4. Contrast Blending Modes
The Contrast Blending Modes use elements from the Darken and Lighten modes to create a complementary blend. When each mode is applied, Photoshop calculates which colors are darker or lighter than 50% gray and uses a darken blend mode on the darker colors, and a lighten blend mode on the lighter colors.

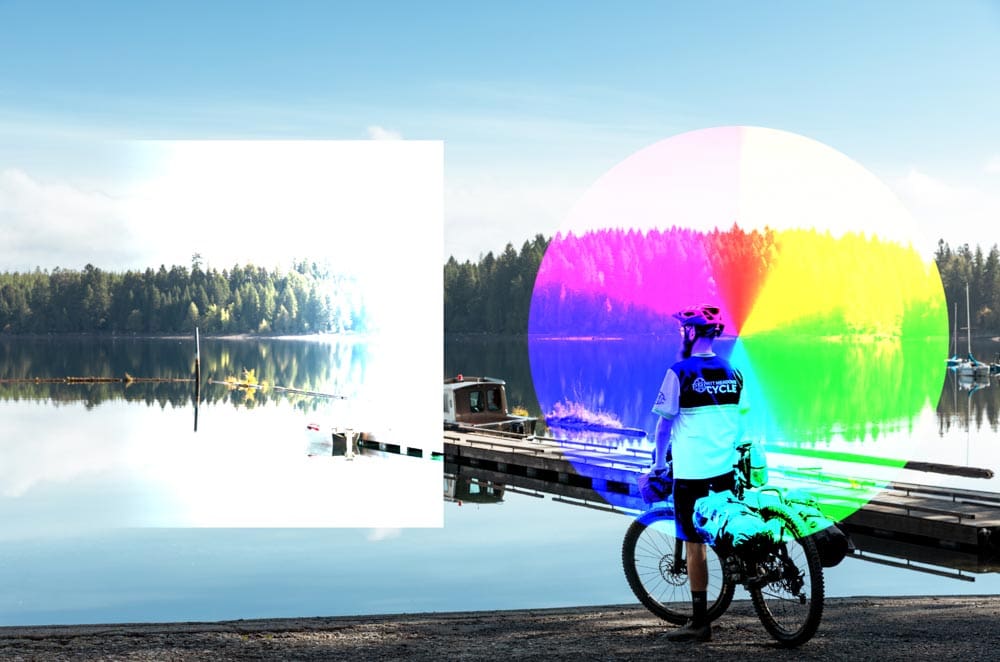
– Overlay
The Overlay blend mode is almost like combining the Multiply and Screen blend modes into one. This mode darkens the areas where the new layer has darker colors than the base layer using the principles of the multiply blend mode.
Then, using the screen blend mode, it lightens the areas where the new layer is lighter than the base. The blend mode uses the base layer to make these calculations.
Applying this blend mode to the same gradient I used before creates a pleasant contrast where the sky (the darker areas of the gradient) is darkened, and the bottom of the image (the lighter areas of the gradient) is lightened. The areas with 50% gray (in the middle) are ignored.
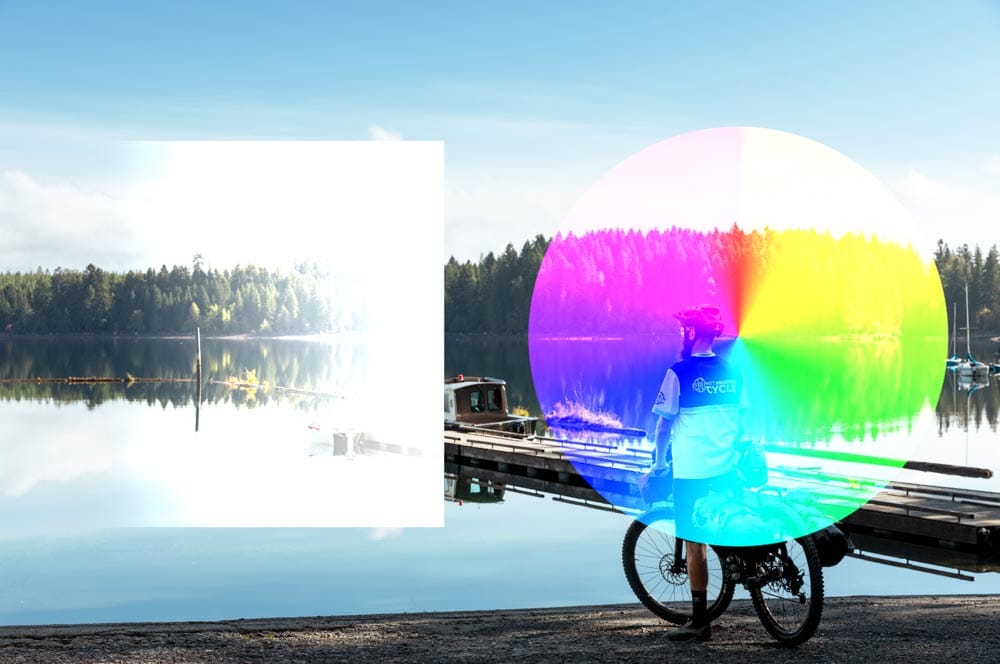
– Soft Light
The Soft Light mode is similar to Overlay as it darkens or lightens areas of the image based on the colors of the blend layer. However, the result is more subtle and reduces the harsh contrast because the mode uses the same principles as Darken and Lighten blend modes. The Soft Light blend mode is often used as a final step when sharpening a photo with the High Pass filter.
Applying the blend mode to the same example as above, you can see the result is softer without the harsh contrast between the shadows and highlights.
– Hard Light
The Hard Light mode is a mix of the Multiply and Screen modes, just like overlay. However, Hard Light uses the brightness of the blend layer to calculate the light and dark areas. The result of this mode is quite harsh and often requires a reduced Opacity for best results.
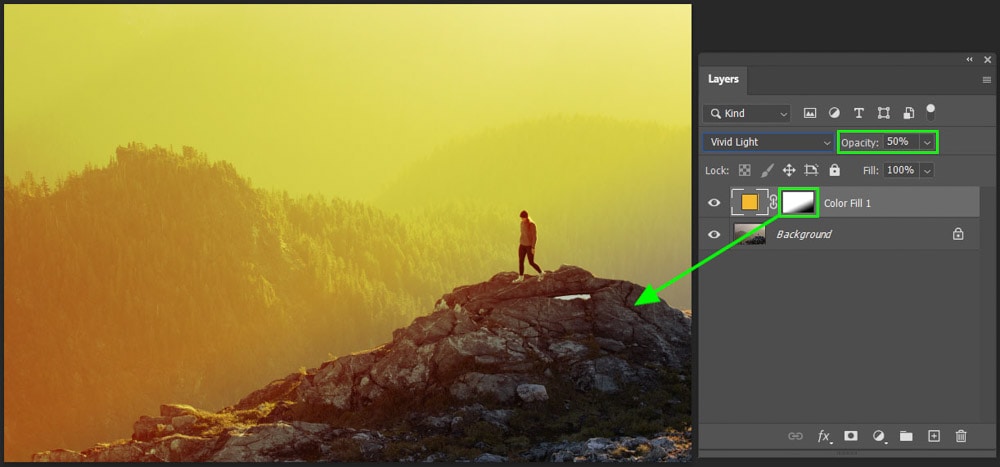
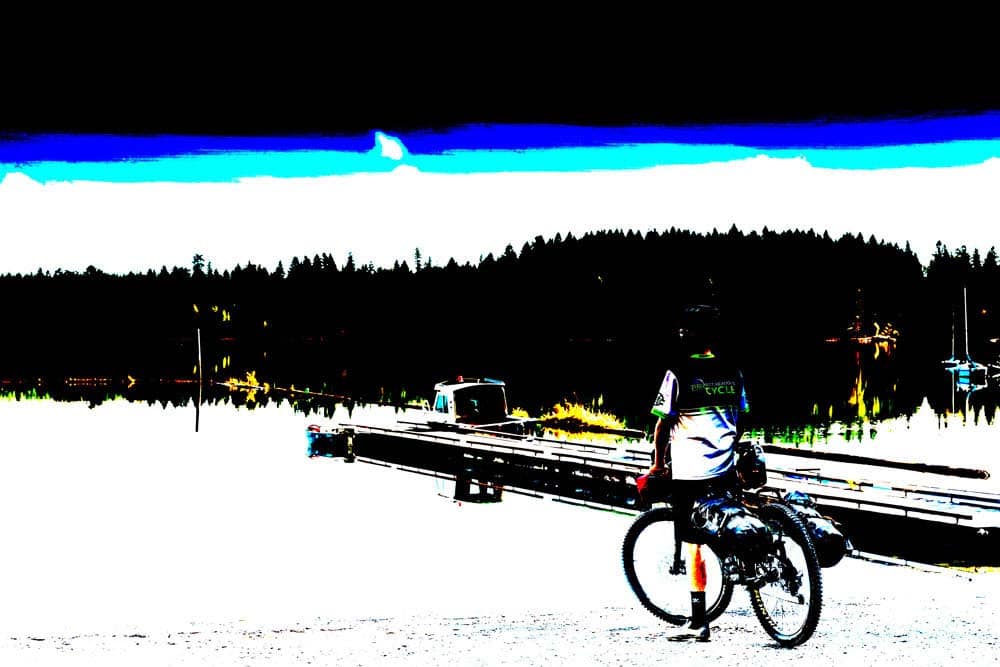
– Vivid Light
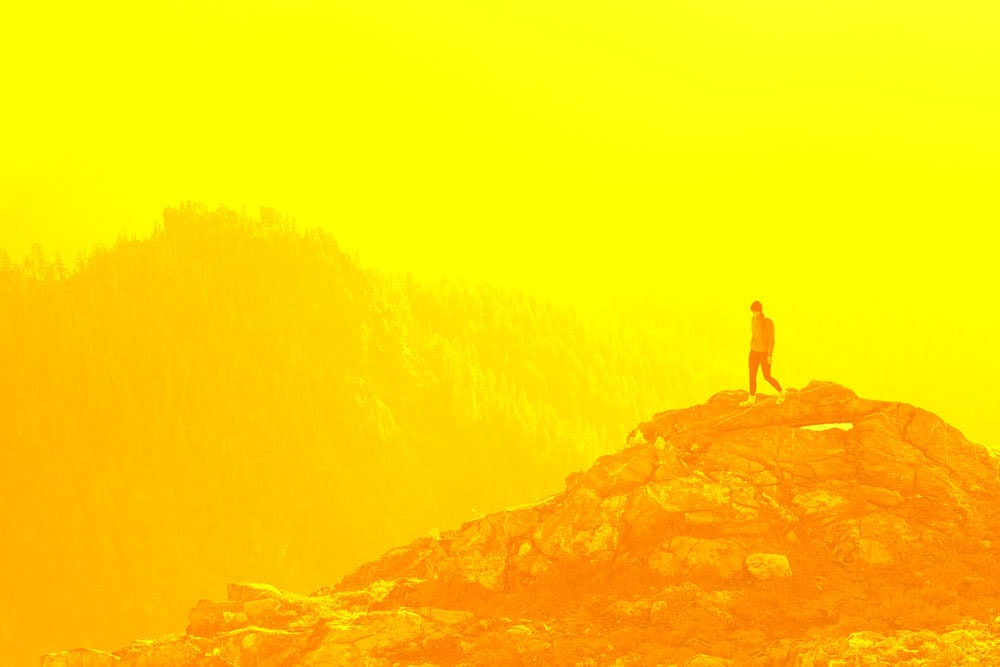
The Vivid Light blend mode is an increased version of the Overlay blend and works by brightening anything below 50% gray and darkening anything above 50% gray using the Color Burn and Dodge modes. The effects of this blend mode are harsh and often require a drop in Opacity.
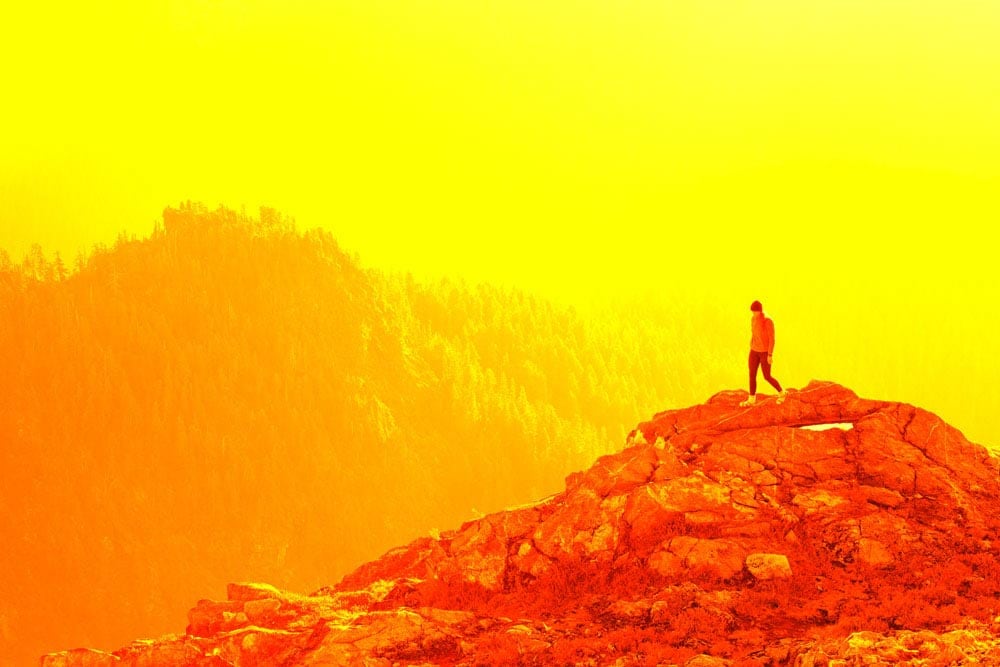
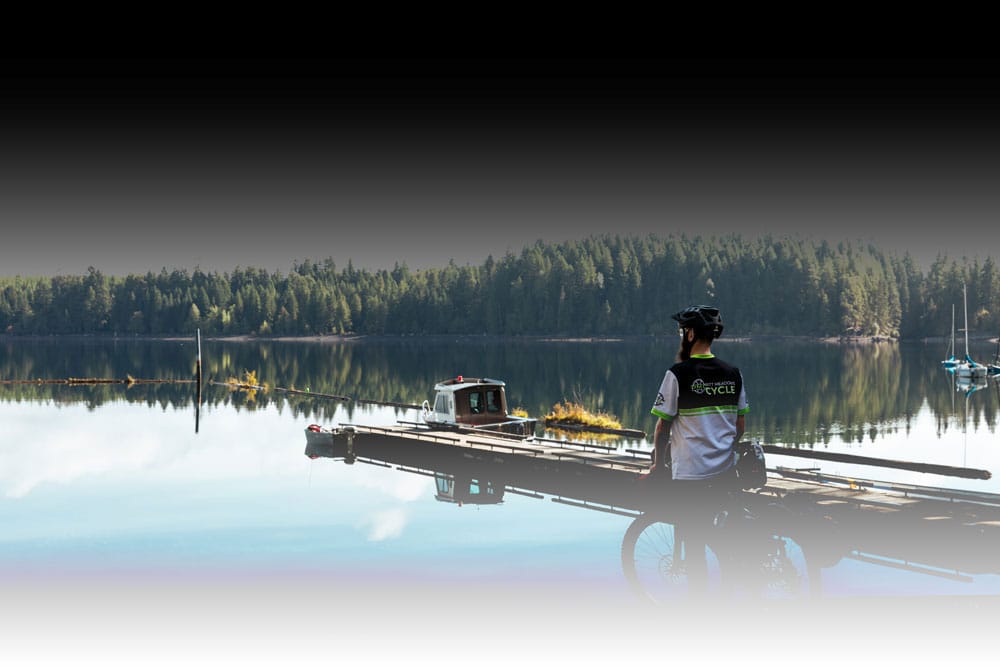
Adding an orange fill layer to the image covers it completely in Normal blend mode.

Now, using the blend mode on the orange fill layer, you can see how oversaturated it looks at 100%.
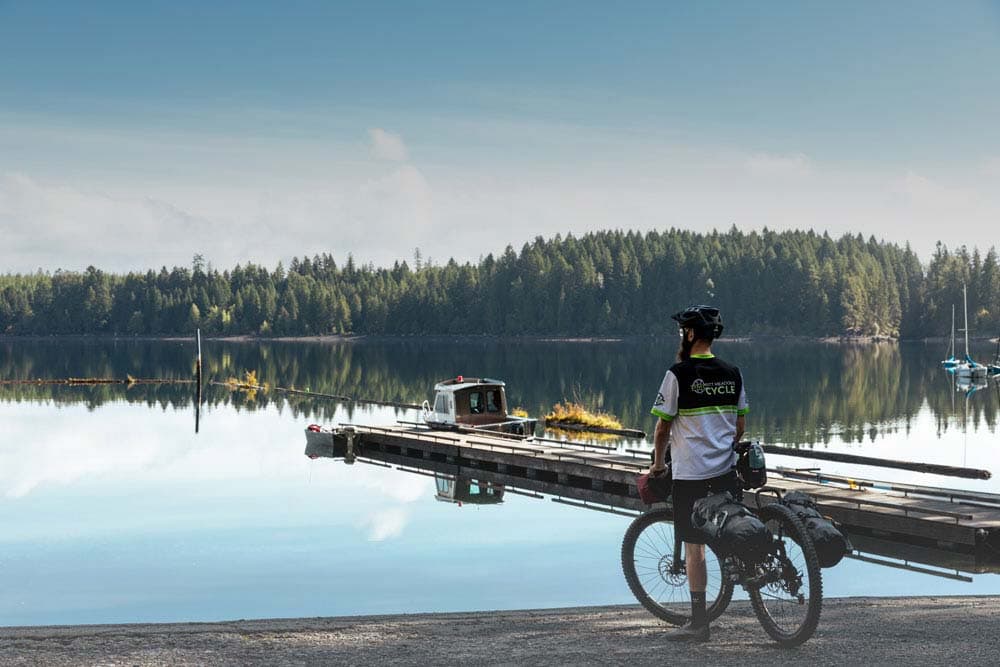
Reducing the opacity to 50% and adding a Layer Mask with a gradient to remove the blend mode from the rocks offers an even better result.

– Linear Light
Linear light blending mode is a mix of the Linear Burn and Linear Dodge modes for darker and lighter pixels. The effect is applied by increasing or decreasing the brightness of the pixels.
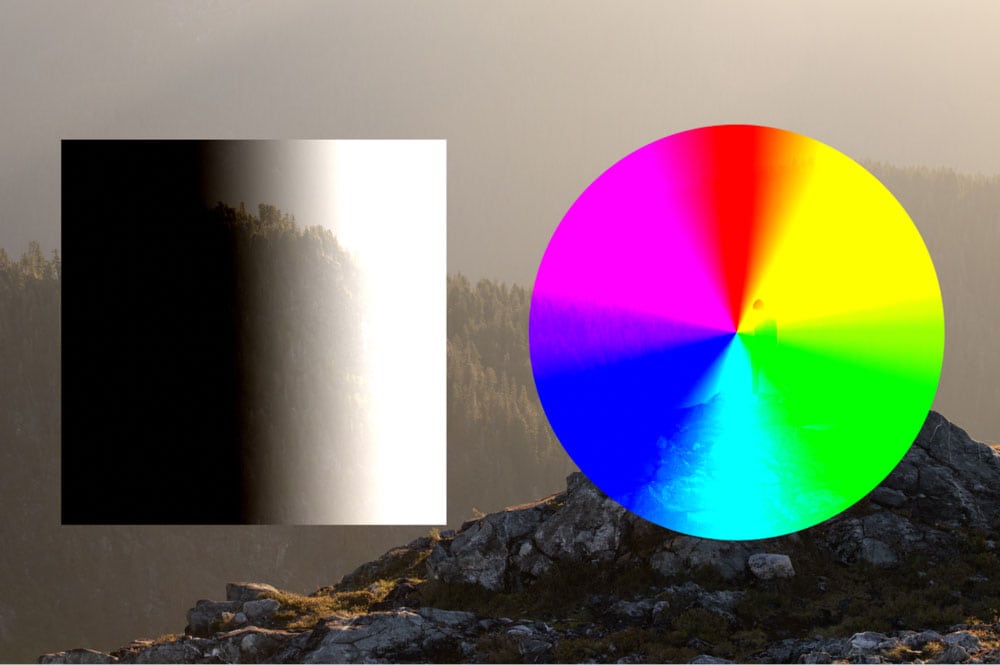
This mode has a brighter result than Vivid Light and is usually too harsh at 100% Opacity. An Opacity of 50% and a gradient layer mask offer better results.
– Pin Light
The Pin Light blend mode is an extreme mix of the Darken and Lighten Blend modes, which removes any mid-tones from the blend layer. In this example, you can see how the mode has left the black and white areas of the gradient layer and ignored the mid-tones.
Lowering the opacity to 25% offers a better result.
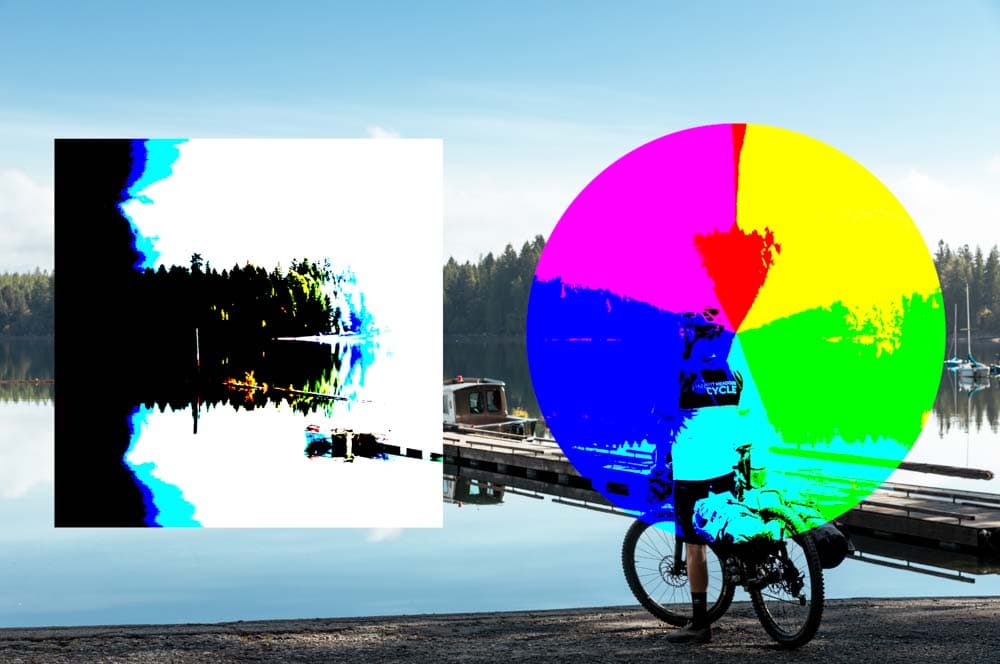
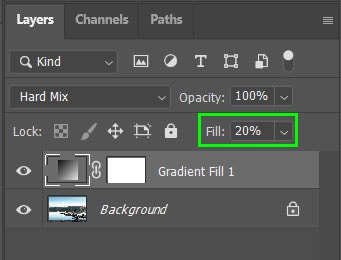
– Hard Mix
The Hard Mix blending mode adds the RGB values of the blend layer with the values of the base layer. When values are added, and the result is higher than 255, the pixels remain at 255; when it’s lower than 255, the pixels change to 0.
The result of this blend mode is that all the pixels are reduced to the primary colors of red, green, blue (for RGB images), cyan, magenta, or yellow (for CMYK images), as well as black and white.
Lowering the Opacity of the blend layer doesn’t produce great results, but lowering the Fill percentage has a better effect.
5. Inversion Blending Modes
The Inversion Blending Modes consider the variations between the base and blend layer to produce a new blend.
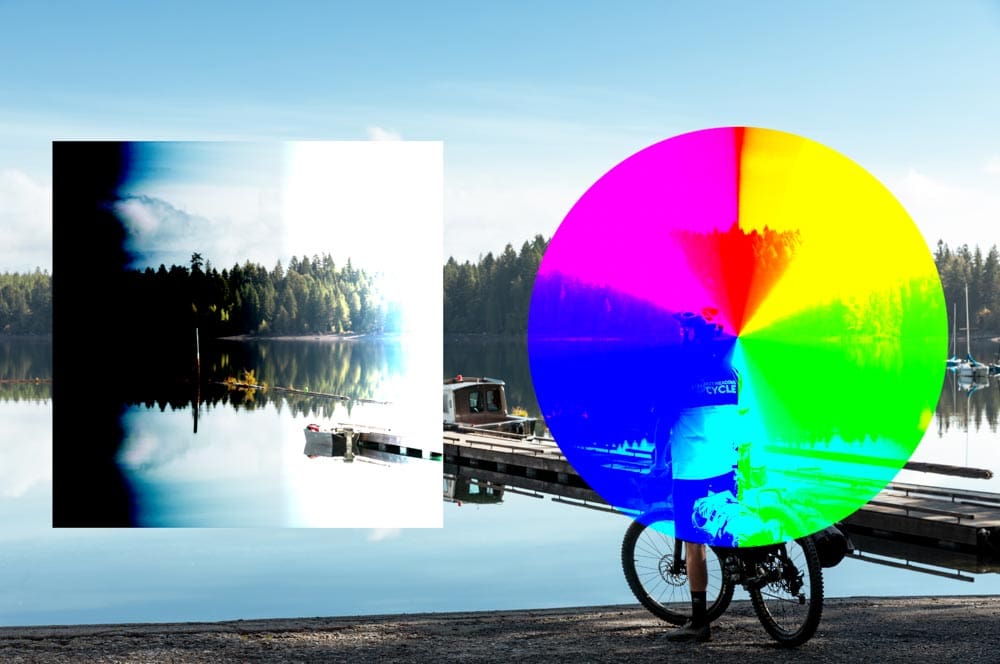
– Difference
The Difference blend mode considers the colors from both the base and blend layer and subtracts the color with the highest brightness value. When white is present, it will invert the values of the base color, and black will have no effect.
When the blend mode is applied to a black and white gradient layer, the black areas portray the base layer, and the white regions invert the colors from the original base layer.
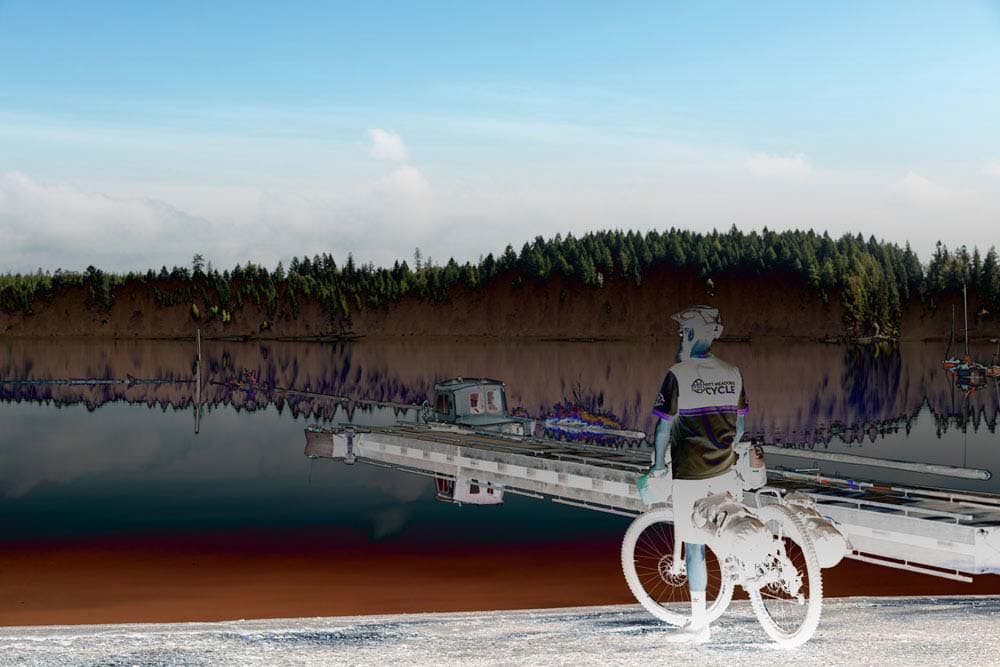
– Exclusion
The Exclusion blend mode works similarly to Difference but produces a more subtle result. The blend creates a more subtle effect because it is lower than the Difference mode. While the areas of white invert the colors, and areas of black are left untouched, the pixels at 50% gray (mid-tones) will remain at 50% gray.
– Subtract
The Subtract blend mode subtracts pixels from the base layer based on the brightness of the pixels on the blend layer. The blend mode reverts any negative pixel values to 0, meaning that any black areas are ignored, so the base layer’s pixels show through, while regions of white essentially delete the pixels of the base layer below it.
– Divide
The Divide blend mode does the exact opposite as Subtract by dividing the blend colors from the base colors. The result is that any pixels underneath black areas are essentially deleted, while white areas are left unchanged.
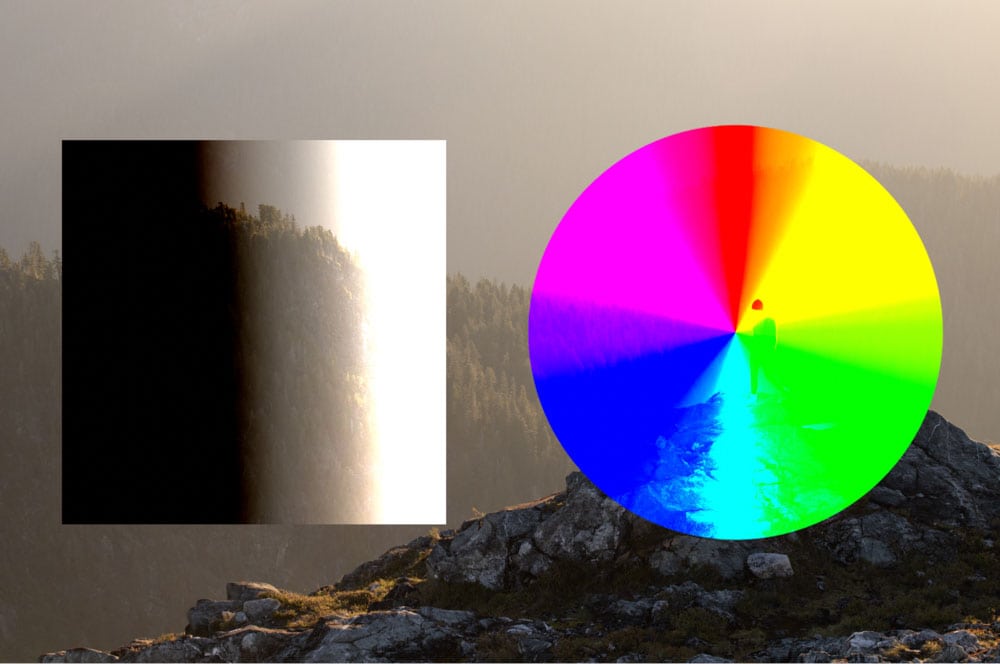
6. Component Blending Modes
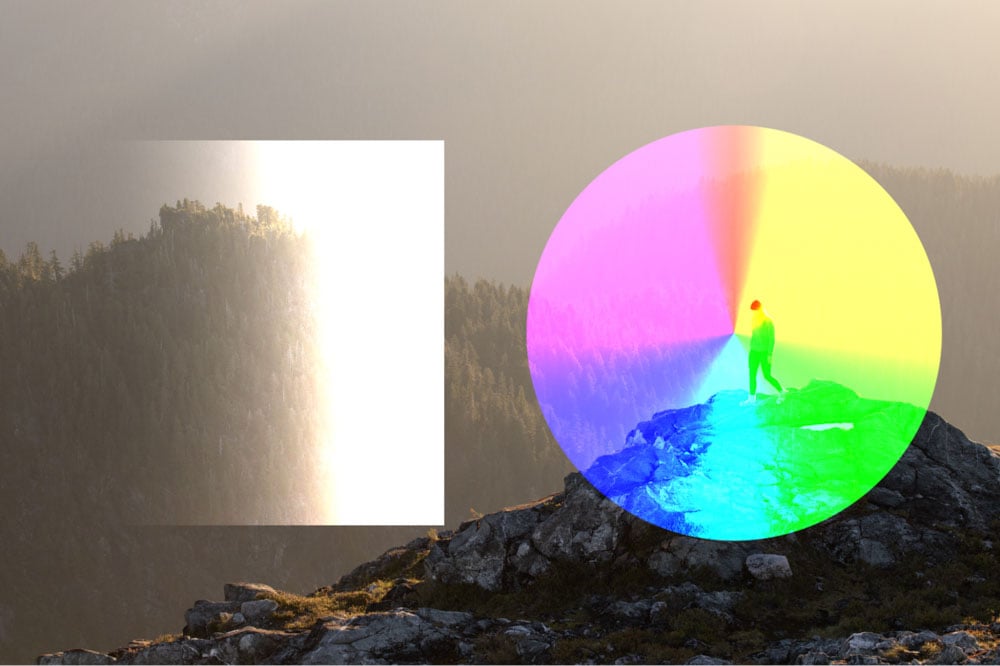
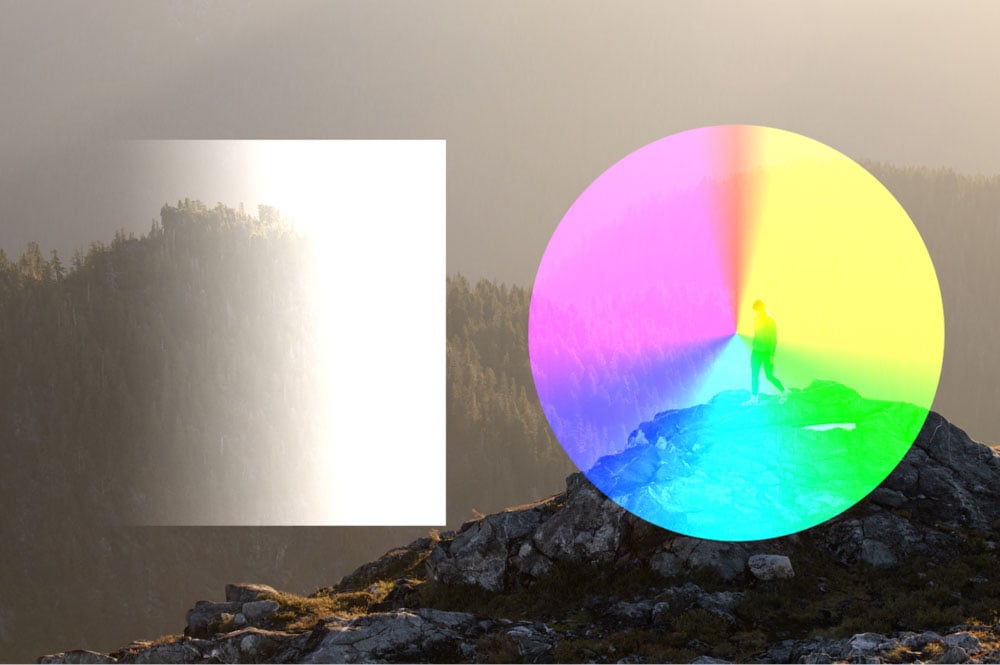
The component Blending modes consider hue, saturation, and brightness, which are primary color components, to create a new blend. Hue is the color of the pixels, excluding white or black. Saturation is the intensity of the pixel color. Then, brightness is the level of darkness or brightness in the pixels, with white being the brightest and black being the darkest.

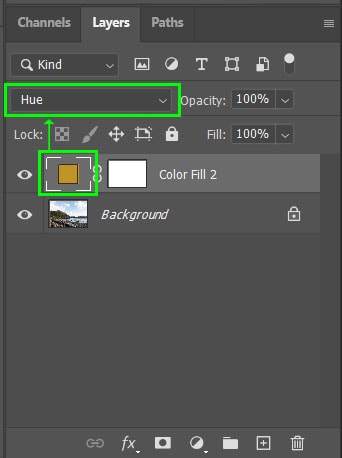
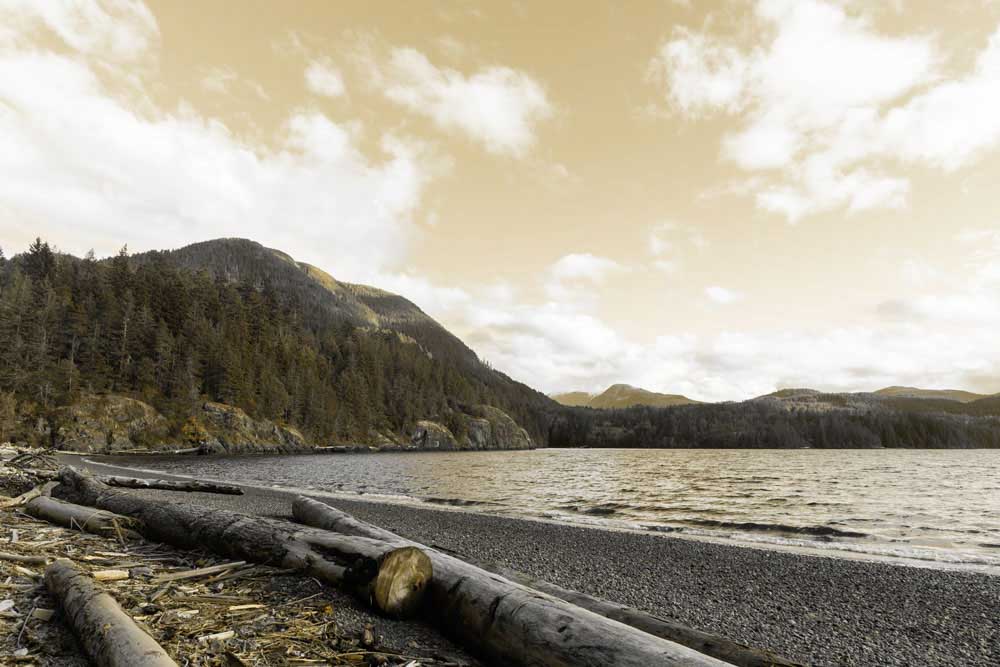
– Hue
The Hue blend mode keeps the base layer’s luminosity and saturation while using the blend layer’s hue. This blend mode is used when you want to change the color of a layer without affecting the luminosity and saturation.
The hue blend mode is an excellent solution if you want to change the feel of an image, such as adding a sepia tone. By adding a brown layer and changing the blend mode to Hue, you can see how only the colors of the photo are affected.
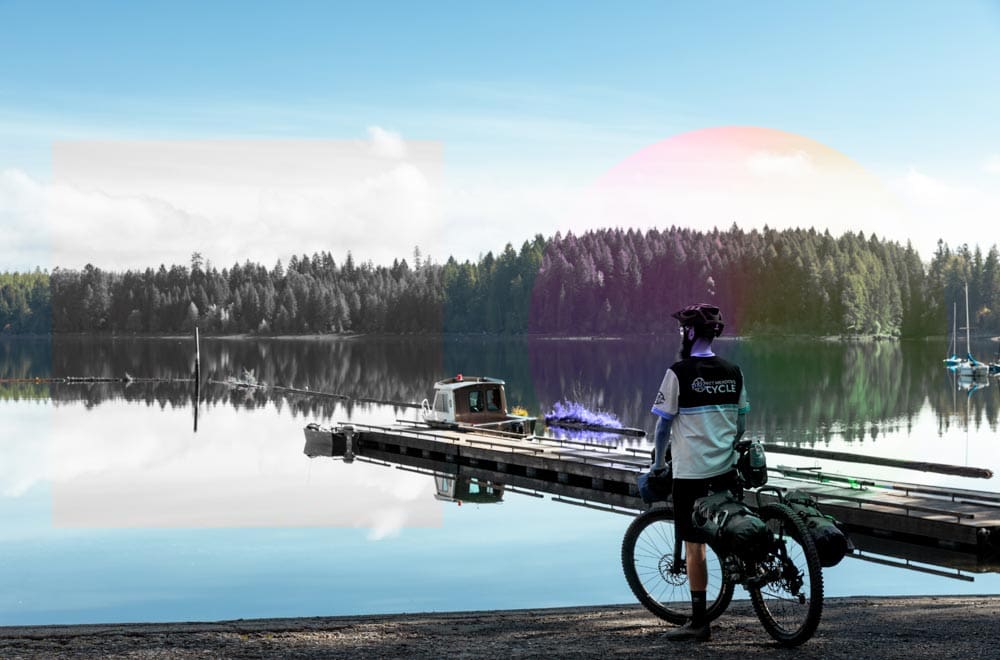
– Saturation
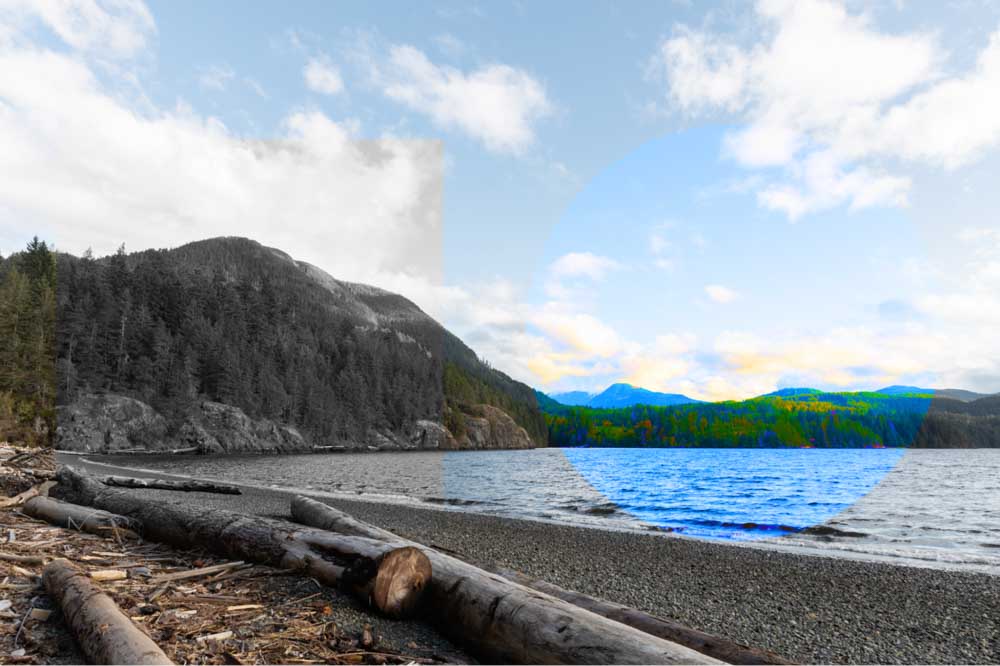
The Saturation blending mode keeps the base layer’s luminosity and hue while using the blend layer’s saturation.
In this example, I will add a gradient fill layer to an image with 50% gray (no saturation) and any color that is higher in saturation. As a result, the areas covered by gray will turn into grayscale since there is no saturation to use, while the other areas experience an increase in saturation.
– Color
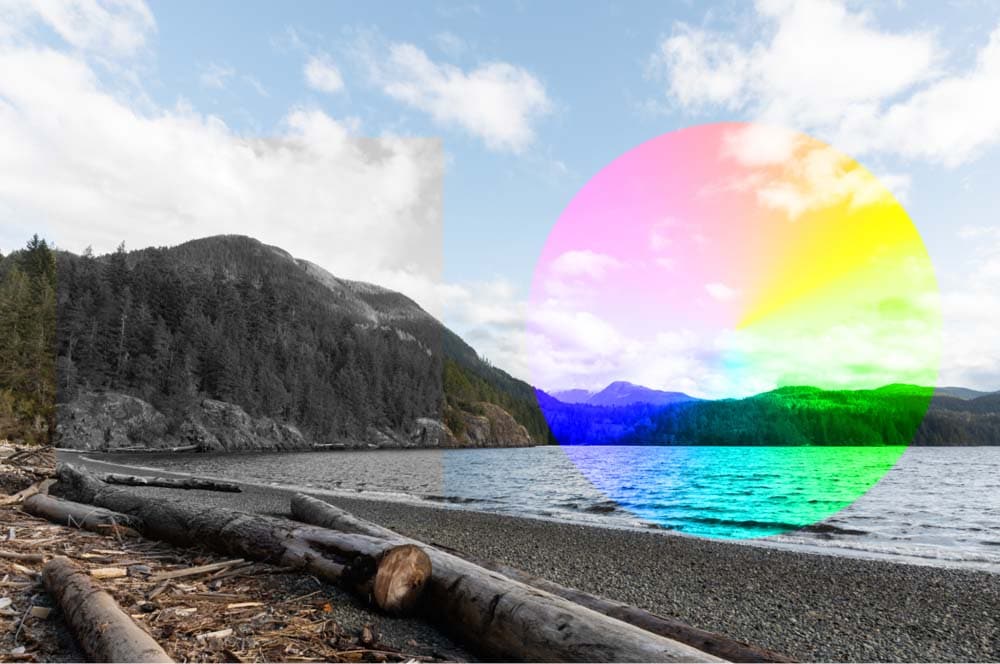
The Color Blending Mode keeps the base layer’s luminosity while using the blend layer’s saturation and hue. This blend mode works well when creating a color effect on the image, just like I did with the sepia tone using the Hue blend mode. However, this mode allows you to add saturation to the photo simultaneously, resulting in a picture with a fuller color.
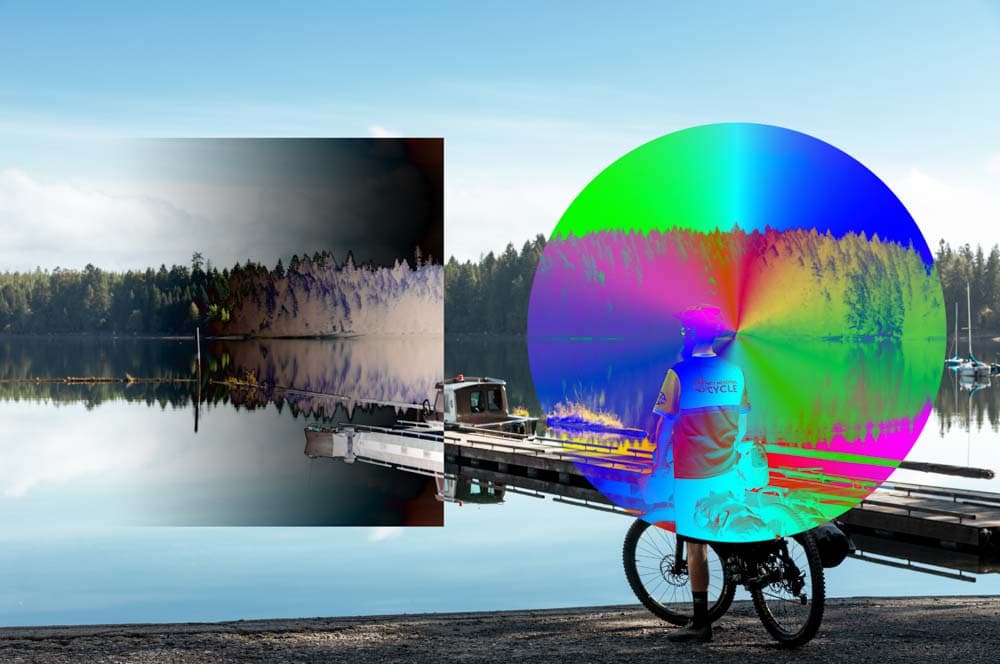
– Luminosity
The Luminosity blend mode keeps the base layer’s hue and saturation while using the blend layer’s luminosity. This blend mode works the opposite of the Color blend mode and is often used when sharpening a photo.
After adding a yellow fill layer to the image, the details in the image are hard to see.

Lowering the opacity of the blended layer creates a better effect.
Blending Mode Keyboard Shortcuts In Photoshop
Almost all of the blend modes have a simple shortcut to easily change the blend mode of the layer. The easiest shortcut to remember is Shift + + or Shift + – (Win & Mac) to rotate through the modes. Just make sure your desired layer is highlighted in the layers panel.
Four blending modes don’t have a shortcut: Darker Color, Lighter Color, Subtract and Divide. You must open the menu and select these four to activate them.
The rest of the blend modes have the following shortcuts:
| Action | Windows | Mac |
|---|---|---|
| Rotate through the blend modes | Shift + + or Shift + – | Shift + + or Shift + – |
| Normal Blending Modes | ||
| Normal | Shift + Alt + N | Shift + Option + N |
| Dissolve | Shift + Alt + I | Shift + Option + I |
| Darken Blending Modes | ||
| Darken | Shift + Alt + K | Shift + Option + K |
| Multiply | Shift + Alt + M | Shift + Option + M |
| Color Burn | Shift + Alt + B | Shift + Option + B |
| Linear Burn | Shift + Alt + A | Shift + Option + A |
| Lighten Blending Modes | ||
| Lighten | Shift + Alt + G | Shift + Option + G |
| Screen | Shift + Alt + S | Shift + Option + S |
| Color Dodge | Shift + Alt + D | Shift + Option + D |
| Linear Dodge (Add) | Shift + Alt + W | Shift + Option + W |
| Contrast Blending Modes | ||
| Overlay | Shift + Alt + O | Shift + Option + O |
| Soft Light | Shift + Alt + F | Shift + Option + F |
| Hard Light | Shift + Alt + H | Shift + Option + H |
| Vivid Light | Shift + Alt + V | Shift + Option + V |
| Linear Light | Shift + Alt + J | Shift + Option + J |
| Pin Light | Shift + Alt + Z | Shift + Option + Z |
| Hard Mix | Shift + Alt + L | Shift + Option + L |
| Inversion Blending Modes | ||
| Difference | Shift + Alt + E | Shift + Option + E |
| Exclusion | Shift + Alt + X | Shift + Option + X |
| Component Blending Modes | ||
| Hue | Shift + Alt + U | Shift + Option + U |
| Saturation | Shift + Alt + T | Shift + Option + T |
| Color | Shift + Alt + C | Shift + Option + C |
| Luminosity | Shift + Alt + Y | Shift + Option + Y |


