
The Best Camera Settings For Beginner Photographers
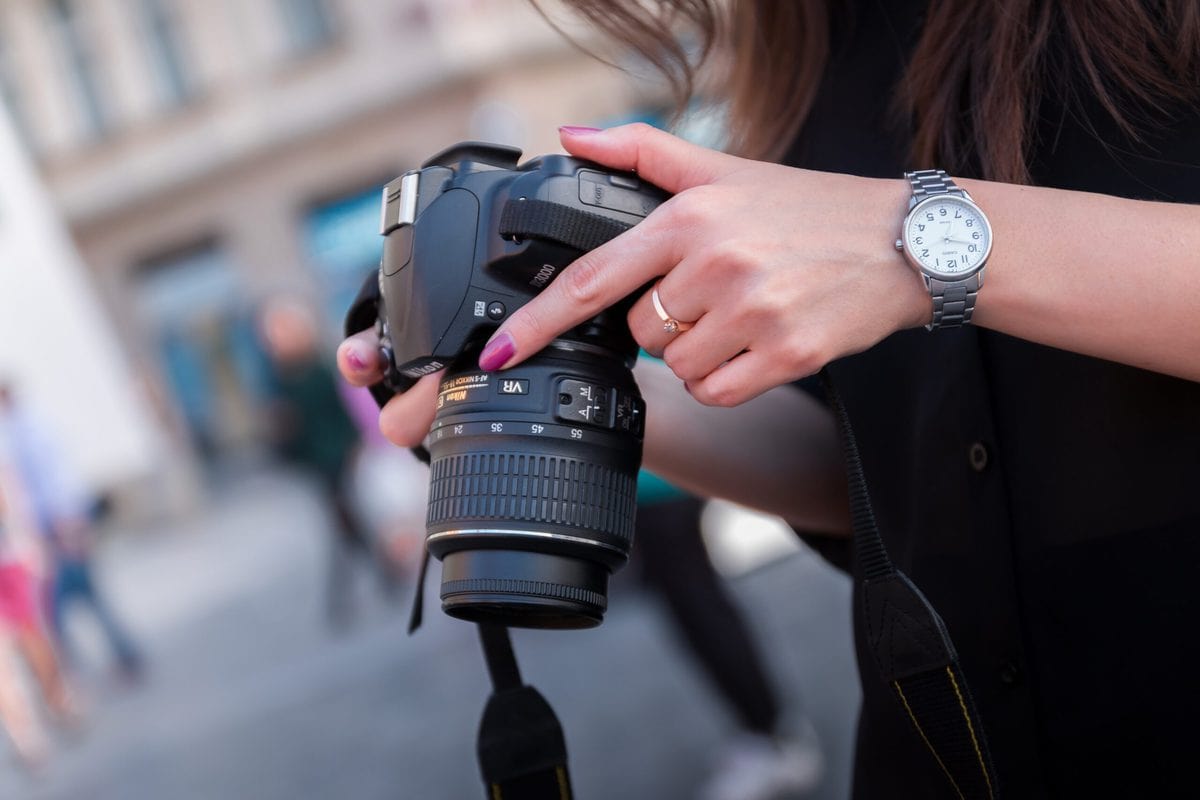
Choosing the best camera settings, for beginner photographers, is one of the hardest parts about learning your way around your camera. You wish you could have more creative control and make your photos look more professional, but you also don’t know which camera settings are most important to capture the picture you have in your head.
In this article, I’ll be breaking down the best camera settings for beginner photographers who are looking to break out of automatic mode and start gaining more creative control over their pictures. Here you’ll learn what shooting modes will work best in different situations, the essential camera settings, and how they work, along with a whole bunch of other beginner photography tips to fast track your photo skills!
Shooting In Automatic Mode
Before we dive into the best camera settings for beginner photographers, let’s first talk about the most common shooting mode, how it works, and why it could be ruining your photos.
Why Do Most Beginner Photographers Use Automatic Mode?
If you are new to photography, you likely just set your camera to automatic mode and start shooting away without a worry in the world. You know your camera’s doing all the ‘technical thinking,’ and all you need to do is press the capture button. The comforts of automatic mode are what lures in many beginner photographers and are the reason many people struggle to start shooting with any other mode on their cameras.
Don’t get me wrong, automatic mode can be pretty awesome in some instances. Since many beginner photographers don’t actually know what the different camera settings do, automatic mode lets you think just about the photo you want to take, not how the end result is going to look.
How Does Automatic Mode Work?
Automatic mode takes all the work out of your hands and does all the technical thinking for you. In automatic mode, your camera will read the amount of light entering the lens via the light meter. The light meter tells your camera how much available light there is and what the appropriate shutter speed, aperture, and ISO is to help you to get an even exposure.
The Problem With Automatic Mode
Like I mentioned before, automatic mode works to get you an even exposure of the available light in the scene. It doesn’t take into account what it is you are actually trying to take a photo of.
For example, if I were to take a photo of a person moving around in a dimly lit scene, automatic mode will just try to make the exposure as good as possible with the available light. It will disregard if my shutter speed is fast enough to capture the movement of my subject. The result ends up being something like this:

So yes, shooting in automatic is the easiest way to quickly capture a photo, but it doesn’t use the best settings for your situation. All automatic mode cares about is having an excellent exposure for the majority of your photo.
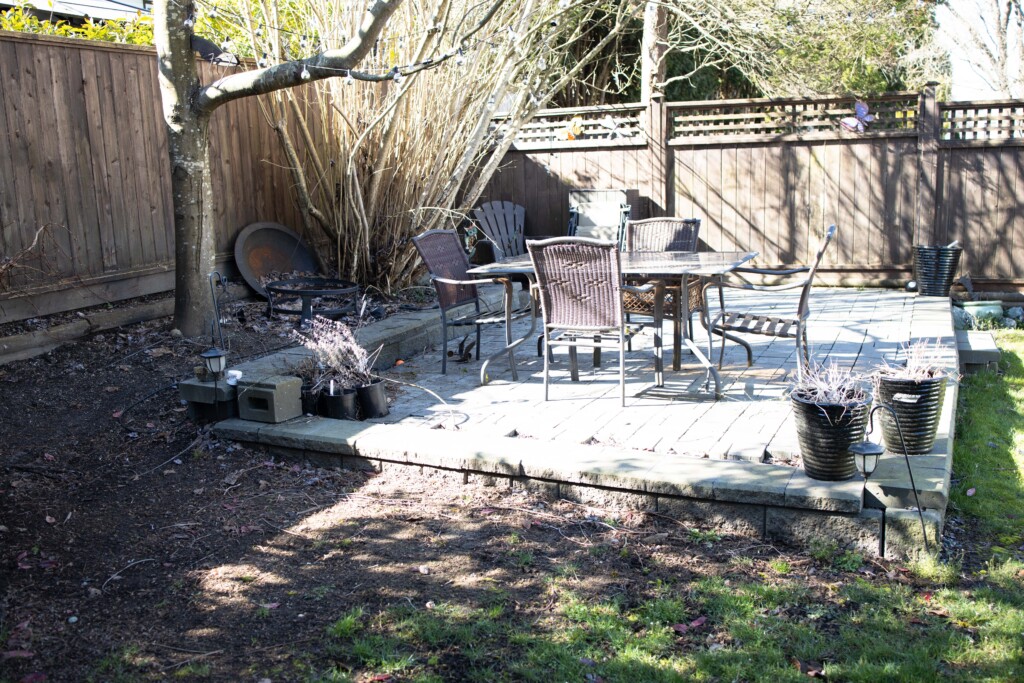
Another common issue that occurs within automatic mode is blown-out highlights. When there is a greater area of shadowed or dark areas in your photo, auto mode will expose for that darker area, since it takes up the majority of the picture. The result is a nicely exposed shadow area, but blown-out highlights. Not necessarily what you want to accomplish.
Best Shooting Modes For Beginner Photographers
Luckily the woes of automatic mode don’t need to plague your photography. There are a variety of other great shooting modes that are perfect for beginner photographers who are wanting some extra control.
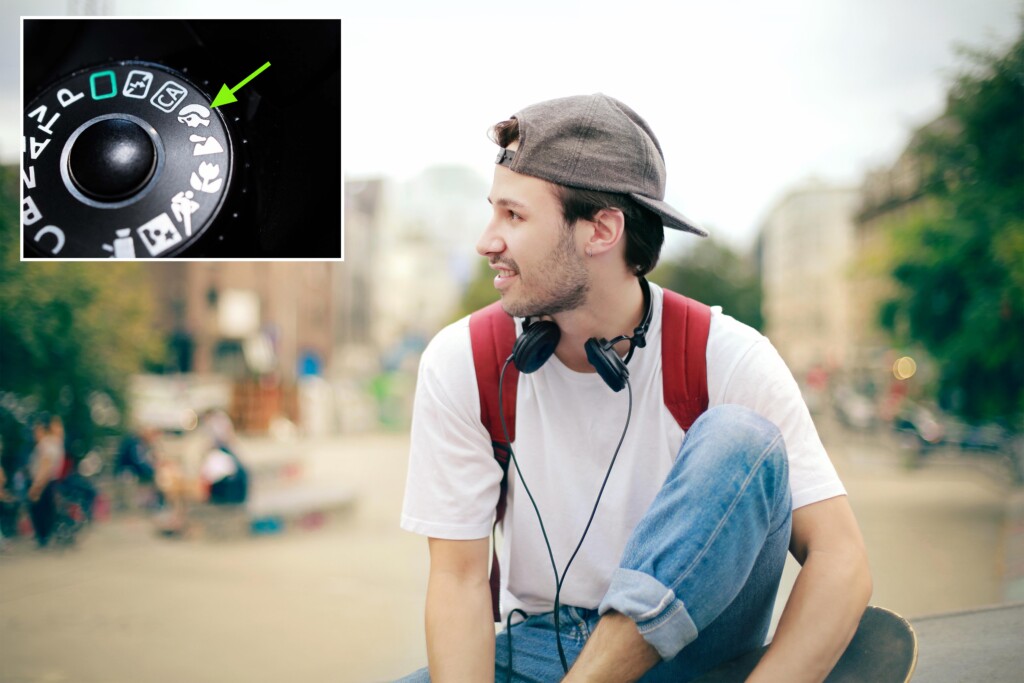
Scene Modes
Scene modes are the next step away from full-on automatic mode. With scene modes, you can tell your camera exactly what you will be taking a photo of to help it better guess the look you’re likely going for. From favoring certain shutter speeds or apertures, the scene modes offer a small step up from automatic while offering the slightest extra bit of creative control.
1. Portrait Mode
Portrait mode is perfect for when you want to take a photo of people. This mode will favor a shallow depth of field to get the beautifully blurred background we all like to see in pictures. All the settings are still automatic, but the camera now knows you will be shooting a person, which is why it will favor a wider aperture. However, the aperture will still be set automatically, and you can’t control the specifics.
2. Landscape Mode
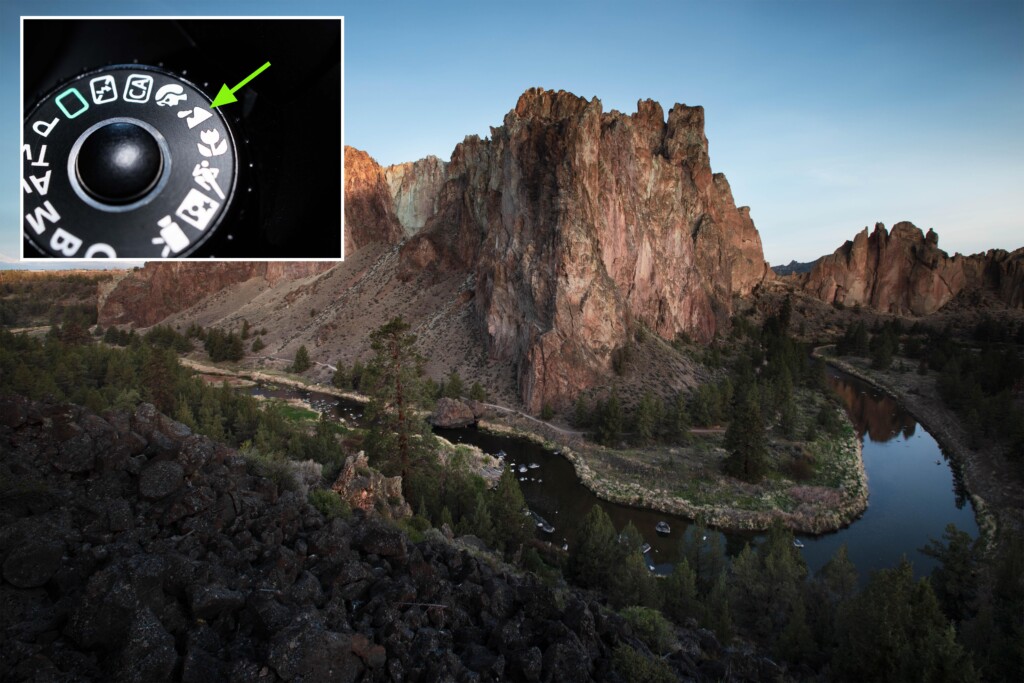
Landscape mode is ideal for shooting great views and wide-open spaces. This mode will favor a smaller aperture to allow more in focus at once. This is great since you want everything in these types of shots to be in focus! Again, a small step away from automatic, but this mode will favor a greater depth of field.
3. Sports Mode
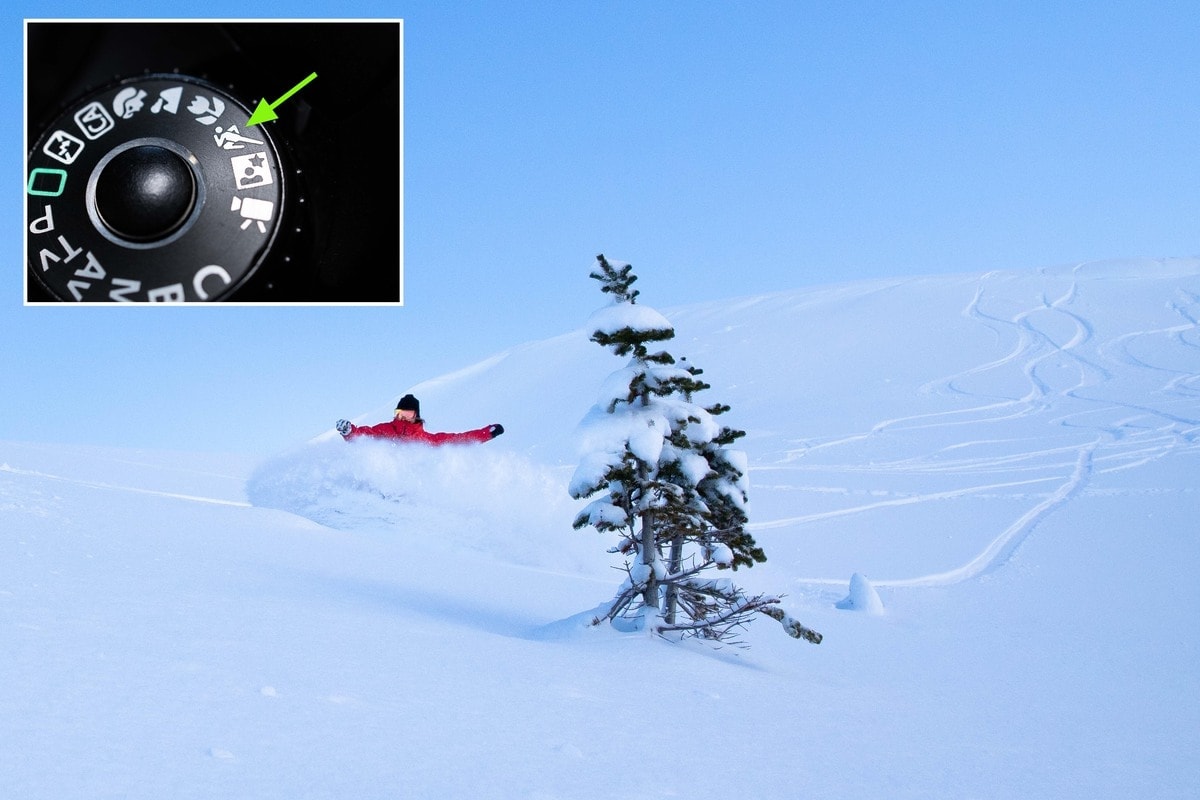
Sports mode is the answer to capturing any fast-moving subject! This scene mode will favor a fast shutter speed to freeze motion perfectly. This mode doesn’t consider aperture or ISO as much since it’s all about making sure your fast-moving subjects are tack sharp.
4. Macro Mode
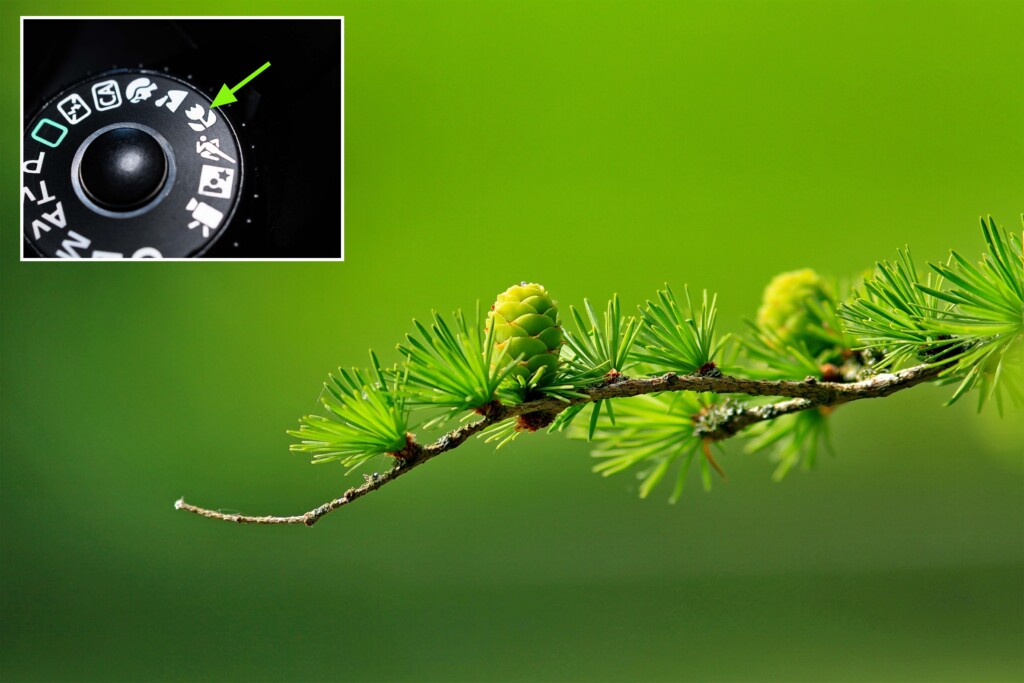
Macro Mode is excellent for the finer details. If you are taking a macro picture, this scene mode will help to choose a wider aperture to get a beautifully blurred background behind your subject. This is similar to portrait mode but really favors that shallow focus even more.
Aperture Priority (Av Mode)
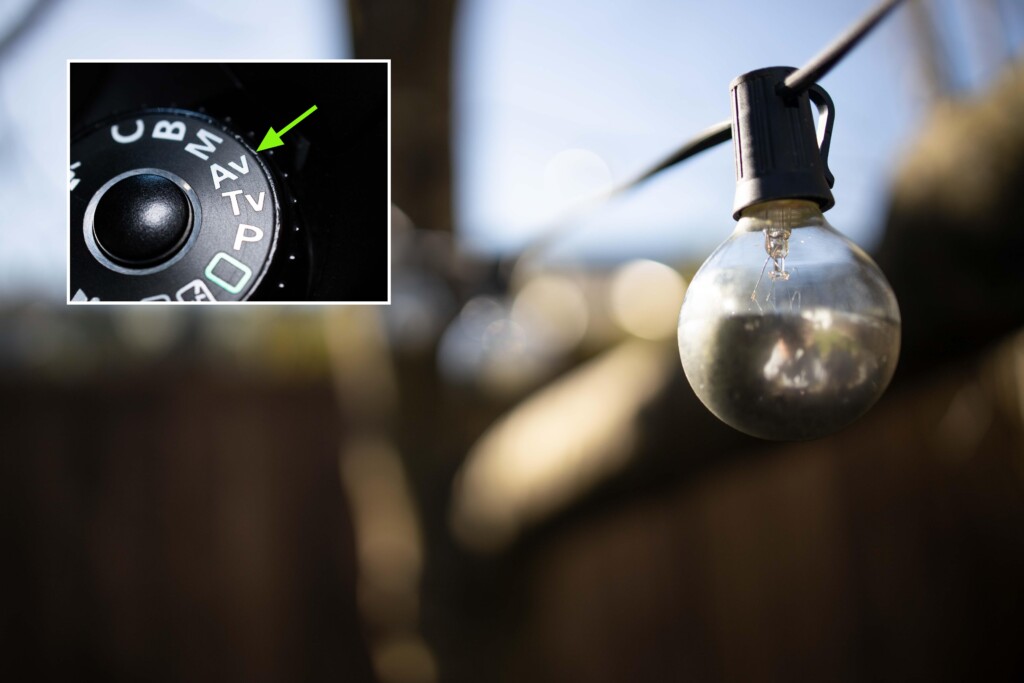
Aperture Priority, otherwise known as Av mode, lets you choose a specific aperture and works the other settings around that. For example, if you know you want to take a portrait with a blurry background, you can set your aperture to something like F/5.6. From here, your camera will adjust the shutter speed and ISO to capture an even exposure.

This mode is slightly more advanced than the Scene Modes but is a great stepping stone to help you understand how aperture works. I would recommend using this mode when you are really sure about having a particular depth of field. If you aren’t entirely sure about aperture and the effects it has on your photo, then be sure to download my free Photography Essential Ebook HERE.
Shutter Priority (Tv Mode)
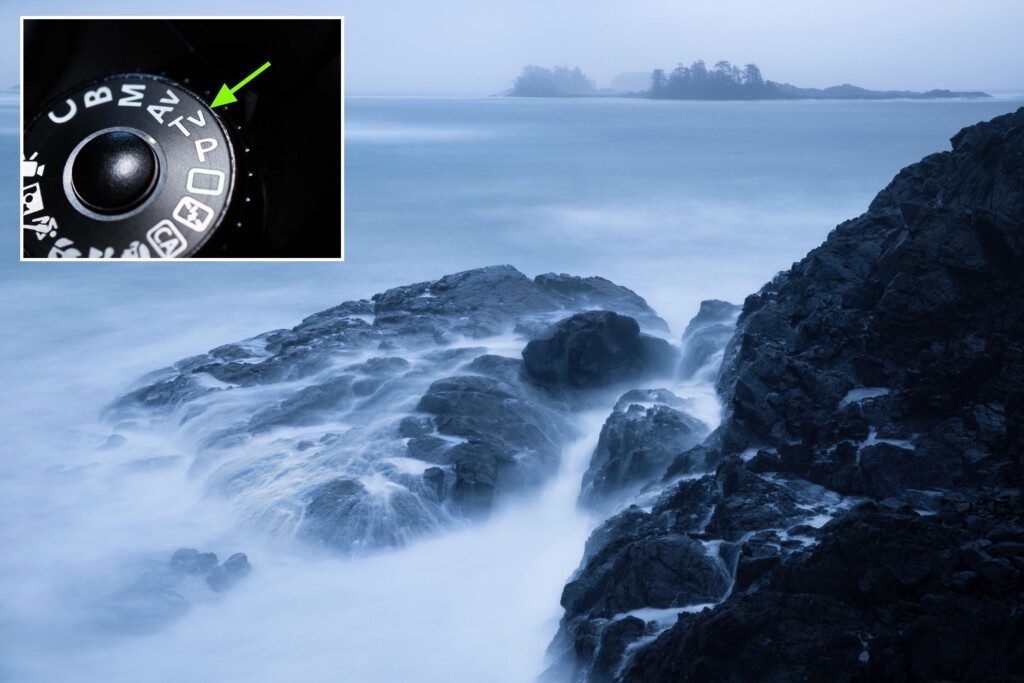
Shutter Priority, also known as Tv mode, lets you pick a specific shutter speed to shoot with. If you are shooting a really fast-moving subject like a car driving by, you can set a fast shutter speed, and your camera will work the aperture and ISO to compensate. You can also use this to shoot long exposures of waterfalls by choosing a slow shutter speed. Your camera will pick a smaller f-stop and low ISO to help accommodate that slow shutter speed!
It’s worth keeping in mind that if you want to capture a long exposure in this mode, you’ll want to make sure you are in a darker area. Somewhere like the shade or late in the day just after the sunset. If you are in direct sunlight, it will become increasingly challenging to capture a long exposure without a neutral density filter. If you don’t want to let that sunshine hold you back, then click here to learn more about neutral density filters.
Programmed Auto (P-Mode)
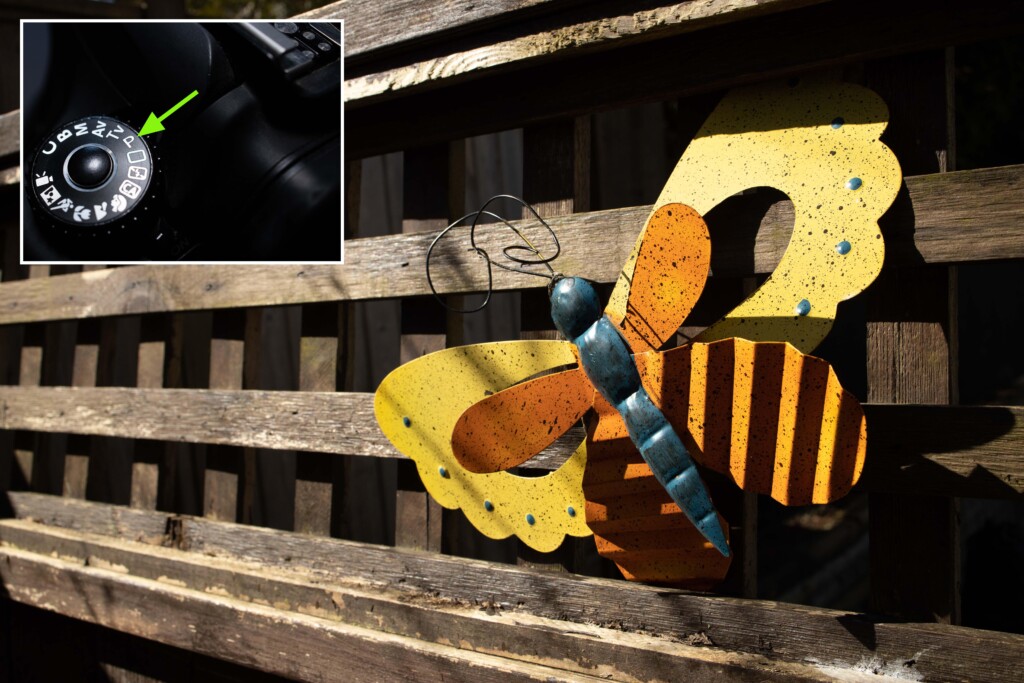
Programmed Auto is another shooting mode that gives you more custom control than the regular automatic mode, but with a little less functionality compared to Tv and Av modes. P-mode will choose the aperture and shutter speed for you, but let you adjust any additional settings to your choosing. This mode still comes along with the drawbacks of full auto, but with a leg due to slightly more settings customization.
Basic Camera Settings Explained
Now that you have a handle on a variety of different shooting modes to help you break free from fully automatic, you’re probably wondering what the heck some of your camera settings even mean. Let’s talk about the most basic camera settings for beginner photographers and how they apply to your photography.
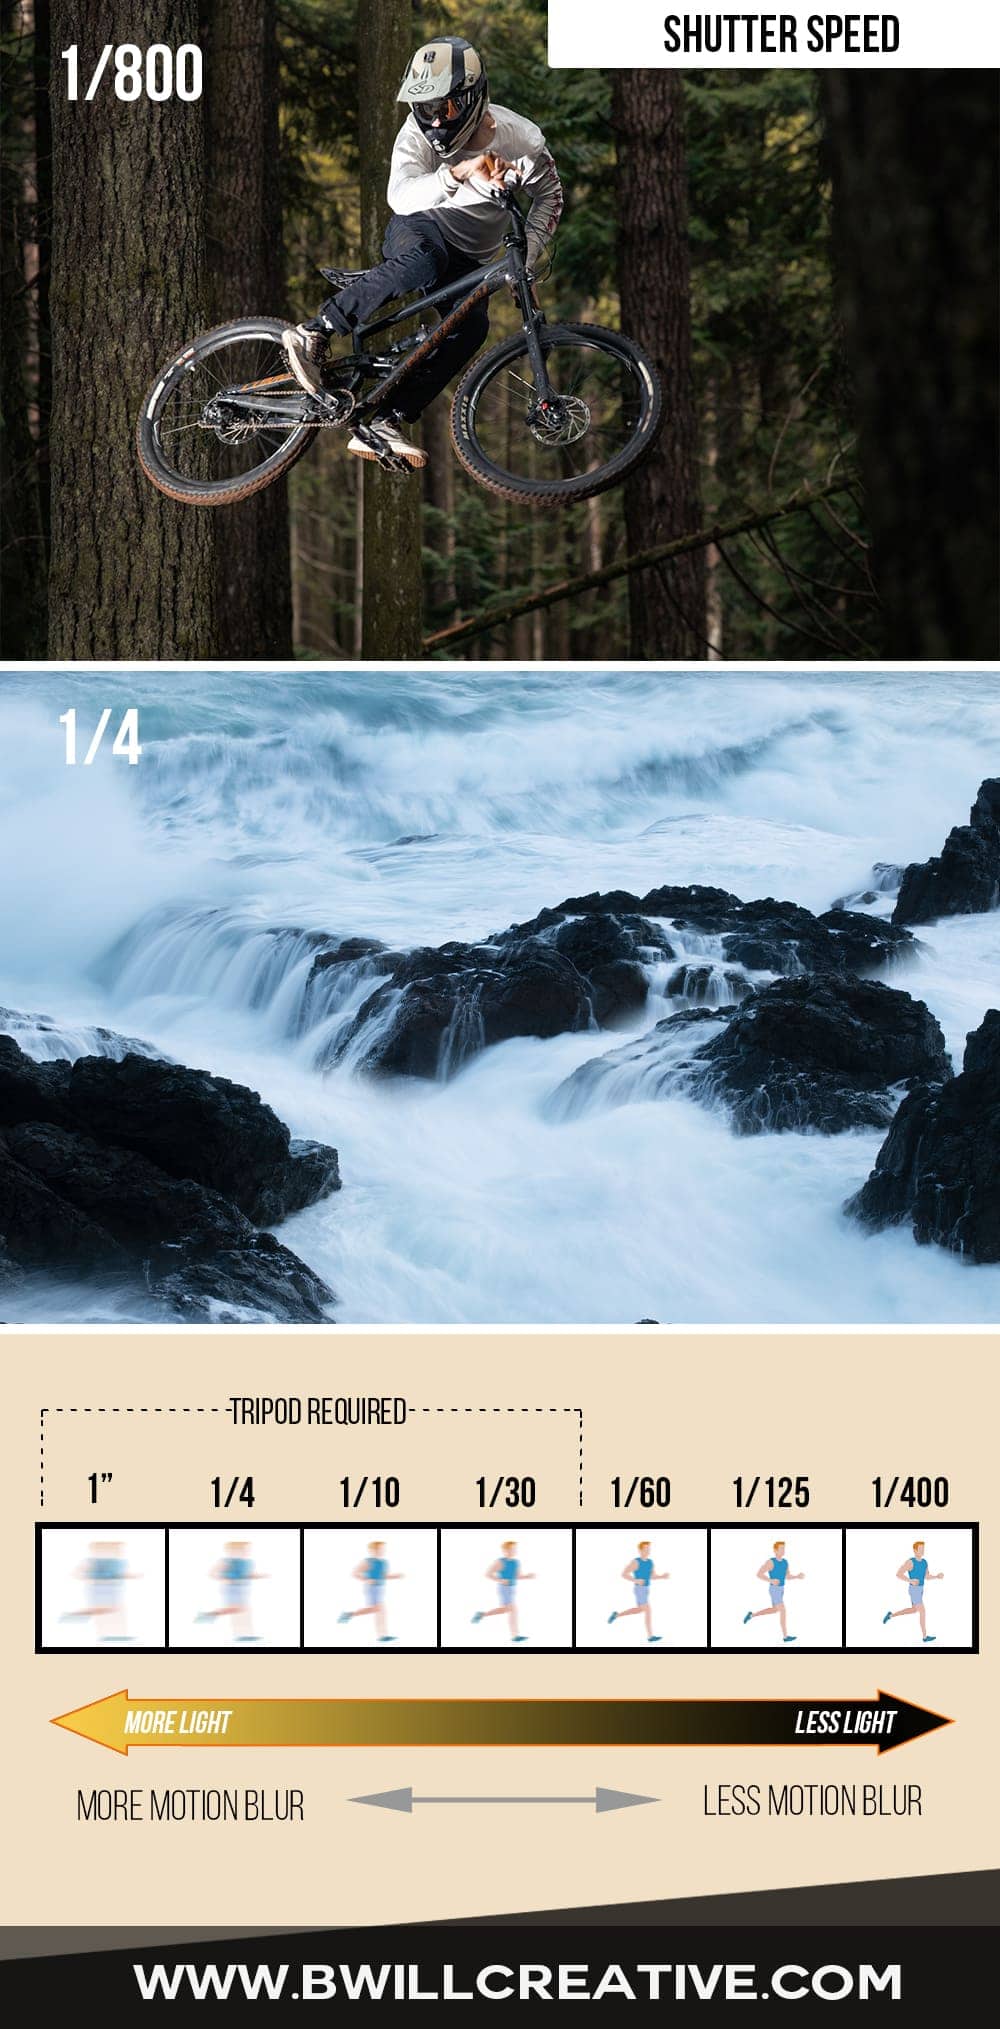
Shutter Speed
Shutter speed is a number that represents how fast the shutter inside your camera opens and closes. When your shutter is open, light passes through your camera and lands on your sensor, aka what records the light and captures your picture. The longer the shutter remains open, the more light can pass through, making for a brighter exposure.
Now it’s worth keeping in mind that the longer your shutter is open, anything that moves during that time will become blurred. This is great for long exposure landscape photography, not so great for portrait photography.
Shutter speed is displayed in seconds to fractions of a second such as 1/800, for example. 1/800 would be a fast shutter speed while 1/4 would be a slow shutter speed.
Aperture
The aperture is a small ring inside of your lens that will open and close, depending on your settings. The aperture will dictate how much is in focus at once, also known as the depth of field. The wider the aperture, the less will be in focus at once. The smaller the aperture, the more will be in focus at once. It’s also important to know that the wider your aperture, the more light can pass through your camera, making for a brighter photo and vice versa.
This is a crucial tool to utilize to help stylize your photos and get professional-looking pictures with blurred backgrounds. Aperture is displayed in F-Stops shown as F/4, for example. F/4 would be considered a wider aperture, while F/16 would be regarded as smaller.

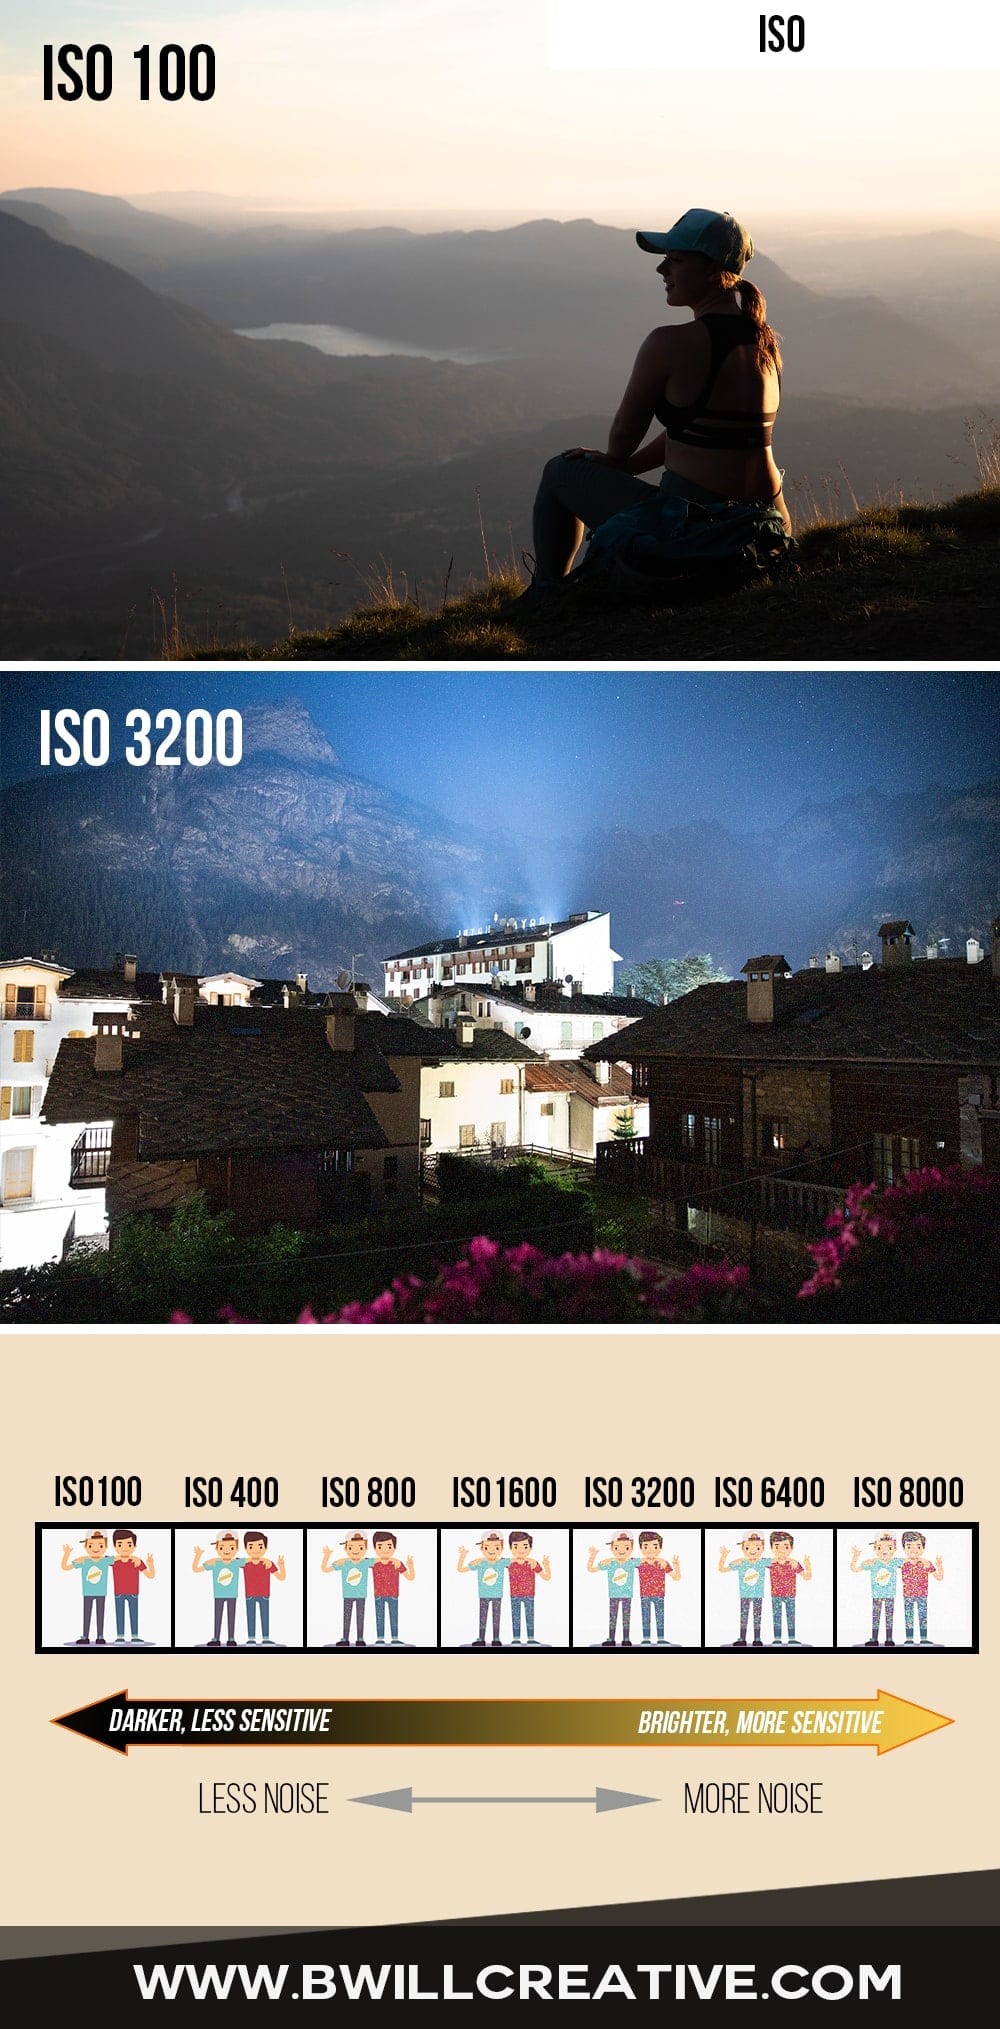
ISO
ISO dictates how sensitive your sensor is to incoming light. The more sensitive, the brighter your photo will become. It may seem pretty great to just crank the ISO to help get a better exposure, but as you increase ISO, you also begin to add more noise and contrast into your photo. It’s always best to keep a low ISO whenever you can help it.
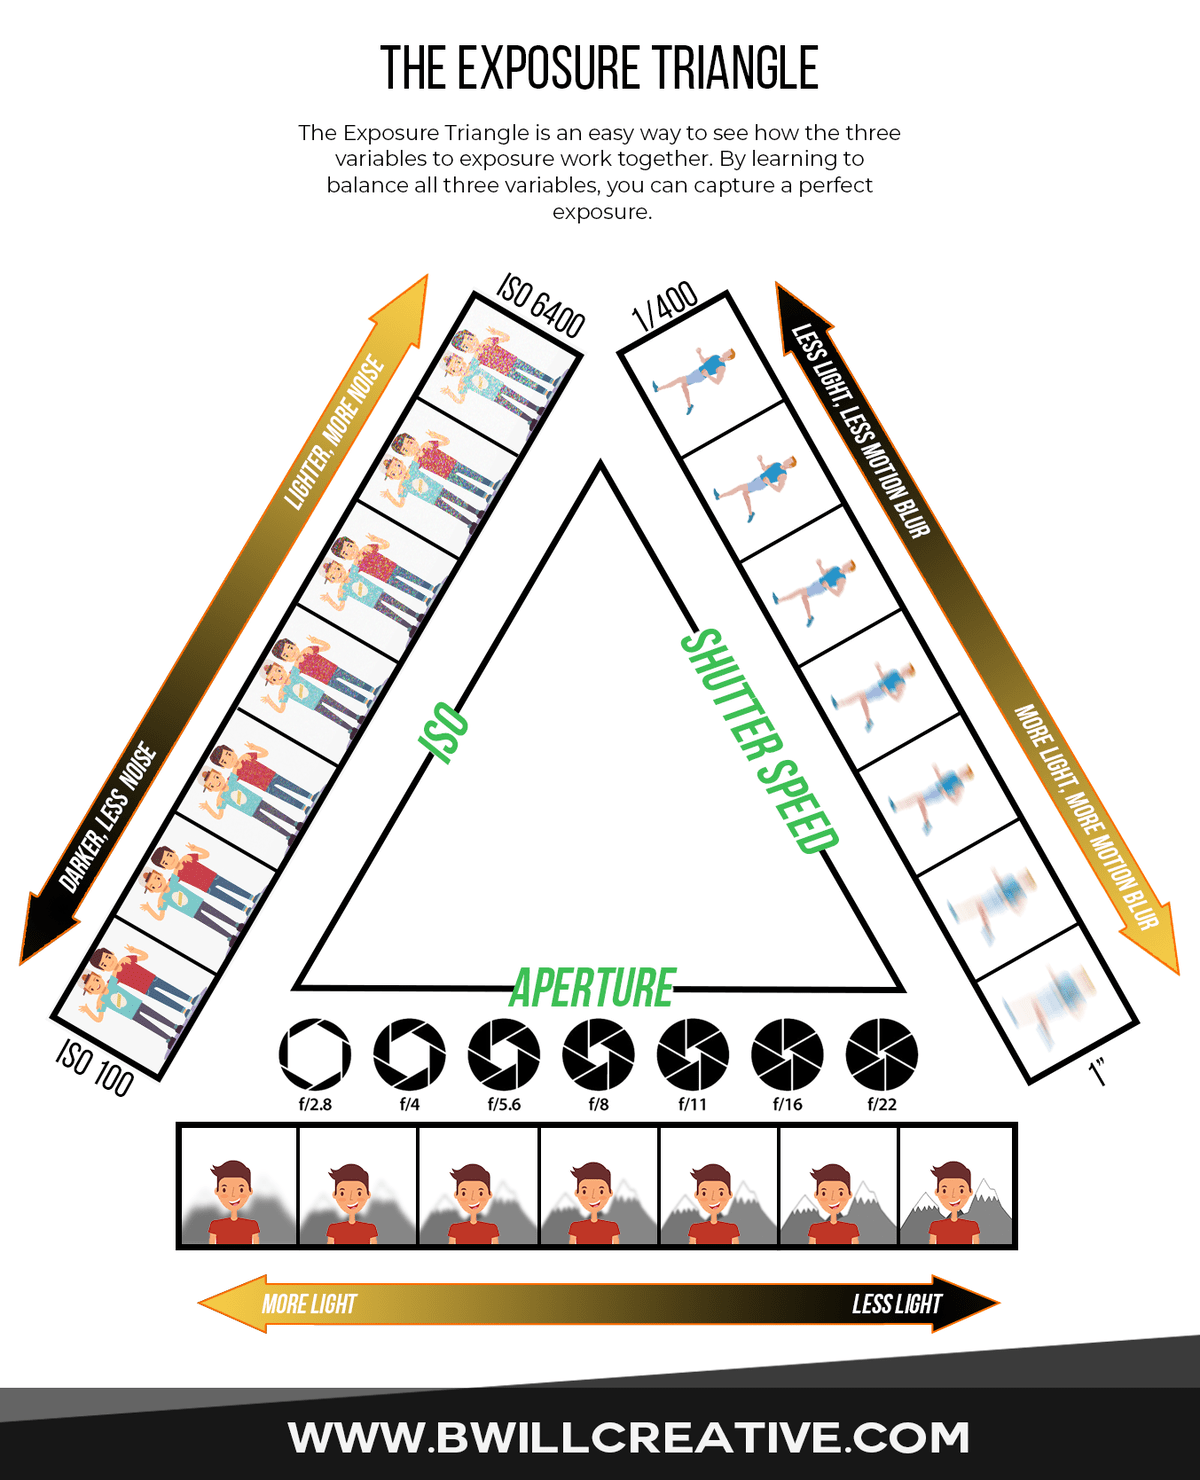
The Exposure Triangle
The exposure triangle is an easy way for beginner photographers to understand their camera settings and how the three pillars of exposure apply to their photography. Notice how each setting relates to the overall exposure of your pictures.
The Best Camera Mode For Beginner Photographers
There is a lot to consider when choosing the perfect camera mode for the situation. If you want to try to expand your horizons and break free from automatic mode, then all of the shooting modes above are viable options for you.
Personally, I would recommend using Tv or Av modes to help discover precisely how shutter speed and aperture settings can play a roll in the pictures you take. Once you have a better handle with those two settings, you will be well on your way to shooting in full manual mode!
If you don’t really care so much to learn more about your camera settings specifically and just want to press the capture button and be done with it, then scene modes are probably a more natural and more straight forward option for you.
One of the best resources I have for beginner photographers like yourself is my photography essentials ebook. It’s FULL of everything I wish I knew when I first started with photography, and guess what? You can get it totally for free, right now! Sign up below to get instant access to my Photography Essentials Ebook and kick start your photography beyond just the basic camera settings!
Autofocus Vs. Manual Focus
As a beginner photographer, it’s hard to choose the best way to keep your images in perfect focus. You can let your camera do all the work for you, or you can manually pick where your focal point is going to be. Although you can’t go wrong with either focus setting, it’s valuable to know the pros and cons of each and the variety of autofocus settings you have at your disposal.
Shooting In Manual Focus
Manual focus is an excellent option if you want to get really specific with where your focal point will be. It can make life easier by manually choosing a focus area instead of battling with your autofocus to find that perfect focal point. I’d recommend using manual focus for images that have a shallow depth of field and require a particular spot to be in focus.
Shooting With Autofocus
Shooting with autofocus makes life stress-free and straightforward, for the most part. With autofocus, your camera will automatically lock onto an area in your photo that’s sitting within your defined AF point. Autofocus is excellent when you are taking a lot of pictures and don’t have the time to manually ensure every shot is perfectly sharp. With autofocus, you can set it and forget it.
Types Of Autofocusing Modes
Continuous Focusing: Also known as AI-Servo(Canon) or AF-C(Nikon), this autofocus mode will continuously track the focus of your subject as it moves in your frame. Continuous focusing is perfect for shooting action shots or anything that involves a lot of movement of either the camera or the subject! I personally use this autofocus setting for shooting just about everything.
One-Shot Focusing: Also know as One-Shot AF(Canon) or AF-S(Nikon), this autofocus mode will only take track of the focus once before you take a picture. This means that if you or the subject are moving while you are taking the photos, the subject could become out of focus if their distance from the lens changes. This mode is preferred if you are trying to conserve battery or don’t want your focus to change continuously as you shoot.
Automatic Focusing: Also know as AI Focus AF(Canon) or AF-A(Nikon), this mode will automatically choose to be in continuous or one-shot focusing depending on the situation. This can be useful if you are totally torn between which focus setting to use. I mean, if you can’t pick just one, why not use both? Automatic focusing allows you to do just that.
The Best Focus Setting For Beginner Photographers
When it comes to focusing, you can’t go wrong using either manual or auto. Both options will result in a sharp image, but with manual focusing, you have easier control over precisely what stays in focus. Autofocus is excellent for when a lot is going on around you, and you don’t have the time to correctly set the focal point by hand.
I like to shoot with autofocus pretty much all the time. I rarely have an issue and trust my camera not to miss focus. I would definitely encourage you to test the autofocusing capabilities of your camera before fully trusting it in every situation. Sometimes the brightness of a photo, speed of the subject, or type of scene you are shooting can play a part in how well your autofocusing performs.
Should Beginner Photographers Shoot In RAW Or Jpeg?
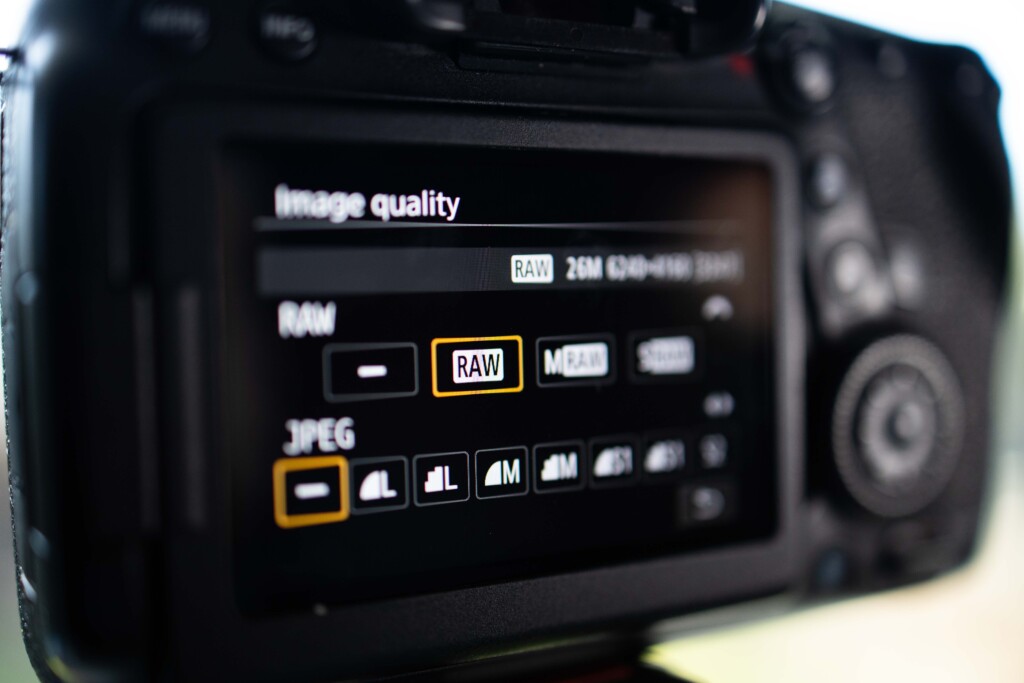
When it comes to the best image file types, it really comes down to two options: RAW or Jpeg. Both options are entirely viable for beginner photographers, but which one you choose will depend on how seriously you want to take your photography.
RAW images are uncompressed and have a higher bitrate allowing you to push the image more in post-processing without losing quality. If you are wanting to edit your photos to really add that extra professional touch, then RAW is the way to go. Just keep in mind that RAW photos have a larger file size and need to be edited before you can share them anywhere.
Jpeg images are more compressed than RAWs and can still be edited, but don’t look nearly as good after some serious post-processing. For more casual shooters that don’t really care much to edit pictures, then Jpeg is an excellent option for you to use.
There are a ton of technical differences between RAW and Jpeg files that are beyond the scope of this article. Still, luckily I cover all of the critical differences between these two file types in my previous article you can find here.
Conclusion
So those are the best camera settings for beginner photographers to use. It may feel overwhelming at first but with a bit of practice, you’ll be a photography wiz in no time.
The camera settings I talked about today are some great options for beginner photographers looking for a stepping stone towards manual mode, without throwing themselves off the deep end. Once you better understand the 3 main camera settings of shutter speed, aperture, and ISO, all of the camera settings we talked about today will feel like a breeze.
I hope this article helped you to learn more about some basic camera settings for beginners, and you can begin to make more educated decisions with your photos and camera settings from here on out!
If you enjoyed this article, make sure to LIKE it and SHARE on Pinterest or Facebook to help spread the word!
Happy shooting,
-Brendan


[…] The aperture is a small donut-shaped ring found inside of a camera lens. This ring opens and closes to allow more or less light into the camera. A wide aperture will make your photo brighter, but also leave you with a shallow depth of field(less in focus). A smaller aperture will make your photo darker but will leave you with a larger depth of field(more in focus). You can learn more about aperture here. […]
[…] Limiting yourself to only one lens is a great way to think outside the box in your photography. Without the comforts of a zoom lens, it’s much harder to get that perfect shot you had in mind. Instead of just zooming in or out, you actually have to move your feet to find a better composition for your picture. This is a fun challenge and can seriously improve your compositions, especially as a beginner photographer! […]
[…] next trick to remember is shooting at a wide-open aperture. Anywhere from f/5.6 to f/2.8 works great and totally blurs out the foreground. Shooting wide open makes for much […]
[…] Make sure you use as wide an aperture as possible for the best […]
[…] article will be building off what I discussed in my ‘best beginner camera settings,’ post and go more in-depth with shutter speed to help you discover the ins and outs of this crucial […]
[…] If you’re new to this series, then be sure to check out the previous articles covering the best beginner camera settings, and learning why shutter speed is […]
[…] To Take Better Photos Using Neutral Density Filte… The Best Camera Settings For Beginner Photographers The Best Editing Tablets For Photo Editing – […]