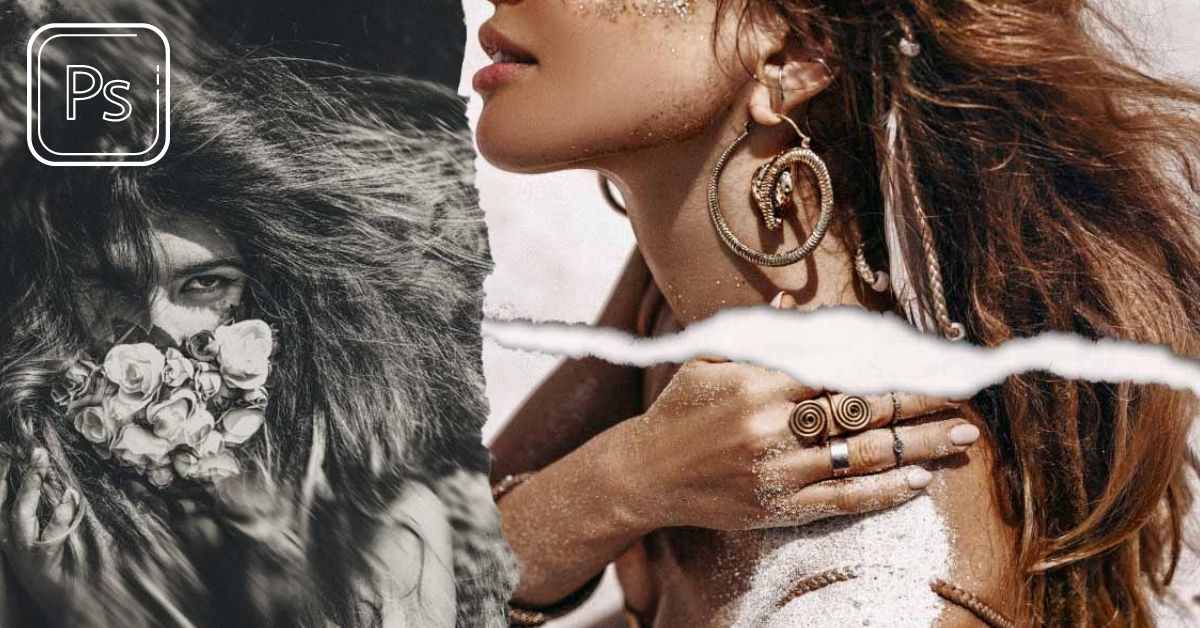

The ripped paper effect is a simple and fun effect to add to your images to make them look as if they were torn in half. Without needing much experience in Photoshop, you can create this effect by following a few basic steps outlined in this tutorial.
Once you understand the steps, you can play around with the effect and create different rips on the page. I will first show you how to make a simple rip over half the page, then give you some ideas of how to expand it from there.
Where To Get Ripped Paper Textures For This Effect
When creating the torn paper effect in Photoshop, you can create your own page with a ripped look using a selection and adding different effects. However, it is much easier to simply download a ripped paper texture to add to your image. It will save you time, and you can also slightly manipulate the texture to make it unique.
There are plenty of sites to download free ripped paper textures to use. You could try the ripped paper texture set from Behance, which includes 10 different ripped textures on transparent backgrounds.
Alternatively, you could download this torn up paper curved pieces texture image from Unsplash. However, you will need to remove the background in Photoshop and crop the image to use each texture separately.
You can also download other ripped paper texture options from Freepik as a PSD file. Once you open the file, copy one of the paper textures to a new document and use the elements together, as I will show you with the other example below.
Whichever texture or image you decide to use, you can follow the steps below to add the effect to your image. Make sure that the paper texture or image is placed on a transparent background and grouped together with any effects used to create the rip texture.
How To Make Edges Of A Photo Look Ripped In Photoshop
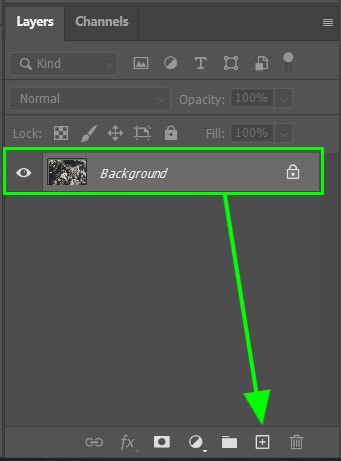
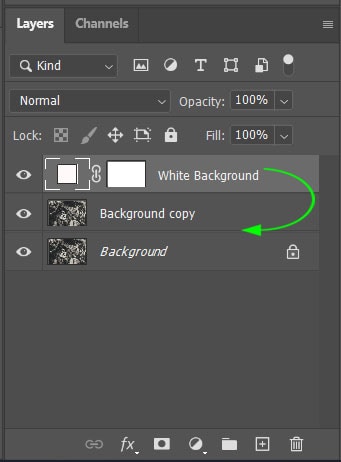
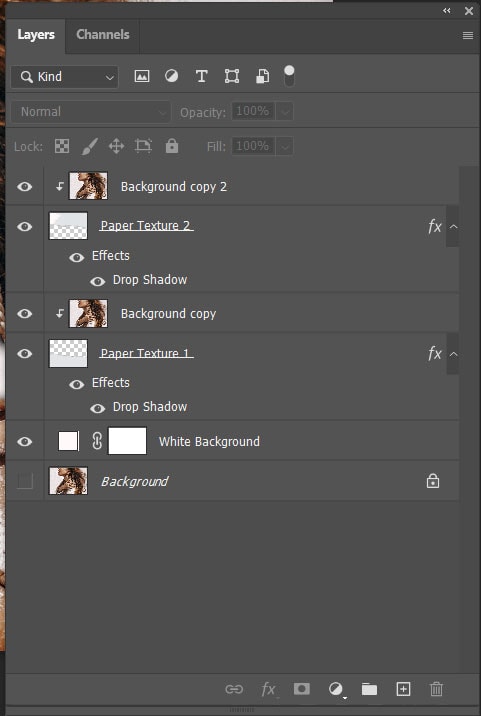
Once your image is open in Photoshop, duplicate the background layer as you will need to be working on a separate layer to create the ripped effect. To duplicate the layer, click on it and drag it to the New Layer icon at the bottom of the Layers panel. You can also press Control + J (Win) or Command + J (Mac).
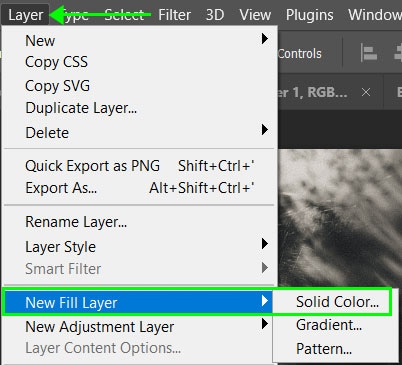
Next, create a white background by adding a new fill layer. To do this, navigate to Layer > New Fill Layer > Solid Color.
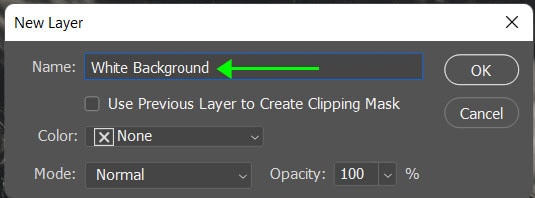
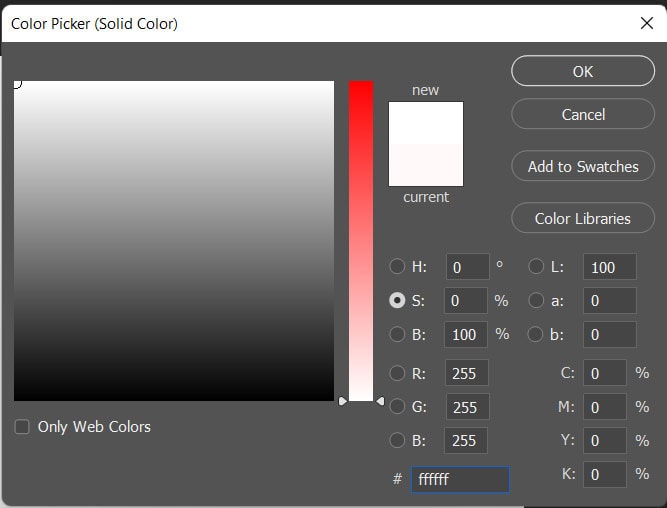
You can then name the new layer as “White Background” in the window that opens and select OK.
Next, the color picker will open, where you can select white and click OK. The white layer will now cover your image.
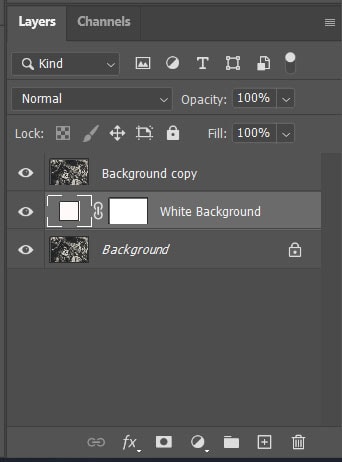
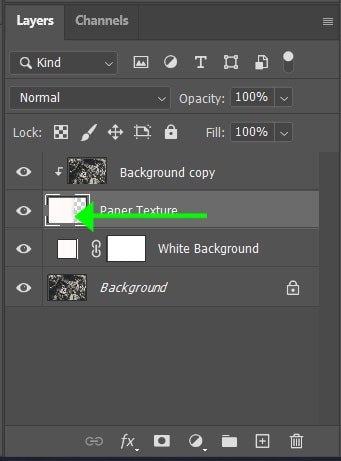
Move the white layer below the background copy layer in the Layers panel by clicking and dragging it down. The white layer should now sit between the original and the copied background layers.
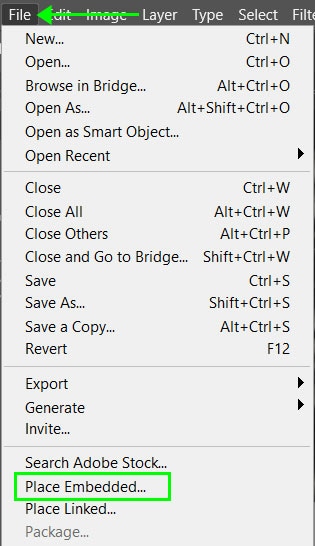
Next, open your chosen paper texture in a new window and drag the layer into the image workspace to add it as a new layer. Alternatively, you can navigate to File > Place Embedded before selecting your image from your files. A new layer will automatically be created in your workspace.
Rename the layer to “Paper Texture” by double-clicking on the layer name. For now, keep this layer at the top of the Layers panel so you can move and resize it easily.

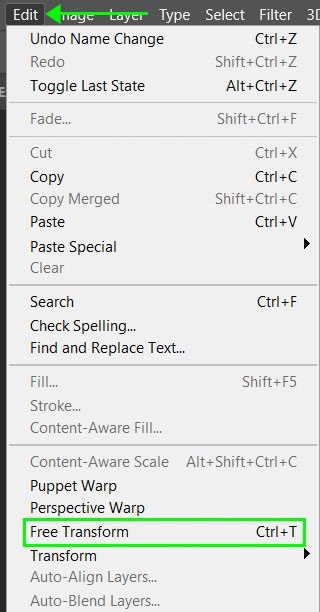
With the Paper Texture layer selected, go to Edit > Free Transform or press Control + T (Win) or Command + T (Mac).
Your layer will now have anchor points around it in the workspace. Click and drag on any corner anchors to resize the image — hold in Shift while dragging to keep the image’s original aspect ratio.
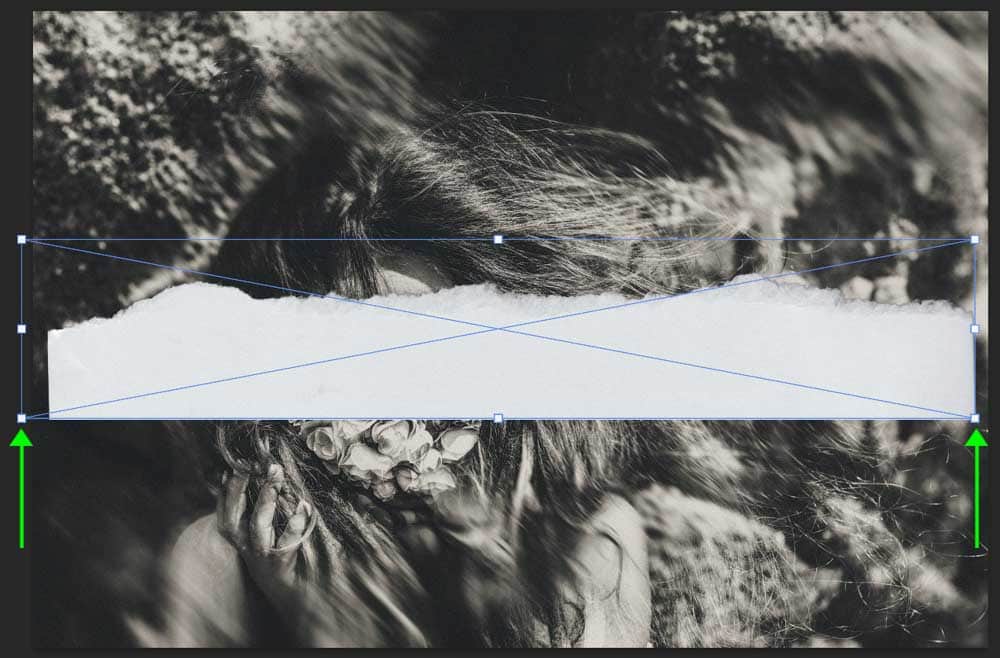
Move the mouse away from the layer until a curved double-arrow icon appears. Click and drag the layer once this icon appears to rotate the layer. Hold in Shift to keep it straight vertically or horizontally.
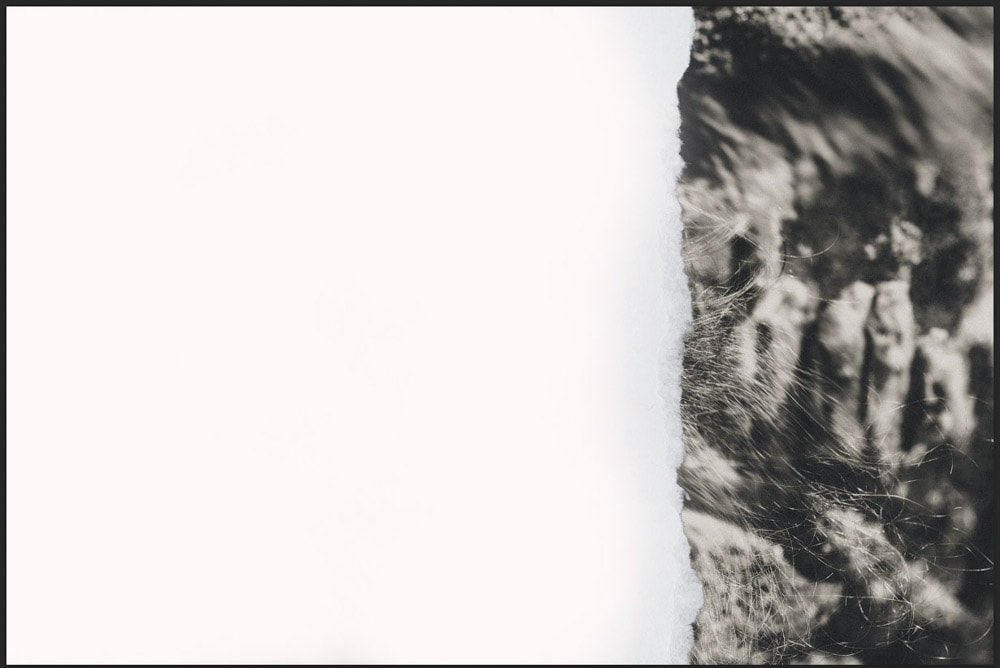
Once the layer is rotated and resized, click and drag to position it where you want it to cut the image. Anything on the torn side of the paper texture will be hidden at the end of the process as if it were torn off.
Once you are happy with the texture placement, click the checkmark in the Options Bar or press Enter.

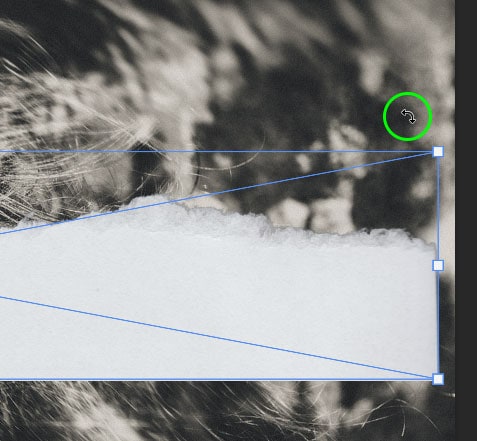
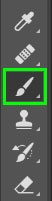
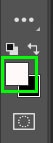
Now, the side of the image next to the straight edge of the texture must be covered in white. To do this, remain on the Paper Texture layer, select the Brush Tool (B) from the toolbar, and ensure the foreground color is set to white.
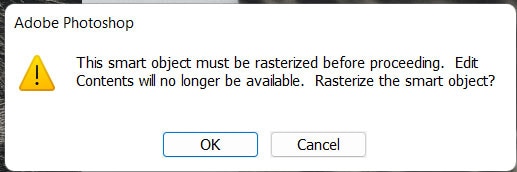
If the paper texture is a Smart Object, a message will pop up asking you to rasterize the layer when you click on the image to add white to the layer. Click OK on this message.
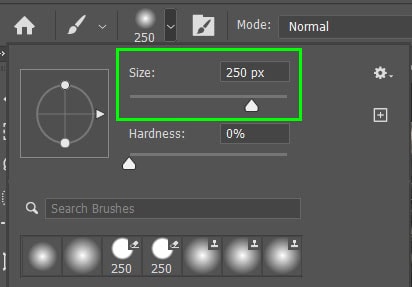
Now resize your brush in the Options Bar or use ] to increase the size, then paint over the image next to the straight edge of the paper texture.
The parts of your image that must be visible at the end of the process should now be covered in white. The rest of the image should be visible next to the torn edge of the paper.
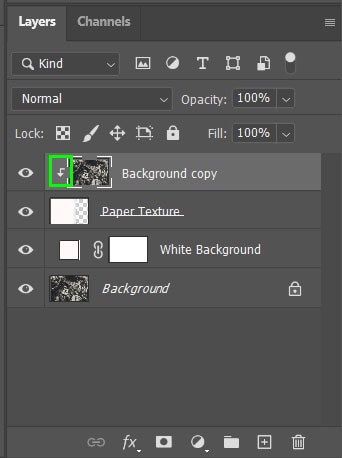
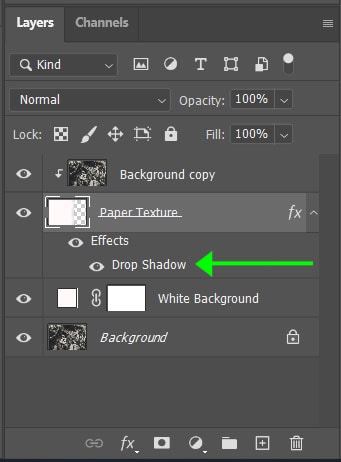
Next, drag the Paper Texture layer below the image layer, so the paper texture is now hidden.

Now, create a Clipping Mask to only show the image on the paper texture. To do this, right-click (Win) or Control + click (Mac) on the image layer and select Create Clipping Mask.
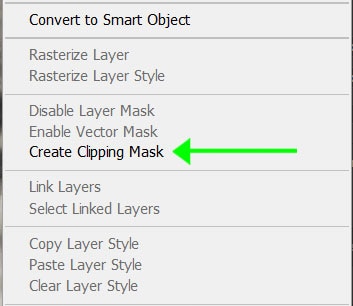
The image layer will have a small arrow next to the thumbnail indicating that the image is only applied to the layer directly below it, which in this case is the Paper Texture layer.
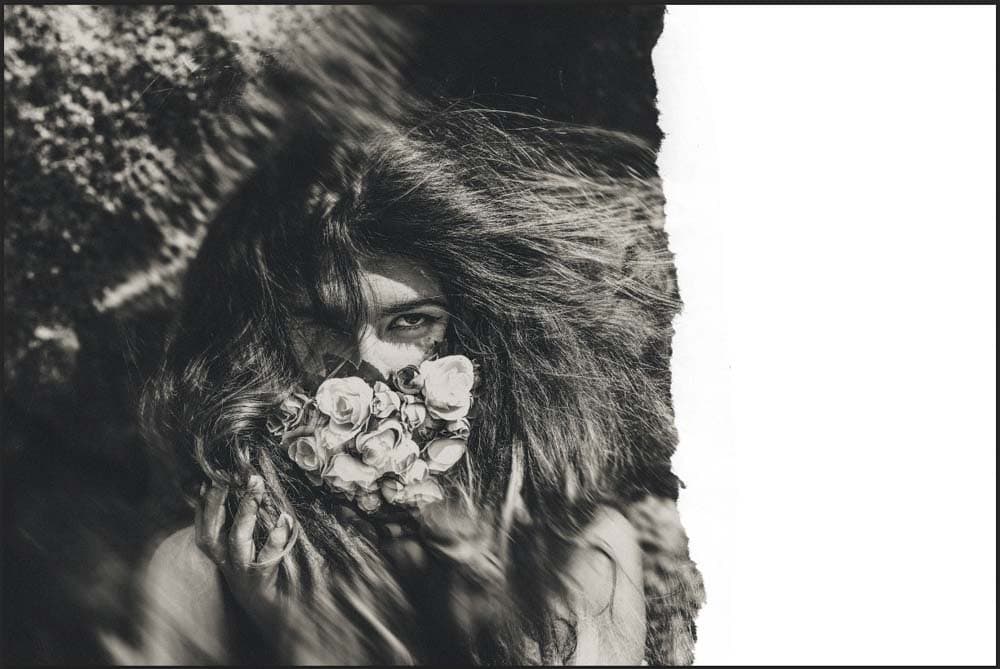
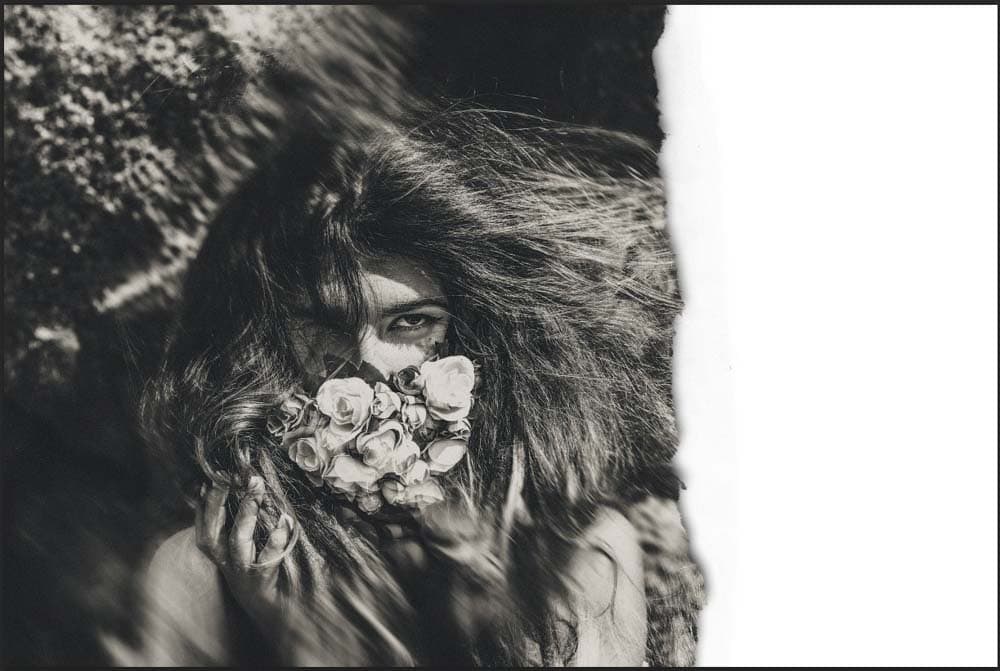
In the workspace, your image will now look as though it has a piece torn off on one side.
Adding A Drop Shadow To Complete The Ripped Effect
While you can stop the process here if you are happy with the result, you can also go one step further to make it look more realistic. A drop shadow makes it look as though one element is separate from the element below it, and this will make it look as though the torn image is sitting on white paper, with the torn edge slightly lifted.
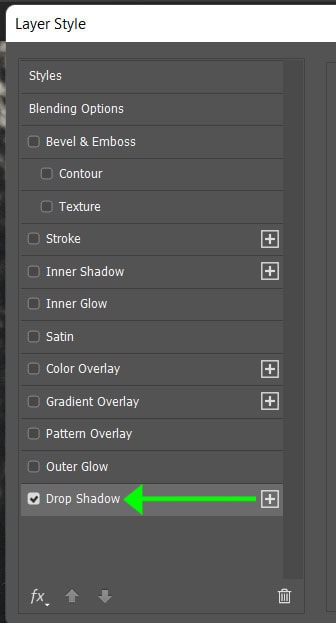
To add the drop shadow, select the Paper Texture layer, click on the fx icon at the bottom of the Layers panel, and choose Drop Shadow.
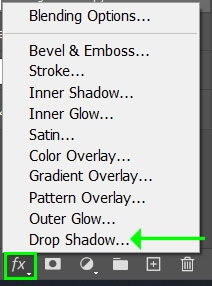
You can also double-click on the layer’s thumbnail and navigate to the Drop Shadow menu at the bottom of the options on the left.
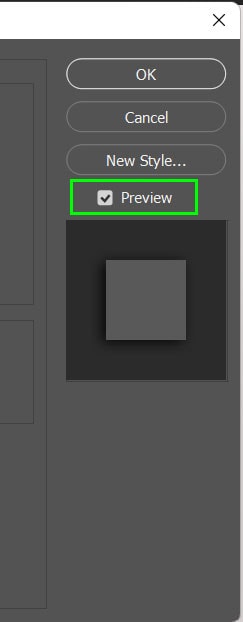
Check the box next to Preview to see the effect on the image while adjusting the settings.
Adjust the settings to create the desired drop shadow result. In this case, focus on the following settings to make a good drop shadow under the paper texture.
- Blend Mode: Set the blend mode to multiply to avoid a harsh shadow
- Opacity: Keep the opacity quite high, but not at 100%, as you want the shadow to look faded
- Angle: Move the angle around until the shadow is slightly visible next to the torn edge of the paper
- Distance: The distance will control how far the shadow extends beyond the edge of the paper
- Size: The size controls how compact or spread out the shadow is
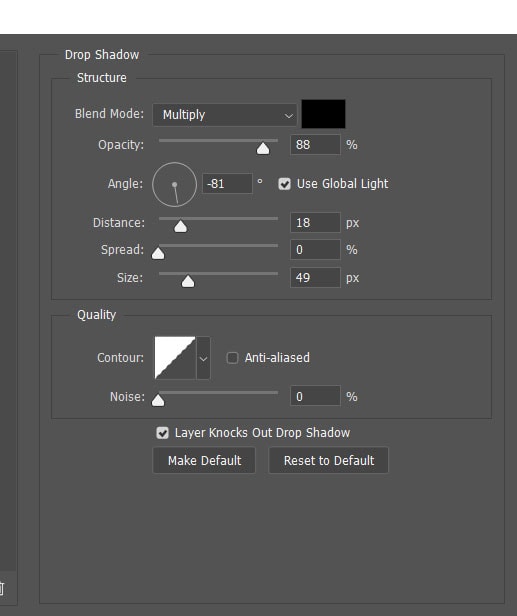
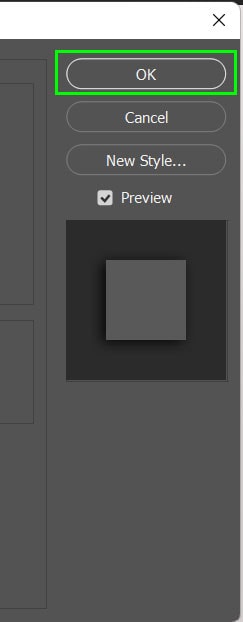
Click OK when you are happy with the drop shadow effects on the image.
The image will now look like the torn edge is slightly separated from the white background, giving the effect a more realistic look.
You can adjust the drop shadow at any point by double-clicking on the drop shadow effects layer in the Layers panel.
Get Creative With The Ripped Paper Effect
You can now try out new looks using the torn paper effect. One example is making it look like a part of the image was torn in the middle. Using the same steps from the above method, you can create this and add an extra paper layer with an extra copy of the image for two separate clipping masks.
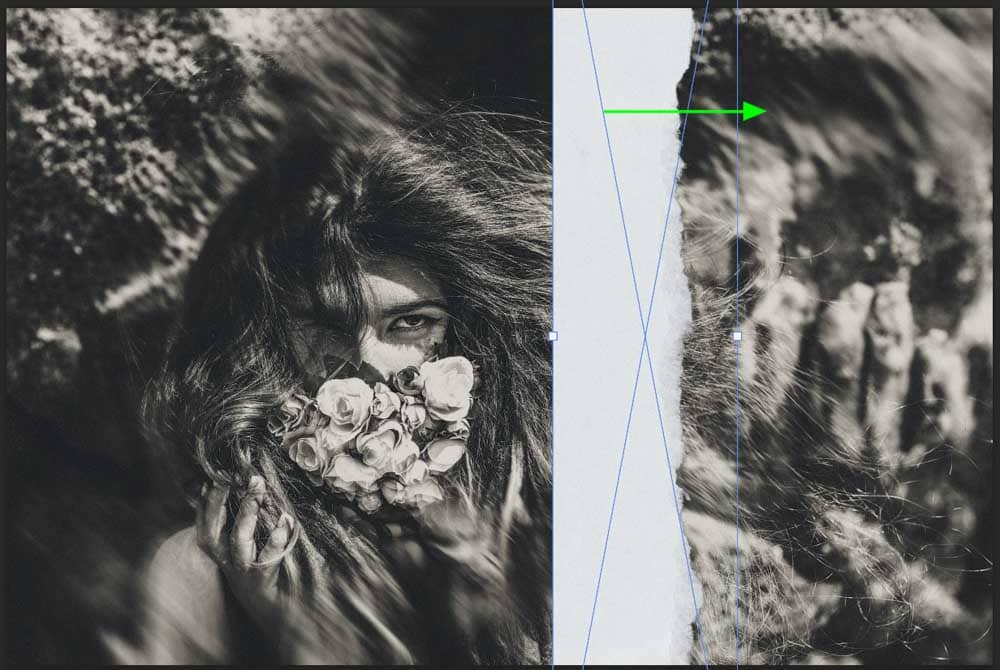
An extra step in this process is to manipulate the paper texture a bit more if the tear doesn’t sit as you would like. To manipulate it, access Free Transform by clicking Control + T (Win) or Command + T (Mac). Then select the warp icon in the Options Bar.
The layer will have the blue transform block with small circles around the perimeter. You can click and drag these circles to manipulate the layer with a warped effect.

Pull the circles up, down, left, or right to move, and pull the paper texture in the direction you want. Hit Enter when you are happy with the effect.
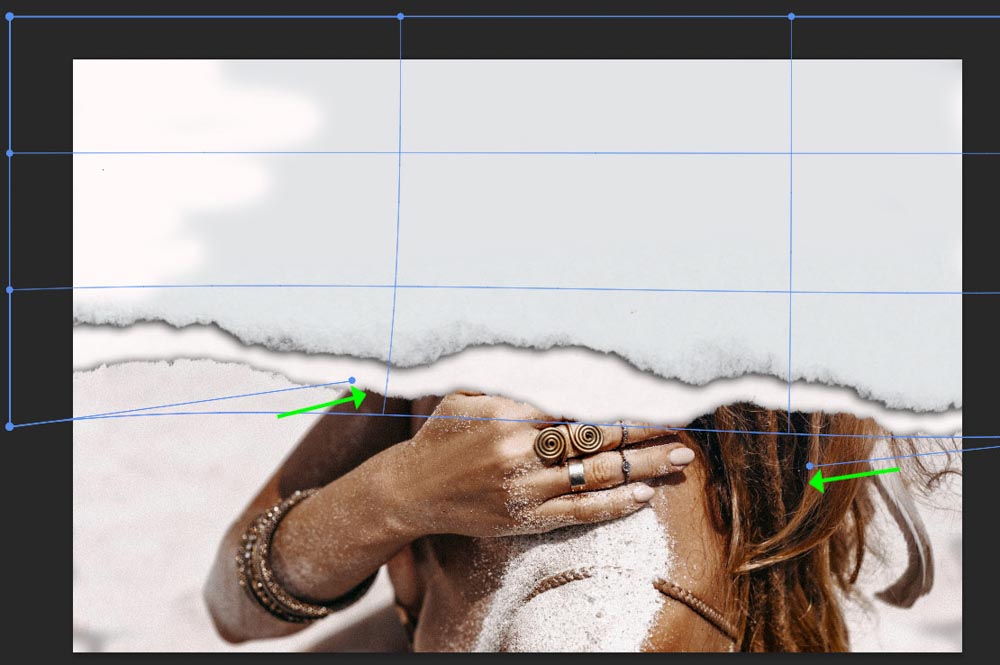
You can now have a different ripped effect on an image with more control over where and how the paper texture sits on the page.

Get More Photoshop Tips To Improve Your Creativity
Now that you know how to make the ripped paper effect in Photoshop, you might be left wondering what else you can start learning. In my free Photoshop Blueprint ebook, you’ll discover 6 effective techniques to make working in Photoshop easier. With the tips outlined here, you’ll be ready for action in your next creative project. Click here to sign up and access the Photoshop Blueprint Ebook for free, or click the button below!


