
If you found a font online that you love, but Canva doesn’t have it, you’re not out of luck. Learning how to upload fonts in Canva can be a great way to give your designs a unique style others won’t have.
In this guide, I’ll show you exactly how to import those new fonts you found into Canva and start using them. Plus, I’ll share the best websites to find fonts without copyright issues if you don’t know where to look.
How To Upload Fonts To Canva
Step 1: Download Your New Font
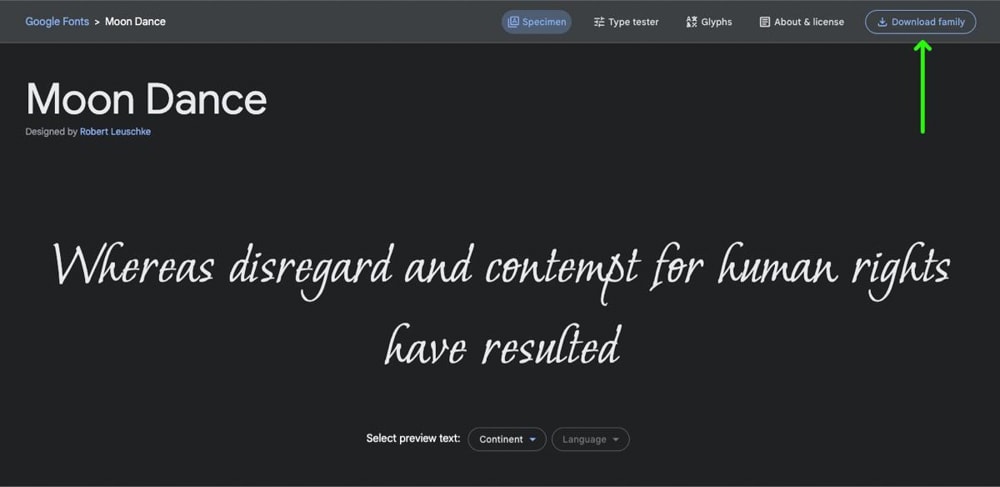
Before you can add a font to Canva, you need a font to download. I’ll use Google Fonts, for example. First, go to the website and click on Download (or Download Family) on the font page.
Note: Canva supports the following font file types: TTF (True Type font), OTF (Open Type font), and WOFF (Web Open Font Format). Each file must also be a maximum of 50MB.
Your font(s) will be downloaded to your computer’s hard drive. Before you add it to Canva, you will have to unzip the folder. To unzip it, click on the folder (which will automatically open it) or right-click the folder and select Extract.
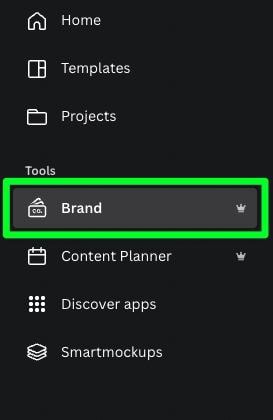
Step 2: Click Brand And Select A Brand Kit Or Click Add New
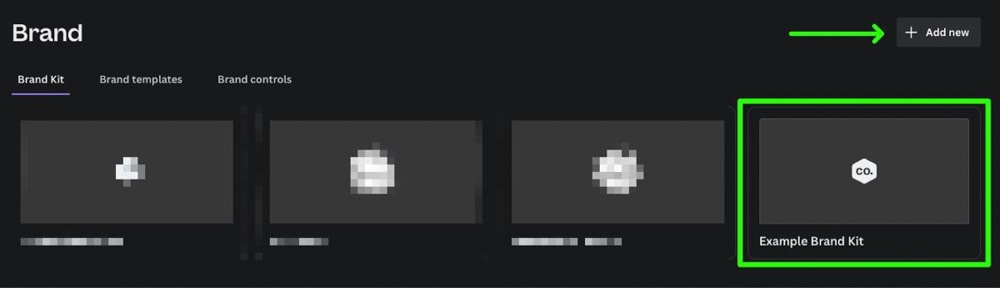
To choose your Brand Kit, open Canva, then, click on Brand, found at the side of the home page. You will be presented with all of your available Brand Kits. If you haven’t made a Brand Kit yet, click on Add New to create a new Brand Kit.
Note: You need Canva Pro to access this feature, which means you can only upload new fonts on Canva Pro.
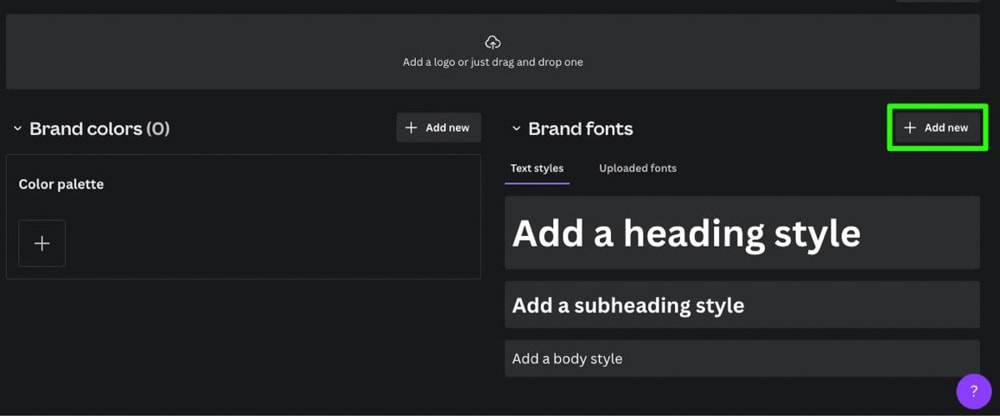
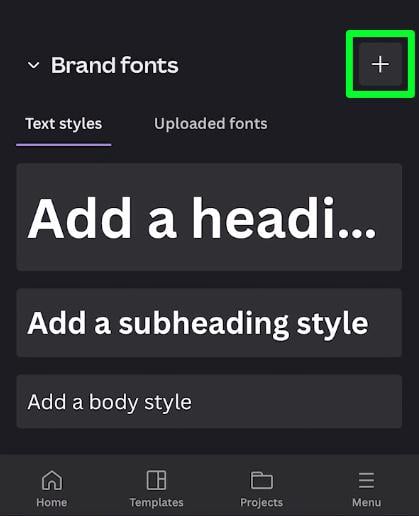
Step 3: Click The Add New Button Under Brand Fonts
Now that your Brand Kit is open, click on the Add New button next to the Brand Fonts section.
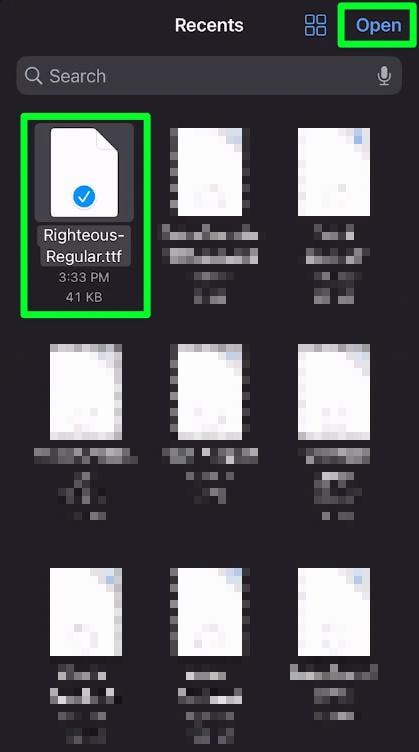
Step 4: Upload The New Font To Canva
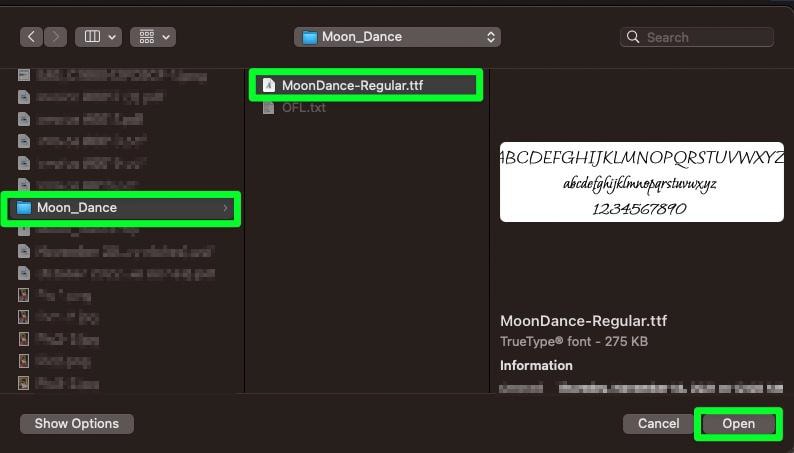
After clicking the Add New button, you will be prompted to locate the font you downloaded on your hard drive. Once you’ve found the font, click Open.
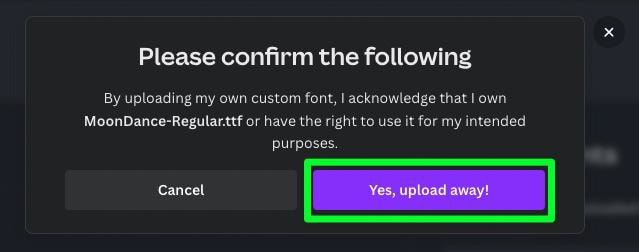
You will be asked to confirm that you have permission to use the font you’re about to download. Always make sure you have access to the proper license before uploading a font. Click Yes, Upload Away to confirm.
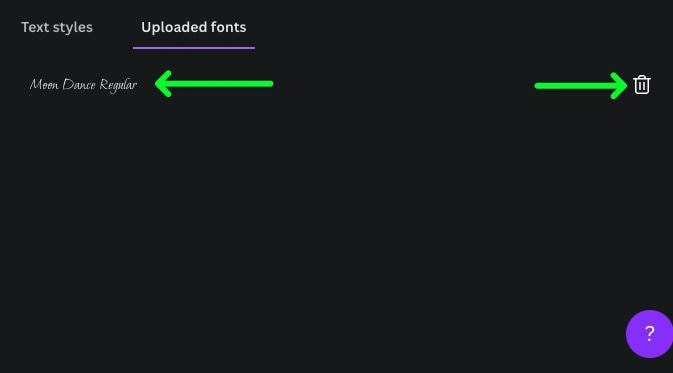
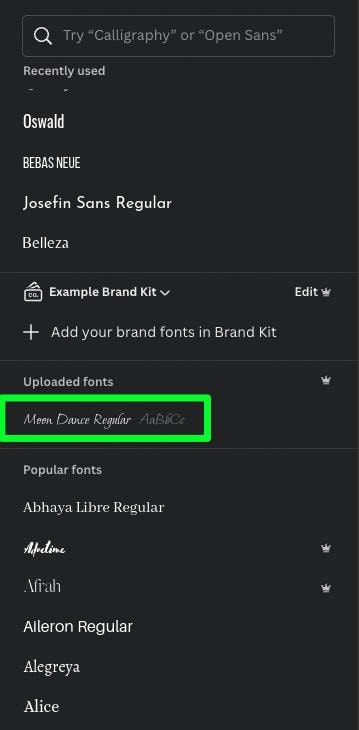
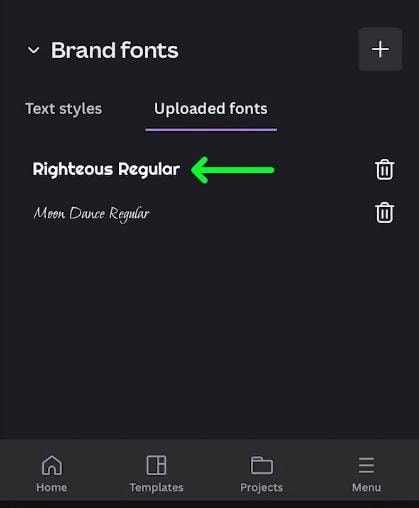
You will now see your new font under the Uploaded Fonts tab. You can use the trash icon to delete any uploaded fonts at any time.
Step 5: Switch To The Correct Brand Kit Under The Font Drop-Down Menu
The first thing you need to remember when using a new font is to switch the Brand Kit in which it is located. You won’t find the font if you’re in the wrong Brand Kit. To switch to the correct Brand Kit, select the text and click on the Font Drop-Down Menu.
In the Font Panel that opens up, click on the Brand Kit Selector. You can now select the Brand Kit that your font is in.
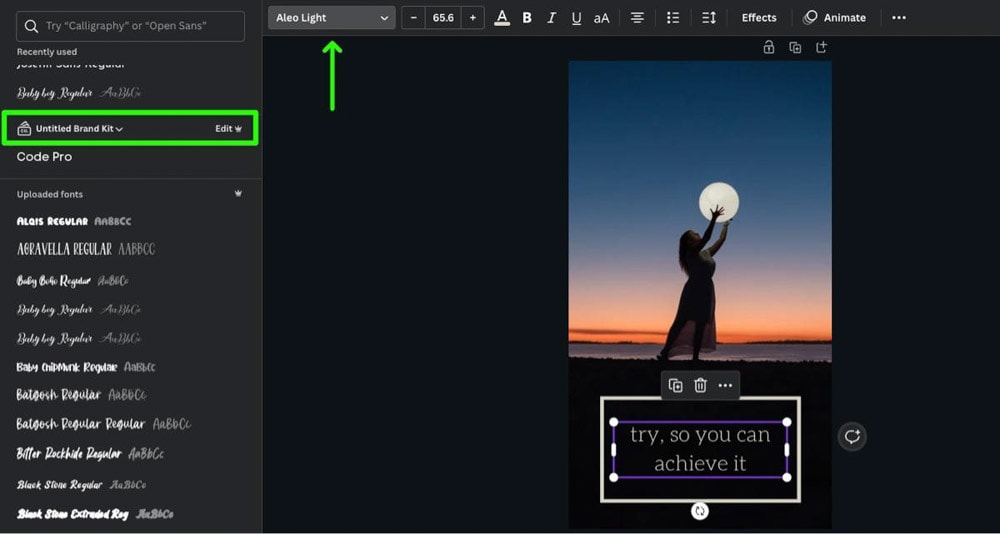
Once you select the correct Brand Kit, you will find your new font under Uploaded Fonts.
How To Add Fonts On Canva Mobile
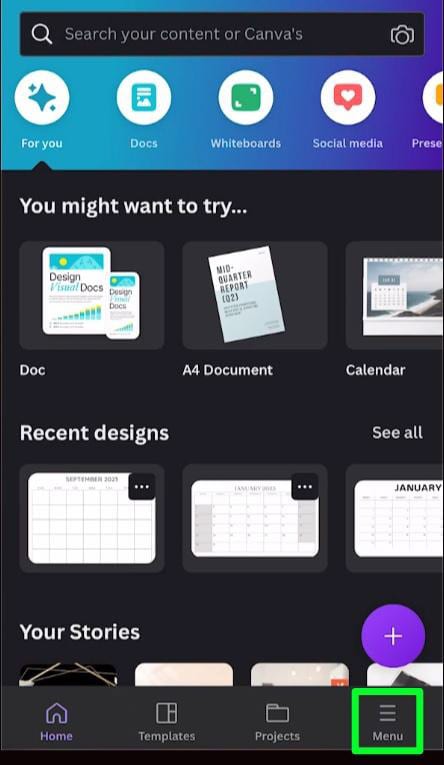
Step 1: Go To Menu > Brand Kit
At the bottom of your screen, tap the Menu button. On the page that opens up, tap Brand.
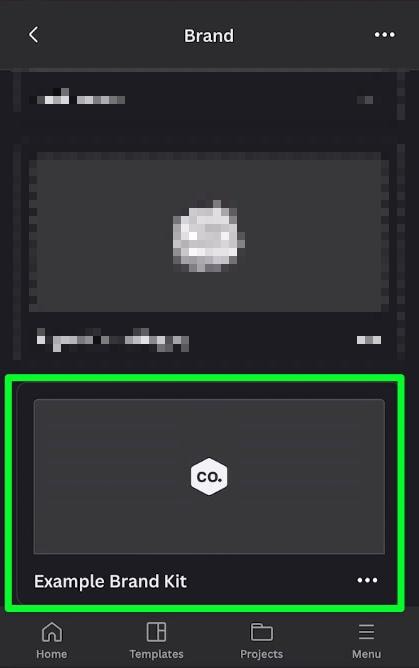
Step 2: Select A Brand Kit To Add The Font To
After tapping the Brand button, you will be presented with a list of all the Brand Kits created with your account. Choose the kit that you want to add your new font to.
Step 3: Locate Your Font On Your Device
To add your font to the Brand Kit, tap the Plus button next to Brand Fonts. You will be prompted to locate the font you wish to upload. Once you find the font, click on it, then tap Open.
You will be asked if you have permission to use the font you’re uploading. Tap Yes, Upload Away to confirm. You will now see your new font under the Uploaded Fonts section.
Where To Find New Fonts For Canva
Google Fonts
Google Fonts is an online library of free, open-source font families created by designers worldwide. Anyone is allowed to download and use these fonts for any type of visual project, from web pages to documents. There are over 1,400 fonts on Google Fonts.
Some of the fonts on this website will already be included with Canva, but hundreds of others are not. Whether you’re looking for a modern serif, an elegant script, or a classic display font, you should be able to find a great font that’s not already on Canva.
Envato Elements
Envato Elements is a subscription-based service that gives you unlimited access to a growing library of creative digital assets. There are over 17,000 fonts on this site. Envato Elements uses a simple license structure. As long as you’re a subscriber, you’re free to use as many fonts in as many projects as you’d like.
Creative Market
Creative Market is an online marketplace that provides access to hundreds of thousands of digital goods, such as fonts, graphics, photos, templates, and more. There are over 69,000 fonts to choose from on this site.
With a Creative Market account, you can browse and purchase items from their library to use in your own projects.


