
There are many reasons to change color in Lightroom when editing your photos. You can fix colored lighting, add a creative twist, or change distracting colors. Lightroom offers different methods to change colors, but it’s hard to know where to start.
That’s why, in this tutorial, you’ll learn how to selectively change color and all about Lightroom’s HSL panel, including how it affects colors and what it can mean for your editing choices.
Video Tutorial
Method 1: How To Change Color In Lightroom Using The Adjustment Brush
Step 1: Select The Masking Tool And Create A New Mask
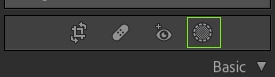
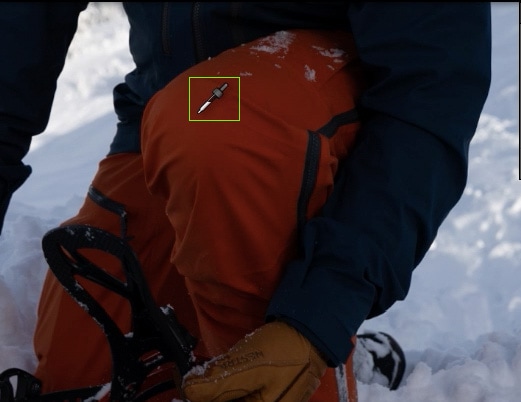
To select one specific color, you’ll need the help of the Masking tool (Shift + W). The Masking tool is found at the top of the toolbar when in Develop mode; it is the right-most icon.
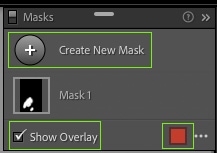
Select the Create New Mask option. You can also ensure the Show Overlay option is enabled and change the color if needed.
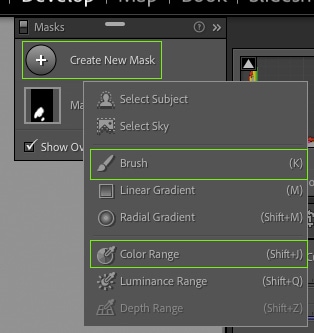
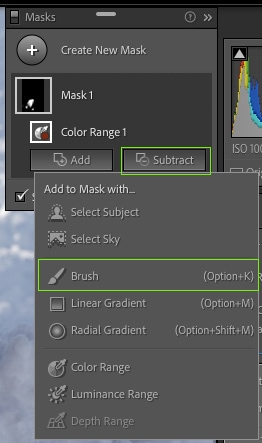
For selective color changing, you’ll only need the Color Range and Brush options. Select the option that best works for your image.
Step 2: Click On The Color Using The Color Range Mask
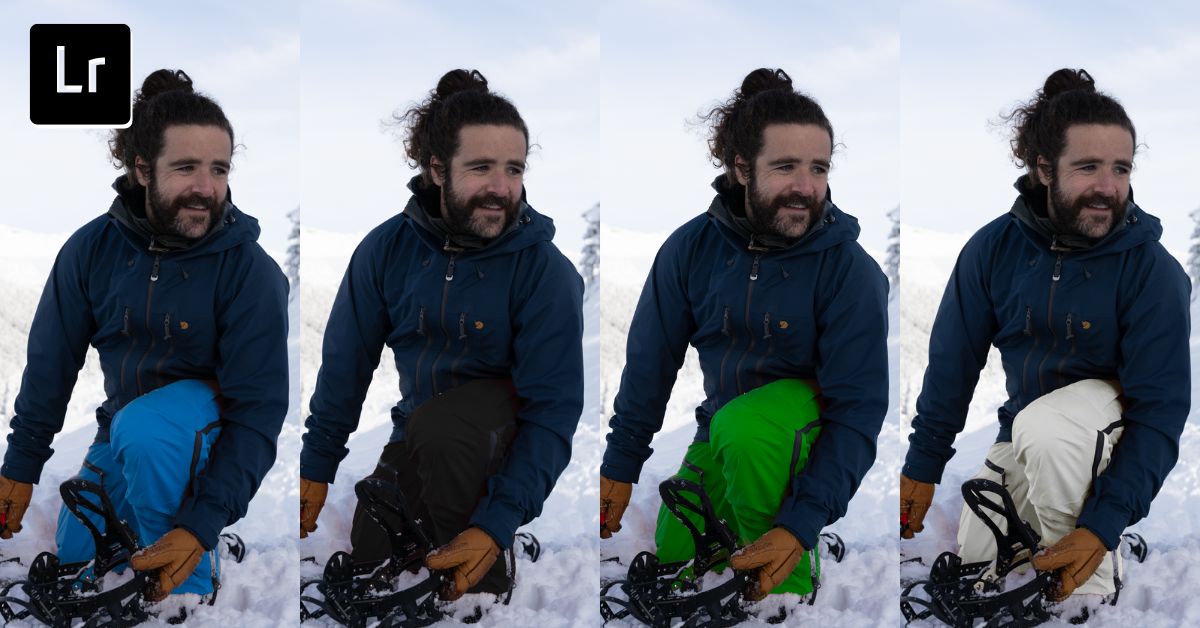
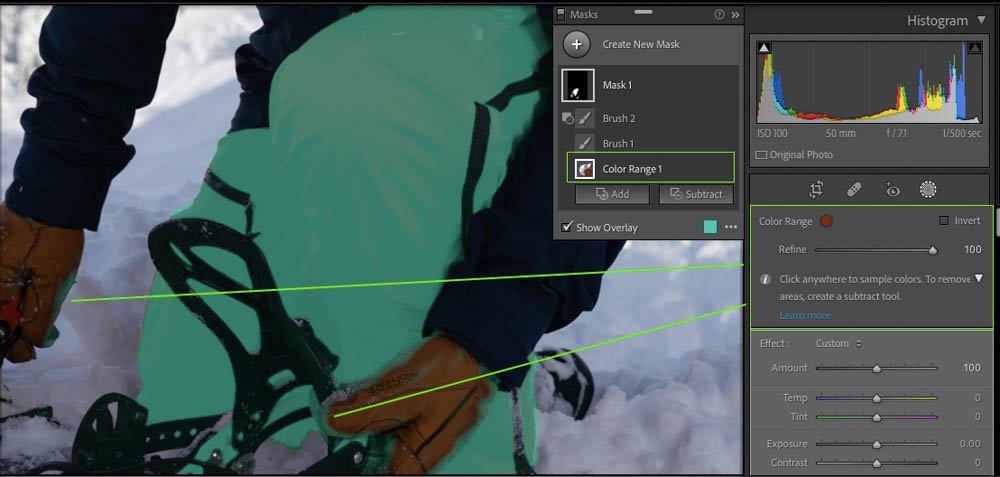
Choose the Color Range mask (Shift + J). This tool will mask any areas within a selected color range in your photo. Once selected, use the eyedropper to select a color range by clicking an area of the color you wish to change.
The click will leave a color wheel and add any similar colors from your sample to the selection. I changed the color of the mask overlay to cyan so I could see it better on the orange pants.
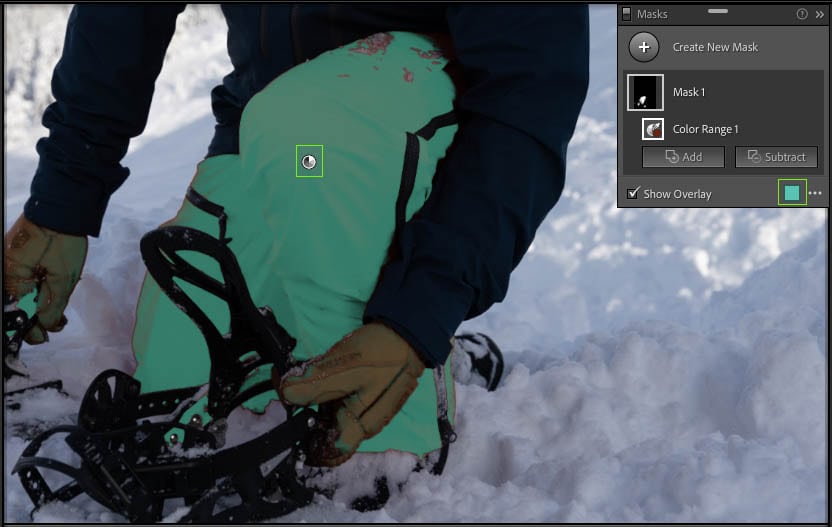
If your color is isolated enough from other colors in the photo, the Color Range tool will successfully select and mask the entirety of the selected color. However, it’s not always perfect, and you may end up with some overlap or some missed parts.
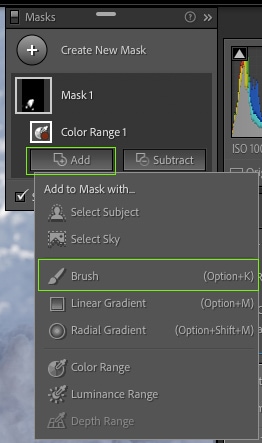
Step 3: Use The Adjustment Brush To Refine The Selection
To correct any missed parts, use the Brush. In the masking panel, click Add, then choose Brush (K).
Use the brush to mask any missed parts of the color. You can adjust the brush size by using the [ or ] keys.
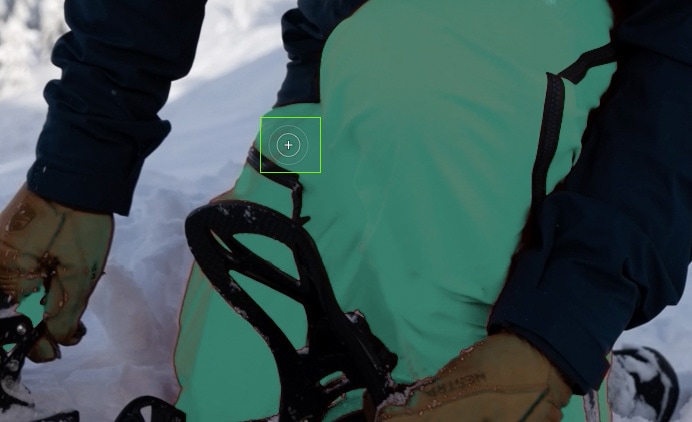
Use the Subtract option with the Brush tool to remove accidentally masked areas. You can go back and forth between Add and Subtract as many times as needed.
To help refine the mask edges, use the Refine slider. Click on the Color Range in the Masks panel and move the Refine slider to 100.
Continue using Add or Subtract until you’re happy.
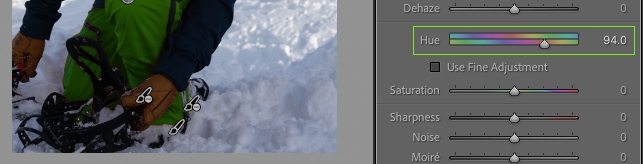
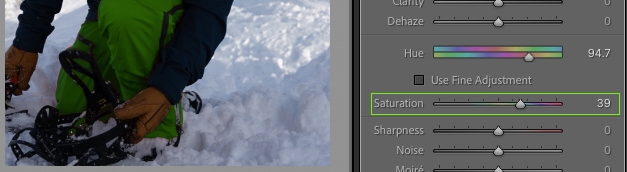
Step 4: Use The Hue & Saturation Sliders To Change Color
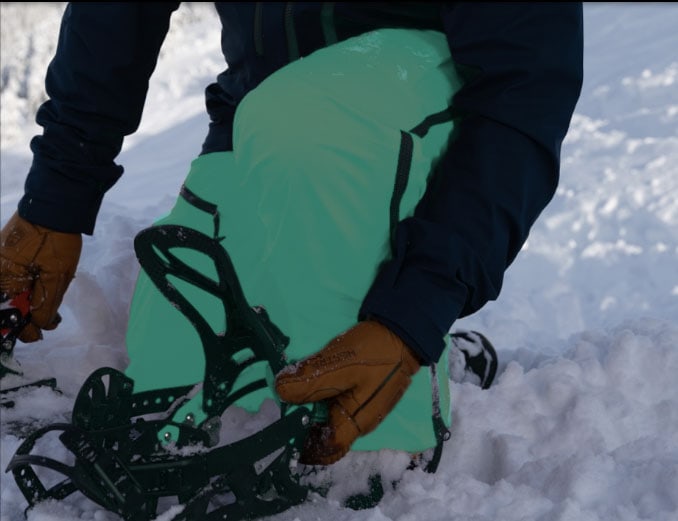
Now, it’s time to change the color. You can hide the mask overlay in the mask panel to give you better visibility of the results.

Use the individual Hue and Saturation sliders to change your colors. These sliders are only available when using the Masking tool. They are different from the global HSL options, as these sliders include all color channels.
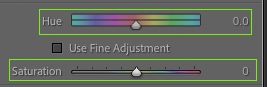
On the Hue slider, move the arrow left or right until you’re happy with the new color on the masked area.
For the color to appear stronger or weaker, you can use the Saturation slider. It’s good to balance each of these sliders with one another rather than relying solely on one.
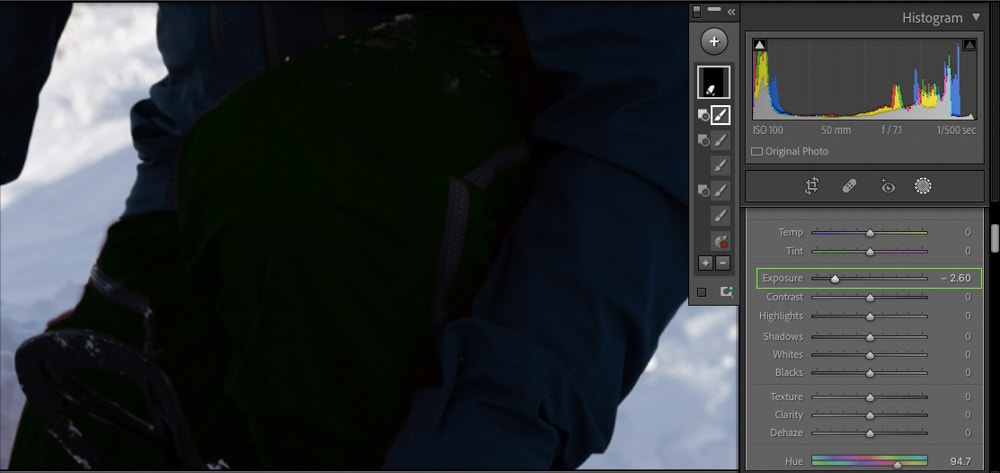
Step 5: Use Exposure Slider To Turn Colors White Or Black
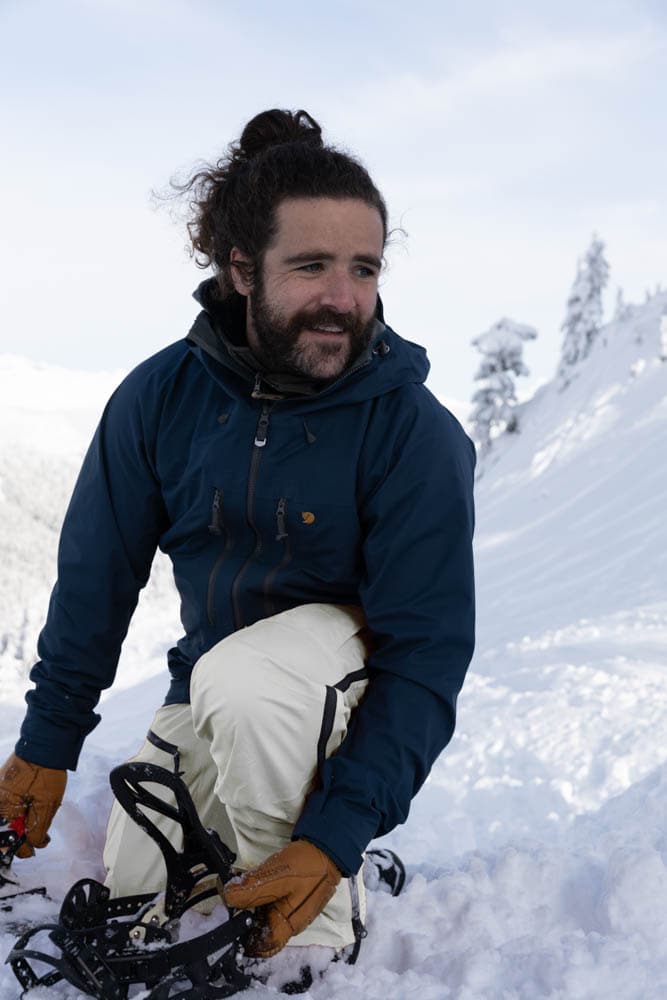
Now, you can also use the Exposure slider to change the brightness of the color. You can use this to turn the pants black or white while realistically keeping shadows and highlights.
To make it black, bring the Exposure slider to the left, but not all the way. This still retains some upper and lower exposure levels, which gives realistic shadows.
Sliding the Exposure to the right helps make a realistic white. But, just using the Exposure slider will mix with the hue value, which won’t be white at all.
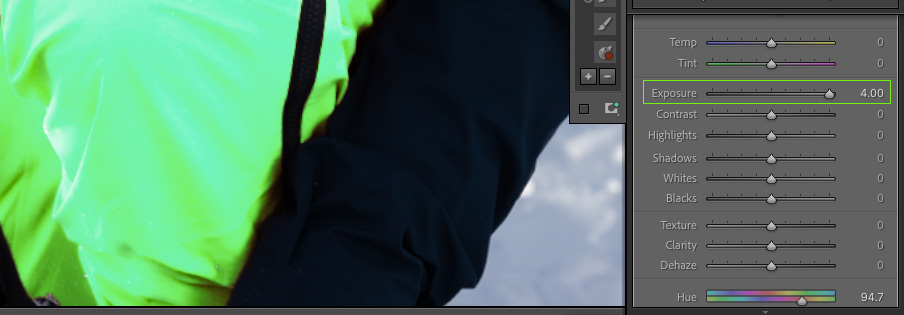
So, that means you need to use the Saturation slider to remove the color to make it appear white. Increase the Exposure and bring down the Saturation slider until it looks white.
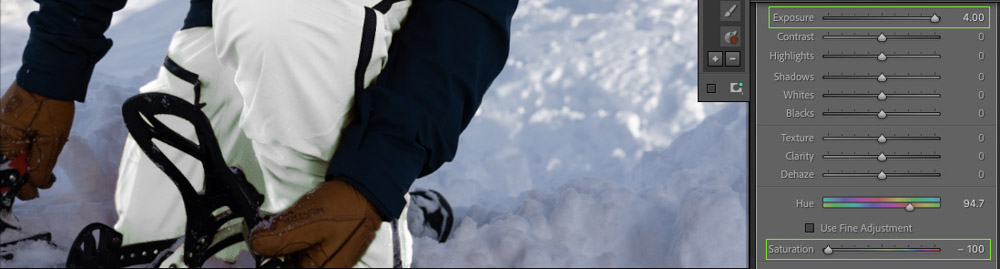
It’s rare for white fabric to look perfectly white, so by changing the saturation levels along with the exposure levels, you can create a realistic white tone.
Method 2: Using HSL To Change Color In Lightroom
Step 1: Open The HSL Panel In The Develop Module
Once you’ve imported your photos into Lightroom, click Develop to start editing an image.

In the Develop Module, you’ll find the HSL panel within the adjustment settings on the right.
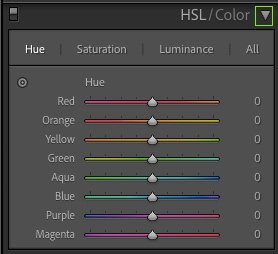
Although found on one panel, the HSL / Color panel provides two separate options within itself: HSL or Color. One option will be highlighted to show which panel is showing, so click HSL to show the HSL options rather than the Color options.
Step 2: Adjust The Hue, Saturation, And Luminance As Needed
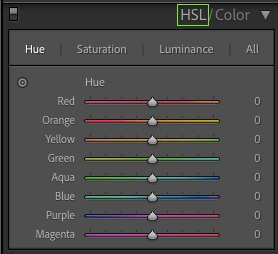
HSL stands for Hue, Saturation, and Luminance. You can control each of these settings by using the sliders in the HSL panel.
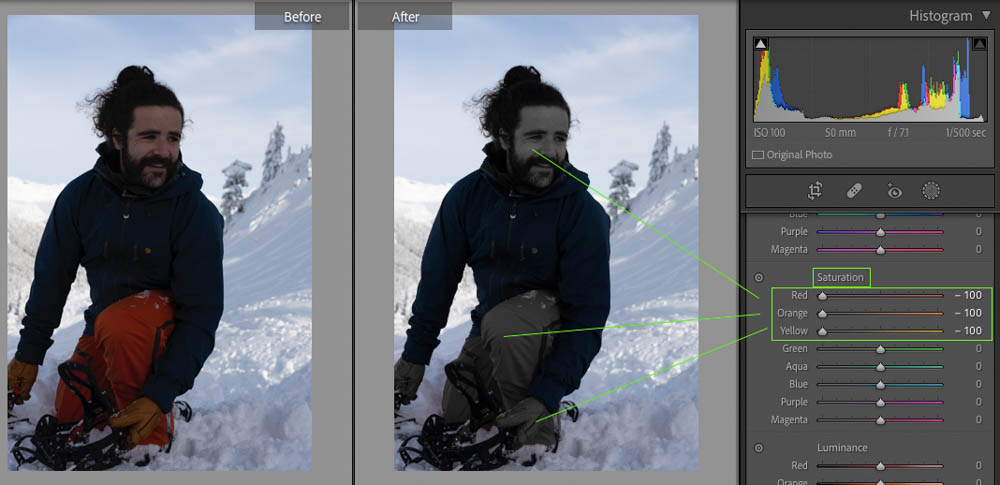
Lightroom’s HSL panel has different channels for each color: red, orange, yellow, green, aqua, blue, purple, and magenta. This allows you to make changes based on an individual color’s hue, saturation, or luminance rather than affecting all the colors at once.
– Adjusting The Hue
The hue of an image sets the overall color tone. You can slide from different shades — or hues — of color within each channel.

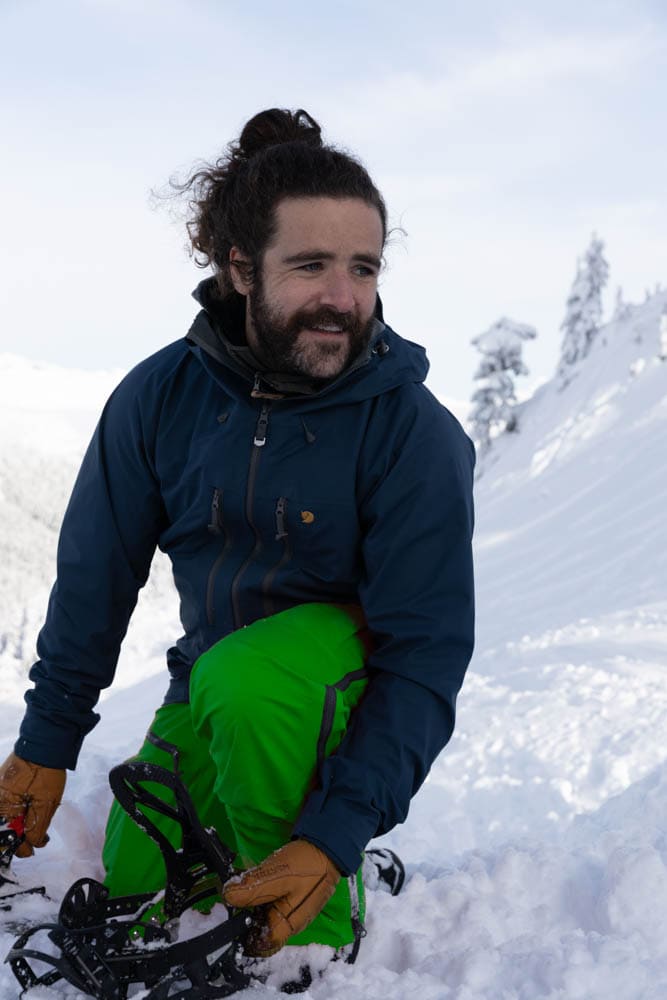
For example, if I change the blue hue slider, any shades of blue in my image will change with it, like the sky, snow, and man’s jacket in my photo.
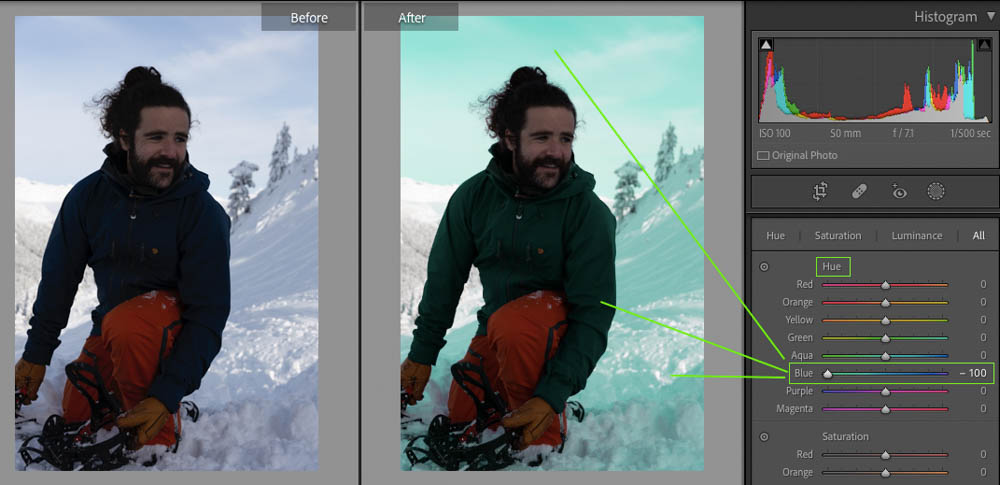
The Hue sliders only let you make changes within one color channel. You couldn’t use the hue slider to change from blue to orange, but only from one hue to another within the same color range. For example, blue to purple or blue to cyan.
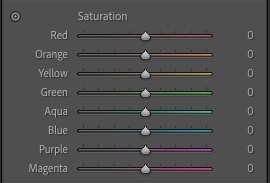
– Adjusting The Saturation
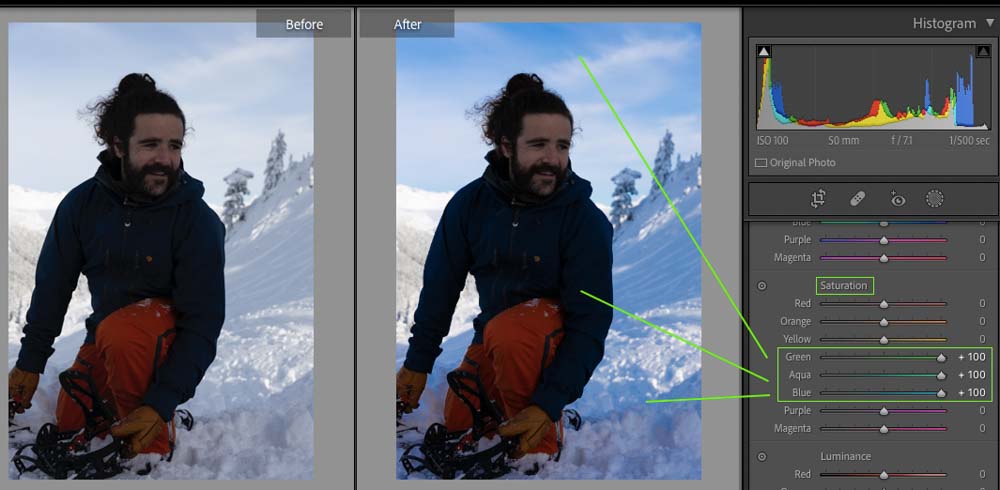
The saturation of a color is how rich it appears. The Saturation sliders in the HSL panel are all desaturated on the left of each color channel and fully saturated on the right. If a color was set to -100, for example, it would have no color left (aka saturation).
Saturation levels control how muted or bright a color shows in an image. If you slide the saturation slider to +100, then most of the colors will become unnaturally saturated.
Using -100 saturation will make the color channels appear gray.
You should use saturation levels in limited amounts if you want your photo to look realistic. For example, you could use them to make a certain color pop, like a blue sky.
– Adjusting The Luminance
Luminance in HSL shows the amount of white or black within a color.
Higher luminance will increase the color’s lightness.
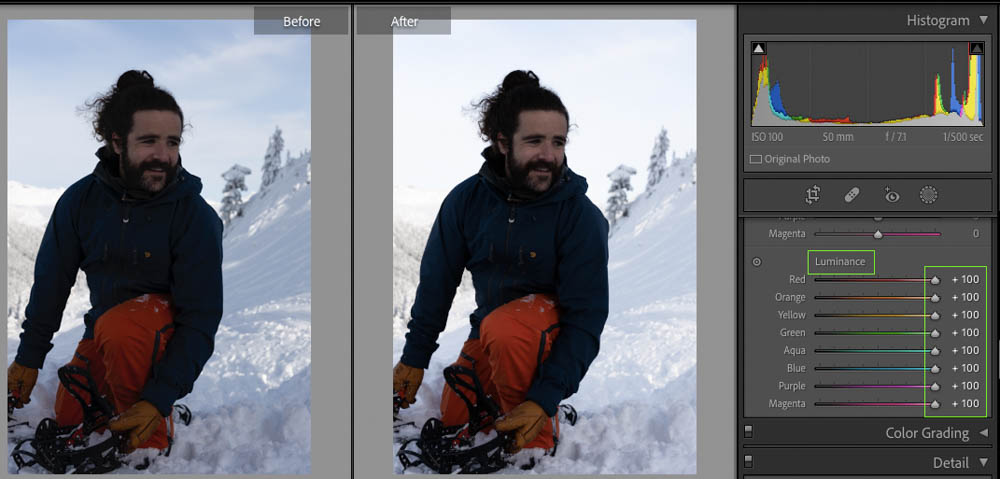
Meanwhile, a lower luminance will present a darker color.

Luminance is not the same as brightness. Brightness is the amount of light in an image, but luminance is the amount of white or black present.
Step 3: Change The Overall Hue Of The Image
HSL settings globally affect each color channel. That means you couldn’t change one blue area of a photo (such as a shirt) without affecting the other blue colors in the photo. So, it’s typically best used subtly or for general creative results.
For example, in my photo, the man is wearing bright orange pants and muted orange gloves. If I change the Hue levels in the Orange channel, both his pants and his gloves will change in hue, since their color falls in the orange color channel.
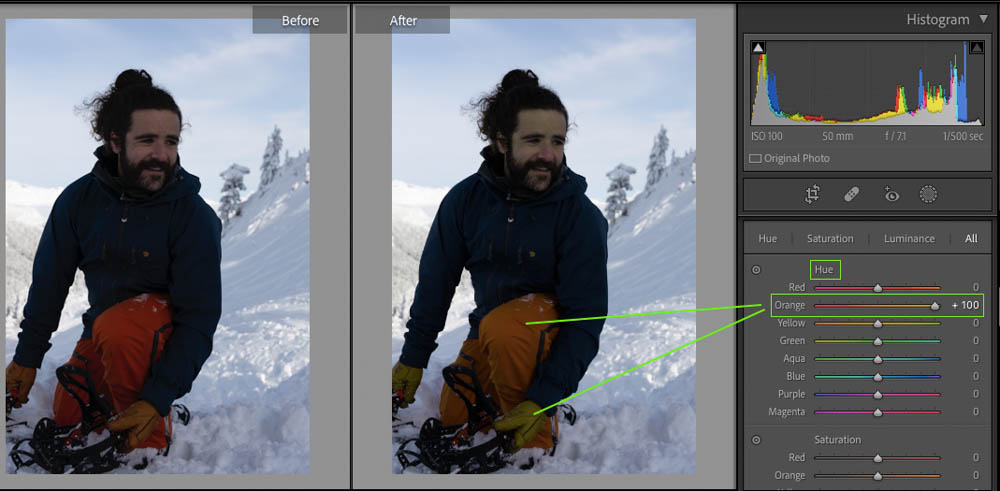
The man’s skin tone also has a reddish-orange hue. This means that although his face isn’t obviously orange, changing the Orange channels in HSL will affect his skin coloring, which I don’t want.
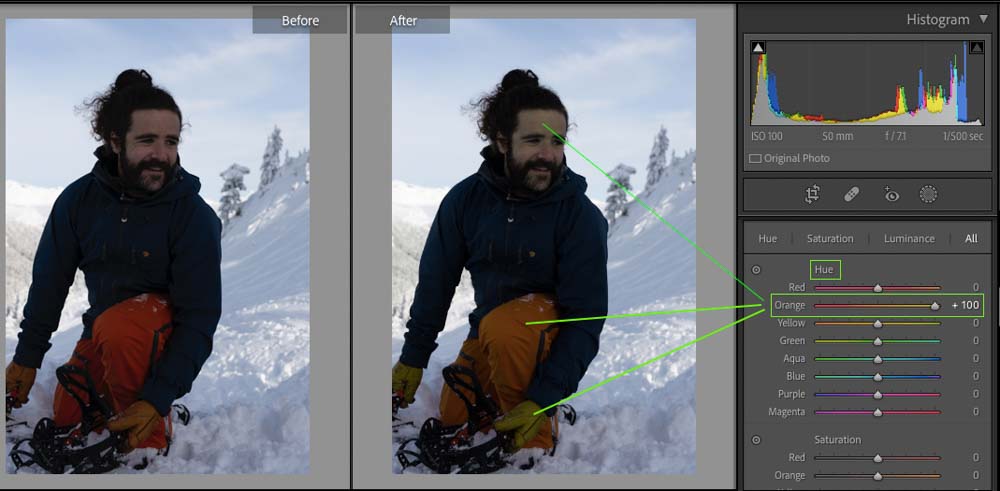
This is part of the global effect of using HSL — there’s no way to avoid it when changing colors using HSL. It isn’t a bad thing, but there are other ways to selectively change color by using the Masking tool. If using HSL for color changing, use it subtly and be wary of how it affects the whole photo, especially with skin tones.


