
Knowing how to update Photoshop is essential to access new features that are being rolled out regularly, whether it’s new tools or bug fixes. Luckily, it’s easy to update the software.
These updates normally occur every couple of months with standard bug fixes or yearly program overhauls. Everyone with a Photoshop subscription can access the updates for free as they come, so it’s important to be aware of them!
Video Tutorial
How To Update Photoshop
Step 1: Open The Adobe Creative Cloud App On Your Device
You’ll be able to update your Photoshop subscription through Adobe’s cloud software, Adobe Creative Cloud (Adobe CC). You’ll likely see the icon for Adobe CC in the taskbar of a Windows OS or the top right area of a Mac OS.


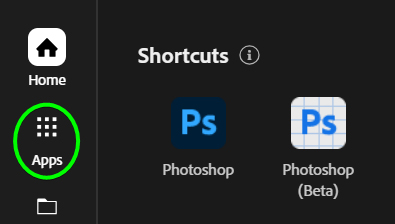
Step 2: Go To Apps > Manage Updates
In the Creative Cloud app, click on Apps in the panel on the left. Then, click on Manage Updates on the right-hand side to open the updates window.
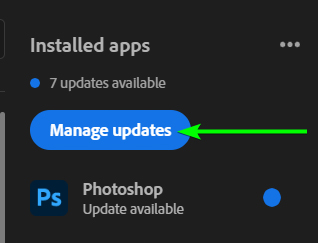
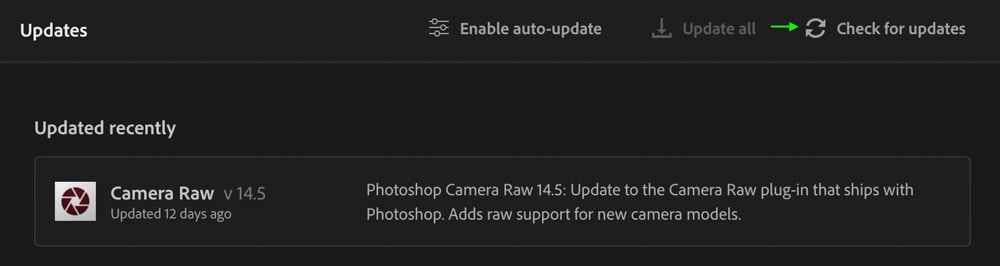
Step 3: Click On Check For Updates In The Top Right Corner
Here, you’ll see the different programs you have downloaded and the available updates for each. Click the Check for Updates button at the top to make sure you’re seeing all the available updates.
Step 4: Click On Update Next To The Photoshop App
To update Photoshop, click the Update button. You can also click View More to learn exactly what new features, bug fixes, and tools each update will bring, a pop-up window appears detailing what the updates contain. You may also be directed to the Adobe website online for more information.

How To Make Sure Photoshop Updates Automatically
Step 1: Go To Apps > Manage Updates
To ensure Photoshop is set to update automatically, head to the Creative Cloud app by clicking the icon on your computer and then go to Apps > Manage Updates.
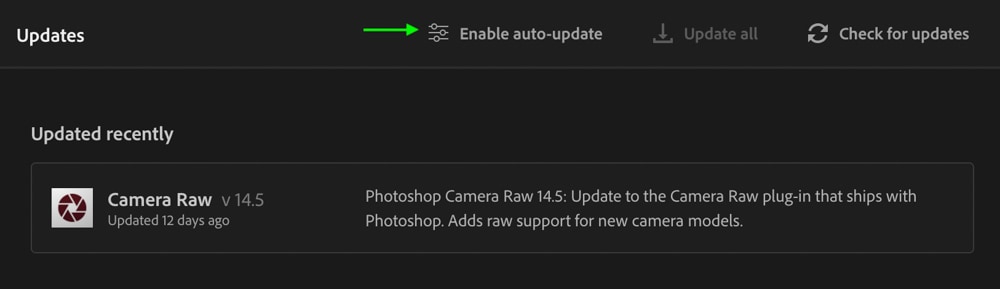
Step 2: Click On Enable Auto-Update
At the top of the tab, click on Enable auto-update.
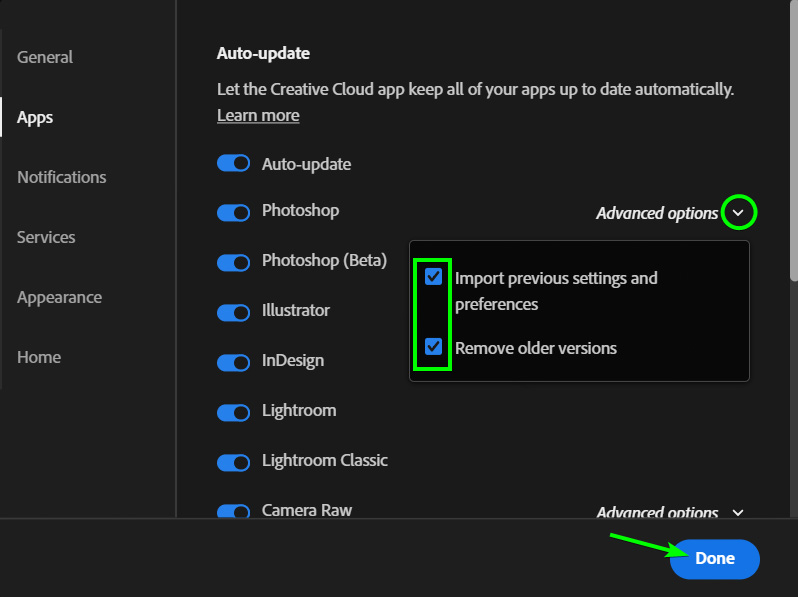
Step 3: Set Your Update Preferences And Click Done
In the window that opens, select all the apps you want to update automatically. You can also select the drop-down menu next to Advanced Options to set the update preferences. Click Done to save your preferences and ensure Photoshop will update automatically from now on.
Can You Update Photoshop For Free?
You’ll be happy to know that updating Photoshop is free — as long as you’ve paid for your subscription for the month, of course.
However, if you’ve been working on an older version of Photoshop (that pre-dates the Creative Cloud) or Photoshop Elements, you may need to buy the current version of Photoshop to get the free updates or pay for updates as you go.
How To Check Your Active Version Of Photoshop
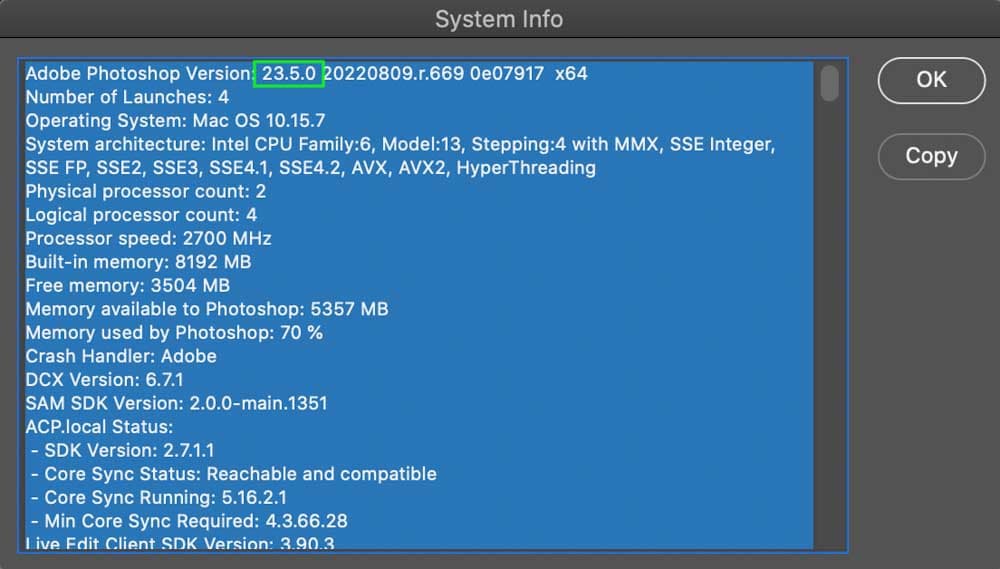
To check what version of Photoshop you’re currently using, open Photoshop, go to Help > System Info, and view the information at the top of the System Info window.

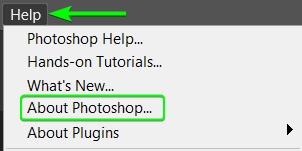
You can also head to Help > About Photoshop (Win) or to Photoshop > About Photoshop (Mac).

The version number appears right below the Adobe Photoshop logo in the window that appears.