
Before you take a photo or record a video, you need to consider which aspect ratio to use. Two of the most common aspect ratios are 16:9 and 4:3, but which one is best for you?
The 16:9 aspect ratio is best for video since it’s 78% wider than it is tall. This makes it easier to fit more in your frame horizontally while optimizing your video for modern screens.
Meanwhile, the 4:3 aspect ratio works better for photography since it’s only 33% wider than it is tall and works better for print.
Depending on the purpose of your project, certain aspect ratios can have their own advantages. This post will break down exactly what aspect ratios are and what they mean for your photo and video work.
What Is Aspect Ratio?
Aspect ratio is the difference in the width and height of your image. For example, a 16:9 aspect ratio could be considered as a frame that’s 16 inches wide by 9 inches tall. There are many aspect ratios in photo and video, but the one you choose ultimately depends on where you intend to display your images.
There are far more aspect ratios than just 16:9 or 4:3, but those are two of the most common in photos and video. A third common aspect ratio in modern photography is 3:2, which matches the 35mm size of a full-frame sensor.
Below is an image highlighting the differences between these three common aspect ratios.
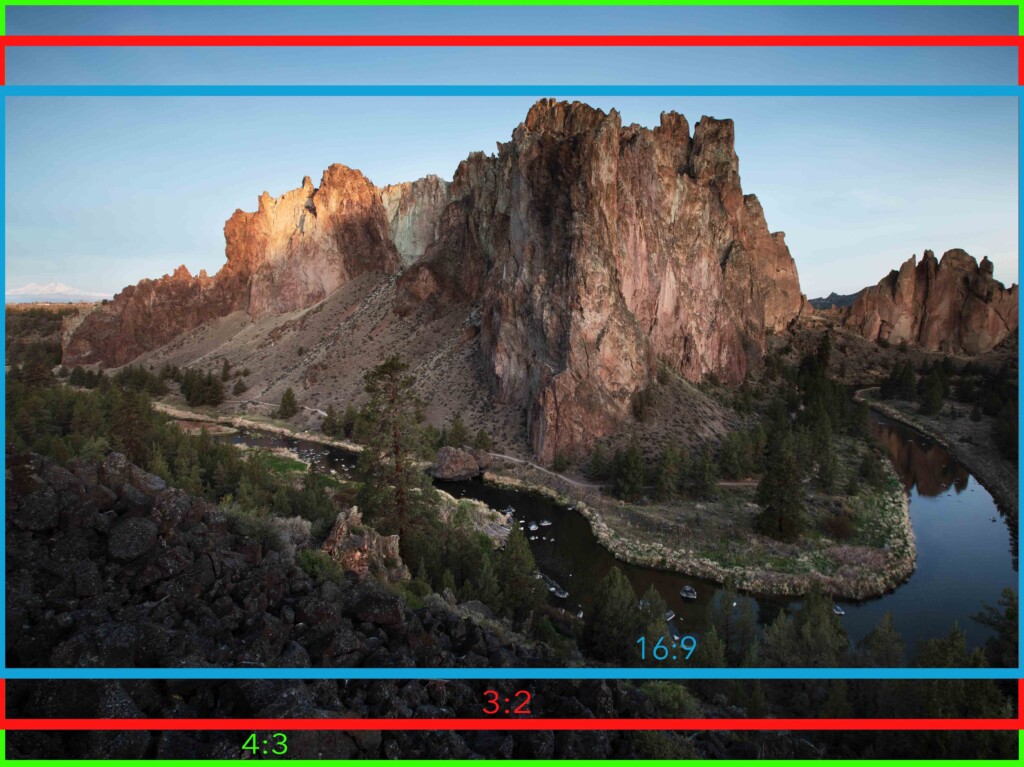
As you change your aspect ratio, you tell your camera what parts of your frame you want to actually record. With a 16:9 ratio, you’ll record less information vertically in your frame, but it will display better on most modern TV and computer monitors.
That’s why the aspect ratio is usually decided based on the final intention for the photo or video. Where will it be displayed, and in what format do you intend and audience to view it?
What Happens If You Use The Wrong Aspect Ratio
If you shoot your photo or video in an aspect ratio that doesn’t match the display it will be portrayed on, you’ll end up cropping or distorting the image.
For example, if you have a 4:3 aspect ratio and want to display it on a 16:9 display, you’ll end up with borders on either end of your image.

If you wanted that 4:3 image to fill the 16:9 monitor, your image would either become distorted or significantly cropped.


The same thing applies if you have a 16:9 image that you want to put onto a 4:3 display—something like an 8X10 printed photo, which would have a 4:3 aspect ratio, for example.
Since you’ll have to distort or heavily crop your photo, it’s important to use the correct aspect ratio before capturing a photo or video.
What’s The Difference Between 16:9 and 4:3?
The 16:9 aspect ratio creates a frame that’s 78% wider than it is tall. The 4:3 aspect ratio, on the other hand, creates a frame that’s 33% wider than it is tall. The difference between these two aspect ratios is that 16:9 records more information horizontally, while 4:3 records more vertically.
Here’s an example of the same image in a 16:9 ratio compared to a 4:3 ratio.


Where Did 4:3 Originate?
The 4:3 aspect ratio was the starting aspect ratio in the beginning days of television in the 1940s. If you think back to that old TV your parents or grandparents had, it would have been more square in shape. This was because the TVs were optimized to display the 4:3 images that the first silent films were created in.
However, the aspect ratio was slightly adjusted when sound was added to films. Rather than a true 4:3 ratio (1.33:1), the pictures were enlarged to 1.37:1, extending the frame’s horizontal width by 4%.
Where Did 16:9 Originate?
As home televisions began to increase in popularity, movie producers and theatres were afraid that they’d be put out of business. To help draw in more audiences, they changed their films to be shot in 16:9 for a wider view than what you got at home. With a wider frame, it made films feel more immersive and larger than life.
This ended up being a success and drew more people into theatres rather than staying home and watching the television.
To this day, most TV and movies are shot in a 16:9 aspect ratio.
Which Aspect Ratio Is Best To Use For Photography?

The best aspect ratio for photography is 4:3 or 3:2 since it’s most compatible with print and displays well on social media. Between the two, the 3:2 ratio is one of the most popular aspect ratios used in modern photography.
Since these aspect ratios are only slightly wider than they are tall, it’s easier to include everything in your frame. From your foreground, mid-ground, and background, you have more real estate to work with.
Especially since photos are shot both horizontally and vertically, using a wider aspect ratio like 16:9 doesn’t make a lot of sense.
With that said, some photographers will experiment with other aspect ratios for creative reasons. Especially if they intend to use very specific dimensions for print, they might shoot in an aspect ratio that will reduce the amount of cropping needed later on.
Which Aspect Ratio Is Best To Use For Video?
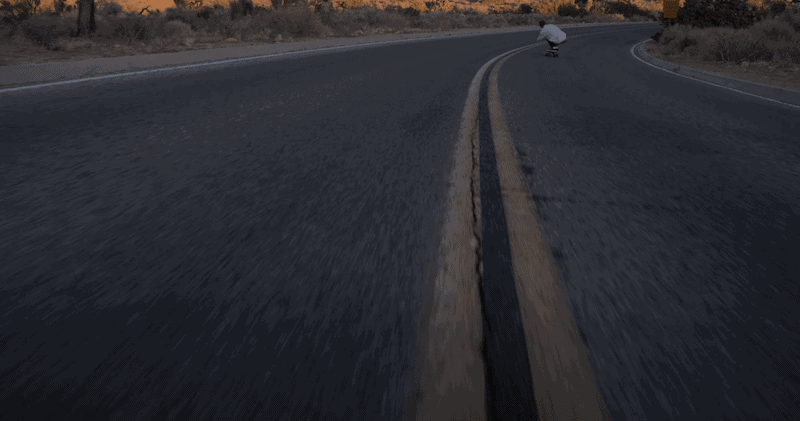
The best aspect ratio for video is 16:9 since it fits most modern displays such as TVs, tablets, phones, and computer screens. Rather than having black bars around your image, this aspect ratio lets you display your entire video without cropping.
Even for common video streaming platforms like YouTube, the 16:9 aspect ratio is still best to use.
Since video is only viewed horizontally, using a wider aspect ratio makes a lot of sense. With 16:9, you can fill the entire frame and optimize the viewing conditions for your audience.
So, Which Aspect Ratio Should You Use?
The proper aspect ratio to use will depend on the project or whether you’re shooting photo or video. As a general rule of thumb, shoot video in 16:9 and photos in 4:3 or 3:2 aspect ratios. That way, if you aren’t sure, this baseline is the perfect place to start.
In my own work, I only shoot video at 16:9 while taking photos at 3:2. Although 3:2 is a slightly smaller frame than 4:3, I prefer it since it doesn’t feel overwhelmingly boxy.
You can change the aspect ratio you shoot in from the menu settings on any modern digital camera. The next time you’re out taking photos or videos, play around with the aspect ratios on your camera to see the results. I’ve always found that the best way to learn something is to see it for yourself, and this is the perfect way to do so!
So now you know the difference between 16:9 and 3:2 aspect ratios in photos and video. Ultimately, the aspect ratio simply dictates the width and height of your frame. The correct one you use solely depends on how you intend to display your images after you capture them.
After all, it’s all about the viewing experience!
Happy shooting,
– Brendan 🙂


