

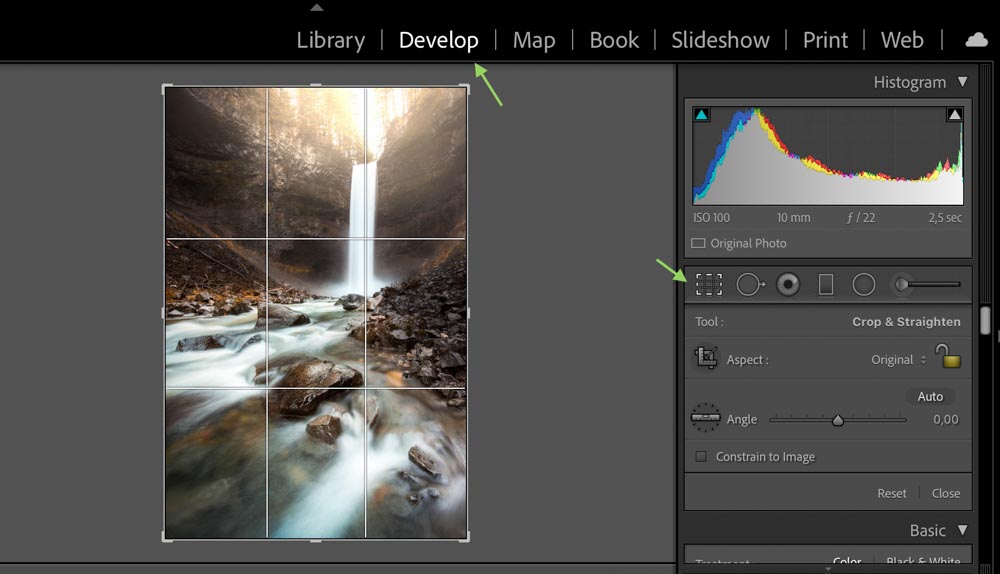
When cropping a photo in Lightroom, crop overlays can provide a helping hand. Cropping a photo often plays an important role in the final product, from finding the perfect composition to getting just the right size for printing or posting. Luckily, Lightroom has an easy-to-use tool that will help you crop your photo precisely according to your needs.
A crop overlay in Lightroom helps to improve the composition of a photo by providing guidelines to suit different styles of framing. By accessing the Crop Tool within the Develop Module, a crop overlay will appear over your photo. You can change this overlay by pressing “O” on your keyboard.
Crop overlays come in handy for a number of reasons. First, they can act as an excellent guide when cropping and editing photos for publication or print, as you might require a particular aspect ratio (more on that later). Second, playing with overlays can also help you fine-tune your composition, which, as we all know, is one of the most complex yet important elements in photography.
How To Use And Change Crop Overlays In Lightroom
Where Are Crop Overlays Found In Lightroom?
To see overlays while you crop, head to the Develop tab and click Crop (you can also press R). Unless you already have overlays turned off, you will see a default overlay. For me, the default overlay is Thirds.
A list of the overlays you can choose is found under Tools > Crop Guide Overlay, but the easiest way to cycle between the different overlays is to press O.

By cycling through your crop overlays you will see a variety of options that will offer unique advantages depending on the composition of your photo. Let’s break down the different types of overlays available in the program.
Types Of Crop Overlays In Lightroom
1. Grid
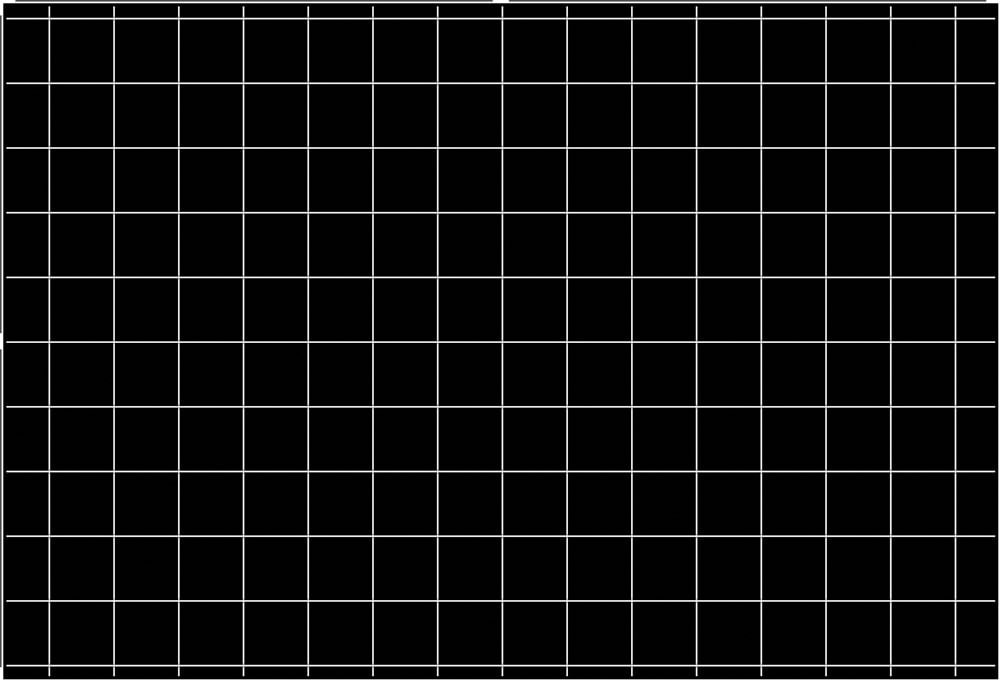
This is the default overlay. A simple grid can help you make sure elements of your photo are perfectly straight.
2. Thirds

The Thirds overlay helps arrange your photo according to the rule of thirds, a popular composition style that can help balance the image and draw the viewer’s eye to specific areas.
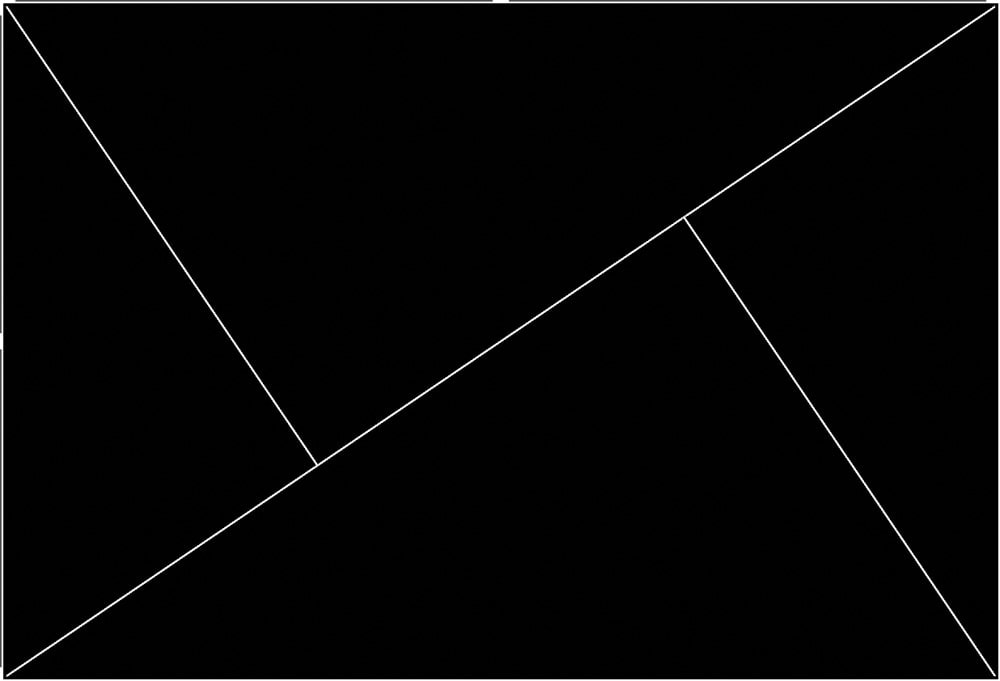
3. Diagonal

The Diagonal overlay can also assist with composition, particularly in photos with diagonal elements or multiple distances. You can position your subject in the center, for example, to see how the elements behind and in front of it line up.
4. Triangle
Struggling with where to place your subject? Try positioning it in the intersection points of the different triangles in this Triangle overlay. Each triangle shows where the eye travels naturally. Other elements can go in the other triangles to create balance.
5. Golden Ratio

A somewhat more advanced version of the Rule of Thirds, the mathematically-calculated Golden Ratio also splits your photo up into sections where you can position points of interest in your image. This composition works best with a centered subject.
6. Golden Spiral
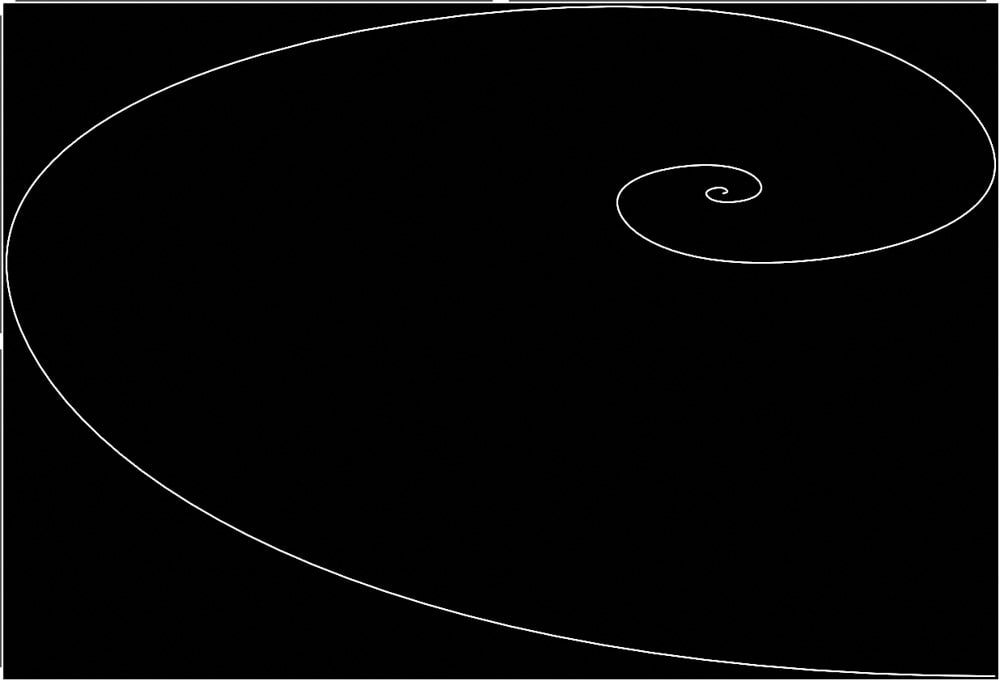
Often found in nature, the golden spiral is said to lead the eye comfortably through a photograph. Follow the golden spiral by placing your most detailed or busy elements in the spiral. This overlay can prove especially helpful if your photo contains natural curves or lines leading to your subject.
7. Aspect Ratios
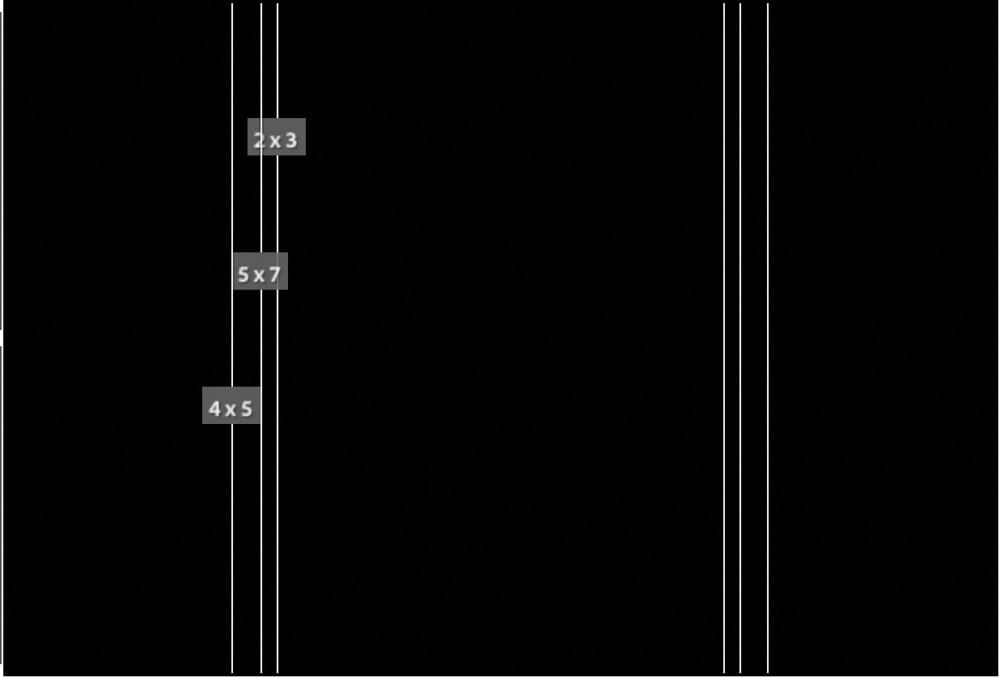
Aspect ratios serve the important purpose of providing specific dimensions commonly required to print or post photos. In addition, these overlays help you keep the important parts of your image from getting cut-off when printing or publishing.
Changing How Crop Overlays Behave In Lightroom
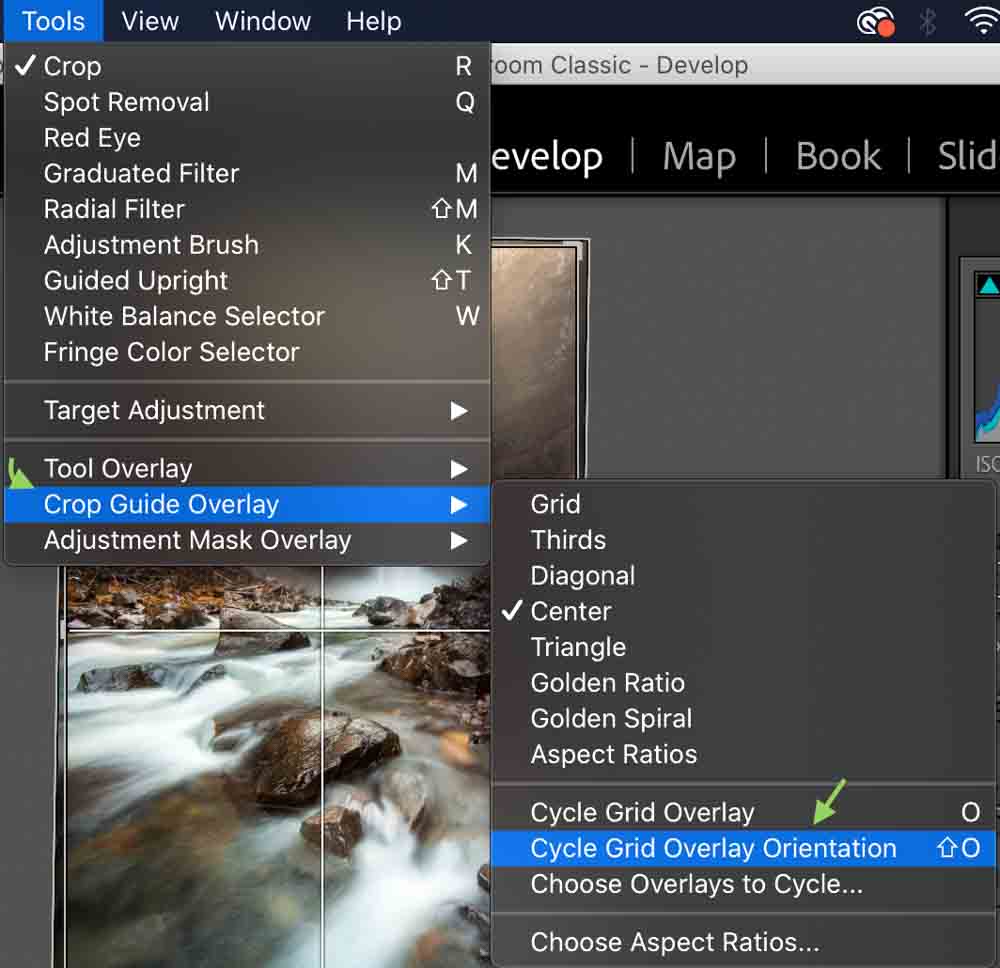
There is also a trick to change how the different overlays interact with your photo. To rotate the orientation of the overlay 90 degrees, go to Tools > Crop Guide Overlay and click Cycle Grid Overlay Orientation, or press Shift + O.
Note that this might not change every overlay, as some appear the same regardless of their orientation.
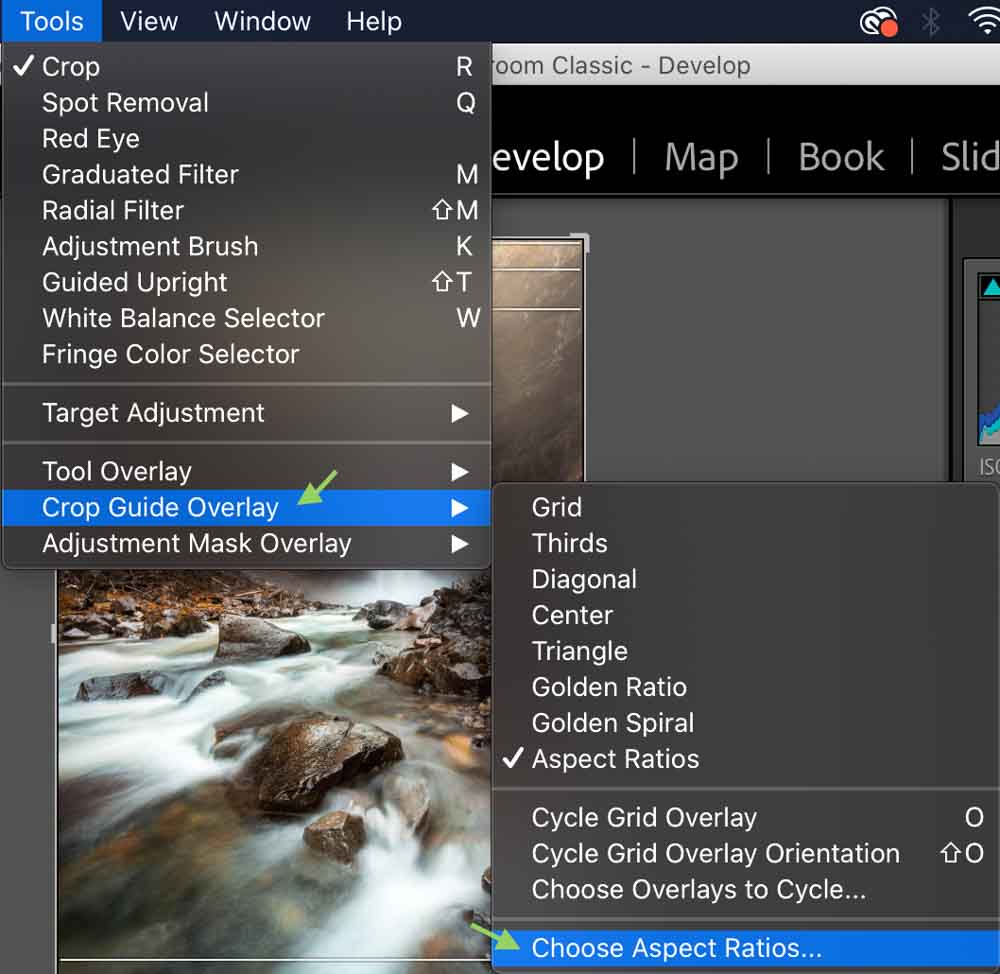
You can also change the specific Aspect Ratios you see on the overlay by going to Tools > Crop Guide Overlay and selecting Choose Aspect Ratios (at the bottom of the list).
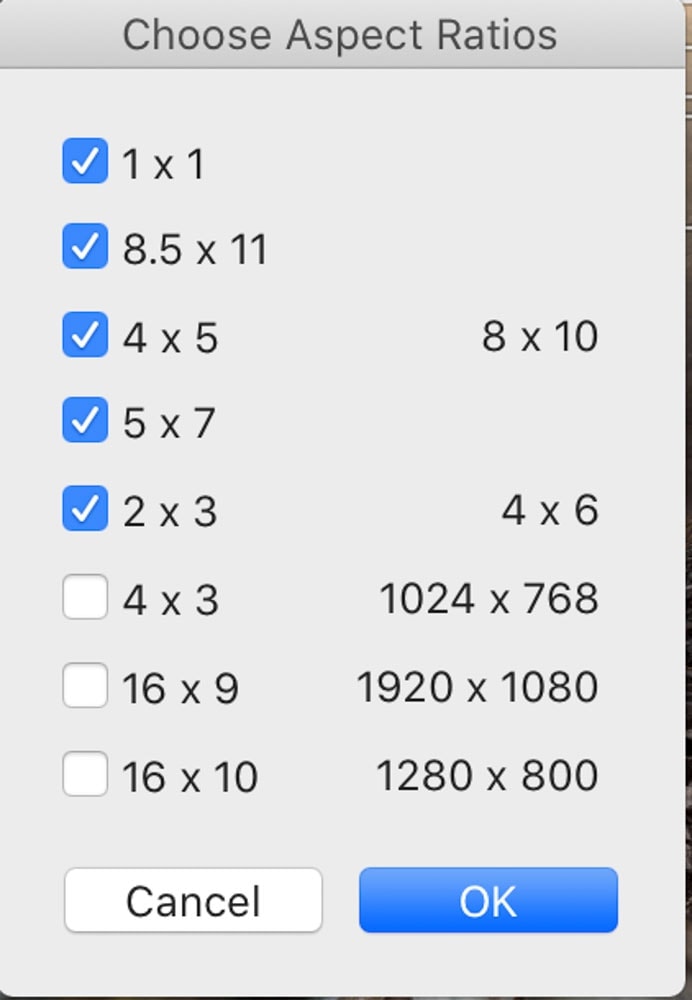
This will bring up a box that allows you to add different aspect ratios, such as 1×1 (helpful for Instagram posts) and 8.5×11 (the common dimensions of printer paper). Here, you can select the ones you’d like to see in your photo.
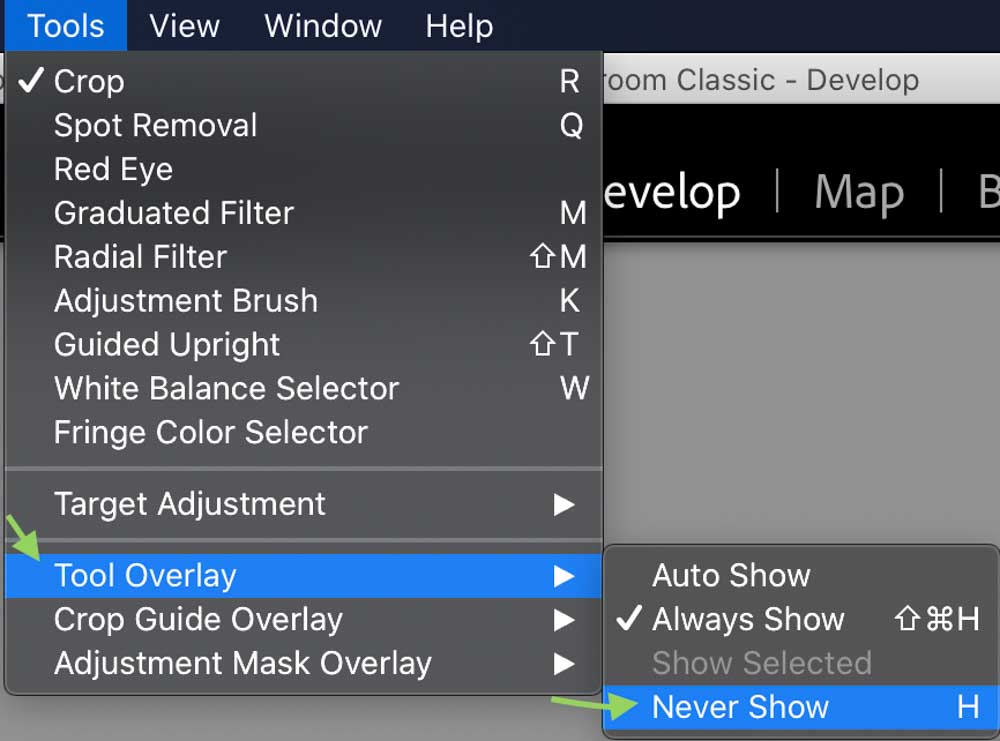
If you prefer to crop without overlays, you can turn them off by going to Tools > Tool Overlay and selecting Never Show (another way to turn overlays on and off is to press H.)
Crop overlays are a deceptively simple way to have that extra bit of control over how your photo looks. For me, using a visual guide allows more freedom to play around with different types of composition. It’s a simple trick, but who knows? This could be the key to taking your photo from good to great. Now to help you level up your cropping skills in Lightroom, check out this next tutorial on how to crop and straighten images like a pro!
Happy Editing!


