Photoshop’s measurement scale equates the pixels in your image to scale units like inches or millimeters. Setting the scale allows you to measure specific areas as you edit so that you can log the calculations you receive. When using Photoshop, you might need to set different measurement scales for different projects. For example, some might require you to work in inches or millimeters, while pixels might be best for others.
To change measurement units in Photoshop, go to Photoshop (Mac) or File (PC) > Preferences > Units & Rulers. In the Units setting, choose the measurement type of the ruler and text to Pixels, Inches, Millimetres, Centimetres, Picas, or Points. Now the measurement preferences will be updated.
Changing the measurement scale can also be useful if you feel most comfortable working with a specific scale. Let’s explore how you can change the measurement units to reflect what you need at different points throughout your project.
How To Change Measurement Preferences In Photoshop
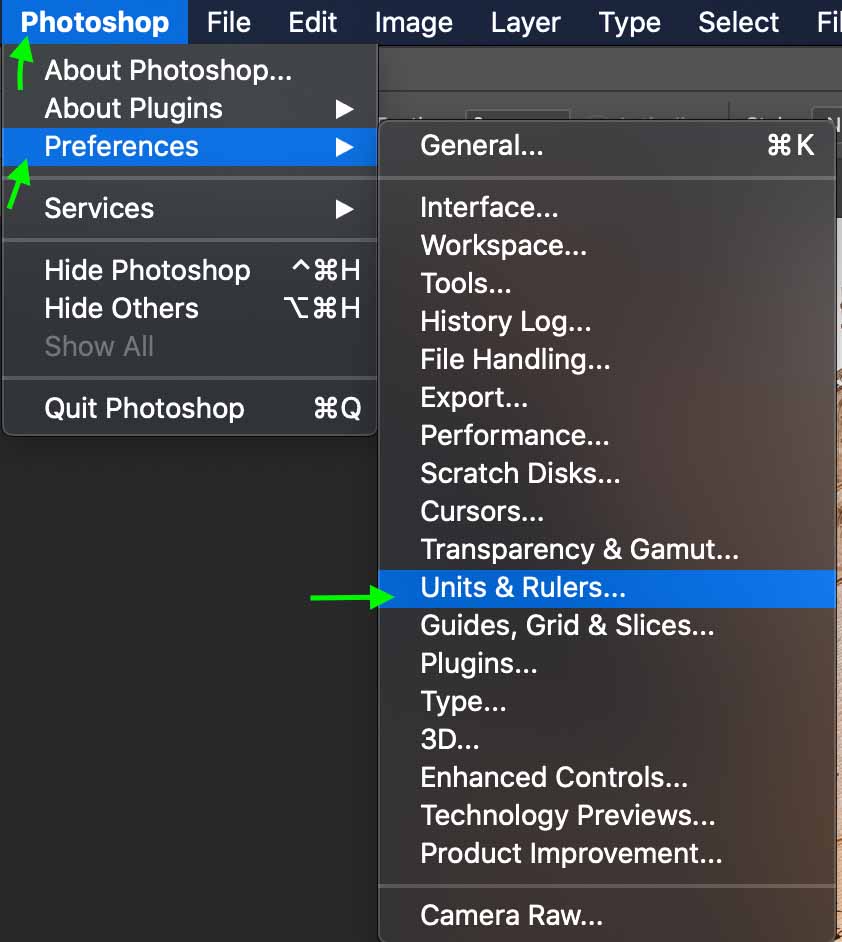
To start, you can set the preferred unit your projects will automatically use by going to the menu at the top and clicking Photoshop > Preferences. Next, the Preferences pop-up window will appear. Here, click Units & Rulers.
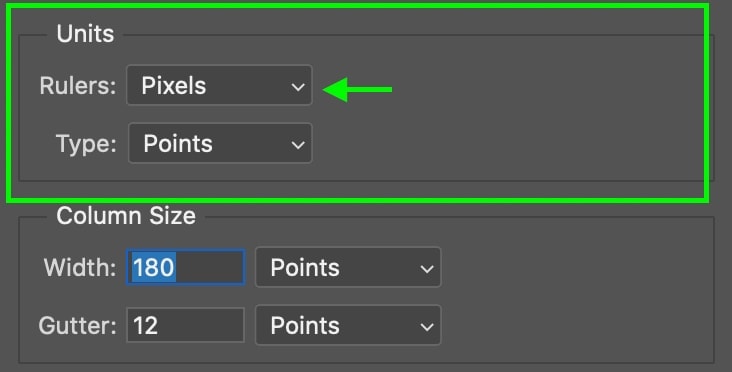
Under the area labeled Units, click the bar next to Rulers.
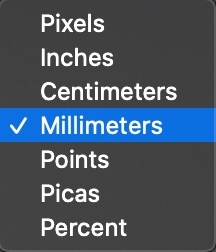
Here you can select the specific unit used to measure your project’s canvas (I chose Millimeters below.)
Click OK on the right to set your preferences. You’ll notice that when you select an area of your project, the area will be measured in the unit you selected.
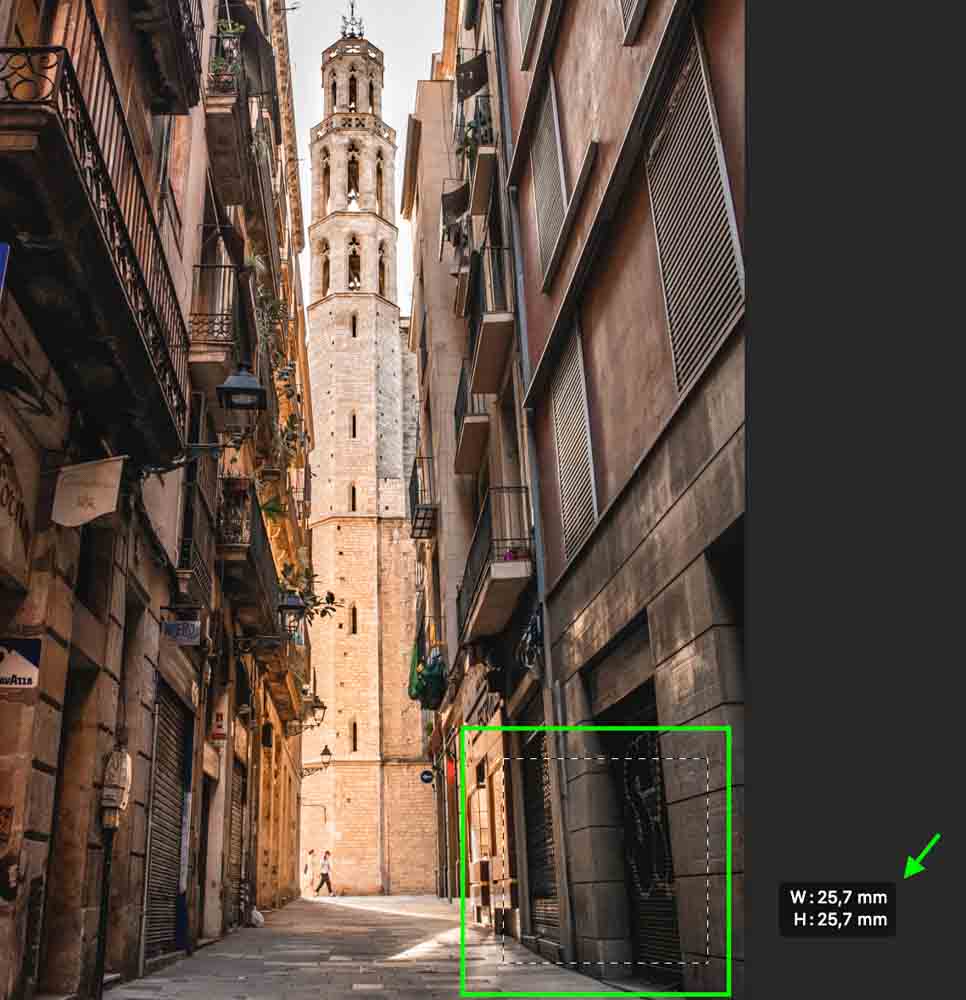
Note that changing this setting will not change the actual size of your project’s canvas. Instead, it will only change the units used to measure the size and the units used in any relevant tools.
How To Change New Project Measurements From Pixels To Inches
Changing a project’s measurement unit to inches from pixels can be helpful for artists based in the United States or for anyone who might need a project to be measured in inches. You can also change the units to centimeters, millimeters, points, or picas.
To do this, there are a few steps you can take to create measurement presets for new documents.
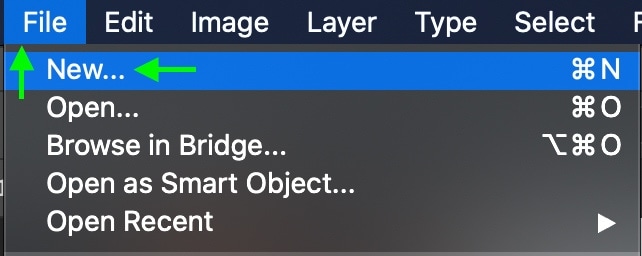
To open a new project, click File > New. You can also use the shortcut Command + N on a Mac or Control + N on a PC.
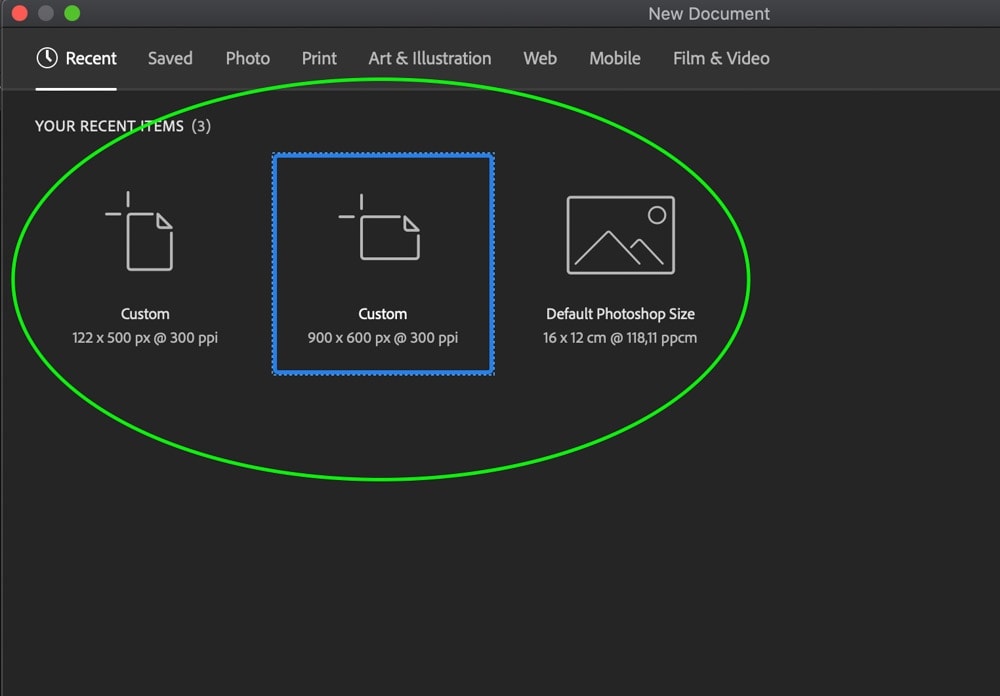
The new document window will pop up, where you can select a preset size for your project from the blank document presets or the templates.
Once you’ve selected the size, head over to the sidebar on the right labeled Preset Details. These settings allow you to edit the details of your chosen preset, and it’s here that you can change the measurements on a new project.
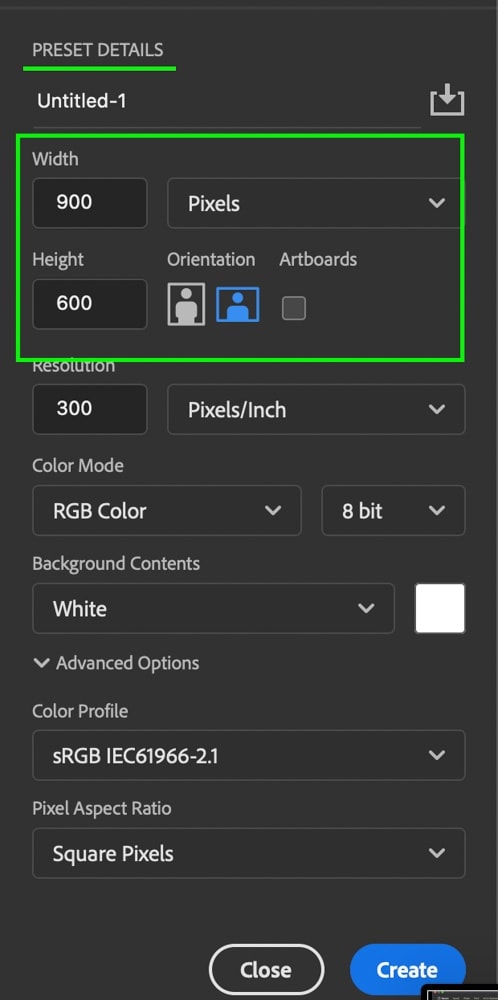
Next to Width, you’ll see a bar with units of measurement – it should automatically say Pixels. Click this, and you’ll see a drop-down where you can choose the specific measurement scale you’d like to work with.
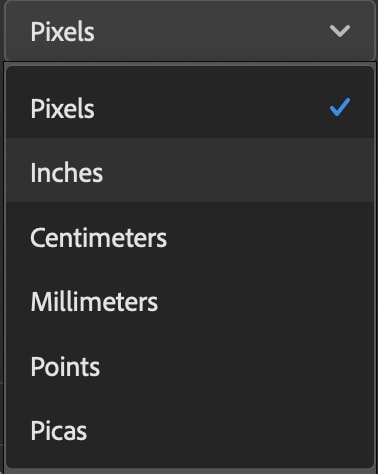
As you change the scale, you’ll notice that the width and height values will automatically adjust to the equivalent value. For instance, a 900×600 pixel landscape size will change to 3×2 inches.
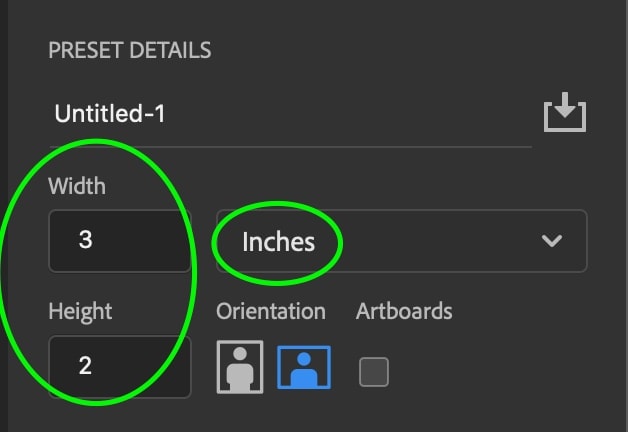
This makes it easier to keep track of the size of your photo while changing the measurement units. You can also edit the width and height values if you want to change the size to specific proportions in your chosen measurement unit.
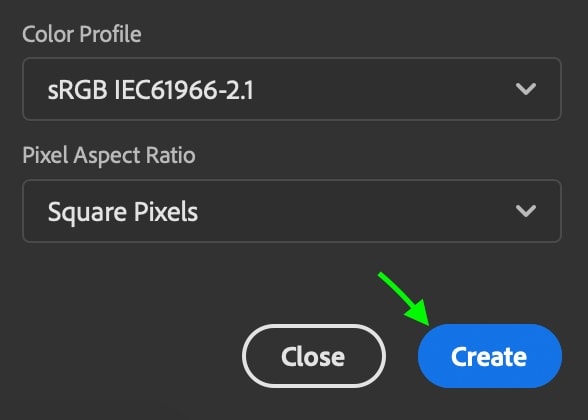
To finish creating your canvas, click Create on the bottom right.
To test the changes, use your cursor to select an area of an image. You’ll notice that, once again, the section is measured in the unit you chose.
How To Change An Existing Project’s Measurements From Pixels To Inches
To change an existing project’s unit of measurement from pixels to inches in Photoshop, go to Image > Canvas Size. Beside the width and height settings, set the measurement type to inches. Now your project will convert its dimensions to display inches instead of pixels.
In addition to working with new projects, you can also edit the measurement units of both the image and the canvas of existing projects while you work.
To be clear, image size and canvas size are two entirely different modifications. Image size refers to how big or small an image (or layer) is – and if the image size is increased too much, the image will lose quality because you’re increasing the size of the pixels, not the amount. This can result in pixelation and blur in some cases.
However, changing the canvas size changes the area size of the entire canvas, not just the picture itself. When you increase the canvas size, you increase the transparent or white area around the image. Decreasing the canvas size would crop whatever image you’ve got in it.
It is important to know the difference between these two sizes, as changing one could hurt your image.
To change the measurement units in the Image Size, go to Image > Image Size.
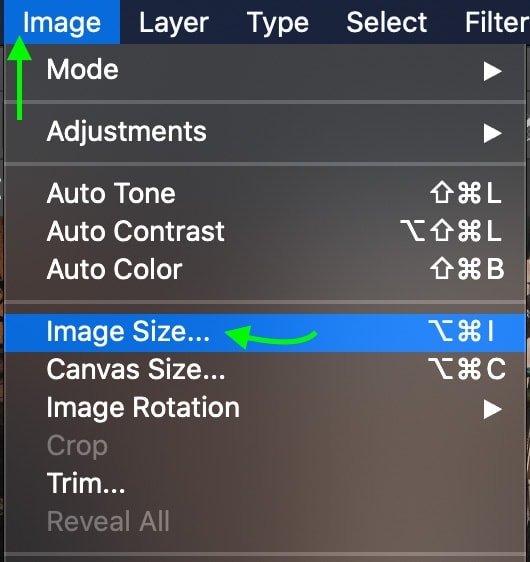
You’ll see the Image Size window come up. Here you can see the current size of your image and make alterations. You can change the units of measurement by clicking the drop-down boxes next to Width and Height and selecting the unit you’d like to work with.
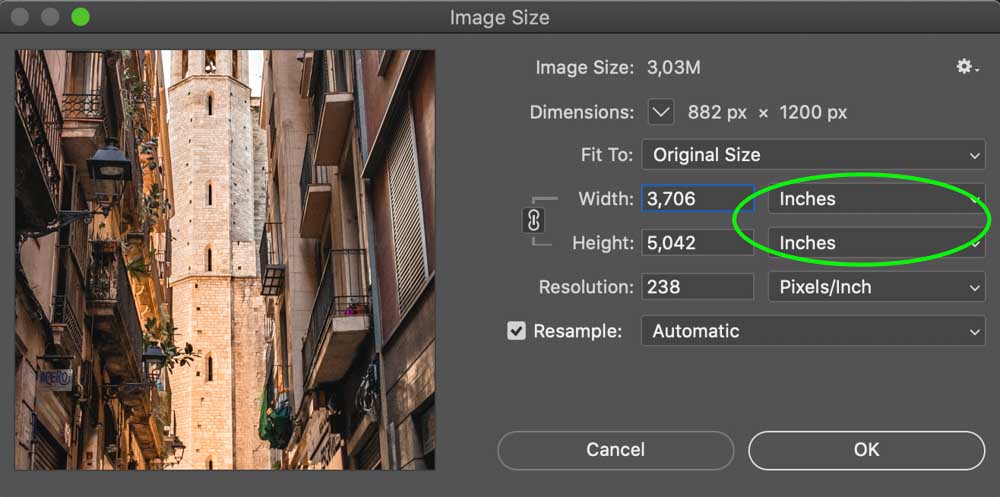
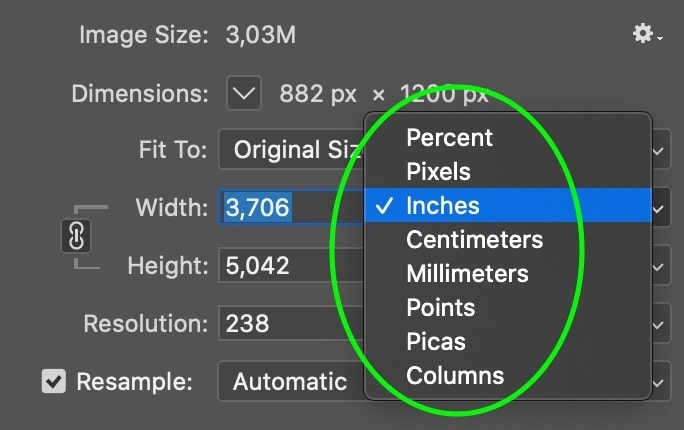
You can edit the measurements here, too, by editing the value of the width and height.
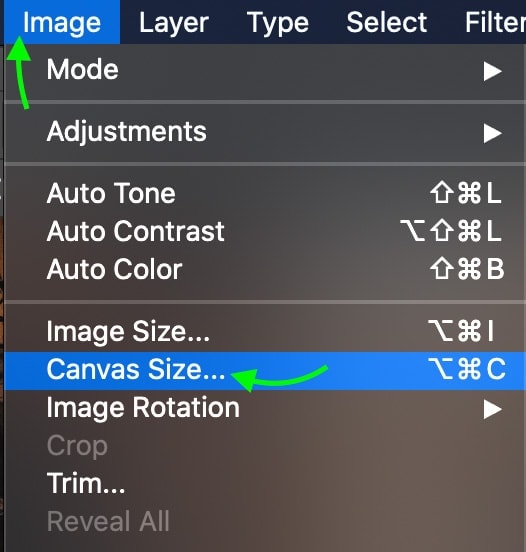
Similarly, you can change the measurement units of the Canvas Size by going to Image > Canvas Size.
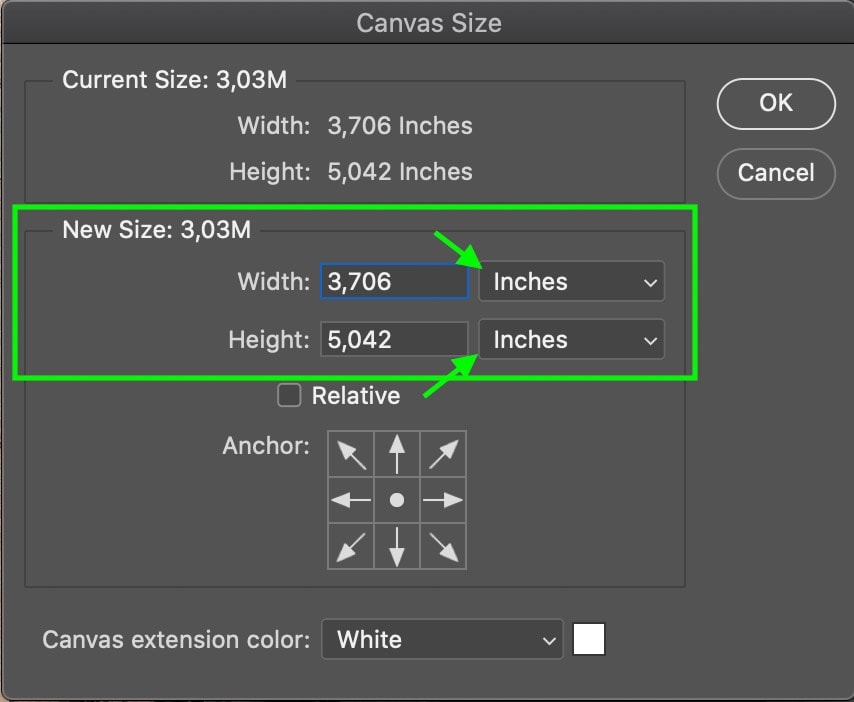
In the Canvas Size window that comes up, you can choose the units you’d like under the section labeled New Size, next to the Width and Height values. Like the Image Size, you can also change your canvas size at this time by editing these values.
How To Change The Ruler From Pixels To Inches In Photoshop
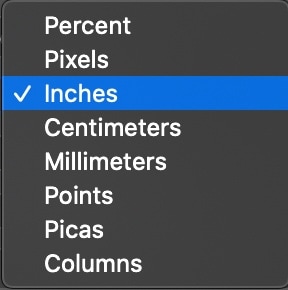
To change the ruler measurements from pixels to inches in Photoshop, go to Photoshop (Mac) or File (PC) > Preferences > Units & Rulers. In the Units setting, set the “Rulers” measurement to Inches. Now your ruler measurements will be displayed in inches rather than pixels.
If you’re interested in working strictly in inches while editing, you can set Photoshop’s preferences accordingly. The process is essentially the same as setting your overall measurement preferences. First, go to Photoshop > Preferences and click Units & Rulers.

In the Rulers drop-down, select Inches as your measurement unit.
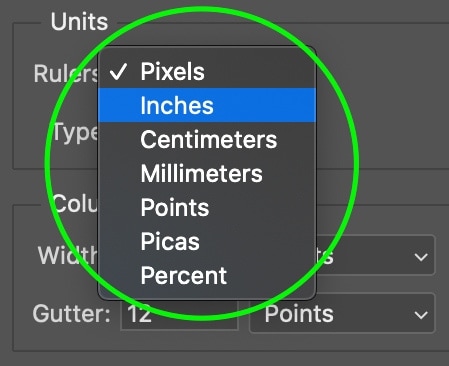
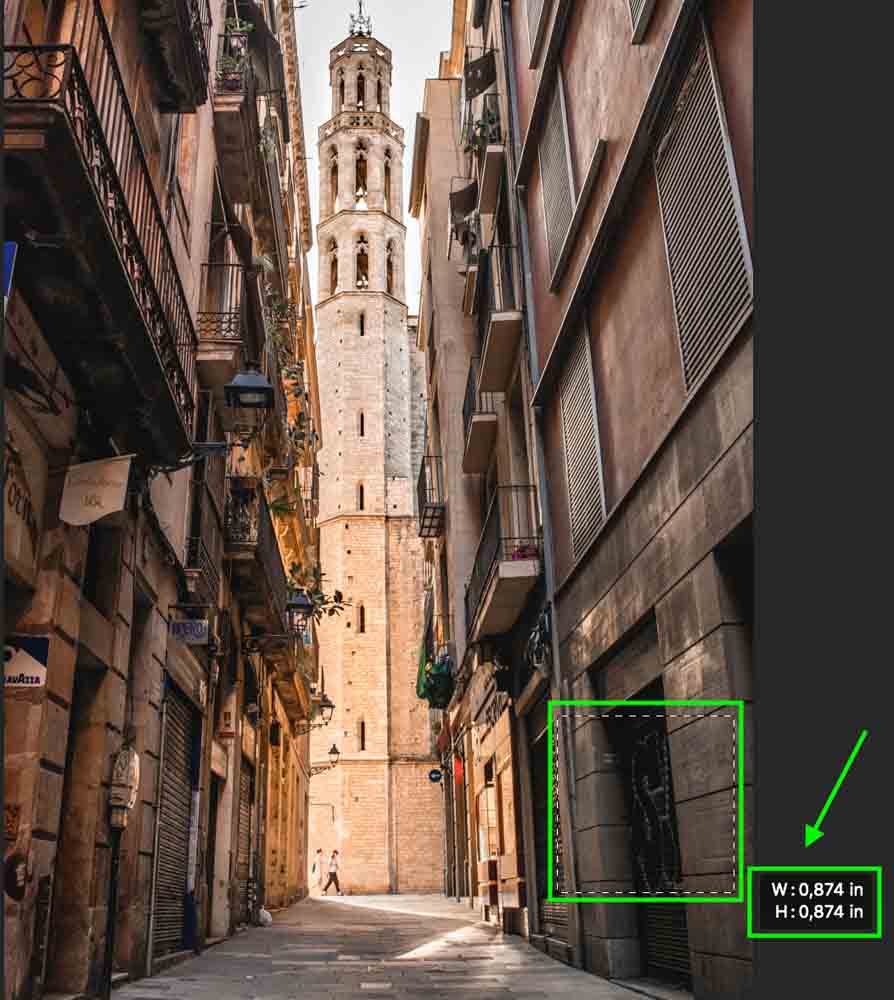
Click OK, and you should be able to select an area of your photo and see it measured in inches.
Which Measurement Unit Should I Use?
Once you know how to change the measurement unit in Photoshop, you will be able to choose exactly which unit to work with based on your needs. For example, while some people prefer to work in pixels, others prefer inches or another form of measurement.
Pixels
A pixel, short for “picture element,” is a tiny building block that makes up your photograph. You probably won’t be able to notice the individual pixels in your photo unless you zoom in or increase the image size. In the first photo below, the entire photograph is visible with no discernable pixels. In the zoomed version, however, you can clearly see the individual pixels.

Measuring your photo in pixels helps control the quality, as you’re aware of how many pixels you’re working with and how the quality changes as that number increases or decreases.
Inches
Measuring in inches, however, can be useful when working with images you plan to print or publish according to specific proportions. Inches are commonly used in print, particularly in the United States. There are 96 pixels in one inch if you are ever trying to do the conversion in your head (like a crazy person).
Millimeters & Centimeters
Similar to inches, using millimeters or centimeters to measure your photo comes in handy for artists working in or creating work for markets in parts of the world besides the United States. Sometimes print proportions are measured in millimeters or centimeters, so using these can help you edit your photo according to exact proportions.
Picas and points
Picas and points are often used to measure type. Picas were the standard measurement unit often used for type. Nowadays, Points are more commonly used as the typical measurement of fonts. You’ve likely selected the size of your font using the point system before. One Pica is comprised of 12 Points.
No matter how you choose to measure your project in Photoshop, it is important to know the options and what they can be used for, as well as how to change between them at different points in your project. This way, you can ensure you’re working with the exact settings you need or prefer.
Happy Editing!
