
If you’re trying to edit multiple photos at once, one of the main workflow hacks you can take advantage of is copy and paste. The easiest way to do this is by knowing how to copy & paste Camera Raw adjustments In Photoshop.
To copy and paste adjustments in Camera Raw, first, edit the photo inside of Camera Raw. Once edited, right-click on the image and choose “Copy Edit Settings.” Now select your next image, right-click, and choose “Paste Edit Settings” to paste your copied settings.
Let’s take a look at a few easy ways to copy and paste Camera Raw settings onto different images.
How To Copy And Paste Settings In Camera Raw
Camera Raw has settings you can use to make basic edits to your images, including copying adjustments from one image to another. However, this method only works if you are working with files from Adobe Bridge or if you are simultaneously opening multiple RAW files directly into Photoshop, as these processes bring up the filmstrip.
If you are not working in this manner, skip to the next section, which details how to copy and paste settings between individual images or layers in Photoshop without using the filmstrip in Camera Raw.
Step 1: Open The Raw Images You Want To Edit
To copy the adjustments, first, open the raw images you’d like to edit in Photoshop. When you click Open in your file window, the Camera Raw window will open automatically.
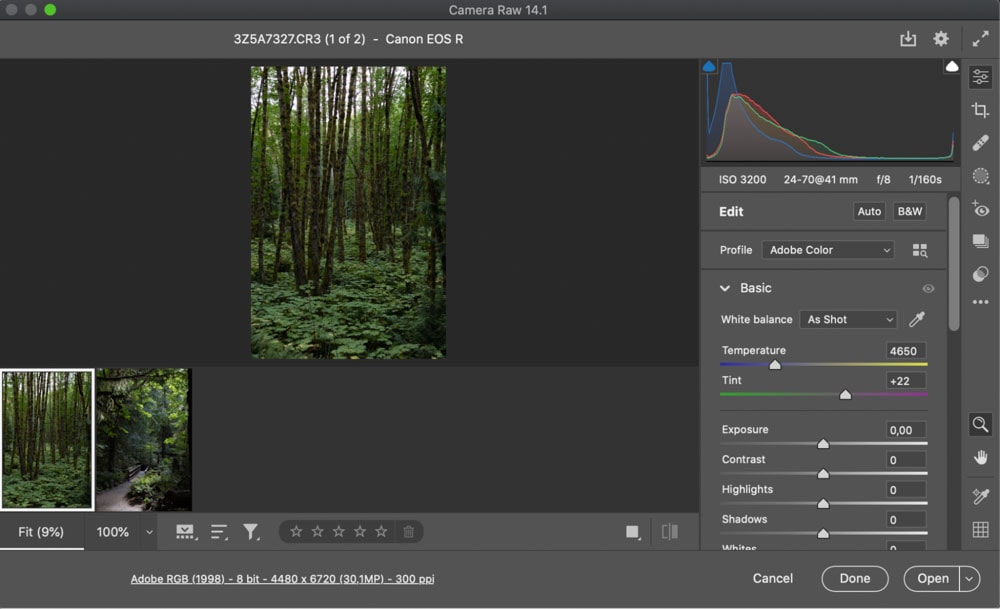
Step 2: Select The Edited Image
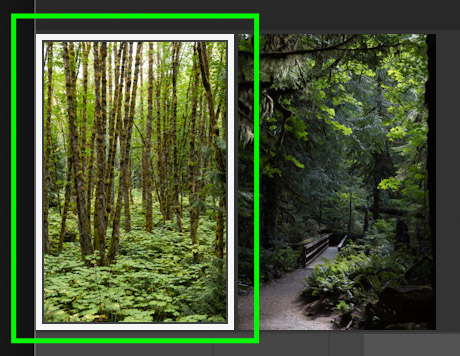
Edit one image the same way you’d like to copy and paste to other images. When you’re satisfied, make sure the photo is selected – with multiple photos open, the thumbnail of the selected photo will have a white border around it.
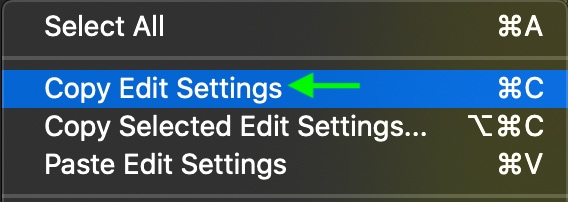
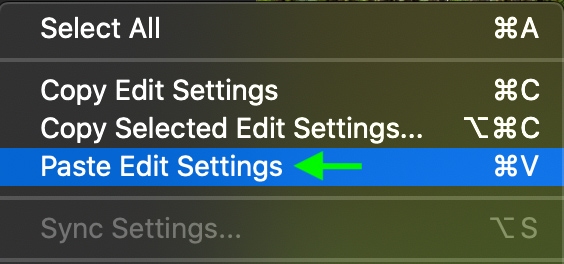
Step 3: Copy The Edit Settings Of Your Edited Image
Now, right-click or Command + click the selected image thumbnail and select Copy Edit Settings. You can also use Control + C (Win) or Command + C (Mac) to copy the settings.
Step 4: Paste The Edit Settings Onto The Unedited Image(s)
Next, right-click or Command + click another image thumbnail, and select Paste Edit Settings. You can also use Control + V (Win) or Command + V (Mac) to paste the settings. You’ll notice the image and its thumbnail change to match the settings of the first image.
To select multiple images at once, you can hold Control (Win) or Command (Mac) as you click the images you’d like to paste the settings to before using Control + V (Win) or Command + V (Mac).
How To Copy And Paste The Camera Raw Filter Between Layers
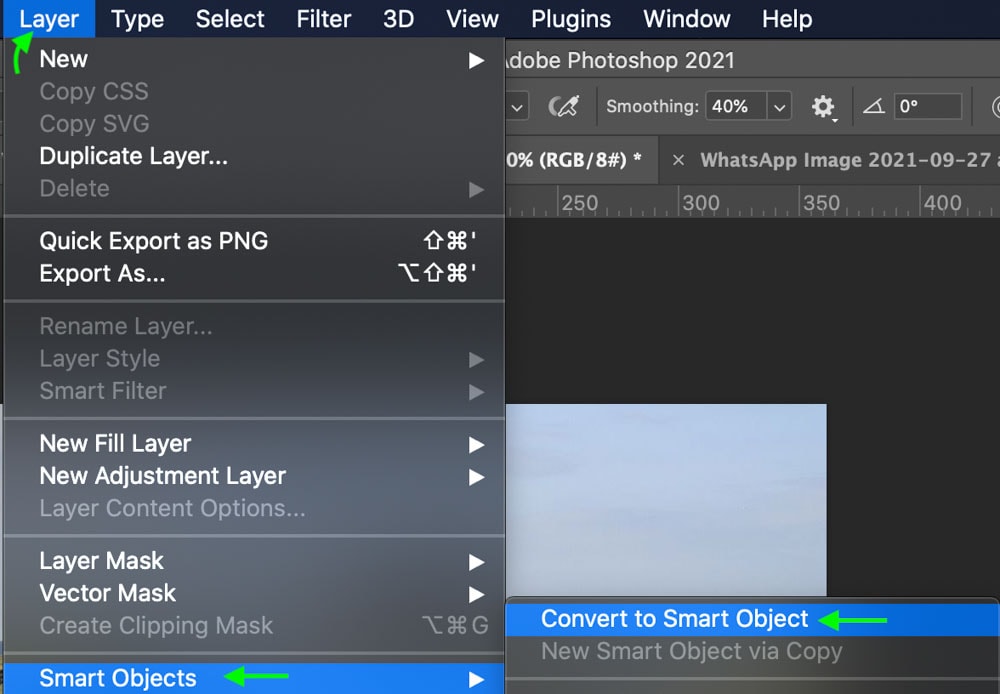
Step 1: Convert The Image Layers To Smart Objects
Convert the active layer to a Smart Object by heading to Layer > Smart Objects > Convert to Smart Object. Now, repeat this process for each of the layers or separate images you’d like to copy or paste onto.
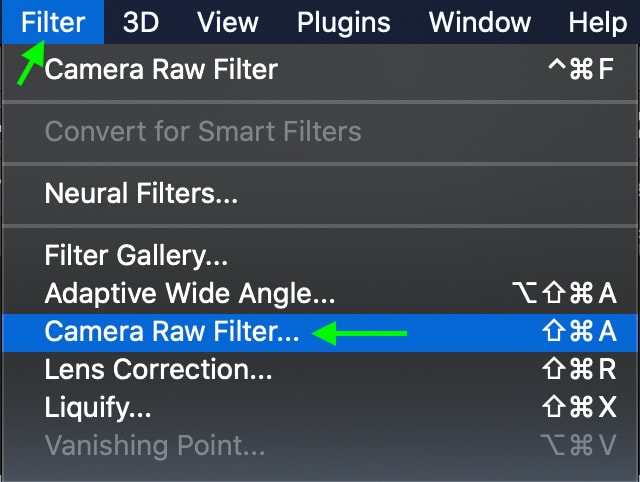
Step 2: Open Camera Raw By Going To Filter > Camera Raw Filter
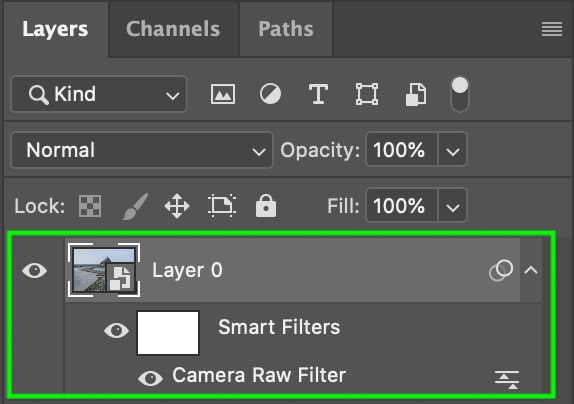
Then, in the Layers Panel, select the layer you’d like to apply the Camera Raw filter to and head to Filter > Camera Raw Filter.
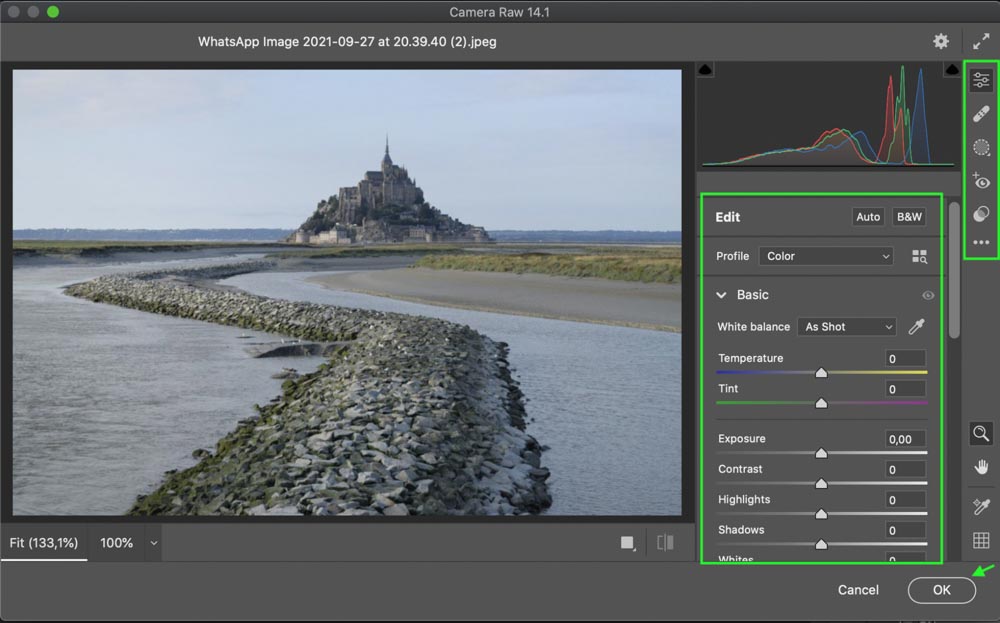
This will bring up the Camera Raw window. Here, you can make any edits to the layer that you’d like using the available adjustments. When you’re satisfied with the edits, click OK.
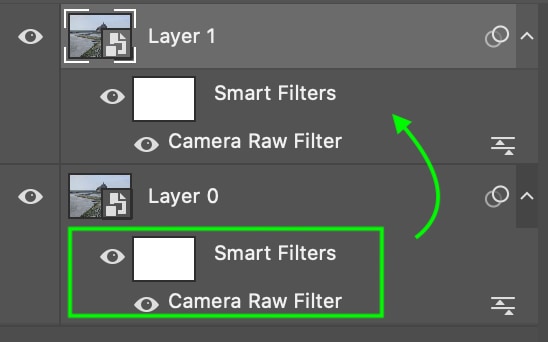
Step 3: Hold Alt/Option And Drag The Smart Filter To The New Layer
Now, head to the Layers Panel, and you’ll notice both the Smart Filters and Camera Raw Filter are visible underneath the active layer.
Hold in Alt (Win) or Option (Mac) and click the Camera Raw Filter, then drag it to the layer you’d like to paste it onto. This will copy and paste the filter onto the layer. You’ll see both layers now have the same filters underneath.
Camera Raw is a great tool to quickly edit photos in Photoshop – even multiple photos at once. Understanding how to copy and paste Camera Raw settings from one image or layer to another makes editing multiple images much easier. I explain more about the important uses of Camera Raw in this next tutorial!
Happy Editing!


