

Cropping images to fit a particular shape is often a significant element in graphic design or photo editing. You can crop images into a shape in Photoshop using a few easy steps to prepare your photos for websites, social media posts, and more.
Below, I outline the exact process to confine your images to shapes using a clipping mask, with helpful tips to move and resize the image and shape once you have finished cropping.
How To Crop Images Into A Shape In Photoshop
Step 1: Add A Shape To Your Image Document
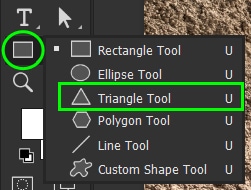
Once the image is open in Photoshop, you’ll need to add the shape you’d like to use to crop the image. You can use any Shape Tool (U). Click and hold the icon in the Toolbar and select the shape you’d like to make. For this example, I will be using the Triangle Tool (U).
Click and drag to draw the shape on the image, placing it over the area you want to keep.
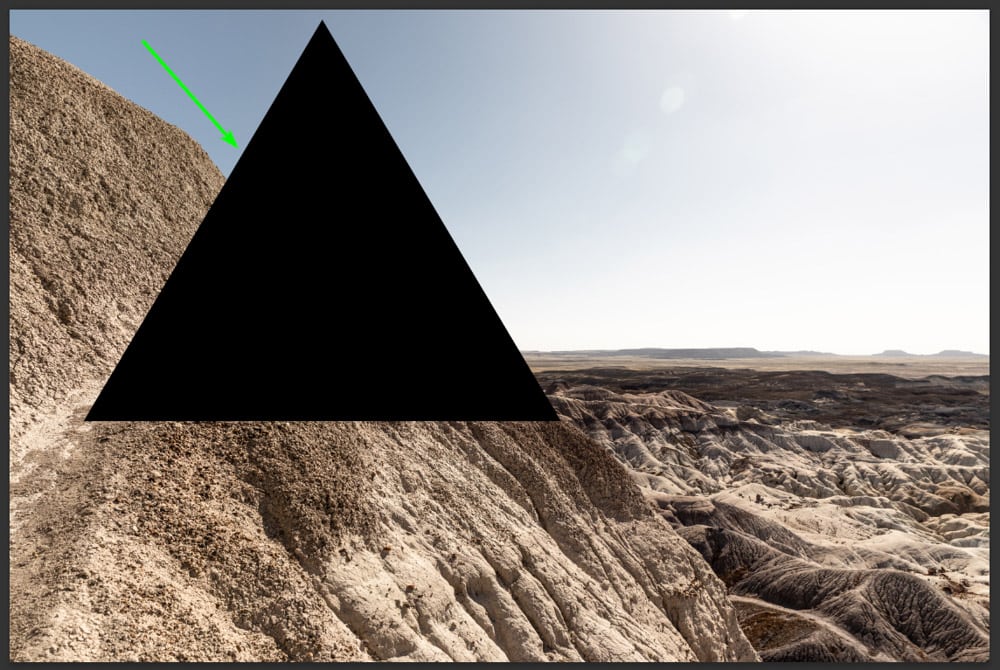
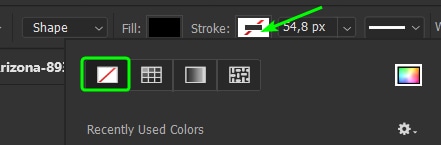
Set the Stroke color of the Shape to Transparent (unless you want an outline around the cropped image).
Note: Everything covered by the shape will remain in the shape, and the rest of the image will be cropped, so move and resize the shape as needed.
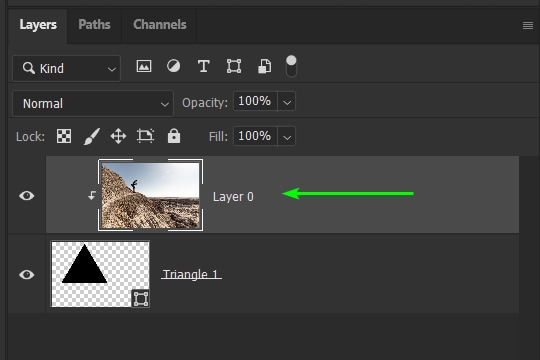
Step 2: Move The Image Layer Above The Shape Layer
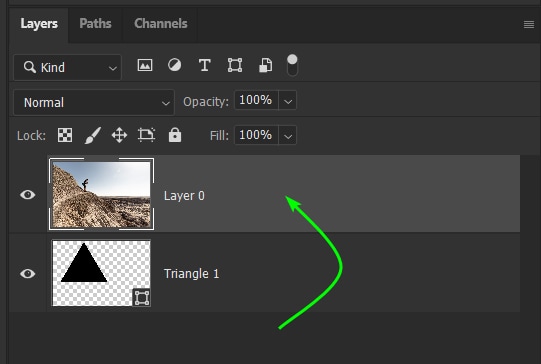
If you are working directly on the image and the image layer is locked, unlock the background layer by clicking on the lock icon in the Layers Panel.

Then, click and drag the image layer above the shape layer. You won’t see the shape anymore on the canvas.
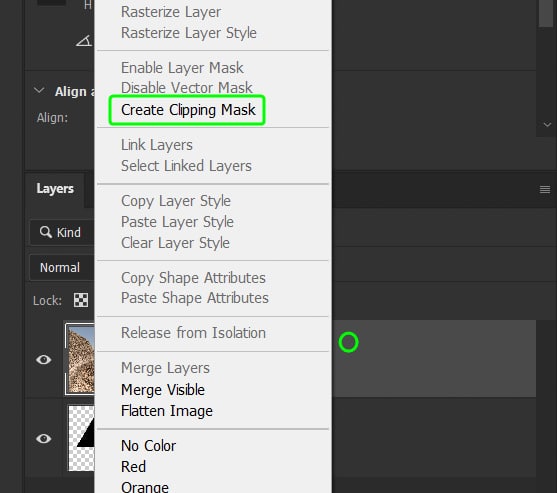
Step 3: Add A Clipping Mask To The Image Layer
Next, add a clipping mask to the image layer to clip the contents to the layer directly below it, which in this case is the shape layer. To add this, right-click on the image layer and select Create Clipping Mask.
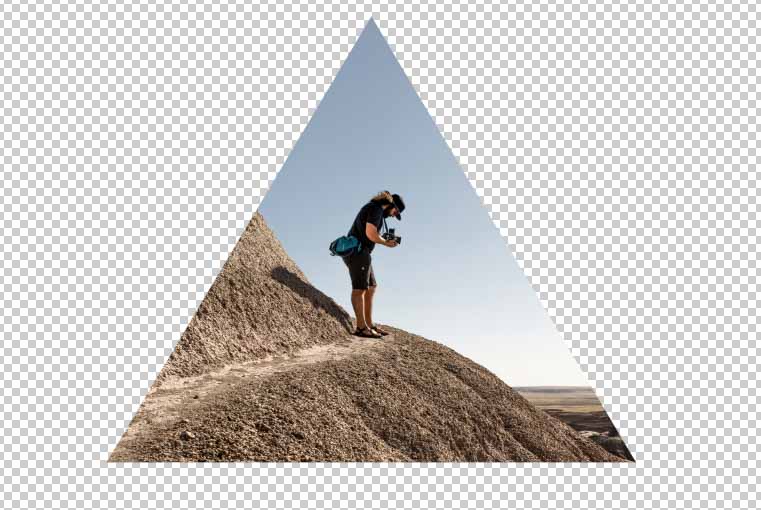
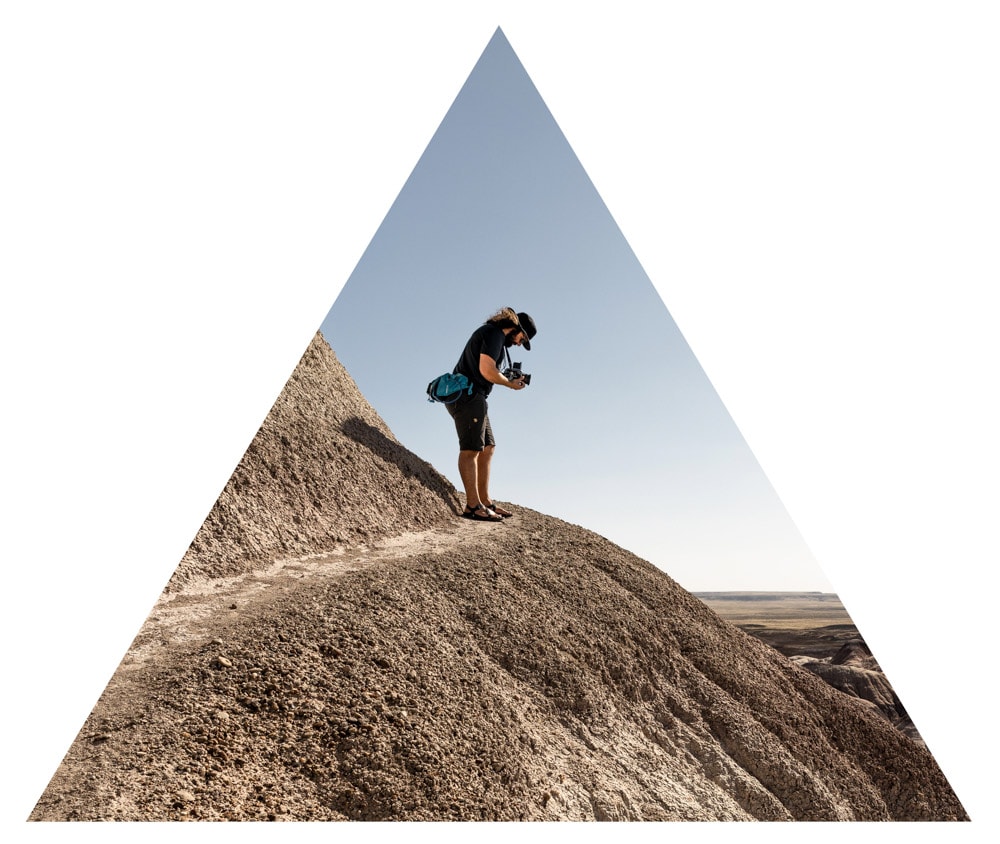
The image will be cropped in the shape.
Step 4: Move And Resize The Shape Or Image (Optional)
You can now move and resize the shape and the image separately or together if needed. To resize or move an element, select the layer. For instance, to move the image inside the shape, select the image layer.
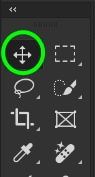
Activate the Move Tool (V) from the Toolbar. Then, activate the Transform Tool by pressing Control + T (Win) or Command + T (Mac).
Next, click and drag the image around or use the transform box handles to resize the image. You can do this for the shape, too, without affecting the image position or size by selecting the shape layer.
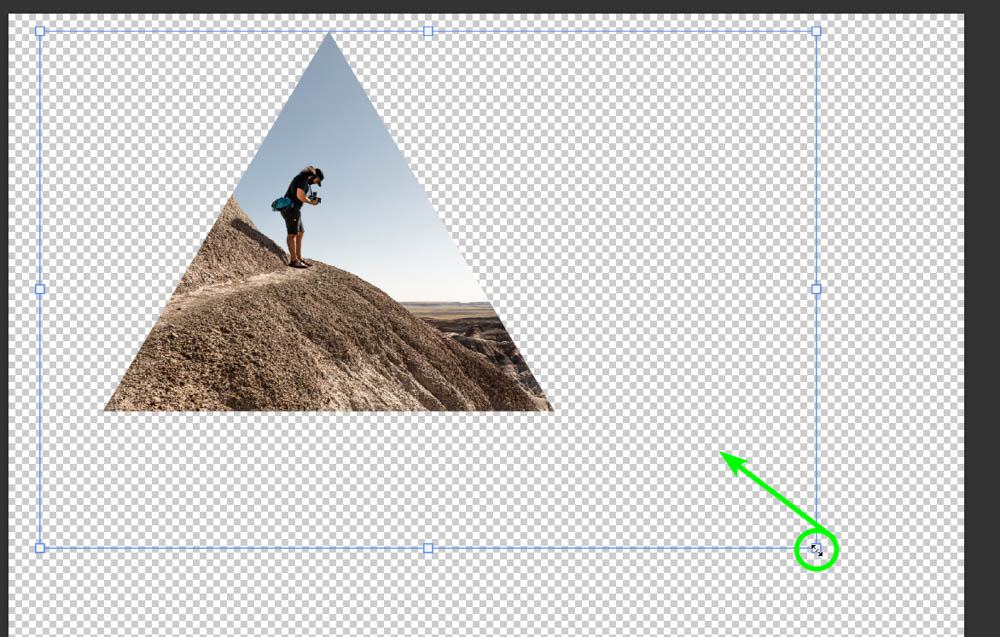
If you want to resize or move both the shape and image together, select both layers in the Layers Panel by holding in Control (Win) or Command (Mac) and clicking on them both.

Then activate the Move Tool (V) and the Transform Tool as above and move or resize the two together.

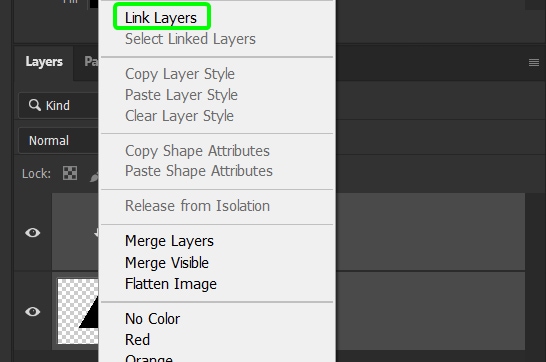
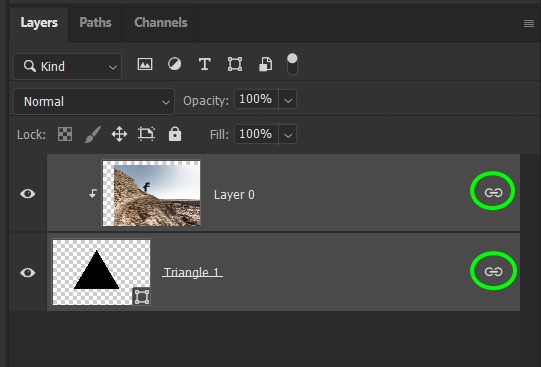
Step 5: Link The Layers (Optional)
If you want to work with the image and shape as one layer, you can link them together so you won’t have to select both layers every time. To do this, select both layers, right-click, and select Link Layers.
There will be two link icons next to the layers, indicating that they are linked. Now, when you move or resize one layer, the edit will happen to the linked layer as well. You can unlink the layers at any time by right-clicking and selecting Unlink Layers.
You now have an image cropped into a shape in Photoshop. From here, you just need to save your image as a PNG file to preserve the transparent background.
Happy Editing!


