The Transform Tool in Photoshop is one of the most useful and common tools you’ll come across in Photoshop. However, at first glance, you may be missing out on many helpful ways it can be used.
This tool is essential when moving, distorting, resizing, or rotating images or objects, such as shapes and text. While the basics of the tool offer your standard resizing and rotating functions, there is so much more to the tool.
What Is The Free Transform Tool In Photoshop?
The Free Transform Tool works to manipulate an object in Photoshop in various ways. Using this tool, you can resize an object, rotate or flip an element, and manipulate an object more drastically by warping, skewing, or changing the perspective.
You can use the tool on almost every type of layer in Photoshop, including image, shape, text, and smart object layers. You can also transform multiple layers, layer masks, selections, paths, and alpha channels. However, you can’t transform a background or locked layer. You must unlock the background layer first.
How To Use The Transform Tool In Photoshop
Step 1: Go To Edit > Free Transform
To activate the Transform Tool, select a layer and then use the following menu path: Edit > Free Transform or press Control + T (Win) or Command + T (Mac).
Note: To preserve the quality of the object when scaling first, convert it to a Smart Object by right-clicking on the layer and selecting Convert to Smart Object.

Once Free Transform is active, you will notice handles around the image or layer you are transforming.

Step 2: Right-Click To Select The Transform Mode
You can right-click (Win) or Control + click (Mac) to access the Transform Tool options. Or you can use any of the shortcuts detailed in the next section to access each mode.

Step 3: Drag The Anchor Points To Scale The Object
For a simple resize, you can use the anchor points by clicking and dragging a handle inward or outward.

If you need to undo any action you have done while using the Free Transform function, press Control + Z (Win) or Command + Z (Mac) to take a step back.
Step 4: Press Enter To Confirm The Changes
Once you have manipulated your object using the Free Transform setting and are happy with the result, press Enter or click on the Checkmark in the Options Bar to apply the effect.

Transform Tool Settings In Photoshop Explained
Scale
The Scale setting lets you resize the object. Once you activate the setting, click on any handles and drag to resize the object or layer. You can drag a handle, and the layer will resize without distorting. If you want to resize the width of the layer without affecting the height, or vice versa, you will need to hold in Shift.

Rotate
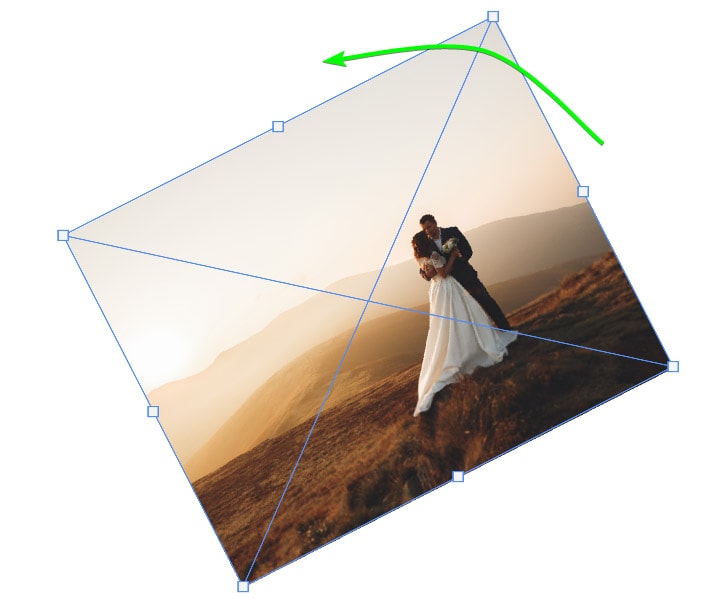
The Rotate setting allows you to turn a layer on a center axis. Once you select the rotate setting, you can move your cursor to the edge of the object, and you will see the double-arrow icon appear. You can then click and drag upward to rotate the layer anti-clockwise or drag down to turn the layer clockwise.


If you have a specific angle you want to rotate the layer, use the Angle box in the Options Bar.

You can move the reference point at any time to turn the object around a different spot. You can turn the point on by checking the box in the Options Bar. Once the reference point is visible, you can move it around the transform box. Now, when you rotate the layer, it will twist around the new reference point location.


Skew
The Skew setting allows you to slant a layer up, down, left, or right. This is a good option to tilt or slant text or skew an image in a particular direction.
Hold in Control (Win) or Command (Mac) to turn on the skew function temporarily. Or hold in Alt + Control (Win) or Option + Command (Mac) while moving a control handle to isolate the handle you select and the opposite handle to manipulate both points together while leaving the other control handles locked in place.

Distort
Depending on how you drag the handles, the distort setting pulls and stretches the layer in all directions.
To temporarily access the distort setting, hold in Control (Win) or Command (Mac), click, and drag any of the corner control handles to manipulate the object. This allows you to distort the object freely. Hold in Alt (Win) or Option (Mac) to distort the opposite handle at the same time.

Perspective
The Perspective setting automatically moves the opposite handle in the opposite direction to add a one-point perspective to an item. This is an accurate way to change the perspective of an object.
Hold in Shift + Alt + Control (Win) or Shift + Option + Command (Mac) to temporarily activate the Perspective setting, then drag a corner handle, and the opposite handle will move in the opposite direction, creating a perspective distortion.

Warp
The Warp setting lets you manipulate the shape of an object while giving you a lot of control over the areas that are warped and those that aren’t. Once the Warp Tool is active, a grid appears over your object.
You can change this default grid or add default warps to the layer using the settings in the Options Bar. You can then distort isolated areas of the layer using the grid. The warp only distorts the pixels in that region, while the gridlines keep the rest of the pixels in place.
Note: Find out more about the Warp Tool here.


Additional Transform Tool Settings
There are a few more transform settings that don’t need much explanation. You can use the set Rotate options to rotate the layer 180 degrees, 90 degrees clockwise, or 90 degrees counterclockwise.
You can also use the Flip Horizontal and Flip Vertical options to mirror the image by flipping it on a horizontal or vertical axis.


