


How To Unlock Layers In Photoshop
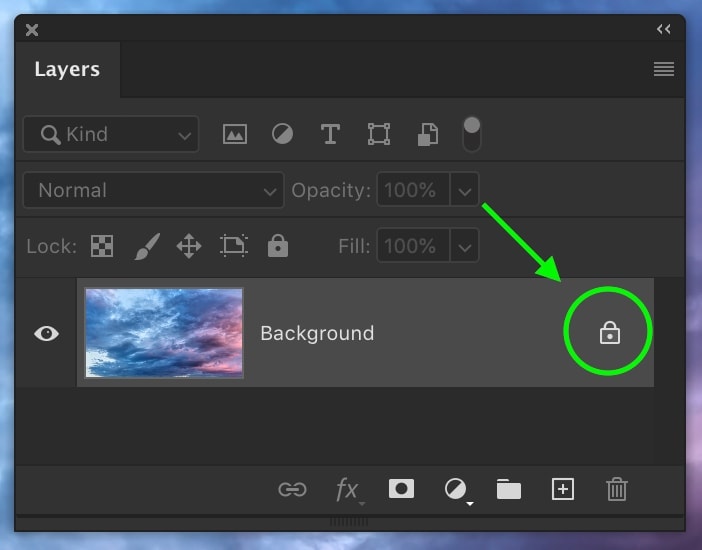
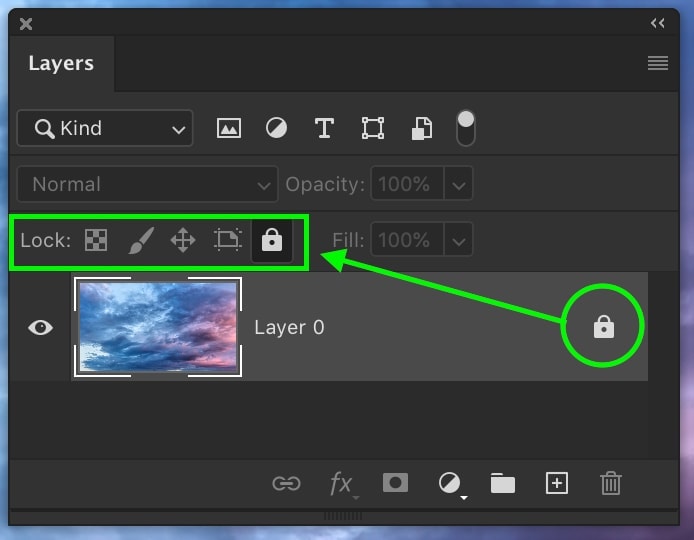
When you first open an image in Photoshop, you’ll likely see a padlock icon. As long as this icon is there, you’re limited by how much you can do with that layer. The padlock icon represents a ‘locked’ layer, which may seem pretty annoying at first, but it can come in handy. Here you’ll learn how to unlock the background layer in Photoshop with just one click, with other alternatives to unlocking layers as well!
Why Is The Background Layer Locked?
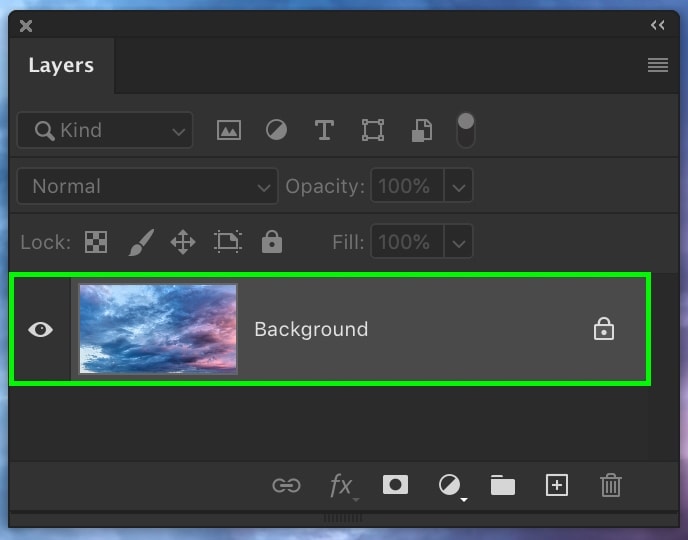
The background layer is usually locked because it acts as the base of your entire canvas. Without it, you’d just have a transparent box with nothing in it. By keeping the layer locked, you can’t accidentally move, group, or delete the layer, which may throw a wrench in things.
Think of a locked background layer as Photoshop’s way of helping get started. It offers a secure base to work from and build your layers around. That way, you always have a layer to go back to if something goes wrong.
Now, if you’re starting to have second guesses about unlocking the background layer, don’t. Your project won’t fall apart the second you unlock that layer. Everything will work the same as before, but now you have full editing capabilities of your background layer.
How To Unlock The Background Layer In Photoshop
Rather than wasting your time with roundabout ways to unlock the background layer in Photoshop, use this simple trick.
Just click on the lock icon to unlock your background layer.
Crazy, right?
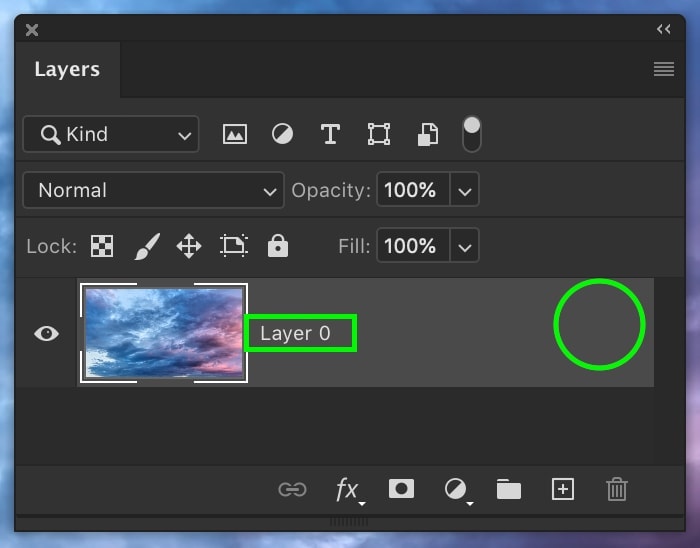
Your layer will now switch to a regular layer and rename itself to ‘Layer 0’. Everything else about the layer will remain the same.
Now you can adjust this layer as much as you want, but just remember, it’s your only backup!
How To Convert Your Background Layer Into A Smart Object
The above technique will unlock the background layer and convert it into a regular layer. What if you want to switch to a smart object instead?
Right-click on your locked background layer and select ‘convert to smart object.’
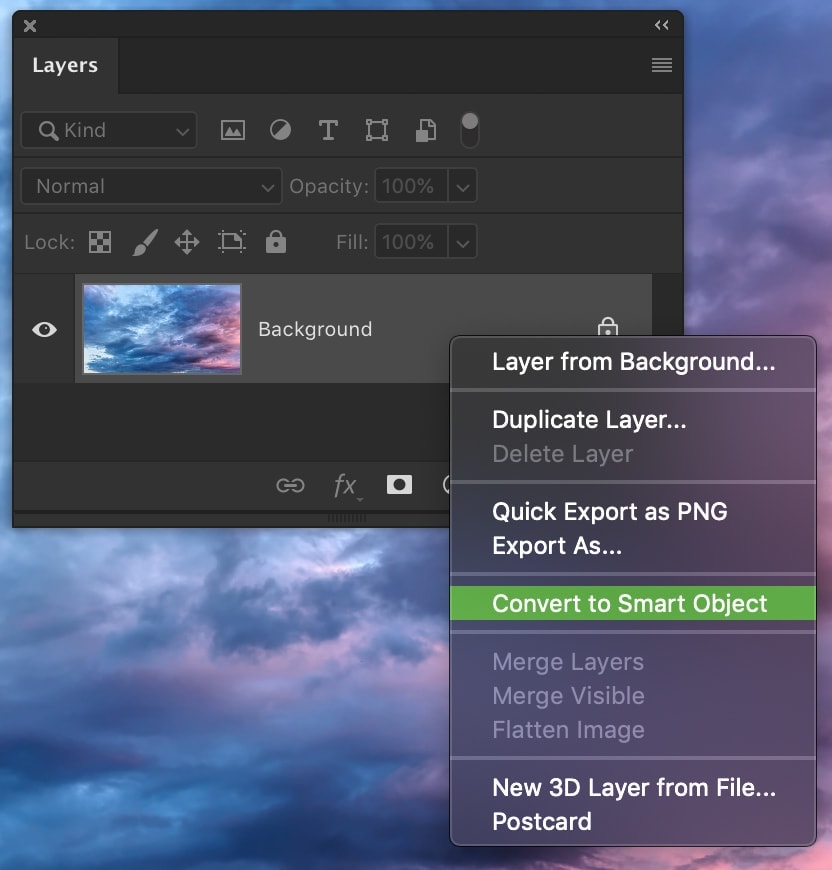
Your layer will unlock and rename itself to ‘layer 0’ once again. This time, as a smart object!

Doing this is another quick way to unlock the background layer in Photoshop. Rather than just unlocking the layer, you also create a smart object for better layer control in the future.
Different Types Of Locked Layers In Photoshop
There isn’t just a single type of locked layer in Photoshop. You can choose between a few different lock options at the top of your layers panel.
Here’s what each lock option does for your layers:
– Lock Transparent Pixels

Prevents the modification of transparent pixels in your layer from things like your brush tool, for example.
– Lock Image Pixels

Prevents the modifications of visible pixels in your layer from things like brush adjustments.
– Lock Position

Locks all the pixels in your layer from being moved.
– Lock All

Applies all of the layer locking options at once.
What Lock Types Are Applied To The Background Layer?
When the background layer is locked, not every type of layer lock is applied. In fact, there’s only two.
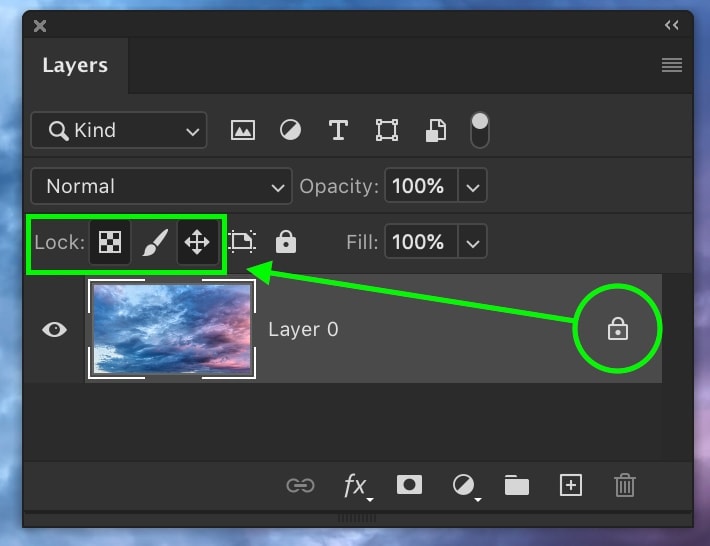
The two lock types applied to a background layer are ‘lock transparent pixels’ and ‘lock position.’ This means you cannot modify any transparent pixels on the background layer, or move it in any way.
There is technically a third lock applied to the background layer called ‘prevent auto-nesting with artboards.’ This doesn’t necessarily affect how you can edit the layer, but rather how you can organize it. With this locking option checked off, you cannot merge it with other artboards.
Transparent Vs. Solid Lock Icons


You may have noticed that some layers can have a solid colored padlock while others have a transparent one. The difference here lets you quickly distinguish how many aspects of your layer is locked.
A transparent lock means that not all layer attributes are locked. It means certain things have been locked, but it can still be modified in some ways.
A solid-colored lock icon means that all the layer attributes are locked. Any layer with a solid-colored lock icon is essentially uneditable until it’s unlocked.
Regardless of which type of lock icon you see, just click on the icon to unlock your layer quickly!
How To Tell What Attributes Of A Layer Are Locked
I don’t have any secret powers to figure out how layers are locked. Photoshop shows you exactly what attributes are locked at the top of your layers panel.
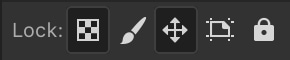
The active lock options will have a slightly darker box around them, while inactive ones won’t have anything.
What To Do If You Don’t Want To Unlock Your Background Layer
If, after reading this, you’ve decided you’d rather keep your background layer locked, how can you go about editing it? Fortunately, there’s an incredibly easy workaround to this by duplicating your background layer.
With your locked background layer selected, press Command + J (Mac) or Control + J (PC) to duplicate the layer. This will create an exact copy of your background layer, but now it’s unlocked!
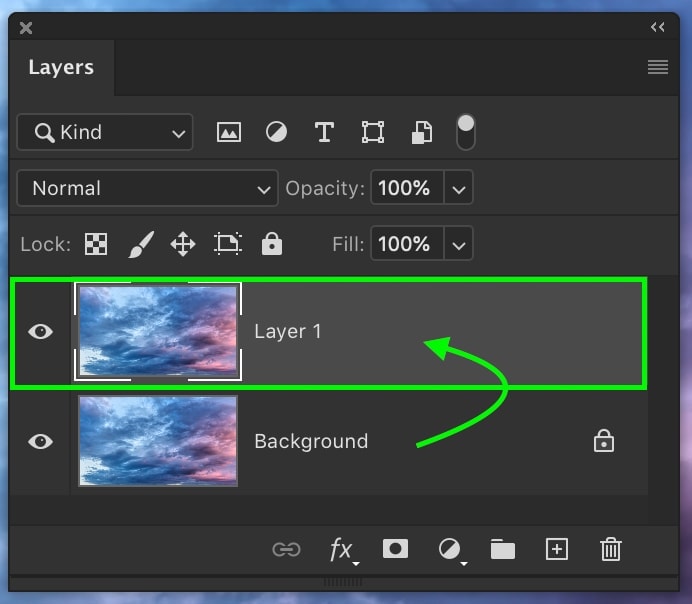
Duplicating your background is an excellent option if you want to edit your background layer, but still, have a backup option.
Conclusion
It doesn’t take more than a single click to unlock the background layer in Photoshop. Rather than the complicated workarounds mentioned in other tutorials out there, this technique completely streamlines the process. With one click, you can be off editing your background layer without a care in the world. 😉
Want more tutorials like this? Subscribe to our weekly newsletter for more photography, and photo editing tips delivered straight to your inbox!
– Brendan 🙂
