


If you batch-process images (or plan to in the future), you may be wondering what an embedded preview in Lightroom is. The answer is simple: the program never works directly on your image files but rather with previews, which come in many forms.
Embedded previews, one of the common preview types, help speed up your photo importing process, getting you into the preview, cull, and edit phase of the workflow faster. But they do have some downsides to them as well, which is why I detail everything you need to know about embedded previews below.
What Is An Embedded Preview In Lightroom?
To preface answering this question, there are a couple of things you should know: First, Lightroom does not work directly on the file itself, so the image that you see in the program is generated to show you what the file looks like.
Second, these generated previews can come from various places, such as the program itself creating a preview or the program pulling the preview from the file itself.
Embedded previews are preview images that are generated directly from the image file itself rather than one created by the Lightroom program. You see, when you take a photograph (especially in RAW), the camera creates a JPG preview of that image and embeds it in the image file. For example, that’s the preview you see on your camera screen when you review photos.
An embedded preview simply pulls this particular preview file directly from the photo itself. Hence, the name embedded preview.
What Are Embedded Previews Used For?
So, with these previews not being very color-accurate, what’s their purpose? Well, embedded previews really shine in the culling part of your workflow!
If you need to view an entire card full of photos and start narrowing down what you’ll be editing and what will be deleted, embedded previews can help load this information up faster. The colors may be off, but embedded previews display the most detailed preview you can use that still loads quickly.
When it is time to edit photographs, Lightroom will have to generate either a standard preview or a smart preview anyway. It won’t edit off of an embedded preview, so it’s generally advisable to have embedded previews regardless.
The Exception For Fujifilm & Olympus Shooters
Fujifilm and Olympus shooters, however, need to be aware that these camera’s RAW modes work a little bit differently than your friendly neighborhood Canon, Nikon, and Sony cameras do.
Most cameras embed full-size previews, which is what Lightroom uses, but Fuji and Olympus do not – they do small-size previews so that you will see a discrepancy in resolution with embedded previews. You can mitigate this by enabling the RAW+JPG option when shooting with those cameras, as Lightroom will use the JPG file version as the embedded preview.
How To Create Embedded Previews In Lightroom
Enabling embedded previews is as simple as a strategic button click upon importing. When opening a folder to import into Lightroom, you will see an Import dialogue box appear where you can adjust your import settings.
In the upper right-hand side, make sure that the File Handling panel is fully open.
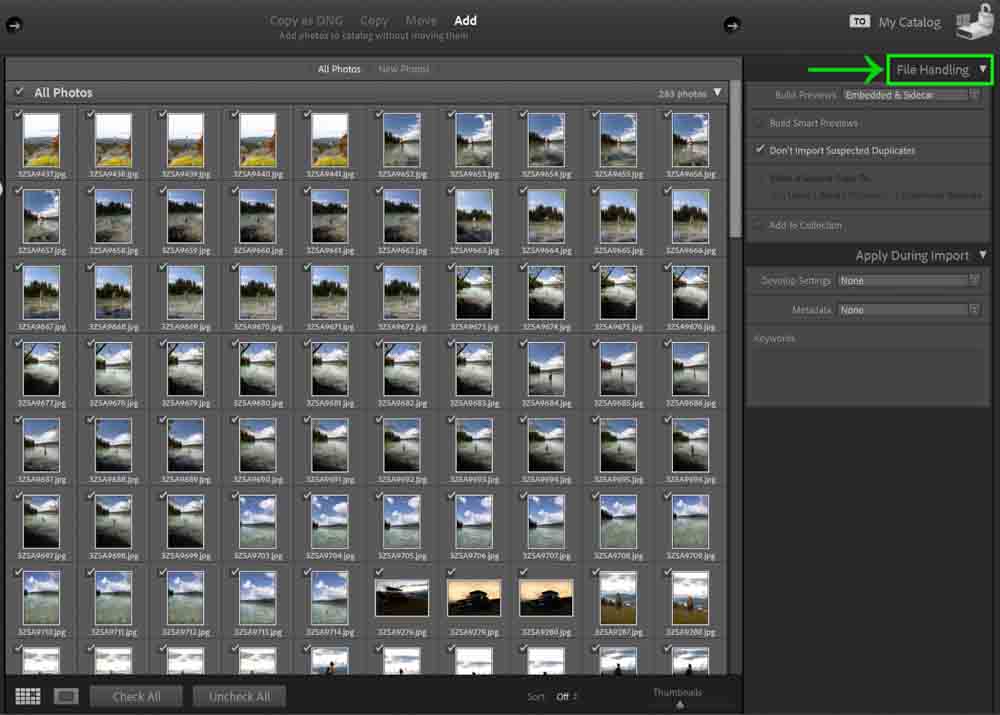
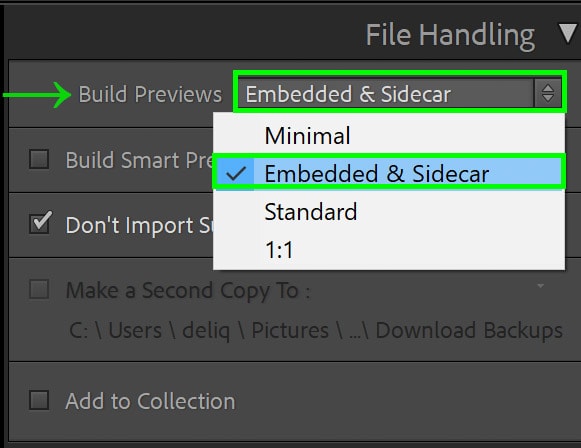
Go to Build Previews and click on the dropdown menu to bring up the previews menu. From here, you can select Embedded & Sidecar.
Click Import when you’ve done this, and that’s it!
How To Turn Off Embedded Previews
Should you decide that embedded previews are not for you, you can turn them off the next time the import dialogue box appears. In the same import window where I selected Embedded Previews, just select another option such as Minimal, Standard, or 1:1.
Also, do remember that the previews will automatically become Standard or Smart previews when going into the Develop window, as Lightroom cannot edit on an embedded preview. So, removing embedded previews is not necessary in most cases.
Embedded Previews VS Smart Previews VS Standard Previews
To further explain, there are a few different types of previews available in Lightroom alongside embedded previews. The two most commonly used previews aside from embedded ones are smart previews and standard previews.
Standard Previews
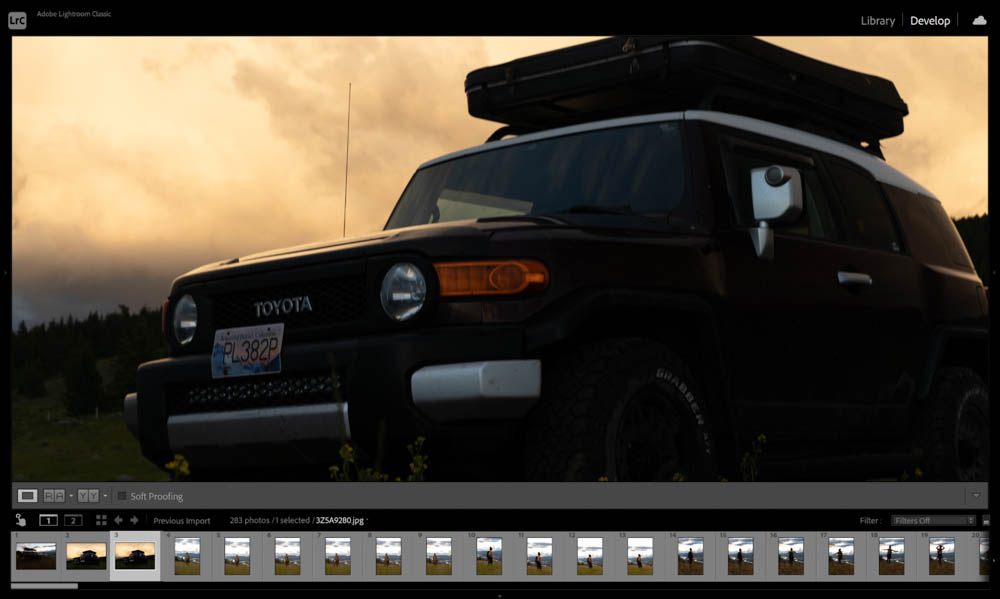
Standard previews are generated by the Lightroom program itself. To edit a file in the Develop module, Lightroom will build its own preview that is high-resolution and full of detail. This allows you to edit a preview file that is extremely accurate to the original file, ensuring all of the adjustments will translate perfectly to the photo.
Standard previews take a while to build, so there is a bit of patience involved here – but you cannot edit without them. When you click on a photo and jump to the Develop module, Lightroom automatically starts building this preview type.
Smart Previews
Smart previews are similar to standard previews but have a nifty bonus to them. Remember how I talked about Lightroom never working directly on the file? Well, the downside to this is that the file has always to be present on your hard drive for Lightroom to find and use. Otherwise, you won’t be able to do anything with the photo.
Smart previews take this problem out of the equation. A smart preview is a type of preview that Lightroom builds that does not require a direct connection to the original photo – so you can work on the photograph without needing Lightroom to be connected to it (until you want to export)!
For example, say you attach an external hard drive and load up some files from it. With smart previews enabled, once Lightroom generates a preview for the files, you can disconnect the external drive and continue working on the photograph(s). With a preview like a standard preview, Lightroom will need to detect that file at all times in order to work on it.
Once your external drive is connected back to the computer, you can export the files you worked on.
Embedded Previews
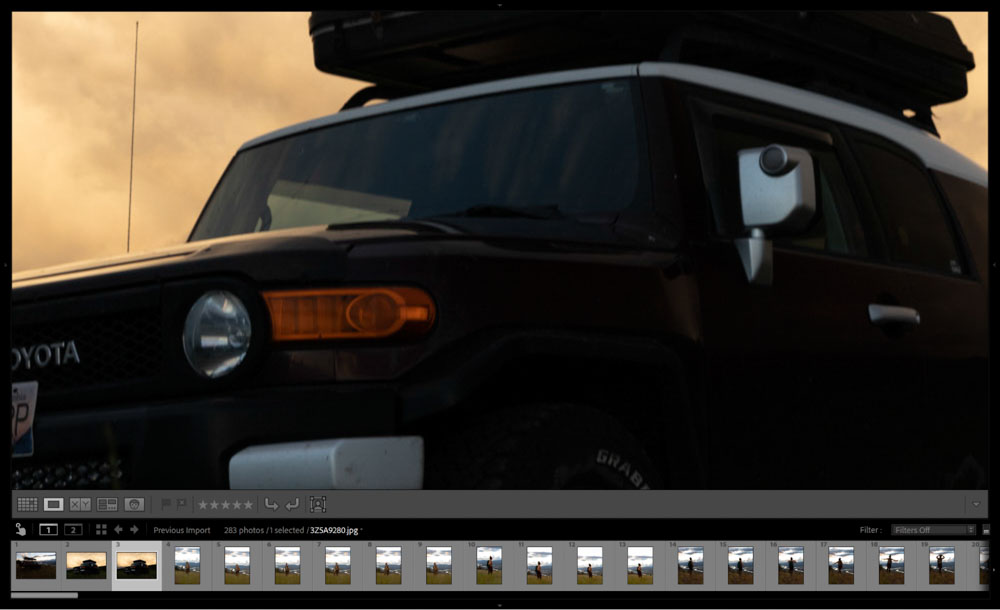
Embedded previews pull the largest preview file possible from the original camera file, so Lightroom does not generate this preview itself. The upside to this is speed: embedded previews load rather fast, and you don’t have to wait for Lightroom to render. This is quite useful when you have thousands and thousands of images to load up.
The downside (primarily with RAW files) is that the embedded preview is not very color or detail-accurate. This would make editing a real pain because the colors displayed are not how the file actually is. With editing relying heavily on accuracy, this could easily flush hours of work down the drain.
Also, embedded previews rely on the file always being detectable by Lightroom, so you cannot disconnect or move the file if you plan on continuing to do things with it in the program.


Nice explanation.
Glad it was what you were looking for! 🙂
Thank you. Well written article.
My pleasure!