It’s easy to learn how to add a border in Canva to give a basic picture or design a fun and professional touch. This is possible with minimal design experience or skills required.
In this tutorial, I’ll show you how easy creating a border can be with the default border style in Canva, plus extra ways to manually add borders for more customization options.
How To Add A Border In Canva Using The Border Style Setting
Step 1: Select The Image Or Element You Want To Add A Border To
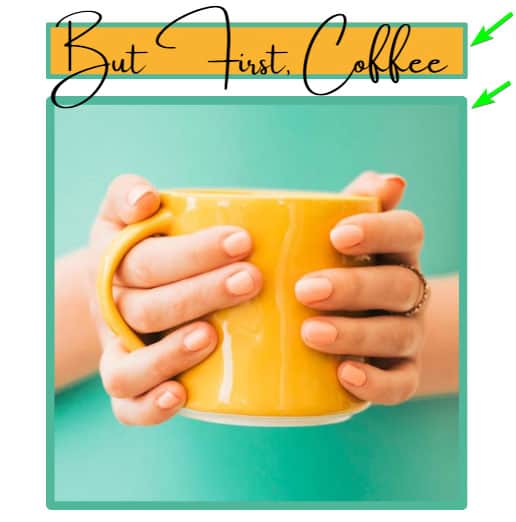
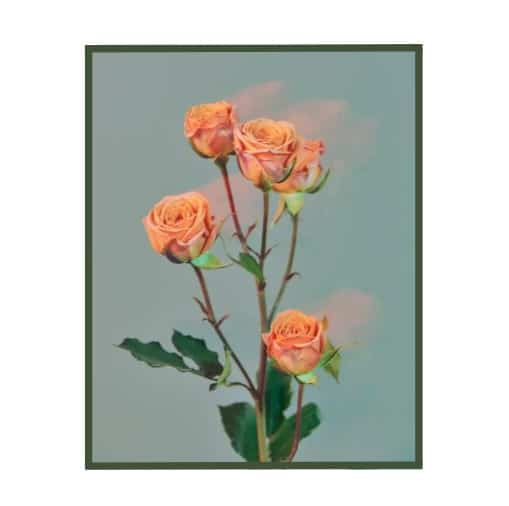
Select the element you want to add a border to. You can add a simple border to images, graphics, and shapes. However, this method adds the border directly around the outer edge of the element, and this can’t be adjusted.

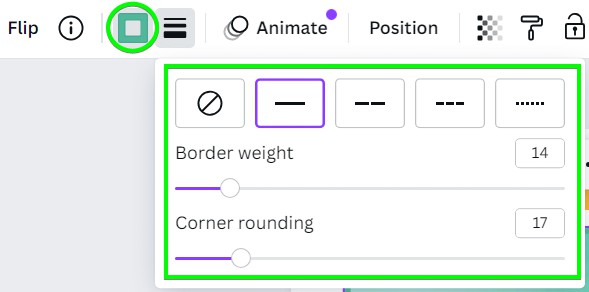
Step 2: Click On The Border Style Button Above The Workspace
Next, click on the Border Style button to open the options for adding and adjusting a border in Canva.
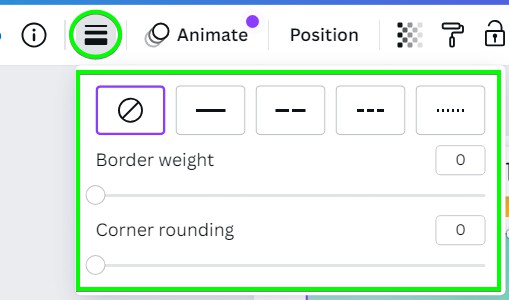
Step 3: Select A Border Style, Width, Color, And Corner Rounding
You can now use the settings within the Border Style Panel to add and adjust the border. First, select a Border Style, which can be a solid or dashed border.
Then, adjust the Border Weight. Once you adjust this setting, you will be able to change the Border Color by clicking on the color swatch in the bar where you selected the border style. Lastly, set the Corner Rounding if you want the border to have rounded corners.
You can repeat this process on other elements to add a basic border in Canva.
Alternative Ways To Manually Add A Border In Canva
Method 1: Add A Border In Canva Using A Border Element
Canva offers several border elements that will give your image a unique touch. Simply search through the border elements, add one to your design, and resize as needed.
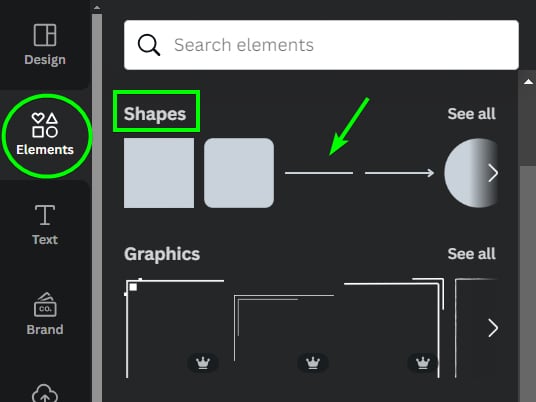
Step 1: Search For “Borders” In The Elements Tab
First, click on the Elements tab. Then, in the search bar, type Borders, and hit Enter.
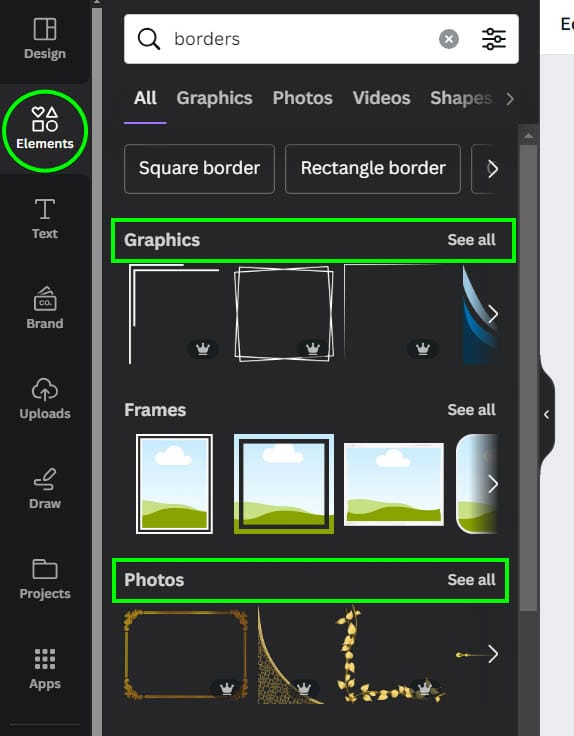
There are two different types of borders that you can find in Canva: Graphic borders and Photo borders. Both types have their strengths and weaknesses. Click on See All next to the group you want to browse to see all your choices.
In the Photos section, you will find a ton of detailed borders, but they are set to specific ratios that can’t be altered. So, instead, graphic borders are often the best way to go, as you have more options to customize your border. Click on a border to select it and add it to the canvas.
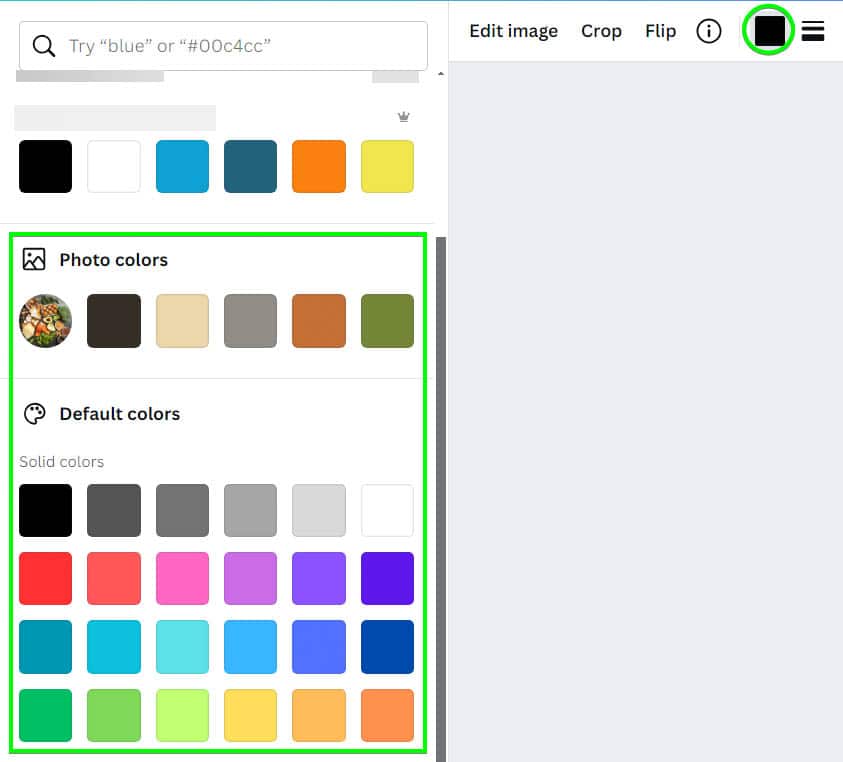
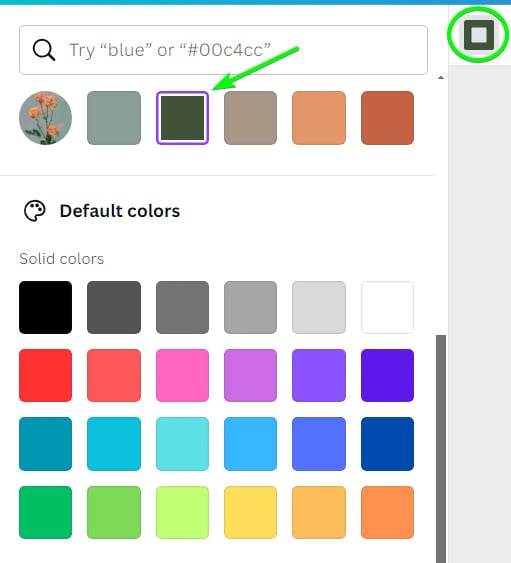
Step 2: Click On The Color Swatch To Change The Border Color
To change the color of your border, click on your border to select it, then click on the Color Picker at the top of the page. From here, you can choose from all of the available colors that Canva provides.
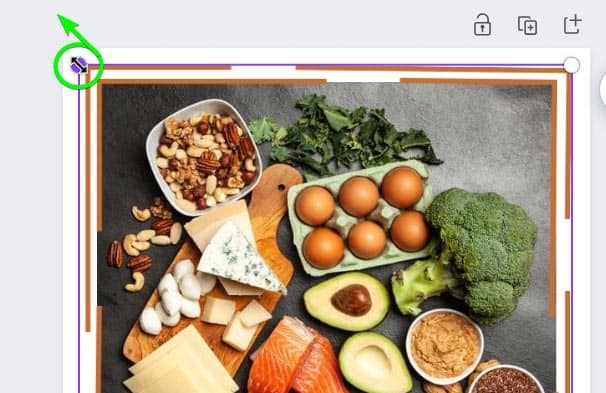
Step 3: Drag The Corner Handles To Resize The Border
Line your border up to one of the corners of your design. Then, pull the opposite corner handle toward the opposite side of your design.
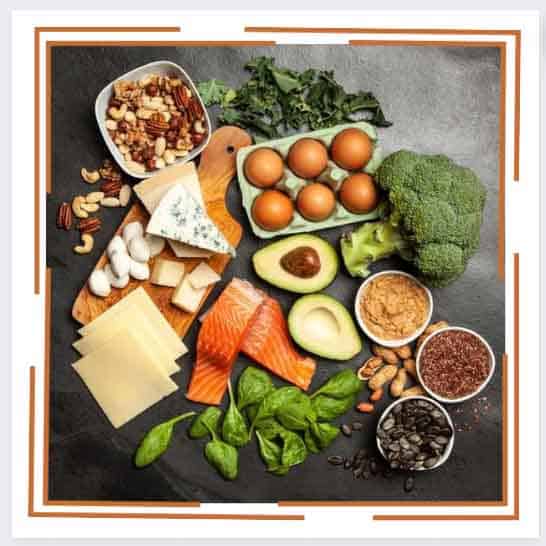
If the border doesn’t fit, you may have to adjust the border slightly with the other side handles. If this doesn’t work, you may have to search for another border.
Method 2: Add A Border In Canva Using Lines
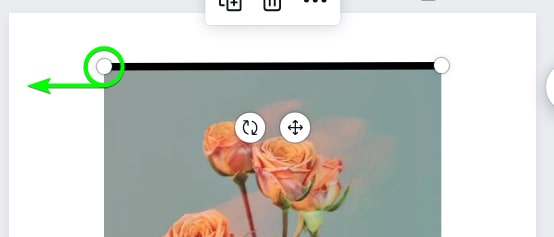
Step 1: Open The Elements Tab And Select A Line Under Shapes
Open the Elements tab, and select a line or any shape you’d like under the Shapes section. Click on the element you’d like to add to the canvas.
Step 2: Move And Resize The Shape To Fit Around Your Image Or Element
You can now click and move the shape to fit around your element. You can drag the corner handles to resize the shape to fit your element.
Step 3: Use The Swatches In The Settings Bar To Change The Shape Stroke And Fill Color
You can change the fill and color of the border by clicking on the stroke and fill options in the top settings bar. Then, use the side panel to select new colors.
Note: If you are using a square or rectangle, use the border style panel to adjust the stroke around the shape and set the fill color to transparent. Or move the rectangle behind the image and make it bigger to have the border stick out around the edges.
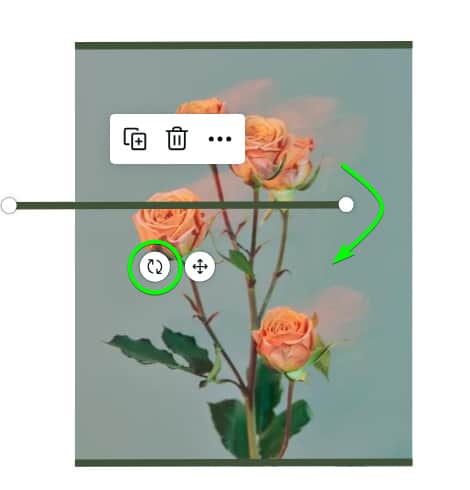
Step 4: Hold Alt/Option, Drag The Line To Duplicate It, And Rotate The Duplicates
Hold in Alt (Win) or Option (Mac), then click and drag to duplicate the line twice and move one duplicate to the bottom of the element. Then, rotate the second duplicate to fit along the side of the element and duplicate it again to fit along the opposite side, resizing the lines on the long edges if needed.
You now have a custom border around your element using shapes.
Method 3: Add A Border Around Text In Canva
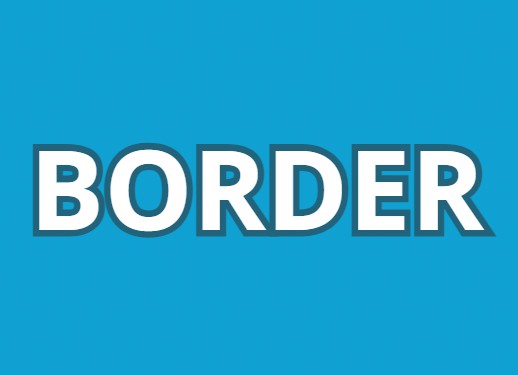
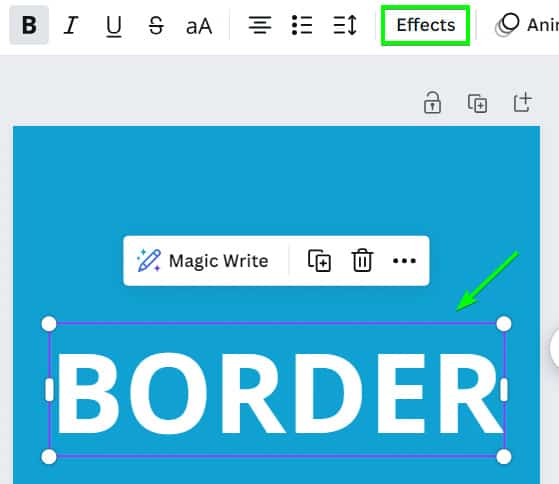
Step 1: Select The Text And Click On Effects In The Top Settings Bar
Once you have your text on your canvas, select it, and then click on the Effects button in the top bar.
Step 2: Select Outline From The Effects Panel
Next, click on the Outline effect to add it to the text and to open the settings. You will now have an outline around your text and you can edit the settings.
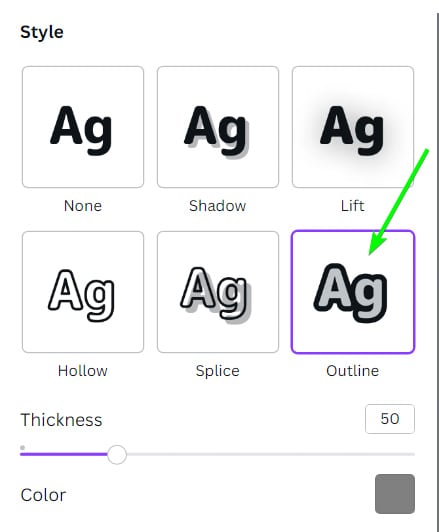
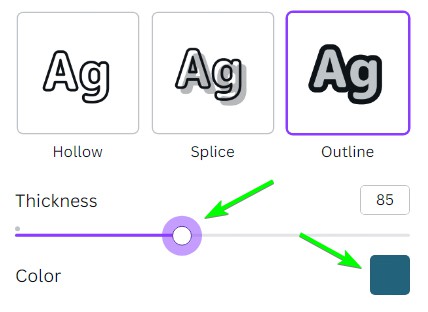
Step 3: Edit The Outline Settings As Needed
Adjust the outline settings as needed by moving the sliders. You can change the outline Thickness and Color.
You now have a border around your text. You can re-open the effects panel and adjust the settings at any stage during the project.