

There are many ways you can fill a selection in Photoshop, whether you want to add a color, a gradient, or even cover up an object within the selection. Like Photoshop has several ways to create a selection, there are also various options when filling one.
Let’s jump in to learn several easy ways in which you can fill all your selections.
Option 1: Fill A Selection Using The Keyboard Shortcut
Step 1: Create A Selection On The Canvas Using Any Selection Tool
You can use this method with a selection created from any of the selection tools. For a simple selection, use the Elliptical Marquee Tool to create a circle selection.

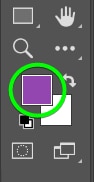
Step 2: Set Your Foreground Or Background Color
To change the foreground/background colors, click any color swatch in the Toolbar and pick a color from the Color Picker panel.

If you want to reset the color fill to its default mode, press D on your keyboard.
Step 3: Press Alt/Option + Delete To Fill The Selection With The Foreground Color
So, if you want to fill a selection with the foreground color, select the layer in which the selection is and press Alt + Delete (Win) or Option + Delete (Mac).

Step 4: Press Control/Command + Delete To Fill With The Background Color
If you want to fill your selection or layer with the background color, press Control + Delete (Win) or Command + Delete (Mac).

Option 2: Fill Selections In Photoshop Using The Fill Selections Command
Step 1: Set The Foreground Color In The Toolbar
First, set the color you want to fill the selection with using the Foreground Color swatch in the Toolbar.
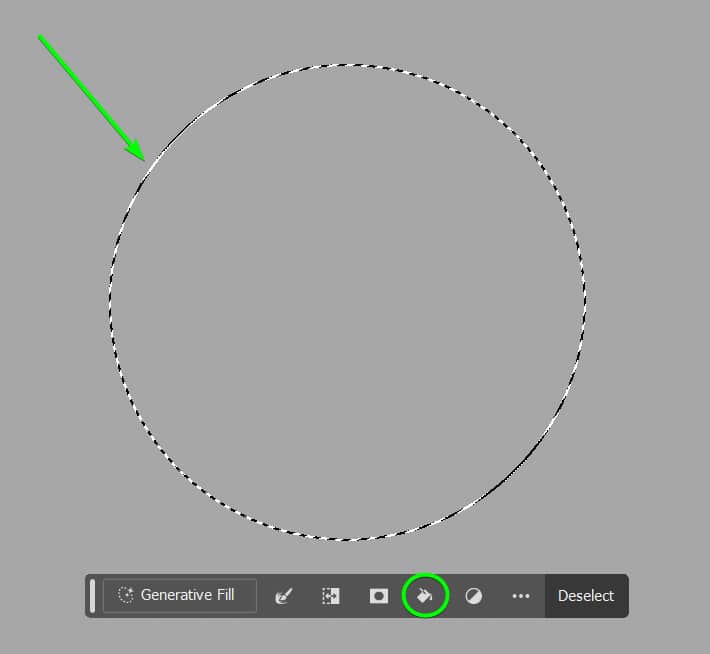
Step 2: Create The Selection And Click On Fill Selection
Next, create the selection using any selection tool and click the Fill Selection icon in the Contextual Task Bar.
Note: You can also select the Paint Bucket Tool (G) from the Toolbar and click inside the selection to add the foreground color.
Step 3: Select Foreground Color From The Menu
You will have options to choose from to fill the selection. If you have already set the foreground color, then select Foreground Color.

The selection will now be filled with the color you set.

Option 3: Fill Selections In Photoshop Using A Solid Color
Step 1: Create A Selection On The Canvas
Create a selection using any selection tool, such as the Rectangular Marquee Tool.

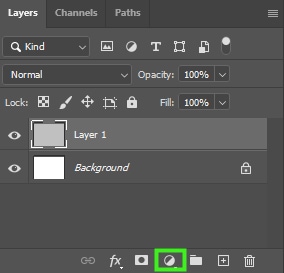
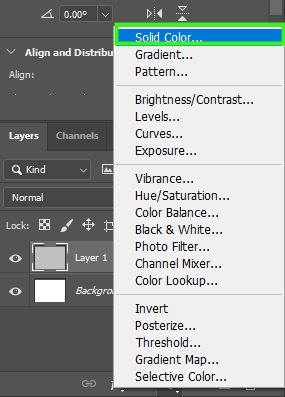
Step 2: Click On The Adjustment Layer Icon And Select Solid Color
To fill a selection with a solid color, click the layer containing the selection. Then, click the Adjustment Layer icon at the bottom of the Layers Panel. When the menu opens, choose Solid Color from the menu.
Note: You can also select Gradient or Pattern to fill the selection with one of those two elements. You will then need to adjust the gradient or select a pattern for the fill.
Step 3: Select A Color In The Color Picker
This will open up the Color Picker panel, where you can select any color to fill your selection with. To choose a color, click the color slider in the middle of the panel. Then, click the color fill to pick a tone from the color you chose. When you’re done, click OK to confirm the choice.

The color will now be added to your selection only.

Step 4: Change The Fill Color (Optional)
When filling a selection with a solid color in this manner, you can change the color at any time by double clicking on the color block in the Layers Panel and selecting a new color from the Color Picker.

Option 4: Fill A Selection In Photoshop Using Generative Fill
Step 1: Select The Subject And Click On Generative Fill In The Contextual Task Bar
The quickest way to make a rough selection around an object is by using the Lasso Tool (L). Select it and drag around an object, keeping some of the background inside the selection. Next, click on Generative Fill in the Contextual Task Bar.

Step 2: Type In A New Object Prompt Or Leave The Fill Box Empty
If you want to replace the selected area with new content, type in what you want to be added to the selection, or if you just want the object removed, leave the box blank. Once you have typed in or left it blank, click on Generate. Photoshop’s AI will then add new pixels based on the background or the prompt you added.

Step 3: Select A Variation In The Properties Panel
Photoshop creates 3 variations for you to choose from. You can toggle through them to choose the one that works best for you from the Properties Panel.
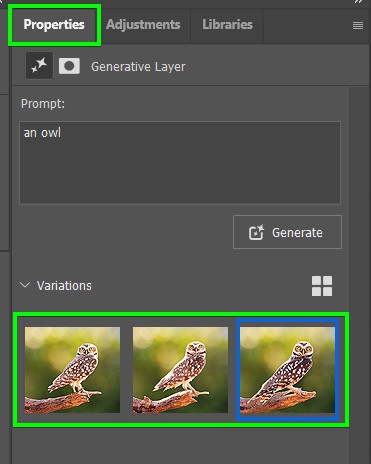
Once you have chosen a variation, you will have now filled the selection.


Option 5: Fill A Selection In Photoshop Using Content-Aware Fill
Step 1: Create A Selection Around The Object You Want To Remove
Make a rough selection around the object you want to remove with a selection tool you like. In my case, I used the Lasso Tool (L). The selection doesn’t have to be perfect. You just need to make a selection to tell Photoshop where the person/object to be removed is.

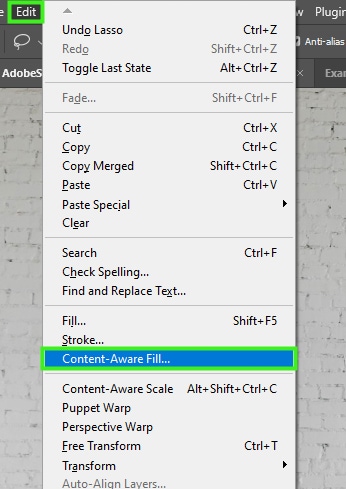
Step 2: Go To Edit > Content-Aware Fill
After making the selection, go to Edit > Content-Aware Fill. This will open up the content-aware fill workspace.
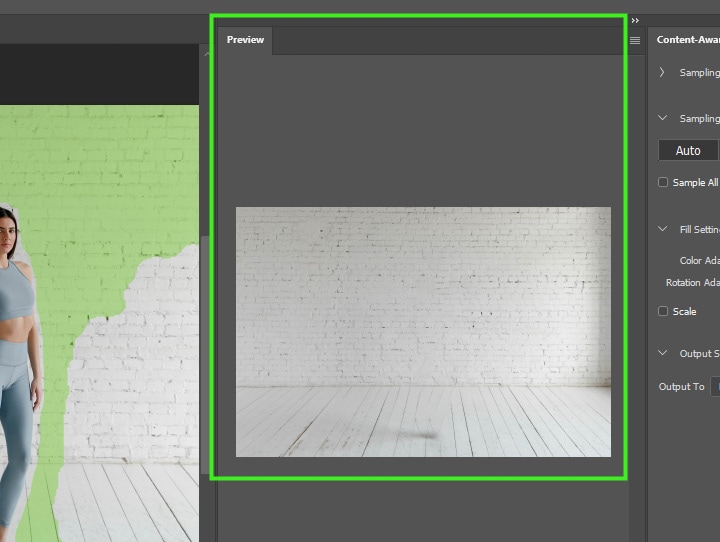
Once you open the Content-Aware fill workspace, you’ll notice the person/object you selected has already been removed by the content-aware fill tool. You can see that in the preview window.
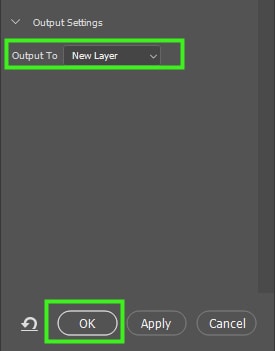
Step 3: Adjust The Fill Settings And Set The Output To New Layer
Although the content-aware fill tool does a good job of removing objects and replacing the empty area with pixels from surrounding areas, you may still need to retouch the area affected by the tool.
Once you finish adjusting the settings that you need to change in the content-aware fill panel, set output to New Layer and click OK to exit the panel.
Even after adjusting some settings in the content-aware fill workspace, you might still notice some imperfections in your image, such as blurs, blemishes, and distorted pixels. Luckily, Photoshop offers several tools to fix these kinds of problems. For example, you can use the Remove Tool or Clone Stamp Tool to remove blemishes.
Using these tools to repair your image can make your image look more natural after using the content-aware fill tool.

Happy Editing!


