

Learning how to use the Lasso Tool in Photoshop allows you to easily make selections and cut out images in Photoshop. Although this tool is a far cry from the “perfect” selection tool, it does provide a simple way to make fast selections around basic edges.
With three different lasso tools to choose from, there’s something that will work for a variety of situations. Such as the Lasso Tool for rough selections, the Polygonal Lasso Tool for selecting straight edges, and the Magnetic Lasso Tool for a more precise selection around difficult edges.
Video Tutorial
How To Use The Lasso Tool
The Lasso Tool creates a quick rough selection. By clicking on a starting point in your canvas, simply drag your cursor around your object to create a path. The Lasso Tool will follow your mouse’s exact movements all the way back around to the starting point.
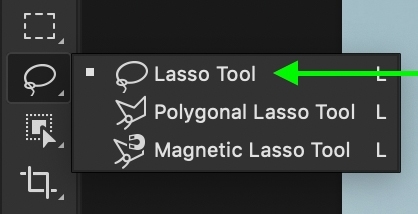
Step 1: Activate The Lasso Tool (L)
To access the Lasso Tool, press L on your keyboard or find it in your toolbar.
Step 2: Set The Mode And Feather In The Options Bar
In the Options Bar, make sure your selection type is set to New Selection by clicking on the solid-colored square icon.
Note: You can also use the other icons (in order) to Add to a selection, Subtract from a selection, or Intersect with a selection.

Next, set the feather radius you want for your selection. For a sharp edge around your selection, leave the feather set to 0px. If you want a soft, blurred-out edge, increase the feather radius to 20px or 30px.

Step 3: Create The Selection By Dragging The Mouse
Click somewhere along the edge you want to select and begin to drag your cursor along that edge. The Lasso Tool will create a path behind your cursor to be used as your new selection area.
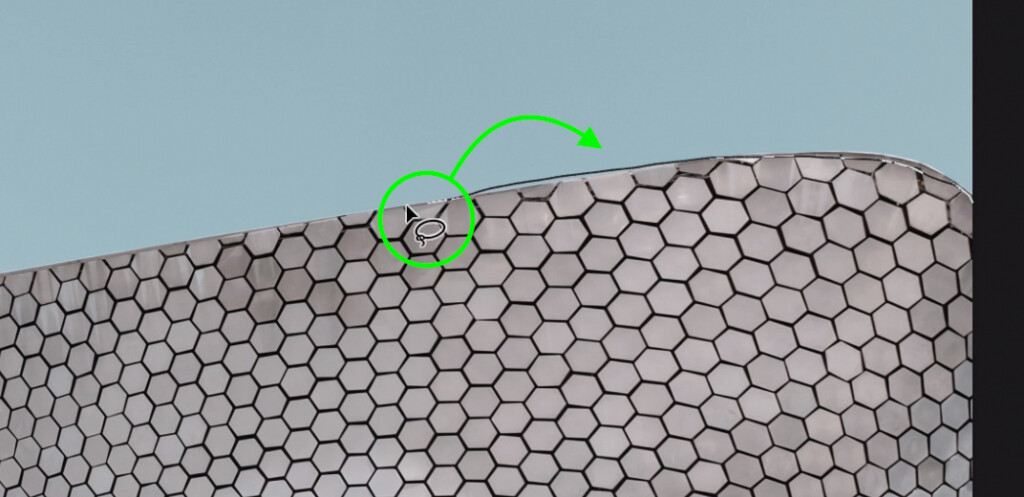
Continue along the edge you want to cut out until you loop back to the starting point of your path. Once at the starting point, click on your path to complete the Lasso selection. The path will change into marching ants to indicate a selection.
Note: If you lift your mouse before reaching the starting point, the selection will close with a straight line back to your starting point.
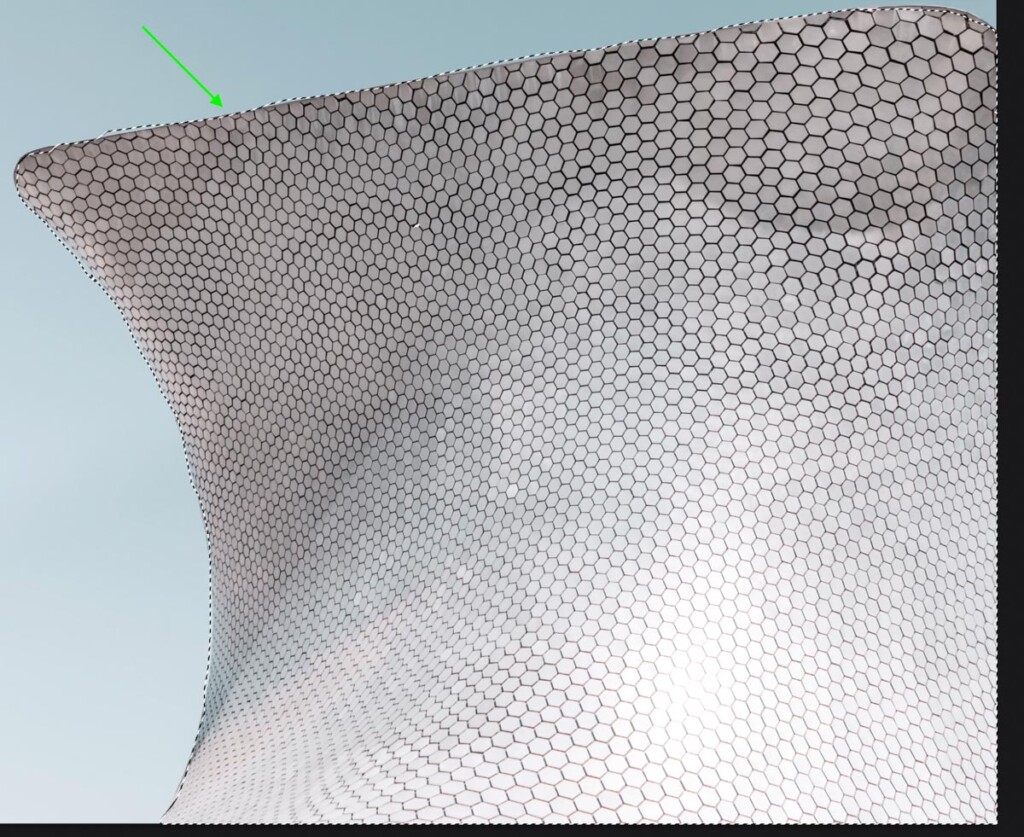
From here, you can delete the background, add your selection to a layer mask, or cut and copy your selection area for another image. Simply right-click inside the Lasso Tool path to see the options you have available to you!
How To Use The Polygonal Lasso Tool
The Polygonal Lasso Tool creates straight lines between each click of your mouse. If you need to cut out something that’s box-shaped or has flat edges, this is the Lasso Tool for you.
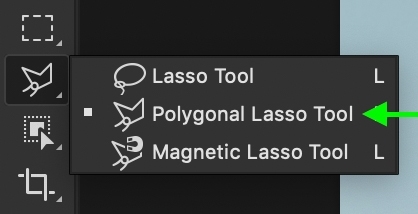
Step 1: Activate The Polygonal Lasso Tool
Activate the tool by clicking and holding on the Lasso Tool icon in your toolbar and selecting the Polygonal Lasso Tool. Alternatively, you can hold Shift + L to cycle through the Lasso Tools.
Step 2: Set The Mode And Feather In The Options Bar
Just like with the regular Lasso Tool, set the Mode to New Selection (or the other options as needed).
Then, set the Feather radius to how hard or soft the edge of your selection will be.

Step 3: Add Anchor Points To Draw Straight Lines
Click anywhere along the edge you want to cut out to begin the Polygonal Lasso path. Rather than the path following your cursor like before, now you’ll need to click to add anchor points for your path to follow.
Stretching out your path and clicking along any points where there’s a change in direction is all you need to do. Continue this process until you’ve gone around your object and back to your starting point.
Step 4: Close The Path To Create A Selection
Back at the starting point, click on your path to complete it and turn it into a selection. Just like before, your Lasso path is transformed into marching ants to indicate an active selection. From here, you can right-click inside the marching ants to see the selection options you have.
Note: If you want to get rid of an anchor point, simply press the Delete key, and Photoshop will delete your most recent anchor point. You can continue to press the delete key until you’re back to the point you want to work from.

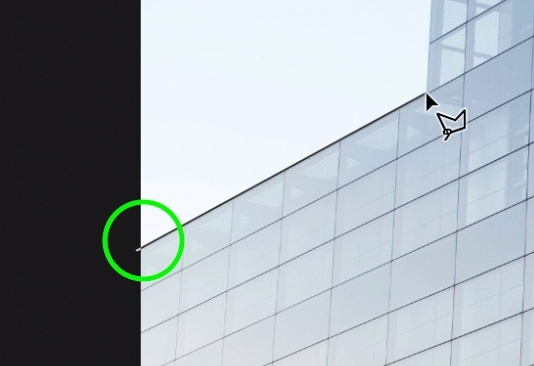
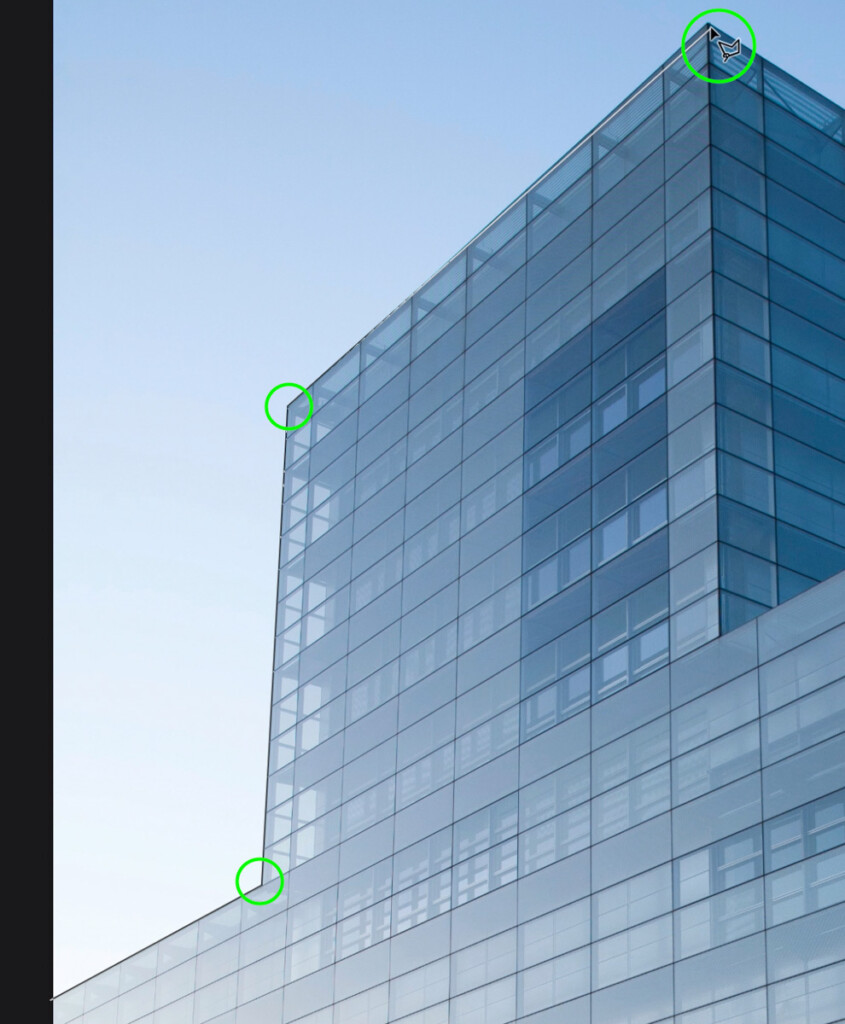
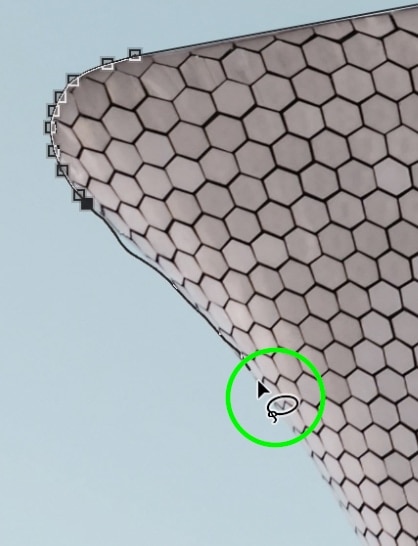
How To Use The Magnetic Lasso Tool
The Magnetic Lasso Tool is a bit more automated than the other options. As long as you’re going along a well-defined edge in your photo, this tool will automatically snap the Lasso Path to the edge. Best of all, this even works along complicated or uneven edges.
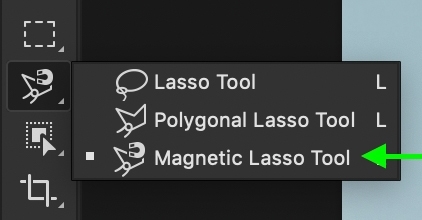
Step 1: Activate The Magnetic Lasso Tool
Click and hold on the Lasso Tool icon to find the Magnetic Lasso Tool in the fly-out menu. You can also press Shift + L to cycle through the different Lasso Tools.
Step 2: Adjust The Settings In The Options Bar
The Magnetic Lasso Tool has more settings that you’ll need to look into before you begin creating a selection. First, ensure you set the Mode to New Selection and the Feather Radius to 0px, as with the other Lasso Tools.
– Width

While using this tool, press the caps lock key to turn your cursor into a selection brush icon. Since the Magnetic Lasso will only lock onto an edge that’s found within the radius of this selection brush, changing the width value (size) will help to be more precise with your path.
– Contrast

The contrast value sets the minimum variance to define something as an edge in your photo. By default, this number is set to a low contrast value of 10%, meaning the Magnetic Lasso Tool will pick up on more subtle edges. If your image has an extremely well-defined edge, increasing your contrast value would ensure that Photoshop only selects that very obvious edge.
– Frequency

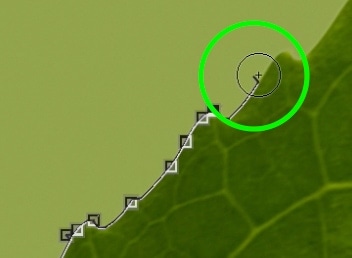
When you create a selection with the Magnetic Lasso Tool, it automatically creates a series of anchor points to base your path on. The frequency setting determines how frequently a new anchor point is created.
When you’re working with an edge that’s relatively complicated, increasing the frequency value can help the tool to be more accurate. A low frequency works well on simple, straight edges but will leave room for mistakes along any edges that change direction.
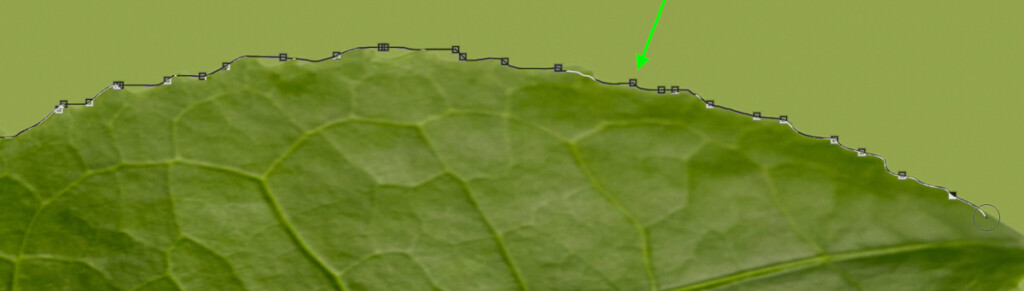
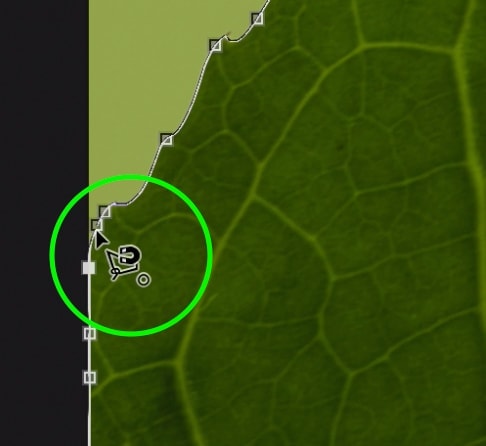
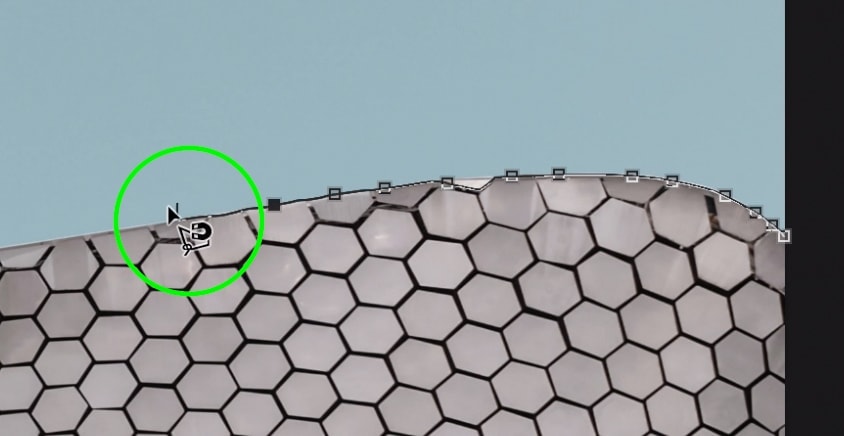
Step 3: Create Your Magnetic Lasso Selection
Then, click on the edge of your path and begin to drag your cursor along the edge. Press the caps lock key to reveal the selection brush icon to make it easier to select your exact edge.
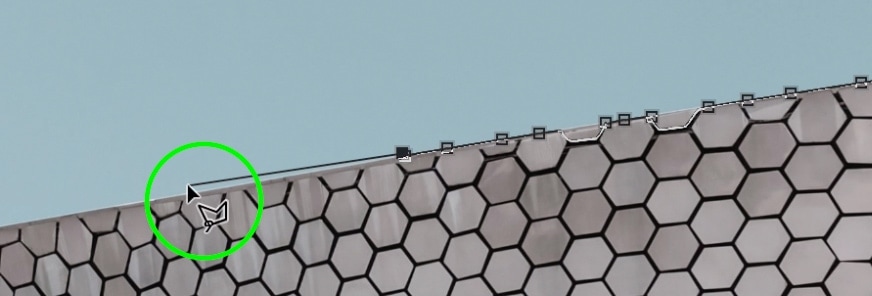
Move around your object to “magnetically” snap onto the edges. Continue around and click on the starting point to create a selection. From here, you can right-click on the inside of your path to select an option for your next step.
Note: If you make a mistake, press the delete key to delete your most recent anchor points. You can continue to press the delete key until you’re back to the point you want to work from.

How To Switch Between Lasso Tools While Creating A Selection
The best way to switch between the tools is to start with the Magnetic Lasso Tool. Then, hold Alt (Win) or Option (Mac) and click to switch to the Polygonal Lasso Tool. When you click to create an additional anchor point, it will switch back to the Magnetic Lasso Tool.
Continue holding the Alt or Option key as you click and add anchor points around your object to keep using the Polygonal Lasso Tool.
To switch to the regular Lasso, once again, hold the Alt or Option key, but this time, click and hold your mouse down. This will switch to the Lasso Tool and allow you to draw a freehand lasso selection. Once you let go of the Alt or Option key, you’ll be switched back to your Magnetic Lasso once again.
The Lasso Tool is one of the most basic and easy-to-use selection tools in Photoshop. By allowing you to make freehand selections, it feels a lot more intuitive than other selection methods in Photoshop.
The downside is that this more casual style of path creation allows for more errors in your paths. That’s why the Lasso Tool is best used for very fast selections or if you don’t need to be extremely specific. Now that you’ve learned how to use the Lasso Tool in Photoshop, check out these other 5 tools for making perfect selections in Photoshop!
Happy Editing!
Brendan 🙂


