
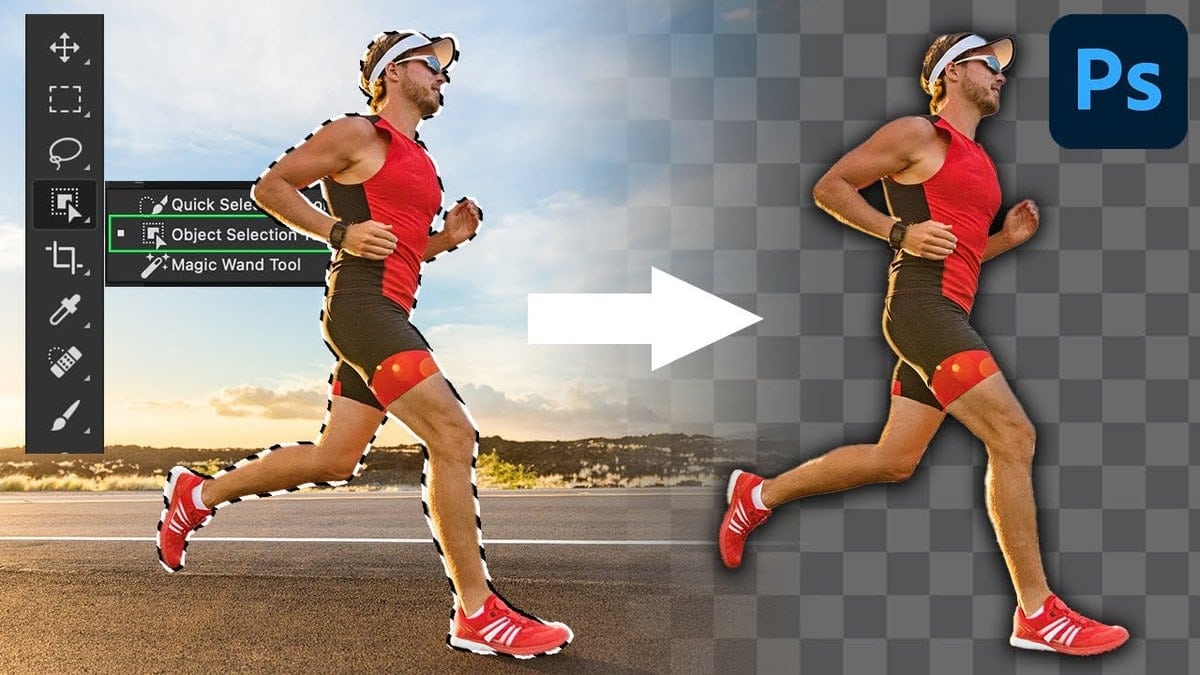

Once you learn how to use the Object Selection Tool in Photoshop, you will be able to remove backgrounds, add selective edits, and so much more in no time. While the tool is relatively straightforward, there are a few tips to create a more accurate selection.
Throughout this tutorial, you’ll not only learn how to use this tool at the most basic level but also understand each of the settings within the tool. This way, you’ll always end up with the perfect cut-out for your images.


Video Tutorial
What Is The Object Selection Tool In Photoshop?
The Object Selection Tool automatically selects objects within a defined region. You can find it in the Toolbar or by pressing the shortcut key, W.
It has both a rectangle and lasso mode that you can use to draw a selection around your subject. Then, after letting go of the mouse, the selection area will snap to any defined edges and select your subject. This tool works best with well-defined edges that have a good amount of contrast.
How To Use The Object Selection Tool
Step 1: Select The Object Selection Tool (W)
Select the Object Selection Tool (W) in the Toolbar.

Step 2: Choose Your Desired Tool Settings
One of the first things you can choose is the Object Selection Tool’s mode. You can either select the Rectangle or the Lasso as the way you want to select an object.

To the left of the selection mode, you’ll see four icons. These are the Selection Options, and they are: New selection, Add to Selection, Subtract from Selection, or Intersect with selection.

- The New Selection option is the default option. This is the one you’d use to make your initial selection of an object.
- The Add to Selection option is the one that you’d use to add to an existing selection.
- The Subtract from Selection option will remove parts from an active selection.
- The Intersect with Selection option would allow you to create an intersection between two selections.
Further down the Options Bar, you’ll see a couple of other settings.

- If you want to create a selection based on all the layers in your document, then you can turn on Sample All Layers. In most cases, this isn’t necessary, so you can leave it off.
- The Enhance Edge option slightly smooths the edges of your selection for a refined look.
- The Object Subtract option allows Photoshop to use its AI to subtract areas from your initial selection. If the Object Subtract option is turned off, the Object Selection Tool behaves like the Lasso Tool or the Marquee Tool. This means it will only affect the pixels you manually create a selection around. The Object Subtract tool should always be left on.
- Select Subject uses Photoshop’s AI to automatically detect the most prominent object in an image; then, it creates an active selection of that object.
- The Select and Mask option simplifies the process of cutting your subject out of an image. It is used to help refine the edges of a selection or even make hair look more realistic.
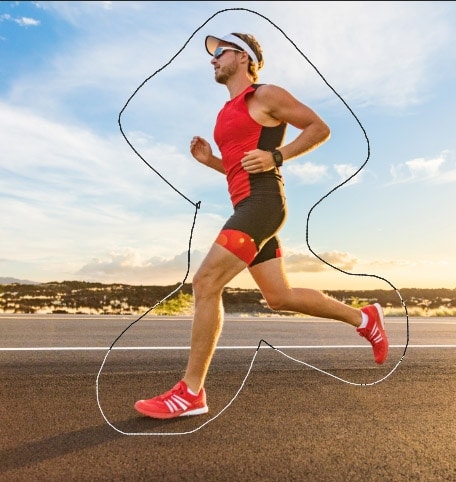
Step 3: Click And Drag To Create A Selection Around Your Subject
Once you’ve chosen your desired settings, click and drag a block around your subject. When you release the mouse, Photoshop’s AI will snap the selection to the edges of the subject.
Step 4: Add To The Selection Using The Shift Key
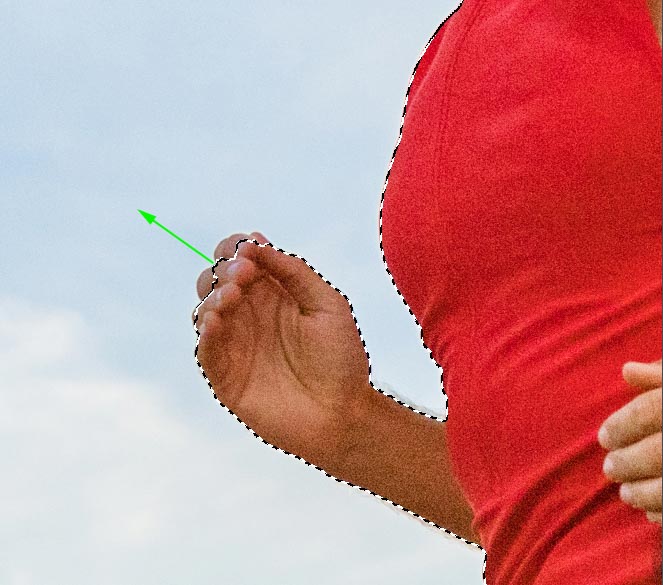
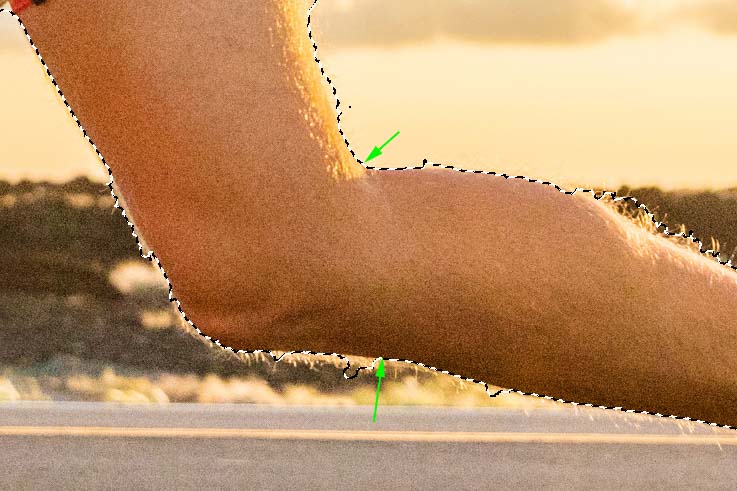
To begin adding to the selection, select the Add to Selection option in the Options Bar. You can also hold down Shift to activate it. Then, go to your image and refine it by drawing a rectangle or lasso mode selection around the unselected area. This will allow you to expand the selection to cover the area of your subject that was not initially selected.

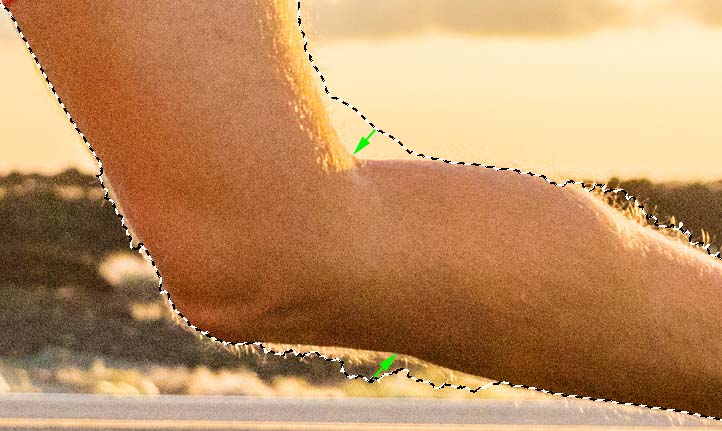
Step 5: Subtract From The Selection Using Alt/Option
For the areas of your selection that need to be reduced, select Subtract from Selection or hold down Alt (Win) or Option (Mac). This will allow you to draw over the necessary areas to subtract from the selection.

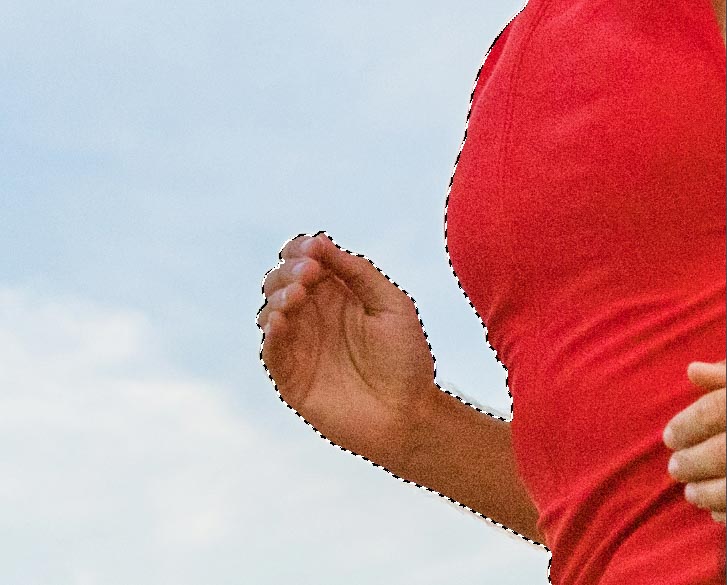
You will now have a selection around your subject that you can use as needed.
The Difference Between Rectangle And Lasso Mode
As the name suggests, the Rectangle mode allows you to create a rectangular selection around an object in an image. The Lasso mode is used to create free form around your image.
The Rectangle Mode works well if you have a simple background but doesn’t work well with complex backgrounds since the defining area is much larger. The Lasso Mode is great for both simple and complex backgrounds since the defining area can be closer to the edge of the subject. This makes it easier for Photoshop to know exactly what you want selected.
Both modes work well for cutting out objects in your images, but switching up the mode may be the solution if you have trouble getting the perfect selection.
So now you know how the Object Selection tool works, how to adjust its settings, and how to use it in Photoshop! This helpful tool is one of the easiest ways to cut out images in Photoshop and will save you a ton of time. Now, to help improve your selection skills in Photoshop, check out these 5 best tools for removing backgrounds in Photoshop!
Happy Editing!
