
There are a few different ways you can learn how to blur edges in Photoshop. Depending on the look you’re going for, you can use blur filters or solid colors to create the effect. Either way, the process doesn’t take long, and a blur can be added in no time.
Here are three different ways to blur the edges of a photo in Photoshop!
Method 1: How To Blur Edges In Photoshop Using A Feather Selection
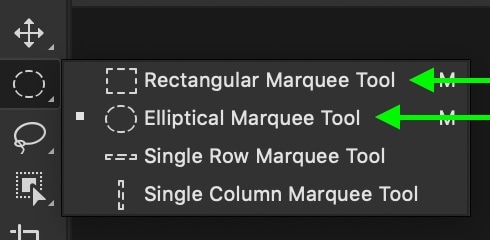
Step 1: Activate The Elliptical Or Rectangular Marquee Tool
Select a Marquee Tool based on the shape of the blur you want on your image. For a circular blur, select the Elliptical Marquee Tool. For a rectangular blur, select the Rectangular Marquee Tool.
Step 2: Set The Feather Amount To Determine The Blur
In the Options Bar, set a feather radius to dictate the blur. If you aren’t familiar with feathering in Photoshop, try to think of it as the softness of an edge. The more feathering you have, the softer (or more blurred) your edge will look.
For a more subtle blur to the edge of your photo, try a radius of 25px. If you want to add a very heavy blur, try a radius of 75px or higher.

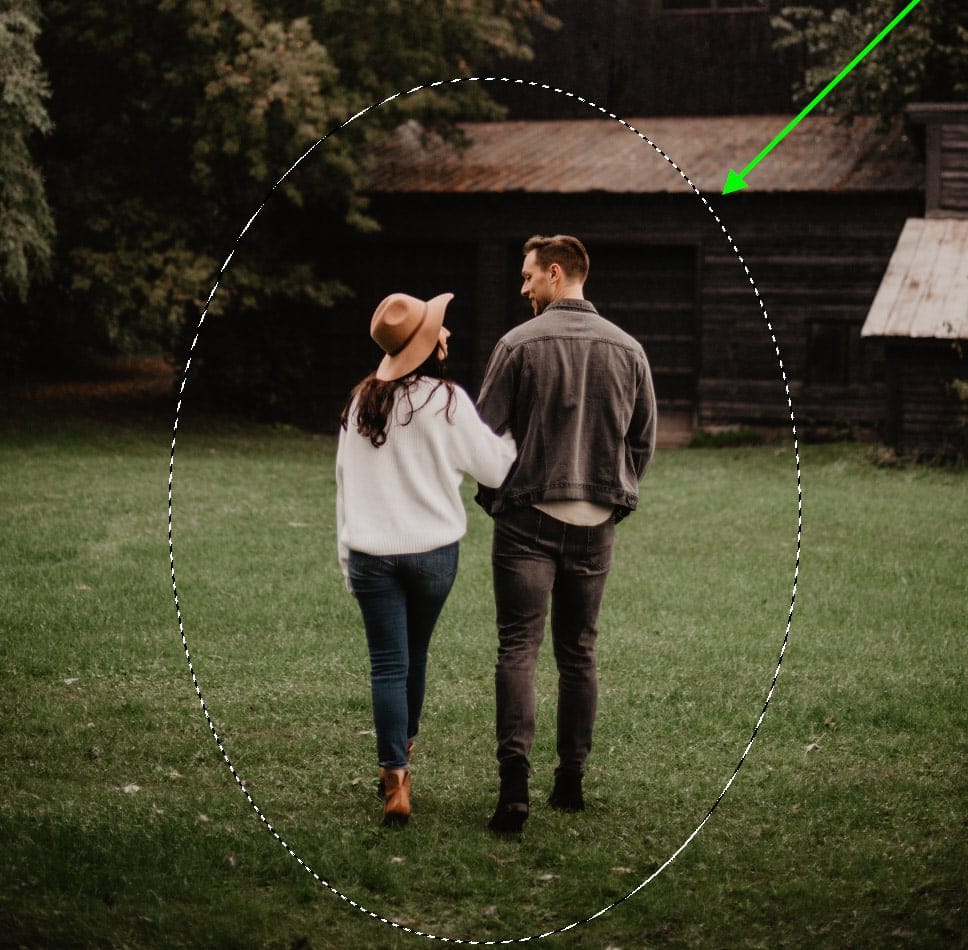
Step 3: Click And Drag On The Canva To Create A Selection
With your feather radius set, click and drag out your Marquee Tool around your subject. Remember, anything outside of this selection will turn into a solid color! For my photo, I will create the selection around my subject’s body.
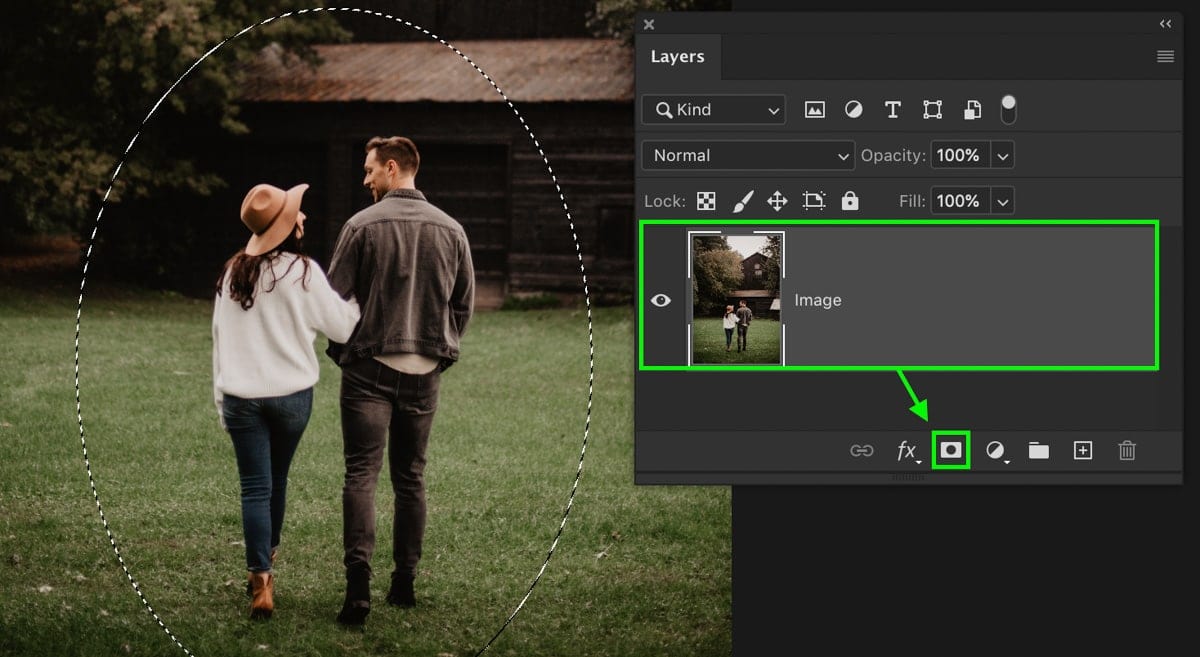
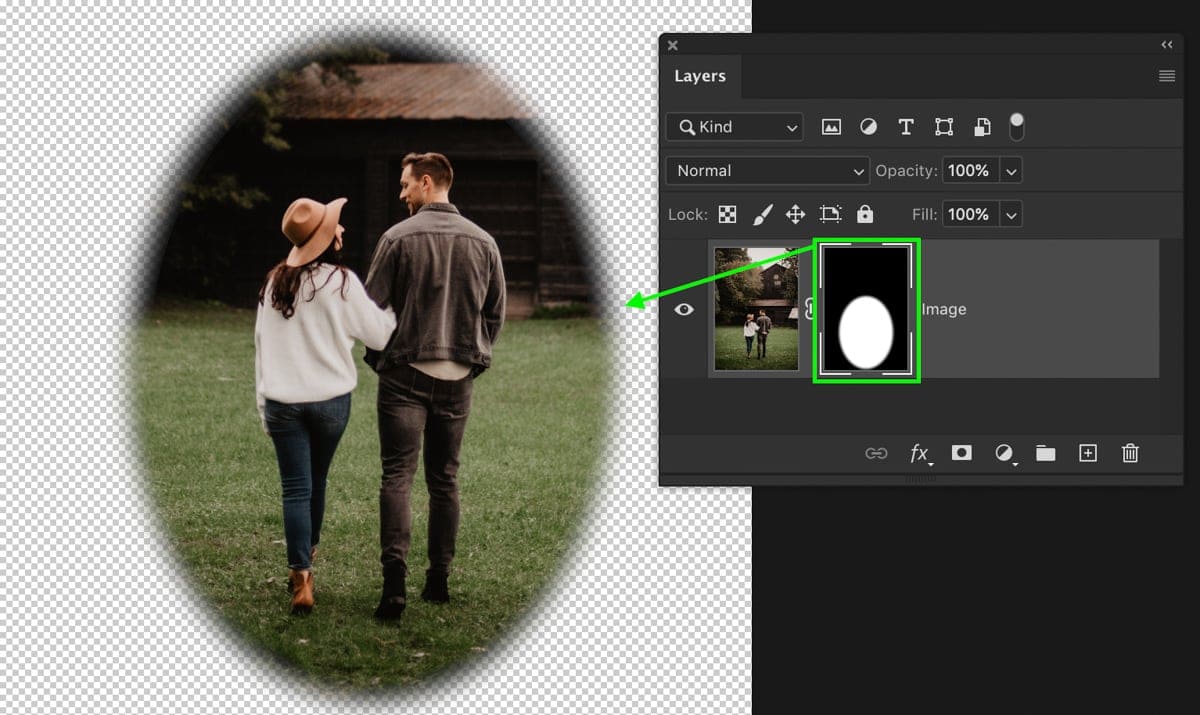
Step 4: Click The Add New Layer Mask Button In The Layers Panel
Next, add a layer mask by clicking on the layer mask icon.
At this point, you’ll have successfully added a blur to the edges of your photo. Now it’s time to choose the color around your background!
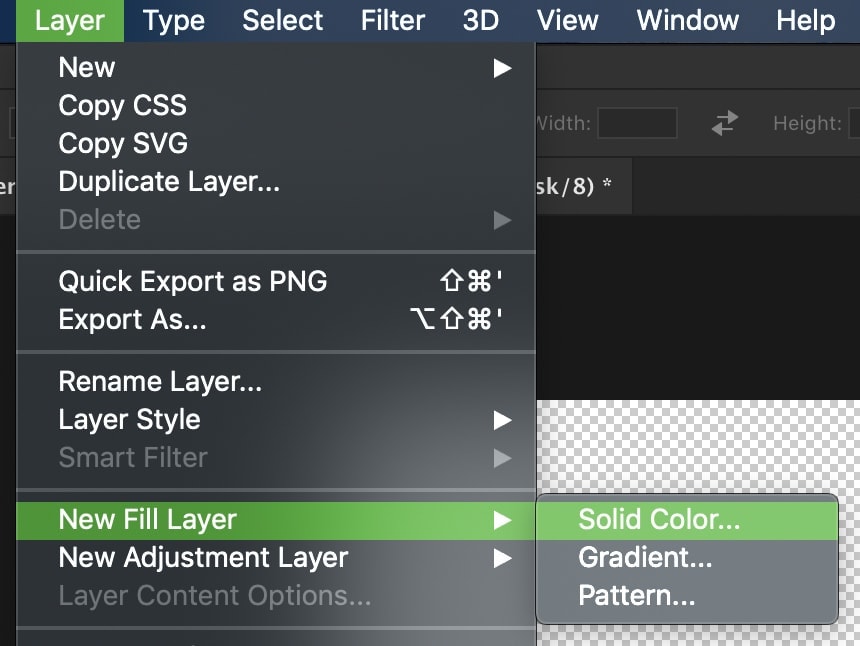
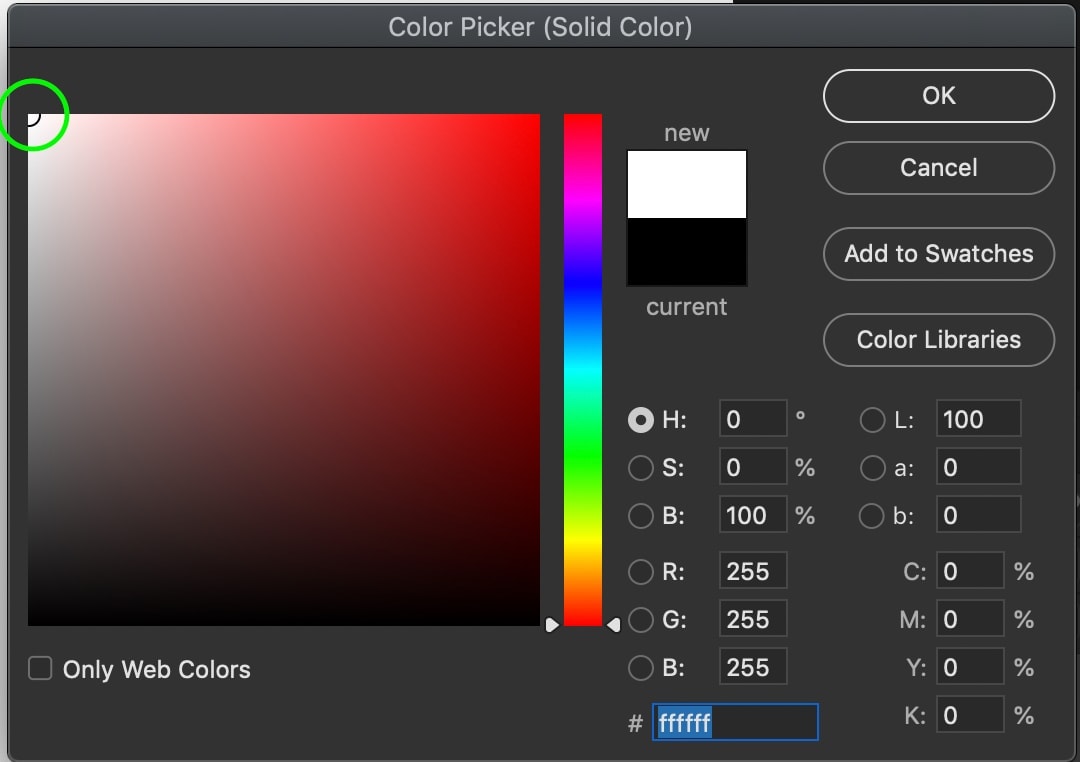
Step 5: Go To Layer > New Fill Layer > Solid Color And Select A Color
Go up to Layer > New Fill Layer > Solid Color. Rename the layer to anything you’d like and click OK.
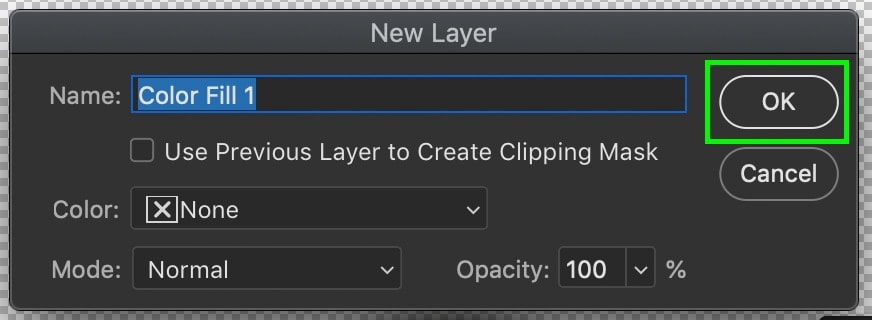
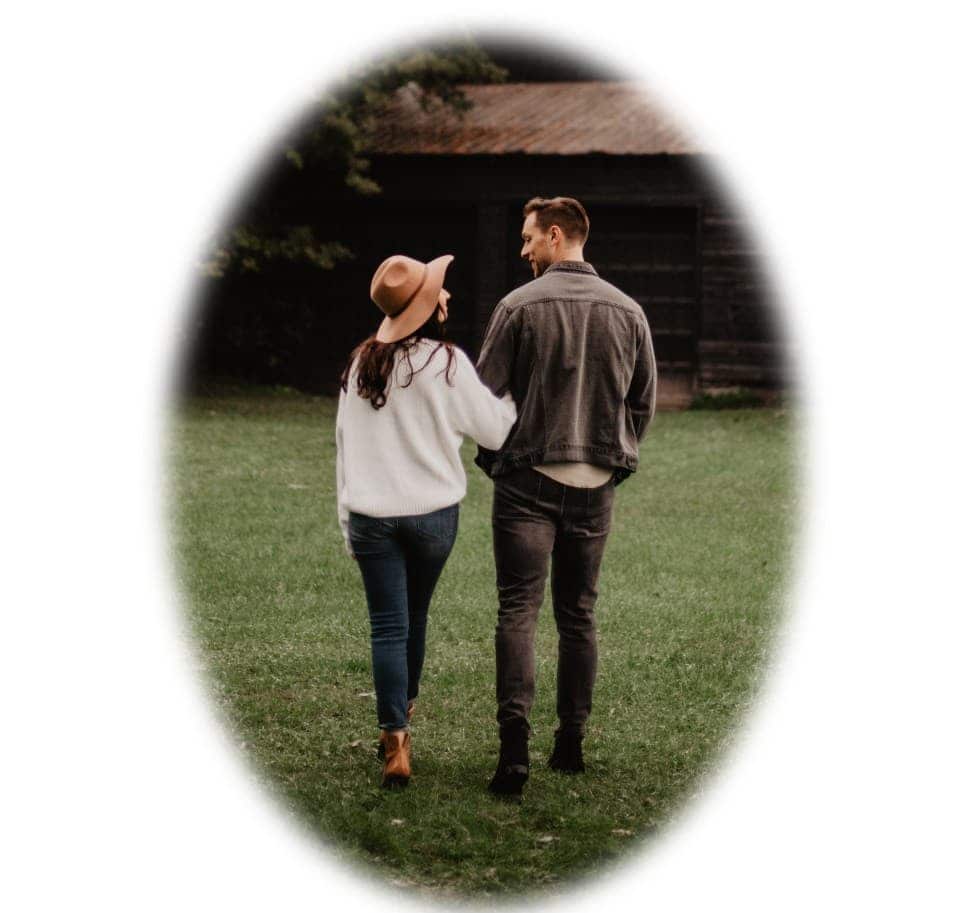
Now, choose a color to have as your background. For now, I’ll choose white, but you can change this at any time!

With your new color fill layer created, drag it below your image layer to complete the blur effect.
Method 2: How To Blur Edges In Photoshop Using Filters
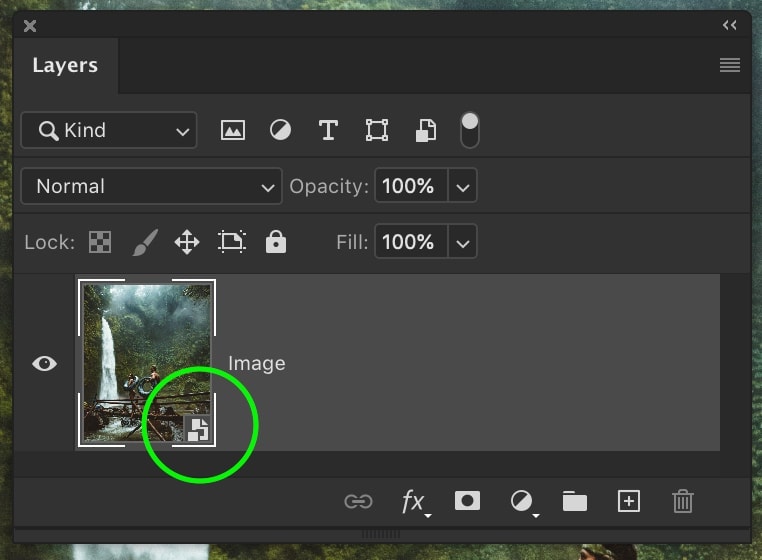
Step 1: Right-Click The Layer And Select Convert To Smart Object
Select the image you want to blur the edges of in your Layers Panel. Next, convert it to a smart object by right-clicking and selecting Convert to Smart Object.

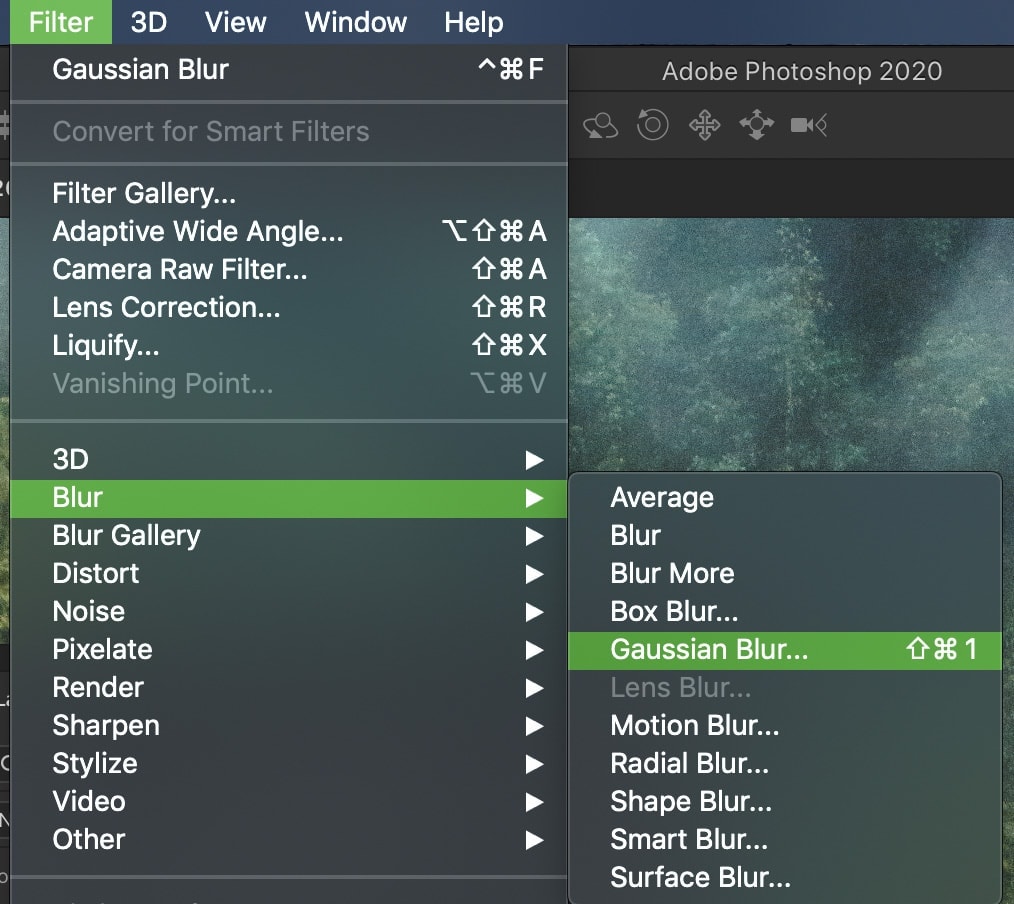
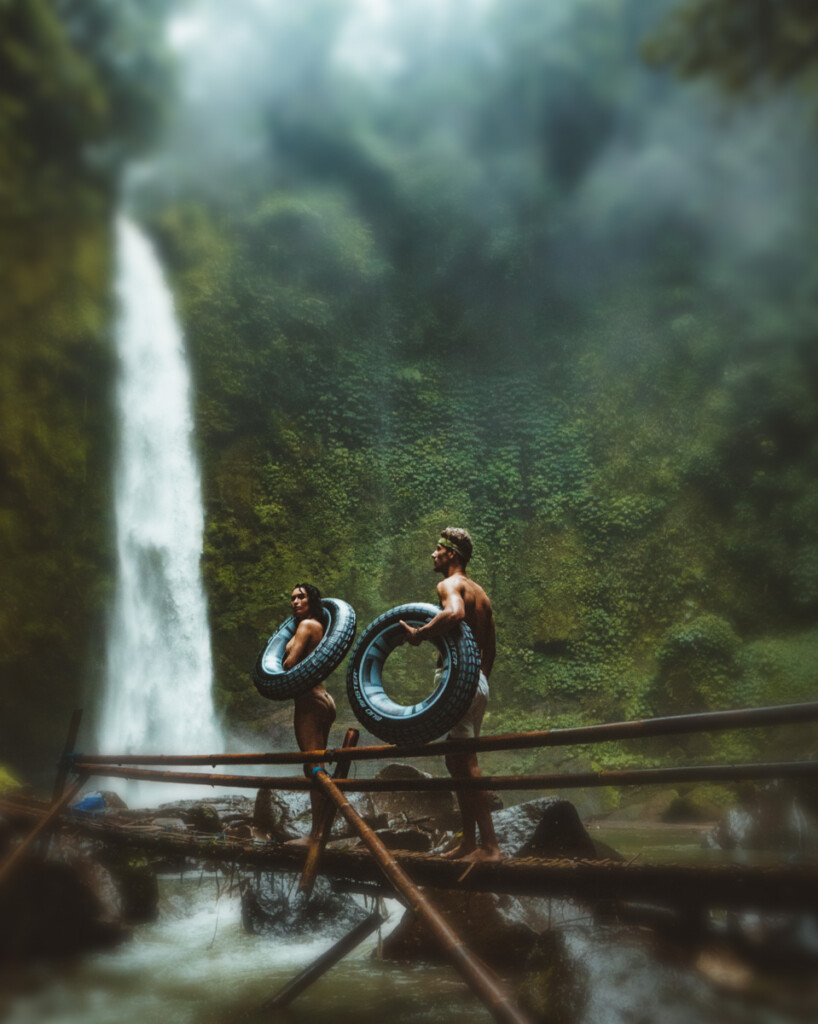
Step 2: Go To Filter > Blur > Gaussian Blur
To add your blur effect, go up to Filter > Blur > Gaussian Blur.
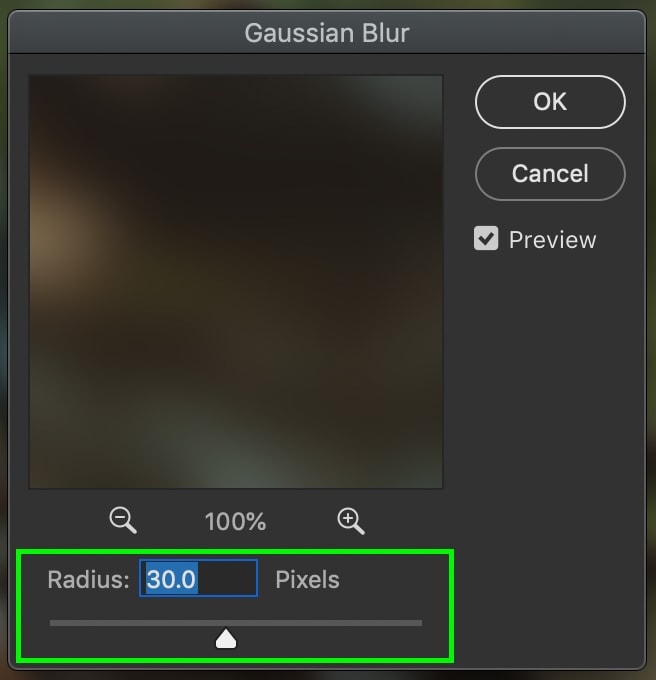
Set a blur radius that fits the look you’re going for. If you want to have a heavier blur around the edge of your photo, set the radius higher. Since I want a mild blur, I’ll set a radius of 30px. Click OK to commit to your changes.
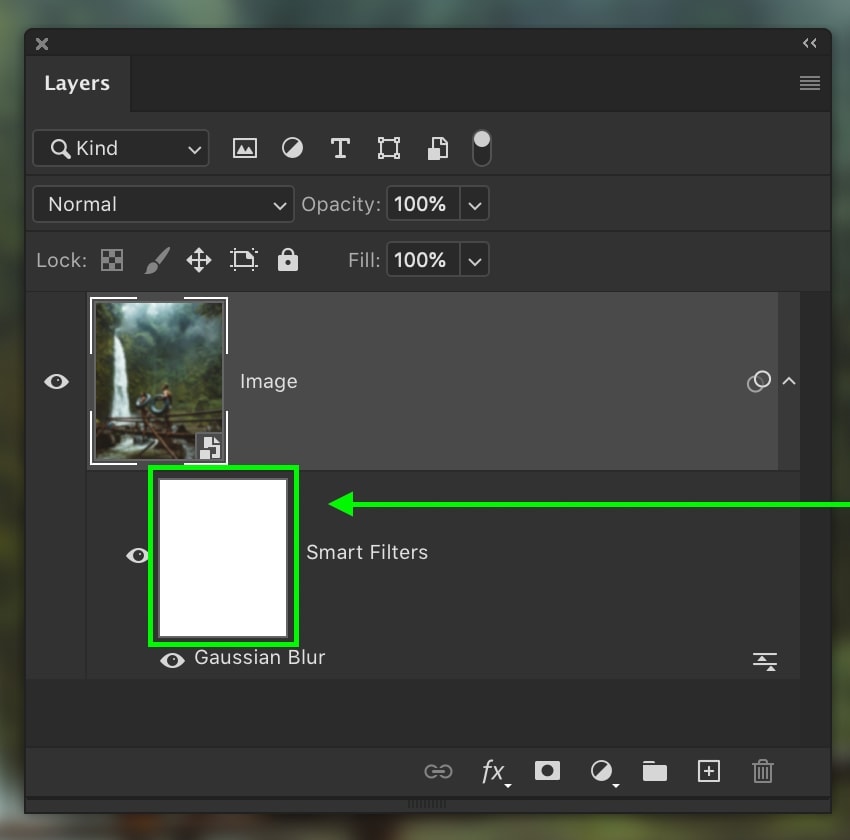
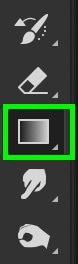
Step 3: Select The Smart Filter Layer Mask And The Gradient Tool
If you take a look at your Layers Panel, you’ll now see filters underneath the image layer with a smart filters layer mask. This layer mask is the key to isolating the blur from the edges of your photo. Click on the smart filters layer mask and select the Gradient Tool (G).
Make sure you’re using a Foreground to Transparent gradient and have black set to your foreground color. Lastly, make sure you’re using a Radial Gradient for the best result.

With the smart filters layer mask selected, click and drag out a gradient around your subject. This will feather the blur and limit it to the edges of your photo! You can go back and adjust this at any time with the smart filter layer mask.
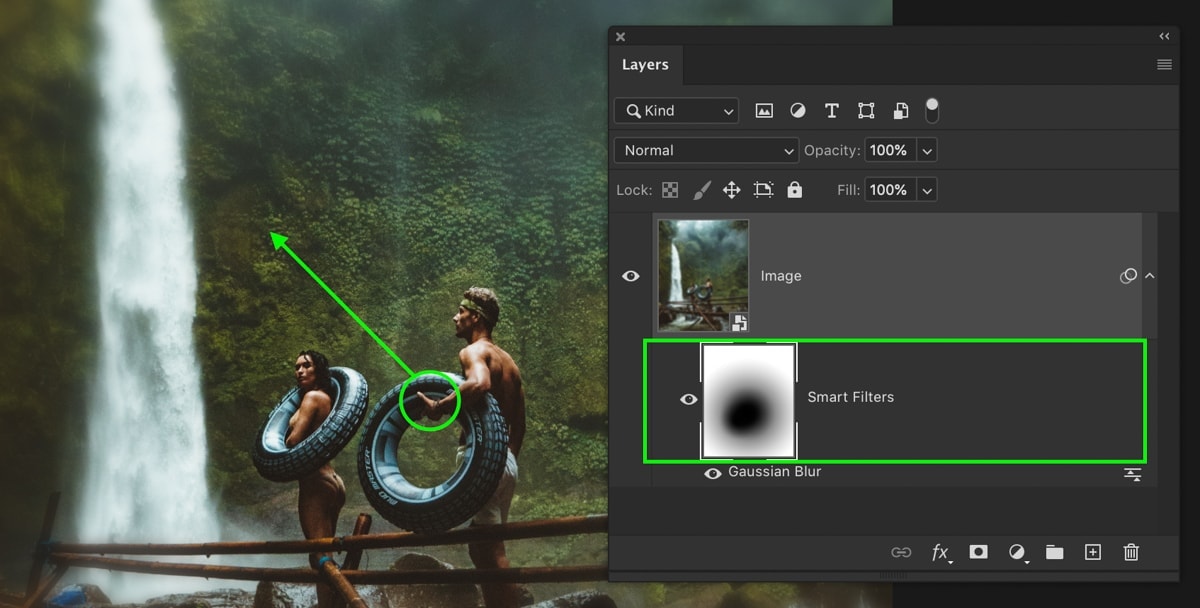
If you need to adjust the blur intensity, just double-click on Gaussian Blur under your image layer. This will open up the Gaussian Blur adjustment window and allow you to set a new radius.
Method 3: How To Blur A Single Edge In Photoshop
Step 1: Go To Layer > New Fill Layer > Solid Color And Select A Color
Create a new color fill layer by going to Layer > New Fill Layer > Solid Color. Rename the layer if you wish and click OK. Now, choose a color you want to show behind the blurred edges of your photo.
With the color fill layer created, drag it underneath your image layer in the Layers Panel.
Note: You can use the same process but add a Gaussian Blur (as done above) to the image layer instead of using a colored fill layer and then use the layer mask and Gradient Tool to remove the blur in different areas.
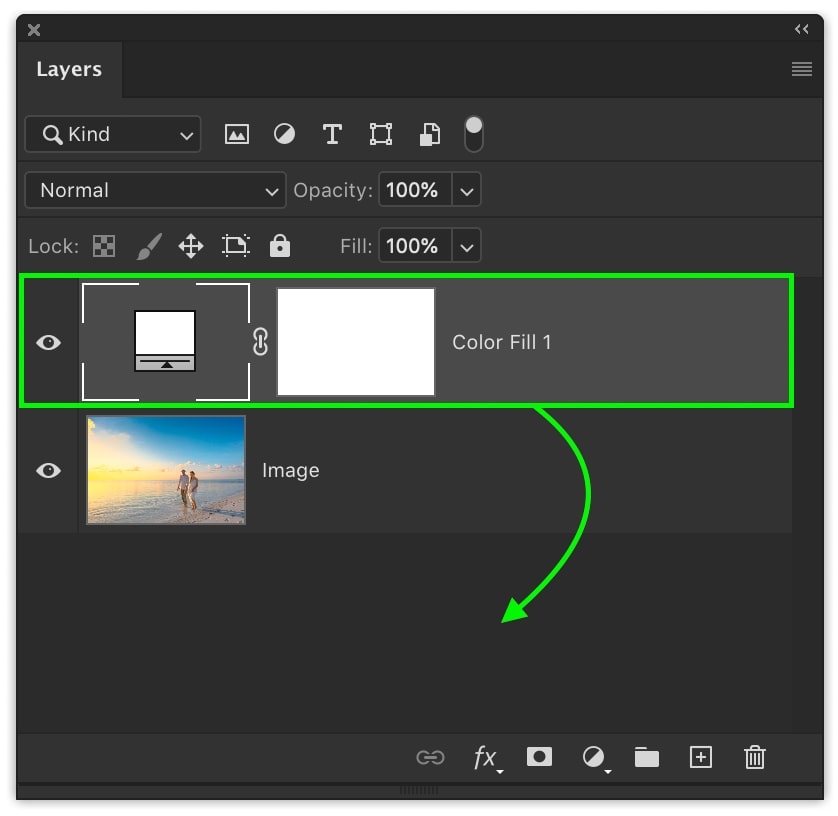

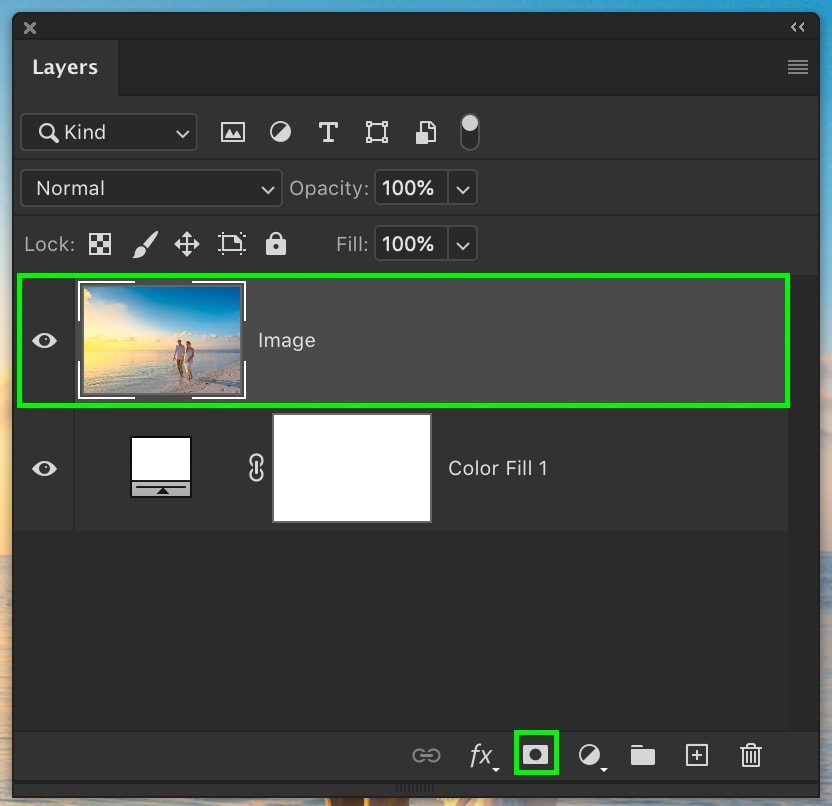
Step 2: Add A Layer Mask To The Image Layer
Select your image layer and add a layer mask.
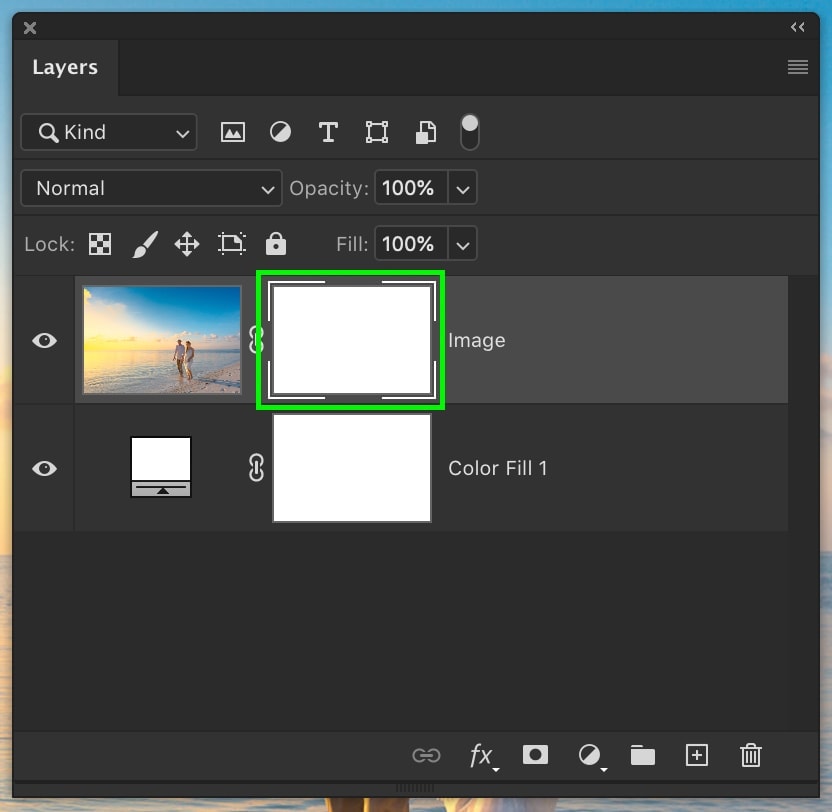
Step 3: Select The Gradient Tool And Add A Linear Gradient To The Layer Mask
Grab your Gradient Tool by pressing G and selecting a foreground to transparent gradient. Make sure you’re using a Linear Gradient and your foreground color is set to black.

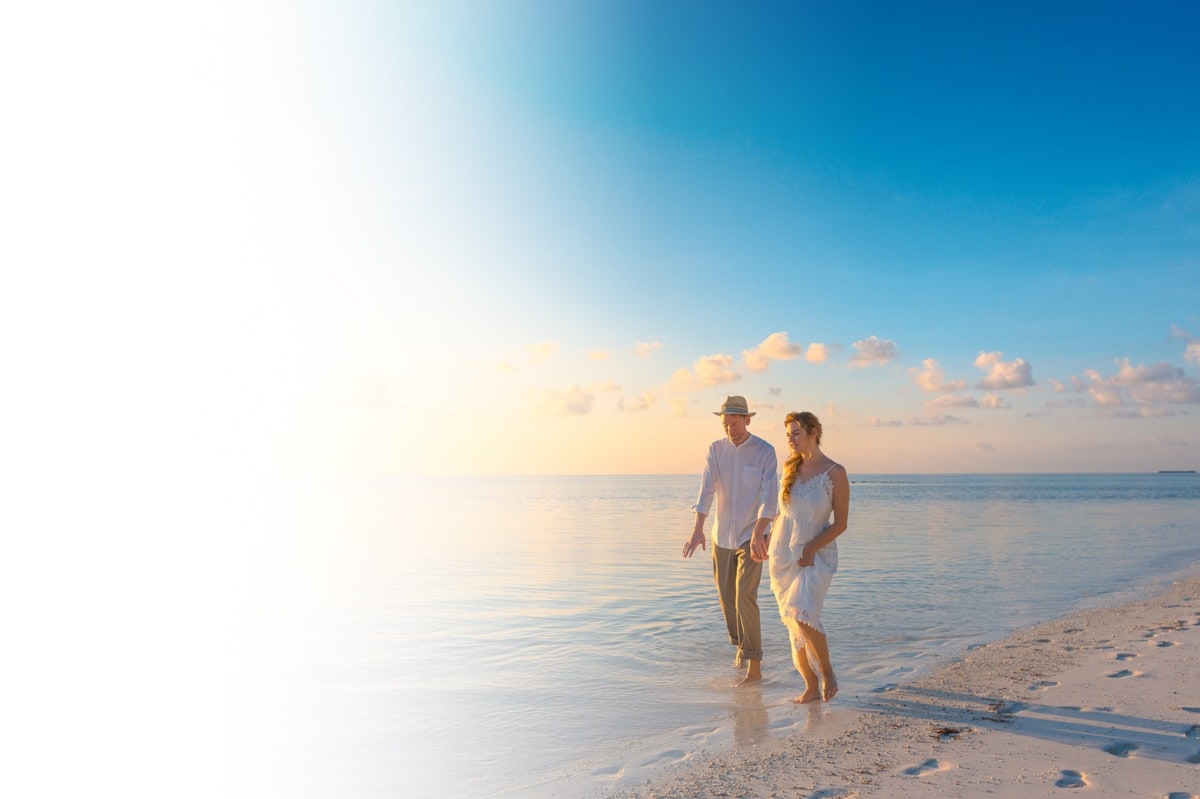
Click on your layer mask, and now click and drag your gradient out from the edge you want to blur. You can continue this as many times as you’d like until you get the blur effect you’re looking for!
There are a few different ways you can blur the edges of a photo in Photoshop. Fortunately, all the methods we discussed here are straightforward and can be done in just a couple of minutes. Even if you’re brand new to Photoshop, adding a blur to the edges of a photo is a great way to get familiar with layer masks, smart filters, and the gradient tool in Photoshop!
– Brendan 🙂


[…] my layer has become blurred, but there’s no way to re-edit my blur […]
[…] into blurry images. If your shutter speed is slightly too slow, you’ll notice a bit of motion blur in all your handheld […]