fbpx

How To Change The Color Of Any Layer In Photoshop


There are many different types of layers in Photoshop that you may want to change the color of. Since each type of layer requires something different for changing the color, you’re not alone if you feel a bit overwhelmed. Luckily in this tutorial, you’ll learn the easiest ways to change the color of any layer you’re working with in Photoshop. To start things off here’s the most basic way of changing the color of a layer.

To change the color of a layer in Photoshop, create a Hue/Saturation Adjustment Layer and place it above the layer you wish to edit. Now right-click on the adjustment layer and press Create Clipping Mask. Next, opening the Hue/Saturation options, adjust the Hue Slider to change the color of your layer.

You will learn more about the Hue/Saturation adjustment later in this post; however, there are some easier color-changing methods available. For text or shape layers, changing the color with the color fill settings will provide a much better result.

So, let’s get started with changing the color of an image layer first!

How To Change The Color Of An Image In Photoshop

In this example, I will show you how to change the color of an object in your image selectively. By selecting the proper color channel, this process is extremely fast and beginner-friendly!

Step 1: Create A Hue/Saturation Adjustment Layer

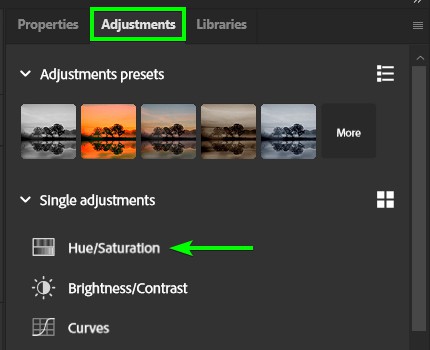
To start things off, create a new Hue/Saturation Adjustment Layer and place it above your image layer. This adjustment layer can be made via the Adjustments Panel or via the adjustment layer options at the bottom of the Layers Panel.

Step 2: Add A Clipping Mask To The Adjustment Layer

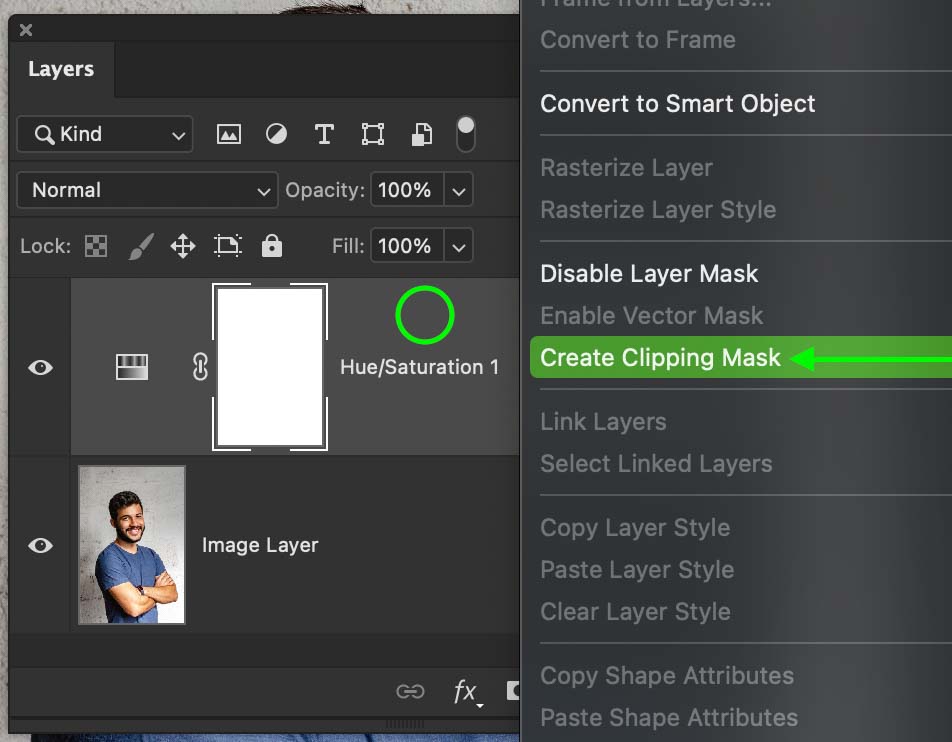
A clipping mask will ensure your color-changing adjustments will only affect the image layer directly below it. This becomes very important when you have multiple layers in your project!

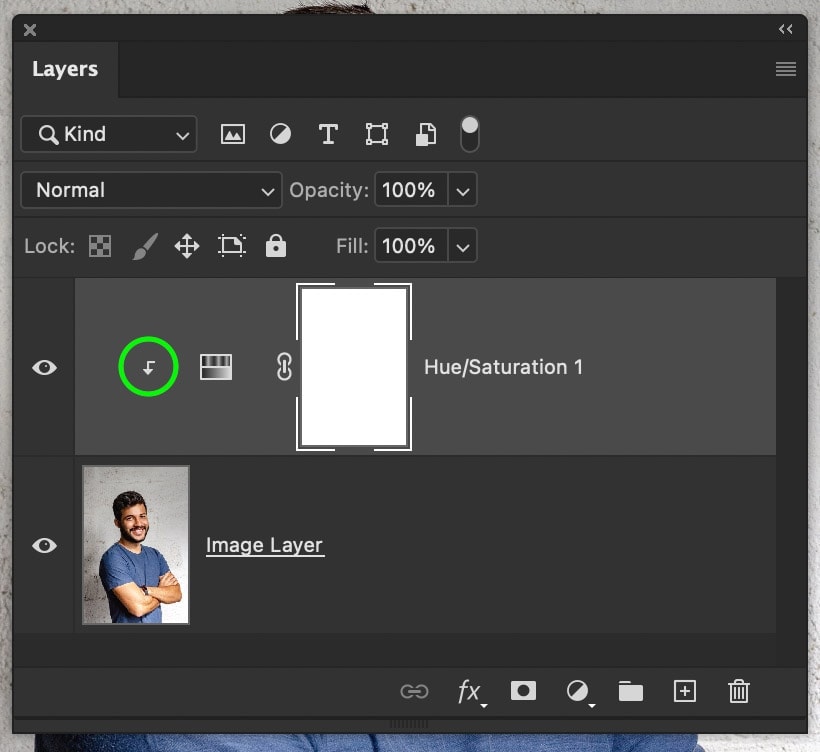
To create a clipping mask, right-click on the Hue/Saturation Adjustment and select “Create Clipping Mask.”

Once applied, you will see a right-angle arrow pointing down to the image layer. This means the clipping mask is active, and your adjustment will only affect the one layer it’s clipped to.
Step 3: Find The Color Channel You Wish To Edit

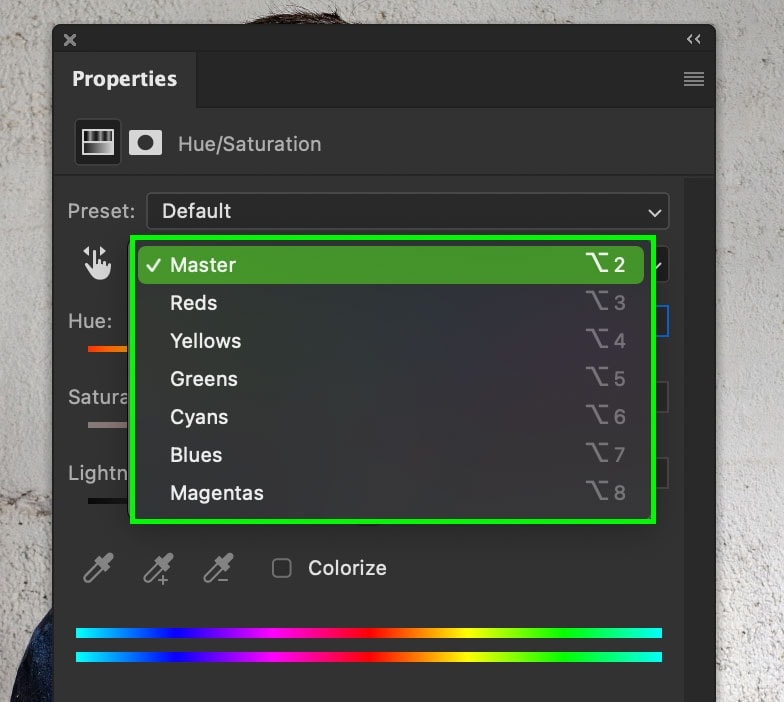
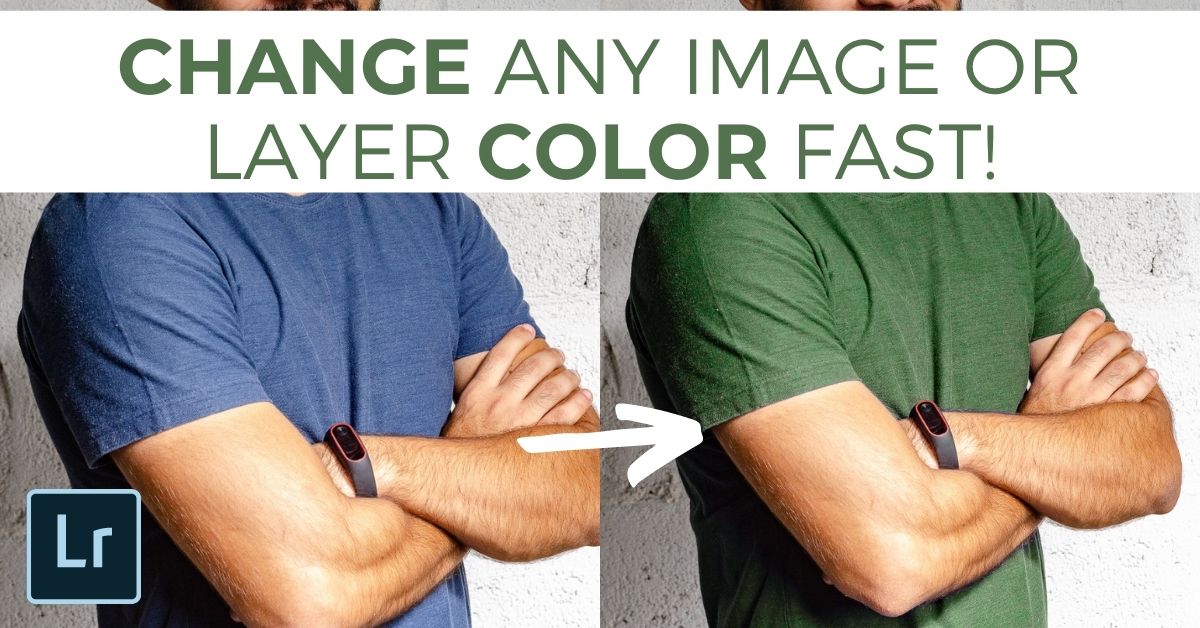
Now let’s start changing some colors! Before you start, you need to figure out which color channel the colors you want to change are located in. In this example, I want to change the color of his blue shirt. That means it’s a safe bet to assume I’ll need to use the Blue color channel.

Double-clicking on the Hue/Saturation Adjustment to open the adjustments options, click on the Channels option. Then locate the channel that your color fits in. In my example, I will select blue (the color of the shirt), but this may be different for your image.
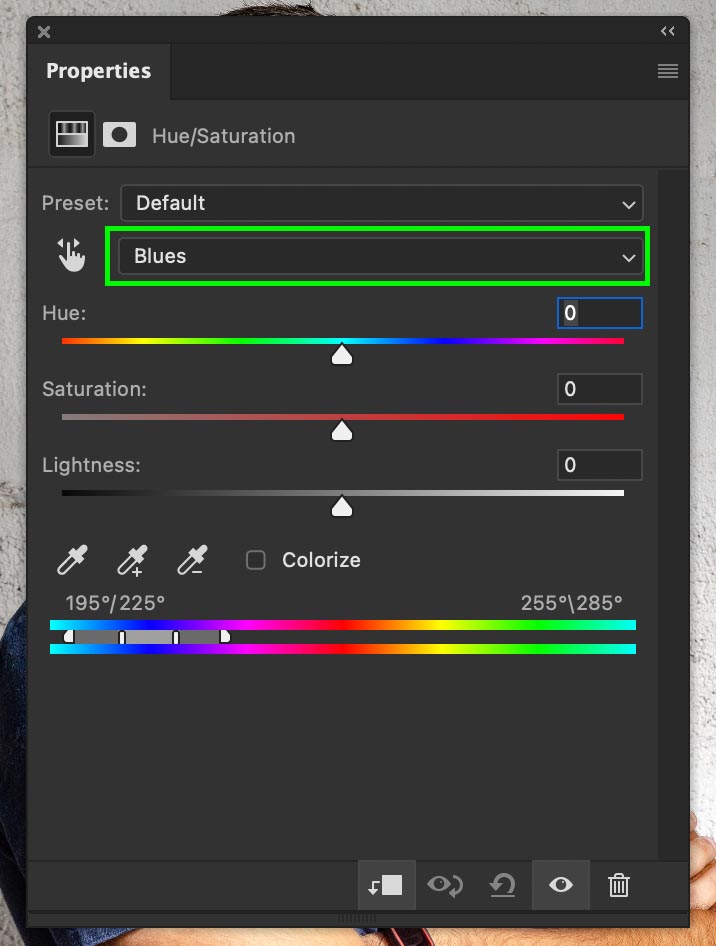
Once you’ve selected a color channel, you can make sure that it is correct by bringing the Saturation slider to +100. Anywhere that you see becoming extremely saturated will be affected by your hue adjustments in the next step.

As you can see in my image, the entire shirt looks very saturated, meaning I am in the perfect color channel! Once you identify that you’re in the correct color channel, reset the Saturation back to 0.

Step 4: Adjust The Hue Slider To Change The Color

To change the color of your selected color channel, adjust the hue slider to your desired color. This will change the color of your layer to a completely different hue. For example, since I have the blue channel selected, I am only changing the colors of the blue hues in the image.
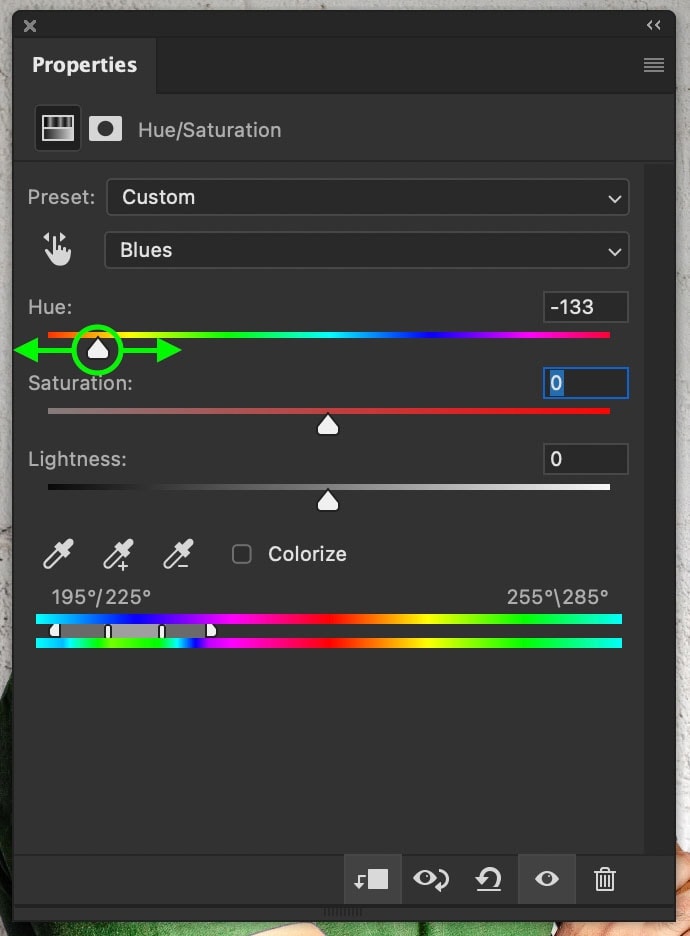
This way, all the other colors in the background and his skin tones remain untouched!

Step 5: Adjust The Saturation And Lightness To Refine The Color

After you settle on a new hue, you can further change the color of your image layer with the Saturation and Lightness sliders.

The Saturation slider will make your colors appear richer by increasing it.

Meanwhile, the Lightness slider will make colors look brighter or darker. This can be helpful if you want a more pastel tone in your photo.
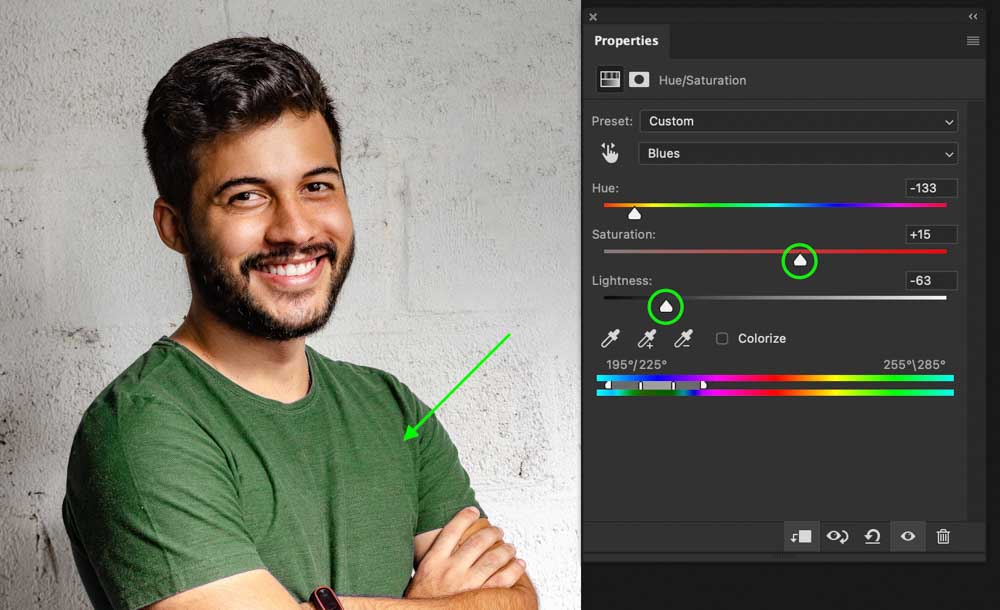
If you’re happy with the color after your hue adjustment, then great! You can leave these two sliders untouched.

You’re Done!

With those five steps, you have successfully changed the color of an image layer in Photoshop. Since you can target your individual color channels, it’s easier than ever to change colors selectively in your photo. This technique works exceptionally well for changing the color of clothing, cars, or other objects in your photos.

In some situations, you may run into trouble and change colors that you didn’t want to edit. For example, if you were editing a blue shirt against a blue background, both of those colors would change. This requires a different technique using selections and layer masks to solve the problem. I outline everything you need to know about that in this tutorial.

Are you looking to change black to color in Photoshop? Check out this post to learn how!

How To Change The Color Of A Shape Layer In Photoshop

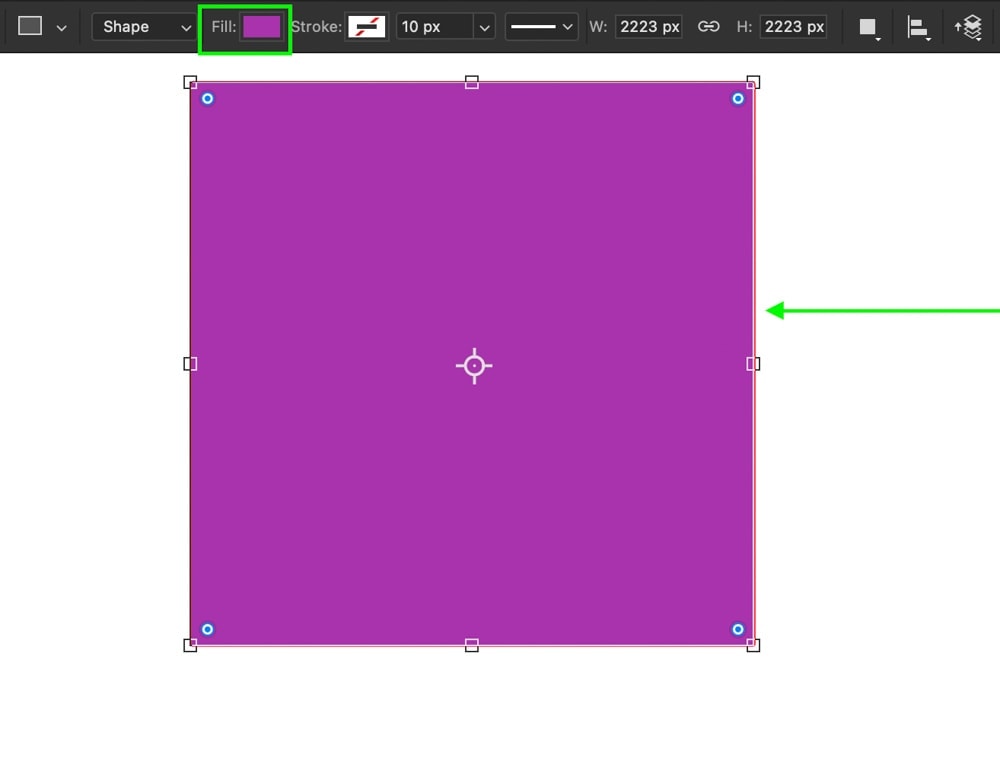
To change the color of a shape layer in Photoshop, select your shape layer and activate the Shape Tool (U). In the upper settings bar, click on the “Fill” option and choose a new color from the provided swatches. Your new selected color will be applied to the shape to change the color.

Let’s break that down more in-depth.

If you haven’t already done so, you need to create a shape layer. After selecting one of the Shape Tools (U), click and drag on your canvas to create a new shape.

Now make sure that the shape layer is selected in the Layers Panel.

With the Shape Tool still active, go to the upper setting bar and click on the “Fill” option. The fill controls the color of any shape layer you work with in Photoshop.

In the fill panel that appears, you can choose between any of the preset swatches for quick color changes.

However, if you want to change the color of your shape layer to something more specific, then click on the color picker icon in the right corner.

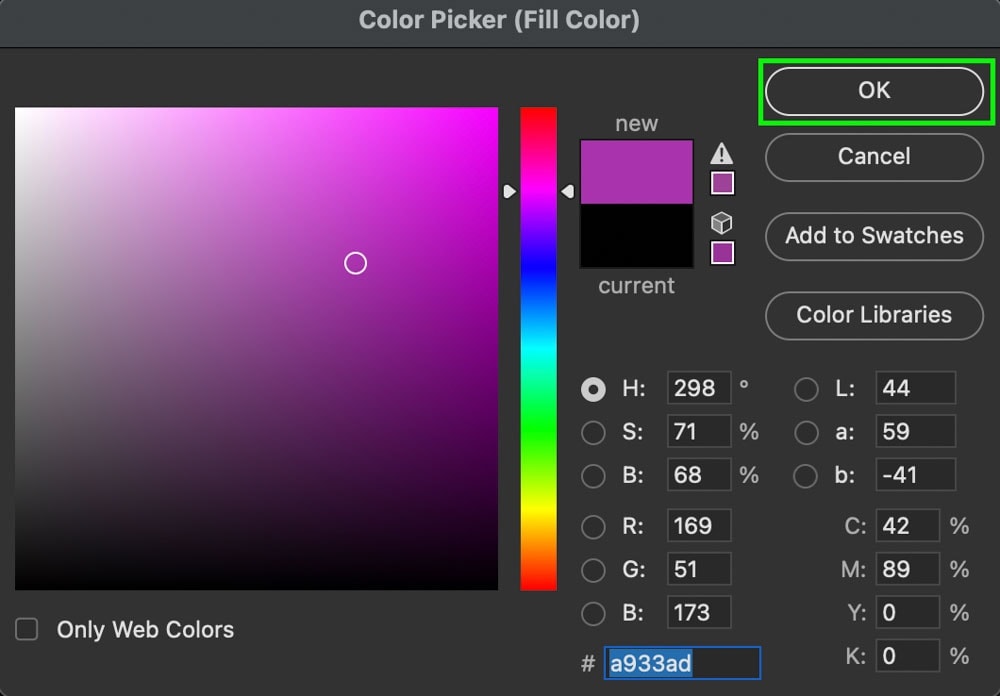
You can manually select a new color for your layer in the color picker that appears by clicking on the color palette. Once you’re happy with the color, click OK to change the color of your shape.
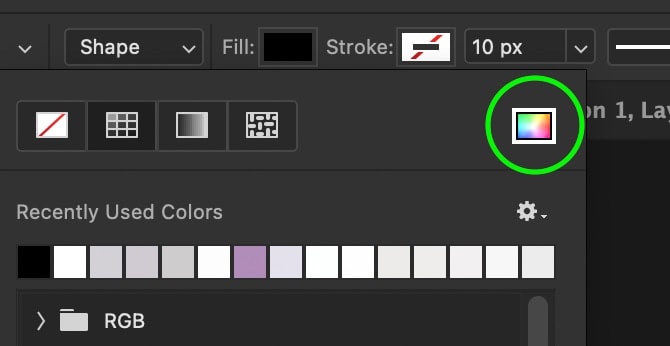
And just like that, you have quickly changed the color of a shape layer in Photoshop!

There is a lot more to cover with changing the color of shapes beyond just solid colors. If you want to learn how to apply gradients, custom colors, or transparency fill to shapes, check out this post.

How To Change The Color Of A Text Layer In Photoshop

To change the color of a text layer in Photoshop, select the Type Tool (T) and click and drag over your text to highlight it. In the upper settings bar, click on the “Fill” option and select a new color for your text. Lastly, press the checkmark in the upper bar to save your changes.

That is the most basic way of changing the color of text in Photoshop, but let’s discuss a more efficient way of doing things.

First, you need to create a new text layer. Selecting the Type Tool by pressing T, then clicking on your canvas, you can quickly add a new piece of text.

New to working with text? Check out this complete guide to text layers in Photoshop!

Once created, make sure your text layer is selected in the Layers Panel, then go to Window > Character to reveal the Character Panel.

The Character Panel is home to all types of custom text adjustments such as changing fonts, character spacing, kerning, and even changing colors!

Since you need to change the color of the text, click on the “Color” option to reveal a color picker.

You can easily select a new color to add to your text layer in the color picker that appears. Then, once you’re happy, click OK to apply the updated text color.
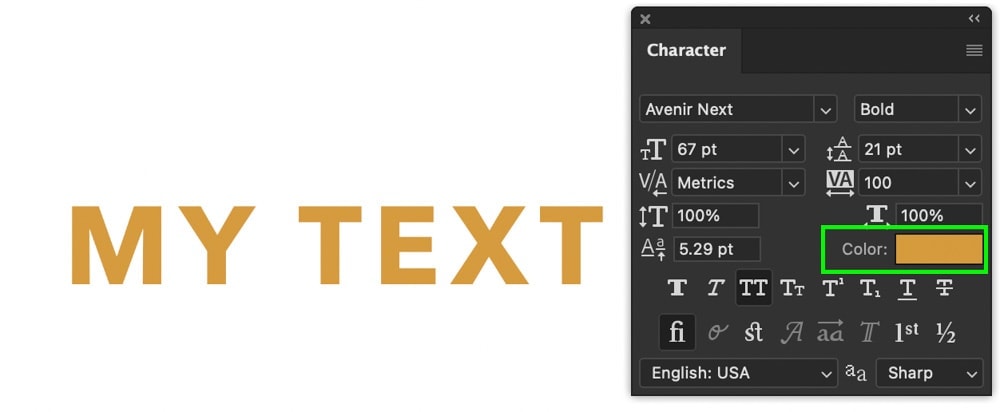
You do not need to select or highlight your text with the Character Panel to change the color. It makes way for a more efficient workflow and is slightly less confusing since you don’t need to have any specific tools active.

Now, if you’re looking for more unique text colors to use, try adding a gradient to your text!

How To Change The Color Of The Background Layer In Photoshop

When you first open a new project in Photoshop, you’ll begin with a background layer. In many cases, this background layer defaults to white, but what if you want to change this to a custom color? Depending on whether you are creating a new project or working on an existing project, there are two methods to try.

Method 1: Changing The Background Color For A New Project

In the new document dialogue box, you can customize all the dimension and resolution values for your project. You can also change the color of your background layer before it’s ever created!

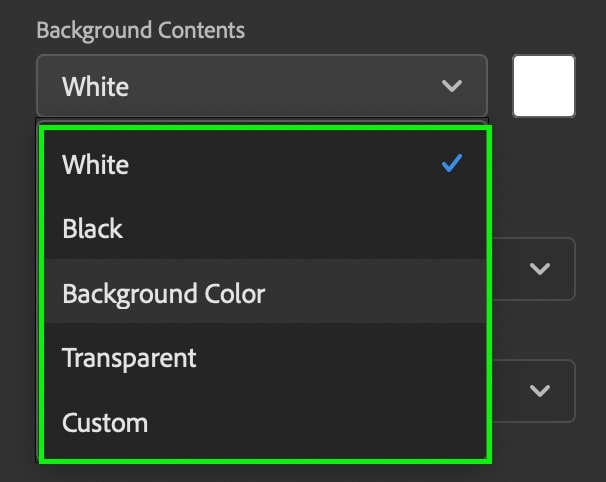
In the “Background Contents” option, you can select between five different background options:

  • White
  • Black
  • Background Color (which is your currently active background color in the Photoshop workspace)
  • Transparent
  • Custom

Most of these options are pretty self-explanatory, so simply select whichever background color you wish to use. If the color you want isn’t provided, click on “Custom” and choose a custom color from the color palette that appears. With these simple options, you can change the background layer color before your project is even created!

Method 2: Changing The Background Color In An Existing Project

Now, if you already have a project created, your background layer color will already be chosen for you. Luckily it’s simple to change with a keyboard shortcut.

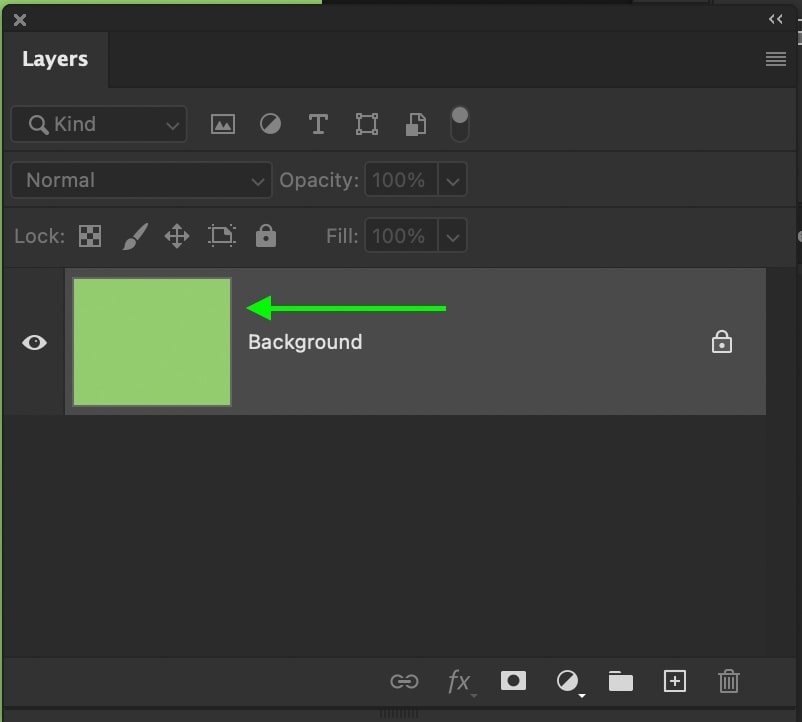
First, click on your foreground color at the bottom of your toolbar and select a new color to fill your background layer with.

Now that your foreground color is set, ensure that your background layer is selected in the Layers Panel.

Then to apply your new color, press Alt + Delete (PC) or Option + Delete (Mac) to fill the layer with your foreground color. Even if your layer is locked, it will fill the background with your updated color instantly.
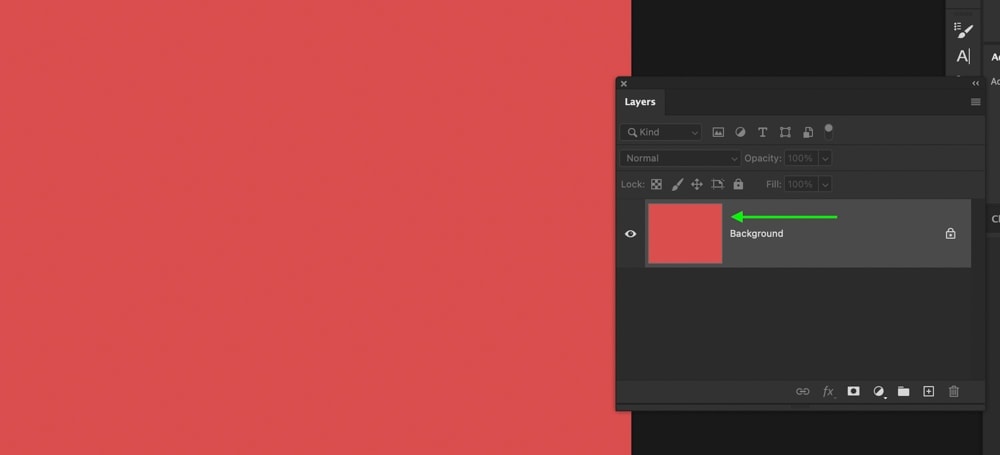
If you want to change your background layer color again in the future, you can do so with the same steps at any time.

How To Change The Color Of Fill Layers In Photoshop

To change the color of a fill layer in Photoshop, double click on the fill layer thumbnail in the Layers Panel. Then, select a new color for the fill layer in the color picker that appears and click OK. This will update your fill layer color and apply it to your project.

Fill layers are great for changing the color of a background or using with a clipping mask to change the color of objects in your project. To create a new fill layer, simply go to Layer > New Fill Layer > Solid Color.

In the color picker that appears, you can change the color easily by clicking to select a new color. Once you’re happy, click OK to add your selected color to your color fill layer.

If you change your mind and want to edit this color fill layers color, double-click on the fill layer thumbnail to reopen the color picker.

Here you can update and change the color just like you did when first creating the color fill layer. Click OK to apply the updated color.
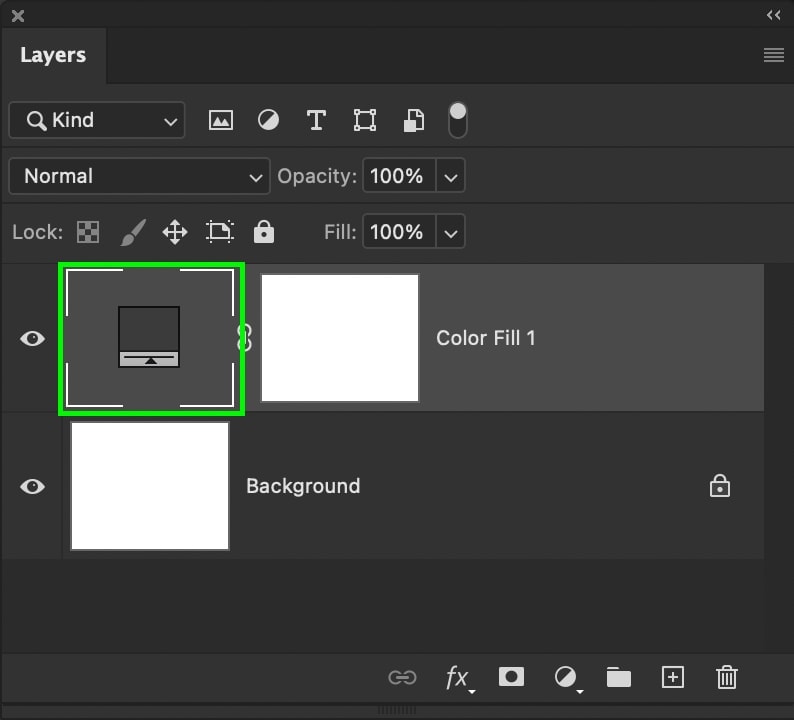
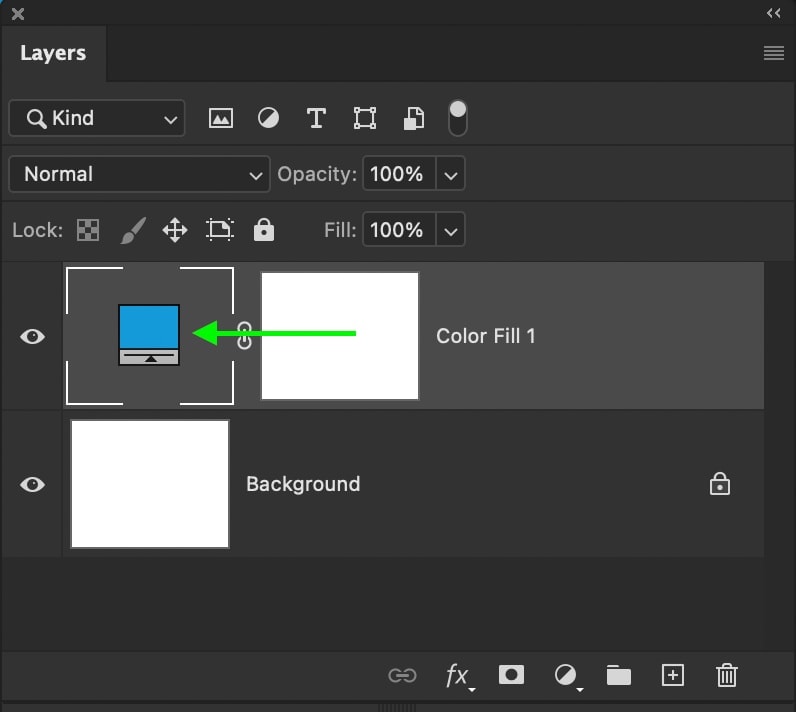
And with that, you have quickly changed the color of an existing color fill layer in Photoshop! These same steps can be applied at any time during your project.

It’s worth remembering that double-clicking on any fill layer thumbnail will allow you to edit it, including gradient and pattern fill layers.

How To Fill A Transparent Layer With Color

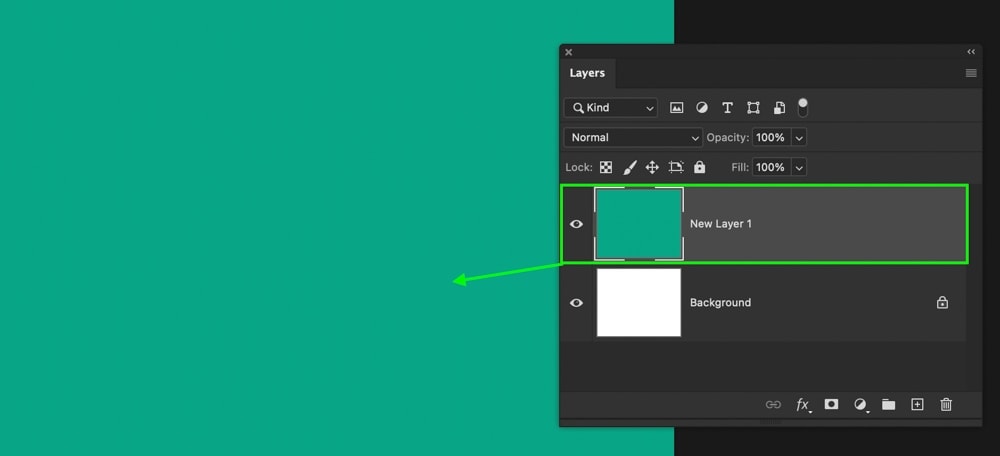
To fill a new layer with a color, click on your foreground color at the bottom of the toolbar and select your desired color. With your color chosen, select your new layer and press Alt + Delete (PC) or Option + Delete (Mac) to fill the layer with your active foreground color.

This process is very similar to changing the color of an existing background layer as you learned previously in this tutorial.

After creating a new layer, make sure it is selected in your Layers Panel.

Then click on your foreground color to reveal the color picker and choose a color to fill your new layer with.

With your color chosen, press Alt + Delete (PC) or Option + Delete (Mac) to fill your selected new layer with the solid color.
Now you know the ins and outs of changing the color of layers in Photoshop from images, shapes, text, and more! The process for each is pretty fast to accomplish once you remember all the steps. After you have everything nailed down, these color-changing tips will come in super handy for all of your future Photoshop endeavors.

Happy Editing!

Brendan 🙂
Article By

Brendan Williams

Hey, I'm Brendan! I'm a professional photographer and photo retoucher who has spent the majority of his career shooting or retouching outdoor lifestyle and social media campaigns for brands like G-Adventures, xoxo Bella, P&G, Fitbit, Chevy, Tourism California, and more. You can view my photography portfolio here.

These days I primarily focus my efforts on this site, creating guides and tutorials that I wish I had earlier in my career. Each week I publish new tutorials on Photography, Photoshop, Lightroom, and Canva to help you unlock new skills and bring your creativity to new levels! Everything you learn here is backed by real experience, so you can finally skip the fluff and focus only on what matters.

Subscribe
Notify of
guest
0 Comments
Inline Feedbacks
View all comments

Continue Reading:

Adobe Lightroom System Requirements For Mac & PC

Here's a breakdown of the system requirements for Adobe Lightroom Classic and Lightroom CC to make sure it will run smoothly on your computer.

How To Add A Watermark In Lightroom Classic & CC

Learn how to add a text or graphic watermark to a photo in Lightroom Classic and Lightroom CC to protect your photos from theft.

How To Use Dehaze In Lightroom

Learn how to use dehaze in Lightroom along with five different ways you can use the dehaze tool to improve your images in Lightroom.

How To Add A Drop Shadow In Canva (To Anything!)

Learn the step by step process to add a drop shadow in Canva to images, text, shapes, and even PNG graphics in your designs.

35+ Best Fonts For Logos In Canva

Here's a list of the best fonts for logos in Canva to help give you inspiration in your next logo design!

How To Create Curved Text In Canva

Learn how to quickly create curved text in Canva desktop and mobile with just a few clicks to spruce up any design!