

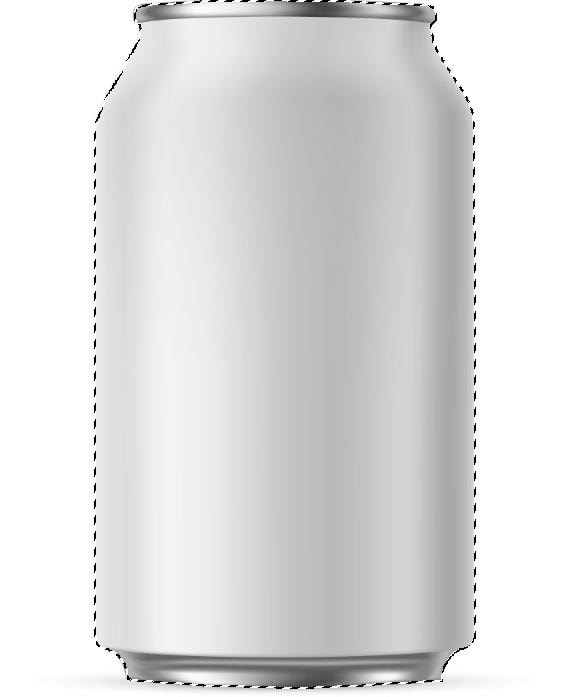
With so many selection tools to try in Photoshop, it’s hard to know where to begin. If you’ve spent some time cutting out images in the past, you likely have a go-to tool that you always fall back on. The problem is, what if there’s a tool out there that would be better for the job, and easier to use, but you just don’t know about it yet?
So let’s break down some of the best tools for the job when you want to create basic selections or even ultra-accurate cutouts. You’ll even learn about a few options that are so simple that you can select your subject with the click of a button!
Here are the 12 best ways to make a selection in Photoshop.
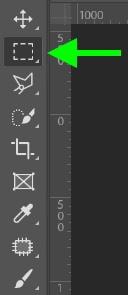
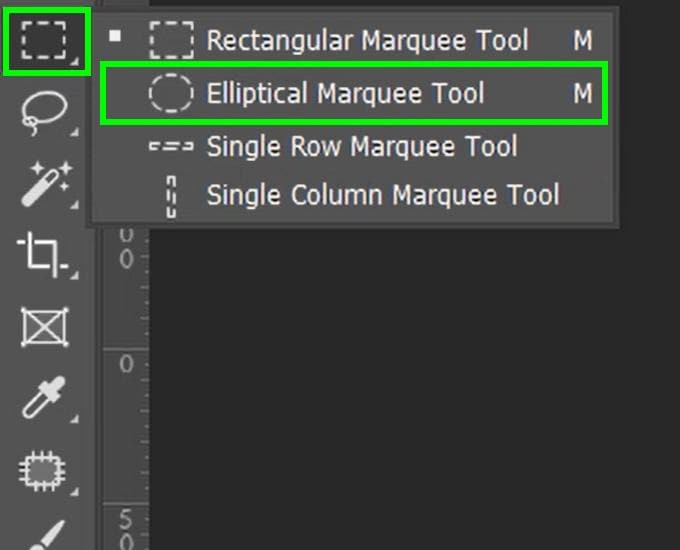
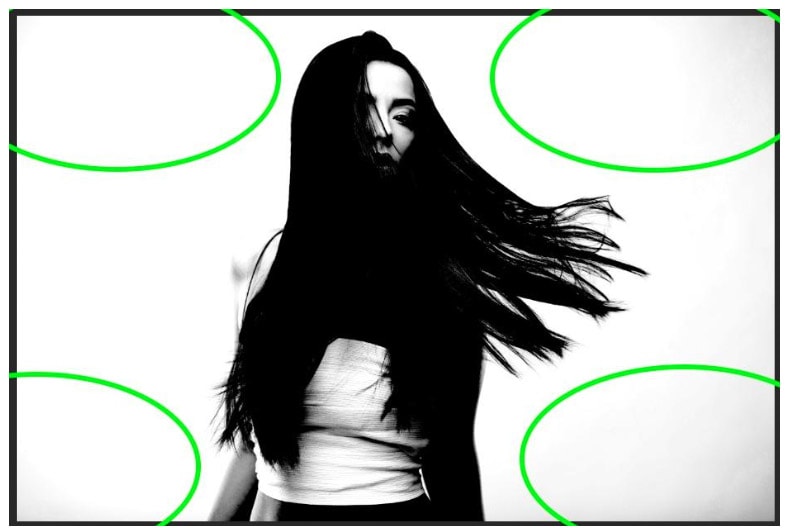
1. The Rectangular & Elliptical Marquee Tool
The Rectangular and Elliptical Marquee tools are great for creating basic selections in rectangular, square, or circular shapes. Although not ideal for selecting a subject or removing a background (unless your subject is a box, I suppose), these tools are great for adding to existing selections or cropping layers to a specific size.
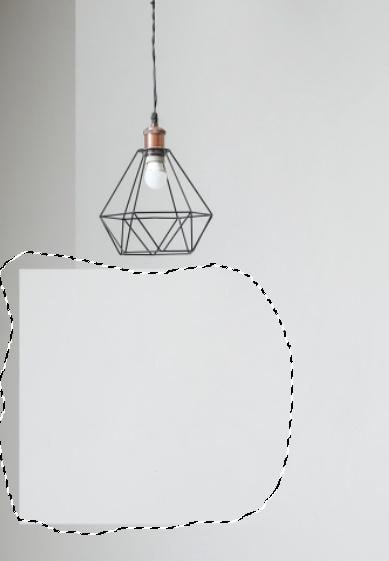
– Rectangular Marquee Tool

You can find the Rectangular Marquee Tool in the Toolbar or by pressing M.
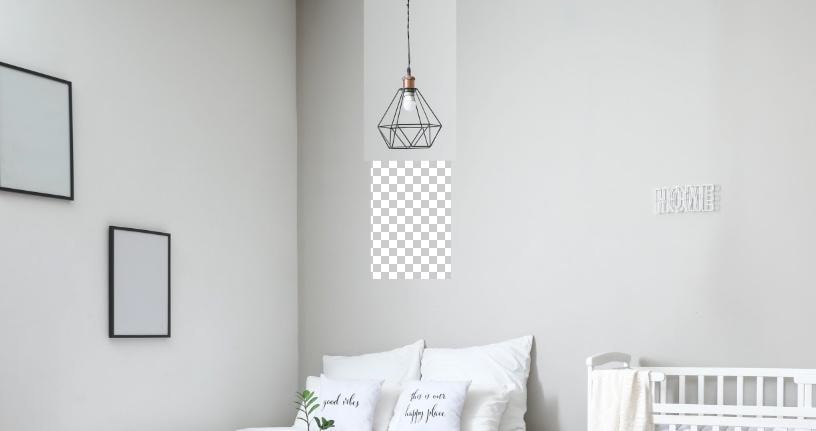
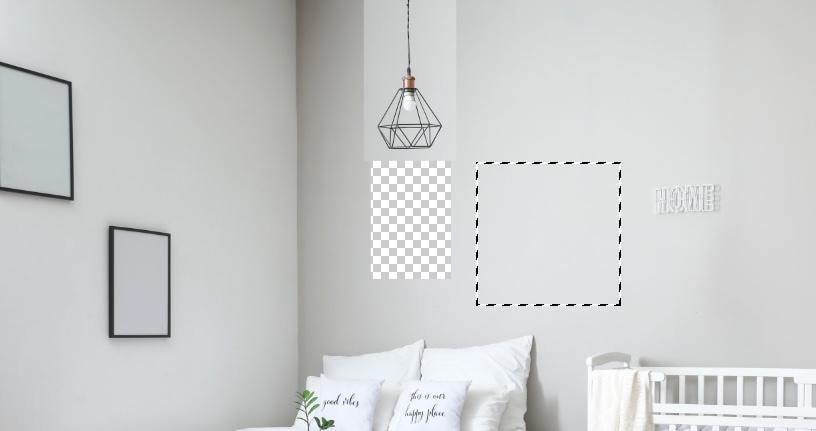
With the tool selected, drag your mouse over the object you want to select.

Once you select your object, you can move it with the Move Tool (V). Then, press Control + D (Win) or Command + D (Mac) to deselect it.
While using the Rectangular Marquee Tool, if you hold down the Shift Key, you will lock the aspect ratio to a square shape.
Holding Control + Alt (Win) or Command + Option (Mac) and dragging your selection will duplicate its contents. While doing this, hold down the Space Bar to adjust where you place your copied selection.
Press Control + D (Win) or Command + D (Mac) to deselect your selection.


You can use the Patch Tool (J) or a similar tool to clean up your work.
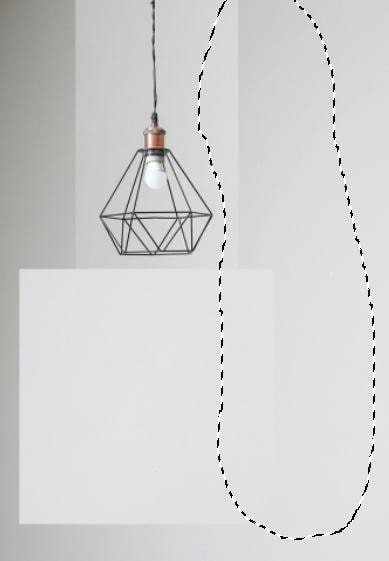

– Elliptical Marquee Tool

You can find the Elliptical Marquee Tool grouped with the Rectangular Marquee Tool.
Click and drag around your object to select it. Hold down the Shift Key if you need to make a perfect circle.

You can move your selection with the Move Tool (V). Deselect your selection with Control + D (Win) or Command + D (Mac).

Hold Control + Alt (Win) or Command + Option (Mac) to copy and move a selection’s contents.


Strengths:
- Straightforward tool to use
- Excellent for small or medium-sized subjects to select
- Great for cropping layers
Weaknesses:
- You can only use it to select square or circular-shaped objects for the most part
- You may need other tools to clean up where you selected
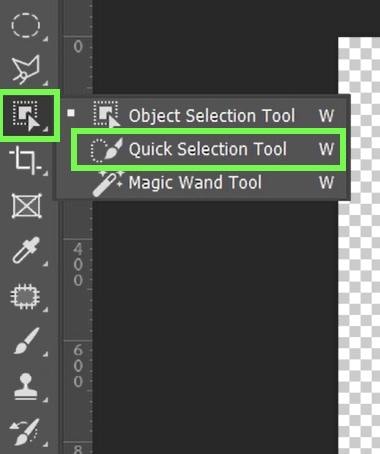
2. The Quick Selection Tool
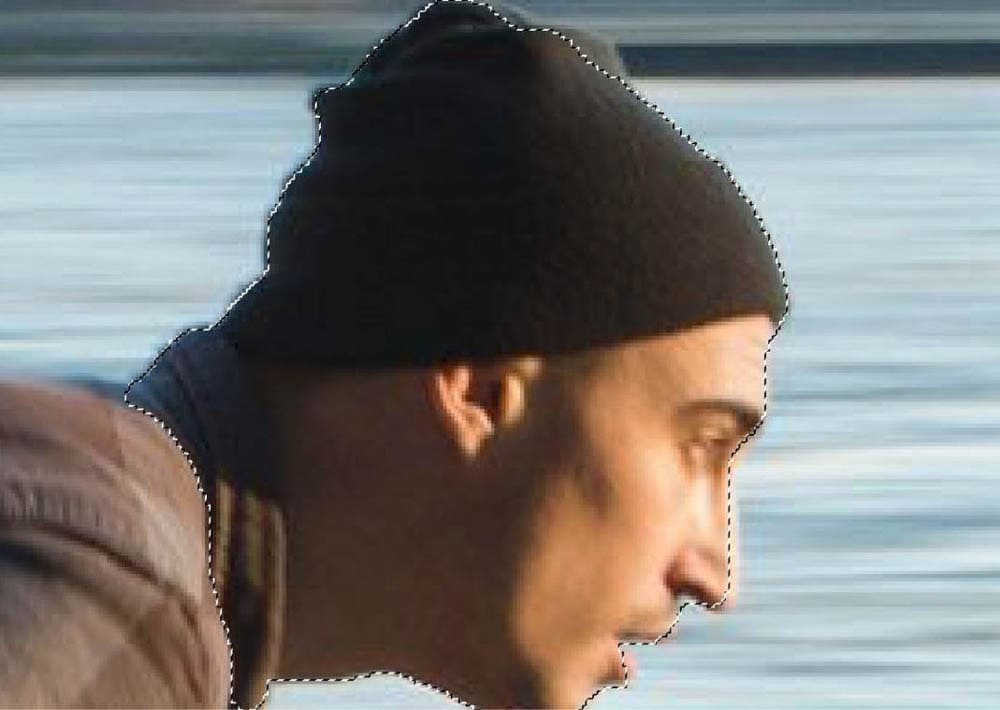
The Quick Selection Tool is one of the most beginner-friendly selection tools in Photoshop. This tool essentially “paints” a selection over your image and automatically snaps to the edges of your subject. Although fairly accurate, this tool doesn’t perform well against complex backgrounds or on fine edges such as hair. Instead, this tool shines when there are more defined edges against a simple background.

The Quick Selection Tool (W) is grouped with the Object Selection Tool and Magic Wand Tool.
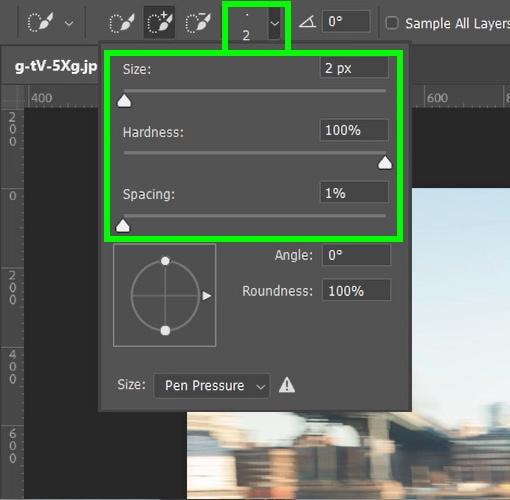
Before you make your selection, adjust the options under the Drop Down Menu in the Options bar. You can change the Size, Hardness, and Spacing. Adjust these settings to the size of your object, and remember to come back here if you need to while selecting.
The Quick Selection Tool works like a brush, but for selections. As you click and drag over the subject, Photoshop will automatically look for edges to select as you drag.

To finish your selection, keep clicking and dragging over your subject until they are completely selected.
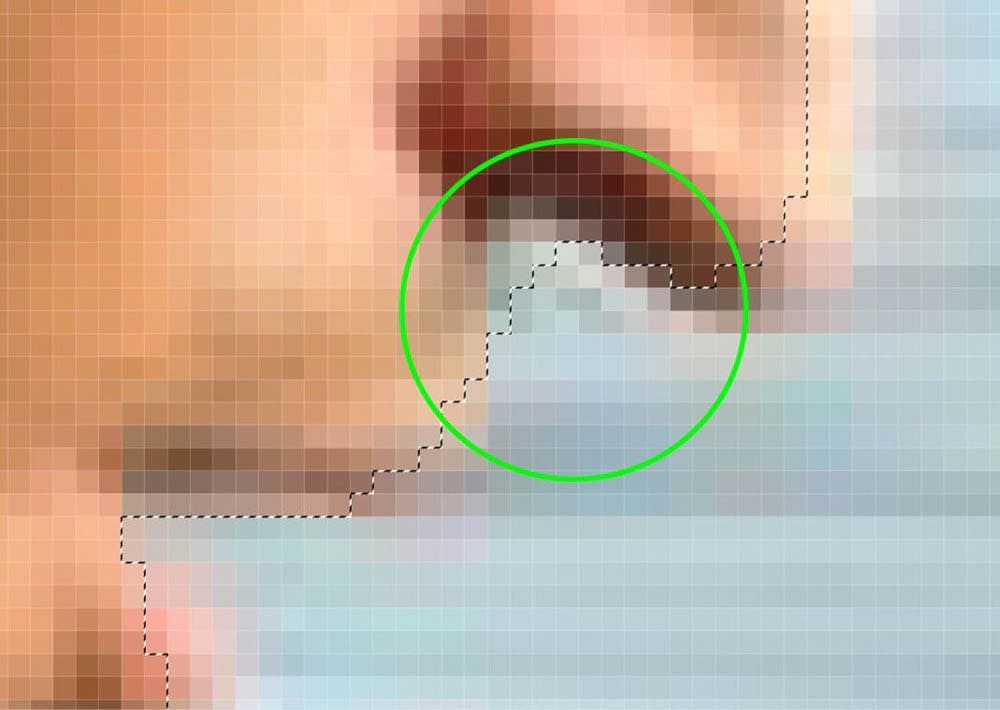
It’s common for this tool to select too much or too little of your subject. Luckily, you can easily subtract from your selection by holding Alt (Win) or Option (Mac) and dragging over unwanted areas.

Once you’ve selected your entire subject, you can make whatever edits you need for your project.

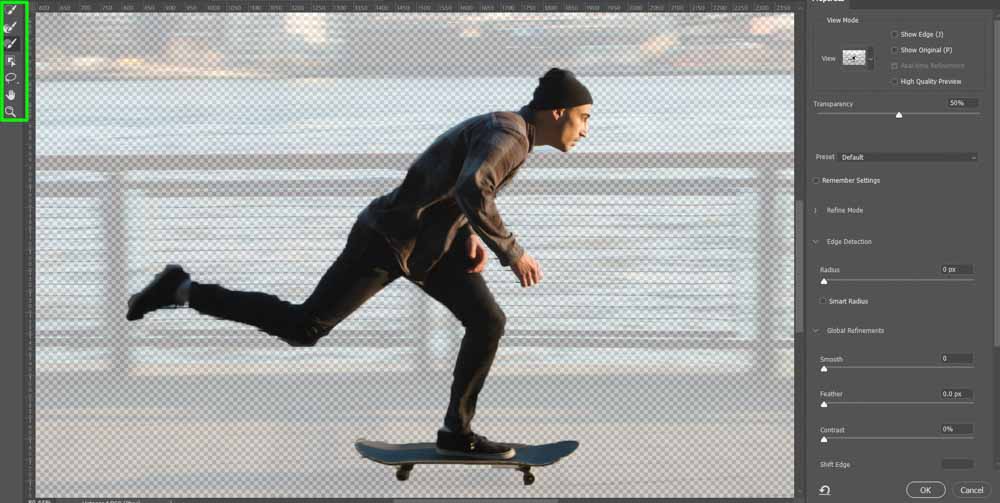
If you need to refine your selection, go to the Options bar and click on Select And Mask. This will bring up the Select And Mask Workspace, where you can use tools like the Redefine Edge Brush Tool and regular Brush Tool to clean up your selection.

Strengths:
- Super quick
- Easy to use
Weaknesses:
- You will spend a lot of time deselecting areas you shouldn’t have selected in the first place
- You may have to clean up your official selection afterward
3. The Select Subject Button
When you need a selection of your subject but don’t feel like spending the time, the Select Subject Button is the answer. This tool is great for getting a selection started, so all you need to do is refine it as needed. It can also be used as a way to create selective adjustments to your subject when editing photos.

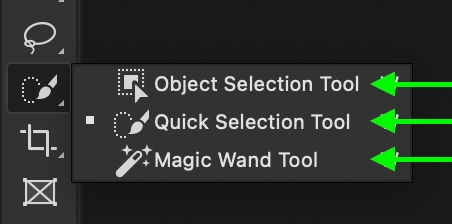
To access the Select Subject Button, select either the Object Selection Tool, Quick Selection Tool, or the Magic Wand Tool.
With your desired tool selected (I chose the Object Selection Tool), you will now find the Select Subject Button in the Options bar. Clicking the button will automatically select the subject in your image.


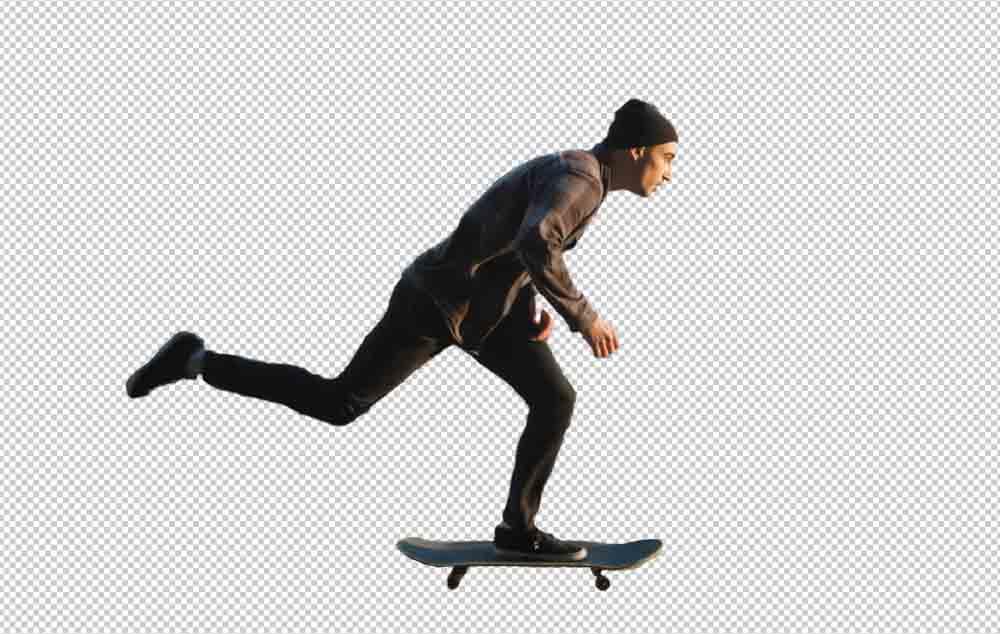
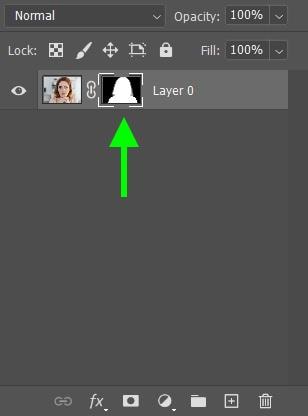
With your subject selected, you can now make any edits you need for your project, including removing the background by adding a layer mask.
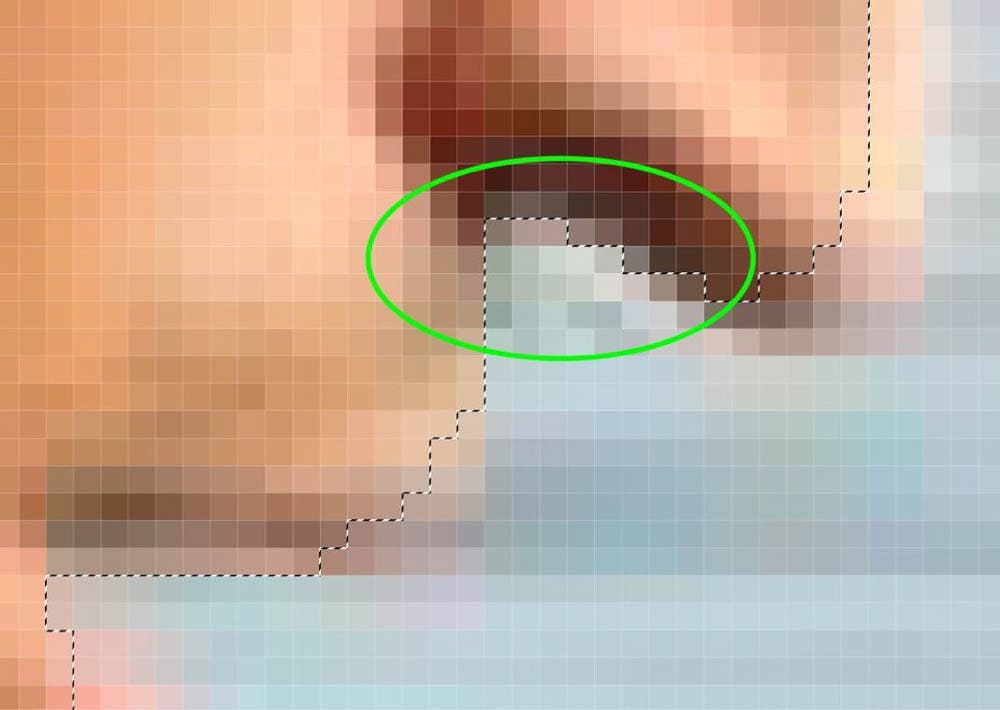
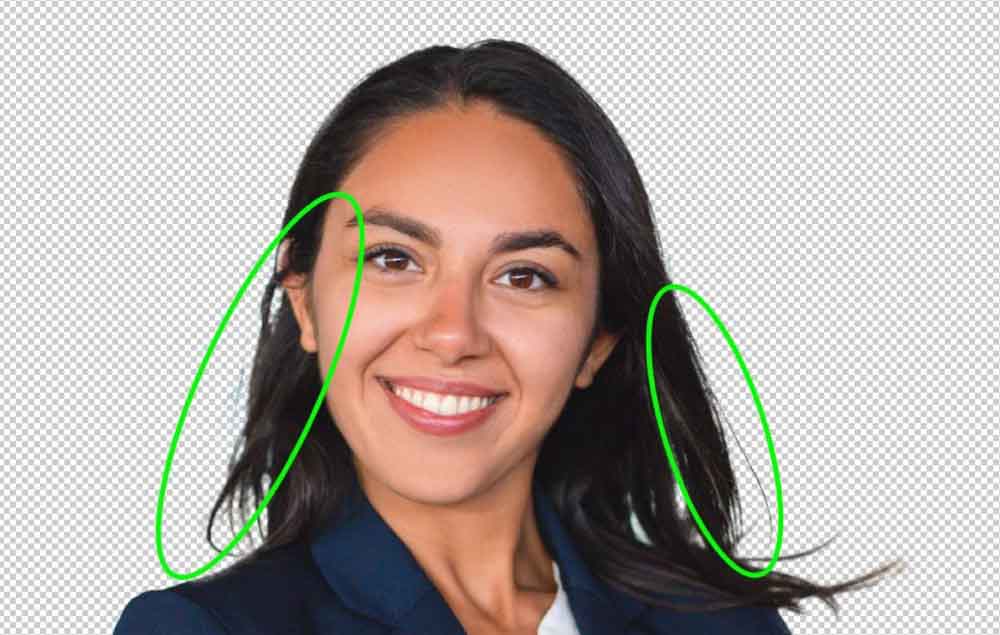
You may notice when using the select subject button that it’s not 100% perfect. You may see some pixels missing, especially when it comes to hair.
You can fix this by using the Brush Tool (B) and painting white to add or black to remove from your layer mask.
Alternatively, you can use the Select and Mask workspace by pressing Control + Alt + R (Win) or Command + Option + R (Mac) to clean up the selection.


Strengths:
- Just one click to use
- Will make a perfect selection the majority of the time
Weaknesses:
- Can have difficulties with complex backgrounds
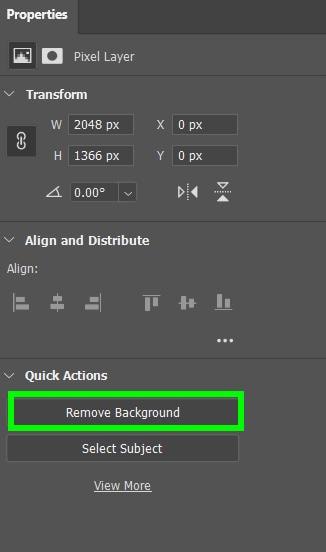
4. The Remove Background Button
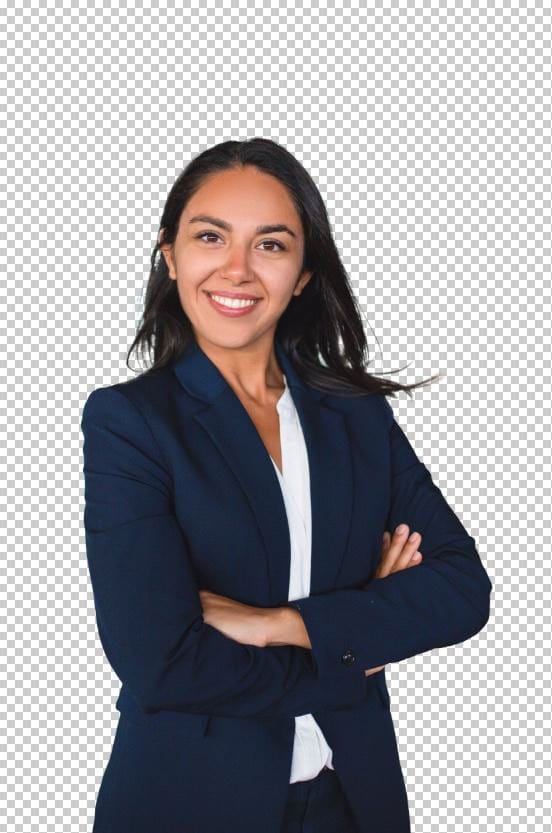
The Remove Background Button is a good alternative to the Select Subject Button in situations when you just want to remove the background. This button does the extra step of adding your selection to a layer mask and non-destructively cutting out your image.

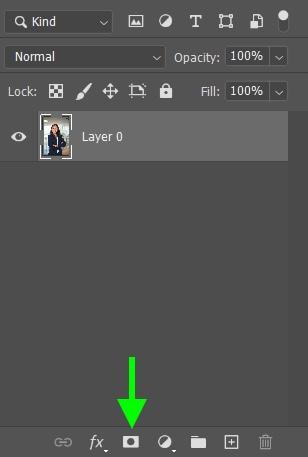
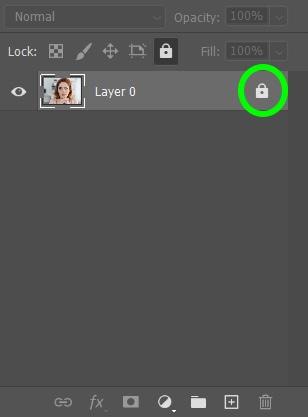
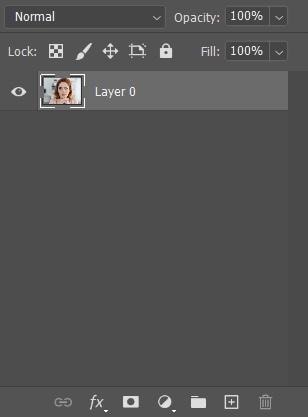
First, unlock your image layer in your Layers panel, as the option to remove your background is not available for locked layers. Click on the Lock icon to unlock the layer.
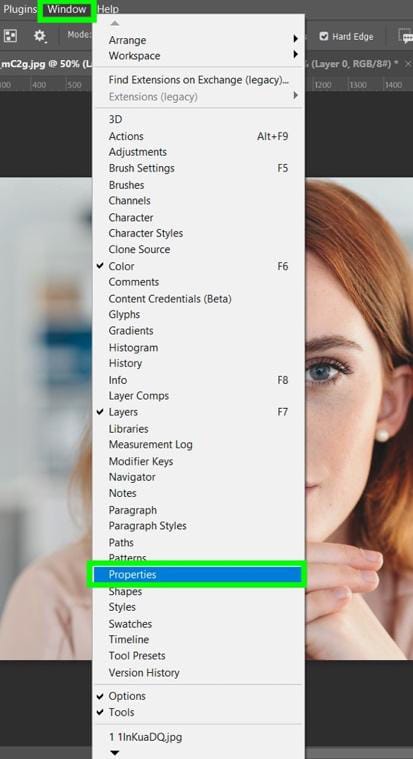
To find the Remove Background Button, make sure the Properties Window is open by going to Window > Properties.
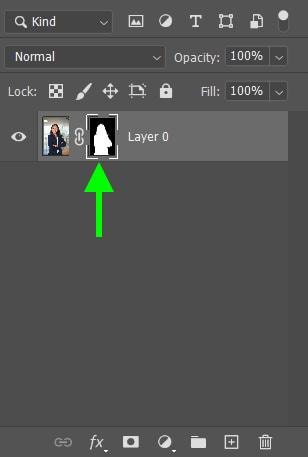
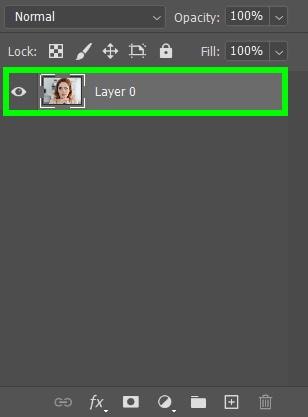
With your layer selected in the Layers panel, click the Remove Background Button. Doing this will automatically detect the subject of your image and remove the background using a layer mask.

Strengths:
- Just one click to use
- Your background will be selected and removed perfectly most of the time with defined subjects
Weaknesses:
- If you don’t use this button often, you will probably forget where it is and how to access it
- You can’t refine the selection before it’s applied to a mask.
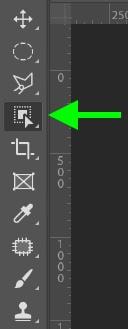
5. The Object Selection Tool
The Object Selection Tool is a good alternative to the Quick Selection Tool and works by creating a selection from a defined Marquee or Lasso selection. In more recent updates to Photoshop, AI subject detection allows you to simply click on your subject to turn it into a selection. This makes it easy to select one or multiple subjects in a photo.

The Object Selection Tool can be found in the Toolbar or by pressing W.
To select your subject with the Object Selection Tool, simply click on your subject. You can also click and drag a block around your subject.

Photoshop’s AI will most likely select your exact subject on the first try. You can now make whatever edits you need for your project.


Strengths:
- Just one click and your subject is selected
- The tool selects your subject perfectly on the first try; most of the time
Weaknesses:
- Every once and a while, the tool selects something you don’t want to be selected
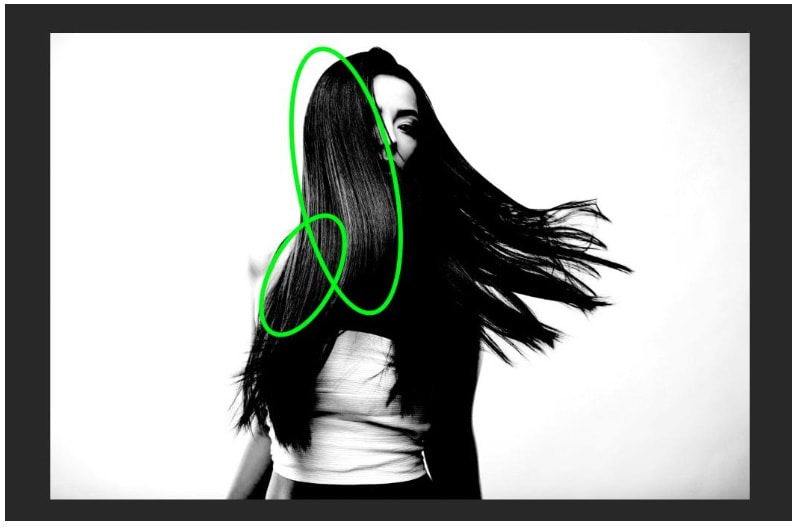
6. The Lasso Tool
The Lasso Tool allows you to draw a selection by clicking and dragging your cursor. Unless you have super-human abilities, odds are you won’t be able to make an accurate selection with this tool. Instead, this tool is good for creating roughed-in selections to align elements in a project or cut out images in customized hand-drawn shapes.

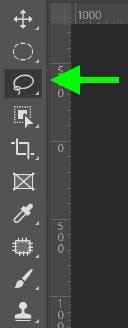
You can find the Lasso Tool in the Toolbar or by pressing L.
With the Lasso Tool selected, click and drag around your object with your mouse to select it.
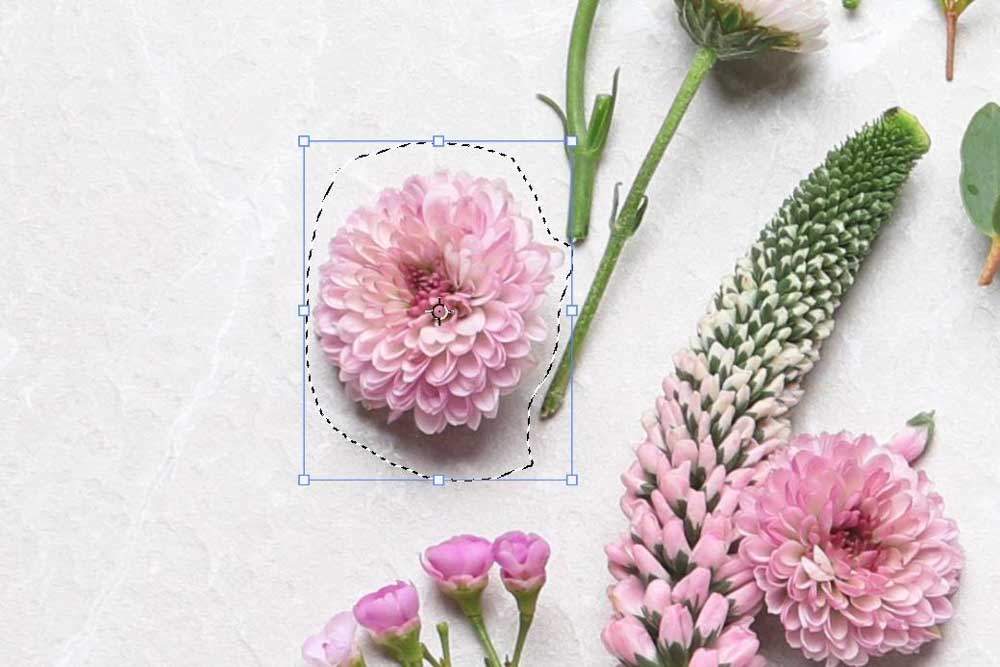
Once you select your subject, you can move it with the Move Tool (V), copy and paste your selection, or do whatever edits you need for your product.

Strengths:
- Probably the best tool to grab when you need to move small objects quickly.
- Easy to use
Weaknesses:
- More difficult to use for selecting larger objects
- Not good for accurate selections
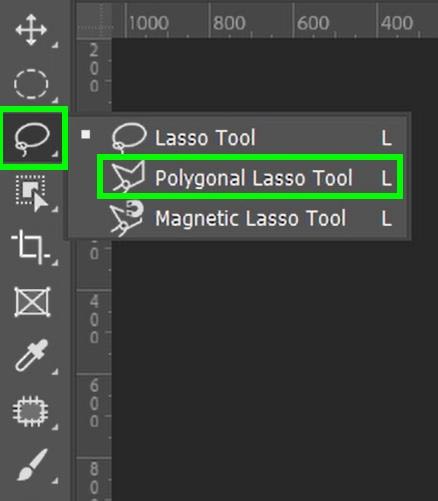
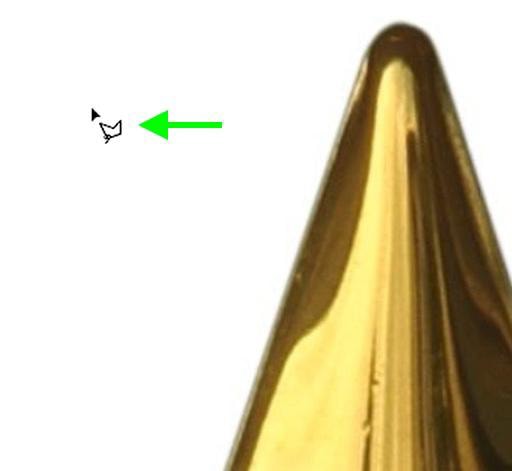
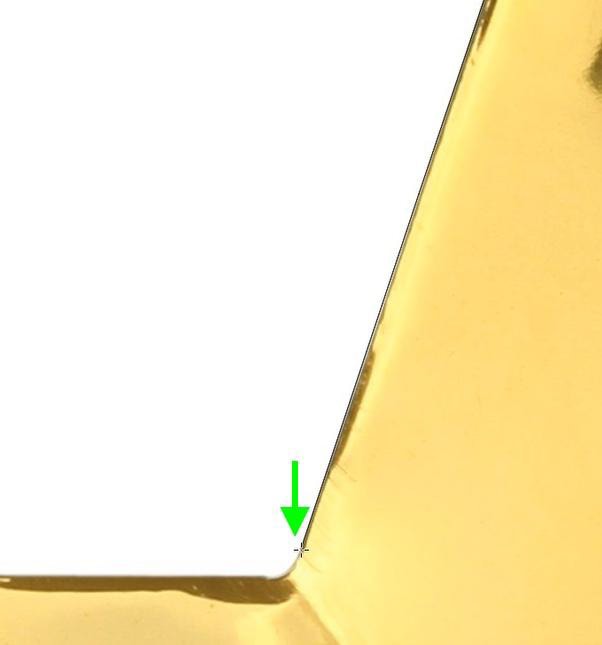
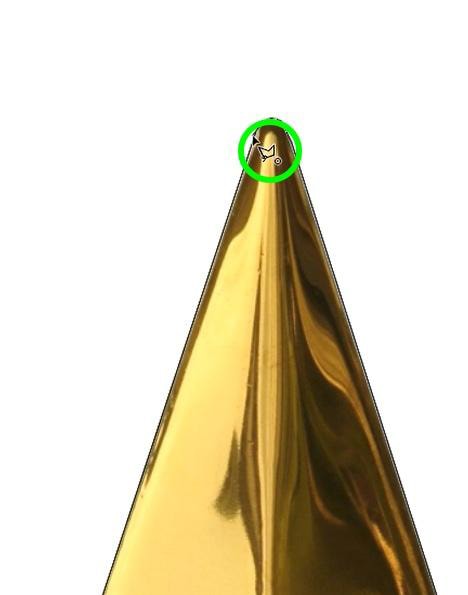
7. The Polygonal Lasso Tool
The Polygonal Lasso Tool is best for creating selections around straight edges such as a building or a fence, for example. Like the Lasso Tool, you only need to move your mouse around and click to define your selection area. Compared to other selection tools in Photoshop, The Polygonal Lasso Tool guarantees a much cleaner selection around any straight edges.

You can find the Polygonal Lasso Tool (L) grouped with the Lasso Tool.
Before selecting your object, press the Caps Lock Key to turn your cursor into a crosshair. This action makes it much easier to click where you need to.

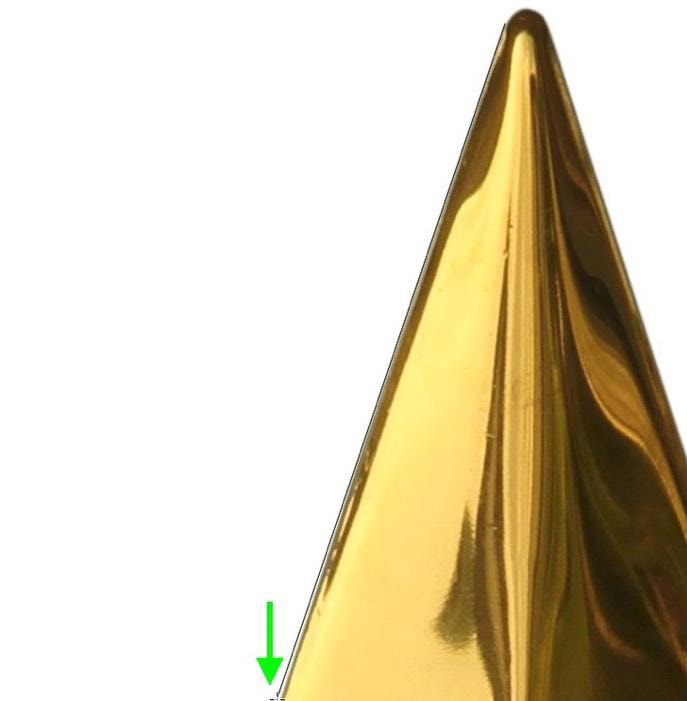
To start your selection, click on the edge of your object, bring the line down the straight edge, and click again. Keep doing this until your entire subject is selected.
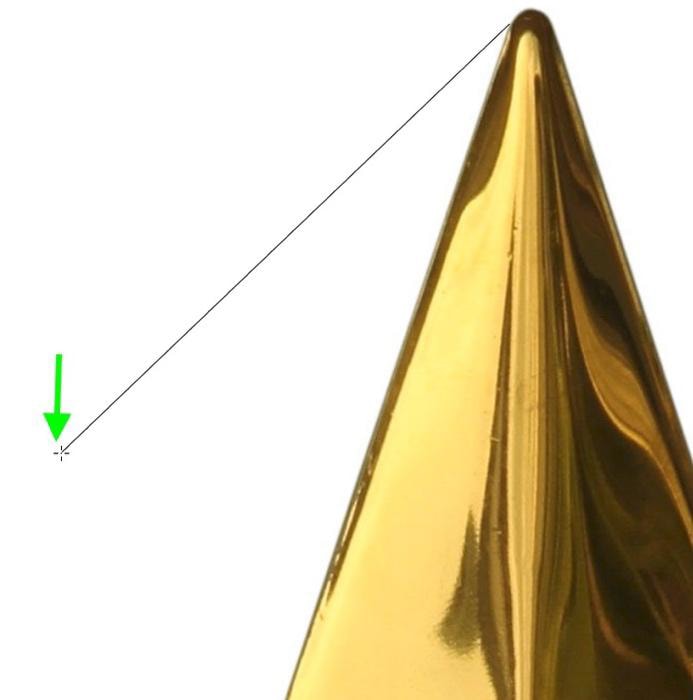
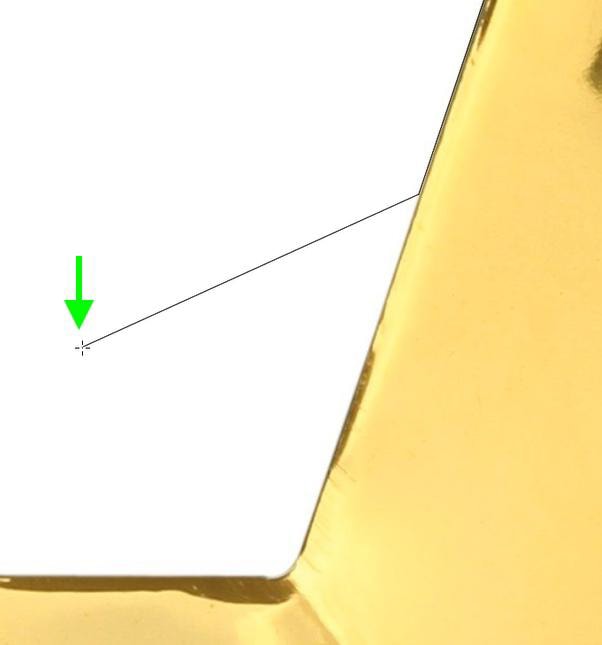
If, for whatever reason, you need to end your selection sequence early, Control + Click (Win) or Command + Click (Mac) anywhere on your canvas.
When you make your way around your subject, your cursor will change. Click where you made your first click to complete your selection.


Once your subject is selected, you are free to make any edits you need to.

Strengths:
- The perfect option for selecting a subject with plenty of straight edges
Weaknesses:
- Not easy to use
- It’s very difficult to select rounded edges
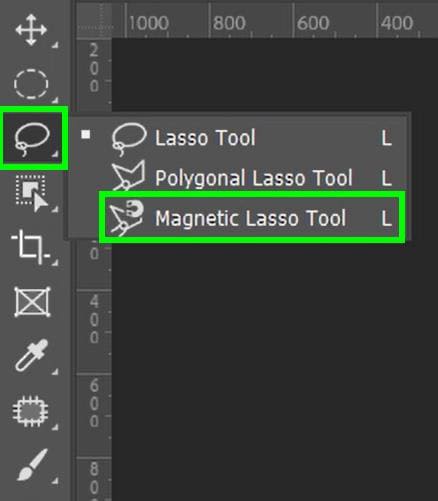
8. The Magnetic Lasso
The Magnetic Lasso Tool snaps to the edges of your subject as you drag your mouse, adding far more accuracy than the regular Lasso Tool. The only trouble with this tool is that it can be frustrating to use as it directly follows your cursor. If your cursor drifts off course, it’s likely your selection will mess up too. This tool is worth knowing about but probably won’t be your first choice when creating selections.
The Magnetic Lasso Tool (L) is grouped with the Lasso Tool.
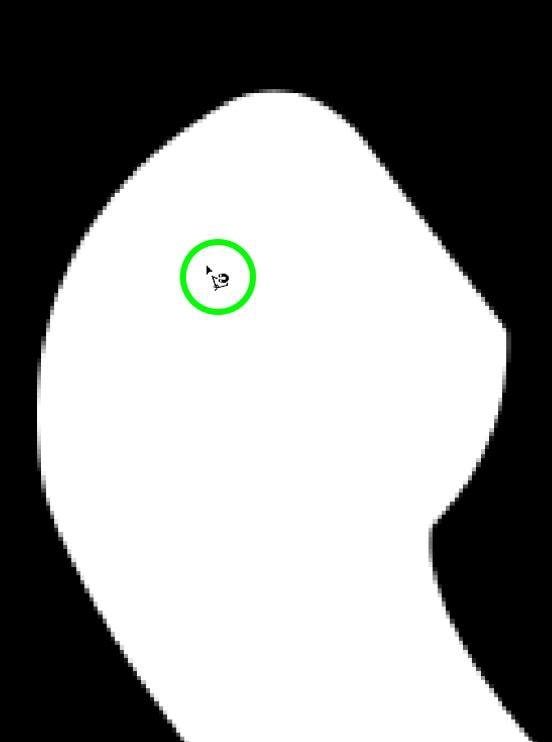
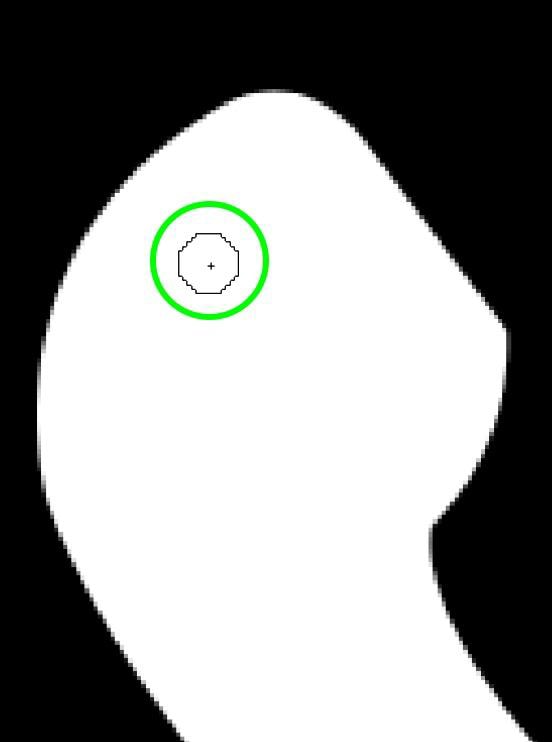
To use the Magnetic Lasso Tool, click where you want to start your selection and then slowly move your mouse around the perimeter of your object. The tool will automatically detect the difference between the pixel colors of your image and leave anchor points where it thinks the edge of your subject is.
Move your mouse around the perimeter of your entire subject to select it.
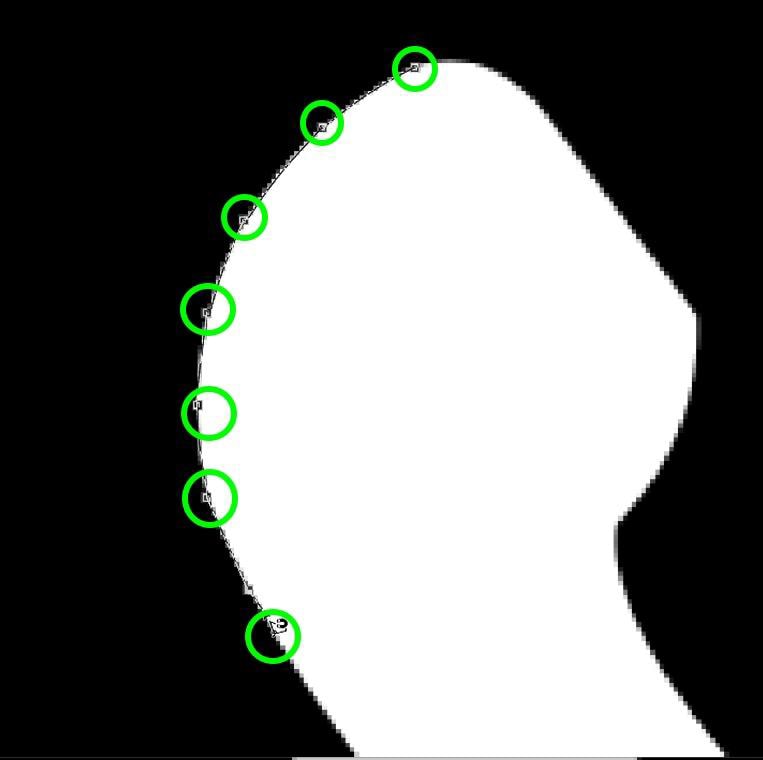

The Magnetic Lasso Tool will most likely miss big chunks of your subject. To fix this, use the Add To Selection button to add the missing pixels to your selection.

Even after you add the missing pixels to your selection, you will still find trouble spots after making your edits. You’ll have to fix these problems manually with whatever tool is applicable to your situation.


Strengths:
- It works okay with images that have distinct edges with different color values
Weaknesses:
- Can be frustrating to use
- Will constantly select areas you don’t want to be selected
- You will most likely have to touch up your final selection with a second tool
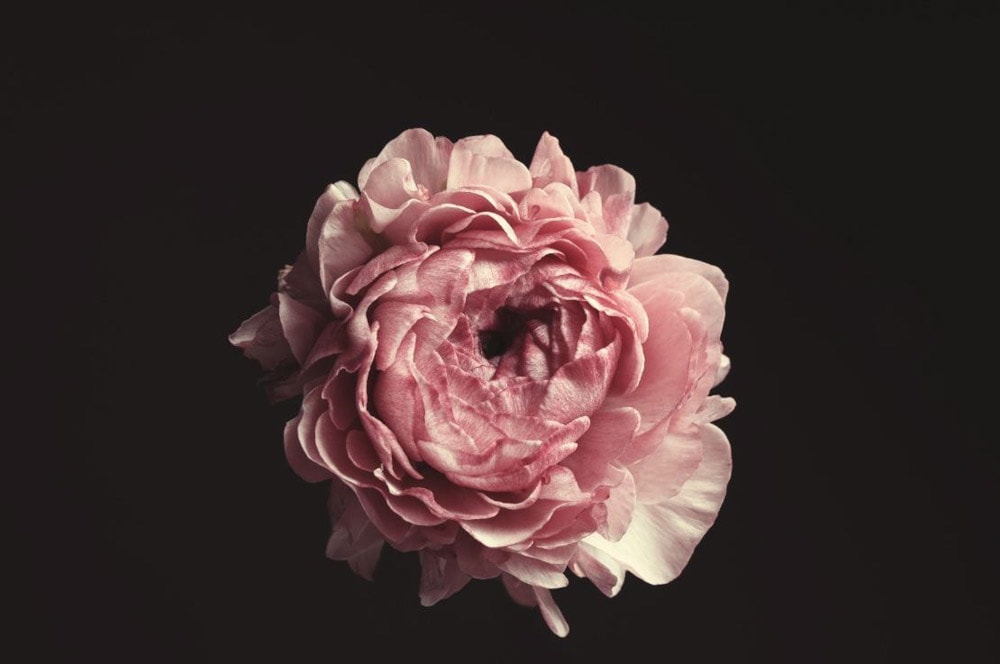
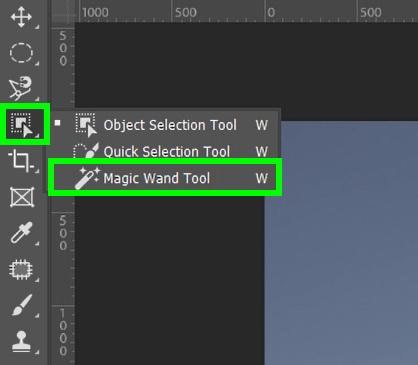
9. The Magic Wand Tool
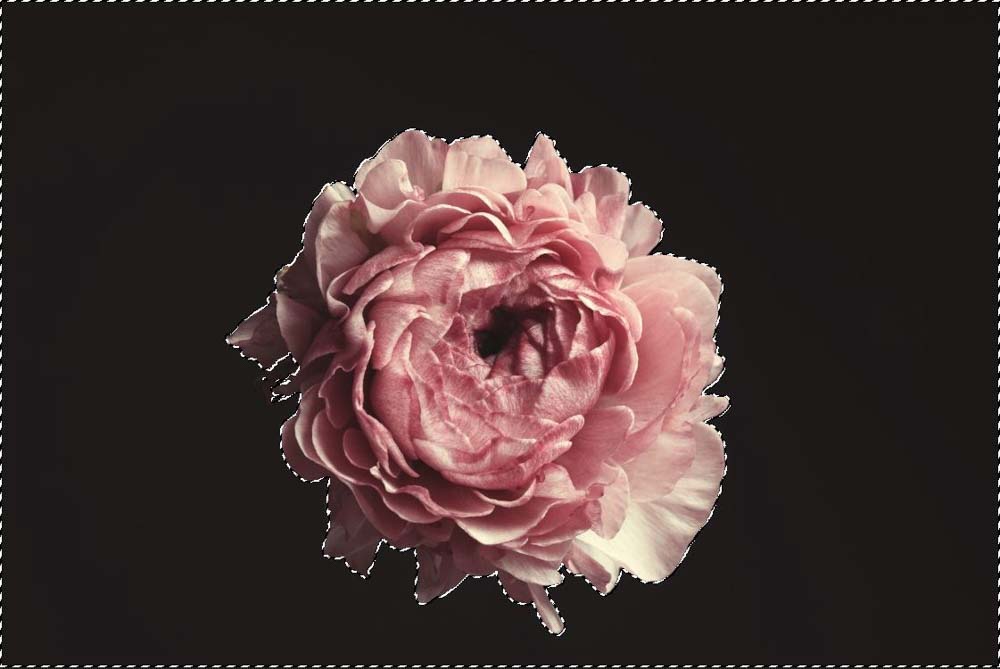
The Magic Wand Tool samples a color in your photo and turns it into a selection by finding other similarly colored pixels. It’s great at removing all of one color from an image or just removing a solid-colored background.
You can find the Magic Wand Tool (W) grouped with the Object Selection Tool and Quick Selection Tool
With the Magic Wand, click on your target color to select all the pixels that match that color. The tool will find other similar colored pixels in your image and add them to a single selection.
If you find that not all your target color is being selected, experiment with the Tolerance until you find a better result. A higher tolerance will include more shades of a sampled color.
Once your color is selected, you can make whatever manipulations you need for your project.


Strengths:
- Easy to use
- The quickest way to select a single color in an image
Weaknesses:
- Difficult to use when your subject has similar colors as the background you want to remove.
10. The Select Color Range Adjustment
Select Color Range is one of my favorite tools for selecting a single color. Like the Magic Wand Tool, it works by sampling a single color and finding other similar colors to add to the selection. The only issue is that there are limited options to prevent the tool from selecting more areas than you were hoping to. However, what this tool gains over the Magic Wand Tool is the use of the Fuzziness Slider, which makes it easier to refine your color selection more accurately.

To select a color range for your image, go to Select > Color Range.

A window will pop up, where an eyedropper tool is automatically selected. Now click on the color you wish to remove, and it will appear white in the selection preview.
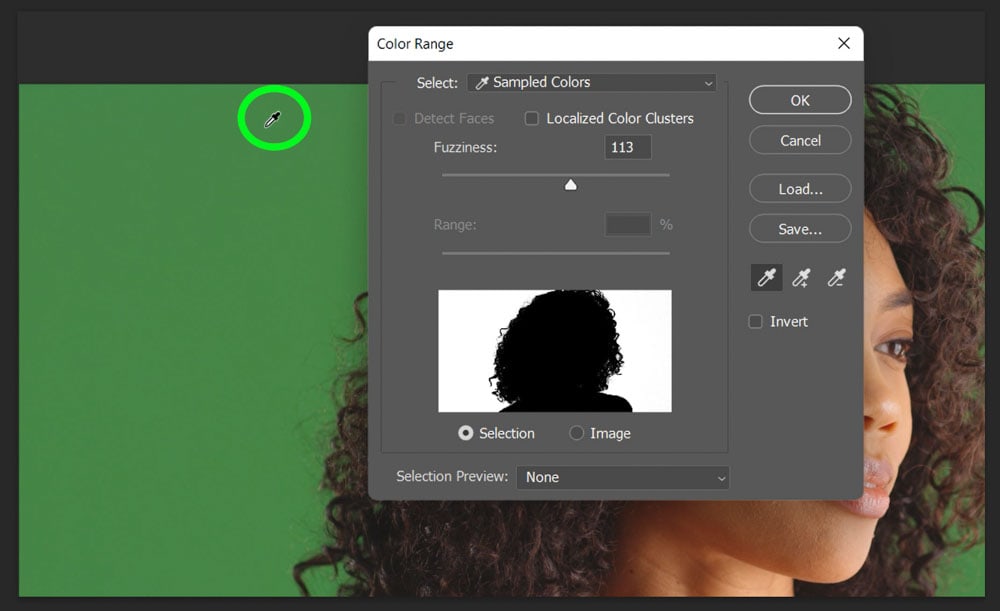
You can further adjust the selection using the Fuzziness Slider. Use the selection preview to refine your sample and fuzziness amount until the subject is accurately selected.
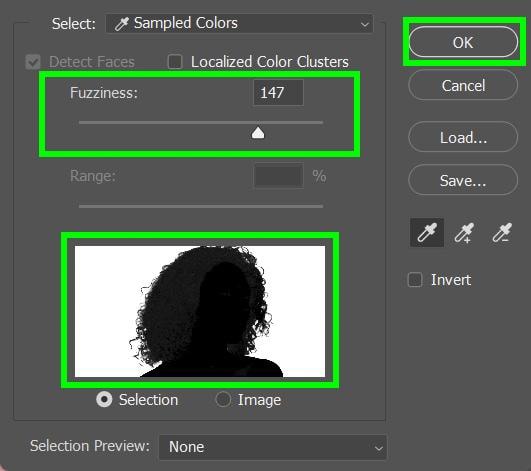
Then click OK to create a new selection.

Once your selection is complete, you can make any edits needed for your project or remove the background via a layer mask.

Strengths:
- A quick way to select a single color
- The Fuzziness slider is easy to use and gives a good visual aid to follow with the Preview Window
Weaknesses:
- This method will select ALL of the pixels with the color you select, including areas you don’t want to be selected
- There will be times when you will need to use other tools to deselect and touch up your selection
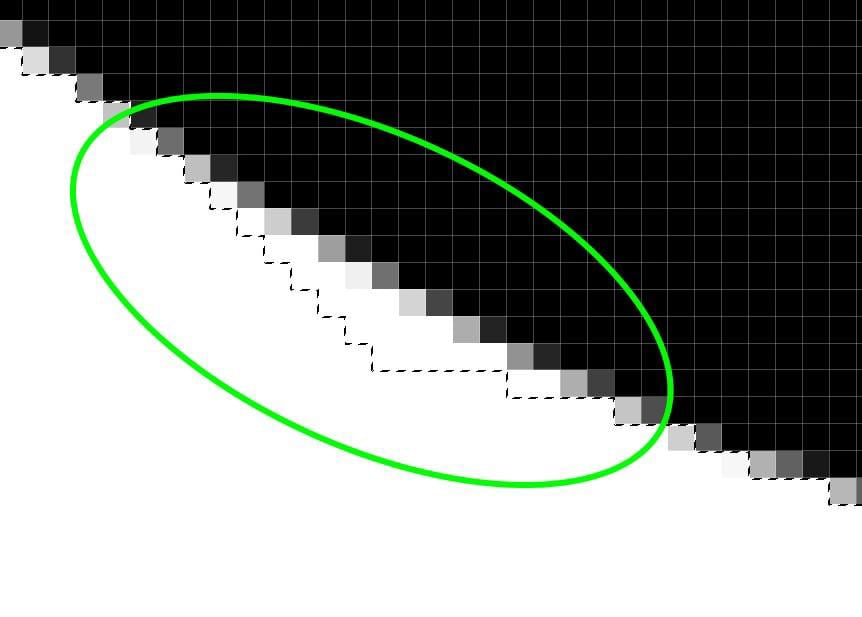
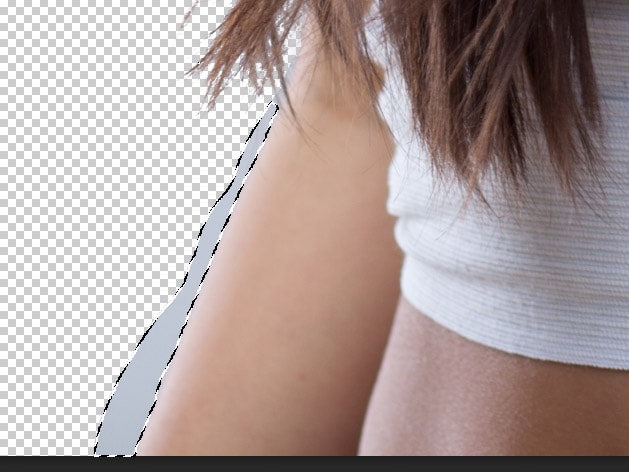
11. The Pen Tool
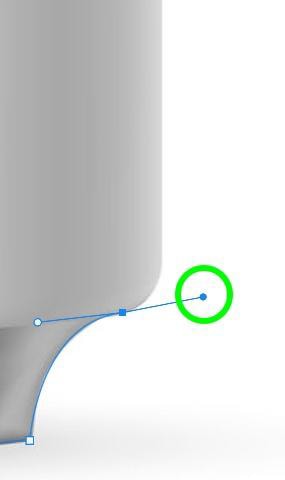
When you want the most accurate and clean selection possible, the Pen Tool is just the ticket. This tool creates a path that can be later used to create a selection. Since the path must be defined manually, it’s relatively easy to have an accurate selection of the edges if you spend time on it. The only downside to this tool is it’s time-consuming, but that’s a trade-off for pixel-perfect selections.

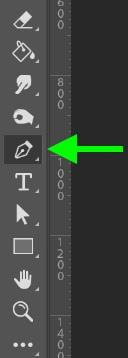
You can find the Pen Tool in the Toolbar or by pressing P.
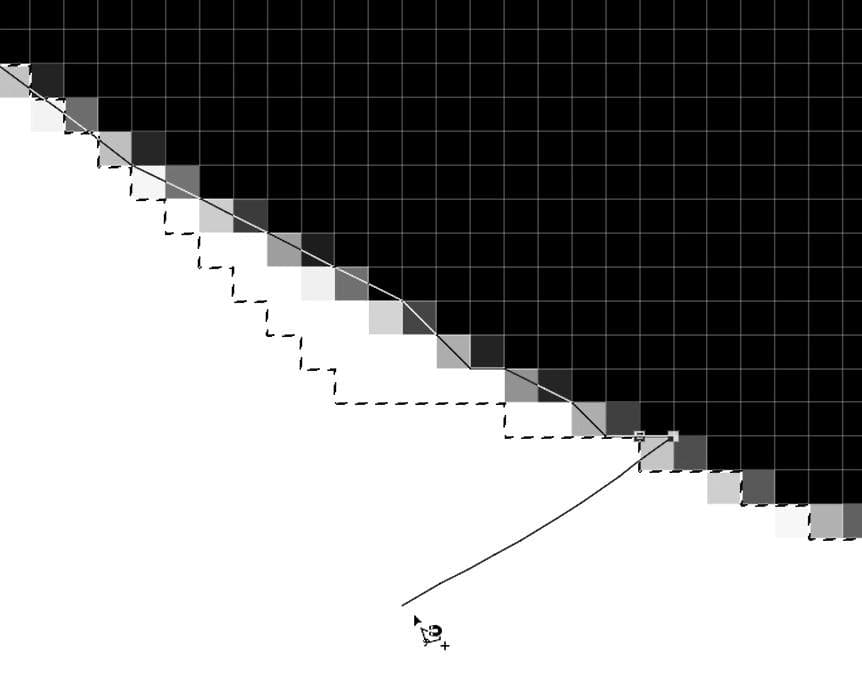
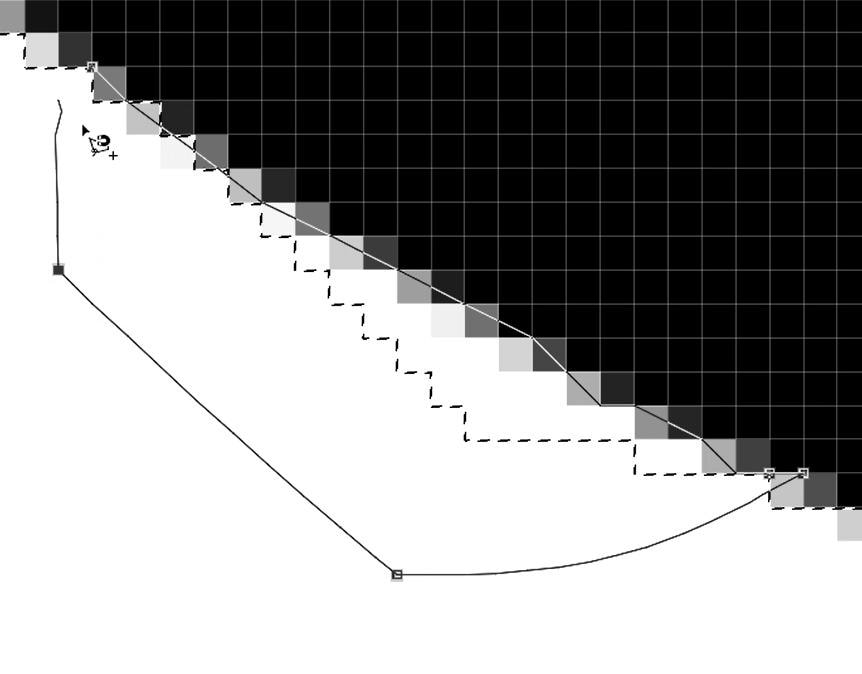
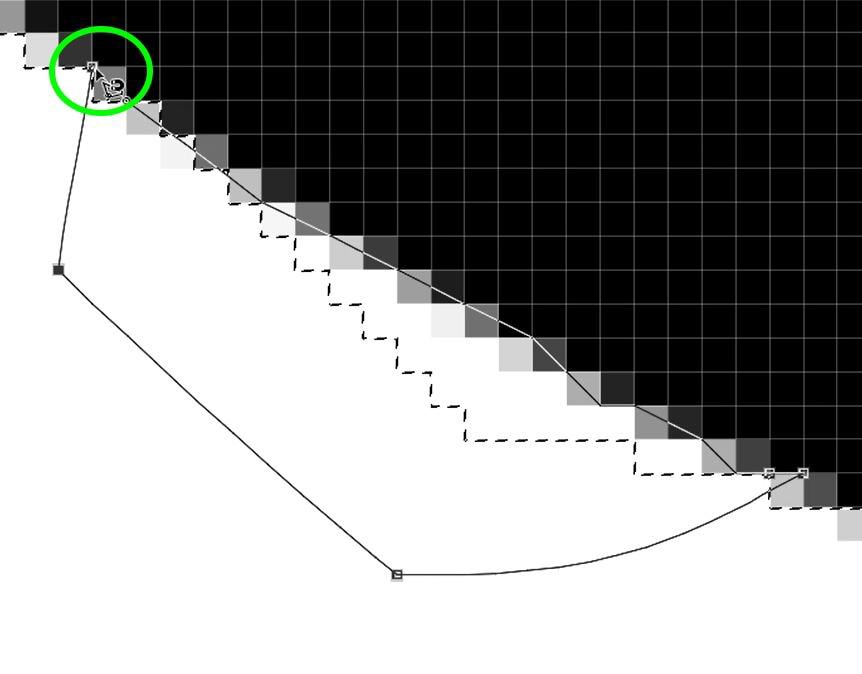
The Pen Tool works by creating anchor points as you click to define a path.
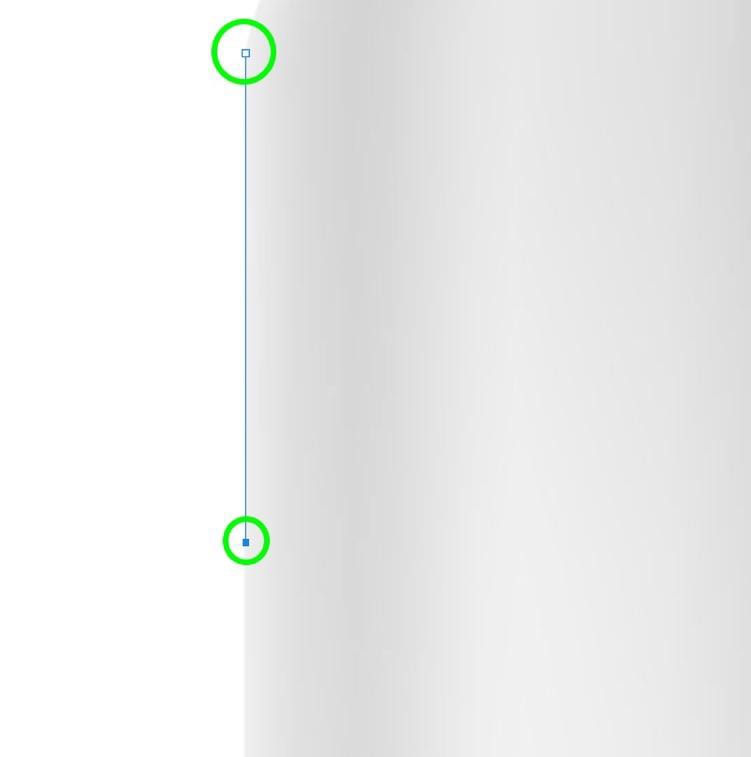
The Pen Tool is known for making precise curves by dragging the mouse to the right or left after you drop an anchor point.
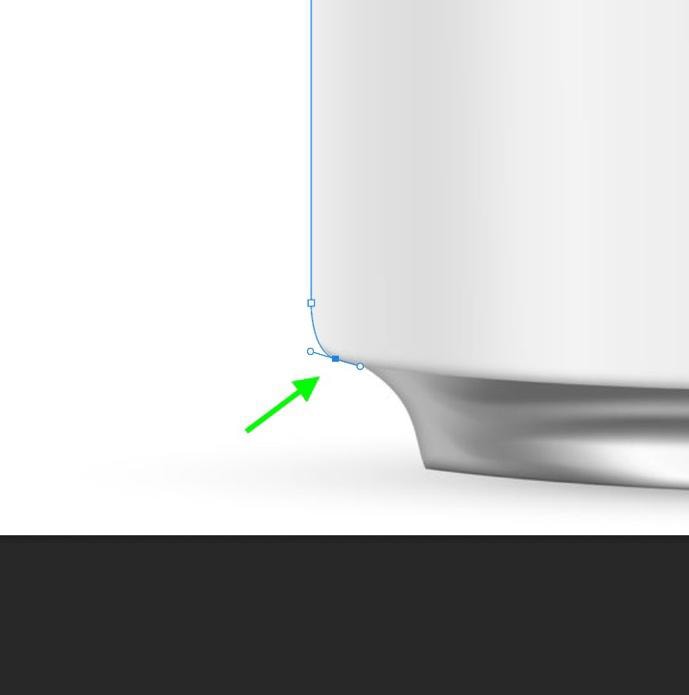
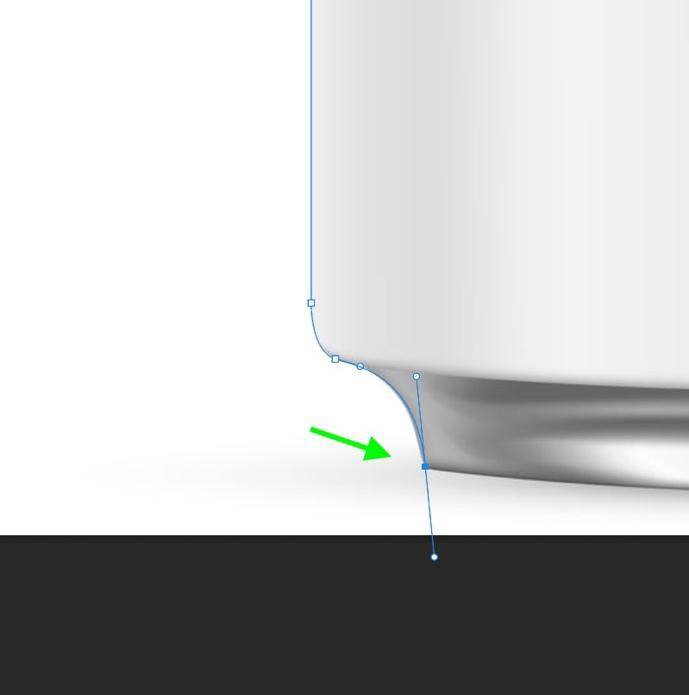
If you mess up with your anchor point placement, you can move it by holding Control (Win) or Command (Mac) and dragging the anchor point where you need it.
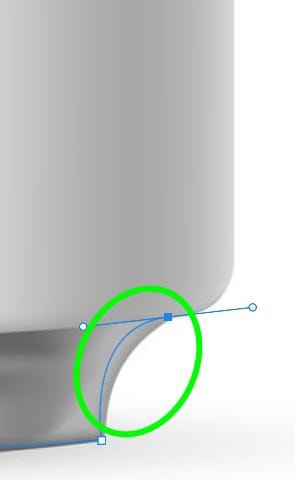

You can also move the handles by holding Control (Win) or Command (Mac) and dragging the handle where you need it.

Make your way around your subject until you reach the first anchor point you placed.
Then, under Make in the Options bar, choose Selection.
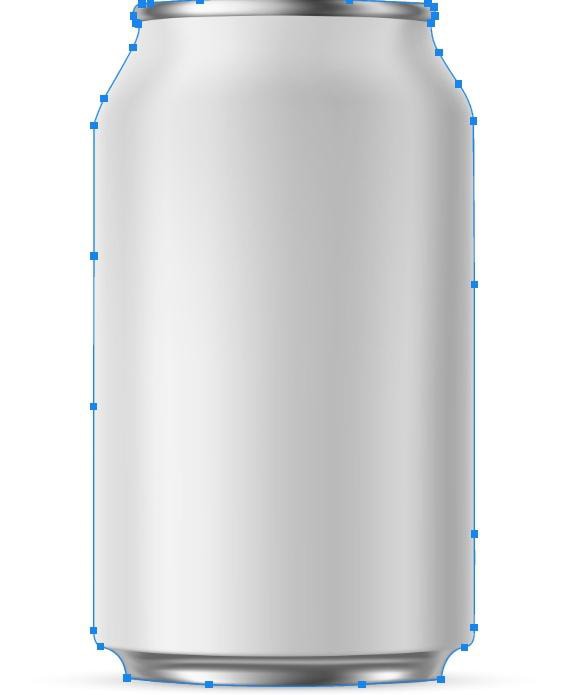

With your object selected, you can make the edits you need or remove the background.
Strengths:
- The most accurate way to select an object by hand
- Anchor points can be moved, so you don’t need to have perfect placement
Weaknesses:
- Time-consuming
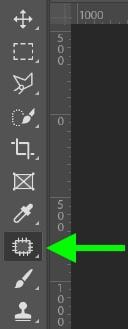
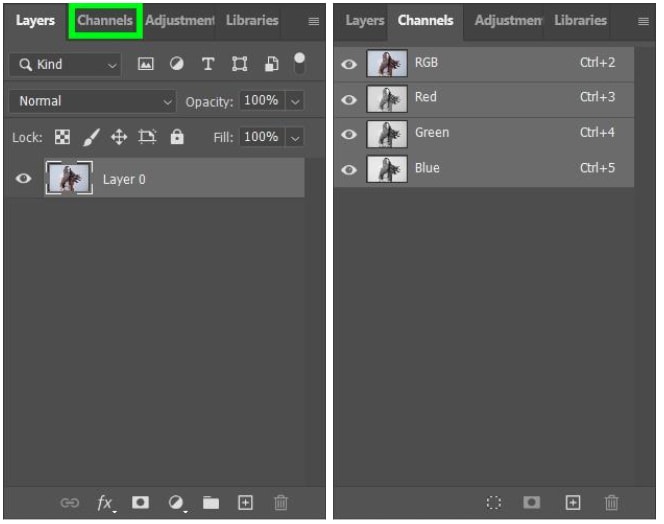
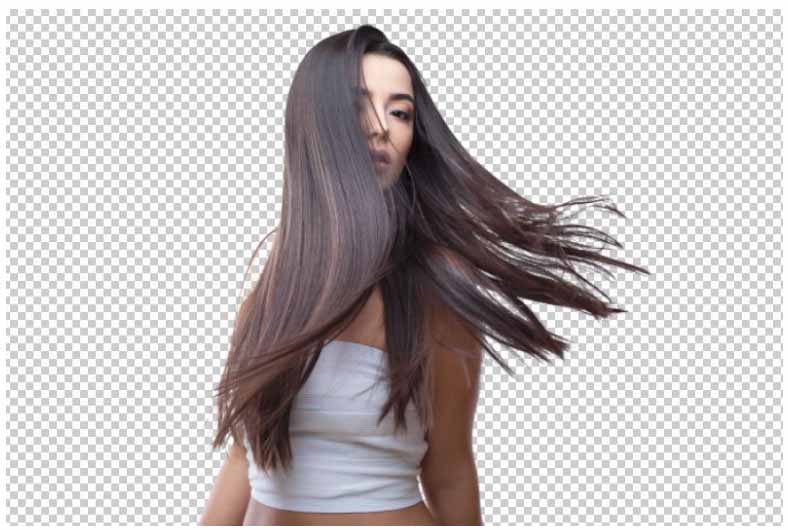
12. Channels
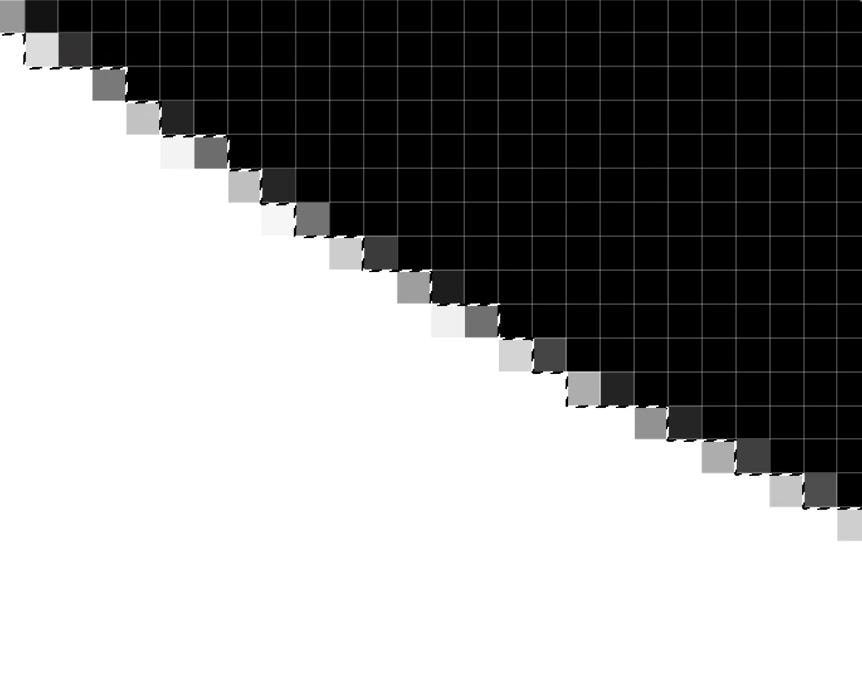
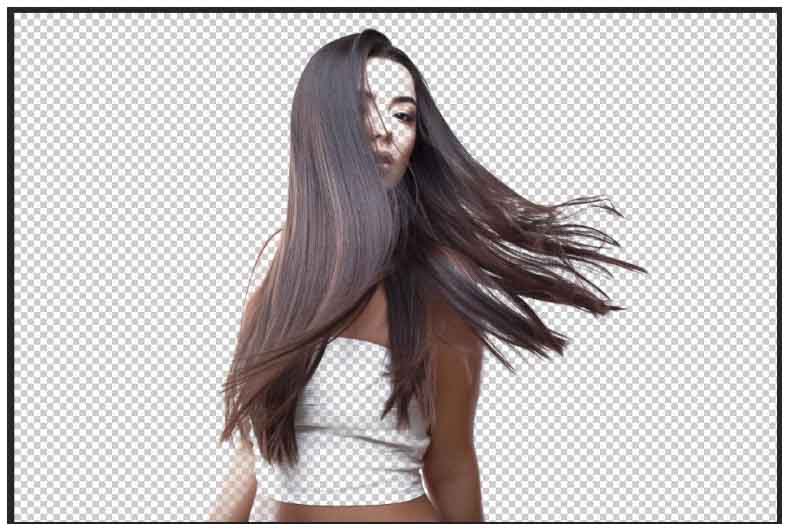
The Channels method is one of the most unique selection techniques in Photoshop since it uses contrast to create selections. This gives it an upper hand when selecting small and complex edges such as hair or tree branches. So whenever there are extremely fine details in your image, Channels are likely the best selection option assuming your background isn’t too dark.

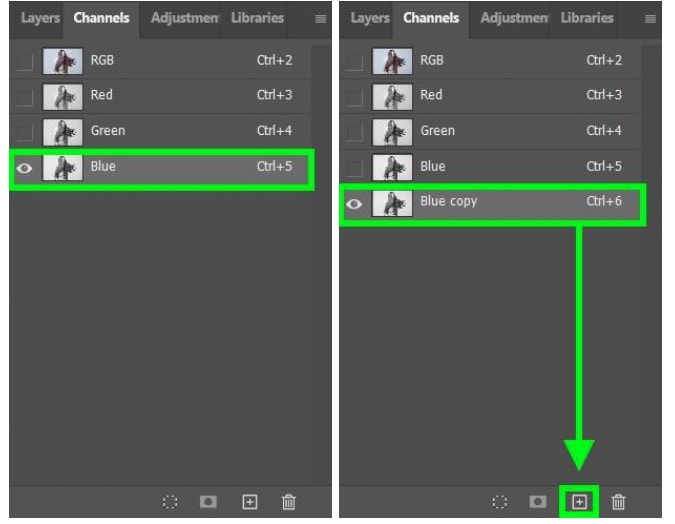
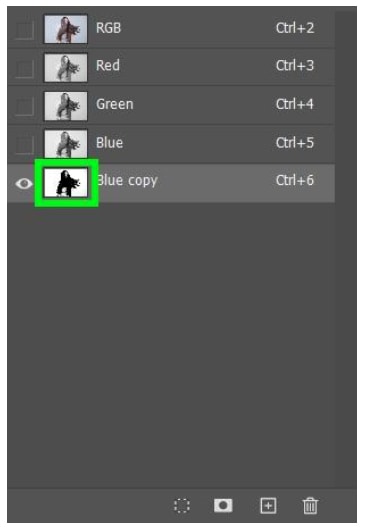
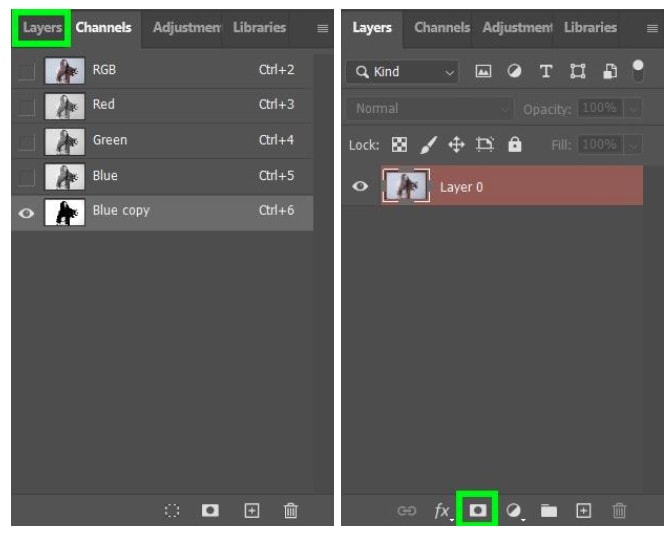
To make a selection using Channels, first, click on the Channels panel, which is usually located next to the Layers panel tab. You will then see the RGB, Red, Green, and Blue channels presented to you.
Your goal here at the beginning of the process is to find the channel with the most contrast between your subject and the background. To do this, click on each channel and judge for yourself which channel has the most visible contrast.
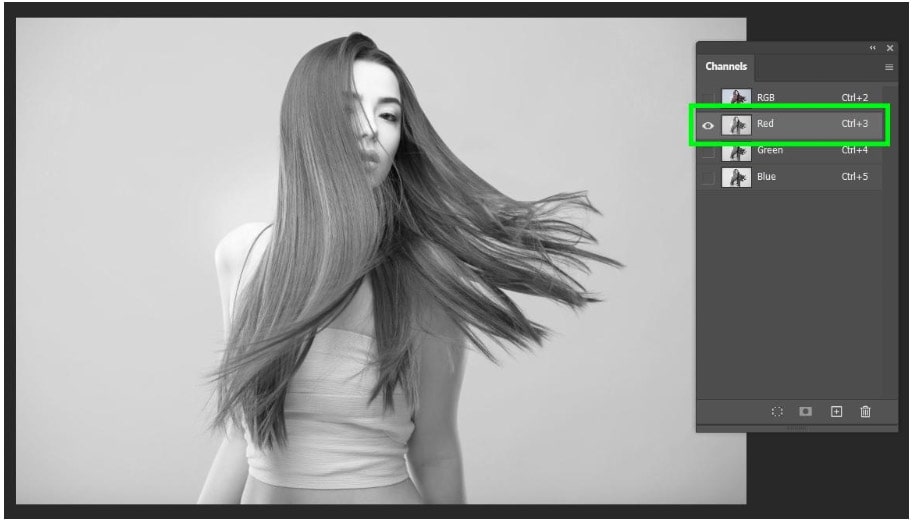
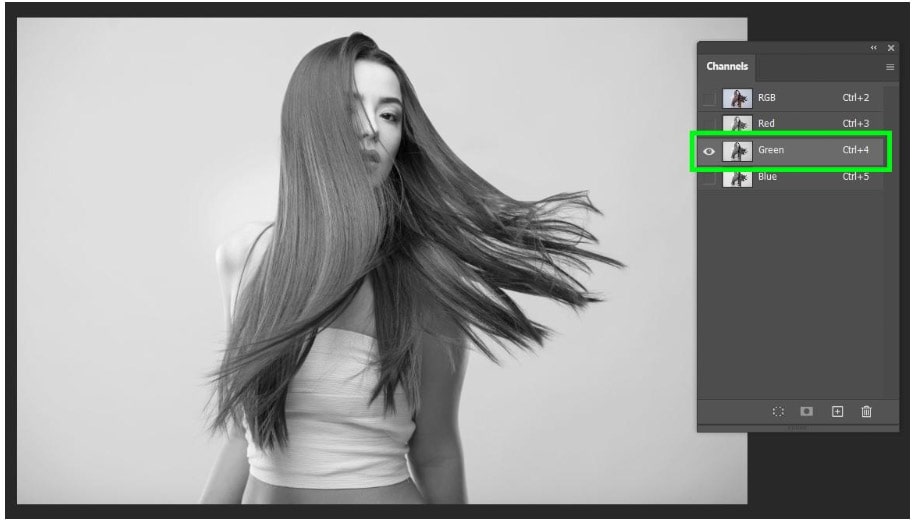
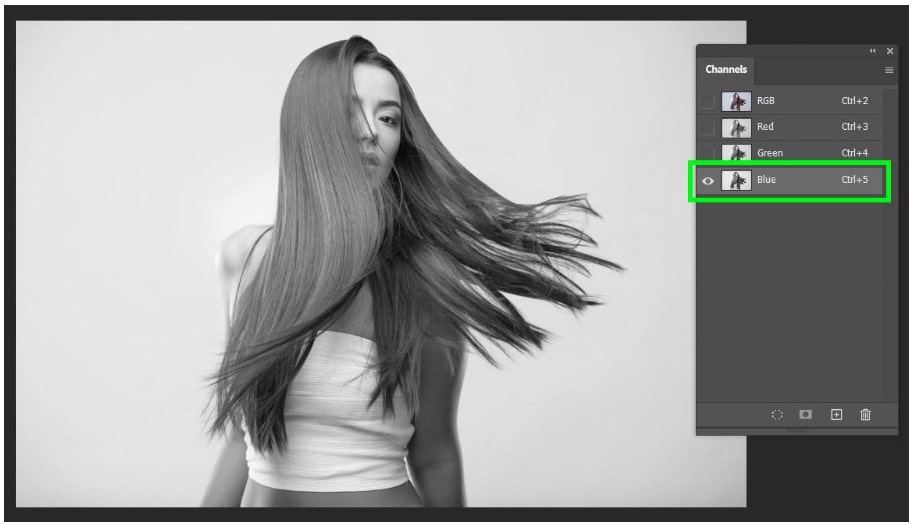
Sometimes it’s easy to tell which channel has the most contrast, and other times all three channels will look similar. Do your best to decide which one works for your image.
Once you’ve decided which channel works best, drag that channel down to the New Channel Button. This will make a copy of the channel.
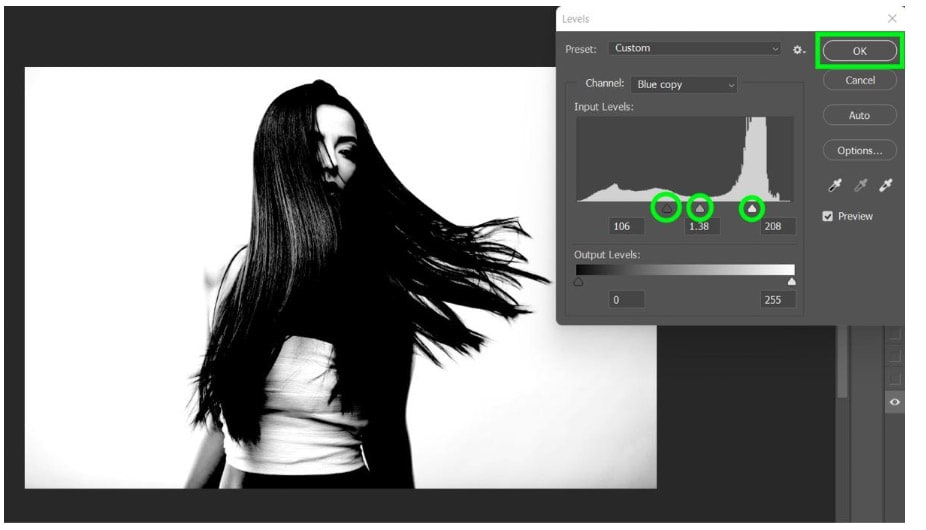
Once you have your copy ready, press Control + L (Win) or Command + L (Mac) to open up the Levels Panel. The handle on the left controls the Shadows in your image, and the handle on the right controls the Highlights of your image. The handle in the middle controls the Midtones.
- Adjust the Shadows until the inside of your subject is as dark as it can be without distorting the rest of your image
- Adjust the Highlights so your background is as bright as it can be
- Adjust the Midtones to help darken the inside of your subject if needed
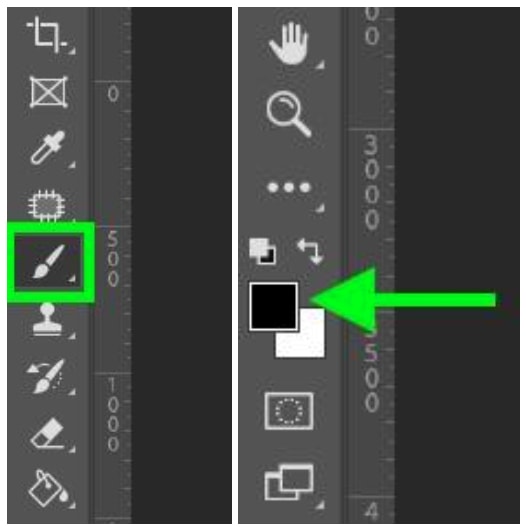
Adjusting the Levels of your image doesn’t always get the result you want. There will most likely still be bright spots within your shadow areas that need to be black. To fix this, grab your Brush Tool (B) and make sure your Foreground Color is black.
With your Brush Tool, paint over the lighter spots in the dark areas, and don’t worry about the rest of your image that has pure white or grey on it. You will handle those areas later.
After you touch up the dark areas, you must touch up the lighter areas of your background as well to make sure they are pure white.
To do this, grab your Brush Tool (B) and set the Mode to Overlay in the Options bar. This prevents your brush strokes from painting over your black areas and only paints on the gray and white areas. Brush over anywhere you feel is not white enough to be selected.

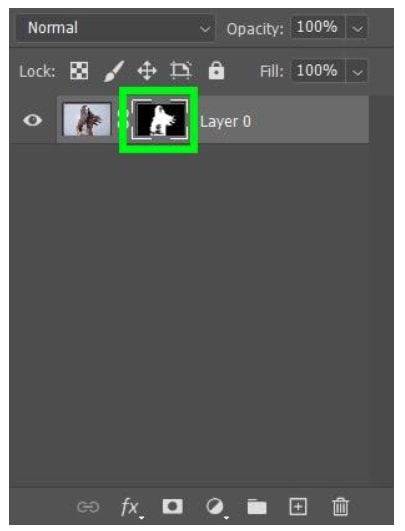
Now you can turn your channel into a selection by pressing Control (Win) or Command (Mac) and clicking the thumbnail of your copied channel.
You will see all the bright areas of your image selected.

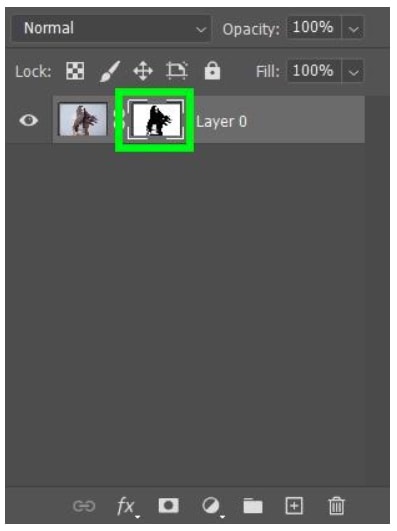
Once you have your selection ready, go to the Layers panel and then click on your layer. Then, click on the Mask icon to mask your selected areas.
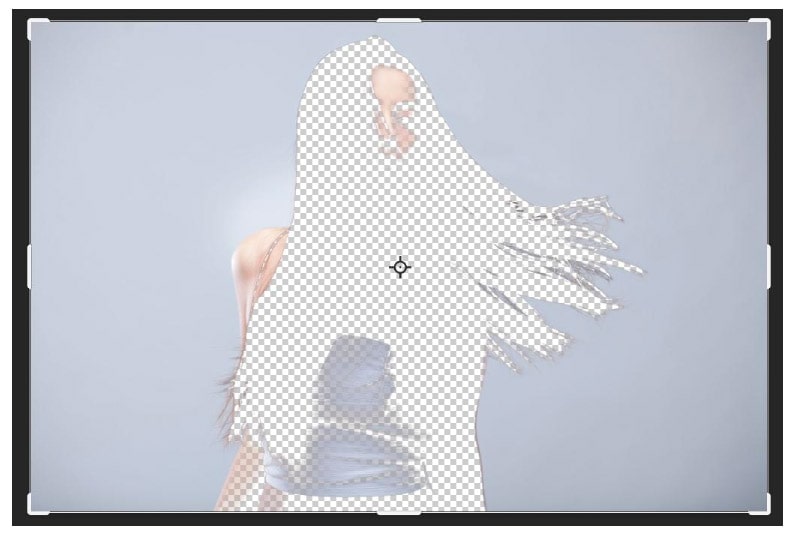
Since the mask hides the subject and the background is visible, click on the mask itself in the Layers panel and press Control + I (Win) or Command + I (Mac) to invert your mask. This reveals the areas you actually want to be selected.
Looking at your selection now, it looks better, but it’s still not where it needs to be. This is an easy fix.
Click on the layers mask and grab your Brush Tool (B), and ensure that your Foreground Color is white.
Also, ensure that Normal is selected under Mode in the Options bar.
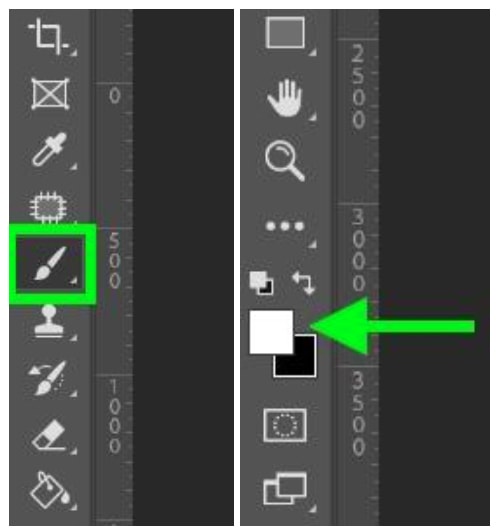

With your Brush Tool set up, paint over the areas that are transparent. Do this for all the transparent areas in the middle of your subject.
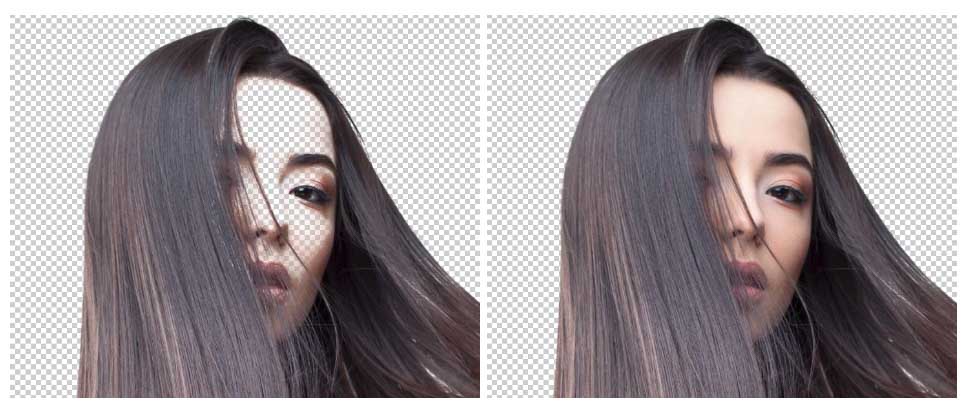
You may have areas around the edge of your subject that need to be painted back on. If this is the case, paint over these areas as well, and don’t worry about slightly going over the edge of your subject and bringing back some of the background.
Now, to remove the areas that you don’t want to keep, grab the Quick Selection Tool (W), which I showed earlier, and select the background areas.

Once you have your background areas selected, fill those areas on the mask with black by pressing Control + Delete (Win) or Command + Delete (Mac). Just make sure that your Background Color is black to make this work.
Strengths:
- Probably the best way to select a very complex subject with little chance of missing any pixels that are important
- If no other selection tools or methods work, this one should
Weaknesses:
- Not beginner friendly
- There are many steps to the process, and it will take you time to memorize them all
Now to get a more in-depth view of any of these tools, I have individual tutorials about these varying tools you can find on my Photoshop Basics Resource Page.
Happy Selecting!


