
Channels are one of the lesser-known yet uber-powerful selection methods in Photoshop that allow you to make extremely precise selections of complex edges. By using the natural contrast in your photo, a single color channel can be used to create the parameters for a mask. That way, you can make exact cut-outs or selective adjustments regardless of the complexity of your subject.
Now I know that might sound a little overwhelming, but trust me when I say this will be your new favorite selection method.
Let’s take a deeper look at how this tool works and how you can begin using it to make flawless selections.
What Are Channels In Photoshop?
There are different types of channels in Photoshop, such as alpha channels that store selections and color channels that store color information about your photo.
Photoshop has a panel dedicated to channels that change according to the color mode you choose. For example, if you choose RGB, you will view RGB channels, and if you choose CMYK, you will view CMYK channels.
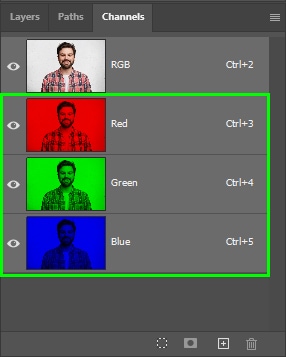
In the examples below, you can see RGB channels. Each channel represents the amount of a particular color in an image.
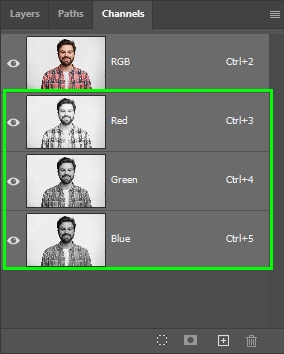
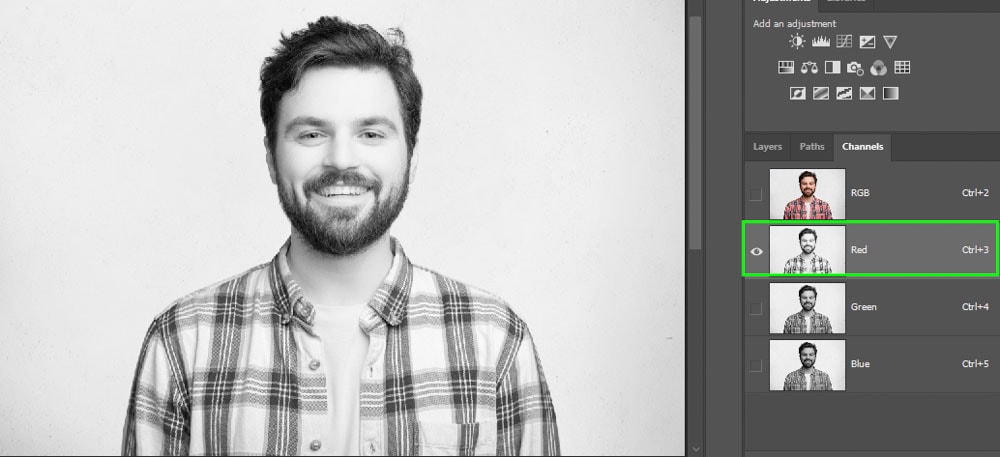
Digital images are colorized in RGB mode, which is three color channels working together to make every color you see appear as it should. Although digital photos contain multiple colors, they are all combinations of red, green, and blue. When you select the Red channel, for example, you will view the amount of red in a particular image represented by a grayscale preview.
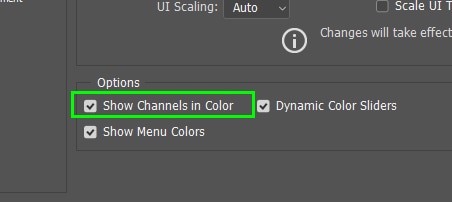
By default, color channels are displayed in grayscale, but you can also view them in colors by going to Edit > Preferences > Interface (Win) or Photoshop > Preferences > Interface (Mac).
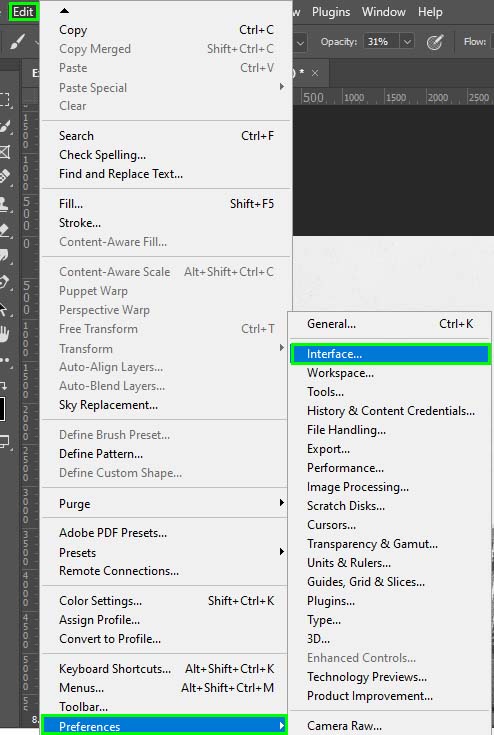
Then, select Show Channels In Color.
You will then view each channel in its corresponding primary color. However, this isn’t ideal for creating selections since the grayscale mode makes it easier to see contrast and make selections from a channel.
What Can Channels Be Used For?
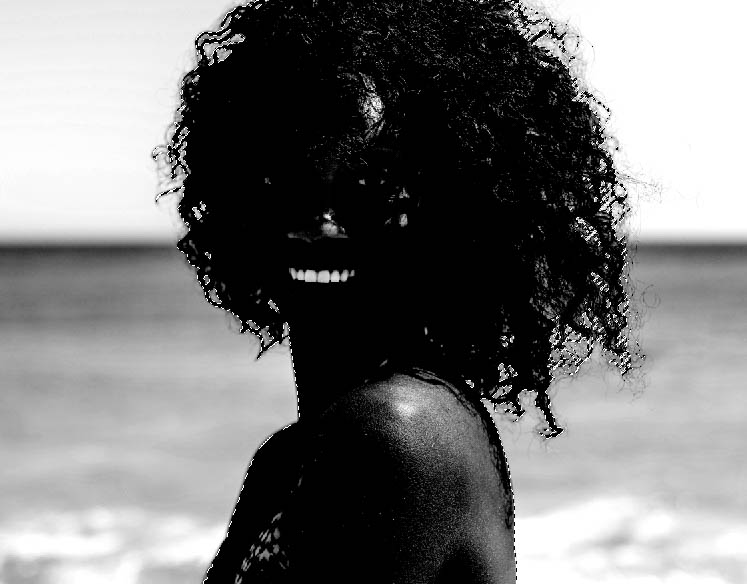
Channels work best for making complex selections, such as selections of hair and trees. Ideally, you should use this selection method when working with images with high contrast between the object to be removed and the background.
The way this works is by using an individual color channel (in grayscale view) to identify the channel with the most contrast between your subject and the background. With the help of a levels adjustment, you can amplify this contrast to help Photoshop create a selection between black and white.
This selection can then be applied to a layer mask on your original image to remove the background while retaining fine details like strands of hair or leaves on a tree branch.
How To Create A Selection With Channels
The key to creating a selection using channels is increasing a channel contrast until it becomes a good enough selection for a layer mask. Once that happens, you can easily remove an image background. Here is how to do it in 6 simple steps.
Step 1: Find The Channel With The Most Contrast In Your Image
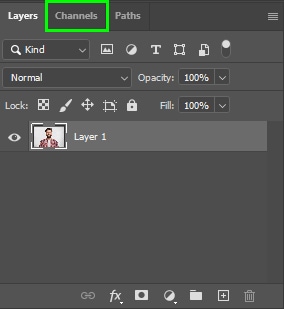
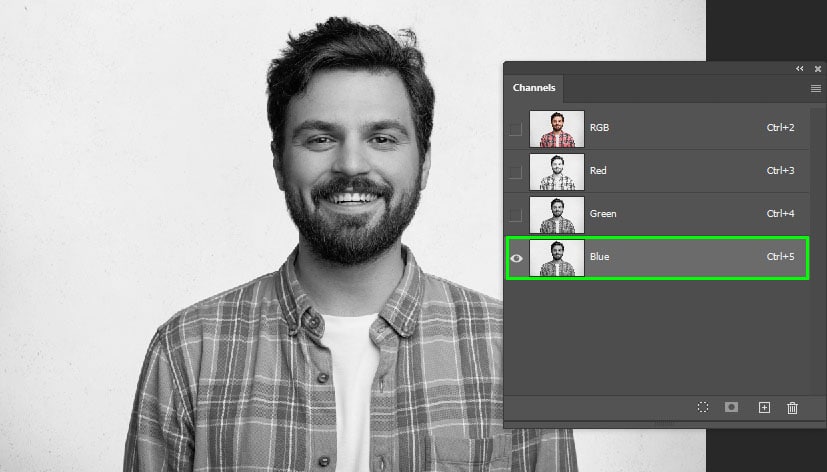
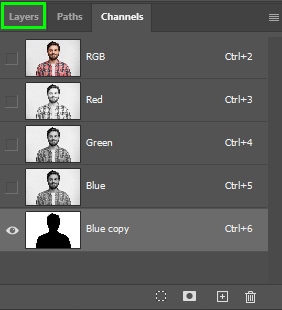
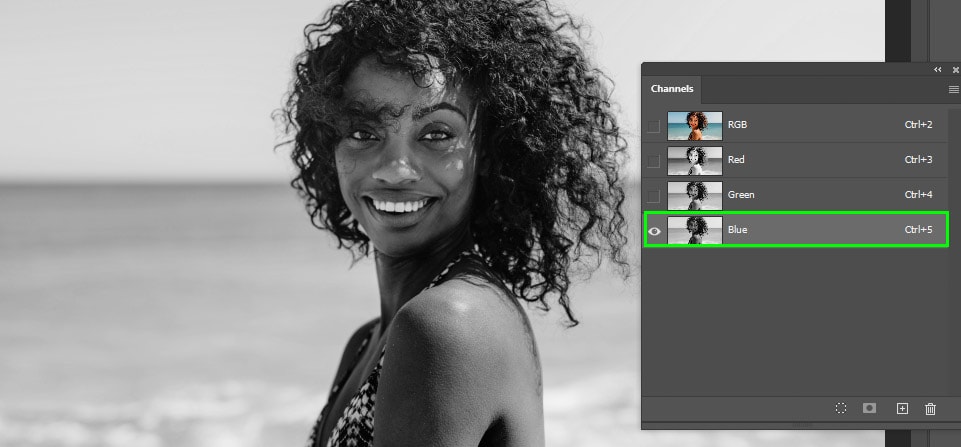
After opening your image in Photoshop, click the Channels panel beside the Layers panel.
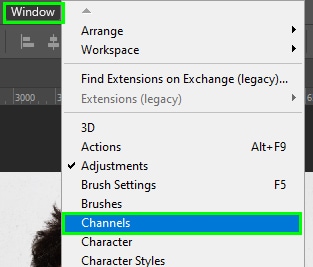
If such a panel isn’t visible in your workspace, bring it up by going to Window > Channels.
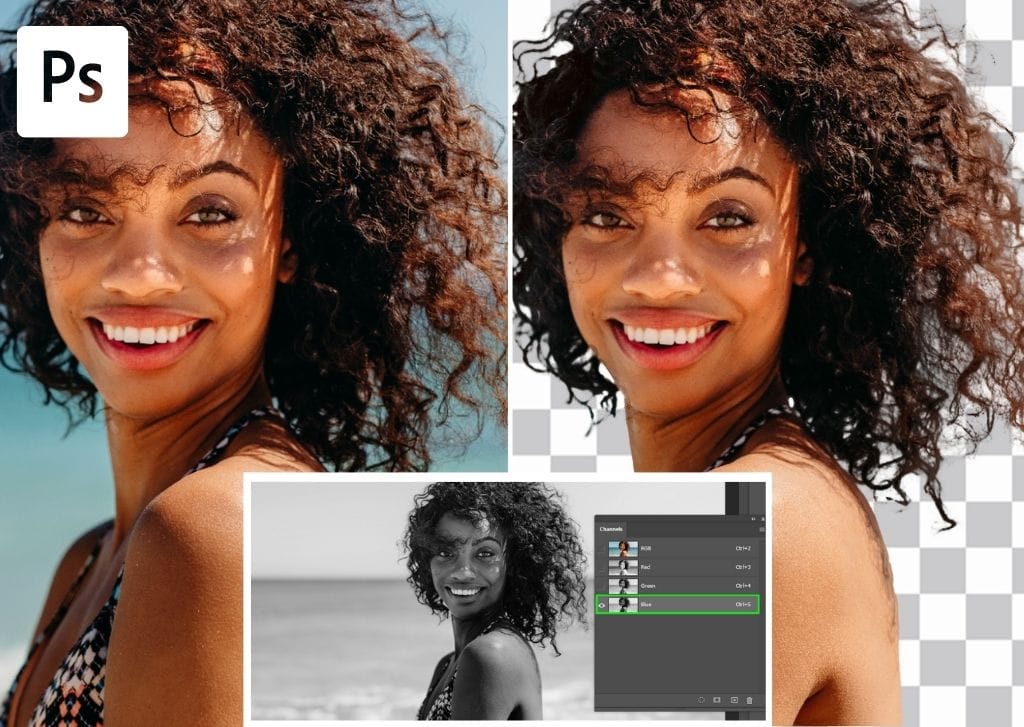
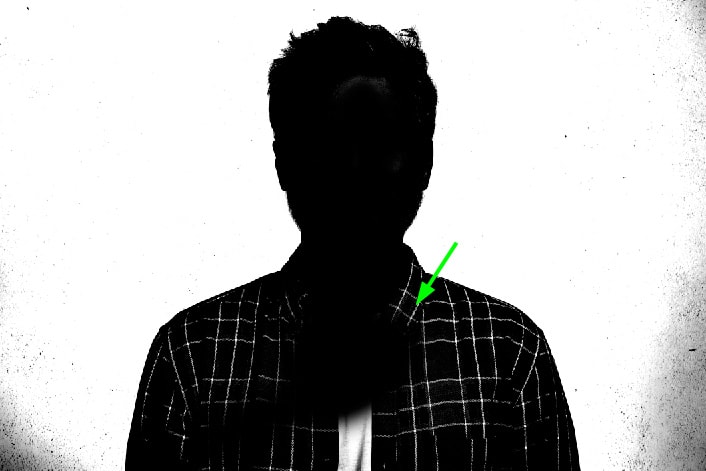
When the Channels panel appears, select the channel with the most contrast. When working with photos that contain people, that is usually the blue channel. However, this will vary between different photos.
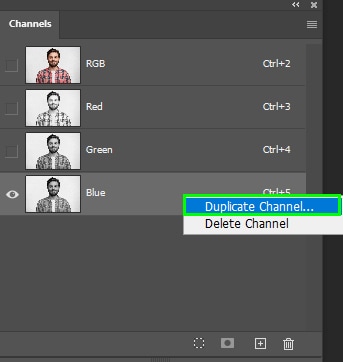
Step 2: Duplicate The Channel With The Most Contrast
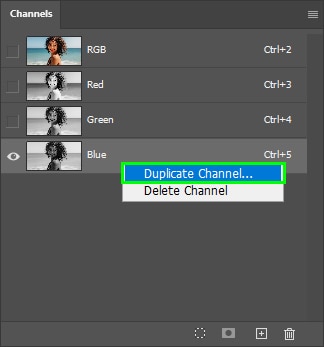
After finding the right channel, you need to duplicate it. To do this, right-click Win or Control + click (Mac) the channel layer and choose Duplicate Channel.
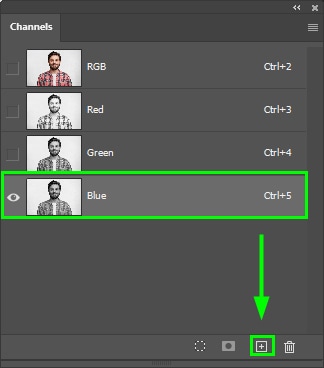
Alternatively, drag the desired channel to the plus sign icon at the bottom of the Channels panel.
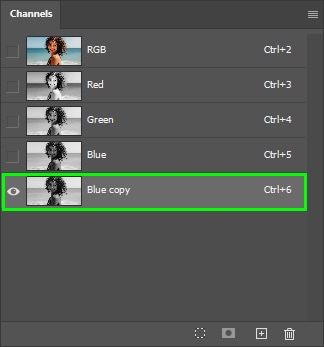
The copy will appear under the original channel layer. Keep it active.
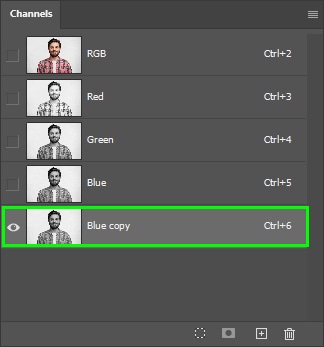
When you duplicate a channel, the corresponding original channel is not affected. This is important since we aim to remove something from a background, not change anything in the original image colors. If you do the following edits on one of the original color channels, you will end up with severely distorted colors, forcing you to start over.
Step 3: Boost Up Your Channel Copy’s Contrast Using Levels
When turning a channel into a selection, you need to increase the image contrast to the maximum. The goal is to make the background completely white and the content you want to remove completely black.
In other words, you need to create a clear selection area with 100% black and 100% white to base your selection on. Any shades of grey will be left at varying opacity levels and not completely visible or removed. So removing any grey is important if you want a flawless selection.
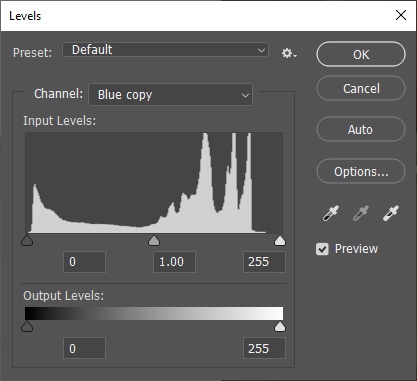
To increase your image contrast, you can use the Levels Adjustment. To do this, hit Control + L (Win) or Command + L (Mac) with your copied channel selected in the Channels panel.
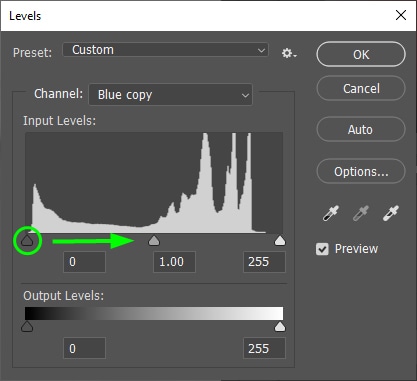
The Levels panel contains a graph with the image shadows, highlights, and mid-tones, as shown below.
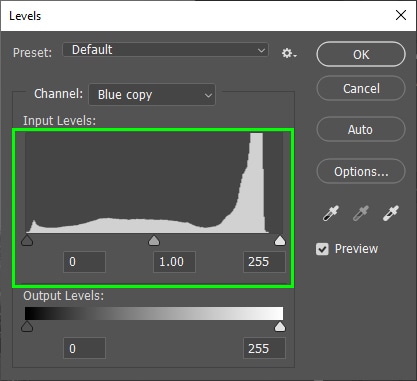
The goal is to increase shadows and highlights to get something close 100% black and 100% white.
To boost your image shadows, click the black arrow beneath the Levels graph and pull it to the right.
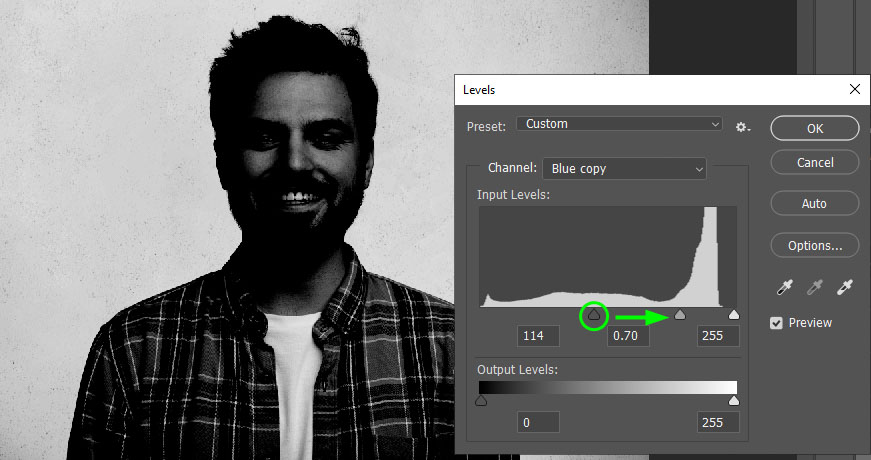
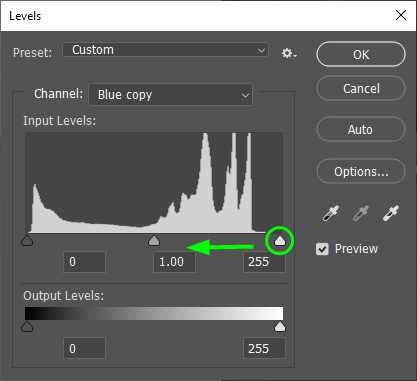
To increase the highlights, click the white arrow and push it to the left.
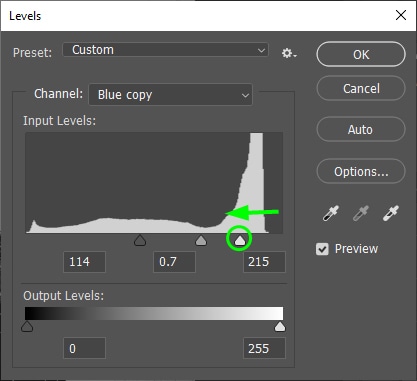
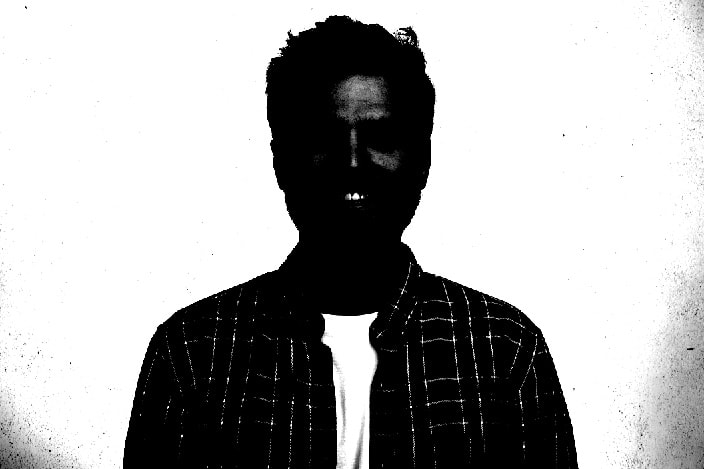
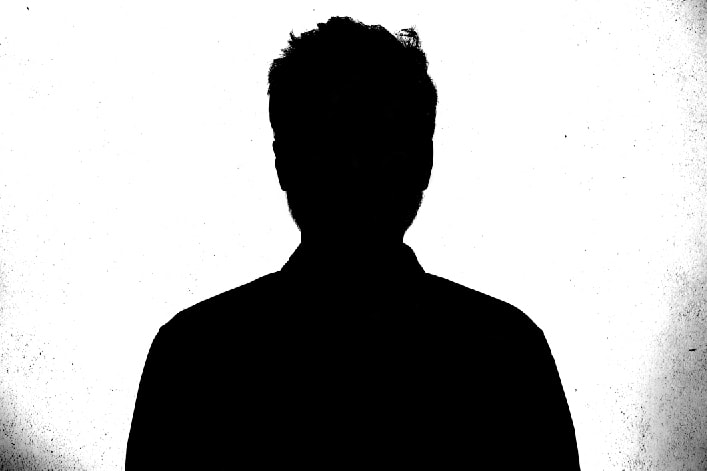
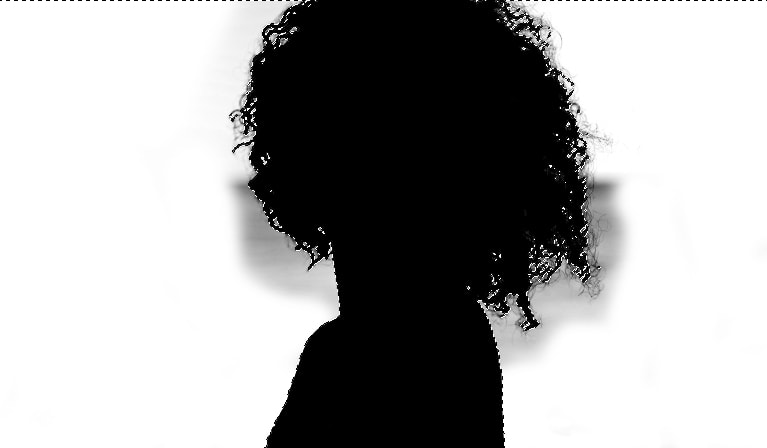
Adjust shadows and highlights until your background turns as bright as possible and your subject as dark as possible, as shown below.
Step 4: Refine The Selection Using The Brush Tool
After increasing your image contrast, there might still be bright spots on your subject and dark spots on the background. Fortunately, you can fix that quickly with some simple tricks.
To do that, enable the Brush Tool by pressing B on your keyboard. Then, go to the Options bar and make sure the brush mode is set to Normal.

Set brush Opacity to 100%.

Next, go to the Toolbar and set the foreground color to black.
Now, paint over your subject in the areas that are not entirely black yet.
Zoom in on your image when needed by pressing Control + + (Win) or Command + + (Mac). You can also adjust brush size by pressing the right bracket key ] and decrease brush size by pressing the left bracket key [.
Paint black over your subject until your subject turns 100% black.
Once your subject is entirely black, you must refine the background and remove any gray or dark stains, making the background completely white.
To do this, enable the Brush Tool again by pressing B. Set the foreground color to white.

Next, ensure the brush mode is set to Normal and the brush Opacity set to 100%.
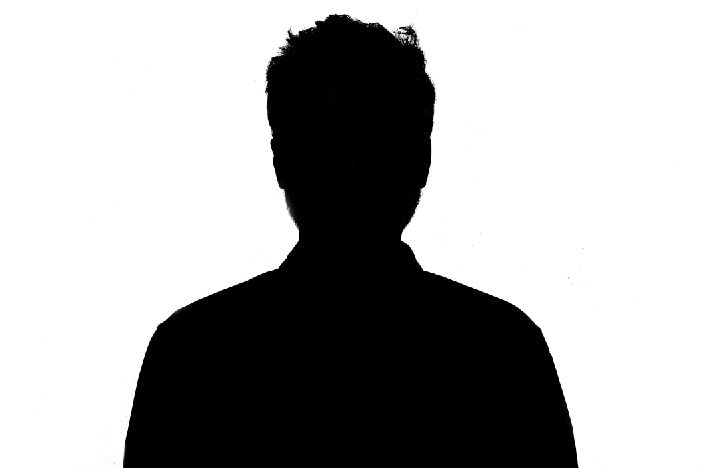
Finally, paint over the black and gray spots left in the background. The background must be completely white by the end of the process.
Step 5: Create A Layer Mask
By creating a layer mask, you can easily remove the image background. To do this, hold Command (Mac) or Control (Win) and click on the Channel copy layer thumbnail. This will turn your channel into a selection.
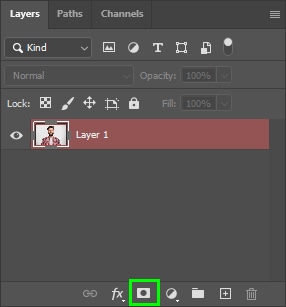
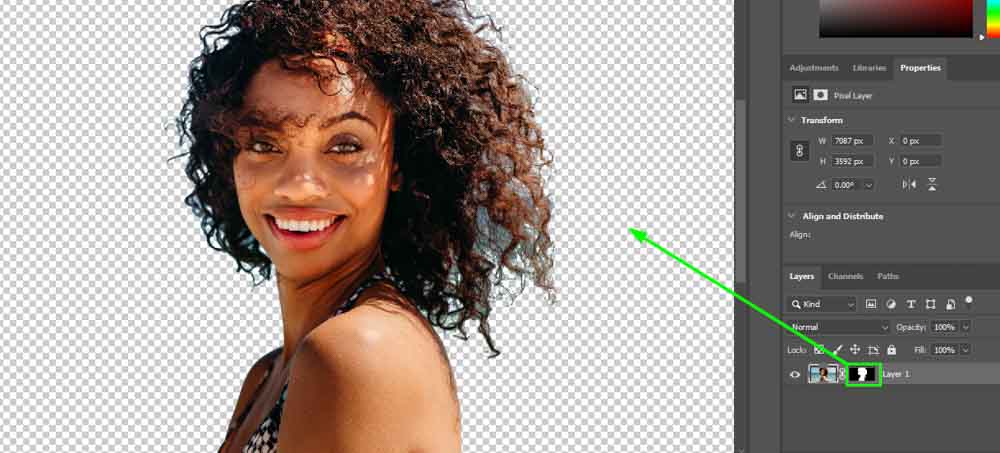
Next, click the Layers tab.
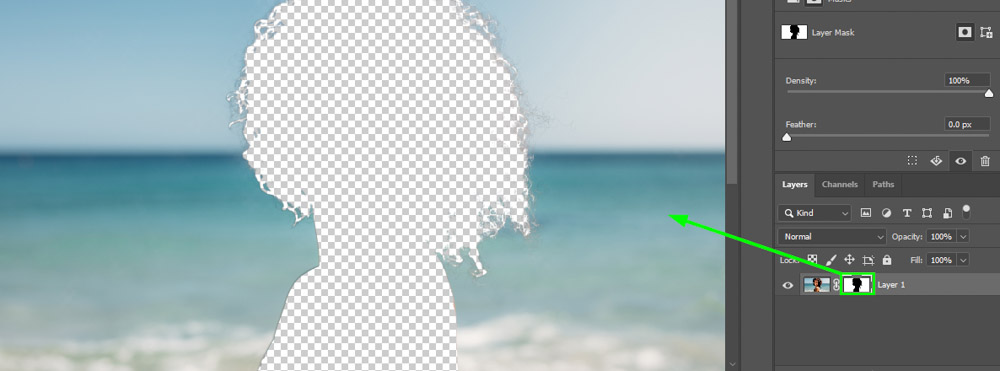
Back in the Layers panel, click the layer mask icon.
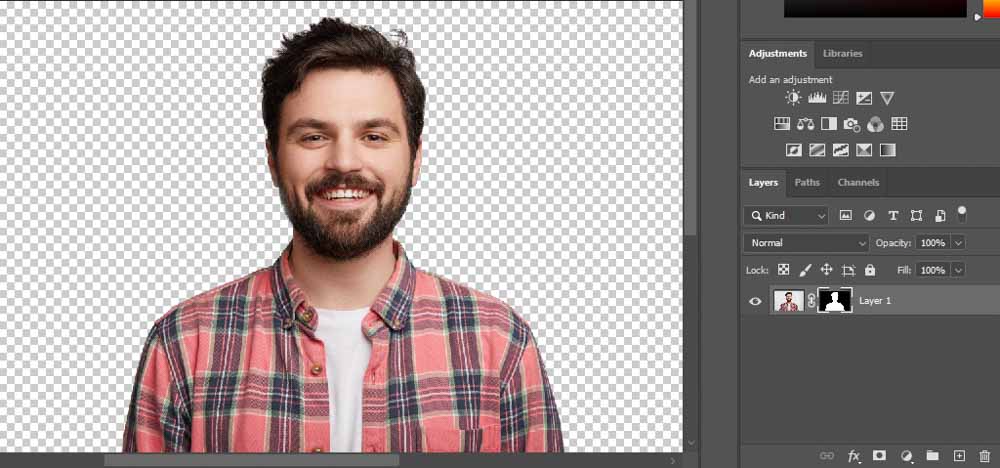
This will apply your selection to a layer mask linked to your original image layer.
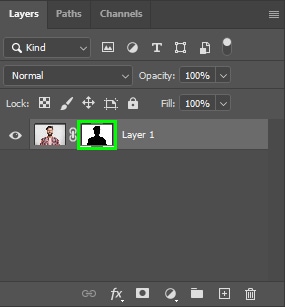
If the selection is inverted, press Control + I (Win) or Command + I (Mac) while your layer mask is selected. This will make your subject visible and the background invisible.


How To Refine Complex Selections With Channels
Some selections are easier than others. A solid background is relatively easy to remove. However, a background with a lot of variation of hues makes the selection way more complex. Fortunately, there are some tricks to make the removal of a complex background easier and more precise.
Step 1: Find The Channel With The Most Contrast In Your Image
Open the Channels panel and find the channel with the most contrast.
Step 2: Duplicate The Channel With The Most Contrast
Duplicate the chosen channel by right-clicking its layer and selecting Duplicate Channel.
A copy of the chosen layer will be generated. Keep it active.
Step 3: Boost Up Your Image Contrast Using Levels
While using Levels to increase the contrast of an image, you need to avoid losing the image details. Keep the chosen channel copy active and press Control + L (Win) or Command + L (Mac) to bring up the Levels adjustment.
Move the black arrow to the right to increase shadows.
And move the white arrow to the left to increase the highlights.
You should be careful while using the Level adjustments when creating complex selections.
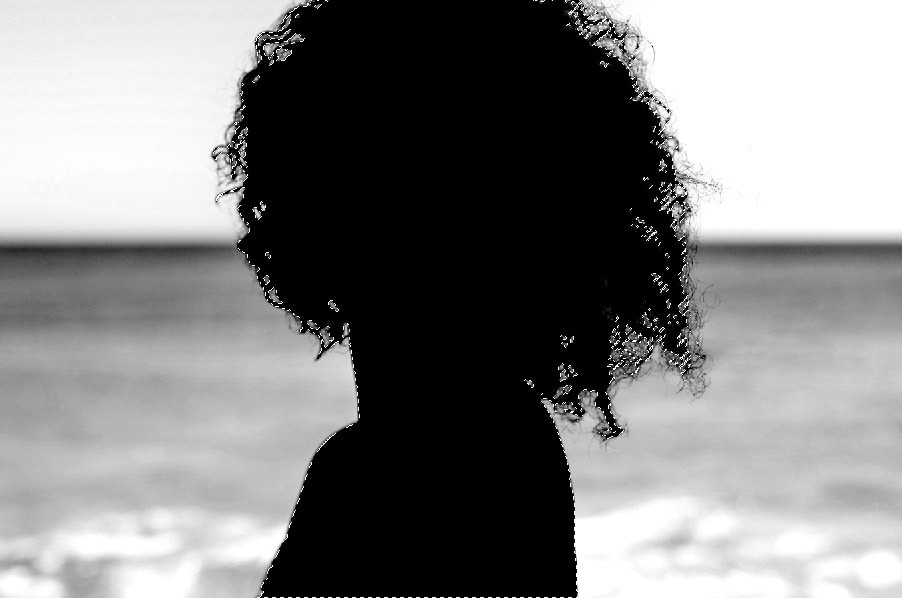
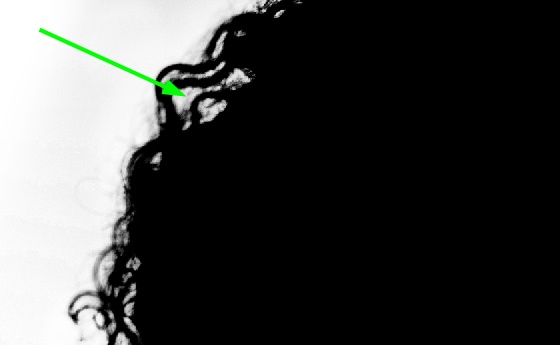
For example, I increased the highlights in the image below to make the background white. However, when I turned up the highlights too much, the model’s flyaway hair started to disappear, leading to the absence of such details in my resulting image.
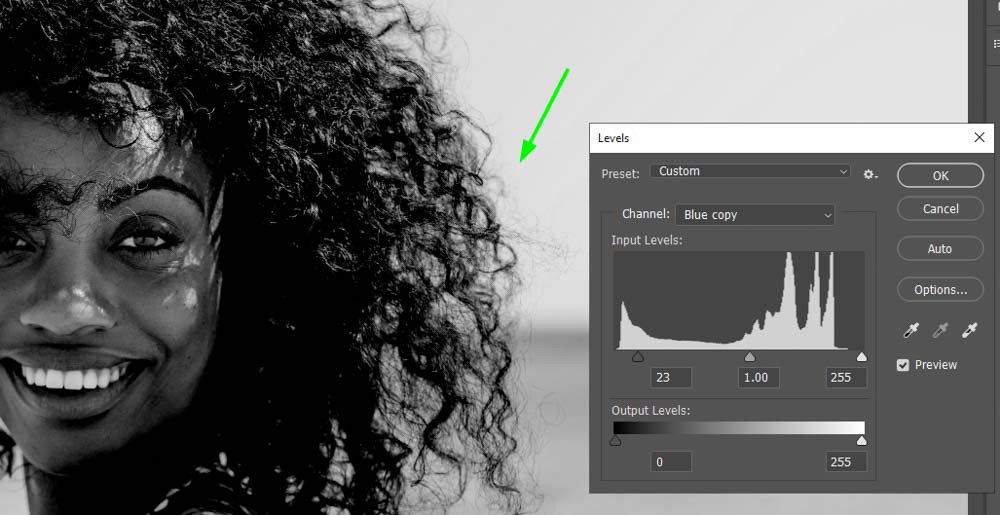

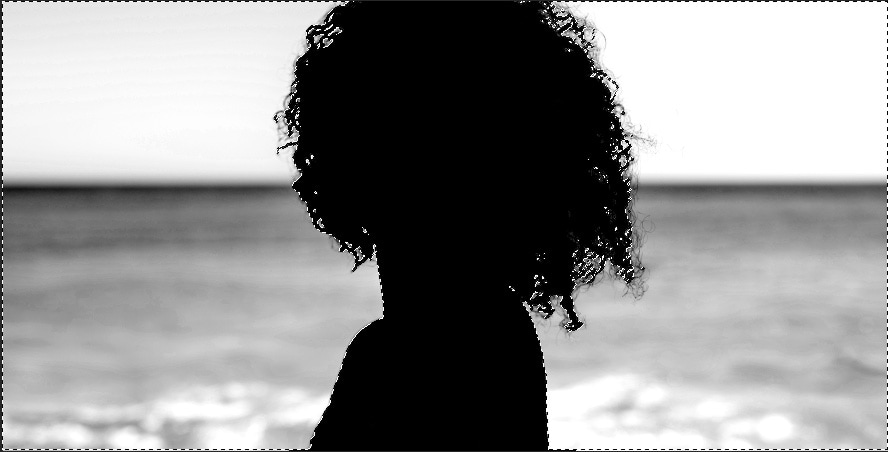
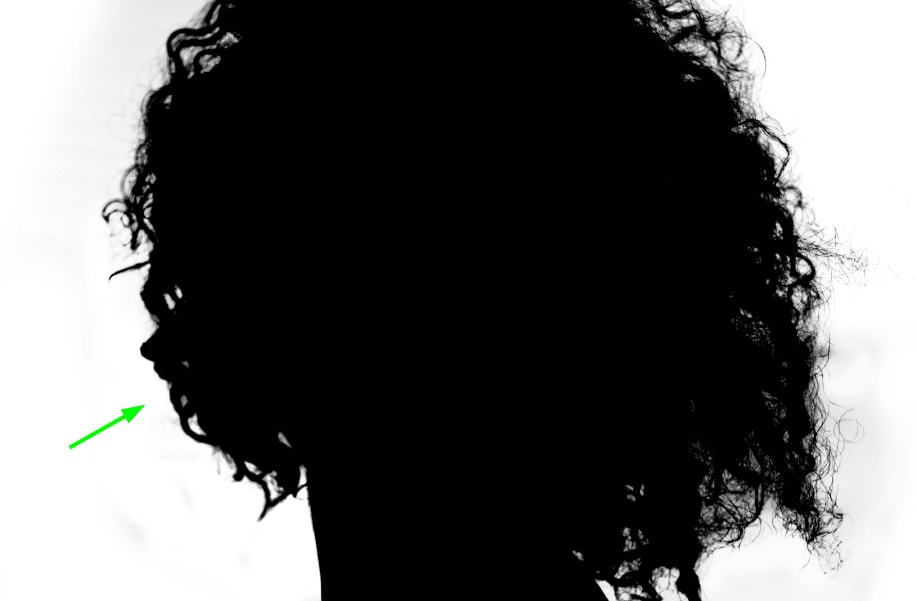
For these reasons, you must adjust levels to the point where the background turns whiter, but the image doesn’t lose details, such as in the example below. Notice I was getting close to making 100% black and white area, but the model’s flyaway hairs were still visible.
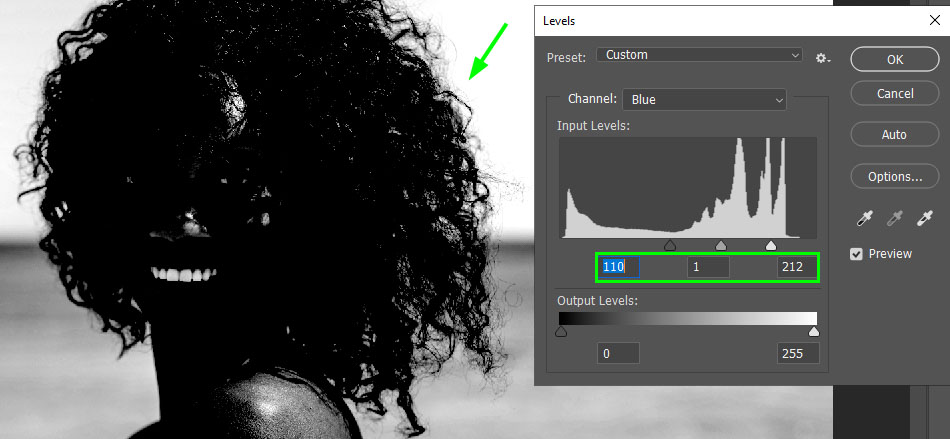
With so many white and grey areas left over, we need to call on some additional methods to refine out channel before making a selection. Let’s start by making our subject fully back like before.
Step 4: Make A Selection Around The Subject With The Quick Selection Tool
By using the Quick Selection Tool, you can get a quick and easy selection of your subject to paint black within. However, you still retain the fine details of the fly away hairs that would have been removed with other selection methods.
To begin, go to the Toolbar and select the Quick Selection Tool (W).

Then, choose Select Subject in the Options bar.

Photoshop will generate a selection around your subject.
Step 5: Paint Your Subject Black
Once your subject is selected, enable the Brush Tool by pressing B on your keyboard. Afterward, go back to the Toolbar and set the foreground color to black.
Now, start painting the selection. Make sure to paint the entire selection black.
With the active selection around your subject, you will only be able to paint black within the selected area. This makes it much easier to “color inside the line.”
Step 6: Invert The Selection
After finishing painting your subject, you need to invert the selection so you can paint the background white and finish creating your layer mask. To do this, press Control + Shift + I (Win) or Command + Shift + I (Mac).
Now the selection is around your background and no longer around your subject.
Step 7: Paint The Background White
After painting black over your subject, you need to invert the selection to paint the background white and finish creating your layer mask. To do this, enable the Brush Tool (B). Then, go to the Toolbar and set the Foreground color to white.
Now, paint over the entire background except for the area near the hair. This is because that area requires special treatment since it contains many details that need to be preserved.
Once you have painted everything properly, press Control + D (Win) or Command + D (Mac) to deselect the selected area.
Step 8: Refine The Area Around The Hair
First, select the Brush Tool by pressing B. Next, set the foreground color to white in the Toolbar.
After that, go to the Options bar and change the brush blend mode to Overlay.
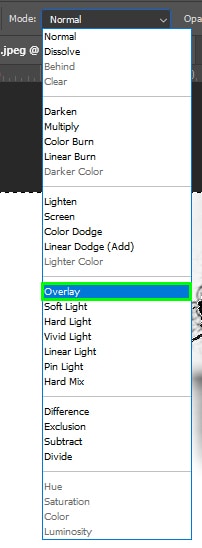
The overlay blend mode will remove gray pixels and preserve black pixels, which will help refine the hair. Now you can paint over the hair edges.
When painting inside the hair, you need to decrease the Brush Tool opacity to 40 or 50%. This will help you preserve flyaway hairs in those areas.

Step 9: Remove The Background
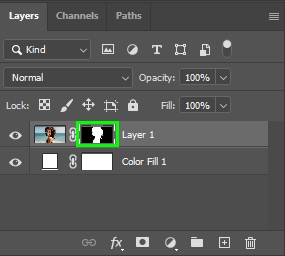
Once you finish creating your layer mask, enable the selection by pressing Control (Win) or Command (Mac) on your keyboard and then clicking the channel thumbnail.

Then, go back to the Layers panel and click the layer mask thumbnail.

If the selection is inverted, press Control + I (Win) or Command + I (Mac). This will make the subject visible and hide the background.
Step 10: Refine The Selection
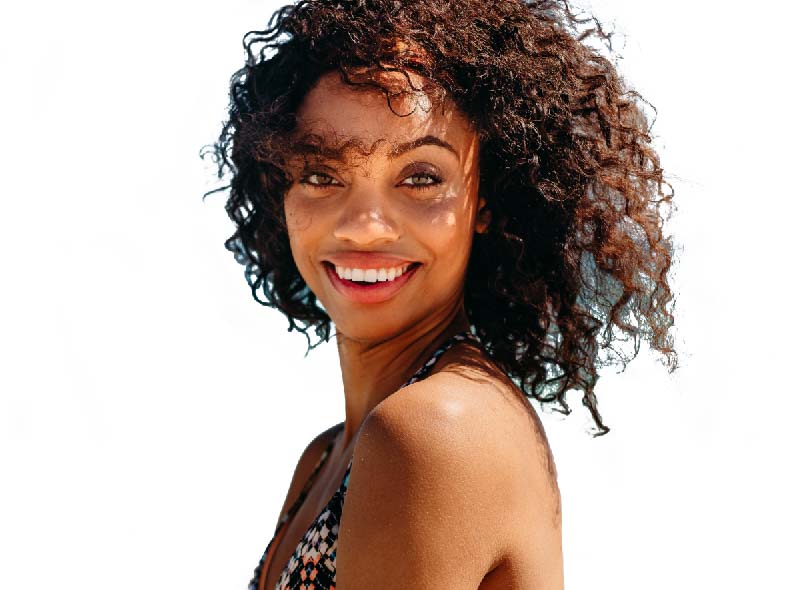
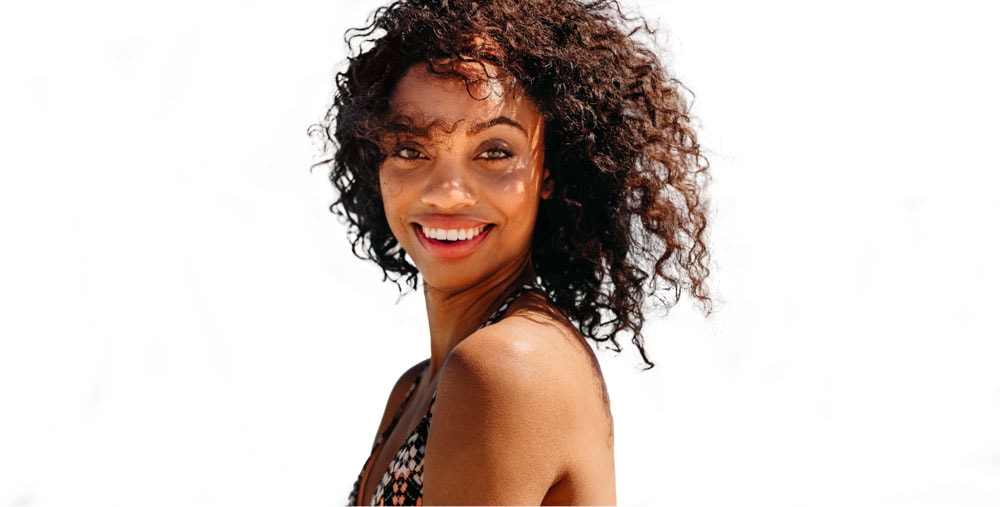
After removing the image background, you can place your subject against a solid background, preferably black or white, to check if the resulting image needs refinements. You can touch up your selection in the Select and Mask workspace if you find color fringing, jagged edges, or any other related problem.
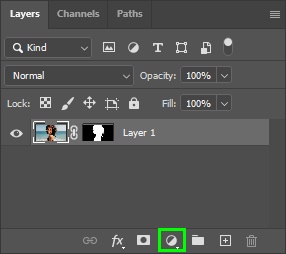
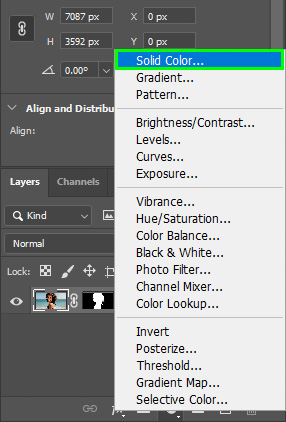
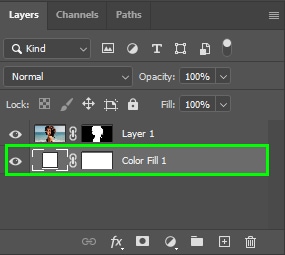
To create a solid background for your image, click the Adjustment Layer icon at the Layers panel and select Solid Color.
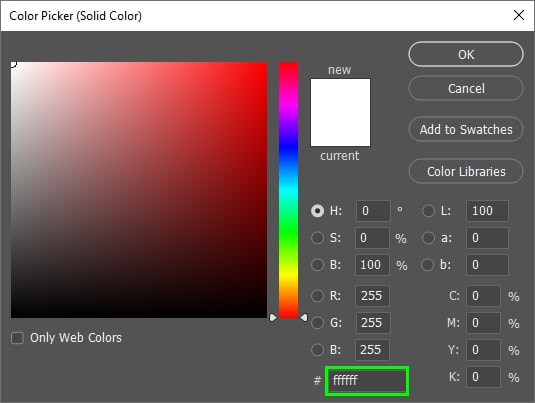
Then, select any color in the Color Picker panel.
Once the solid background is created, drag it under your image layer.
Now scan your photo for problems with the selection. In my case, there was blue fringing in the model’s hair.
To fix this, double-click the layer mask.
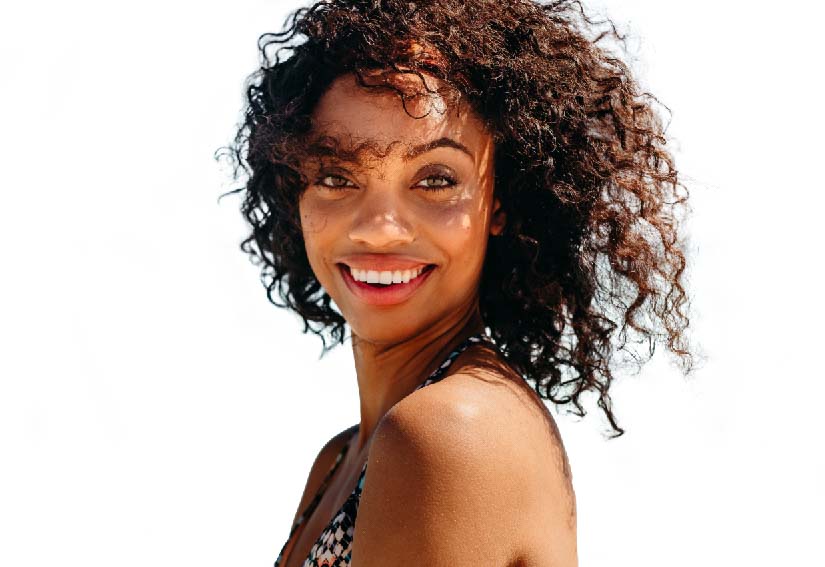
This will open up the Select And Mask workspace. If your subject’s hair needs refinements, press the Refine Hair button in the Selection And Mask Options bar.

That will remove most of your image hair fringing.
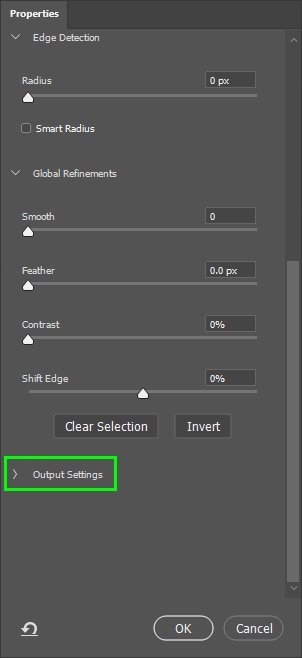
If there is still color fringing in your subject’s hair, scroll down the Properties panel on the right side of the workspace and click the arrow next to Output Settings to reveal some additional options.
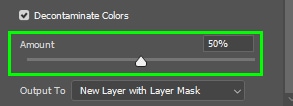
Next, check Decontaminate Colors.

The Amount slider controls how much color decontamination is applied. Values between 30% and 50% should be used for optimum results.
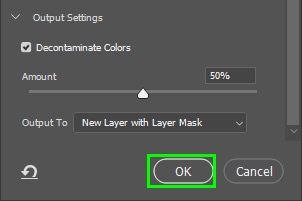
When you’re finished touching up your selection, click Ok to close the Select And Mask workspace.
With channels, I could create selections that would have taken me hours to make otherwise. Although they take some practice to understand fully, you’ll be glad to have this technique in your back pocket.
To further improve your background removal skills in Photoshop, check out my guide to the best background removal techniques in Photoshop to build on what you learned here!


