

One of the most simple yet confusing things about Photoshop is learning why you should use layer masks. I remember first learning the program and seeing people use them constantly in tutorials. I thought to myself, “don’t they realize they can use the eraser tool? Why are they wasting their time with a mask?”
Fast forward to now and the thought of losing layer masks from my editing workflow makes me weak in the knees. They’re the one thing you can always rely on to get the effect you’re looking for. By creating selective adjustments non-destructively, they give you creative freedom.
No more worrying about whether you made the correct adjustment or having to undo a dozen times to fix your mistake.
So if you’re unsure what masking in Photoshop is all about, then this tutorial is going to bring you to the other side. The side where everything is made easy and mistakes are ok. Layer masks are about to change your editing.
What Is A “Layer Mask”?
Layer masking is a reversible way to hide part of a layer. Unlike the eraser tool, a layer mask does not affect the original pixels of the image. This means you can change which parts of the layer are hidden at any time. When removing backgrounds or adding selective adjustments, they are very useful.
You can apply a layer mask to any layer or group in Photoshop. Since they don’t actually erase anything, you are free to adjust them as needed. This proves extremely useful when cutting out objects, for example. By applying a selection to a layer mask, you can refine the selection after it is made. If you were to delete the background, these changes are permanent, and you couldn’t add back the original pixels.
Instead, layer masks never remove the original pixels from the layer. They only hide parts of the layer. Imagine them like the cloak of invisibility from Harry Potter, but for photo editing. They hide something without actually removing what lies underneath.
Now even if you understand what a layer mask is, it’s still hard to know why and when you should use them. So let’s break down eight reasons why you should use masks in Photoshop.
Why Should You Use Layer Masks In Photoshop?
1. It’s A Non-Destructive Way To Apply Adjustments
The number one reason to use a layer mask is that you can apply adjustments non-destructively. That means you are making adjustments without permanently changing the original, which is super important for flexibility and room for error in your workflow!
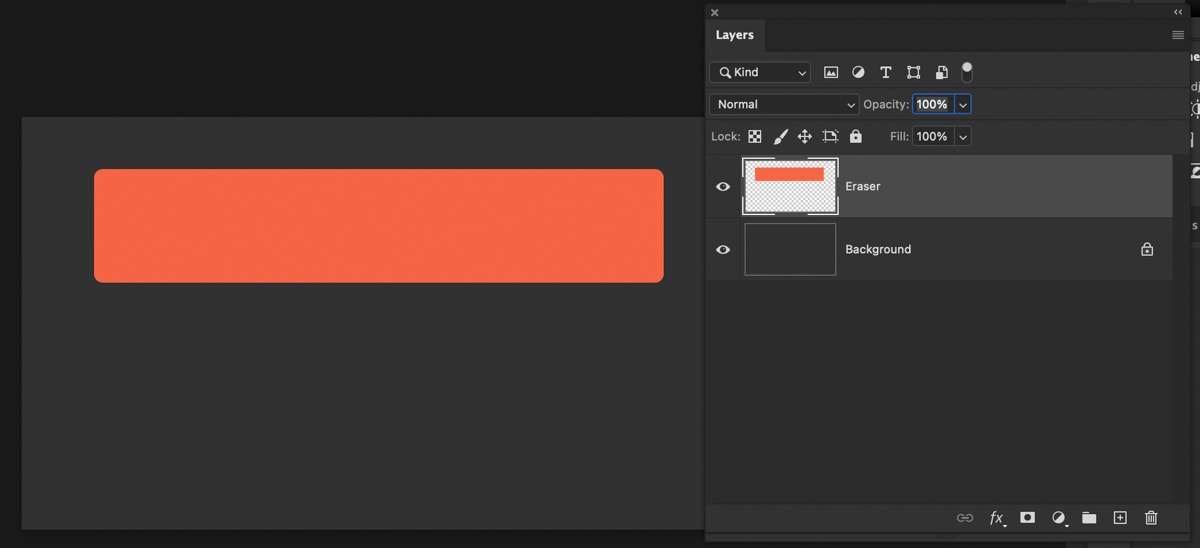
The best way to understand this idea is by removing part of a layer with the Eraser Tool versus a layer mask.
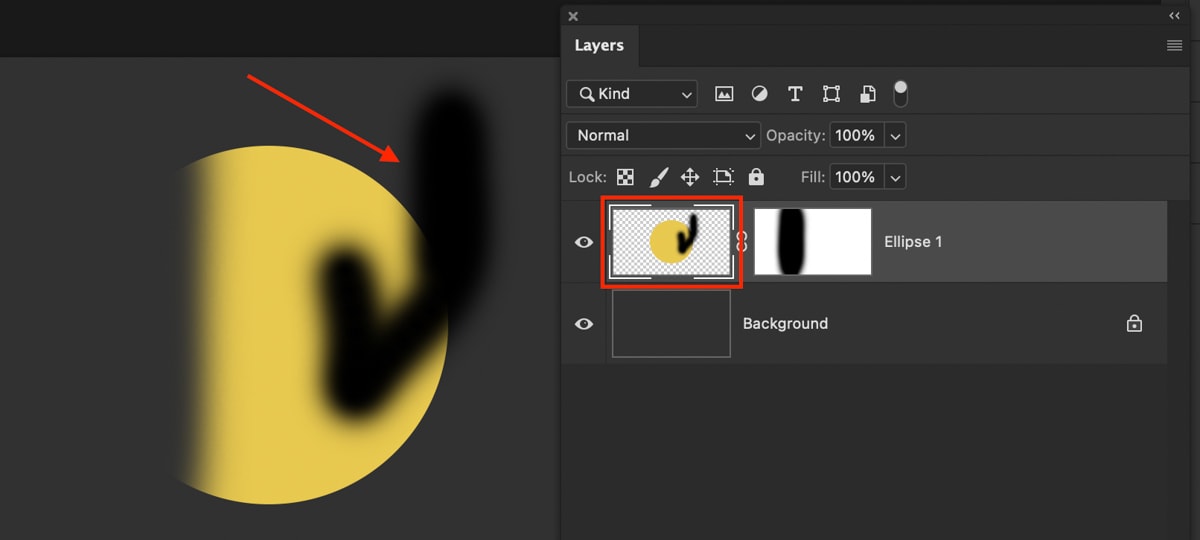
In the below example, I have used the Eraser Tool to remove half of my layer. Looking on my canvas, the layer has been partially erased. However, looking at the layer thumbnail, that same area is now missing. That’s because it was permanently erased, not hidden.
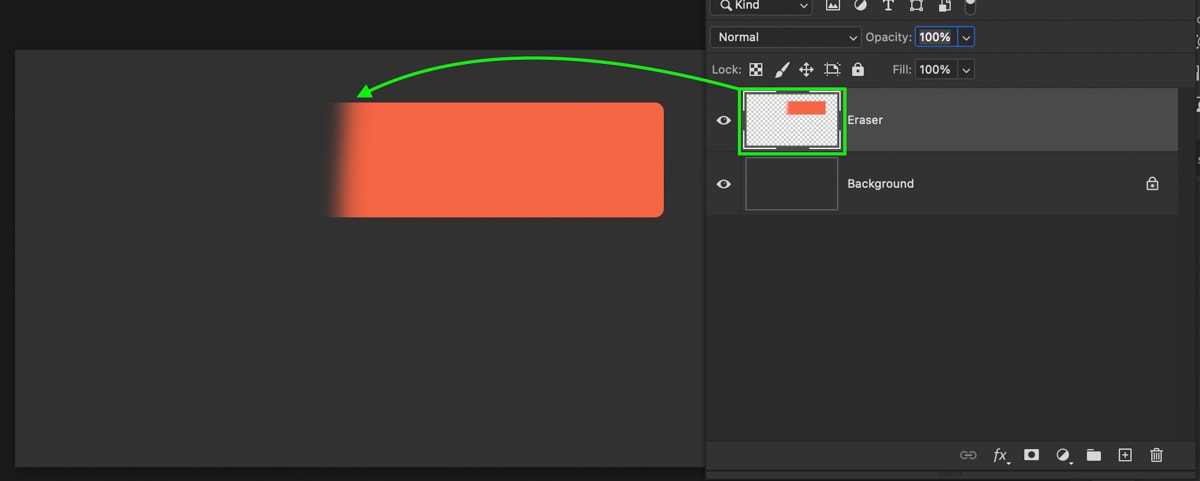
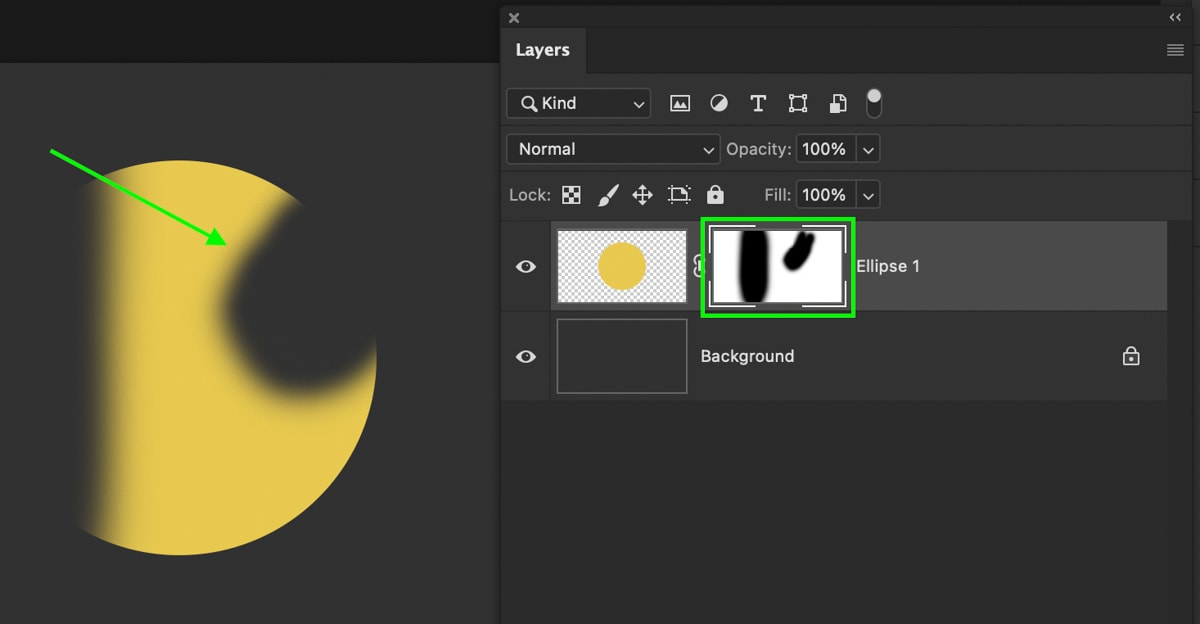
Now making the same adjustment with a layer mask, notice how I am left with the same result on my canvas, but my layer thumbnail appears untouched. That’s because the mask only hides the black (aka transparent) areas of the mask.
If I want to add back parts of the layer, I can paint white on my mask to make sections visible again.
With the Eraser Tool, I cannot add anything back since the original pixels no longer exist.
Although the result was the same, a layer mask allows for adjustments later on. So even if you don’t think you need to make changes initially, it’s worth having just in case.
2. Layer Masks Allow You To Refine Your Cutouts
So now you understand why erasing something is far less ideal than just adding a mask. The same thing applies to cutting out an image. After making a selection and deleting the background, you can’t fix any mistakes you’ve made. With a layer mask, you can easily add back or remove pieces of your cutout afterward.
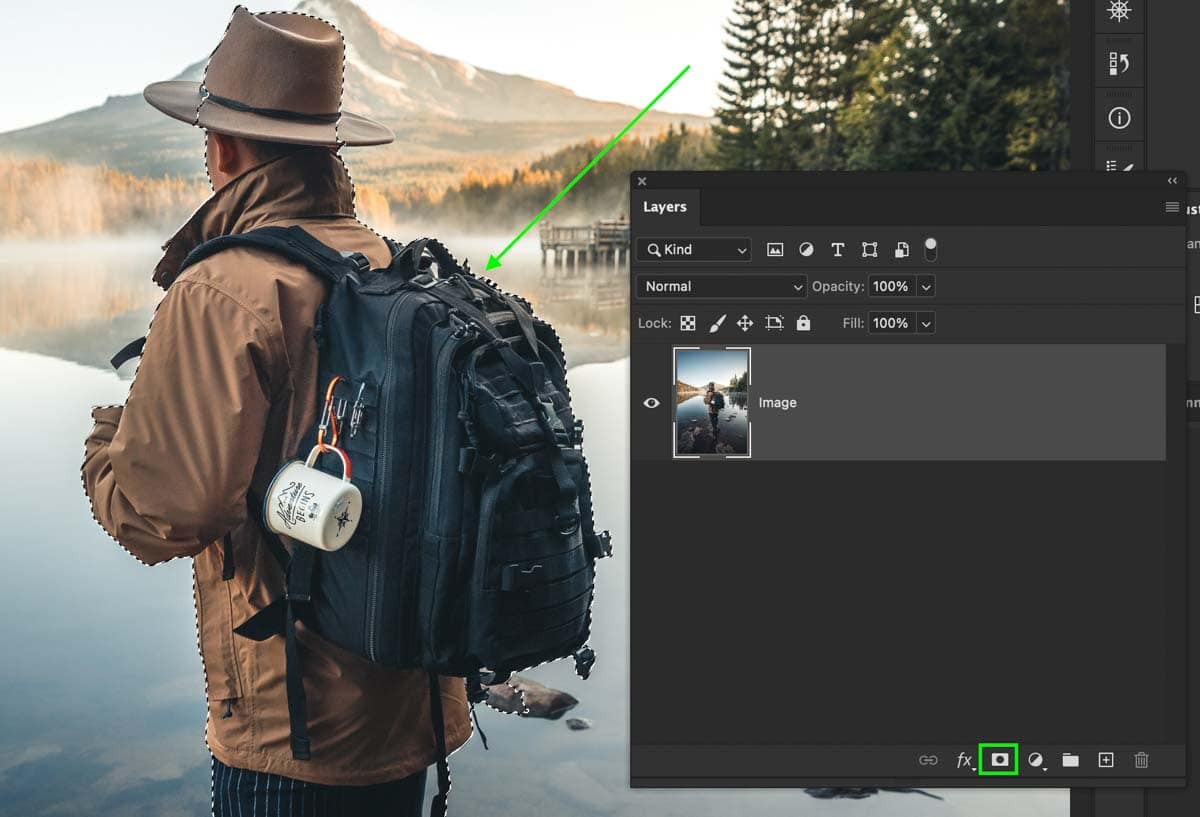
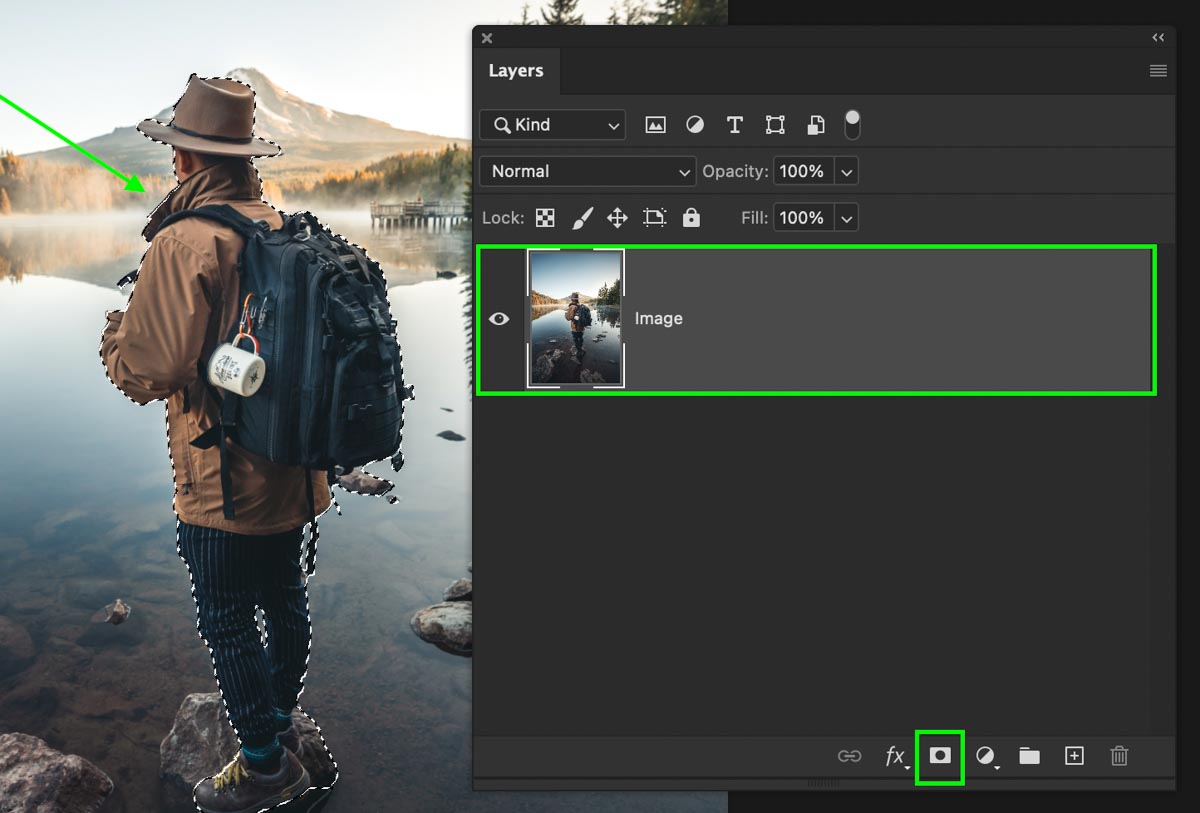
Here’s an example to make this idea easier.
I’ve used the Object Selection Tool to create a selection around an object, so I’ll press the layer mask icon to apply the selection to the mask. Now the background is removed.
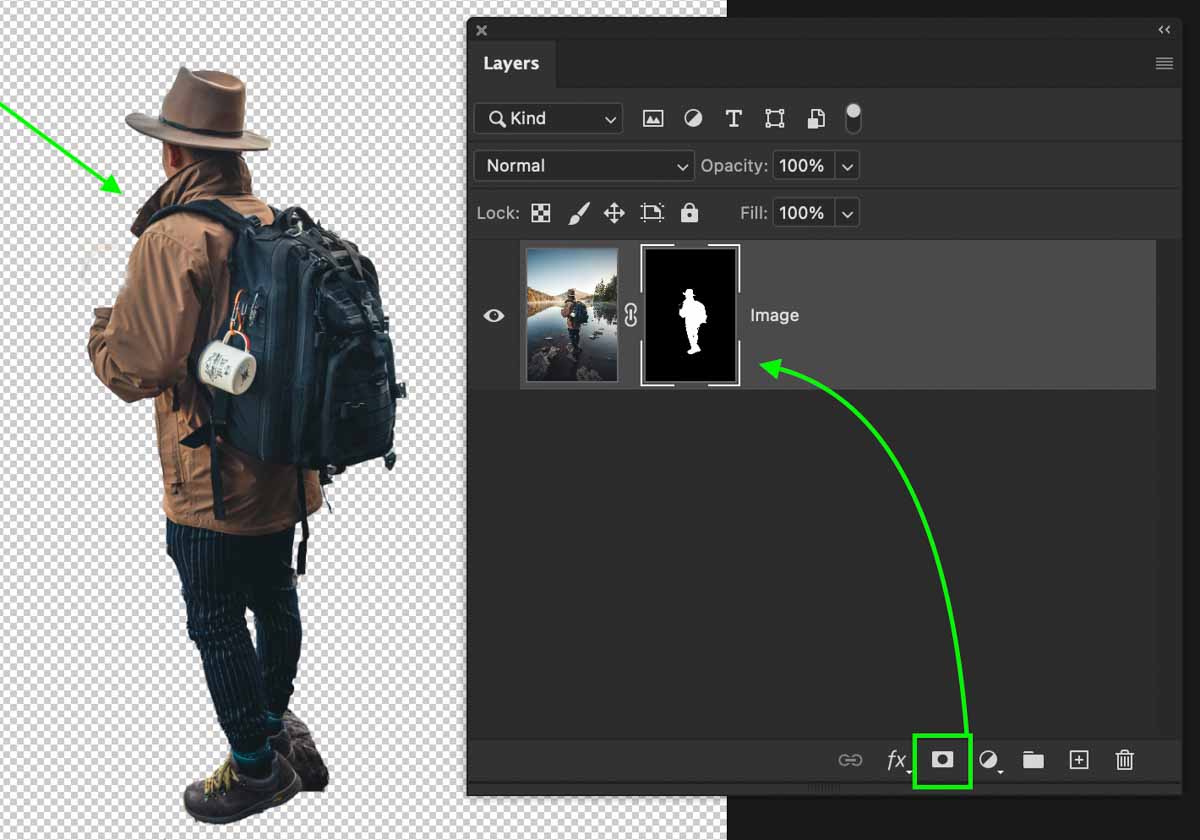
The problem here is that the selection messed up, and there’s part of the layer I need to add back.
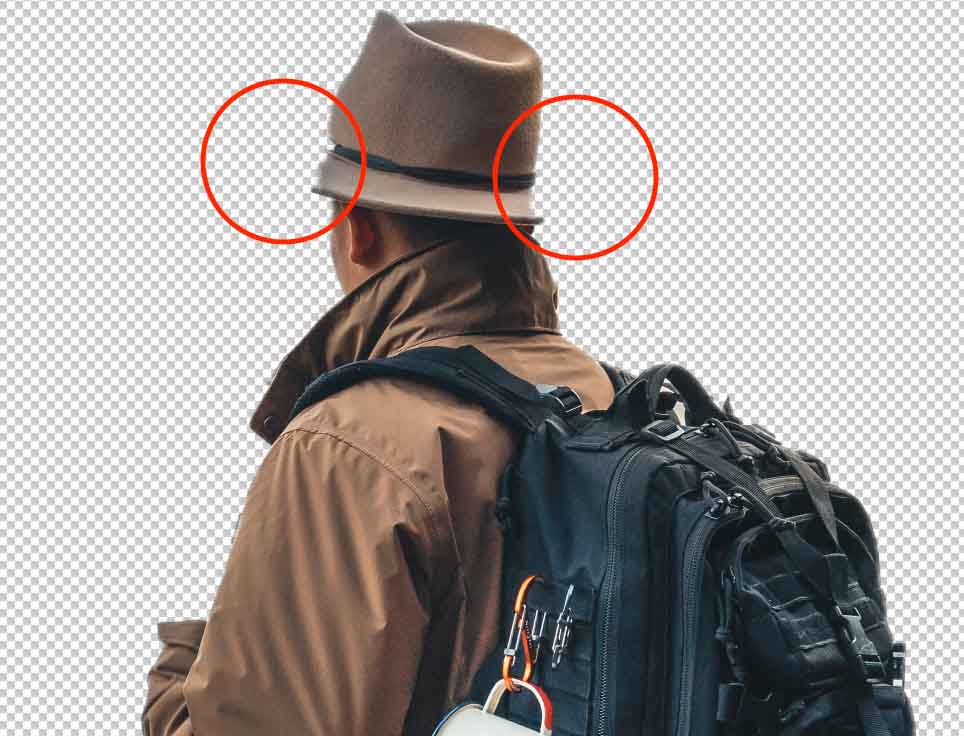
Luckily I can paint white onto the mask to add back any transparent areas. With a few touch-ups, my selection is looking better than ever and ready for use in another image!
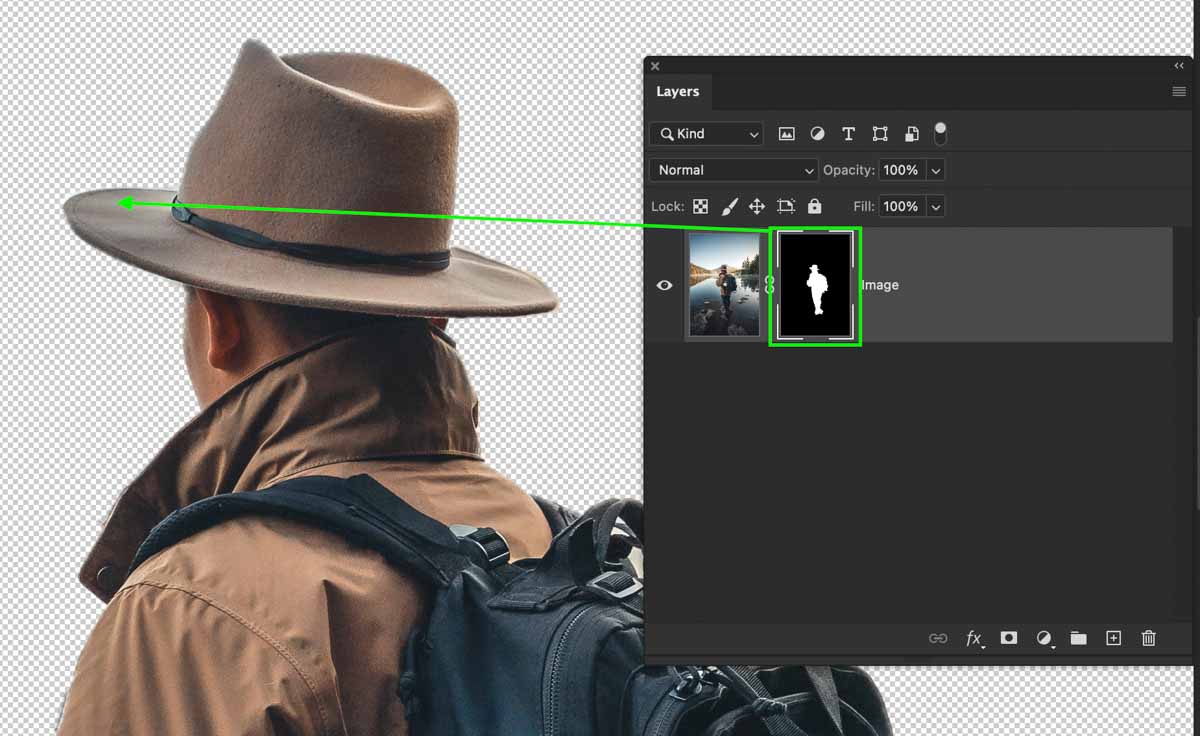
If you had erased the background in this example, those mistakes would have been permanent. So you would be stuck with the messed-up selection and would have to undo and start all over again.
And if you ask me, that sounds like a big waste of time. So there’s another excellent reason to use masks in Photoshop.
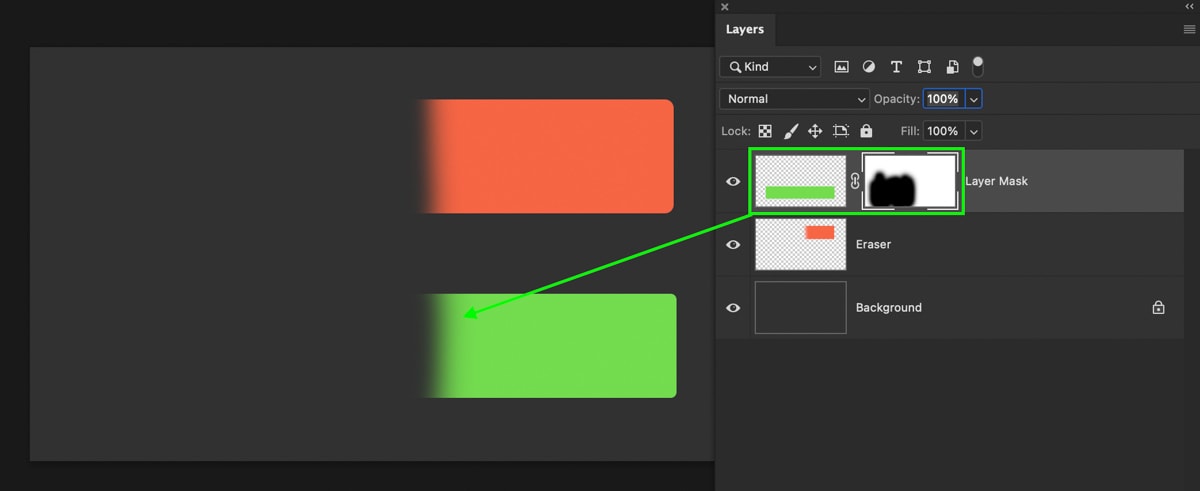
3. Layer Masks Can Selectively Change The Opacity Of A Layer
Layer masks can not only hide layers completely, but they can also selectively change the opacity. In the world of layer masks, black is 100% transparent, while white is 100% visible. All the shades of grey in between represent varying levels of transparency. So 50% grey, for example, would represent 50% opacity (the layer would be half-hidden).
When you change the opacity of a layer within the Layers Panel, the entire layer’s opacity is reduced equally. So if you need one section to look more reduced than the other, then a layer mask is the perfect solution!
Below I have added a layer mask and painted a dark and light grey in two different parts of the mask. Notice how the dark grey is more transparent, while the light grey section is slightly more visible. Meanwhile, the rest of the layer’s opacity is left untouched since no masking adjustments are applied.
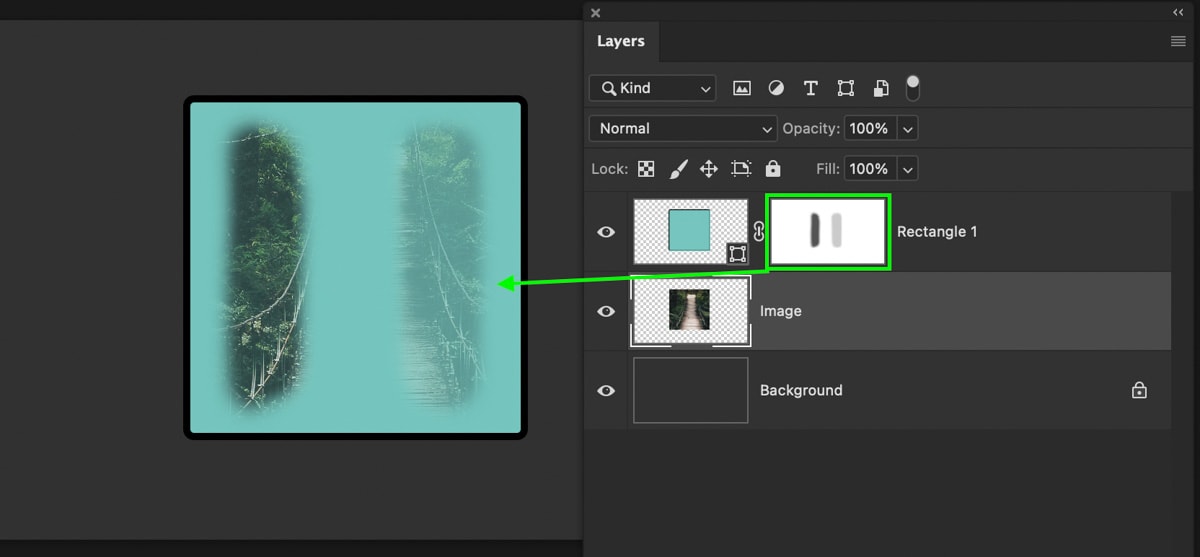
This can be useful for blending two photos or making adjustment layers blend more subtly into your project.
4. You Can Apply Adjustment Layers Selectively With Layer Masks
Unlike Lightroom, Photoshop doesn’t have a selective adjustment brush, a gradient filter, or anything like that to make selective adjustments. Instead, it has layer masks!
For example, let’s say you need to brighten around your subject, but nowhere else in the photo. By adding a Brightness and Contrast adjustment layer, you can make your image brighter.
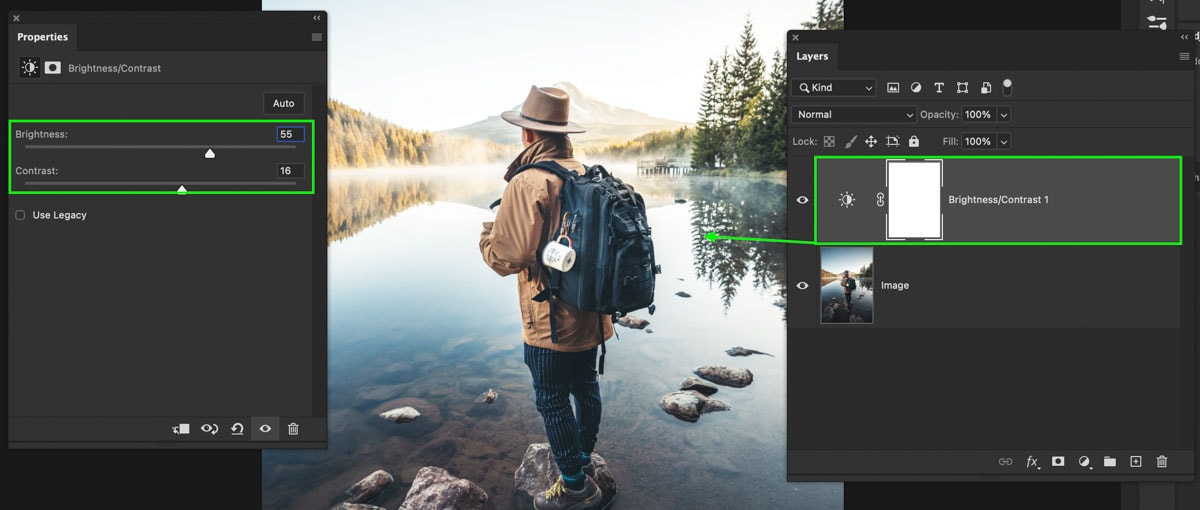
But hold on, this is affecting the entire photo. You only want it to apply to your subject. That means you need to edit the layer mask!
By selecting the mask and pressing Command + I (Mac) or Control + I (PC), it will change from white to black. This completely hides the brightness adjustment layer.
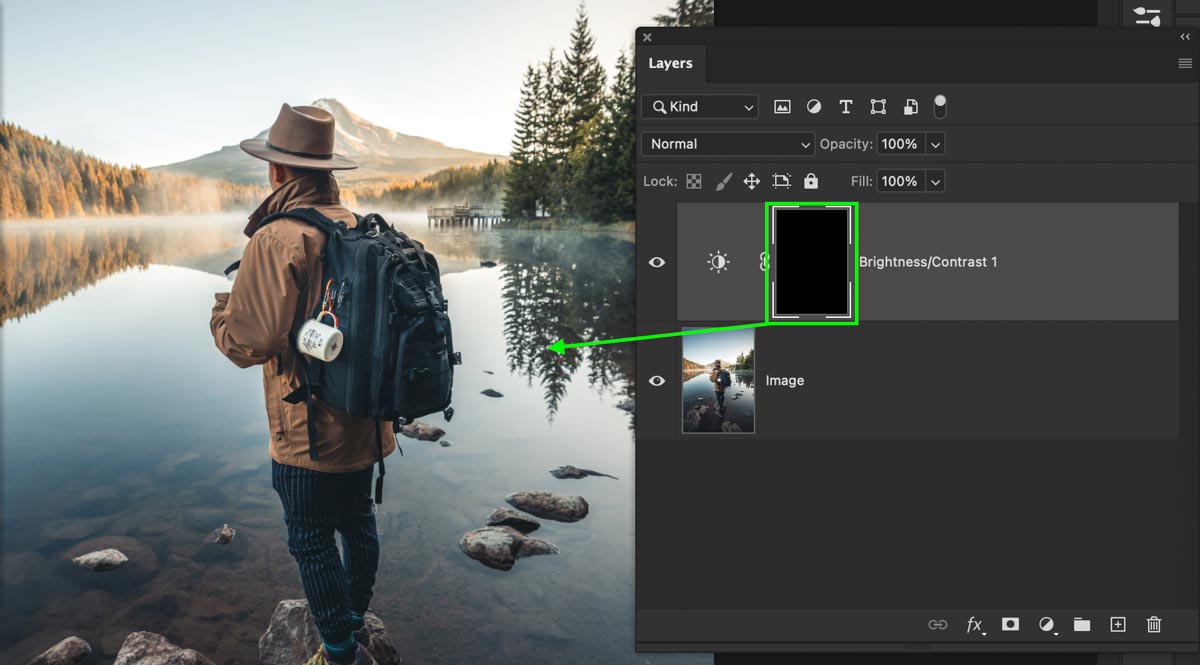
Now using the Brush Tool to paint white, you can make certain areas of the adjustment layer visible again. In this case, that means painting around the subject to brighten them. Now the adjustment is isolated to a certain area!
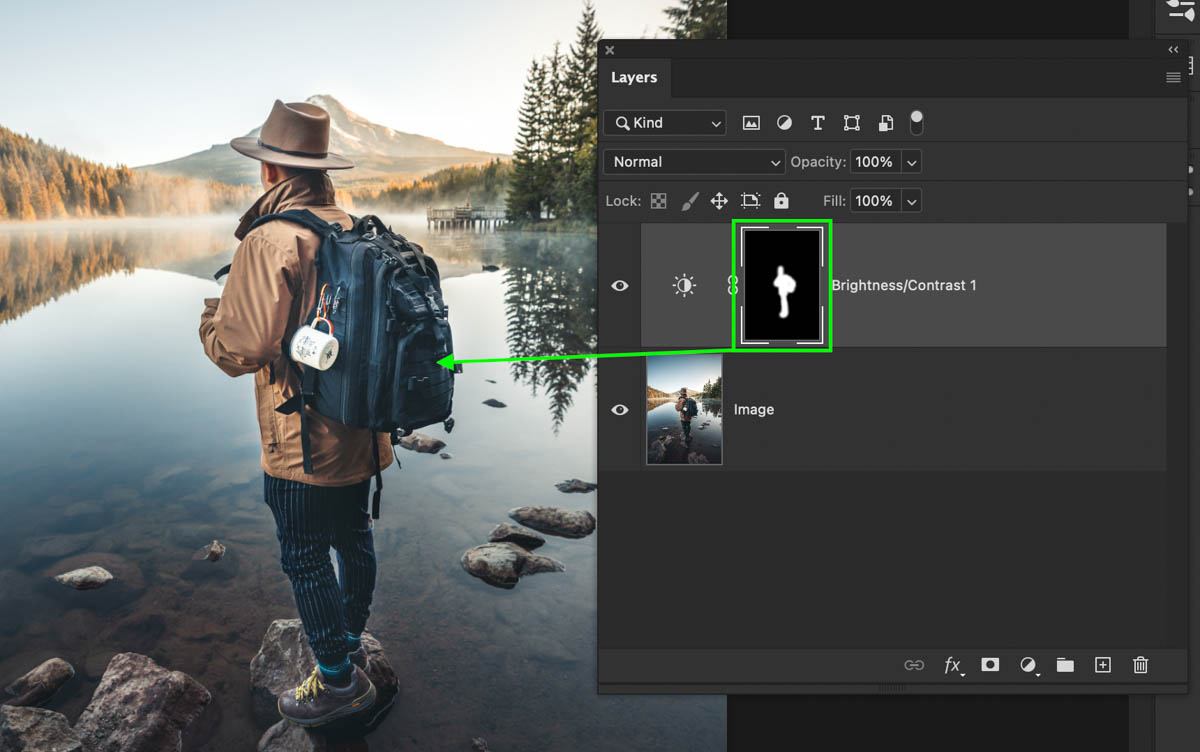
This same thing applies to any adjustment layer you use. Layer masks are handy for making selective adjustments in Photoshop and are an essential part of any edit.
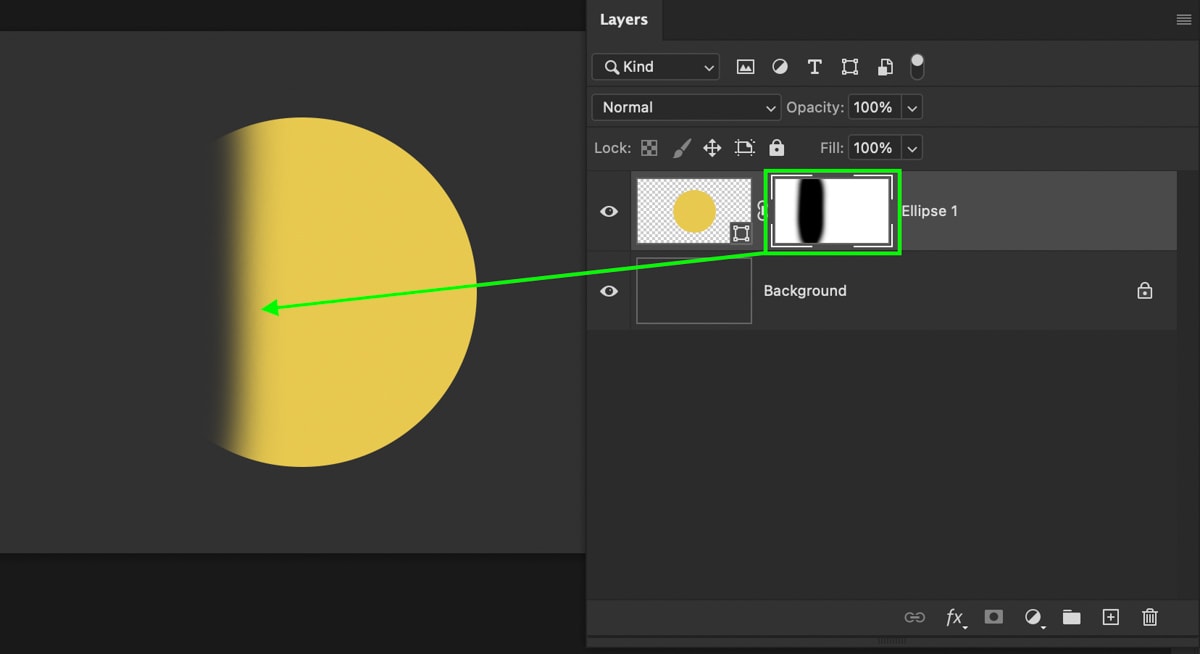
5. They Can Use Gradient Adjustments To Soften Edges
If you’re trying to blend two images side by side, you’ll have the edge of one layer that you need to get rid of.
Rather than erasing it, a layer mask will let you remove the edge and refine it later if needed. Better yet, you can apply a gradient to the mask to make the transition even smoother.
First, you need to apply a layer mask onto the layer you want to soften the edge of.
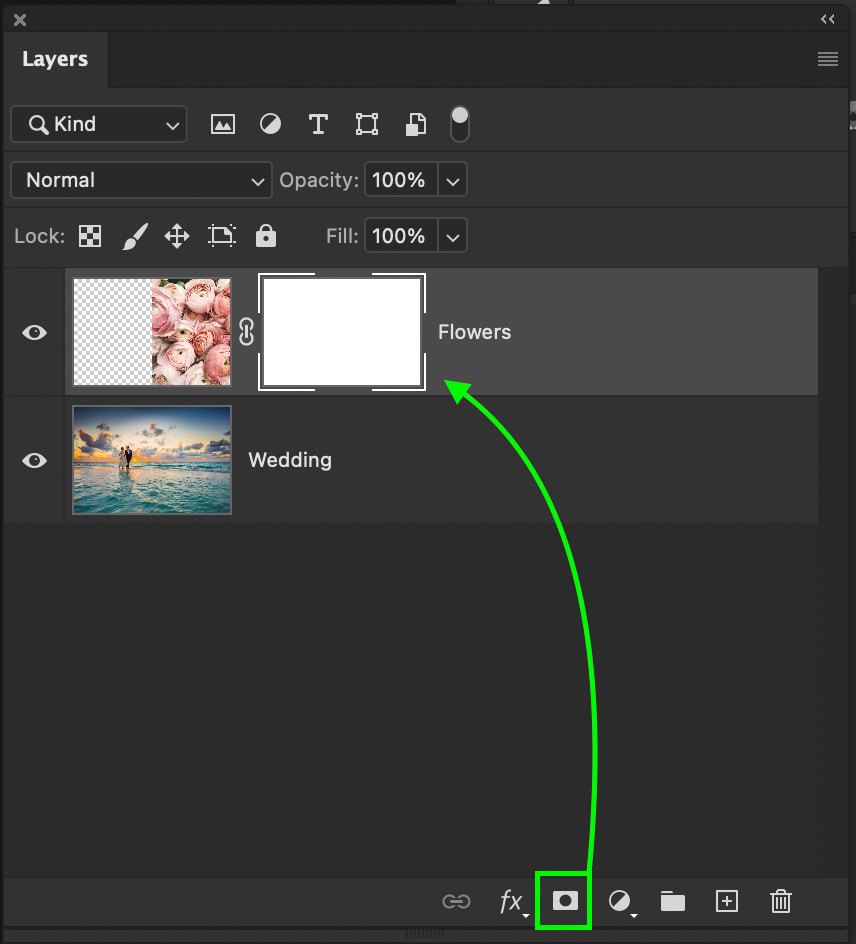
Then select the Gradient Tool (G) and select the foreground to transparent gradient.
With your foreground color set to black, you can click and drag over the edge of your layer to add a gradient to your layer mask. Now the edge will be hidden with a soft transition between visible and invisible!

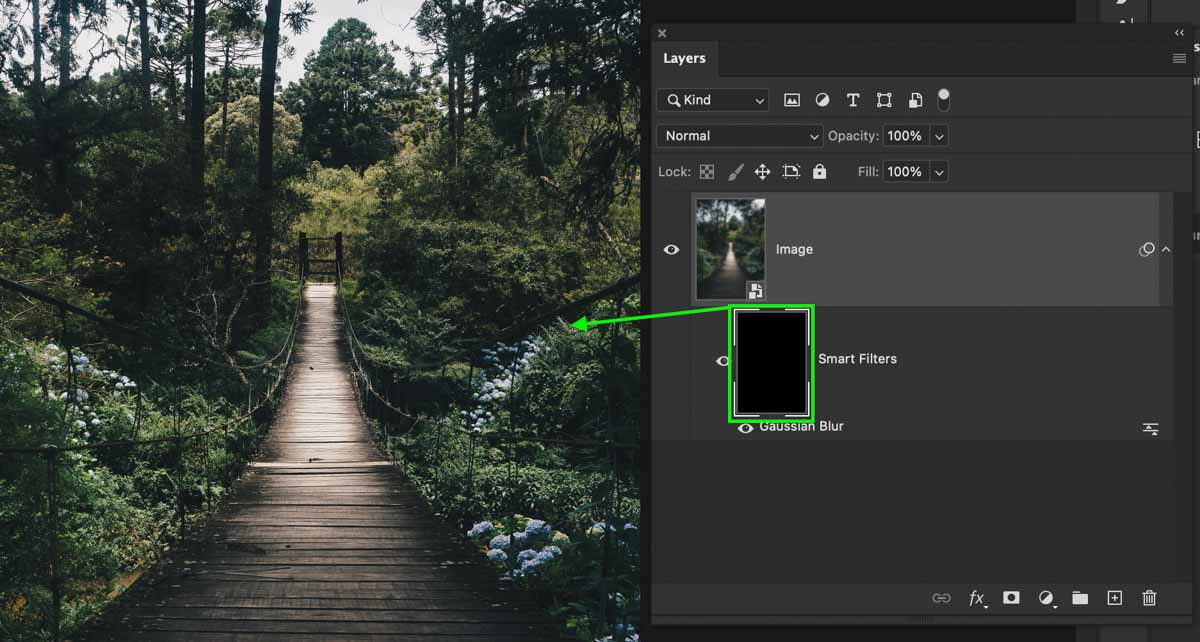
6. You Can Selectively Apply Smart Filters
You will notice a smart filter layer mask below your layer after converting a layer into a Smart Object and adding a filter. This mask controls the visibility of each filter that’s applied to your layer. If you need to use a filter selectively, this mask allows you to do so.
For example, let’s say you want to blur the edges of your photo. By converting your layer to a smart object (to enable smart filters), then applying a gaussian blur, you have a completely blurred image.
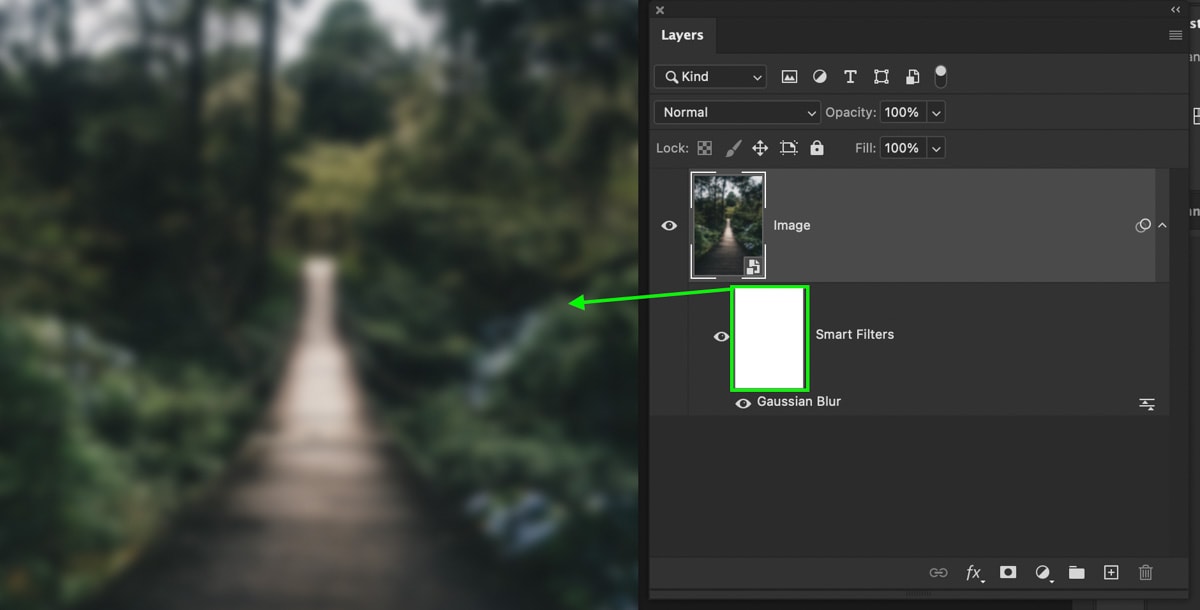
To isolate this adjustment, you could click on this smart filter mask and press Command + I (Mac) or Control + I (PC) to make it invisible. Now the blur adjustment is completely hidden.
To add the blur back around the edges, you can select the Brush Tool and paint white on your canvas to reveal the blur again. But, this time, it’s isolated to the edges of your photo!
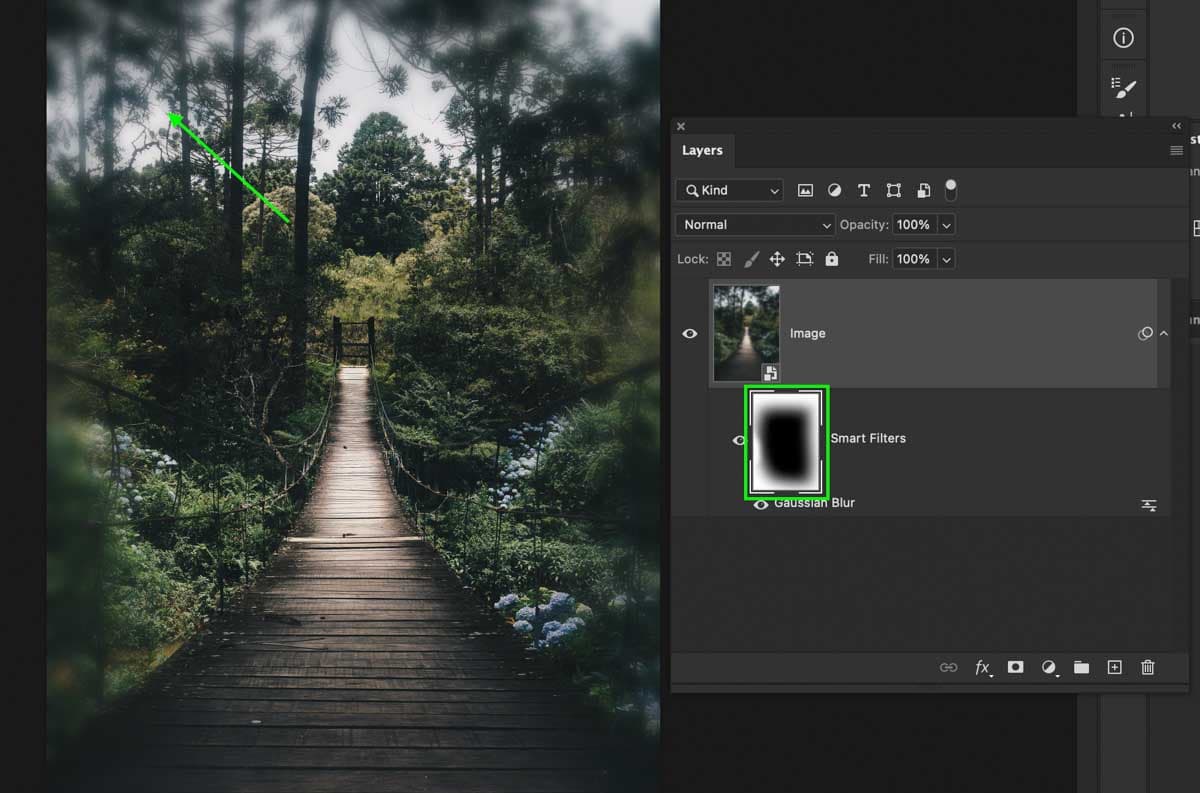
This same idea applies to any smart filter you work with. Without the help of a smart filter mask, it would be far more complicated to isolate these adjustments.
7. Layer Masks Can Be Applied To A Group Of Layers
Another reason why you should use layer masks in Photoshop is that you can apply transparency adjustments to a series of layers. Once a set of layers are grouped, you can add a single layer mask to edit every layer within that group.
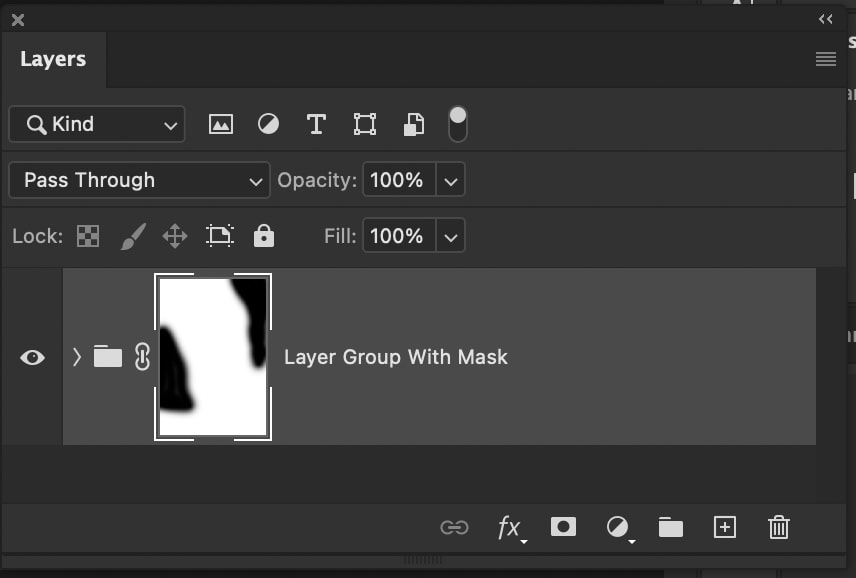
So rather than having to mask every layer individually, you can mask multiple layers at once. If you were using the Eraser Tool, you would have to merge your layers or go through each one individually for the same result. Using layer masks in this manner offers an effective way to edit the visibility of multiple layers at once!
8. You Can Easily Copy And Paste Them
If you want to apply similar mask adjustments to multiple layers, layer masks can be easily copied and pasted between multiple layers. For example, you might want a series of adjustment layers only to affect a single area on your photo. Rather than making a new mask each time, you can copy and paste to save time.
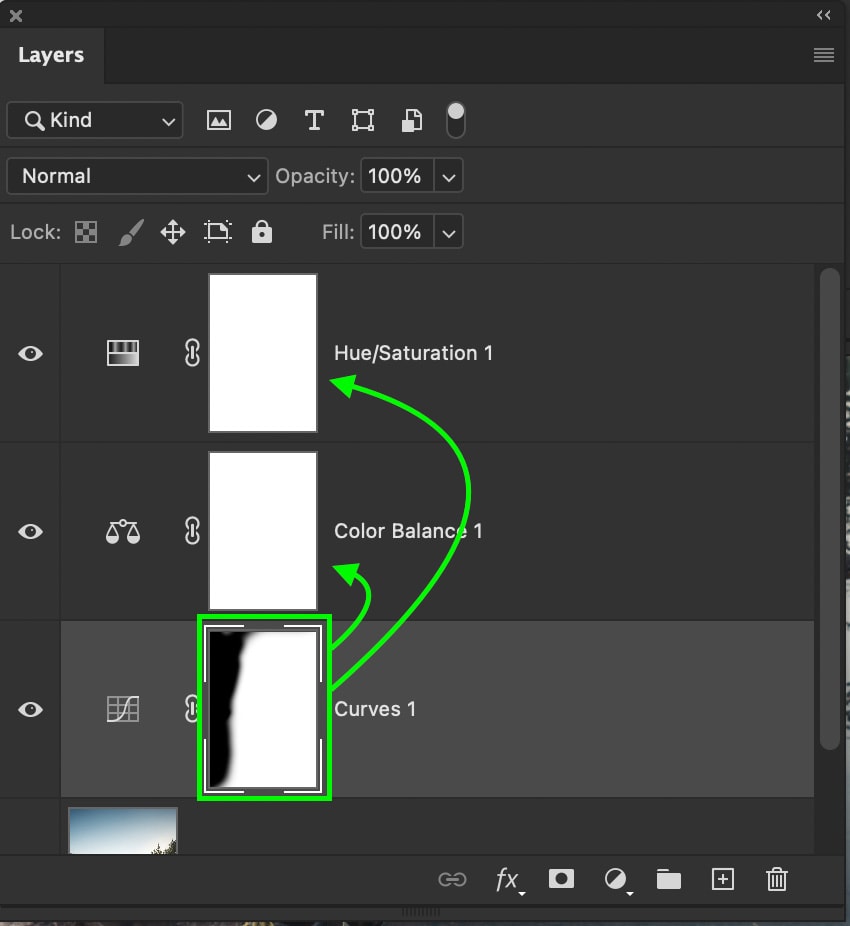
Holding Alt or Option (PC/Mac) and clicking and dragging the layer mask you want to copy over to the other will apply a duplicate mask.
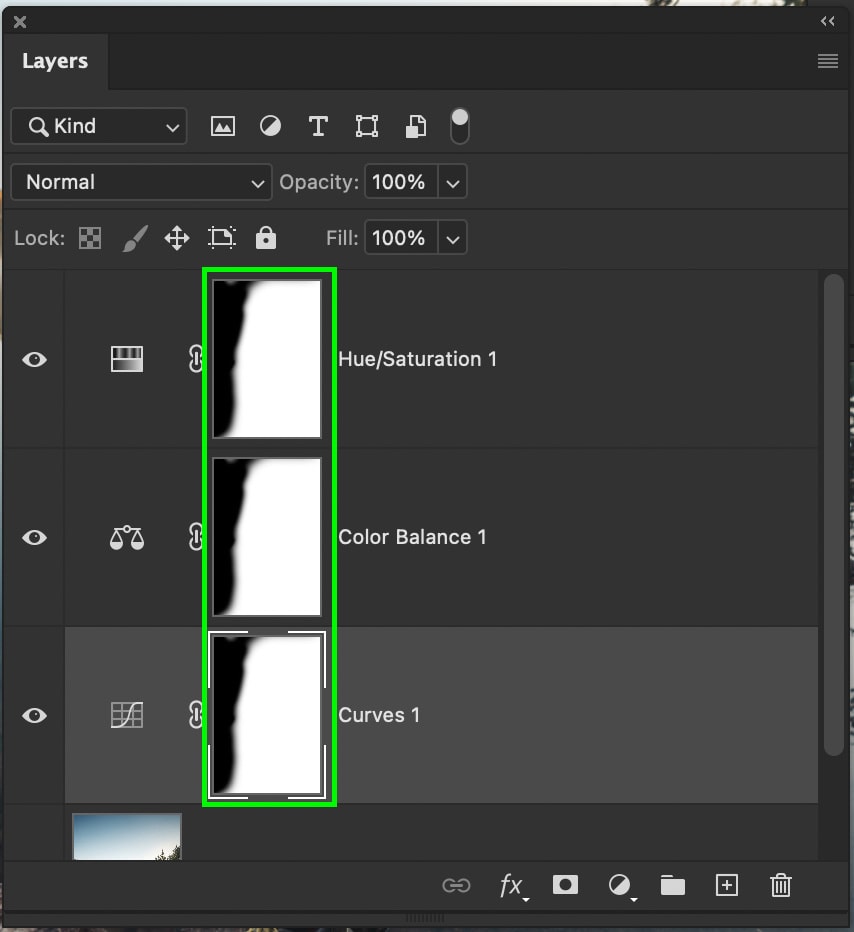
This type of thing wouldn’t be possible if you were erasing parts of your layer since that couldn’t be copied and pasted. With a layer mask, you can easily share the same transparency adjustments between any layer in your project.
How To Use Layer Masks In Photoshop
So now you’re (hopefully) convinced that layer masks are the best thing since sliced bread, but how do you actually use them?
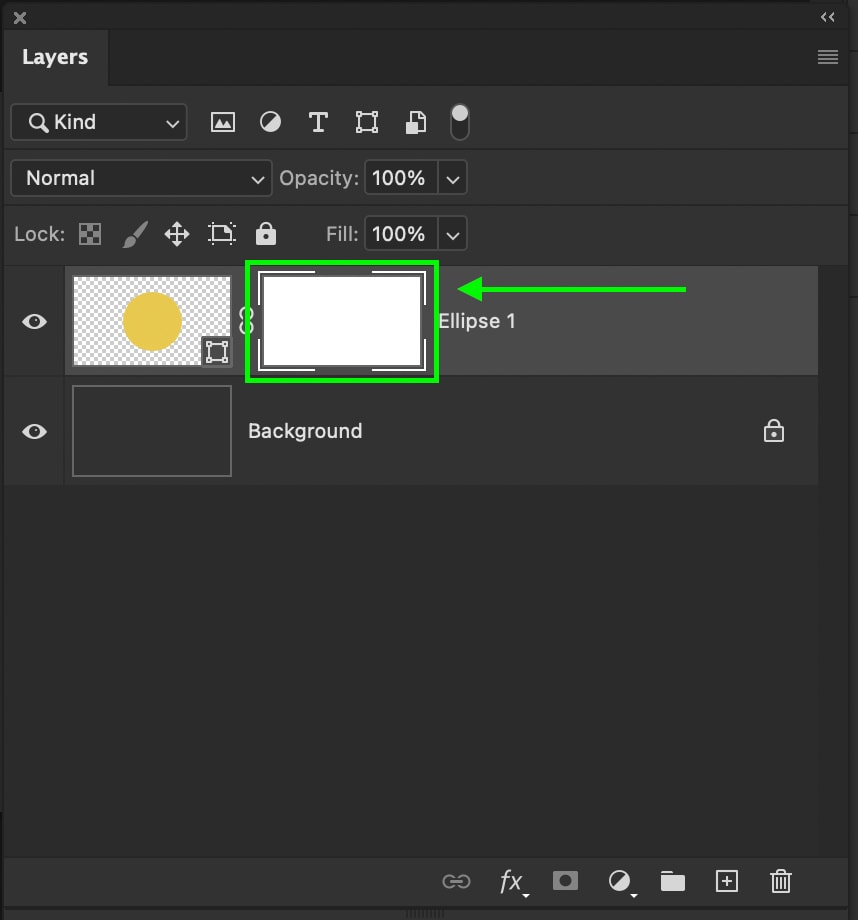
Creating a layer mask in Photoshop is easy. First, select the layer you want to apply it to, then click the layer mask icon at the bottom of the Layers Panel.
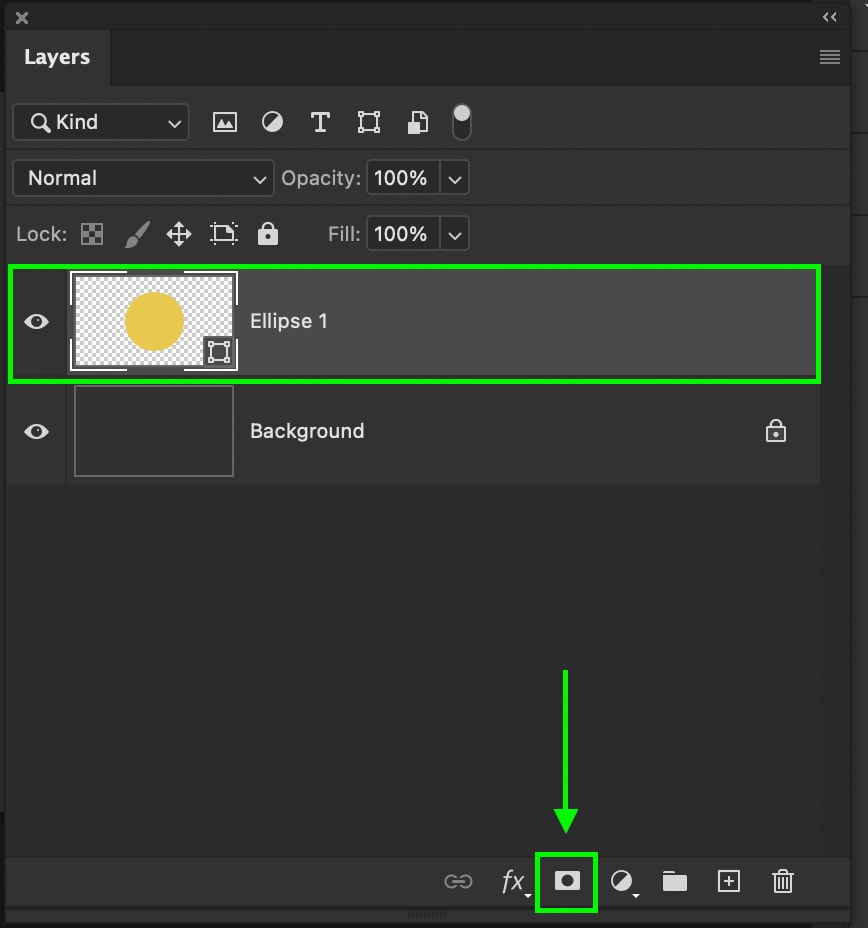
Layer masks appear as a white box beside your layer thumbnail. By default, it’s fully white, which means everything on that layer is visible.
If you create an adjustment layer, a layer mask will be automatically applied once it’s created.
As I mentioned earlier, white is 100% visible white black is 100% transparent. This is important to remember while you work with masks to understand exactly what you’re looking at.
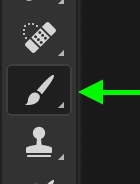
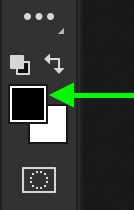
Now to adjust a layer mask, the most simple method is using the Brush Tool. By selecting your Brush Tool (B) and setting your foreground color to white or black, you can paint on your canvas to apply the transparency adjustments on your mask. The foreground color you choose will depend on if you want to hide or reveal parts of your layer.
In some cases, you might end up actually painting white or black on your image directly. This will happen if your layer thumbnail is selected and not the layer mask.
By clicking on your layer mask and making sure there are the while boxes around it, you can rest easy knowing that’s where your brush adjustments will go.
Using Layer Masks With Selections
Painting by hand on your masks is most useful when applying small selective transparency adjustments. However, for cutting out an image, this is a huge waste of time. Luckily you can quickly apply selections to layer masks as well.
By creating a new selection first, then clicking on the layer mask icon, your selection will automatically apply to the mask. Anything inside your selection will be visible, while anything outside of it will be transparent.
As you can see, layer masks are an extremely versatile and important tool inside Photoshop. They can help to hide parts of a layer, apply selective adjustments, or cut out an image while keeping the ability to refine the selection. Layer masks are a crucial part of any non-destructive workflow and will undoubtedly improve the things you can do in Photoshop!
Happy Editing,
Brendan 🙂


