
Layer masks are among Photoshop’s most important tools. When you add selections or duplicate layer masks, it’s not uncommon to see the opposite of what you want. That’s why learning how to invert a layer mask in Photoshop is so useful.
In this tutorial, you’ll learn how to invert a layer mask in Photoshop to save yourself a ton of time. Let’s get started!
Video Tutorial
How To Invert A Layer Mask In Photoshop
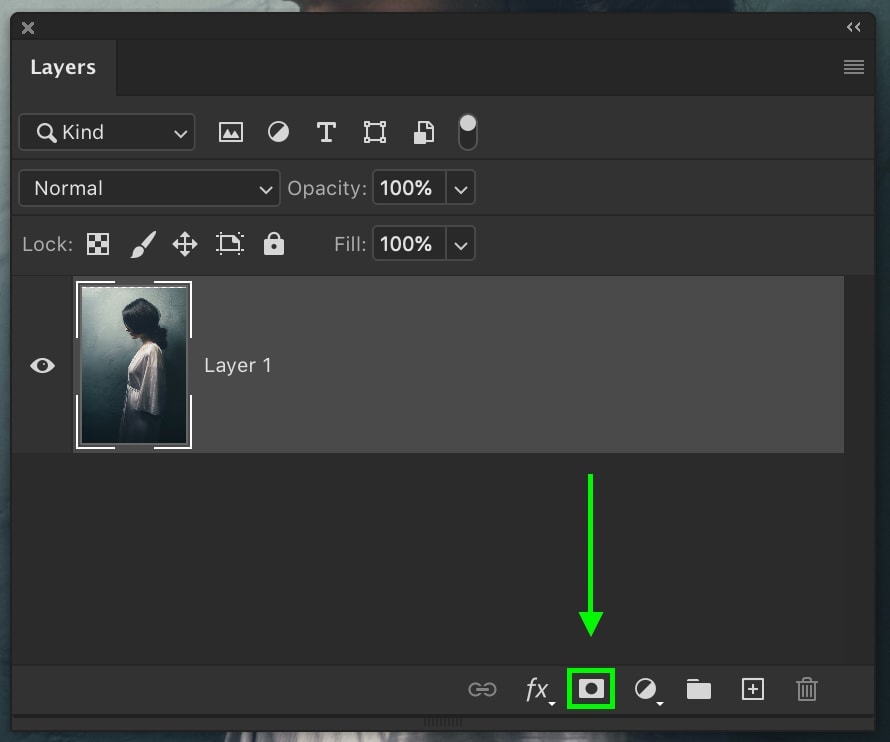
Step 1: Select The Layer Mask In The Layers Panel
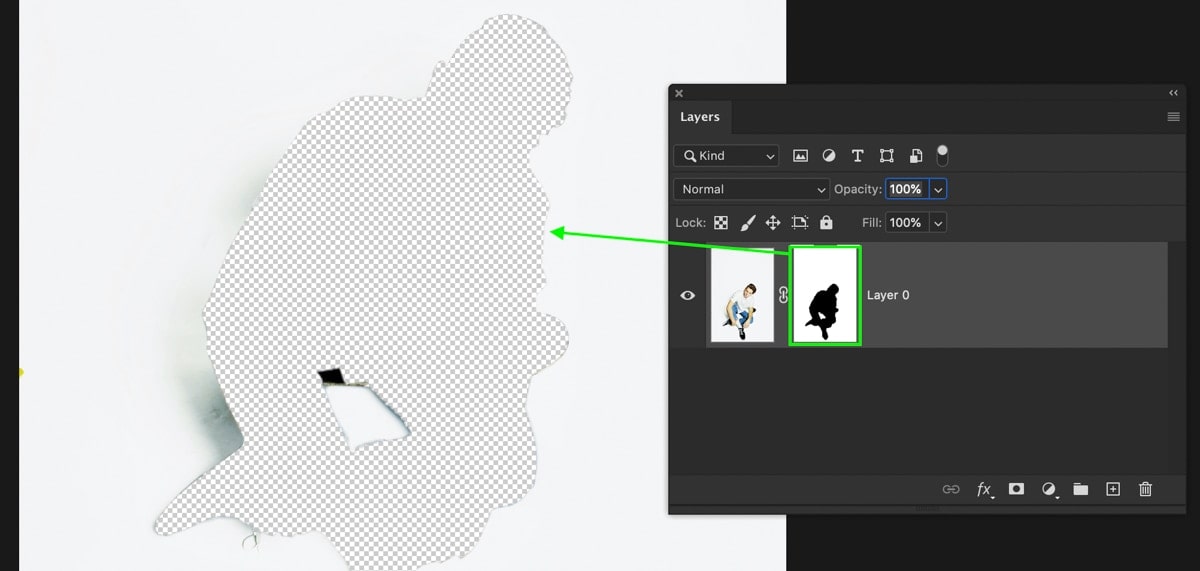
Before you do anything, make sure your layer mask is selected by clicking on the mask. A white box will appear around the layer mask, indicating that it’s selected. Now, any adjustments you make will affect the mask and not your image!
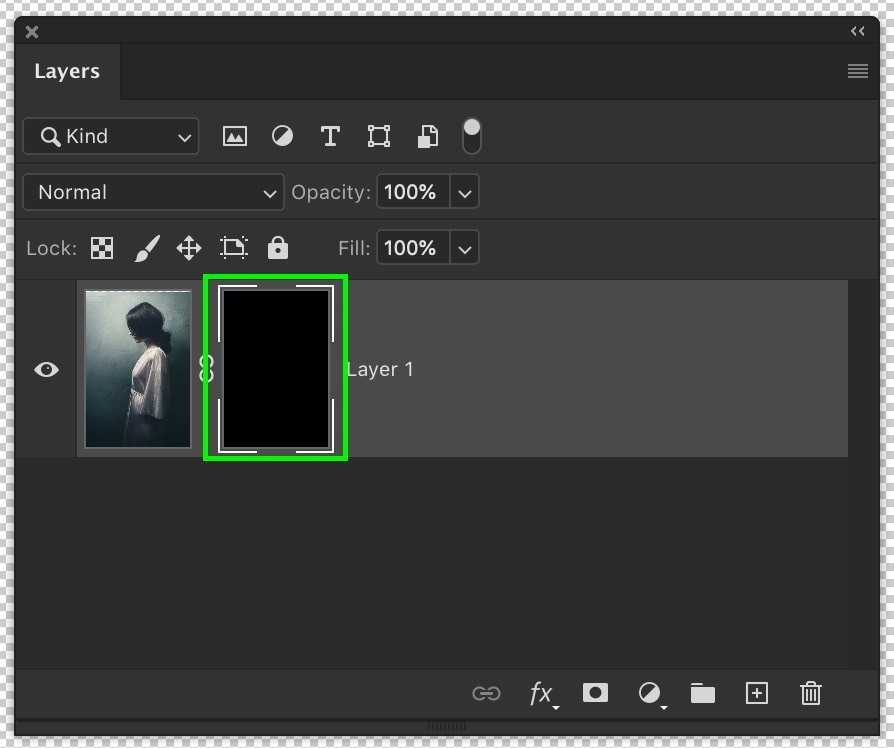
Step 2: Press Control/Command + I As A Shortcut
The easiest way to invert a layer mask in Photoshop is with the keyboard shortcut Control + I (Win) or Command + I (Mac).
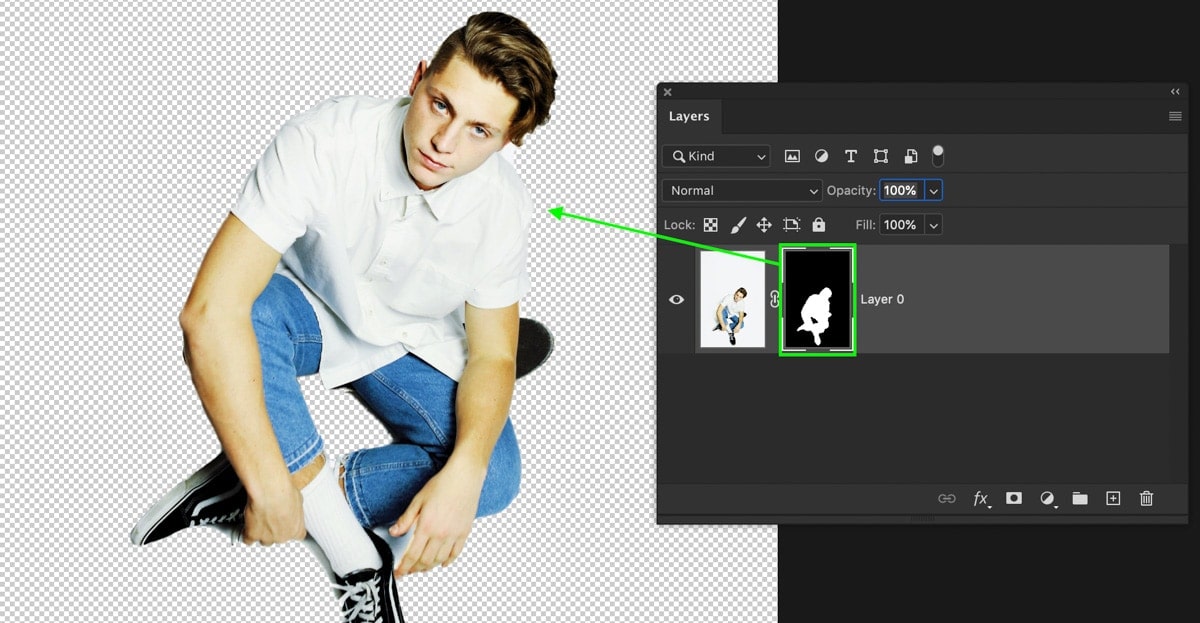
This will switch everything in your layer mask to the opposite color. Black will become white, and white will become black, swapping which areas are transparent.
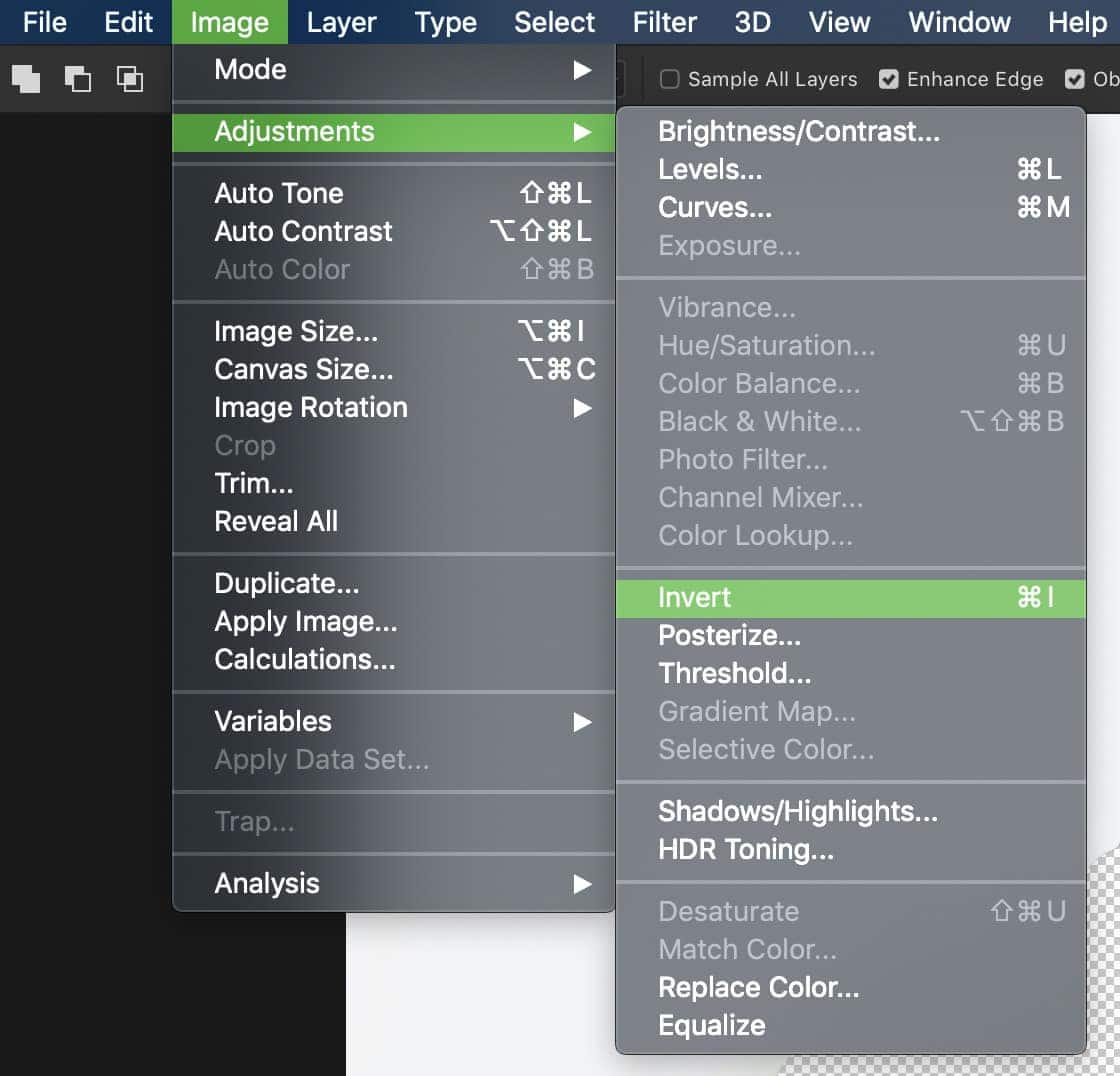
Step 3: Go To Image > Adjustments > Invert (Optional)
To achieve the same result, you can also go to Image > Adjustments > Invert rather than using a keyboard shortcut.
How To Invert A New Layer Mask In Photoshop
Select the layer to which you want to add your layer mask. Next, hold Alt (Win) or Option (Mac) and click on the layer mask icon to create a new mask. Rather than having a white mask, this will create a black, inverted mask from the get-go.
Using this easy technique saves you from the extra step of inverting your layer mask with a keyboard shortcut. Now, it’s inverted and ready to go the moment it’s created!
How To Duplicate And Invert A Layer Mask
I’ve already disussed extensively how to duplicate layer masks in another post, but let’s add a twist. Rather than duplicating or inverting a layer mask, you can do it all at once.
Hold Control + Shift (Win) or Option + Shift (Mac), and click and drag your layer mask to a new layer. This will duplicate and invert your layer mask simultaneously.
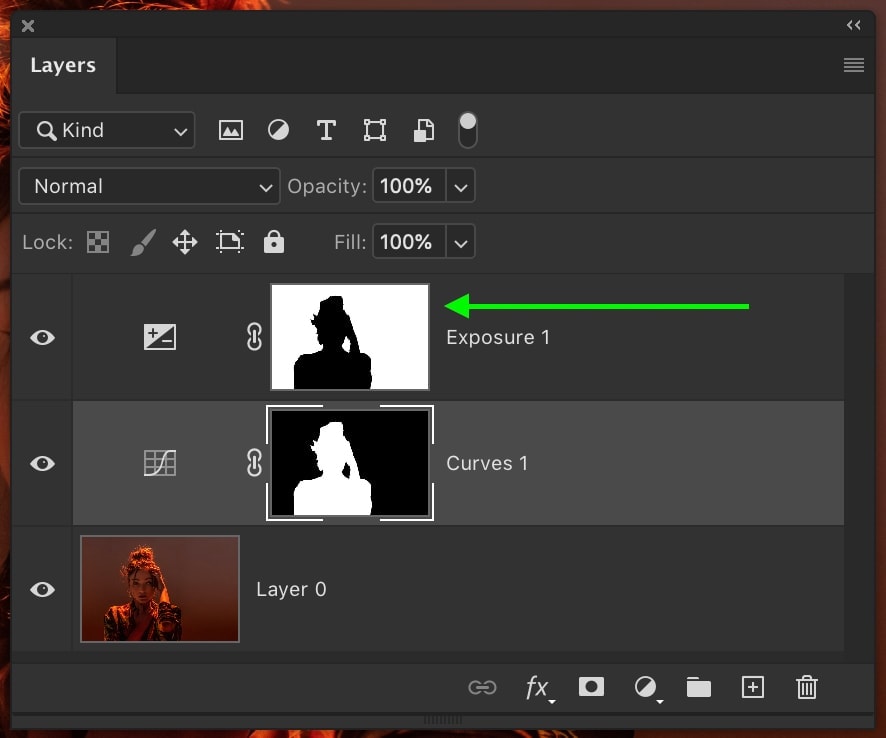
This trick is another huge time saver and prevents you from needing to create an entirely new layer mask.
Learning how to invert a layer mask in Photoshop is an essential skill for any creative. It not only saves time but also makes it much easier to get the proper mask. By remembering the shortcuts and tips you learned here, you’ll never have to worry about inverting a layer mask again!
– Brendan 🙂


