


If you have an image with text, but the text and background are compressed into a single image, Photoshop has a few easy tools to remove the background from the text in a flash. With the help of the Magic Wand Tool, the Select Color Tool, or Channels, there are a variety of ways to select your text, regardless of the color, font, or size. Although every tool has its own pros and cons, the best tool for the job is the Magic Wand Tool.
To remove the background from your text, select the Magic Wand Tool (W) and choose the “Add To Selection” setting in the upper bar. Next, set the sample size to Point Sample, Tolerance to 32, and check Anti-alias and Contiguous. Now click on each character to select the text, then add a layer mask.
When text layers are attached to the background image, such as when you export a PSD file to JPEG, isolating the text from the background becomes difficult. However, with the help of selections, it can be done relatively quickly, regardless of the color or font of your text.
Just remember that separating the background from the text will only offer you a transparent background. You will not be able to edit the main attributes of the text such as the font. If you are looking to instead create a new piece of text in your project, see my other tutorial on creating text in Photoshop.
How To Remove The Background From Text
Option 1: The Magic Wand Tool
The Magic Wand tool is a fast and simple tool you can use to make selections and edit parts of a project. This is useful when trying to work with only a certain area of the image while leaving the rest alone, such as when trying to remove the background from a graphic or text. The Magic Wand tool works by sampling colors and turning them into a selection, making it the ideal choice for selecting solid colored text.
To make the background transparent using the Magic Wand tool, first, you’ll have to turn the background into a layer so that you can edit it.
First, head to the Layers Panel.
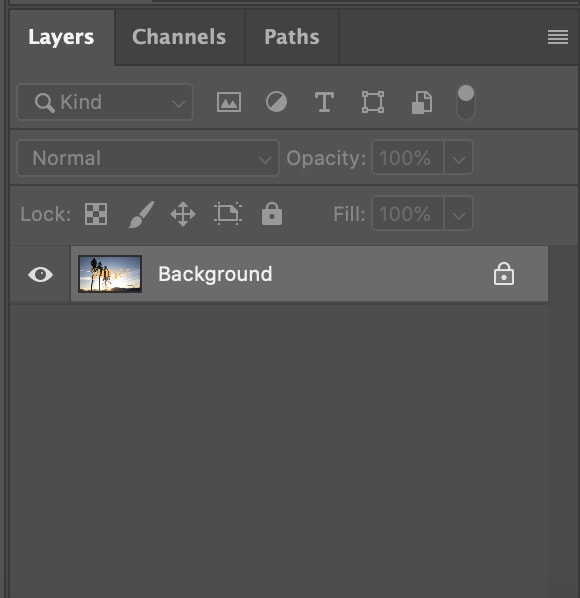
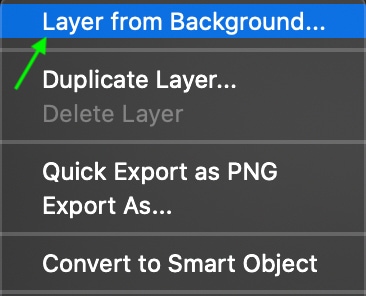
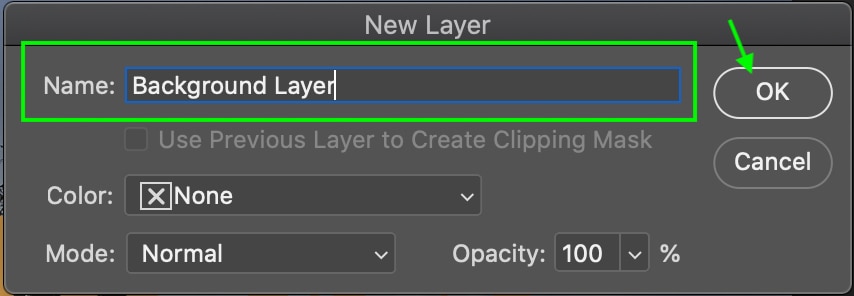
Here, right-click (Win) or Control + Click (Mac) on the background layer. From the options that appear, select Layer From Background and, in the window that comes up, give the layer a name, then, click OK.
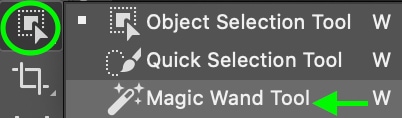
Now, in the Tools area, click and hold the icon for the Object Selection tool to bring up the Selection menu. When the menu appears, select the Magic Wand Tool.
Now, you’ll have to correctly adjust the settings so that you can use your magic wand to select the text from the background. Head to the settings toolbar at the top, and you’ll see the different settings. Below is an explanation of each.

- New Selection (first icon on the left) generates a new selection each time you click your mouse.
- Add To Selection (second icon from the left) lets you select more than one part of the same area. When you make your selection, it will be added to the previous selected areas and exist as the same selection. This is useful when selecting different areas of a project that you’d like to add to one selection.
- Subtract From Selection (third icon from the left) allows you to remove parts of a selection, making it a useful option when trying to correct your selection.
- Intersect With Selection (fourth icon from the left) makes it easier to select intersecting areas of an image by making a quick scan of the selection and only keeping the area that overlaps.
- Tolerance is the range of lightness/darkness that will be included with each selection; for instance, setting the tolerance to 32 will include not only the exact color you click on, but any areas of the image that are up to 32 shades darker or lighter. The higher this value, the more of the colors in the image will be selected.
- Anti-Alias is a great way to ensure the edges of your selection remain smooth instead of pixelated or jagged, as it automatically smoothes them out by feathering them slightly. It’s best to always keep this checked.
- Contiguous will only select similar colored pixels that are touching is checked.
- Sample All Layers will include all the layers in the selected area, not just the active ones.
In the Options toolbar, select Add To Selection.

Make sure the sample size is set to Point Sample and the Tolerance to 32.

Now, make sure that Contiguous and Anti-Alias are all checked while Sample All Layers is unchecked.

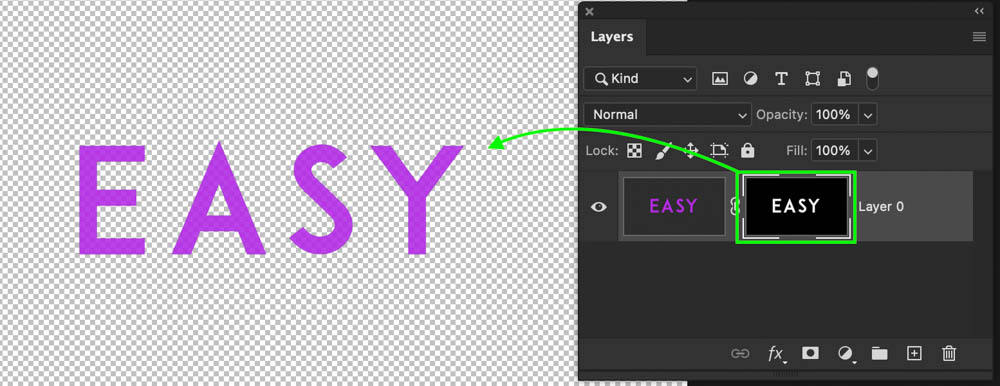
Now, it’s time to make the background selection. To do this click on your image layer in the layers panel, then click on your text to create a selection. Since Photoshop will sample the color of your text and find similar colored pixels touching your original sample, it will automatically select the character you clicked on.

With your first character selected, click inside of the remaining characters to select each one. Since the Add To Selection option was chosen in the upper setting bar, your selection will be added to each time you click.
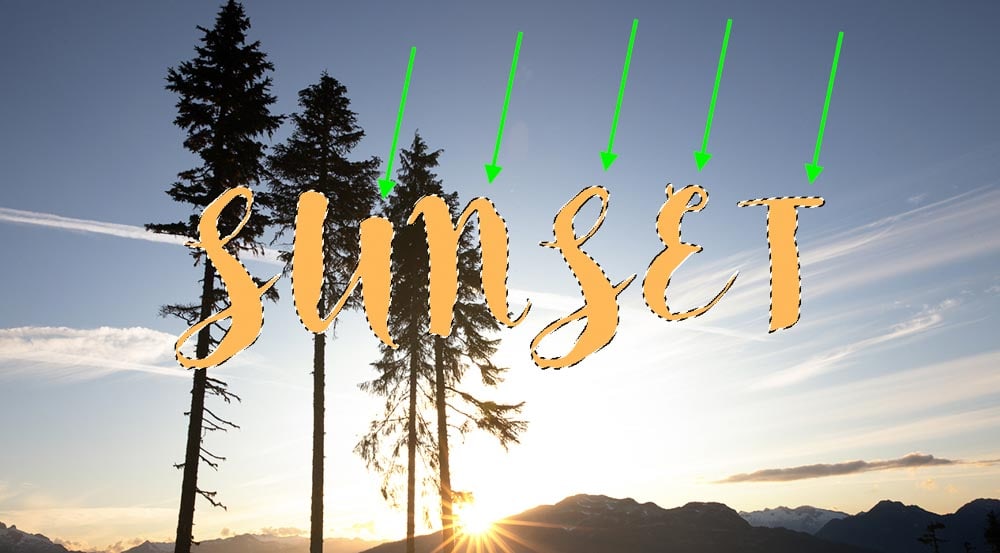
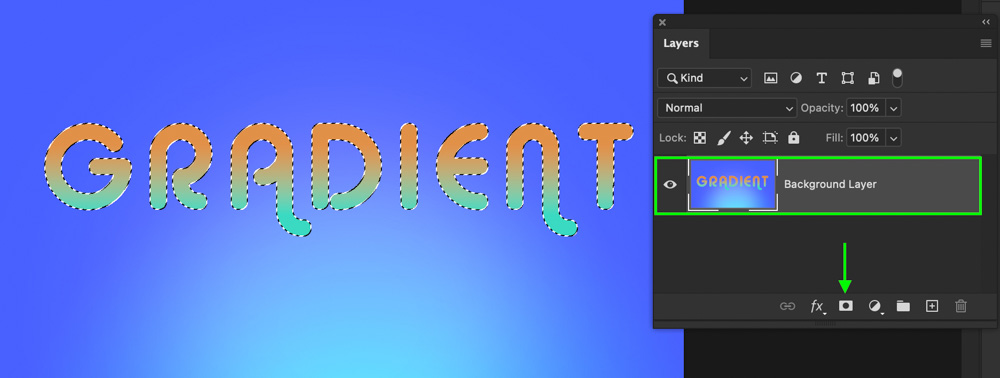
After all of the characters are selected, select your layer and click the layer mask icon to add your selection to a mask.
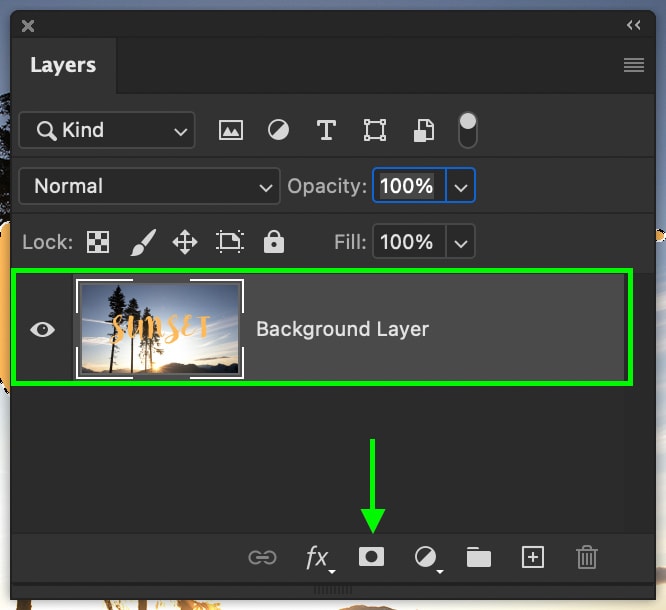
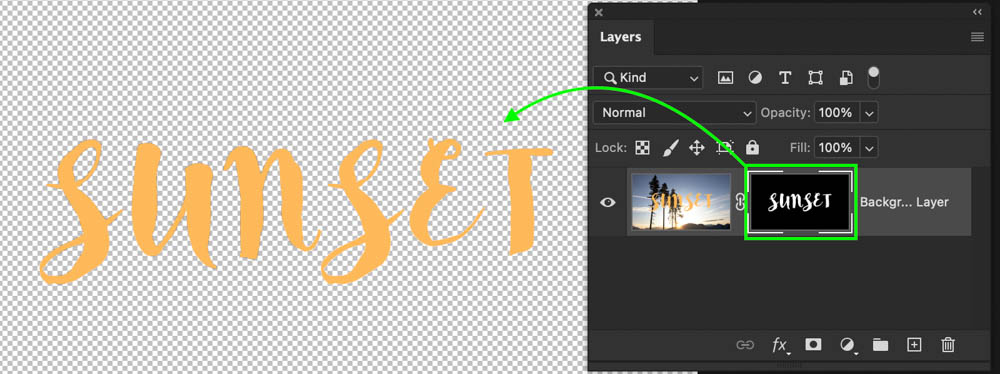
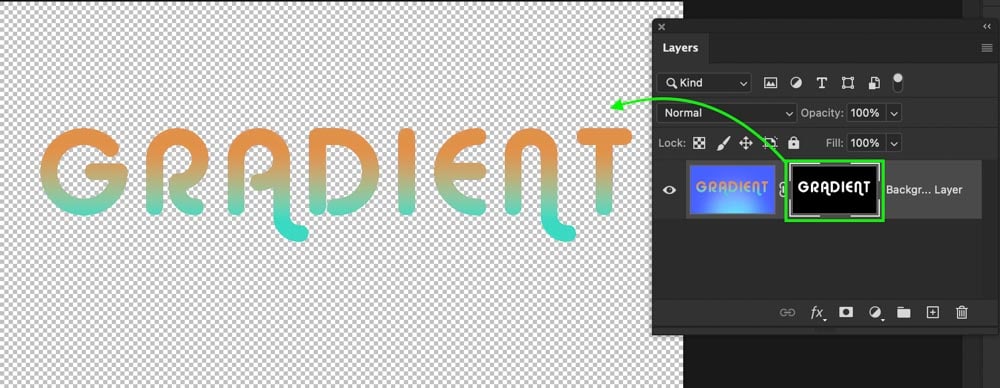
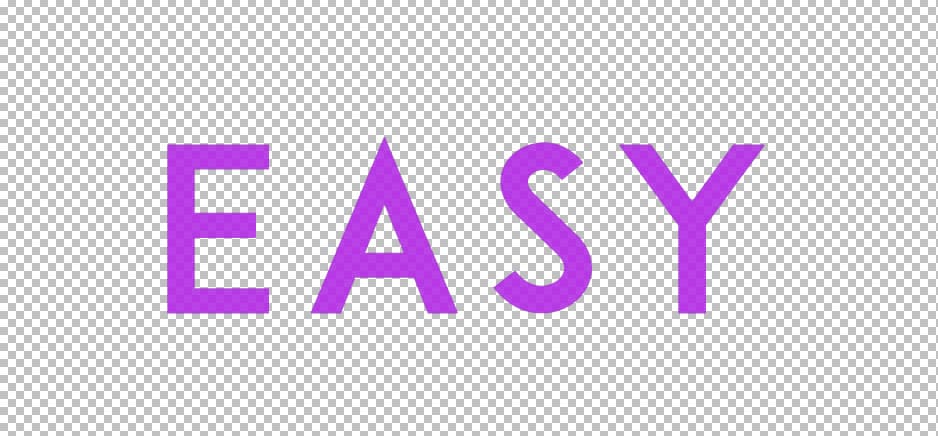
With the selection applied to your mask, the background will become transparent, while only your text remains visible. This method works great with solid colored text since the Magic Wand Tool turns sampled colors into selections.

Option 2: Select Color Range
The next option allows you to select a range of colors that you can then delete from the image. To use this method, you’ll once again need to ensure the background is unlocked, by creating a layer from the background.
In the Layers panel, right-click (Win) or Control + Click (Mac) the background layer. From the options that appear, select Layer From Background and, in the window that comes up, name the layer then click OK.
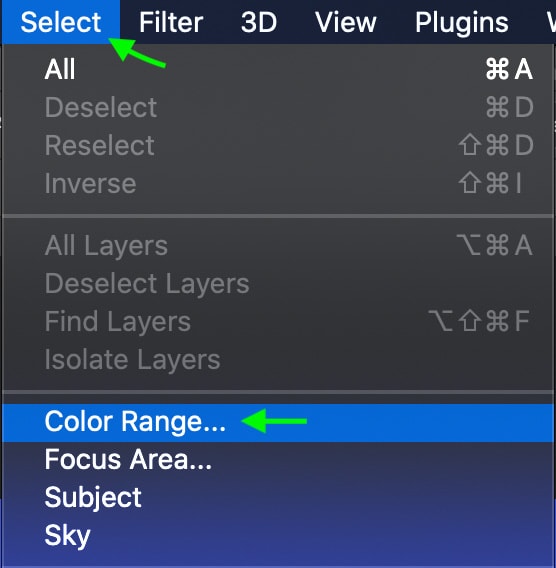
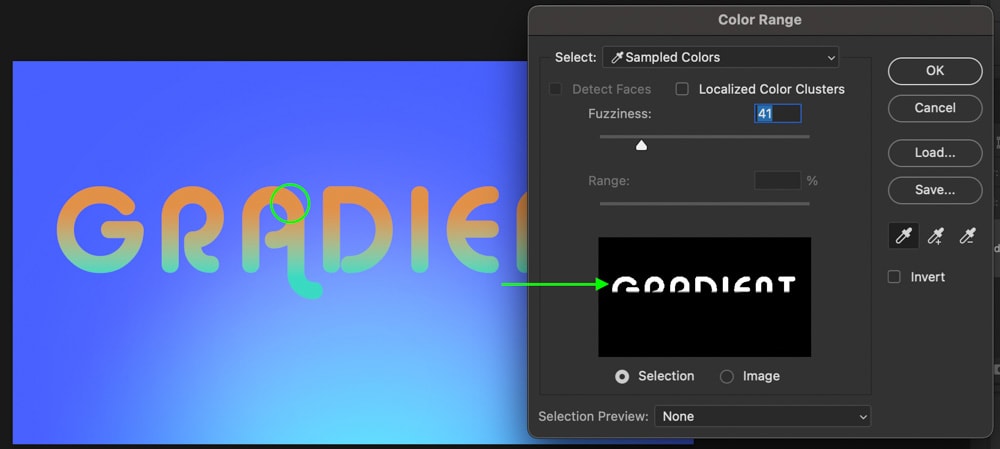
Now, head to Select > Color Range.
In the window that appears, you can use the color picker to select a color within your text. Since this example has multiple colors within the text, I will hold the Shift Key and click between every color of my text. In this example, I clicked the top, middle, and bottom colors in the gradient to get an accurate sample.
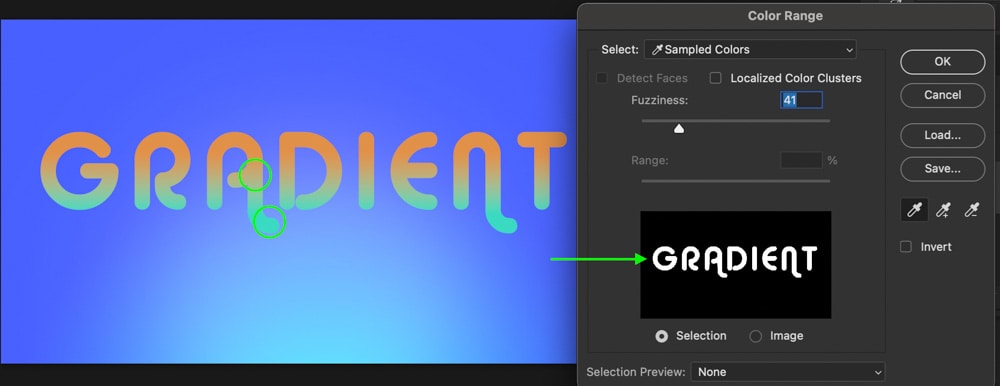
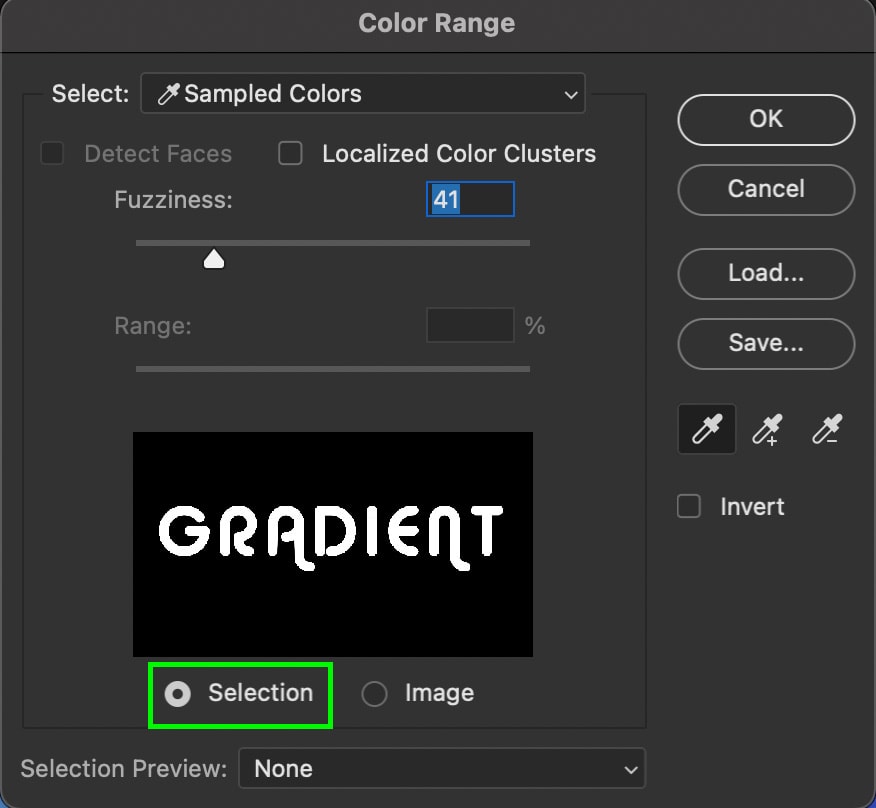
Once you have sampled the text color, make sure your preview is set to Selection. Here you should see your text as completely white, while the background is completely black.
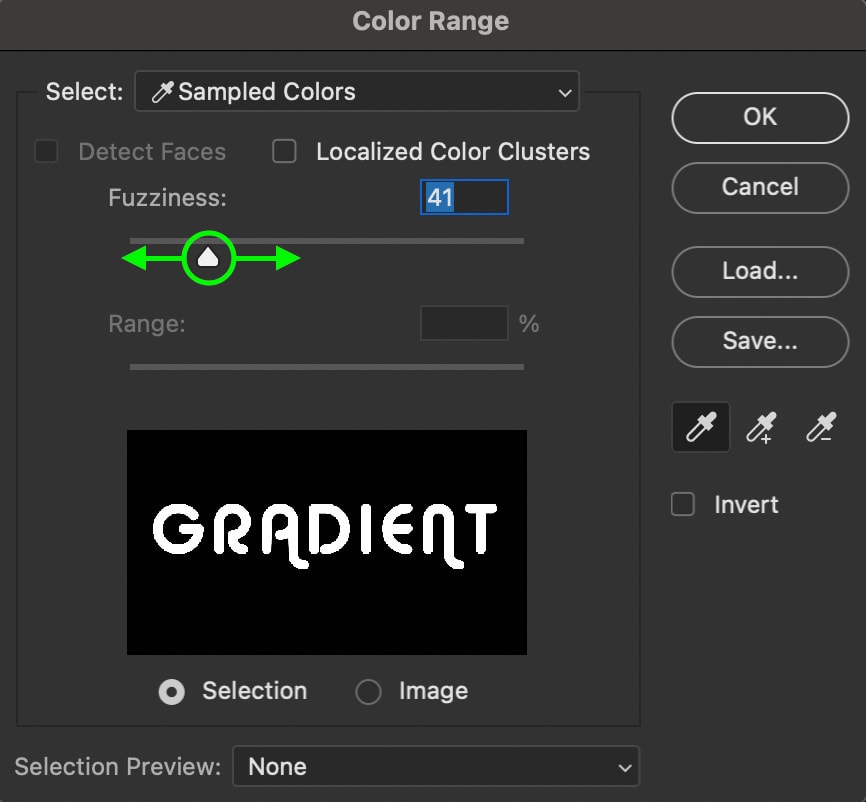
If parts of your text or background aren’t fully white or black, adjust the fuzziness slider to change the tolerance of your selection. By reducing the fuzziness slider Photoshop will become pickier about which colors are included in your selection.
Once your fuzziness has been adjusted so your text is completely white, click OK to create a selection.
With your selection created, select your image layer and click on the layer mask icon. Now your text will remain visible, while the entire background becomes transparent.

Option 3: Channels
Channels are another tool that can help you remove the background from text. While working with channels is not difficult, understanding what they are and how channels work can be a bit confusing. For this reason, it is helpful to have some knowledge of how to use channels beforehand, so let’s break down the main things you’ll need to know about channels.
In short, channels are the separate layers of different colors that make up an image. They correspond with your color mode, so if you’re using the RGB color mode, you will have a red, green, and blue channel. Photoshop creates channels automatically when you open an image.
Channels are a great way to make selections based on contrast. By enhancing the contrast in a particular channel, you can create a selection of certain elements in the image.
When it comes to cutting out text, channels are the best method to use if all your text is the same color, or is dark text against a light background (or vice versa). It will be more difficult and time-consuming to use channels to make selections if you have multicolored text, therefore I’d suggest going with the previous method instead. Since channels work with contrast, they do a great job to select small details that other selection methods cannot do as well. For certain types of fonts, this can prove very valuable.
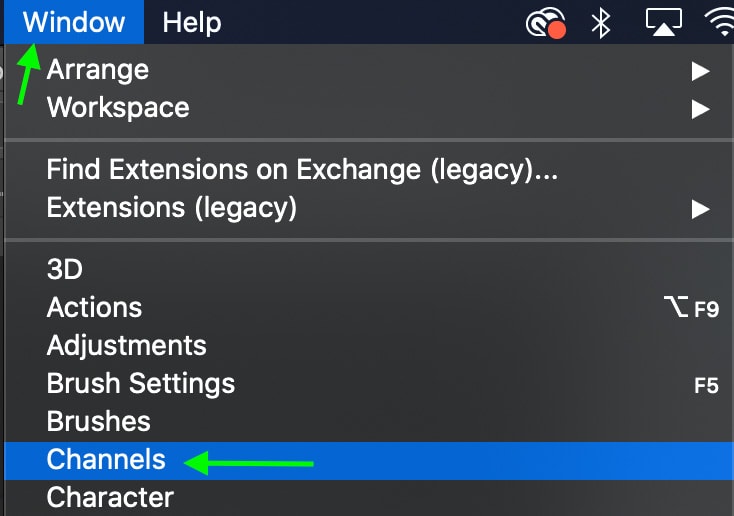
To access channels, head to Window > Channels.
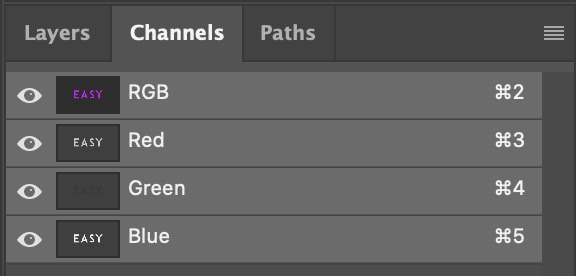
In the Channels panel, you’ll see all the different color channels in the image.
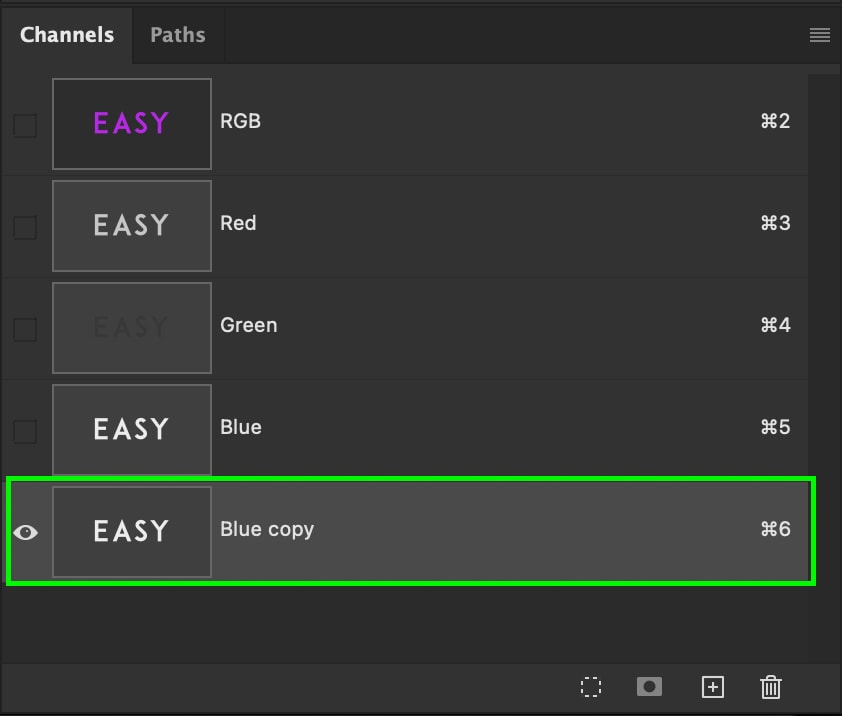
Click through the channels to find the one with the most contrast. For this image, it looks like the Blue channel has the most contrast, but it might differ based on the background and the image. With the Blue channel selected, click and drag it down to the new layer icon to create a duplicate channel.

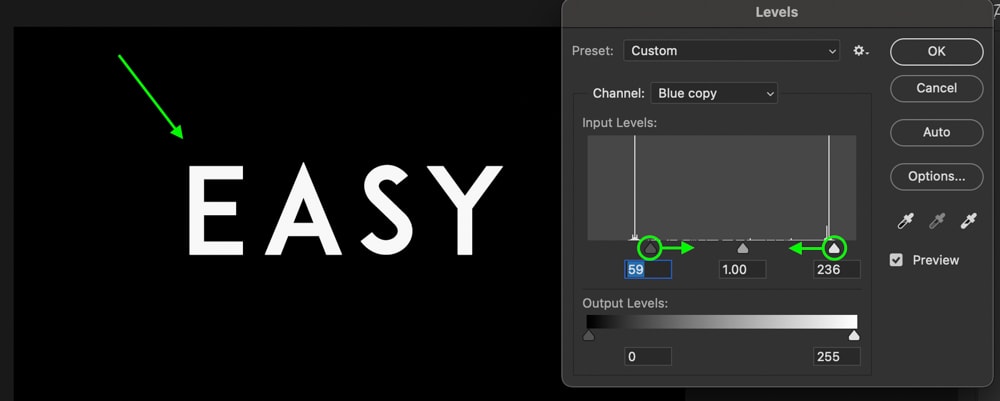
With the duplicated channel selected, press Control + L (Win) or Command + L (Mac) to access the Levels adjustment. Begin increasing the highlights and shadow intensity until the text is completely black, while the background is completely white. Lastly, click OK to apply the adjustment to the duplicated channel.
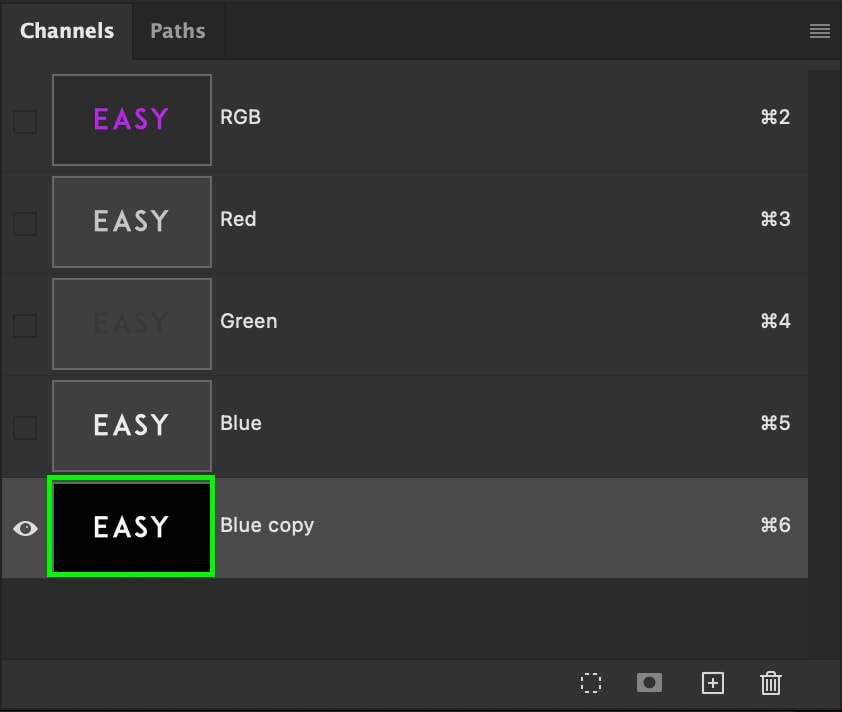
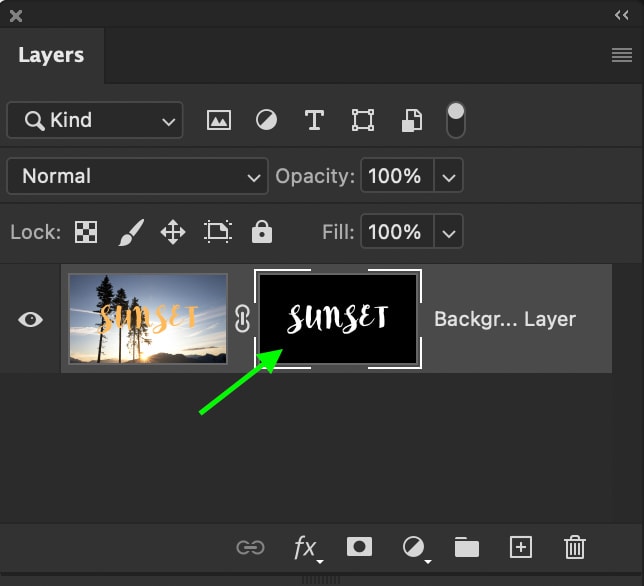
Now, let’s make a selection. Hold in Control (Win) or Command (Mac) and click the layer thumbnail of the channel. You’ll notice that the text is surrounded by marching ants, indicating the selection.
Now, click the Layers panel, and select the layer. At the bottom of the Layers panel, click the Layer Mask icon.
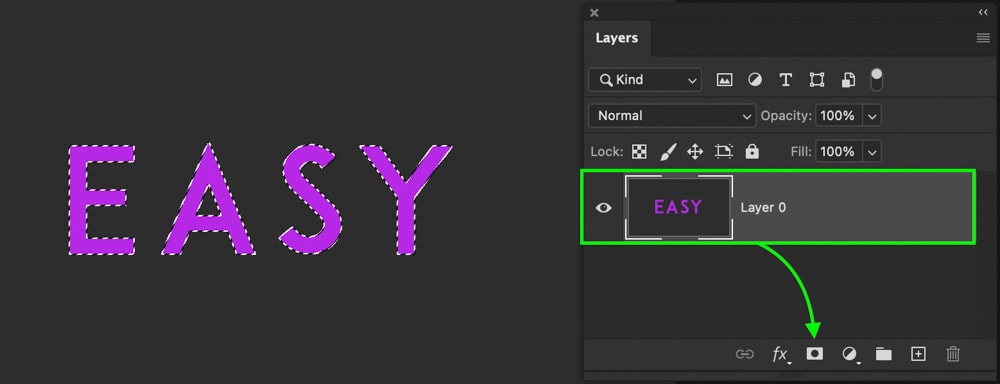
If you see the opposite of what you wanted, such as when the text is transparent, click on the layer mask and press Control + I (Win) or Command + I (Mac) to invert the mask and make your text visible once again.
How To Smooth The Edges Of Text Once The Background Is Removed
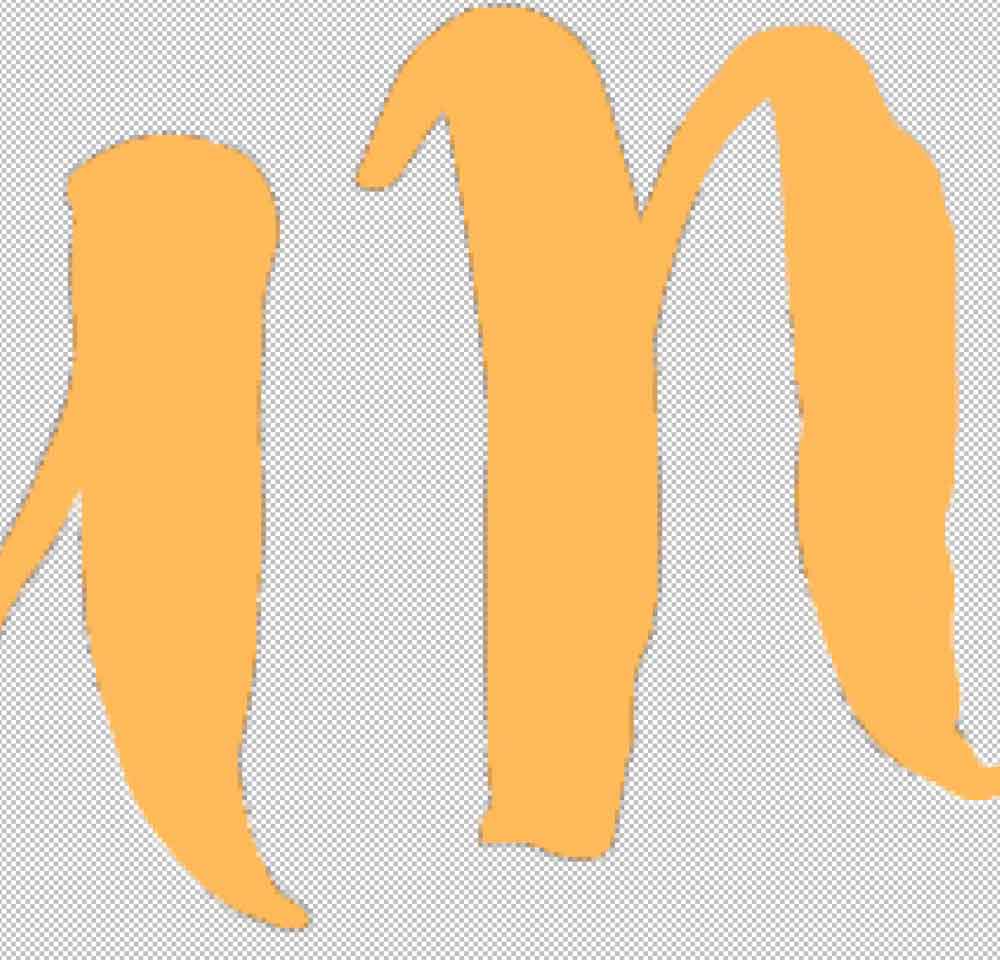
Now that you’ve removed the background from the image and only the text remains, your edges may appear uneven or have a bit of a halo.
You can reduce this using the select and mask tools which can be accessed by double-clicking on your layer mask after you’ve created and applied your selection using the above methods.
In the window that appears you’ll see a variety of adjustments that you can make to your selection. Head to the Global Refinements area.
Move the Feather value up slightly to soften the fringing then increase the Contrast value until the edges become sharp once again. If there are still remnants of fringing or haloing around your text, decrease the Shift Edge option to move the active edge of your text inwards to remove these unwanted remnants.
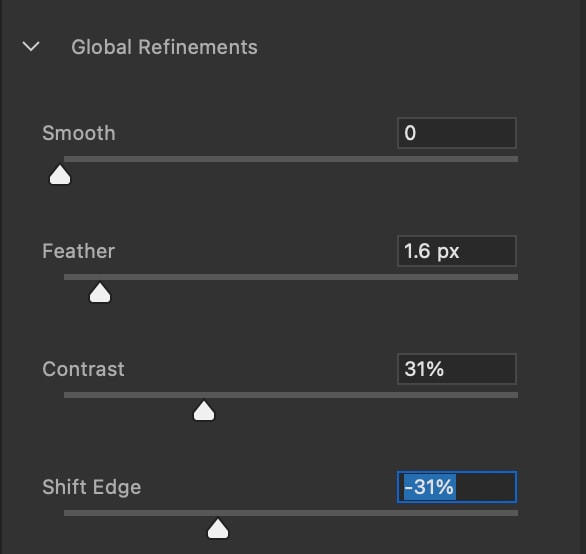
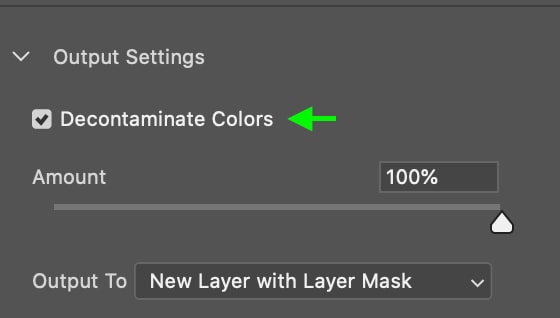
Now, in the Output Settings area, check the Decontaminate Colors box. This will remove any remaining fringing from your text to create a clean edge.
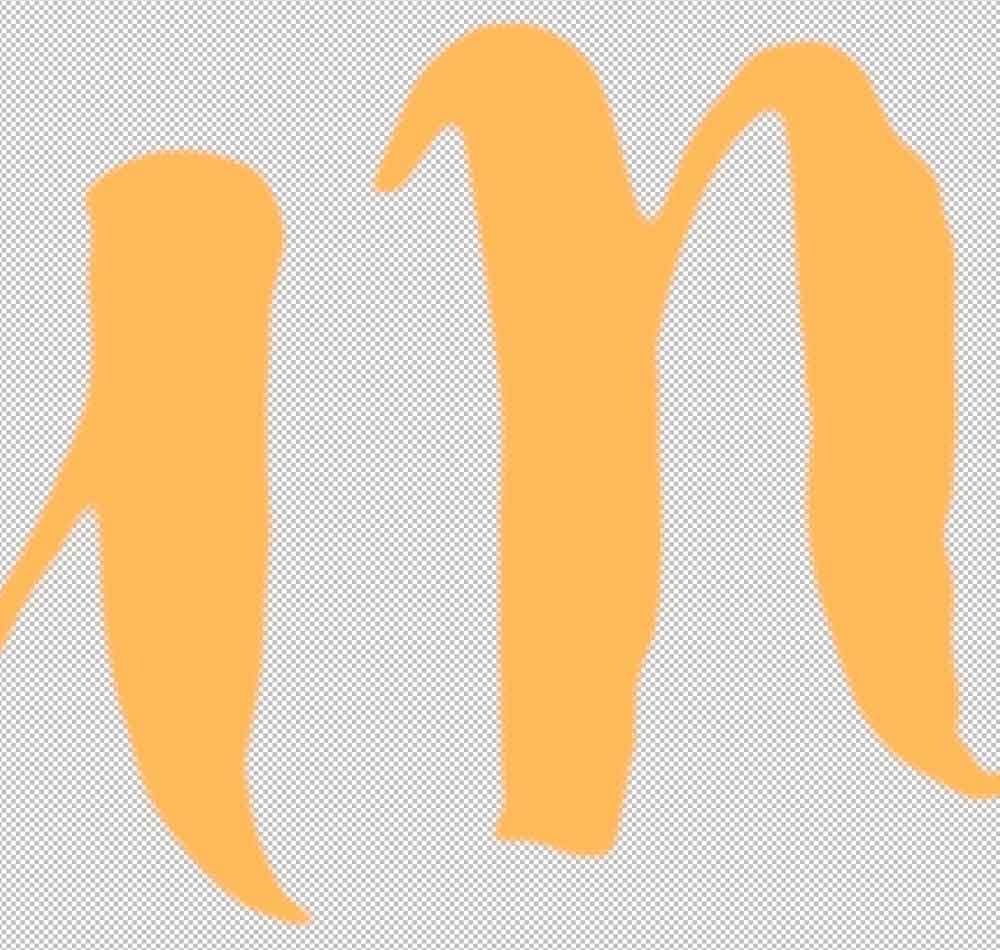
The edges of the font will have cleaned up significantly. Before, the edges were visibly jagged and uneven. After the mask has been applied, the edges are smoother without jagged areas and there is far less pixelation.
Now that your text has the background removed, you need to export your file as a PNG or SVG file to preserve its transparency. I break down how to quickly export your cut-out images with transparent backgrounds in this next tutorial on converting JPEG to PNG in Photoshop!
Happy Editing!
