
Creating selections in Photoshop allows you to edit specific areas of your image, create paths for other projects, and remove the background of your image. Regardless of how you create a selection, it’s not uncommon for your selection to be slightly too small or slightly too large; especially with the auto selection methods. Fortunately, there are ways to change and modify a selection in a few easy steps.
To add or subtract from a selection, select the Quick Selection Tool (W), then hold Shift and paint over the selection area to add to it. Alternatively, hold Control or Command to subtract from the selection area. Finally, you can modify the entire selection by going to Select > Transform Selection.
Now let’s get into a few more ways to modify your selection in-depth below!
How To Change Selection Size In Photoshop
You can change a selection in a few different ways. You can expand it, add more content to it, or remove portions of it.
Option 1: Expand Selection
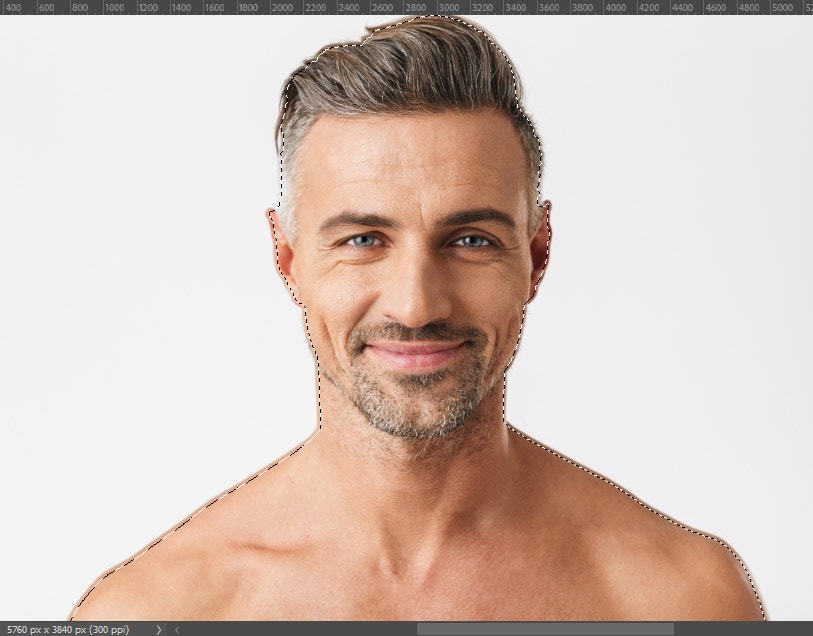
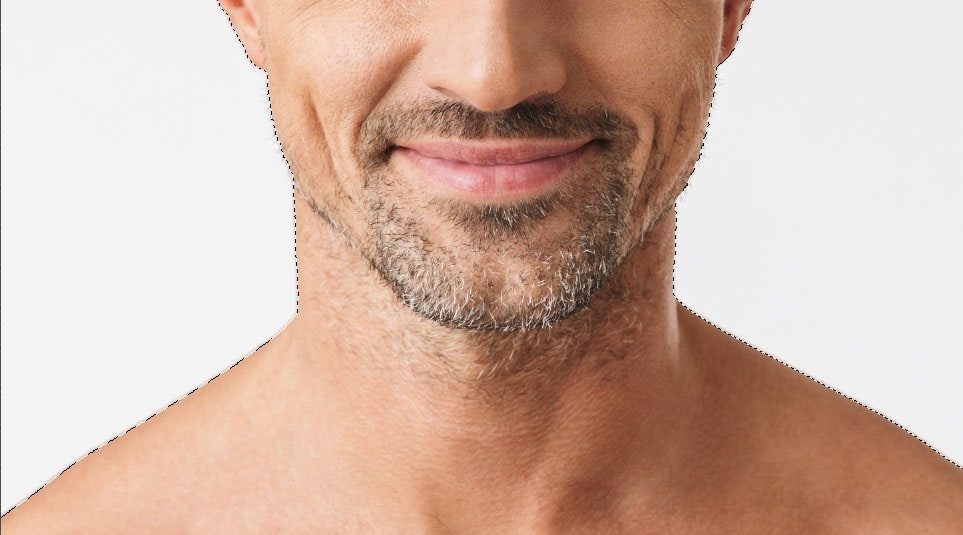
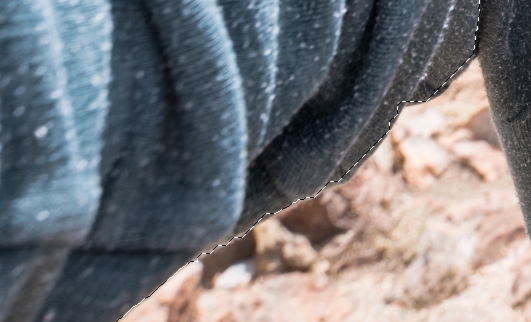
After making your selection, you may want to expand it to add more of the image to the selection. Here is a selection that I made, and as you can see, it needs to be expanded to cover the entire subject of the image.
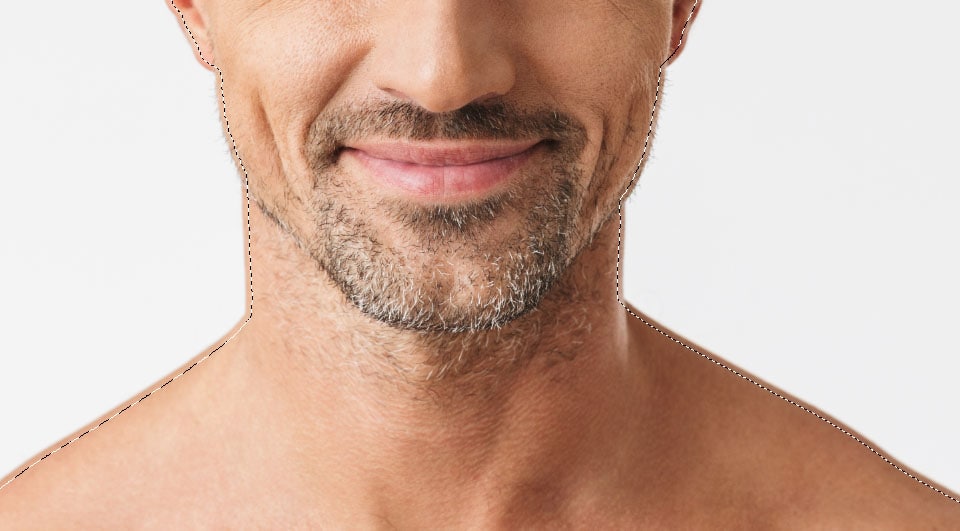
To expand your selection, keep it active and go to Select > Modify > Expand.
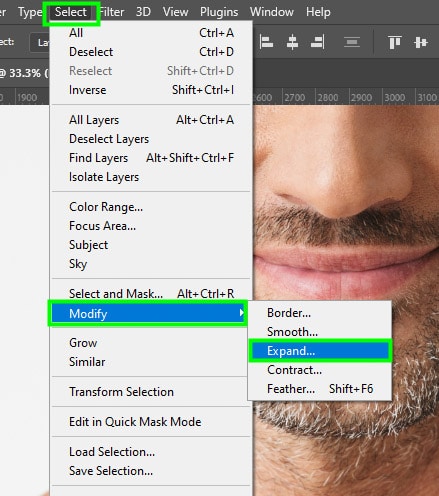
In the dialog box that opens, enter a pixel value for the selection to be expanded by, and click OK to confirm the changes.
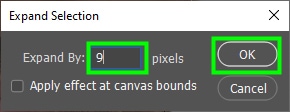
You will instantly enlarge the entire selection by the number of pixels you have specified.

Option 2: Add To The Selection
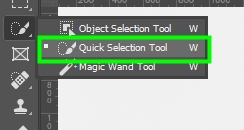
After making your initial selection, you may want to add content to it without expanding the entire selection outwards. Instead, you may want to only expand a certain portion of your selection. To give you an example of this in action, let’s create a new selection.
To make your initial selection, pick any selection tool in the toolbar (W). I chose the Quick Selection tool, but the tips for adding to selections here apply to any selection tool.
Next, start dragging over the image around the area you want to select.

Now to add content to the selection, go to the Options bar and click the Add to Selection icon. As I used the quick selection tool, its icon is a brush with a plus sign next to it. But there is an equivalent icon for each selection tool you choose. For example, the magic wand tool Add to Selection icon will be a magic wand with a plus sign next to it, and so on.

Then, go back to the canvas and continue making your selection. For a quick alternative to adding the selection hold Shift while dragging over the image around the area you want to select.

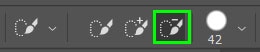
Option 3: Subtract From The Selection
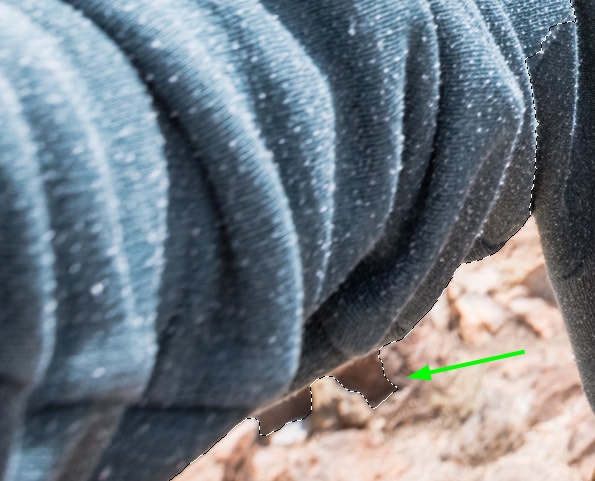
While making your selection, you may notice that more areas are being selected than there should be. In my case, the selection of the clothing expanded into the background.
If something similar happens to you, keep your selection active, then go to the Options bar and click the Subtract From Selection icon, and brush over the area you want to deselect. Alternatively, press Alt (Win) or Option (Mac) on your keyboard while dragging around the portion of the image to be subtracted.
How To Transform A Selection In Photoshop
Photoshop has a handful of impressive ways to modify active selections, and one of the best is the Transform Selection tool.
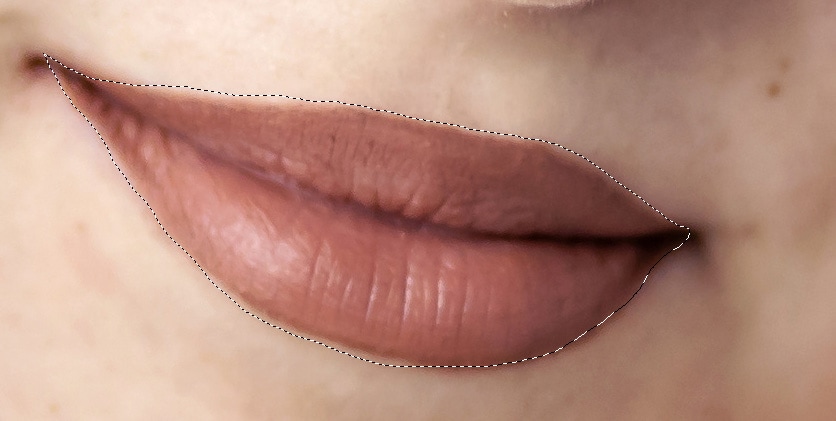
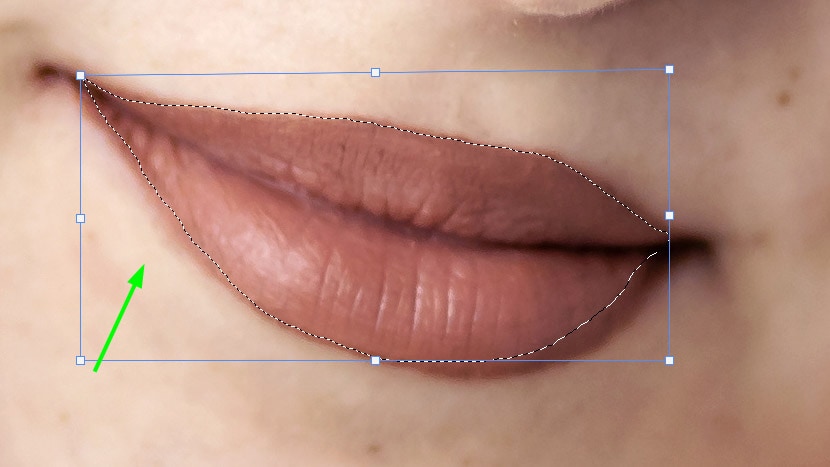
So here is the selection I initially made, but I want the selection to take the exact shape of the model’s lips, so I can change the color of her lipstick. The transform selection tool is excellent for when you want the selection to take an unusual shape.
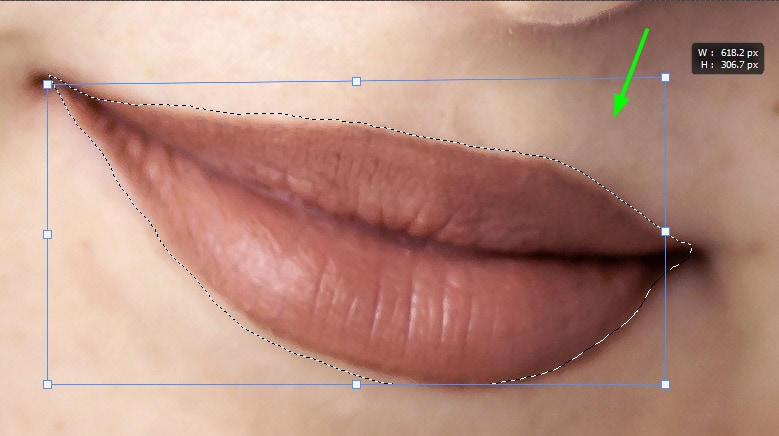
To enable the Transform Selection tool, go to Select > Transform Selection.
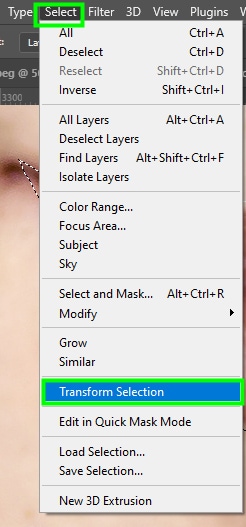
This will create control points around the selection. The Transform Selection tool then allows you to transform the selection itself, without affecting the content within it.

You can rescale the selection by clicking any of the control points up or down.
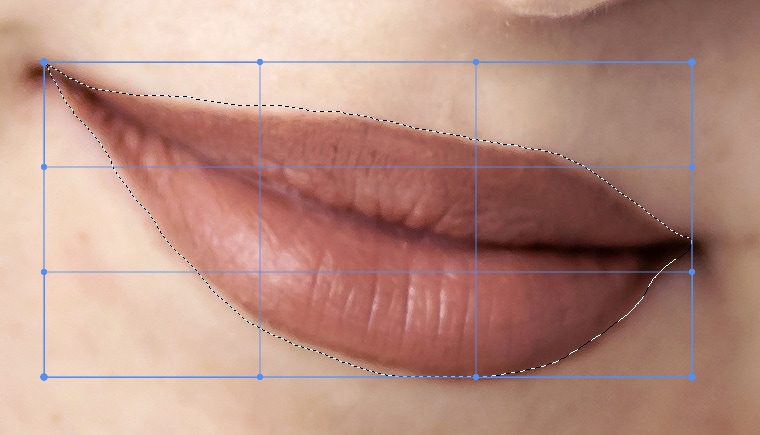
To have more control of the selection, you can also enable the Warp setting in the Options bar by clicking the warp icon.

This will create a grid in the selection.
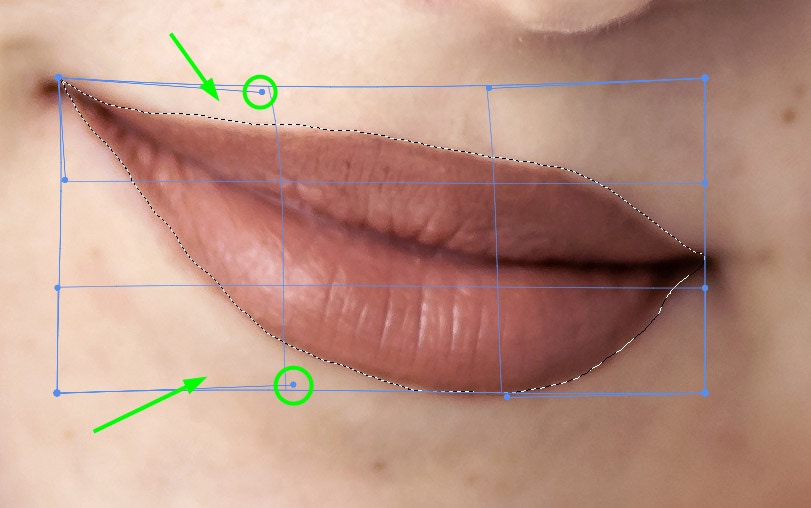
This gives you more flexibility while transforming your selection, because, besides control points, you will also have handles available that you can move around to transform your selection. Additionally, you can move the grid mesh up or down to contract or expand your selection.
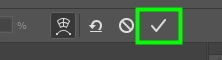
After finishing transforming your selection, press Enter on your keyboard or click the checkmark in the Options bar.
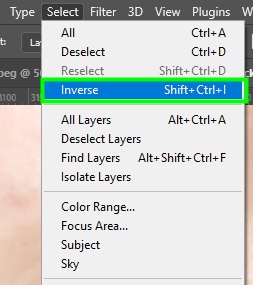
How To Invert A Selection In Photoshop
Inverting a selection comes in handy, especially if you noticed you selected the wrong part of an image. To invert an active selection, go up to Select > Inverse. Alternatively, press Shift + Control + I (Win) or Shift + Command + I (Mac). By doing so, the content outside the selection will be selected.


How To Remove A Selection In Photoshop
After you’re finished with a selection or you make a mistake, removing the selection entirely is what you’ll likely want to do. To remove a selection, go up to Select > Deselect. Alternatively, press Control + D (Win) or Command + D (Mac).
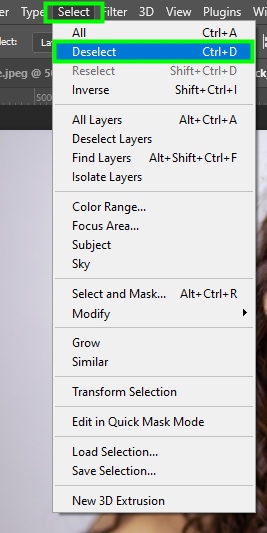
Keep in mind that this will remove the entire selection. The only way to reverse that action and bring the selection back again is by pressing Control + Z (Win) or Command + Z (Mac) on your keyboard or redoing the selection.
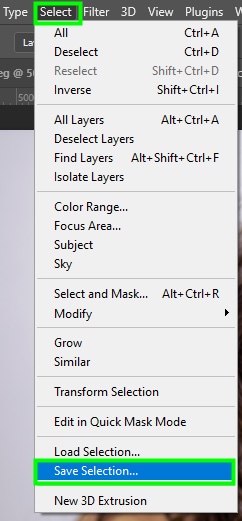
How To Save A Selection For Later Use
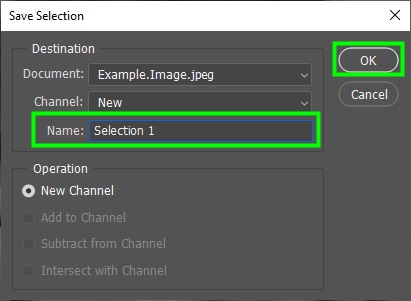
When you create a selection that you will want to go back to later on in the project, you can save the active selection area for later use. To do this, go up to Select > Save Selection while you have an active selection.
Name the selection in the Save Selection dialog box and click Ok to confirm the action.
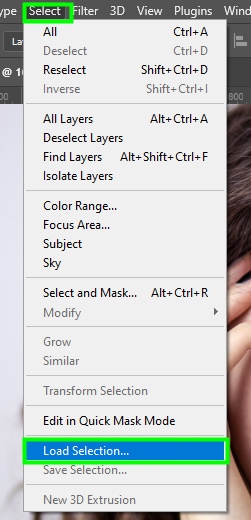
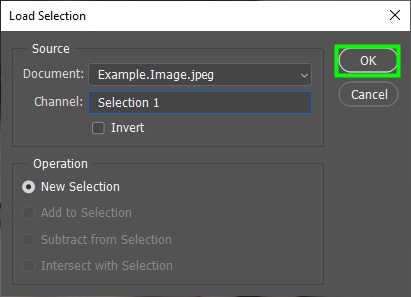
To load the selection when you go back to finish your work, go to Select > Load Selection.
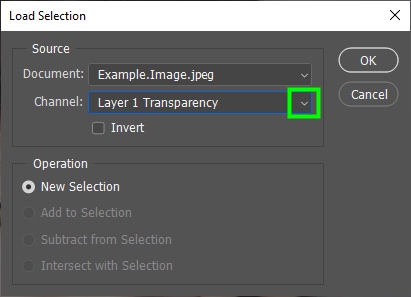
Then, click the Channel drop-down menu.
A list of saved selections will appear. Look for the one you saved and click it, I named mine Selection 1.
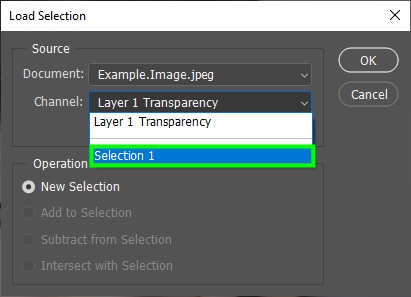
Click Ok when you’re finished to load your saved selection onto your project.
So with these tips, it doesn’t matter how you created the selection since all of these methods allow you to easily modify and change the active selection area. These techniques are something you’ll find extremely handy when working with selections in Photoshop, and are tricks I use every day in my workflow. I hope you get the same amount of use out of them too!
Happy Editing!


