

How To Undo And Redo In Photoshop
Unless you’re some kind of alien cyborg, you’re going to make a mistake while working in Photoshop. Whether that be a wrong brush adjustment, accidental button click, or deleted layer, we all make mistakes like this. Thankfully no mistake is permanent because you can use the undo feature to step backward through your adjustments. In this tutorial, you’ll learn how to undo in Photoshop, as well as redo, if you go too far!
How To Undo In Photoshop
There are a few different ways you can undo in Photoshop. Depending on how far you’d like to step back, the best method will differ. Let’s go over the four different ways to undo.
– How To Undo With The Menu Bar
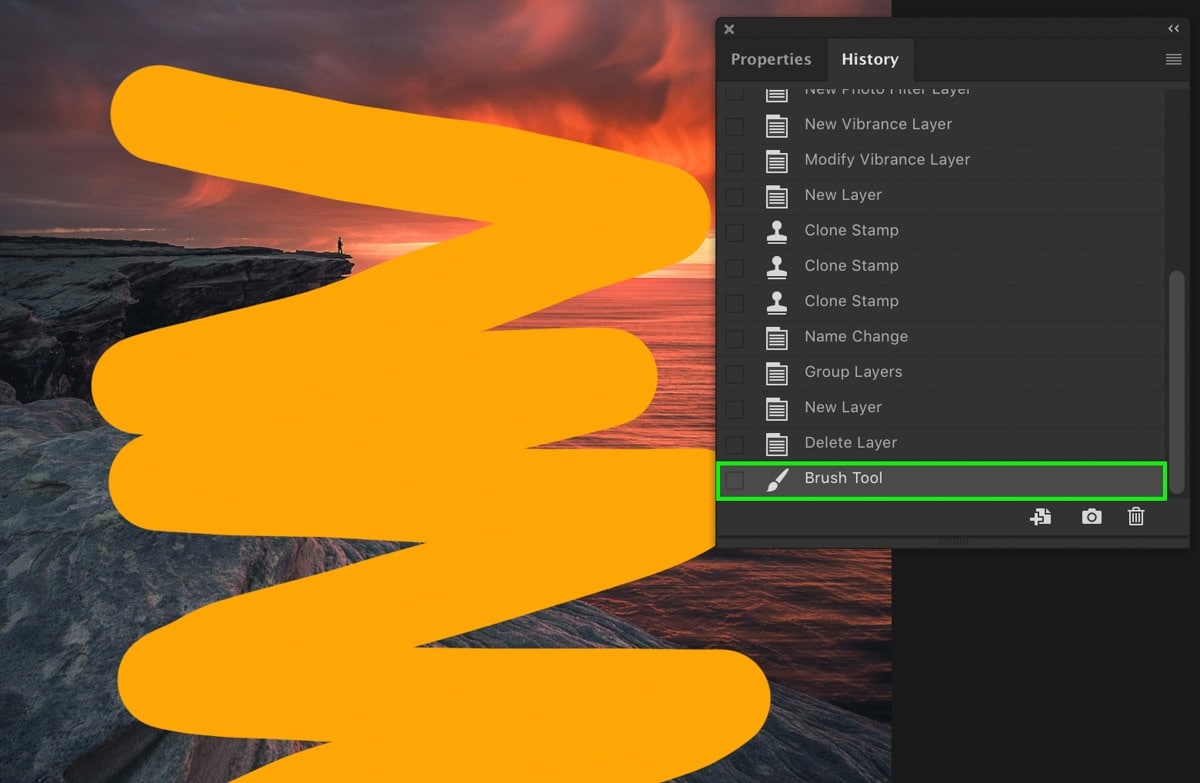
For this example, let’s make the mistake extremely obvious. I’ll grab my Brush Tool (B) and paint a long line directly on my image layer.
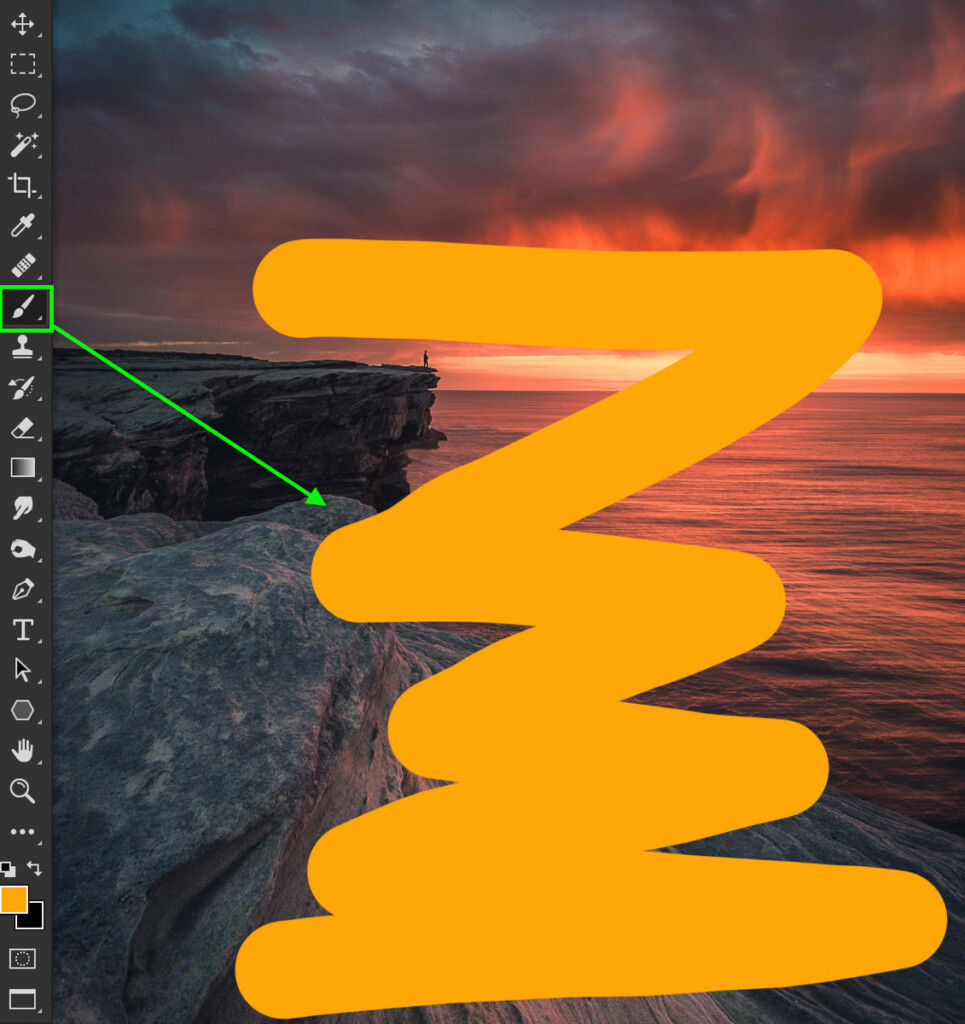
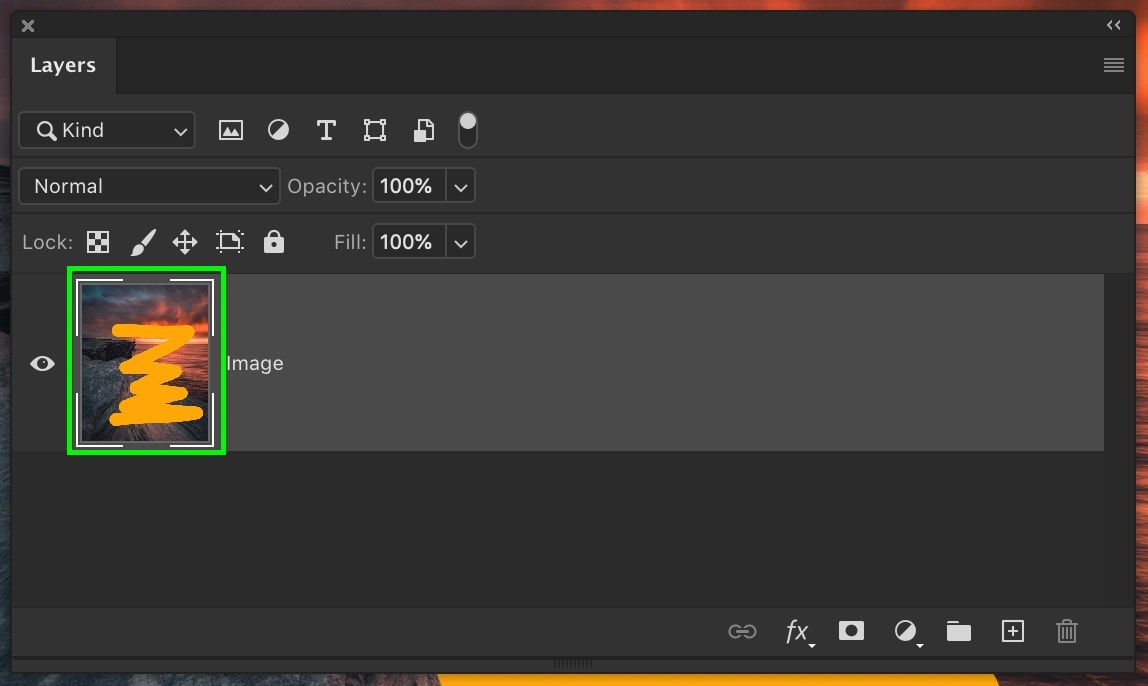
Since the line and image are on one layer, I can’t just delete the layer. That would get rid of both my brush and the image. So what can be done to get rid of just the brush stroke?
Yup, you guessed it: undo.
The most basic way to undo in Photoshop is to use the top menu bar. Go to Edit > Undo to step back from your last adjustment.
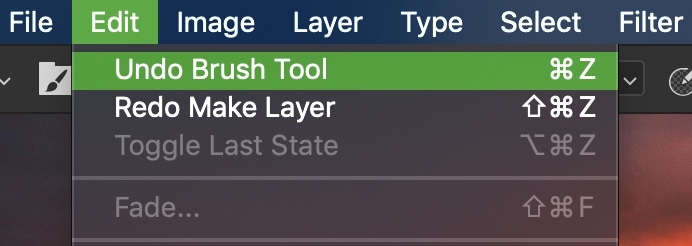
Depending on what that last adjustment was, you might see ‘Undo Brush Stroke’ or ‘Undo Delete Layer’ etc. This is telling you exactly what adjustment you’ll be undoing.
– The Undo Keyboard Shortcut In Photoshop
The second (and fastest) way to undo in Photoshop is with a keyboard shortcut.
After you’ve made any type of mistake, just press Command + Z (Mac) or Control + Z (PC) to step back to your previous state.


In this case, using the undo shortcut gets rid of the line since it was my most recent adjustment.
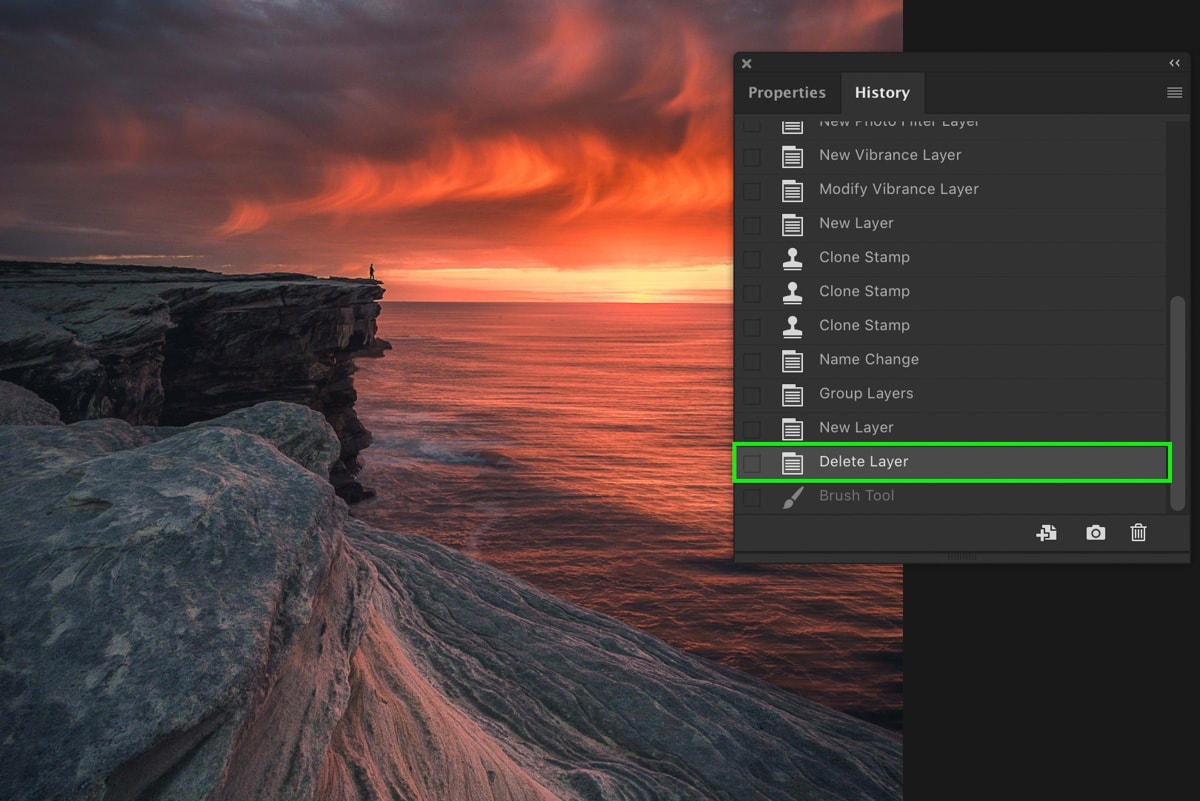
– Using The History Panel To Undo In Photoshop
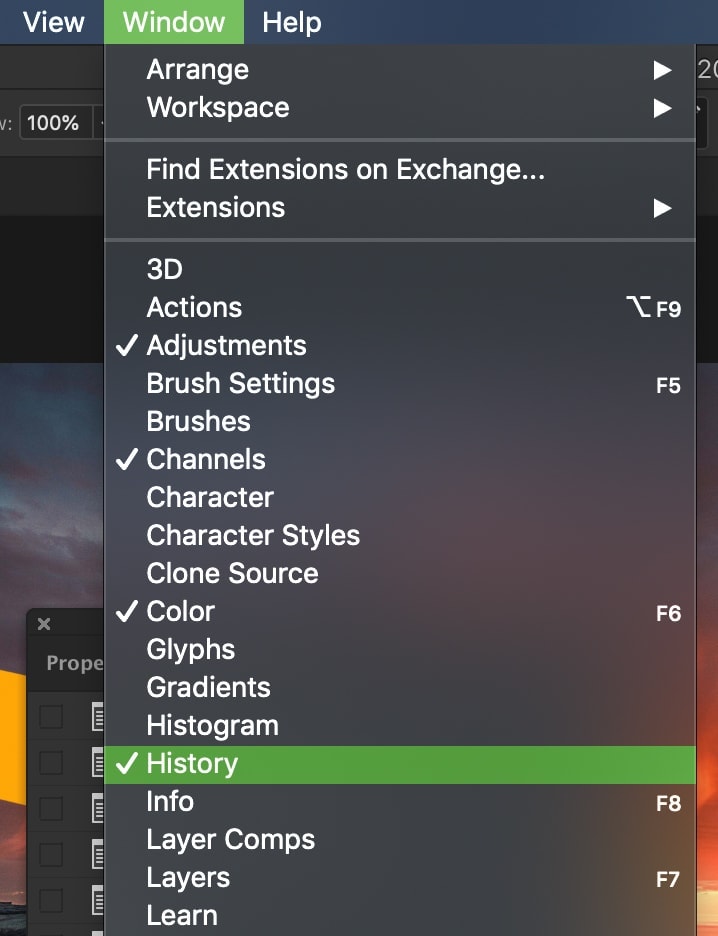
A less common, but highly useful, way to undo in Photoshop is with the History Panel.
If you don’t know where this is, go to Window > History to reveal this panel.
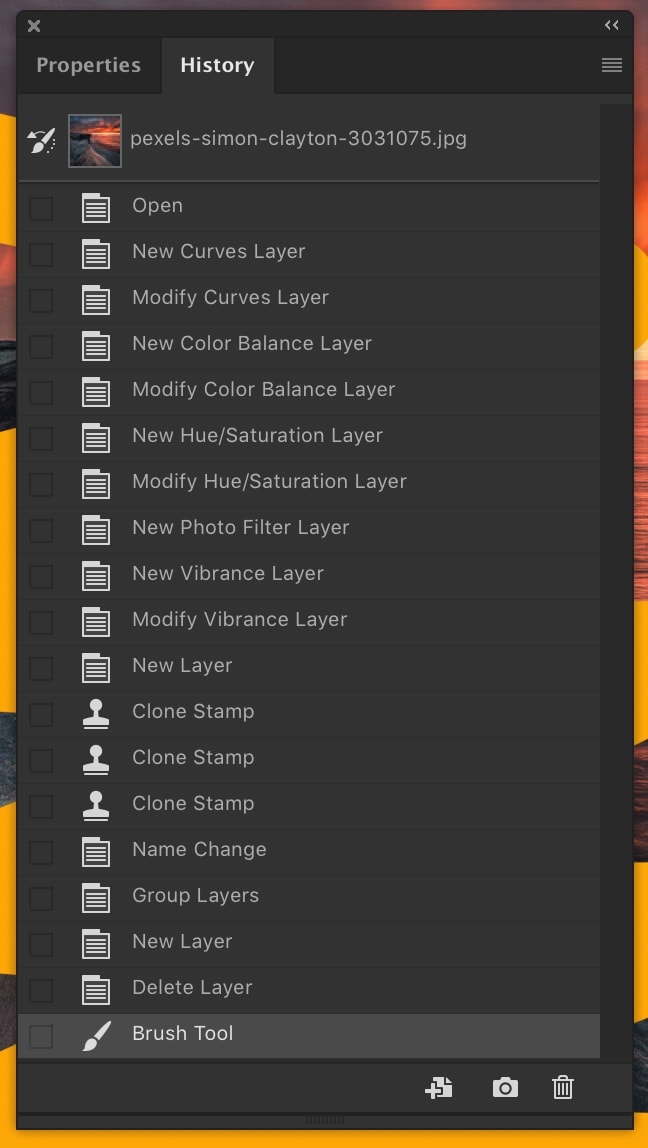
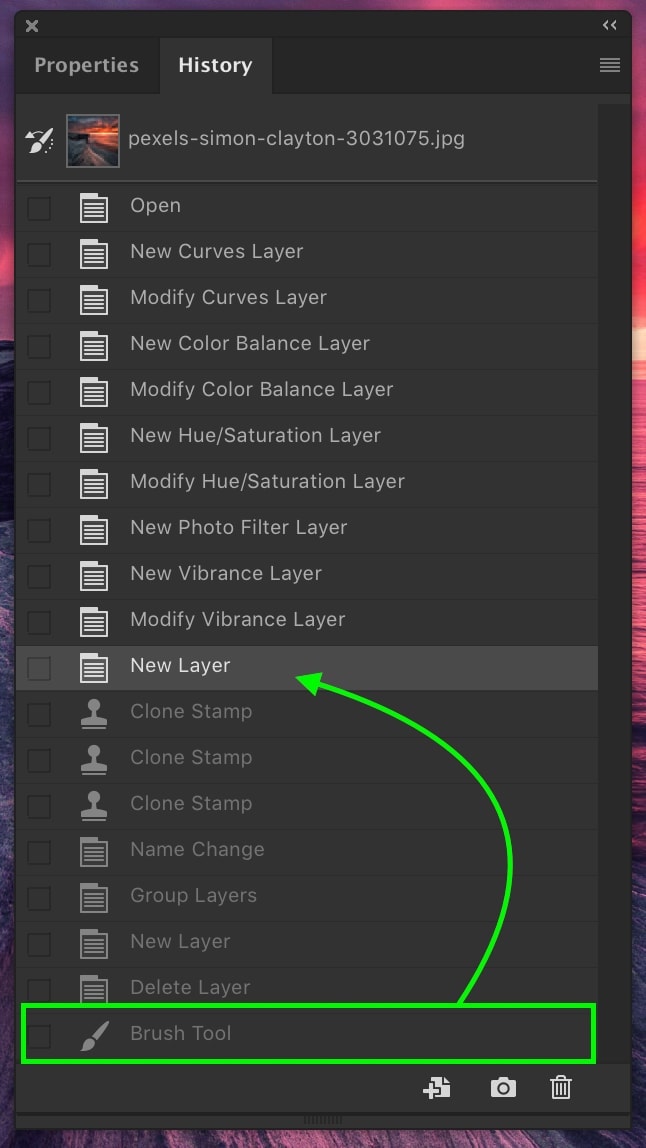
Here you’ll find a list of every adjustment you’ve made in your current project. Each row represents a different history state.
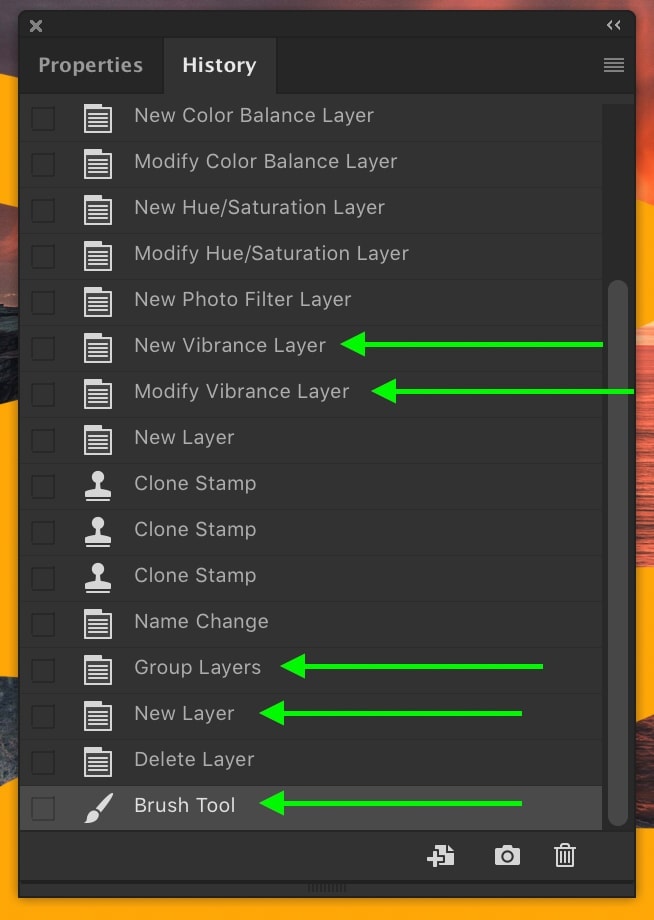
If you want to undo something, just select a previous history state in this panel.
For this brush example, the brush adjustment is listed as ‘Brush Tool’.

By selecting the history state before this, it gets rid of the brush adjustment, and I’m back to where I was before.
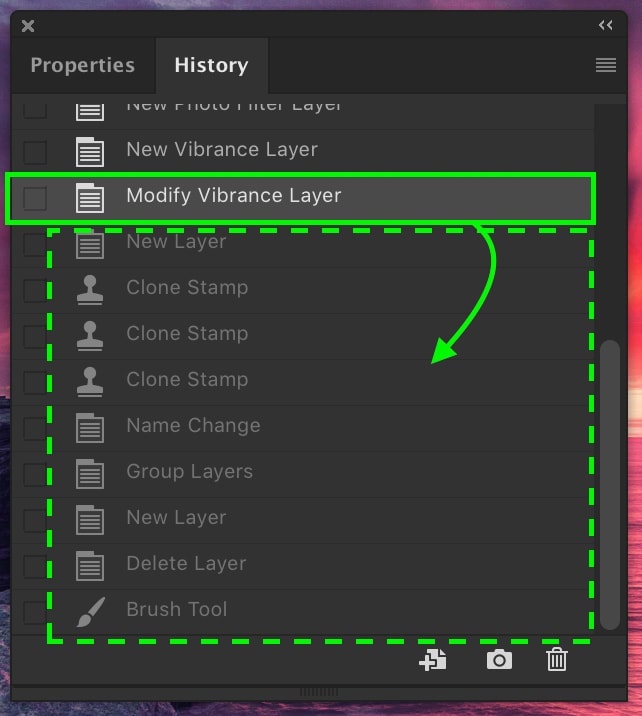
The beauty of the history panel is that you can go back 20+ history states in a single click. Just scroll through the different states and select one of the starting ones to go back to. This is one of the most efficient ways to undo multiple times in Photoshop!
Of course, your history panel will be more or less full, depending on how fresh your project is. If you’ve made a lot of adjustments, you’ll have a lot of history states and vice versa.
Learn More: How To Use Snapshots To Save History States In Photoshop
– How To Undo Multiple Times With A Keyboard Shortcut
In earlier versions on Photoshop, using the undo shortcut of Command / Control + Z would only undo and redo a single history state. This was annoying to many Photoshop users who needed to undo multiple times.
Luckily, there’s an easy workaround if you’re in an earlier version of Photoshop.
In Photoshop CC 2018 or earlier, you’ll need to use the shortcut Option + Command + Z (Mac) or Alt + Control + Z (PC) to undo multiple times.
In Photoshop CC 2019 and later, you can press Command + Z (Mac) or Control + Z (PC) repeatedly to undo multiple times.
– How To Toggle Last History State
Now there was an advantage to being able to undo/redo an adjustment over and over. This makes it extremely easy to see a recent adjustment you’ve made and decide how you like it.
In Photoshop CC 2018 or earlier, just press Command + Z (Mac) or Control + Z (PC) a few times. This will go back and forth between your two most recent history states.
In Photoshop CC 2019 and later, you’ll need to use Option + Command + Z (Maz) or Alt + Command + Z (PC). This shortcut will also toggle your recent history states but in the updated versions of Photoshop (2019 or later).
How To Redo In Photoshop
Learning how to undo in Photoshop is great, but what if you step back too far? That’s why being able to redo an adjustment is equally as important to learn. Here are three great ways to redo an adjustment in Photoshop.
– How To Redo With The Menu Bar
For these examples, I’ll use the same example as before, but this time trying to redo the brush adjustment.
The first way to do this is with the menu bar.
Go up to Edit > Redo to redo your last history state.
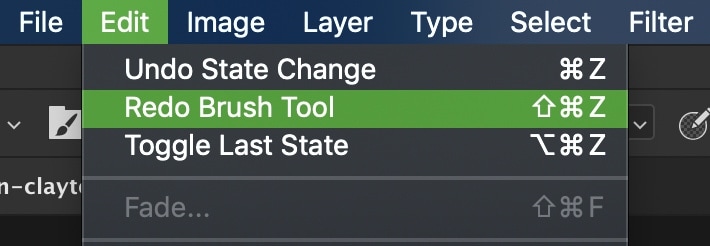
In this case, that brings back the brush stroke into the image.
– How To Redo With A Keyboard Shortcut
Next, let’s use another easy keyboard shortcut, but this time to redo the adjustment.
To quickly redo in Photoshop, press Shift + Command + Z (Mac) or Shift + Control + Z (PC) to step forward through your history states.
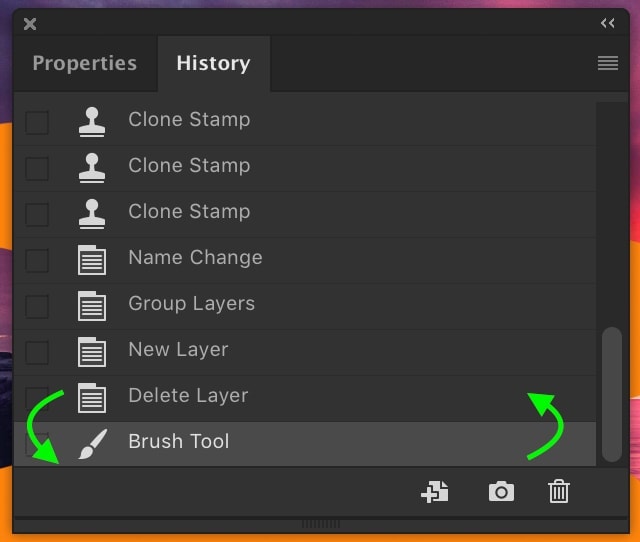
– How To Redo Using The History Panel
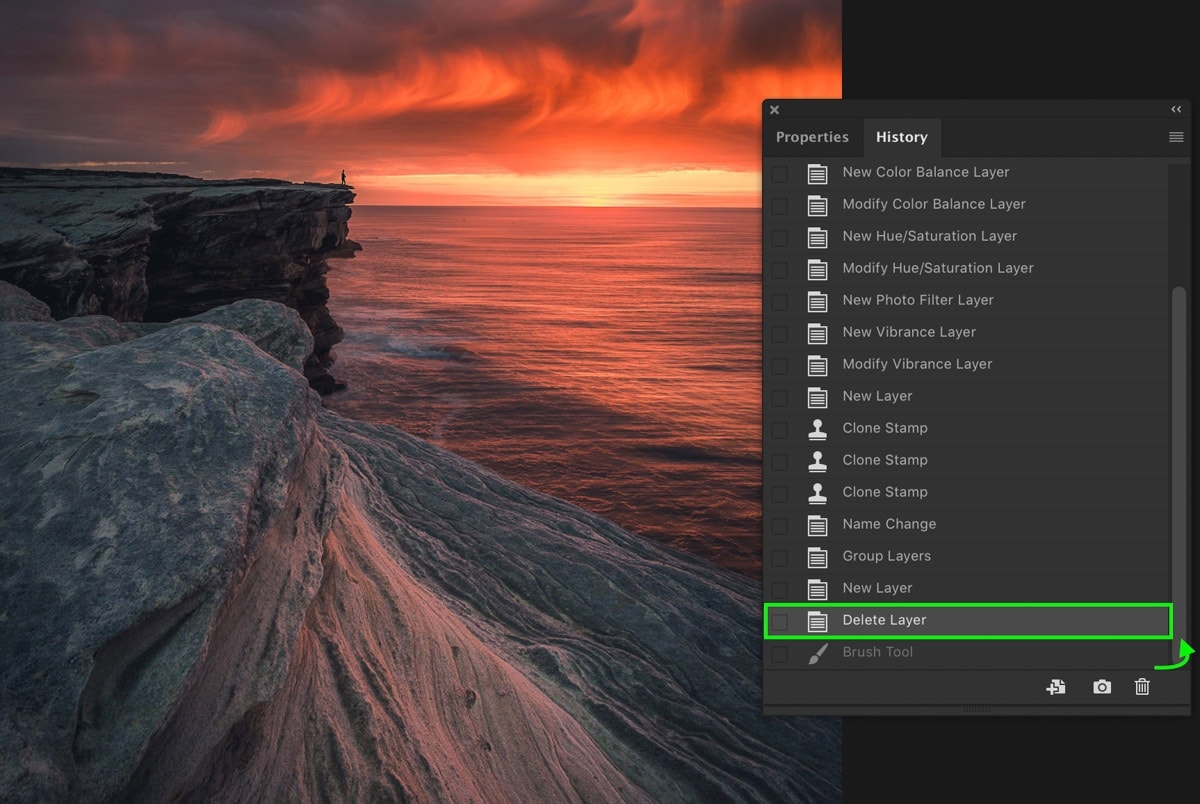
Instead of going back in your history panel, this time, you’ll go forward to redo an adjustment.
If you don’t see your history panel, once again, go up to Window > History to reveal it.
Once in the history panel, scroll down to reveal your most recent history states.
To redo an adjustment, just click on any history state that lies after your current state.
Just like with undoing, this panel makes it easy to redo multiple times. Since you can jump between various history states in one click, it drastically speeds up the process.
How Many Times Can You Undo/Redo In Photoshop
Well, it depends. You can only undo or redo in Photoshop based on your total number of history states.
Most people have a limit of 20-50 history states. That means that Photoshop will only remember 20-50 recent adjustments for you to go back to.
Keeping a lower number of history states is useful to help keep Photoshop running smoothly. If you are saving 100+ history states, that’s a lot of extra information Photoshop has to store.
Especially when your computer doesn’t have incredible specs, this will make a noticeable difference in speed.
With that said, it is still possible to increase or decrease the number of history states in Photoshop. Here’s how:
– How To Change The Amount Of History States In Photoshop
First, go up to Photoshop > Preferences > Performance.
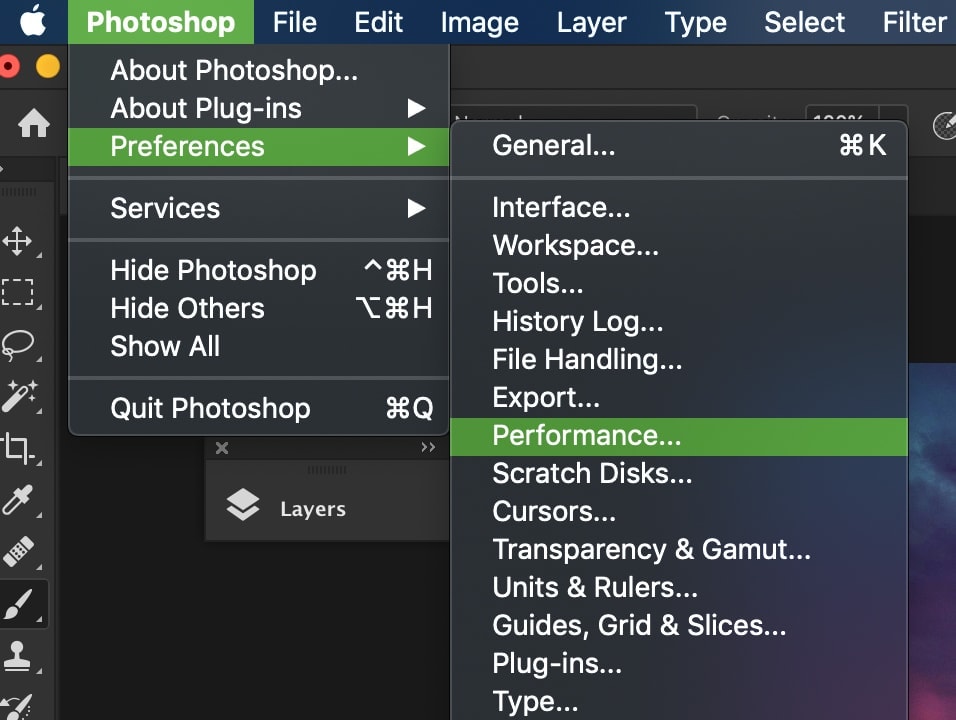
On the right side of the dialogue box that appears, you’ll see a history states option. This number is the total number of history states Photoshop will currently remember from your project.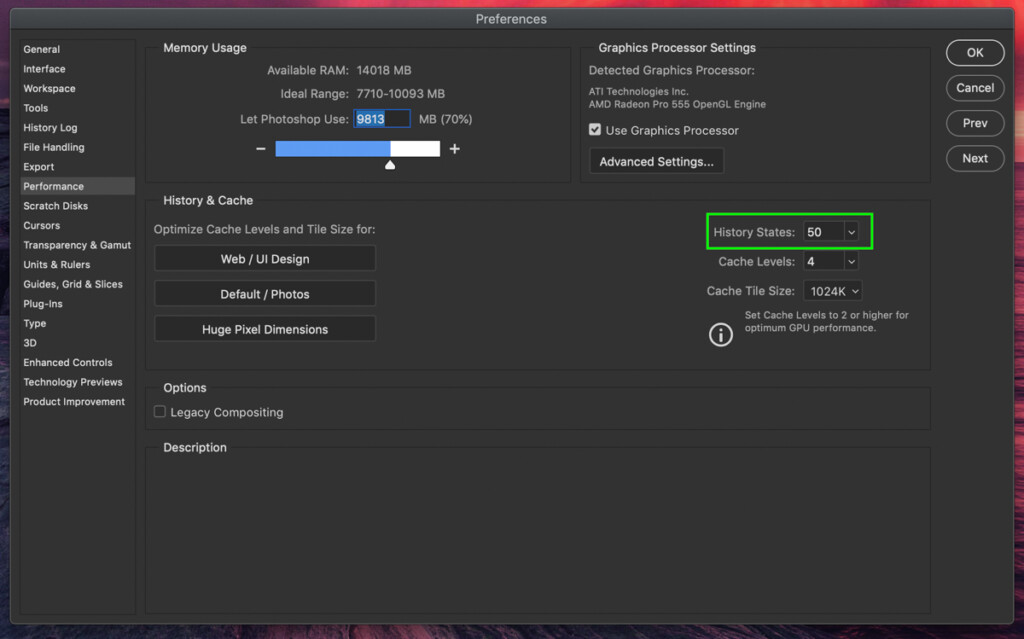
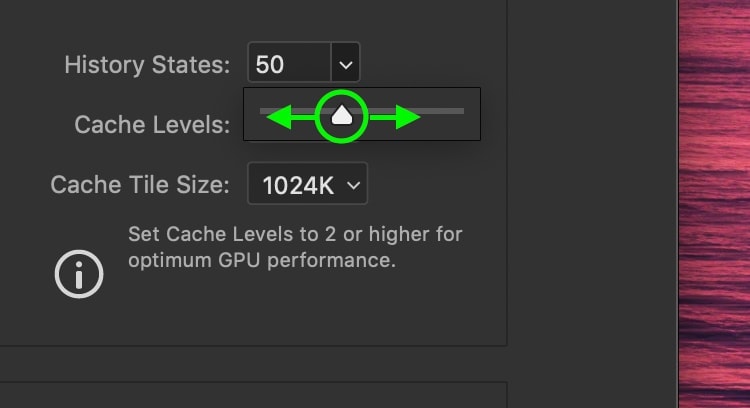
To adjust the number, click on the arrow to reveal a slider.

You can then move the slider left or right to decrease or increase your amount of history states.
There is a maximum of 1000 history states and a minimum of 1. I like to keep mine set around 35 – 50.
An Alternative To Increasing History States
It’s not realistic to have 1000 history states. It will bog down your computer and also make it extremely hard to sift through.
Trying to find that one history state in a thousand is like trying to find a needle in a haystack.
That’s where snapshots come in handy.
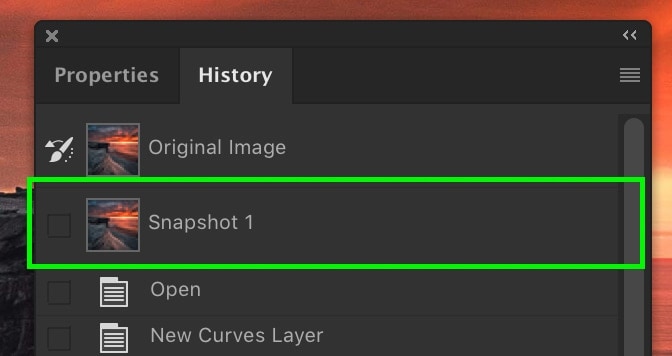
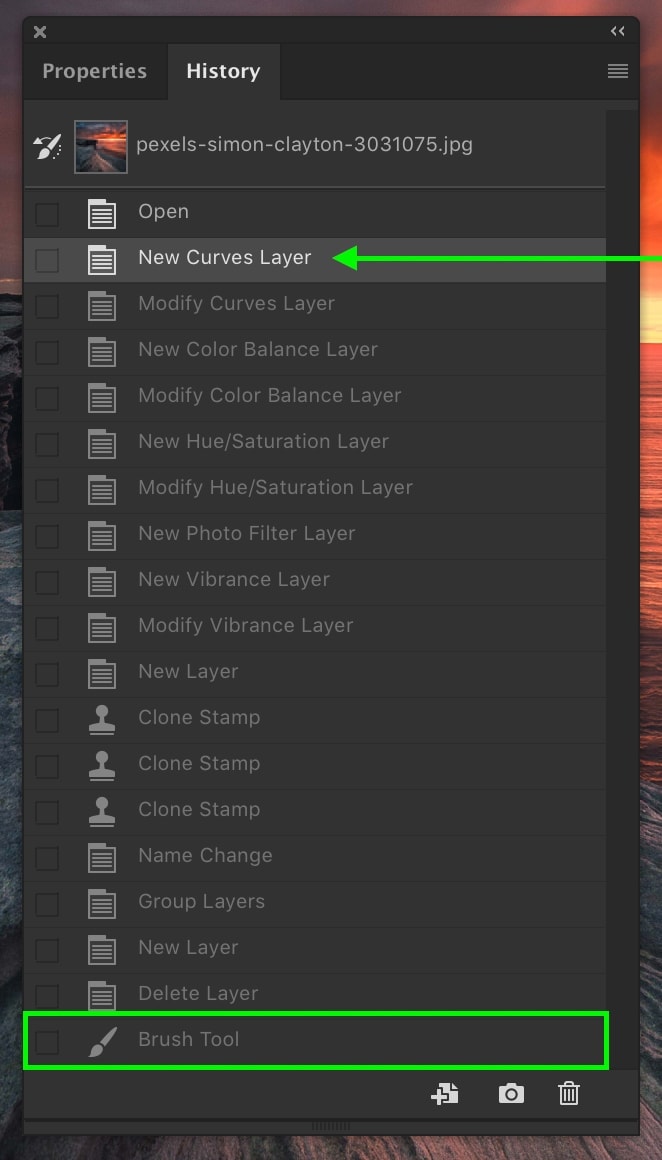
A snapshot is like a checkpoint you can create for your project. It’s separate from history states and can be accessed at any time. That means it will last the entirety of your project, no matter how many adjustments you make!
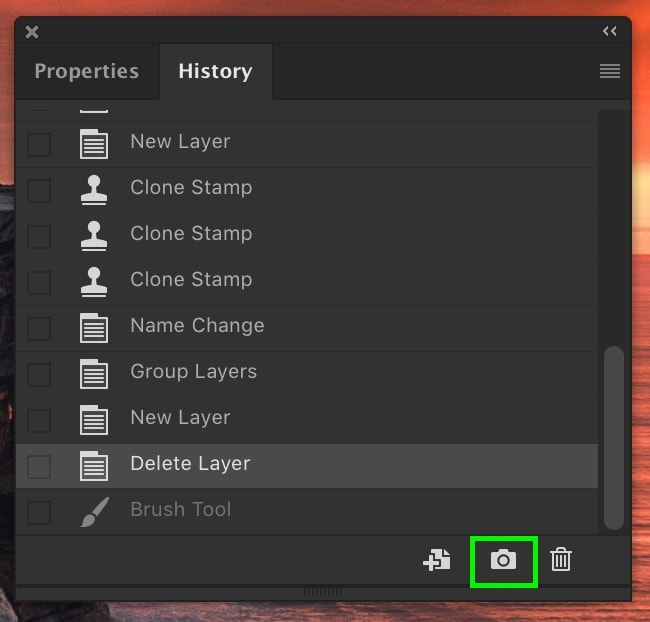
To create a snapshot, press the camera icon at the bottom of the History Panel.
A new snapshot will be created that can be accessed at the top of your history panel.
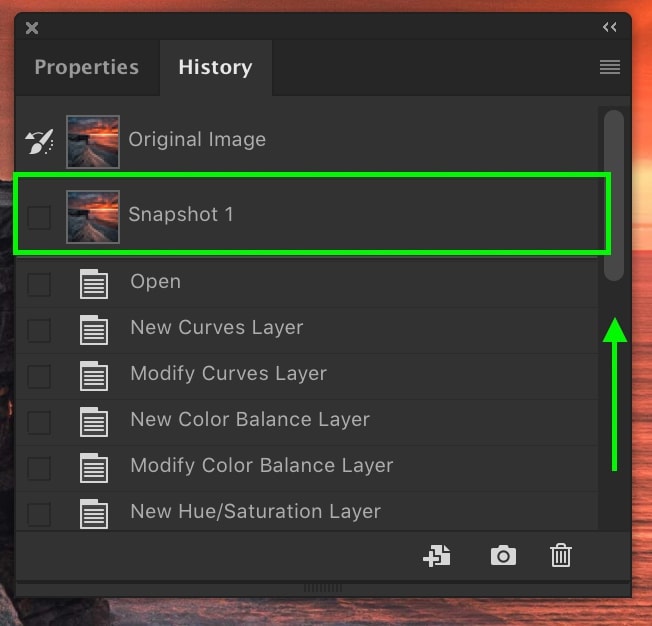
It’s a good idea to rename it to something you’ll remember like ‘clone adjustments,’ for example. Now you can click on this snapshot to access your saved history state.
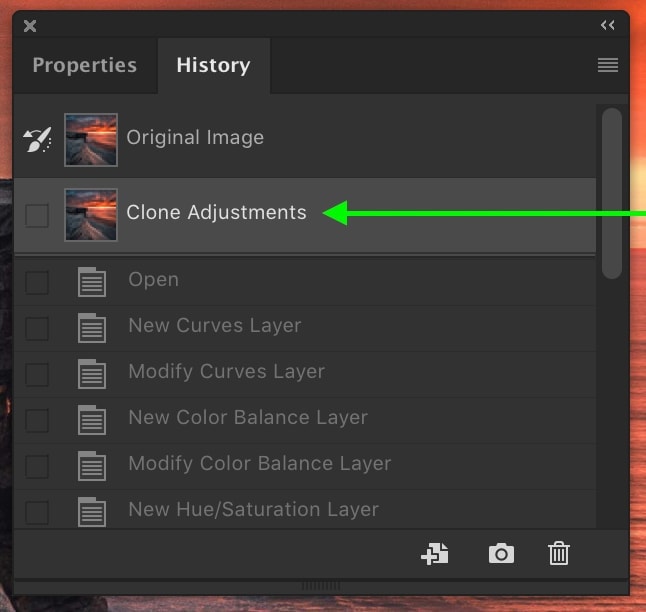
Using snapshots are a perfect way to help mark milestones in your project. You could make one after exposure adjustments, another for color, and another for clone adjustments. That way, you always have a place to step back to if necessary.
I talk about snapshots more in-depth in this post if you’d like to learn more.
Conclusion
Learning how to undo in Photoshop is the ultimate failsafe if anything goes sideways during your editing process. Unless you’re some kind of robot, you’ll always run into some accidental ‘whoopsies’ while in Photoshop. Undoing gives you the peace of mind that no matter how bad things get, you can always go back.
On the flip side, learning how to redo in Photoshop is equally as important. It’s not uncommon to undo too far or want to toggle a recent adjustment. With the redo options you learned in this tutorial, you’re ready to face any type of mistake in Photoshop.
If you enjoyed this tutorial, I would LOVE if you shared it with a friend!
Want more tutorials like this one? Subscribe to my weekly newsletter for more photography, and photo editing tips delivered straight to your inbox!
– Brendan 🙂
