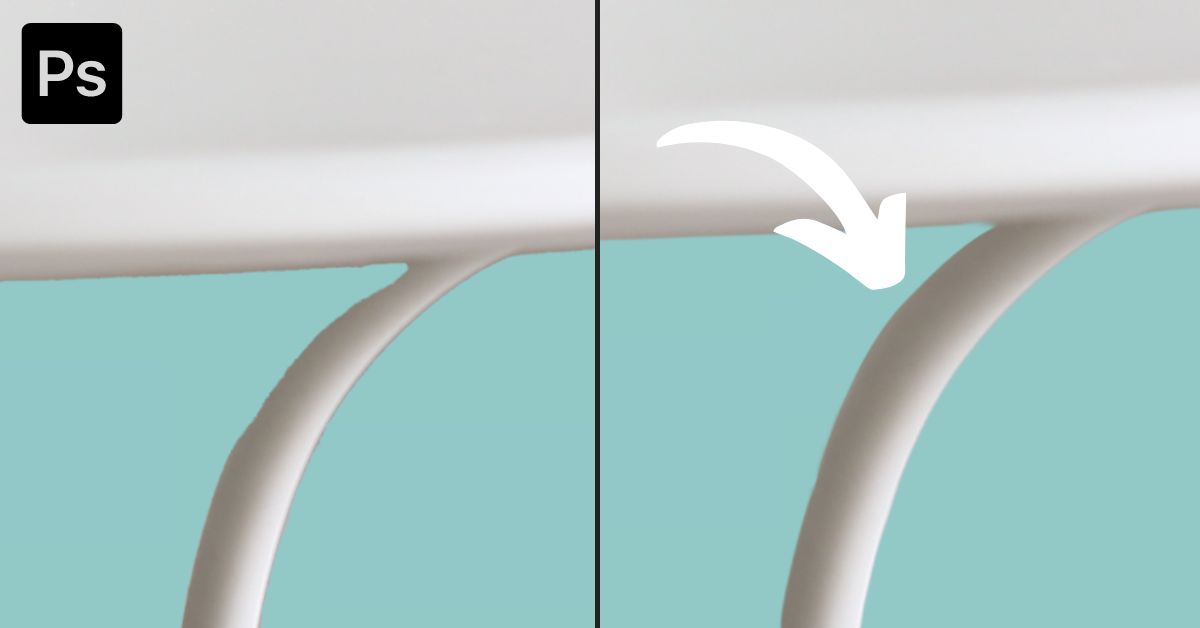

Cutting out objects from photos is relatively easy when you use any quick selection methods and add a mask to the image. However, often the cutout isn’t quite right, and there are jagged edges around the object, which is more evident when you add new background. Luckily, it’s easy to learn how to smooth edges in Photoshop for that perfect finish.
When you notice jagged edges on the cutout you’ve made, you may automatically feather the selection you’ve made to blur the edges. While feathering blends the edges and remove the jagged look, it also makes it quite evident that the background was removed in some cases.
Here, I will show you how to go a few steps further to refine the selection and make the cutout more realistic so that you can add the object seamlessly to a new background or use it in an advertisement.
How To Smooth Edges In Photoshop
There are several ways to create a selection in Photoshop, but using the faster methods is not ideal for creating a smooth selection without jagged edges unless you follow these steps to remove the harsh edges.
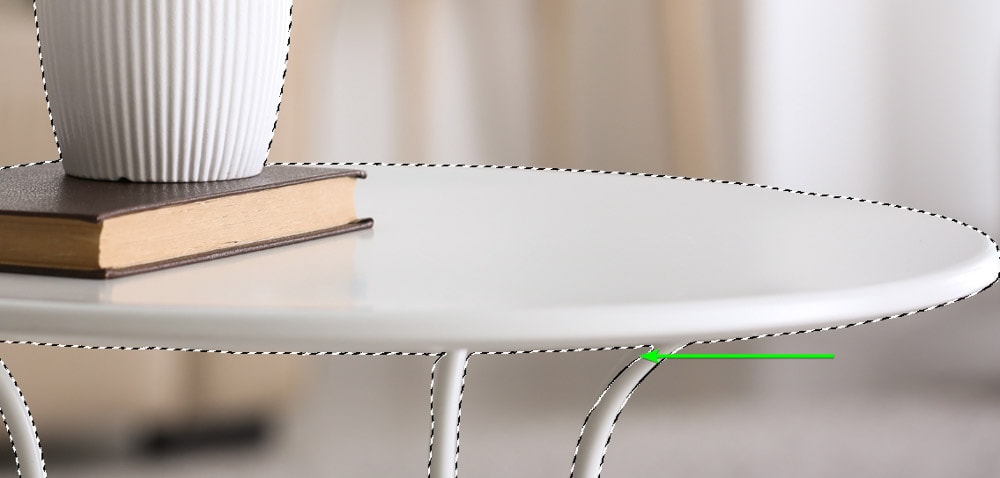
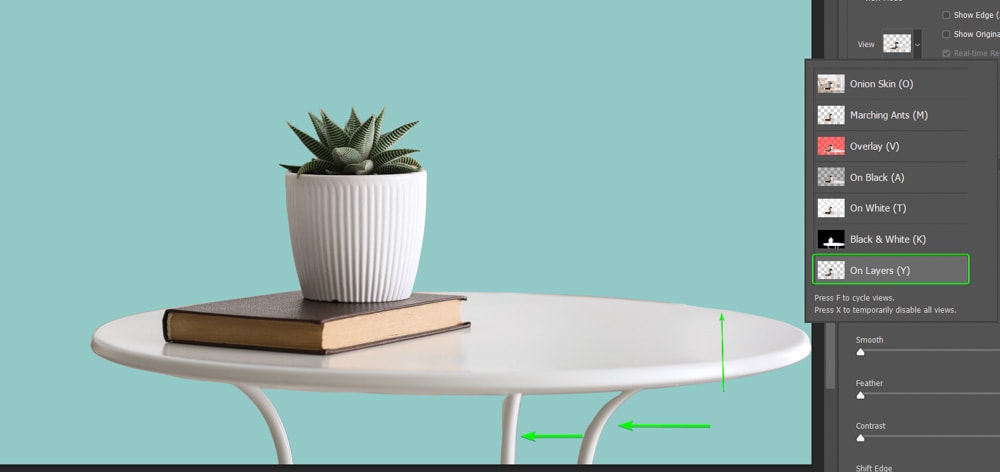
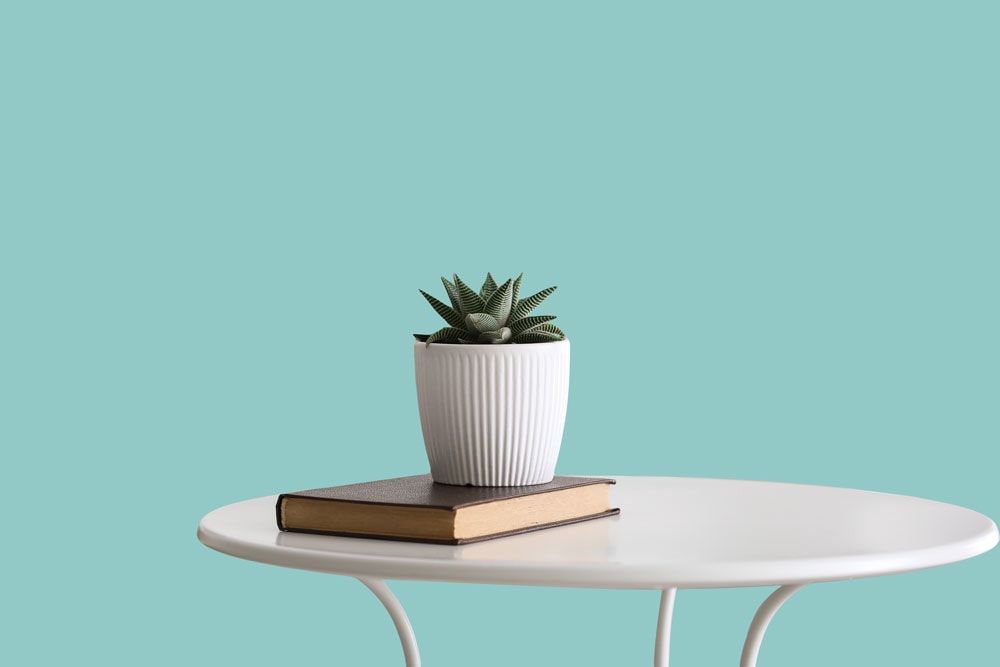
Certain shapes are harder to select correctly with the quick selection methods, such as the image of this book and the plant on a coffee table.

Step 1: Create A Selection
To start, create a selection around the object you want to remove from the background. For this, you can use any selection method. You can use the Pen Tool to create a perfect selection since it won’t create jagged edges but is more time-consuming.
Or, you can use any automatic selection methods, such as the Quick Selection Tool, the Magic Wand Tool, the Lasso Tools, or the Object Selection Tool, which I will be using for this example. These tools select individual pixels, which cause the jagged edges.
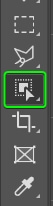
Grab your tool of choice, in my case, the Object Selection Tool (W), from the toolbar.
Then, select your object based on the tool you’re using. I will select the plant and wait for Photoshop to create the selection.
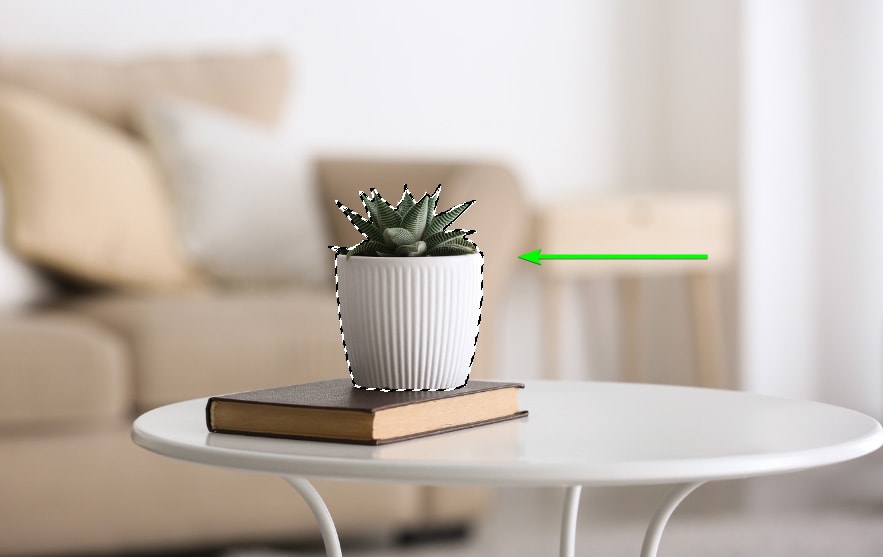
I will then hold Shift to add to the selection. Now selecting the book, the table, and the legs on the table to complete my selection.
Your selection doesn’t have to be perfect at this stage. If some areas aren’t appropriately selected, you can fix that up later on. In my case, the legs are missing a bit, and since it’s hard to get that area better, I’ll fix it up later.
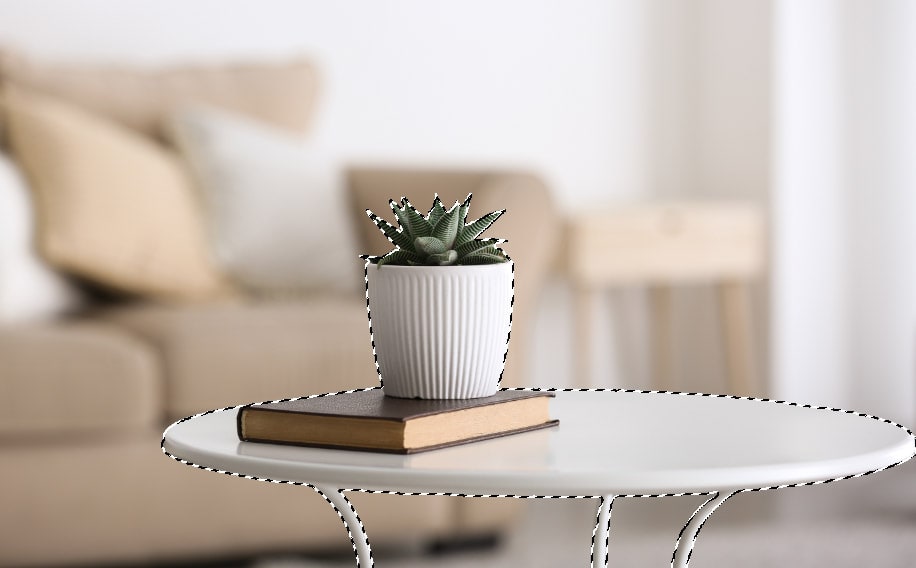
Step 2: Remove The Background
Once you have made the selection around your object, remove the background using a layer mask. To remove the background, click on the Add a mask icon at the bottom of the Layers panel.
Remember that everything within your selection remains visible on the canvas, and everything not selected is hidden by the layer mask. Inverse your selection before adding the mask if you need to.
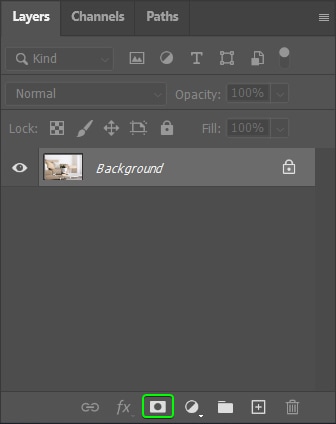
Once the layer mask is added, it appears beside your image thumbnail. Everything in white is visible, while everything in black is hidden. The background is now also removed from the image.
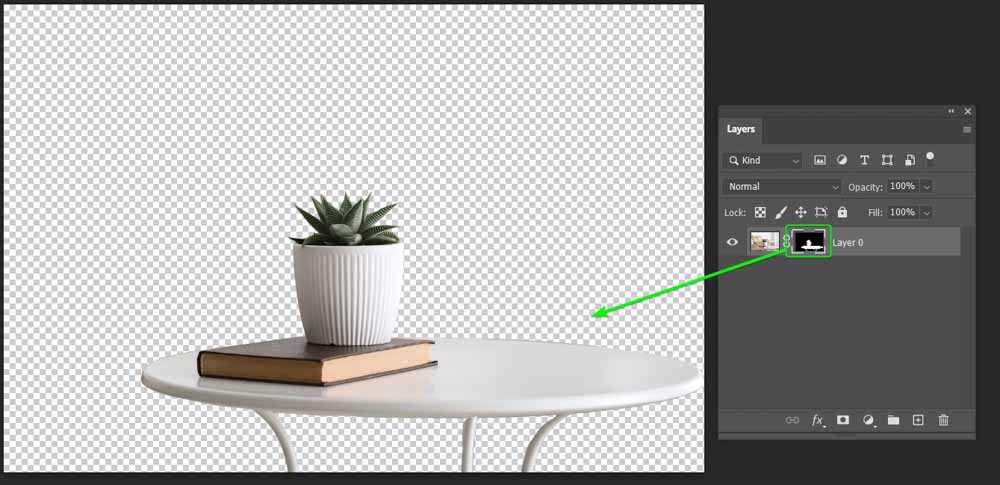
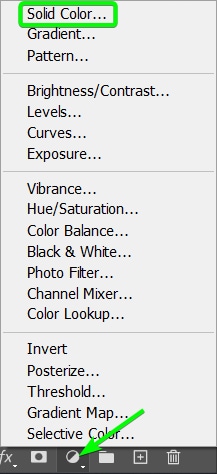
The edges may not look too jagged when the object sits on a transparent background. However, if you want to use the object for a poster and add a solid color background by clicking the Create a new fill or adjustment layer icon at the bottom of the Layers panel, the edges stand out more.
Therefore, it’s time to smooth the edges.

Step 3: Open Select & Mask
You must refine the selection using the Select and Mask workspace to smooth the edges. You can access Select and Mask by double clicking on the layer mask or finding the button within the Properties panel.
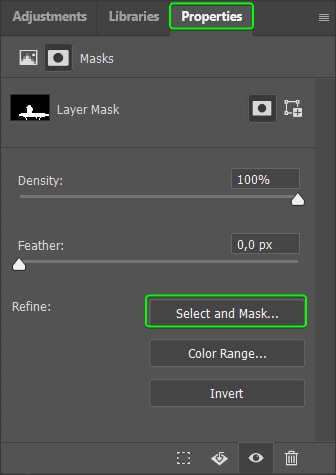

There are various options to refine your selection using this workspace.
You only need to focus on the Properties panel to the right for this example. This panel allows you to adjust the preview of your selection and make the necessary edits to smooth the edges.
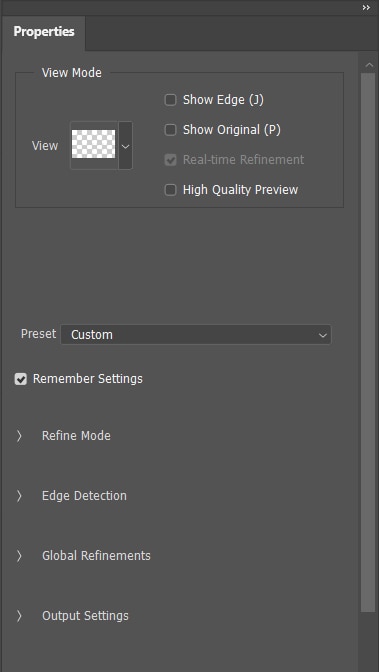
First, choose the mode for the preview by changing the View mode at the top of the panel. I recommend you find a view mode that works best for your image, one which highlights the jagged edges in your photo.
Click the arrow next to View to open the drop-down menu containing the various viewing options.
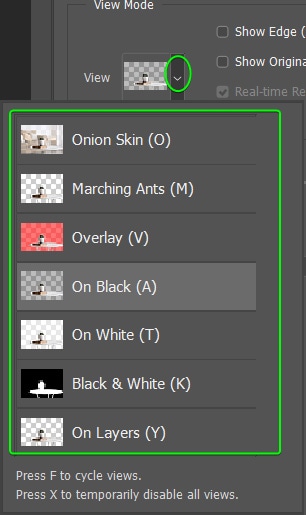
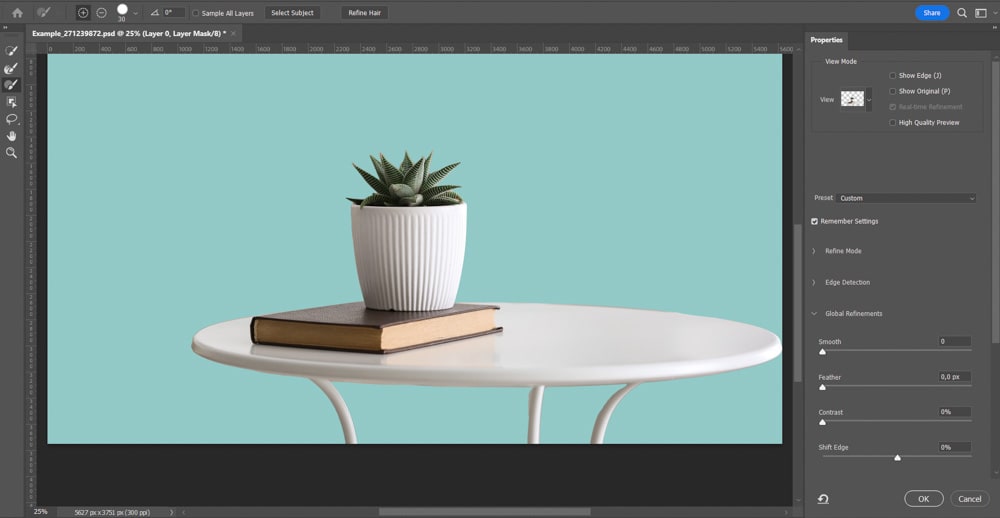
I will keep the view mode as On Layers for my image because I want to see how my image looks on the background I added.
Step 4: Smooth The Selection
Once the preparation is done, it’s time to get into the actual process of smoothing the edges. Three sliders are located under the Global Refinements tab in the Properties panel that are essential for this process.
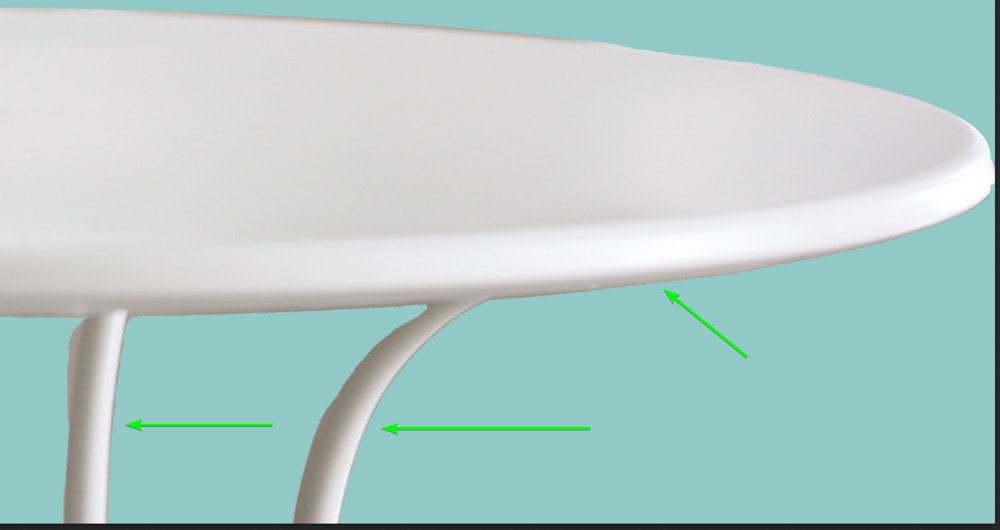
The first action is the Smooth slider, which, as you can probably guess, smooths the edges of the selection or mask. Use the Smooth slider to curve the jagged edges for a smoother finish. I will zoom in to my image on a rough edge by pressing Control + + (Win) or Command + + (Mac).
Now move the Smooth slider to the right to reduce the jagged edges. To keep a few bumps around the selection, don’t increase the value too much. However, to minimize the ridges around the object, increase the value more. For my image, I will move the slider to about 18.
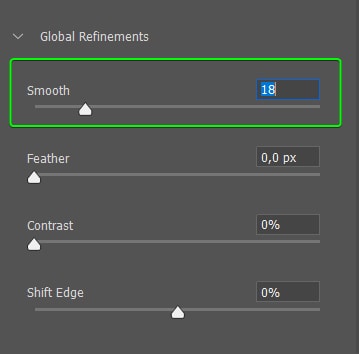
While the Smooth slider does a good job of dulling the jagged edges, surprisingly, it’s not the key to smoothing the edges in Photoshop. Increasing the slider resulted in the edges becoming smoother but still not looking how I wanted them.
Here is where the Feather and Contrast sliders come into play.
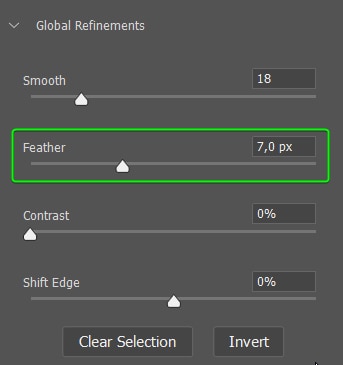
Step 5: Feather The Selection/Mask
The next step is to adjust the Feather slider to feather the selection. The feather effect blurs the object’s edges to blend into the background.
While this adjustment works well when using blurred backgrounds and similar colors, it creates an apparent difference between sharper elements. However, don’t worry about that because I will show you how to sharpen the selection next.
For now, increase the feather of the selection by pulling the Feather slider to the right. Add enough feather to create an even edge around the object, but not too much that it begins to blur the object you have selected. In my case, 7px works for me.
Don’t worry if the feather adds more to your selection than you would like. I will show you how to fix this later.

Step 6: Adjust The Contrast
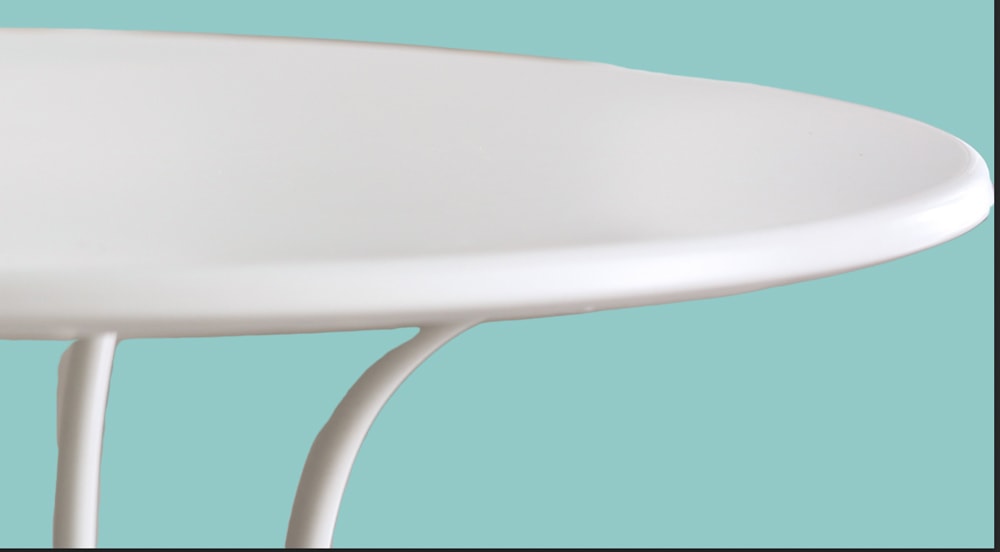
Here is where the real magic happens. You can use the Contrast slider to create more contrast between the selection and the background. This slider sharpens the edges, and because you have removed the jagged edges with the Smooth slider, your selection won’t have these rough edges anymore.
Increase the contrast slider to sharpen the edges, depending on how sharp you need the edges on your image to be. Generally, you’ll need to increase the contrast relatively high to produce a sharp effect. For my example, I increased the Contrast slider to 75%.
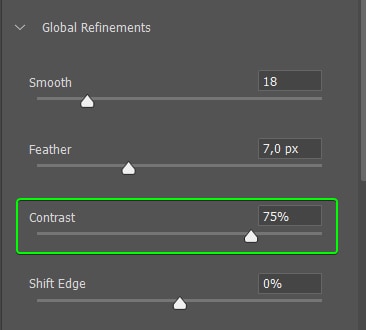
You will notice the blurred edges from the feather slider are sharpened, creating a clean-cut selection around the object.
Step 7: Shift The Selection Edge
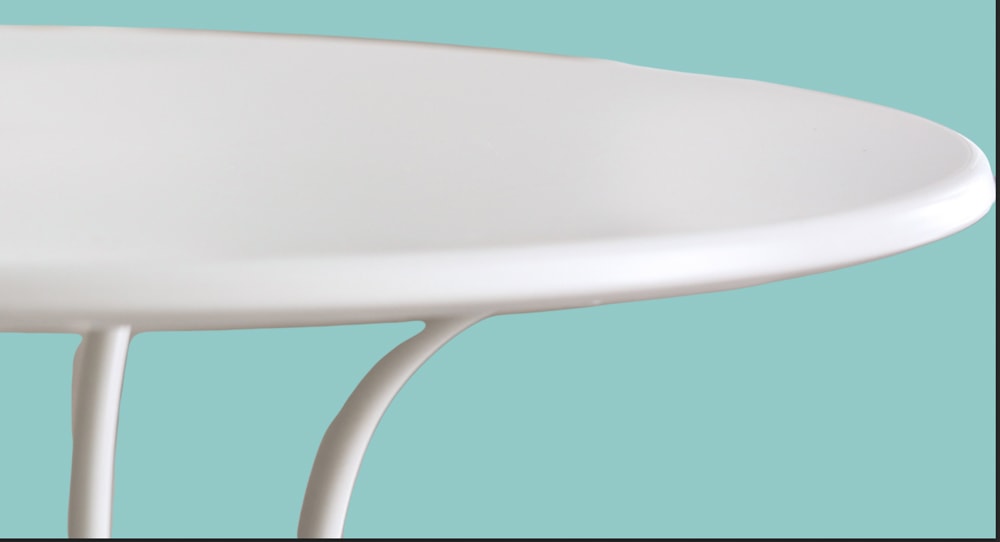
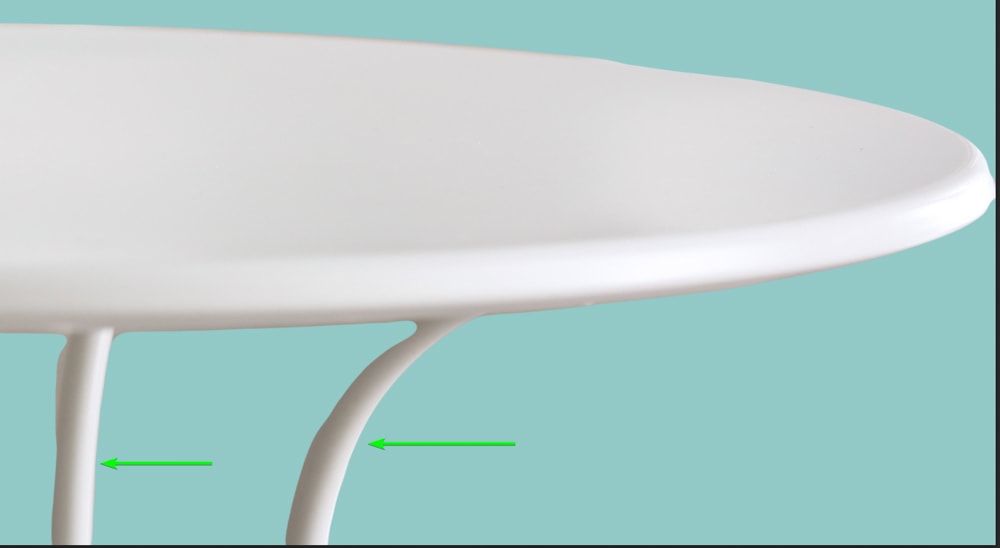
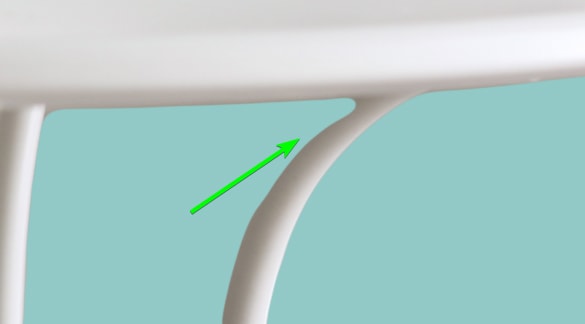
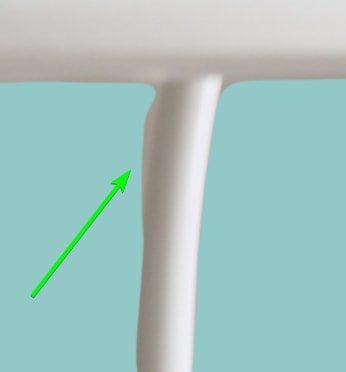
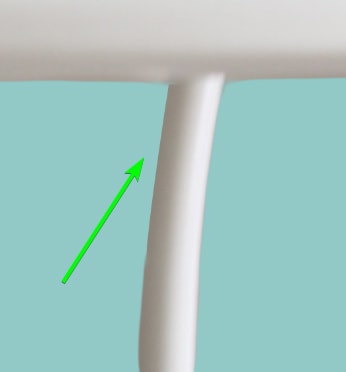
After adjusting the slider, some selections may still have some background left in the image. My image has this problem, where you can see a different color around the table’s legs.
To fix this problem, adjust the Shift Edge slider to the left to move the edge inwards toward the object. In this case, -15% works for my image.
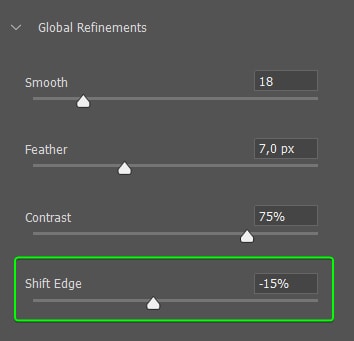
Notice how the darker color (aka fringing) from the background is removed from the edges of the table legs.
Step 8: Exit Select And Mask
Now that you have smoothed and sharpened the edges in the Select and Mask workspace, it’s time to fix any errors left over from the selection. In my case, I still have a large piece missing from one leg and too much background left on the other leg. These are common issues when using any quick selection methods.

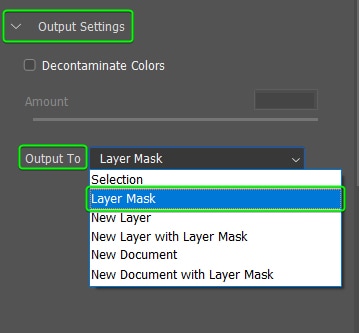
Before exiting the Select and Mask workspace, choose the output of the selection you have just refined. The output option is found under the Output Settings at the bottom of the Properties panel. Since I added a layer mask already, I will set the Output To Layer Mask, so my refinements are added to the mask I’ve already created.
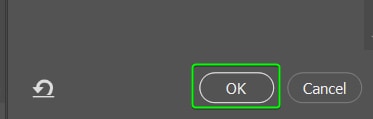
Once you’ve selected the output, click OK to add the refinements to your image.
Step 9: Refine The Selection Further
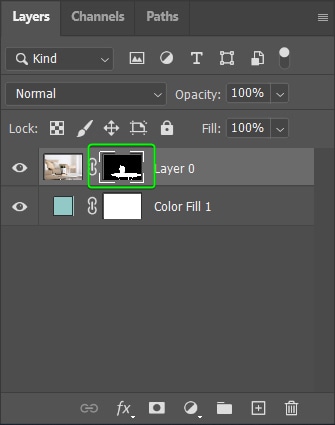
Once the selection is smoothed and sharpened, areas where you selected parts of the background, are more evident in the image. You can use the layer mask to fix these areas and create a clean-cut selection.
To remove background pieces or add in parts of the object that were cut off, select the layer mask by clicking on the thumbnail. The white border around the layer mask indicates that it is selected.
Then, select the Brush Tool (B) from the toolbar and adjust the Brush hardness using the drop-down menu in the Options bar. I recommend using a soft round brush with the Hardness set relatively high, around 60% to 80%. Using a low hardness causes feathering, which won’t work with the sharper edges around the rest of the table.

Next, select the correct foreground color to paint on the mask. Remember, whenever you work with layer masks, the areas covered in black are hidden, and the areas covered in white are visible. Here, I will change the foreground color to white to add in the missing piece of the leg.

Once the color is selected, adjust the brush size by pressing [ to decrease or ] to increase the size. Then, paint over the areas you want to reveal.

Now, I will switch the foreground color to black by pressing X and paint over the areas to remove parts of the background.
Continue fixing up areas around the object until everything looks good.
How To Smooth The Edges Of Text In Photoshop
Sometimes, your text may also appear jagged in Photoshop, usually caused by setting the anti-aliasing option to the wrong mode. If you want to add text to your newly cut-out object to continue the design, you may notice the text has jagged edges.
Jagged edges on text are more noticeable when zooming into the text.


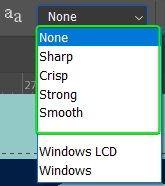
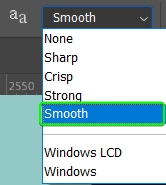
Luckily, the jagged text is super easy to fix. All you need to do is add anti-aliasing to the text. While the Type Tool (T) is selected, you will notice settings in the Options bar, including the font family, font type, font size, and another drop-down menu, which is anti-aliasing.

When the anti-aliasing is set to None, the text looks jagged. There are four other options to choose from to add anti-aliasing; Sharp, Crisp, Strong, and Smooth.
The options are pretty self-explanatory but work as follows:
- None: Removes anti-aliasing from the text
- Sharp: The text becomes its sharpest
- Crisp: The text becomes somewhat sharp
- Strong: The text takes on a heavier look
- Smooth: The text becomes smoother
Select the Smooth option to remove the jagged edges and portray the smoothest version of the text.

You can now zoom out and complete your design with smooth edges around the image and text.

Anti-Aliasing & Feathering In Photoshop Explained
Anti-aliasing and feathering are both used to smooth edges around various elements in Photoshop. However, these two functions are used for different purposes and alter the pixels slightly differently.
Anti-aliasing softens the color transition between the selected pixels and those directly surrounding the selection. Instead of choosing whole block-shaped pixels, the selection used with anti-aliasing partially selects a curved piece of the pixels directly next to the selected pixels.
You can only use anti-aliasing with the Lasso Tools, the Magic Wand Tool, the Elliptical Marquee Tool, and Text layers. When you use anti-aliasing on a text layer, Photoshop adds extra pixels around the edges to create a smoother appearance.
Feathering blurs the pixels around the edges to create a softer appearance. The feathering function extends the border out from the selection and in to make a smoother transition between the selection and the surrounding pixels.
You can set how many pixels you want to be feathered and add point values. For example, selecting the correct feather value for your image is easier when choosing 5.7 pixels or 0.5 pixels.


Happy Editing!


I thoroughly enjoyed watching. You explain everything so simply.Thankyou
You are welcome!
Exactly the kind of help I was looking for.
Glad you found it helpful Mark!