When working with text in photoshop, it can be really frustrating to suddenly notice that the edges of your text appear blocky and pixelated. This appearance makes any text look low-quality and will likely be exported in even worse shape. Fortunately there are some easy ways to fix this problem.
A common reason for pixelated text in Photoshop is an incorrect Anti-Aliasing setting. Anti-Aliasing smooths the blocky edges of text to create a crisp edge. By accessing the Type Tool and setting the Anti-Aliasing to “Smooth” in the upper settings bar, your text will have a more crisp edge.
So let’s explore the top five most common reasons for a pixelated appearance in text, and some easy ways to fix each one.
Video Tutorial
5 Common Reasons And Solutions For Pixelated Text In Photoshop
1. The Project Size Is Too Small
When creating a new project in photoshop, you can choose the size of the document you’ll be working with. The size is measured in pixels, so naturally, if you choose a small size – 200×200, for example – you’ll automatically have less pixels to work with than if you chose a larger size, like 1000×1000.
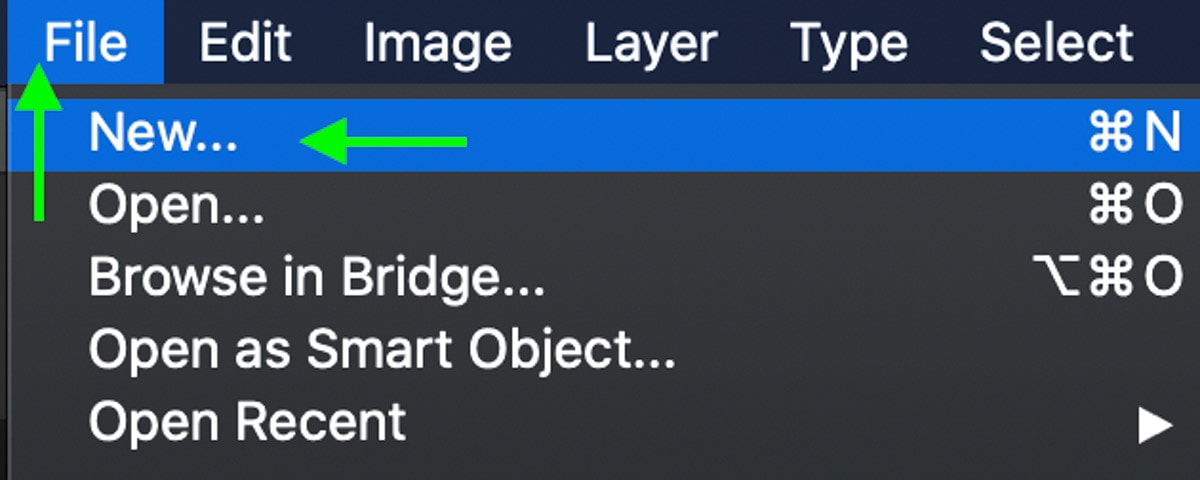
To make sure your document size is large enough when creating a new project, first head to File > New (or press Command + N on Mac and Control + N on Windows). In the new project window that pops up, you’ll notice the area on the right where you can edit the measurements of your document. Make sure the unit selected in the drop-down box next to Width and Height is Pixels.
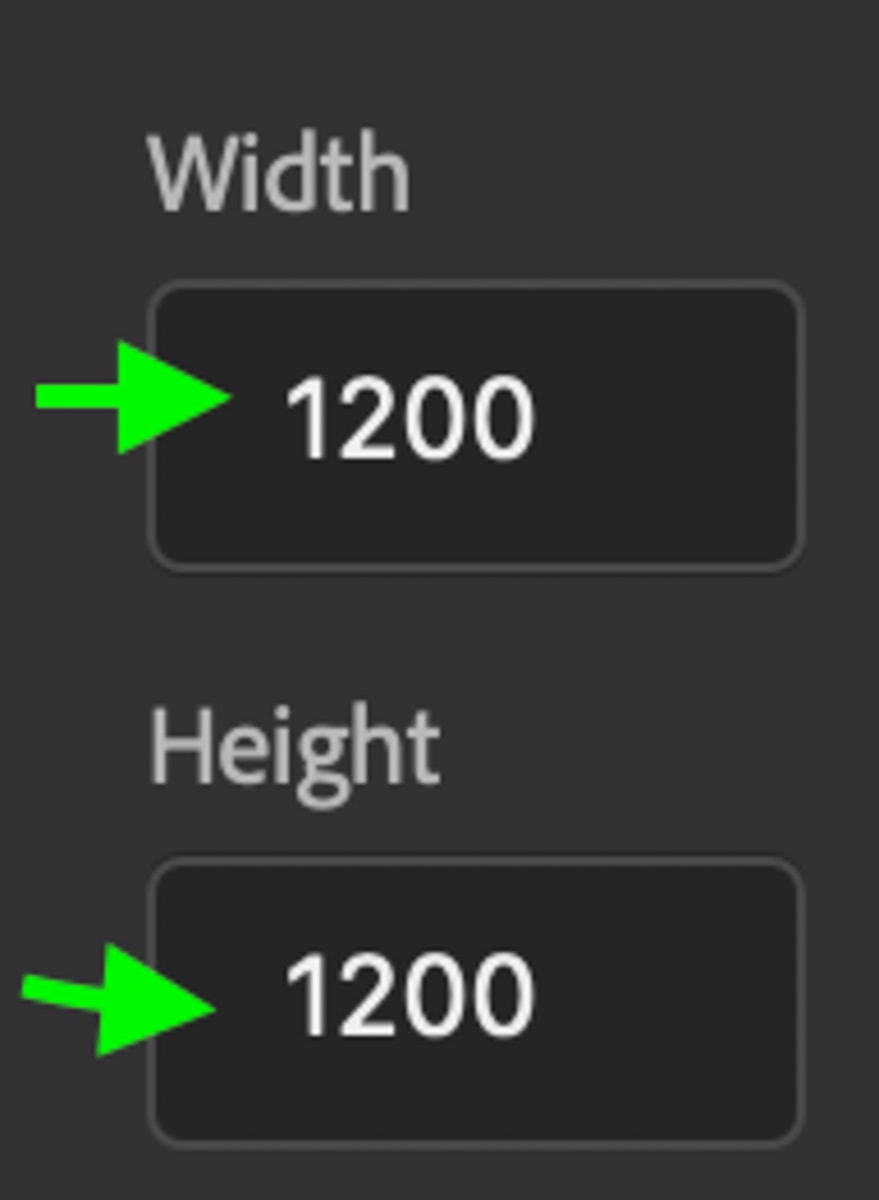
Now you can type the width and height you’d like. For best resolution, I’d suggest anything over 1000×1000 with a resolution of 200 PPI or higher.
Click “Create” on the bottom right and you’re good to go.
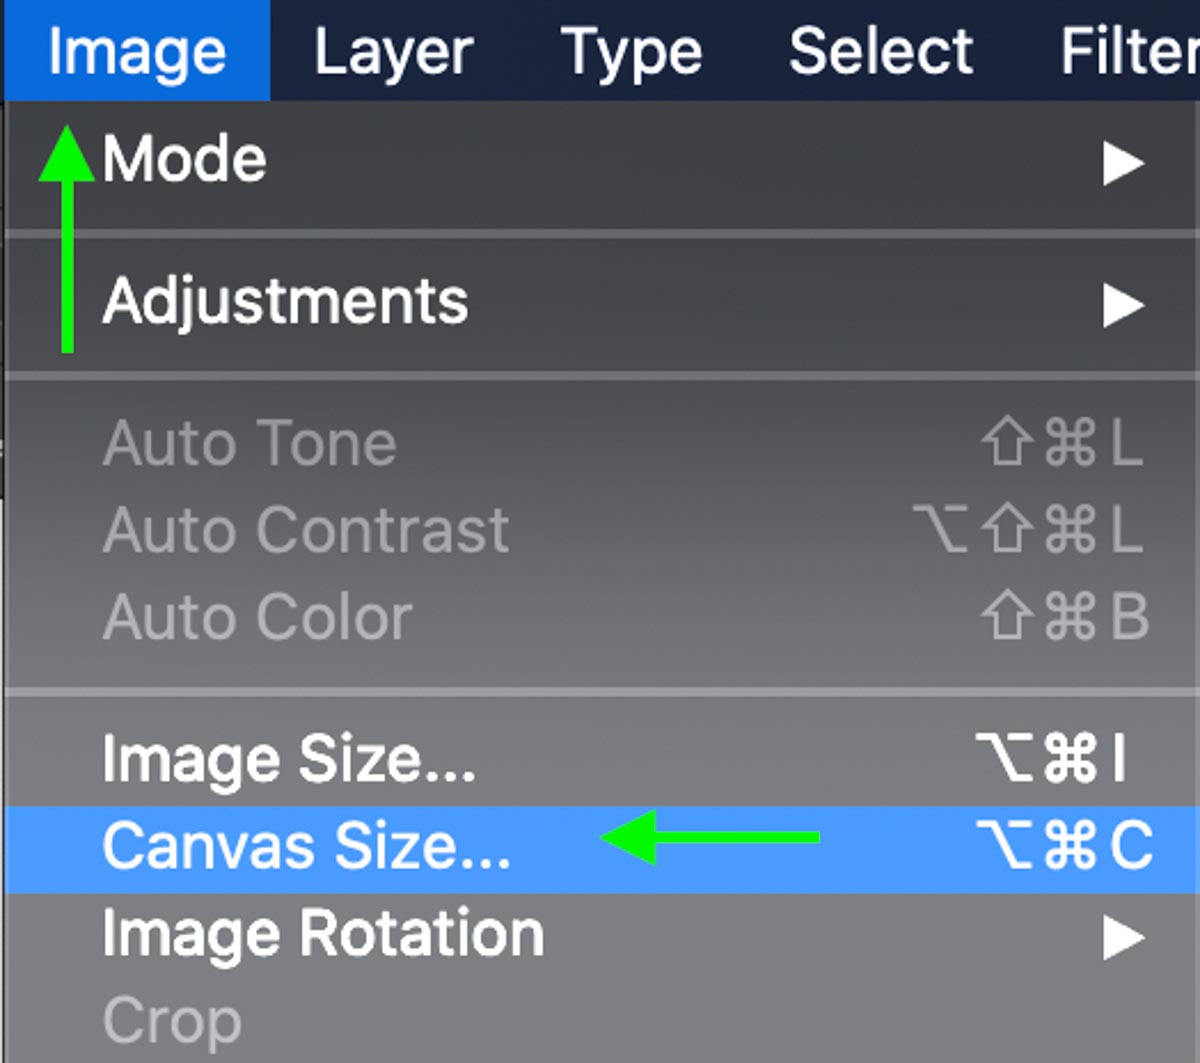
If you’ve already created your project, you can still change the size of your canvas by heading to Image > Canvas Size.
In the window that comes up, make sure you’re working in Pixels by clicking either of the unit dropdown boxes next to Width and Height and selecting Pixels.

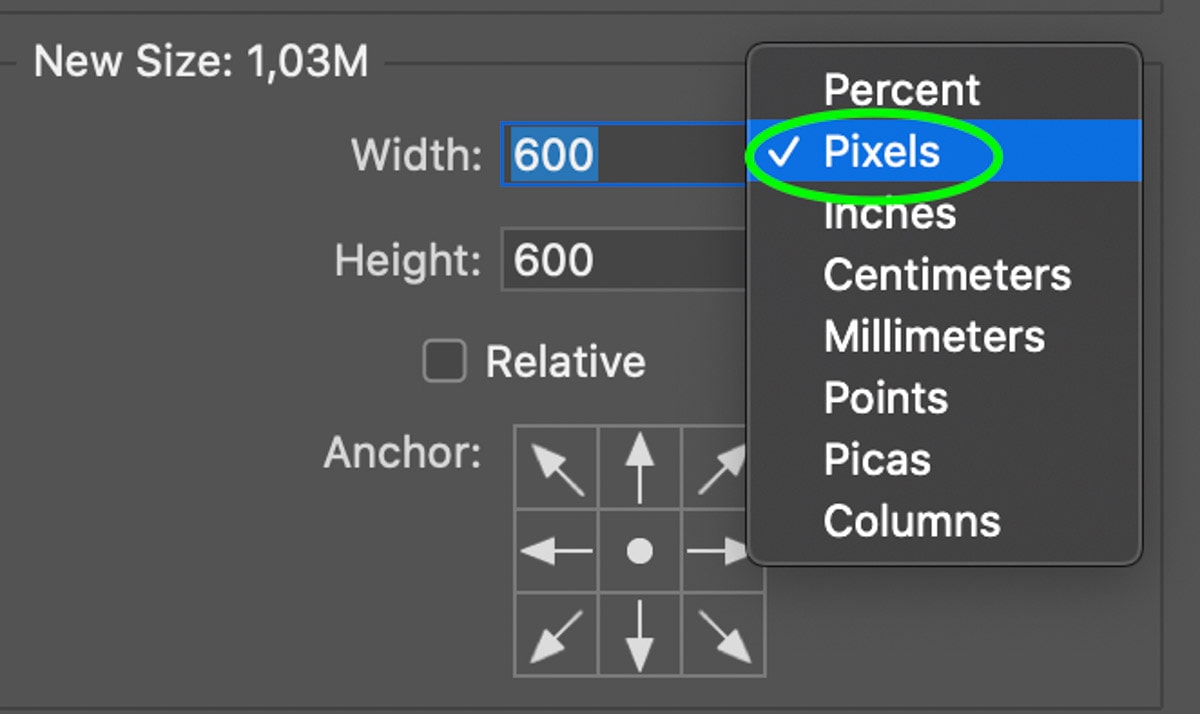
Then, enter a different size for the Width and Height of your canvas. Again, anything above 1000×1000 works best.

2. You’re Too Zoomed In
Another reason your text might appear pixelated is if you’re zoomed in too closely on the document. The closer you zoom into your project, the larger the pixels will become, to the point where you might be able to see them if you’ve zoomed in too close.
To check how much you’ve zoomed in on the document, head to the tab above your project with the project’s name and a percentage. This percentage you see is the percentage you’ve zoomed into the canvas.
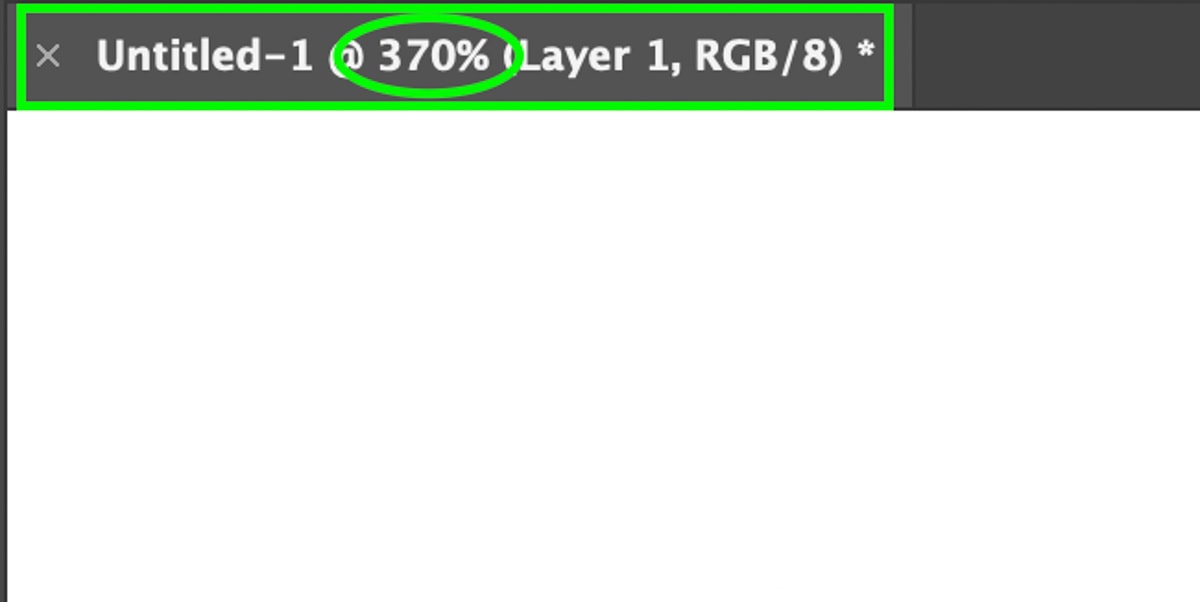
370% in this case will give you an unrealistic view of how the text will look in its actual size at 100%. Zoom out by heading to the bottom left and clicking the percentage there. You can then type in the amount you’d like to zoom – it should be no more than 100% when checking the quality of the text. As you zoom in more, you’ll gradually begin to see more and more pixelation in your text regardless of your project settings.

3. You Haven’t Enabled Anti-Aliasing Yet
One way to ensure your text doesn’t have blocky, pixelated edges is to make sure your anti-aliasing settings are correct. Aliasing is a visual stair-stepping effect that appears on low-resolution images. It follows, then, that anti-aliasing prevents this by smoothing the edges of an image.
For this reason, setting the anti-aliasing will also smooth the edges of your text. Select the Type Tool and head to the upper settings bar, then click on the AA option. The anti-aliasing will automatically be set to None with some fonts. Any of the different options here will make the edges look much less pixelated. Let’s go with Smooth.

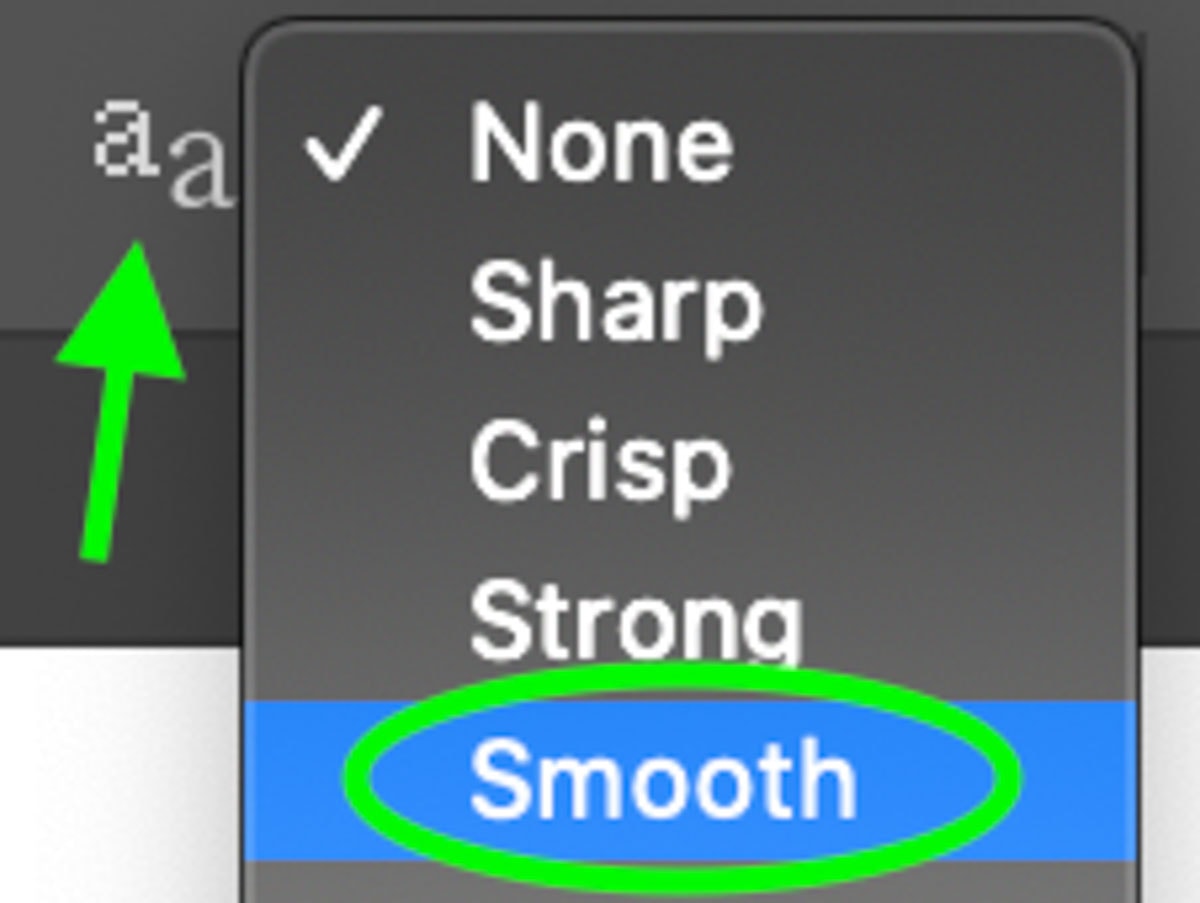
This will help smooth the edges and make pixelation less visible.
Before:

After:

4. You Haven’t Set Your File Format As PNG For Export
If your text appears low quality after export, you might’ve exported it in the wrong file format. There are several file formats you can work with when it comes to Photoshop, and some will result in better quality images than others.
While different files have different uses and strengths, PNG is considered the best file format for anything to do with text. Jpeg, for instance, is best for smaller, compressed files such as photographs. However, this compression can result in the text appearing at a much lower resolution when exported. This can be solved by exporting to PNG.
To ensure you save and export your text image as a PNG, simply go to File > Save As.
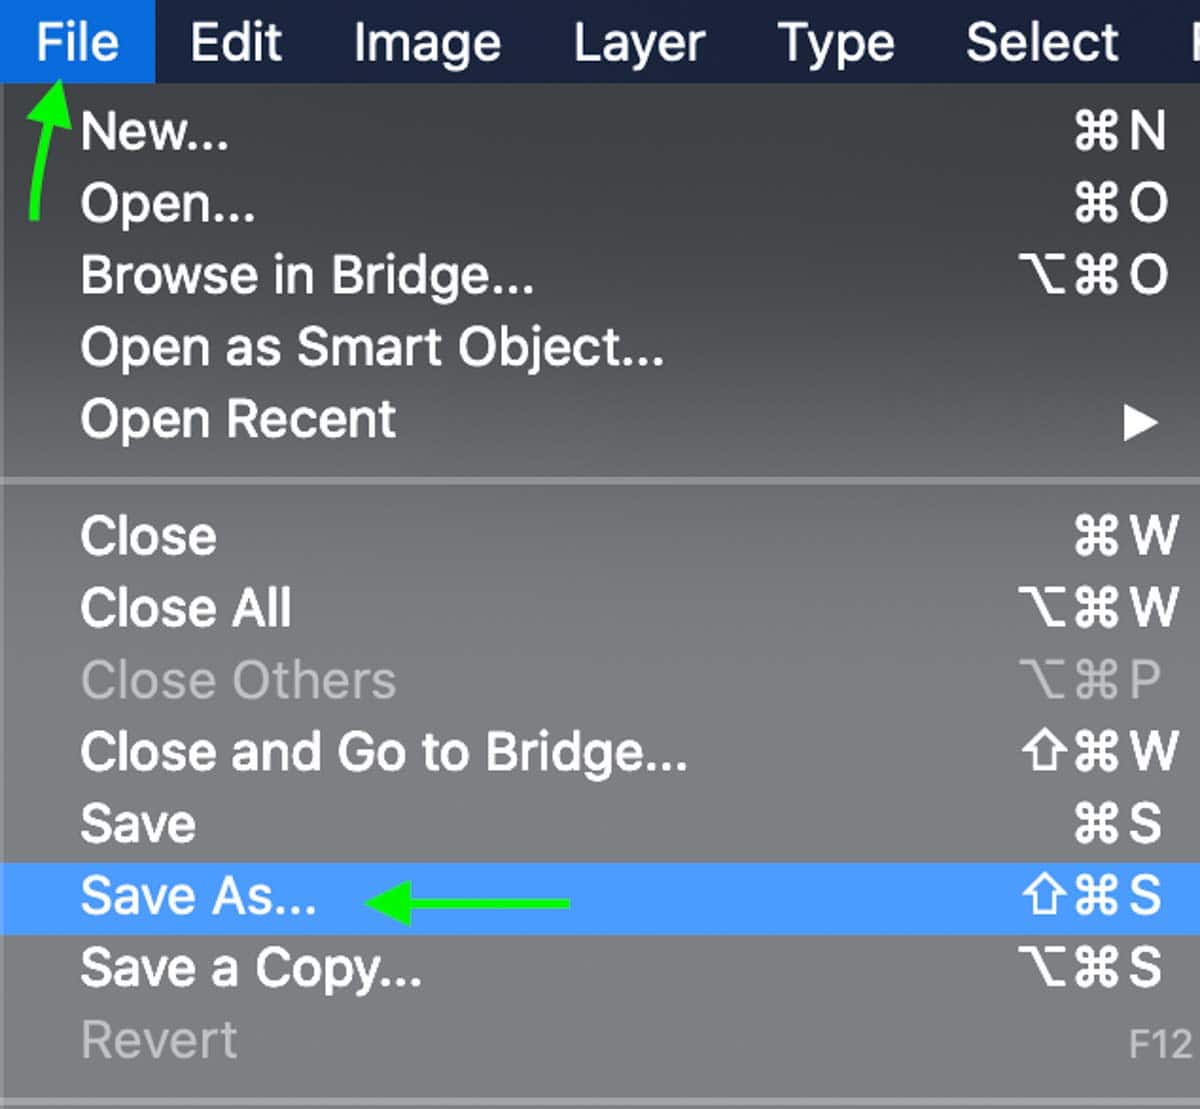
In the window that appears, head to the dropdown box next to Format and you’ll see a large selection of different file formats you can choose. Find and select PNG.
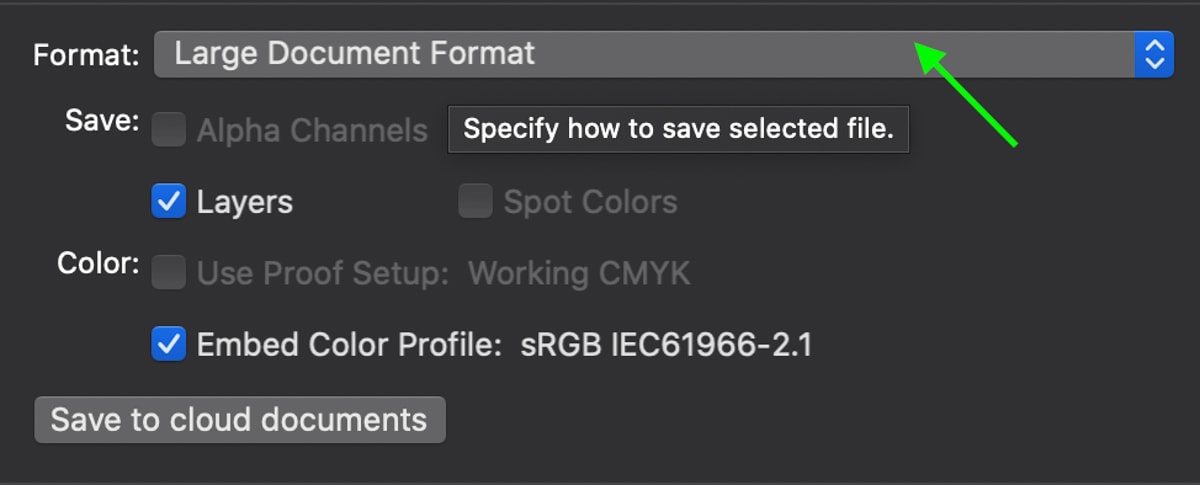
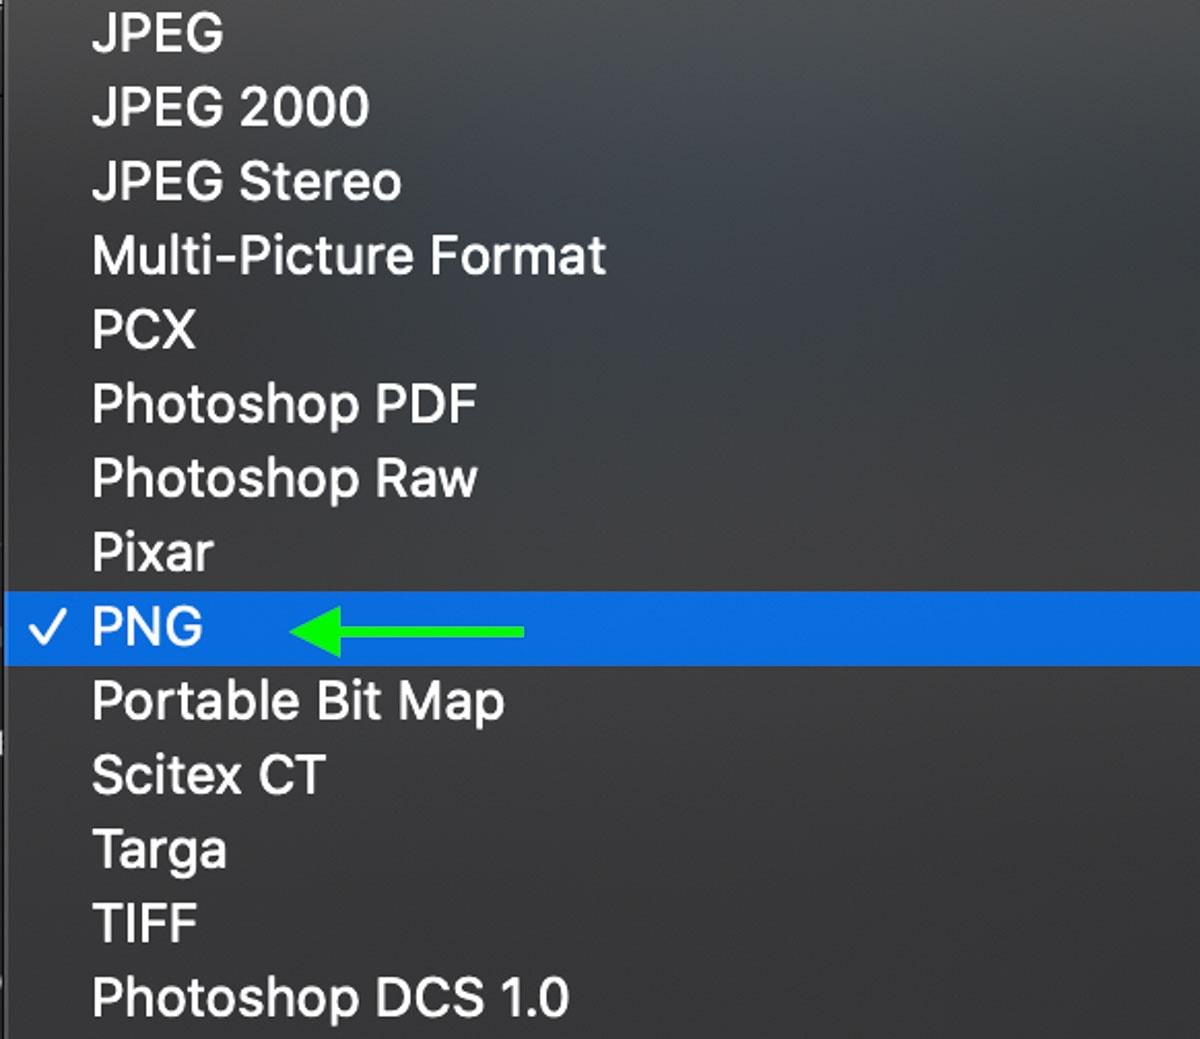
It is worth noting that saving as a PNG file will result in any areas you’ve set to appear transparent on your canvas (represented in Photoshop by a grey and white checkered pattern) to appear transparent in the exported version. This is another reason PNG is the ideal file format for text-based images like logos – instead of a bothersome white or black background, the background will appear transparent and your text can be easily applied in other projects.
5. Your PPI is too low
PPI, or Pixels Per Inch, refers to the number of pixels in each inch of your image. Naturally, it follows then that the higher the PPI, the better quality your image will appear. The same premise applies to text as well. When working with text in Photoshop, a high PPI means that you’ll have clearer, sharper edges and less visible pixelation in your text.
You can check your PPI setting either in a new project or while working with an existing project. To check and edit your PPI for a new project, first open up a new canvas by clicking File > New.

In the new project window that appears, head to the drop-down menu next to Resolution and make sure Pixels/Inch is selected.
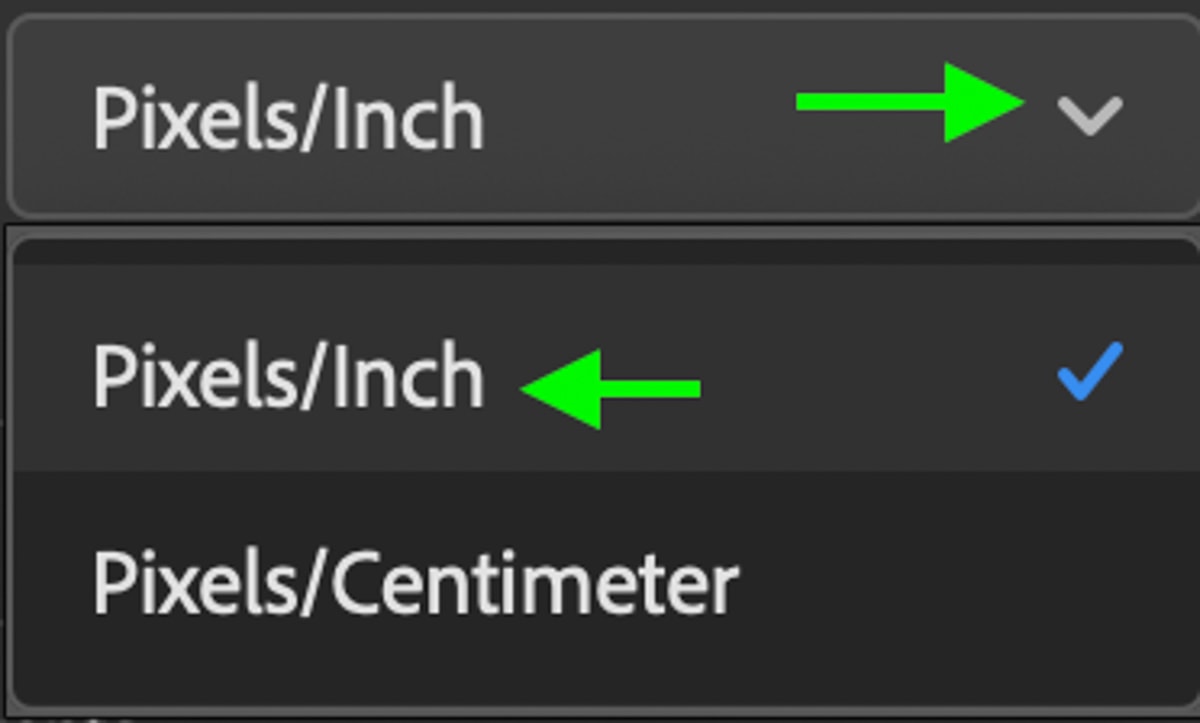
The number you see in the box next to Resolution is the amount of PPI you’re working with, so you can edit this to a high PPI – something above 300 will give you excellent, crisp-looking text. Just remember the higher your PPI, the larger your project will become.

You can also change your PPI while working on a current project by heading to Image > Image Size.
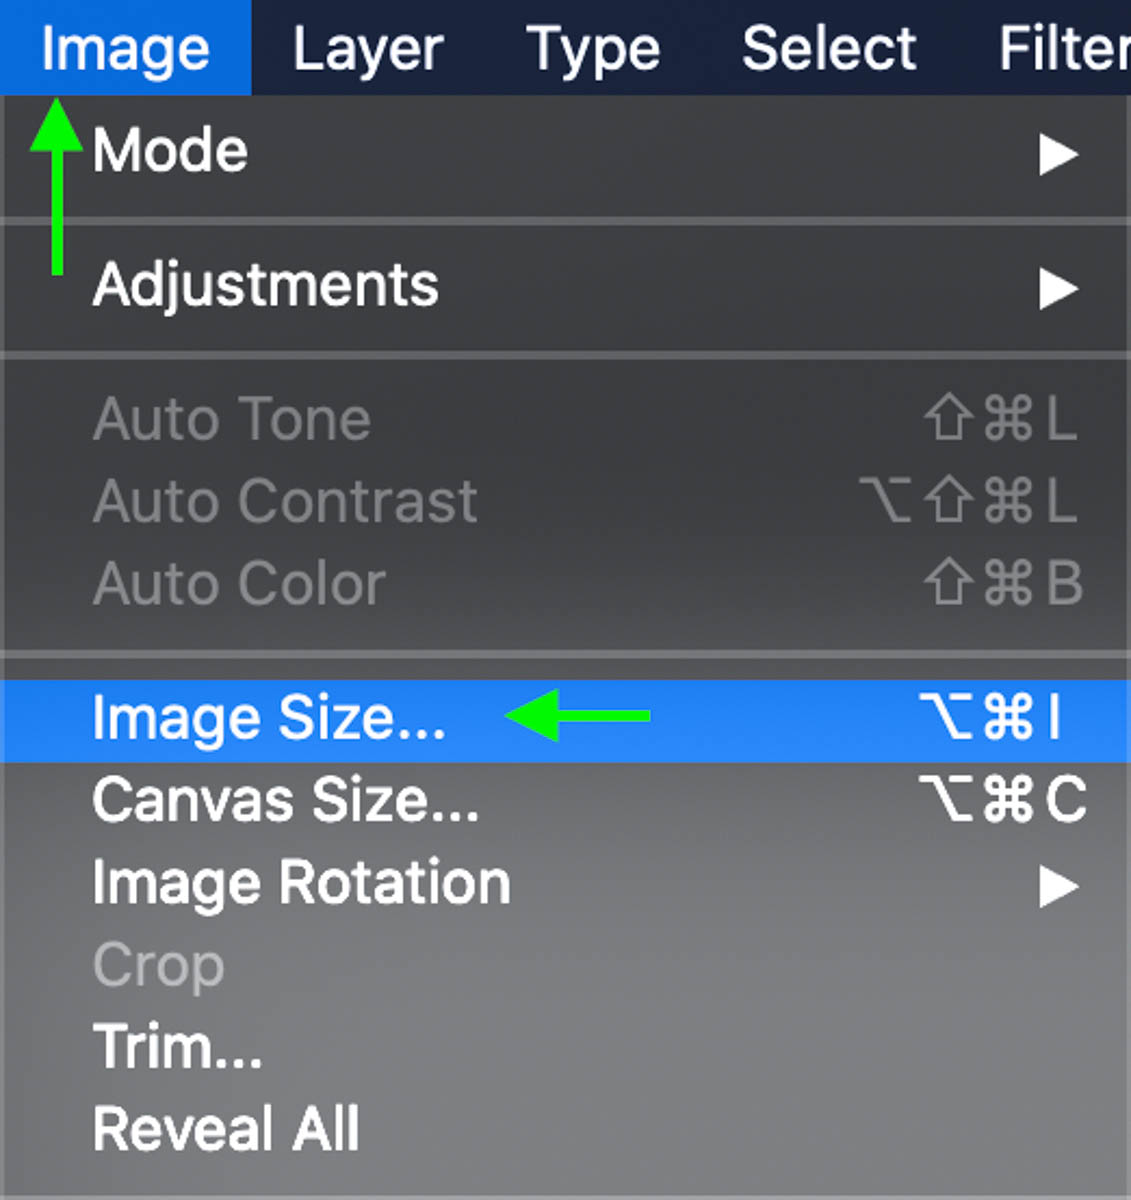
In the window that comes up, make sure Pixels/Inch is selected as the default Resolution measurement, and edit the number to anything over 300.

Apply this and you’ll notice the edges of your text suddenly become much cleaner.
Seeing pixelation in images and text while working in Photoshop can be frustrating, especially if you don’t know the reason. Hopefully, now that you understand some of the most common reasons text can appear pixelated, you can apply these easy fixes and get a crisp, smooth-edged text for a beautiful final result. To learn more about working with text in Photoshop, check out my complete guide here!
Happy Editing!


