Knowing how to make any color transparent is a useful skill to have when using Photoshop. Often in projects, the design or edit requires elements from an image to be added to other designs with transparent attributes. Luckily with the help of selection tools like the Magic Wand tool and the Select Color feature, turning color into transparency is pretty straightforward.
To make a color transparent in Photoshop, go to Select > Color Range. Click on the color you want to remove, then hold Shift to add additional colors to the selection. Adjust the Fuzziness slider until your subject is white then click OK. Lastly, press Delete to make the selected colors transparent.
How To Make A Color Transparent In Photoshop
Making a color transparent is not as hard as it may sound. Using color-based selections, you can easily select parts of an image and make them transparent by deleting or masking the rest of the layer.
Option 1: The Magic Wand Tool
The magic wand tool allows you to make selections based on color and tone. This tool is ideal for removing monochromatic areas or areas that are very similar in tone. It is also easy to use when the object you want to keep is a different tone to the background you are removing.
In order for the magic wand tool to work at its best, you need to adjust its settings properly. Here, you will learn how to adjust the magic wand settings so that you are able to use the tool more efficiently. To explore the Magic Wand tool options, first, click the tool icon from the toolbar.
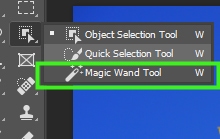
Once you select the tool, the Options bar will display all the magic wand tool options.

By default, when the magic wand tool is selected, Photoshop enables the new selection option. Thus, when you click an area of an image, the tool will select the color tones you clicked on.
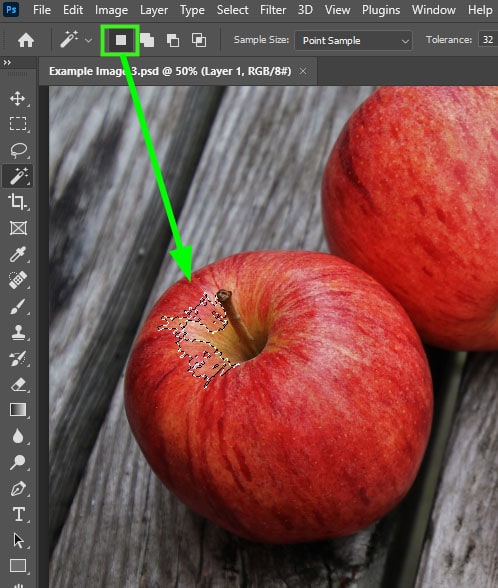
To select an additional area, click on the second square icon on the Options bar known as the Add To Selection setting. When you do this, a plus sign icon will appear next to the magic wand. The shortcut for this option is holding in Shift and clicking if you don’t want to make changes up the upper bar.
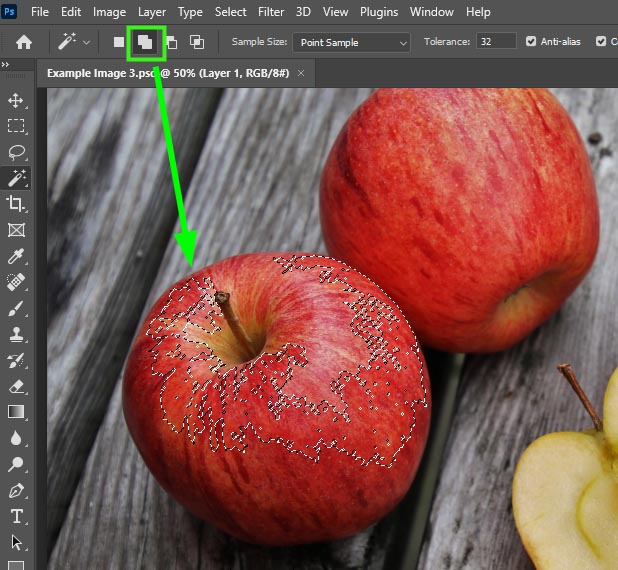
To subtract an area from your selection, click on the third square icon. The shortcut for this action is Alt (Win) or Option (Mac).
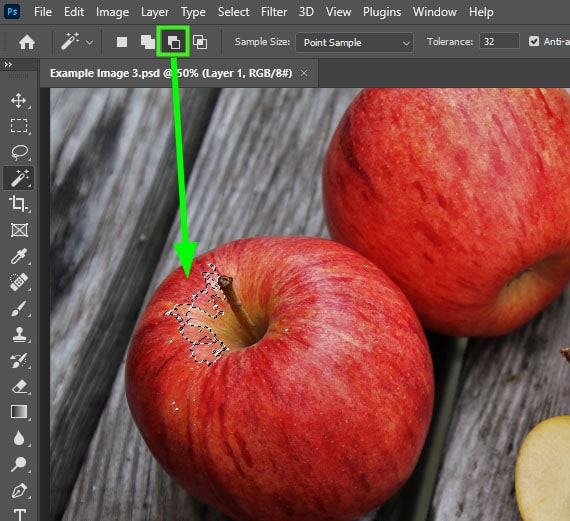
If you want to select the intersection between two selections, click the last square option.
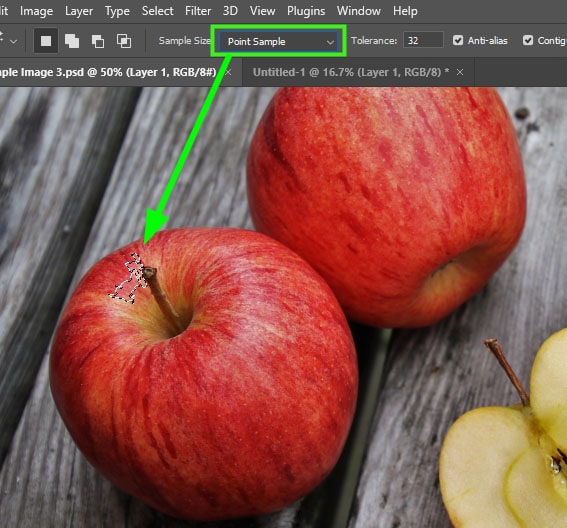
The Sample Size option is set to Point Sample by default, which means any selection you make will be based on a single pixels color. That’s why the magic wand tool only selects a small area when I click my image in the example below. Its sample is extremely specific, therefore it’s pickier with what other colors it selects.
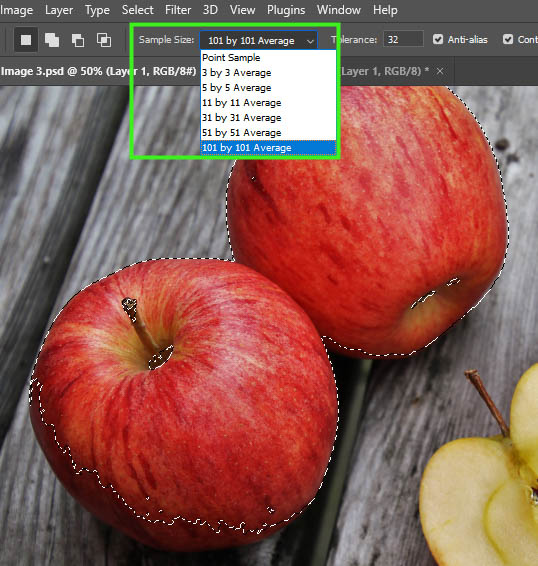
But the sample size menu allows you to increase the sample size up to 101 by 101 Average, which samples more pixels for the selection. This makes your job easier if you intend to select the largest number of pixels from similar tones.
By default, Tolerance is set to 32 pixels, which means the magic wand tool selects pixels in the range of 32 tones below and above the pixel color you selected.

Anti-alias reduces selection imperfections, such as jaggedness and sharp edges. You should always make sure this option is selected.

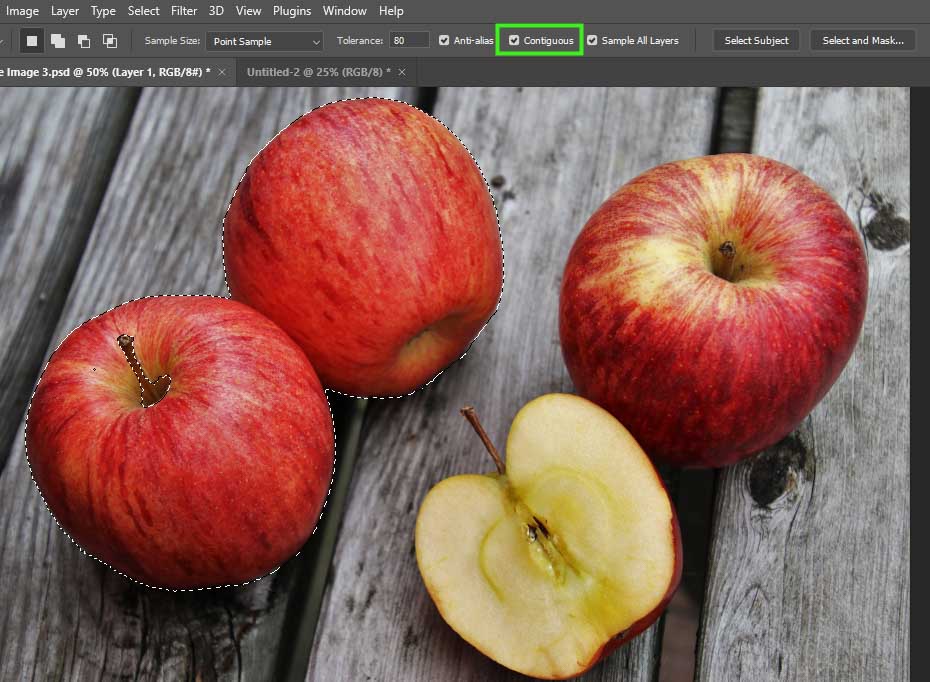
Contiguous is another useful option that you will constantly use. Select this option if you only want to select pixels of similar tones that are directly next to each other. While contiguous is enabled, the tool will only select colored pixels that are touching, while excluding any ones that are isolated from your original sample.
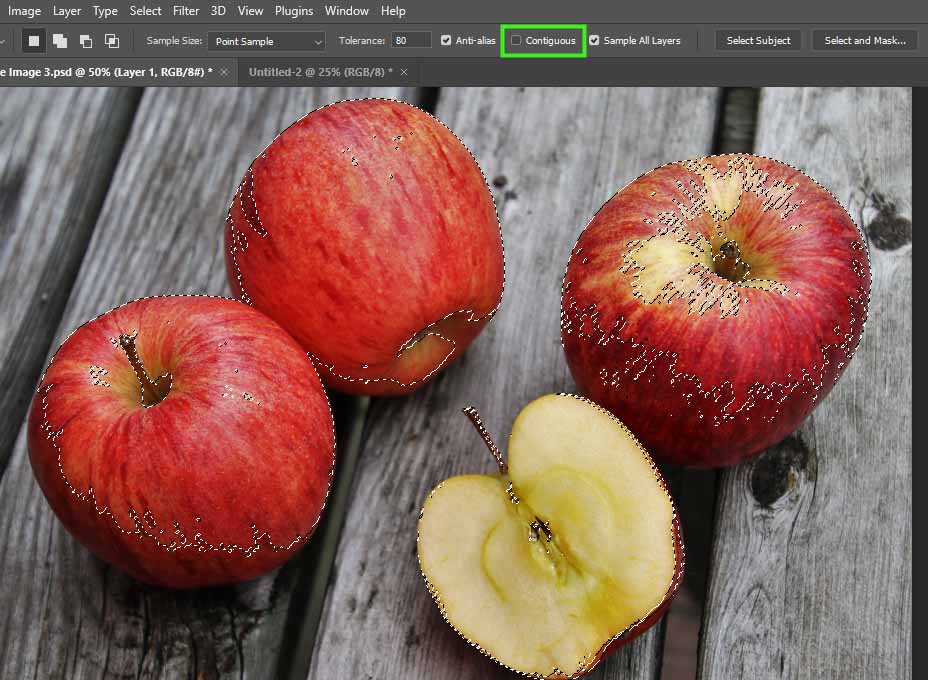
If you uncheck this option, the magic wand tool will select pixels of similar tones from your entire image rather than colored pixels that are touching.
Finally, Sample All Layers is a useful option for making selections with the magic wand tool in two or more layers.

This way, you can make selections on all the layers in the Layers panel at once.
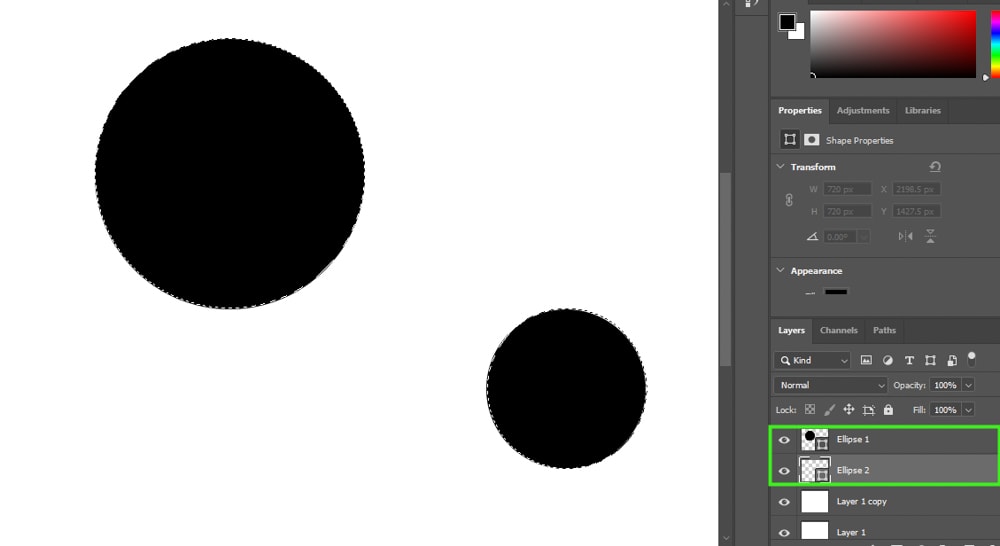
Now that you know all the magic wand tool options, let’s look at an example of how to make a color transparent using a different image.

Click the magic wand tool from the toolbar (W) to start making your selection.

Next, adjust the settings in the Options bar. For my image, I want to increase the tolerance, so that more pixels are selected since the background has different tones.
For example, the area near the sunflower is brighter than the area near the edges of the image. As I want all blue pixels gone, no matter what tone they are, I set the Tolerance to 78.

Then, I will check Anti-alias because I want to reduce the risk of imperfections in the object’s edges.

Next, I will uncheck Contiguous since I want all blue pixels gone, no matter where they are in the image. By adjusting this setting, the magic wand will select similar pixels from the whole image. I will also uncheck All Layers since I only have one layer in my Layers panel.

With the settings adjusted, I will click anywhere in the blue area of the image. The pixels containing the tones within the chosen range are now selected.
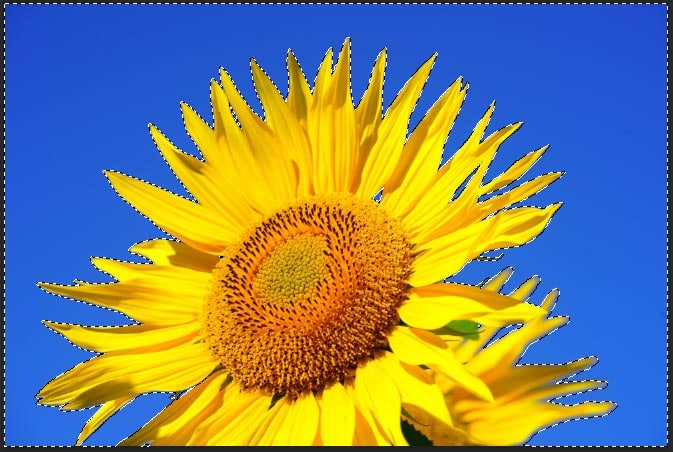
Notice every part of the blue background was selected. Since the magic wand settings were adjusted, I don’t need to subtract or add any more content to the selection.
Now, to make a selection transparent, you need to either delete the content you selected or create a layer mask. The difference is that if you delete the content, you can’t refine your selection.
If you’re not worried about refining your selection, press Delete on your keyboard.
However, if your selection may need refinements, you should create a layer mask instead. To do that, invert the selection by pressing Control + Shift + I (Win) or Command + Shift + I (Mac).

This is necessary because the layer mask shows content within a selection and hides all content outside the selection.
Now, create a layer mask by clicking the layer mask icon at the bottom of the Layers panel.
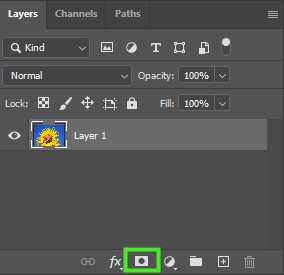
This will create a layer mask and make the unselected content transparent, which in this case is the sky.
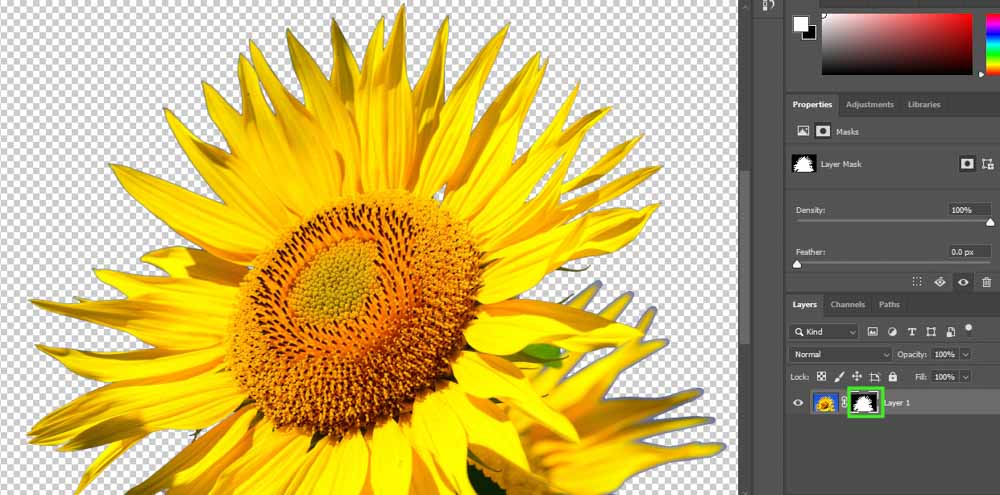
Although the layer mask does a good job making the area you selected transparent, you still need to refine your selection in most cases to get rid of color fringing and other selection imperfections. To do that, double-click the layer mask.
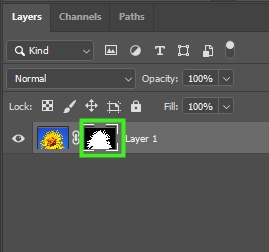
This will bring up the Select And Mask workspace, where you can find several options to refine your selection.
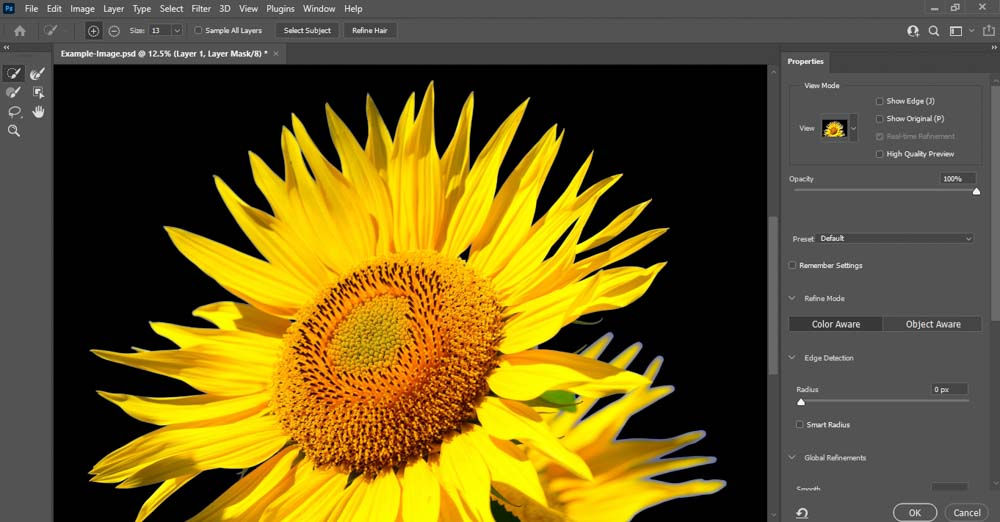
For my image, I clicked the Refine Edge brush tool on the left side of the panel, which is an excellent tool to refine the edges of selections with fur, hair, feathers, or even flower petals. I then painted over any areas with fringing to remove any unwanted pixels surrounding the sunflower.

When you’re finished refining your selection, click ok to exit the Select And Mask workspace.
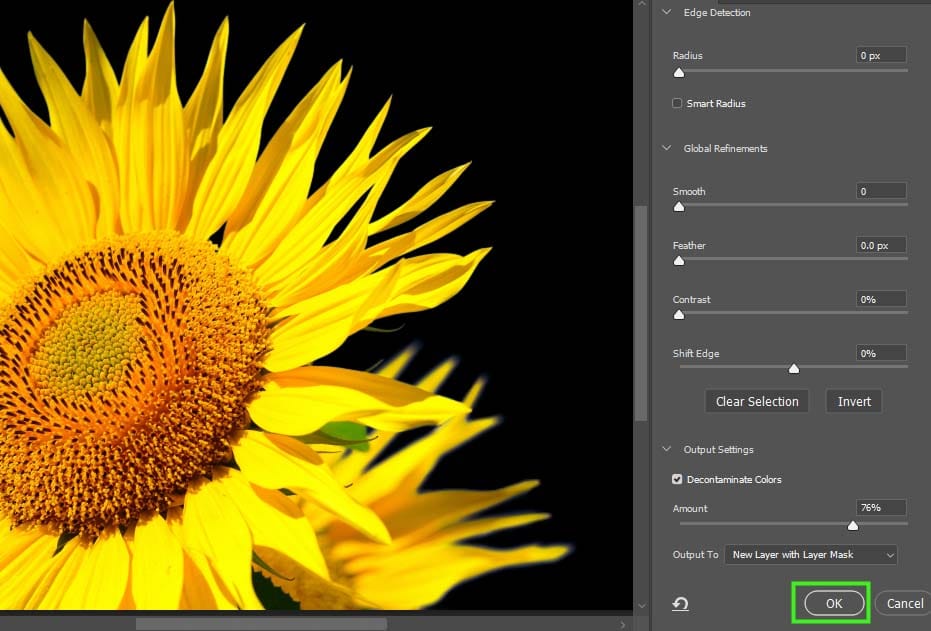
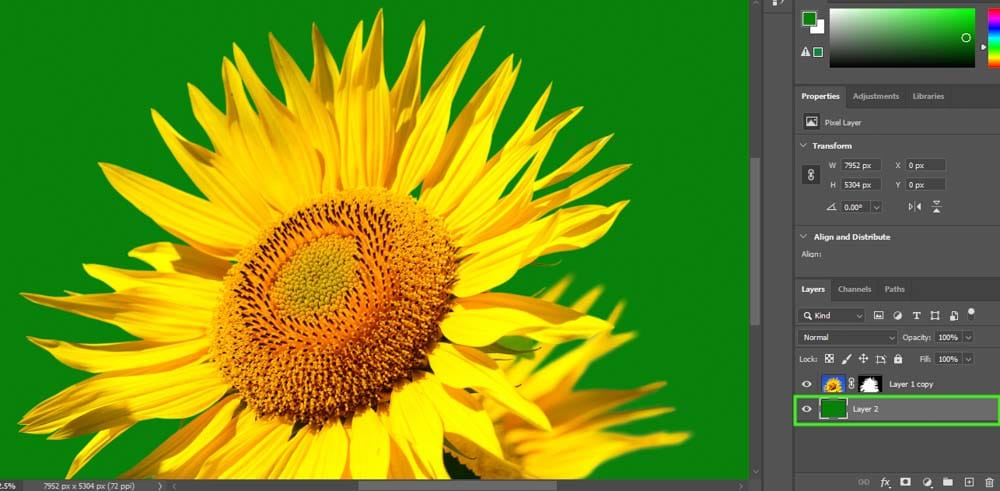
Then, you can go back to the canvas, where you can do many things to your image, such as changing its background or even export it as a PNG file to save your transparent background.
Option 2: Select Color Range
You can also make a color transparent using the color range tool. This selection tool is very similar to the magic wand tool, but it offers other advantages. The color range tool allows you to select a wider variety of tones in your image by sampling colors and turning them into a selection. In some cases, it proves far more user-friendly than the magic wand tool.
The main similarity between the Color Range tool and the Magic Wand tool is the number of settings available to refine the selection.
To use the color range, bring a photo into Photoshop with a monochromatic area or an area with similar tones that you want to remove.

Then go up to Select > Color Range.
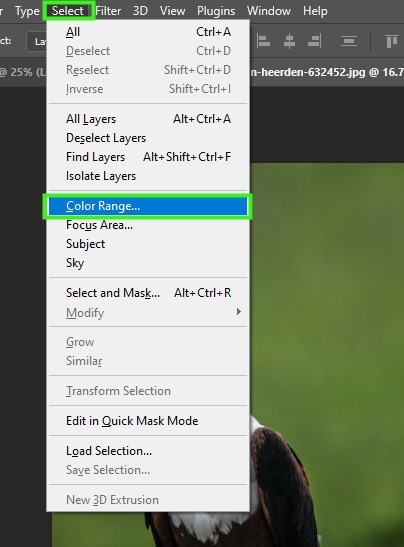
Once the color range panel opens up, you need to adjust some settings for the tool to work efficiently. First, choose Sampled Colors from the Select menu.
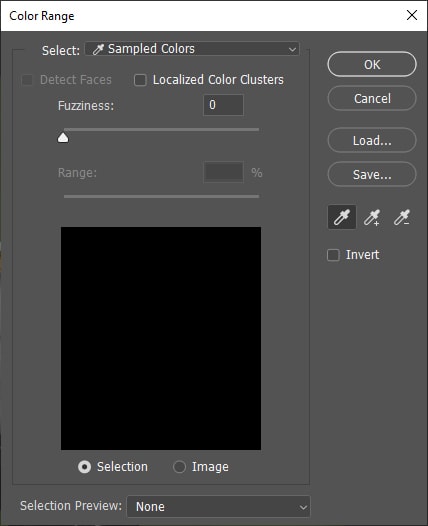
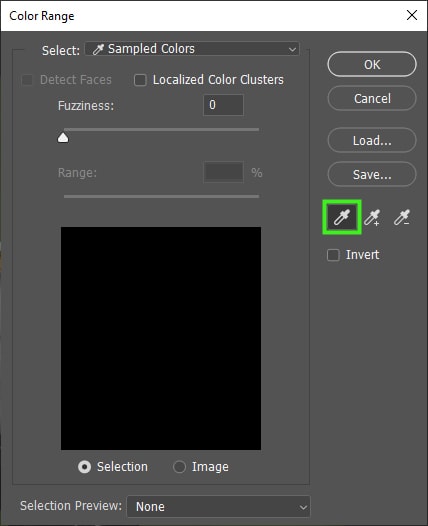
This will enable the eyedropper tool, so you can sample a color from the area you want to make transparent.
Next, it’s time to adjust the Fuzziness. Fuzziness controls the range of colors that the eyedropper tool can sample.
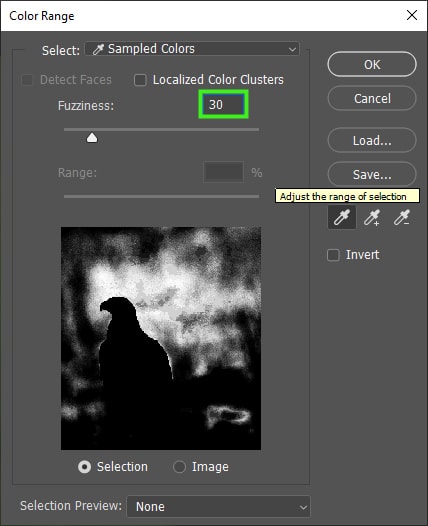
Fuzziness at 30 means Photoshop will select pixels from the same color as the one you sample and pixels that are 30 tones brighter and 30 tones darker from the color you sample.
Fuzziness is like Tolerance to the magic wand tool. The difference is that you can change fuzziness any time while making a selection and even after it, which gives you more control while making your selections.
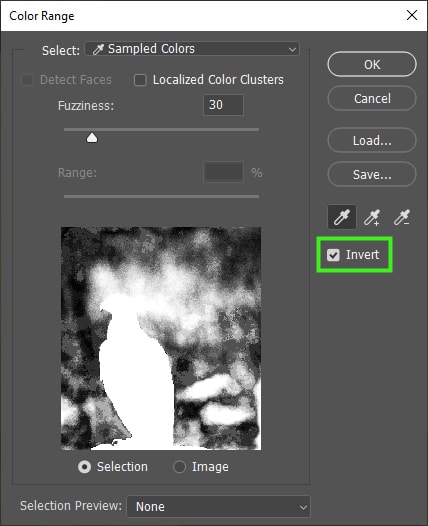
Another setting you may want to change is Invert. By checking the Invert checkbox, the area you want to make transparent will turn black and the area you want to make visible will turn white, just like it happens with a layer mask.
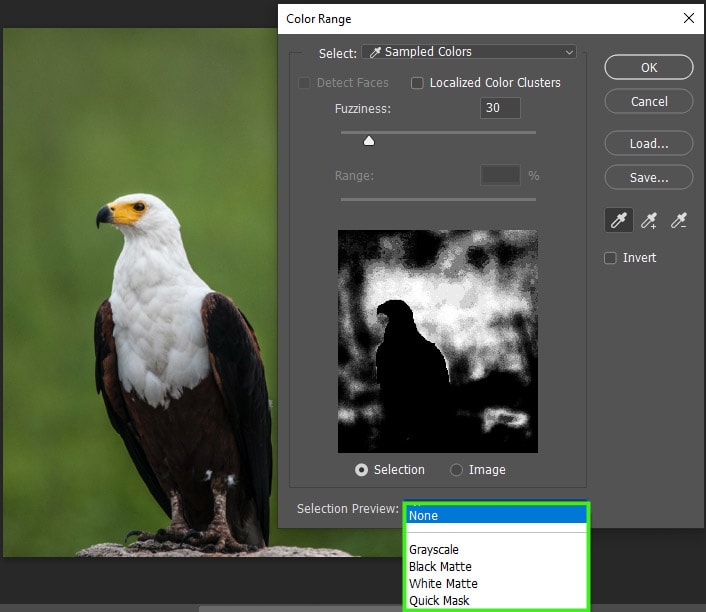
Selection Preview controls what you see on the canvas. If you’re already seeing your selection in the preview window in the color range panel, it’s better to set Selection Preview to none. Otherwise, you can choose from one of the selection preview modes available.
After adjusting all the color range settings you need, you can start sampling the colors you want to make transparent. To do that, simply click the area you want to make transparent.
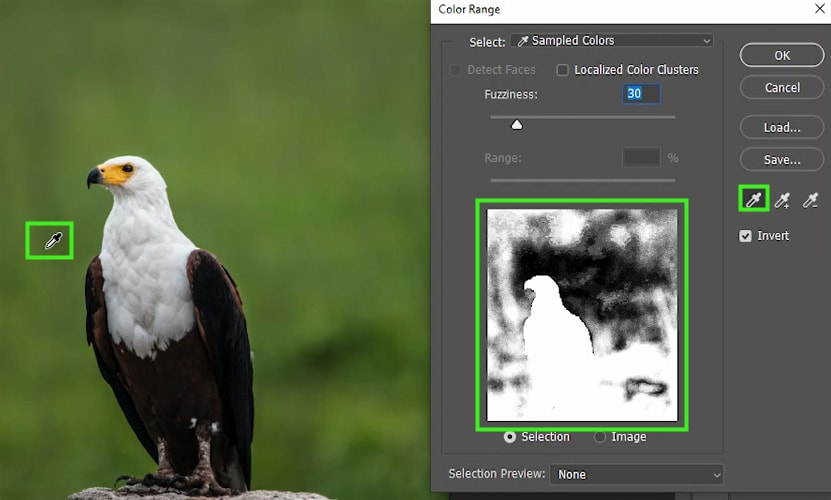
You can add more colors to the selection by pressing Shift while clicking on the other regions of the image you want to add. When you press Shift you will notice a plus sign icon will appear next to the eyedropper tool. You can also press Shift while dragging around the image with the eyedropper tool to add more content to the selection.
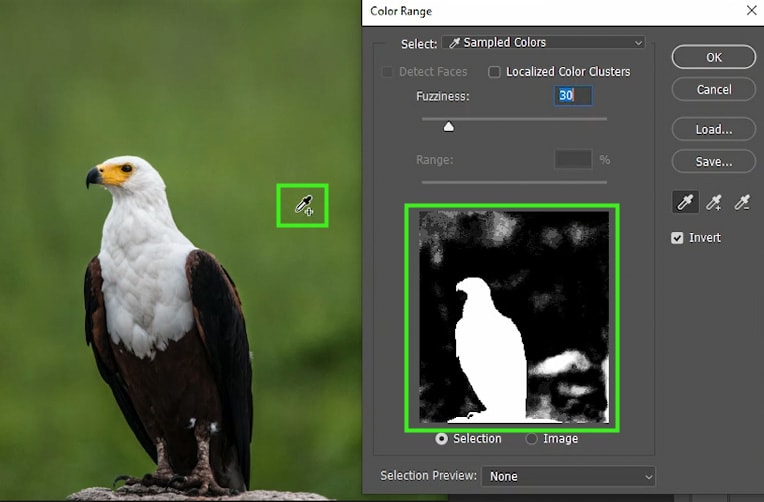
The goal here is to make the content you want transparent turn black, and all content you want to make visible turn white in the preview window.
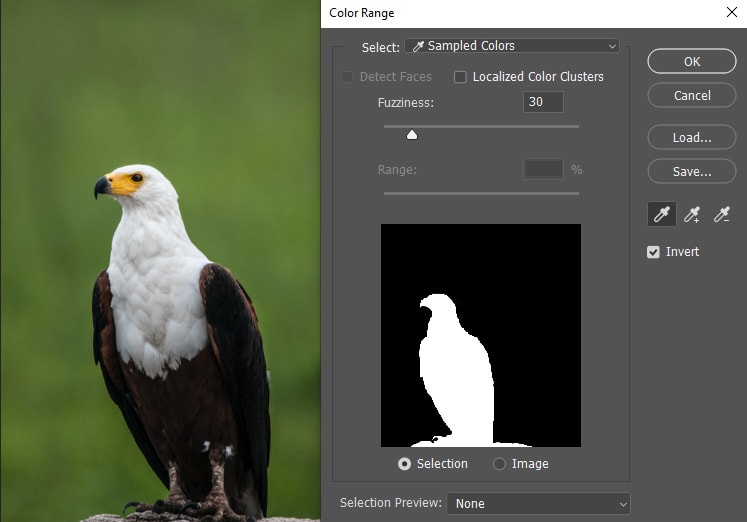
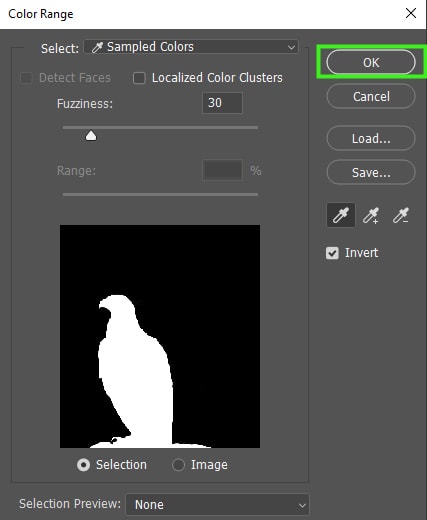
When that happens, click OK to exit the color range panel and create the selection.

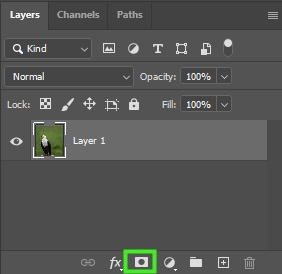
Now, with your image layer selected, click the layer mask icon at the bottom of the Layers panel to create a layer mask and make the color you selected transparent.
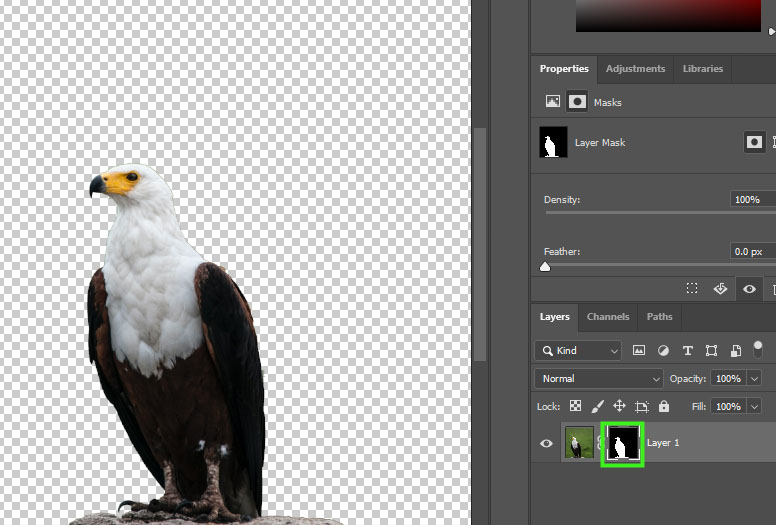
After making your selection transparent, you can double-click the layer mask to open the Select and Mask workspace where you can refine your selection.
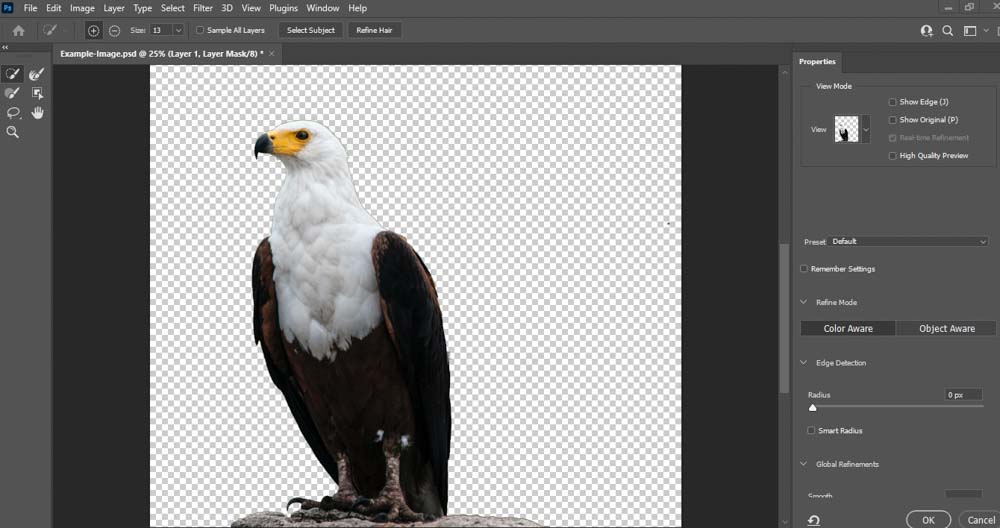
On the right side of the selection and mask workspace, for example, you can access the Global Refinements options to refine the edges of your selection.
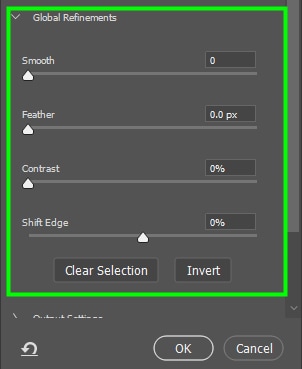
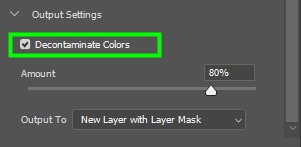
Then, in Decontaminate colors, you can get rid of color fringing.
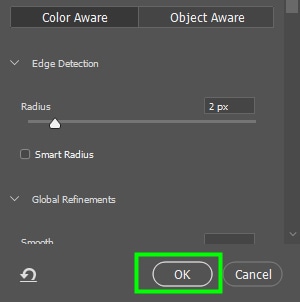
After sharpening your selection, click Ok to exit the Select and Mask workspace.
How To Export Your Image With Transparency In Photoshop
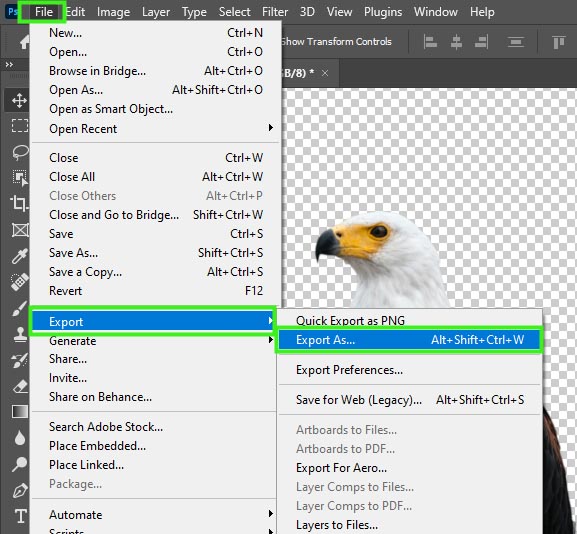
After making your selection transparent, you can export your image with transparency to use in other projects.
To do that, go to File > Export > Export As. You can also press Alt + Shift + Control + W (Win) or Option + Shift + Command + W (Mac).
In the Export As panel, set the Format to PNG, check the Transparency checkbox, and click Export to save the file with the settings you adjusted.
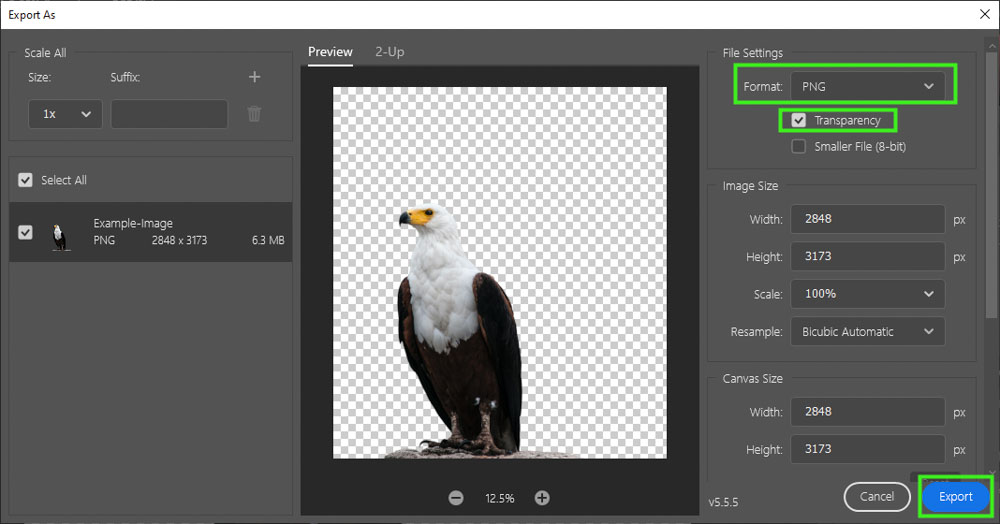
With the help of these two tools, you can quickly sample colors and make them transparent in Photoshop whether you’re working with images, graphics, or text. Just remember that to export your image with transparency, you must export as PNG to preserve the transparent attributes.
Happy Editing!


