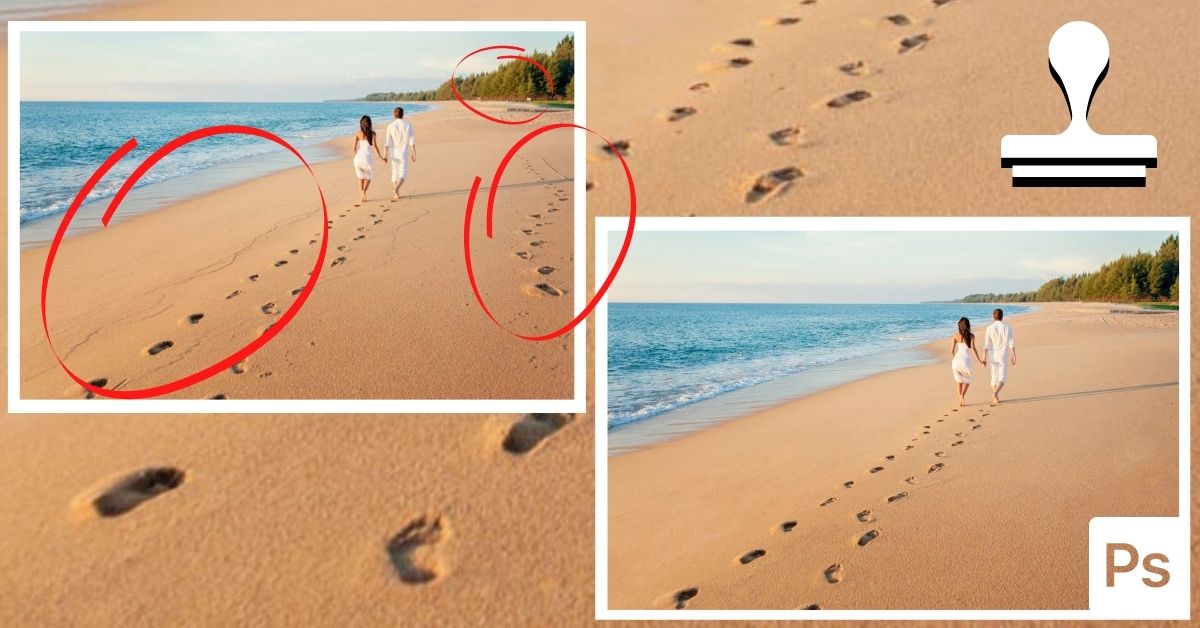
The Clone Stamp tool in Photoshop is one of the most versatile options for removing unwanted objects from a photo. Whether it be an entire person, a footprint on the beach, or a blemish on your subject’s face, the Clone Stamp Tool can do it all. Although this tool is relatively easy to use, it does require a bit of up-front knowledge to know how to use it properly. That’s why in this tutorial I will walk you through everything you need to know when using the Clone Stamp tool so you can easily remove unwanted parts of any photo!
Let’s get started!
Video Tutorial
What Is The Clone Stamp Tool Used For?
Have you ever taken a nice picture but a light pole, a bag, or any other random object distracts from your subject? This is super common and often impossible to avoid in some locations that you shoot in. Luckily, the clone stamp tool can be used to remove these objects from your photos entirely.
This tool works by taking pixels from one part of an image and placing them over your unwanted objects. This effectively “hides” the distractions in your images and makes it seem like they were never there.
How To Locate The Clone Stamp Tool In Photoshop
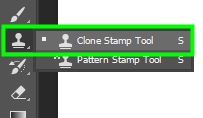
The clone stamp tool is located in the toolbar. The shortcut for this tool is S.
Clone Stamp Tool Settings Explained
Once you enable the clone stamp tool, the settings will appear in the Options bar. Here are the 13 settings available for the Clone Stamp tool.
1. Tool Preset Picker

This option allows you to pick clone stamp tool presets to work with. It will only work if you have any preset saved for the clone stamp tool.
2. Brush Preset Picker

The Clone Stamp Tool is a tool that copies and pastes pixels using a brush. This means that adjusting brush settings is essential for getting excellent results. The most important settings in the brush preset picker are size, hardness, and type. If you are familiar with the brush tool in Photoshop, these settings operate the exact same way.
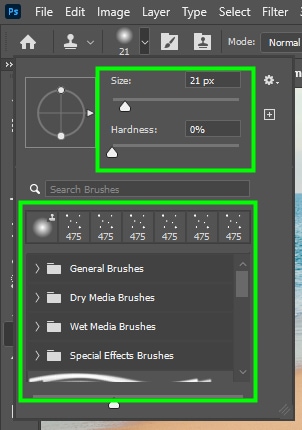
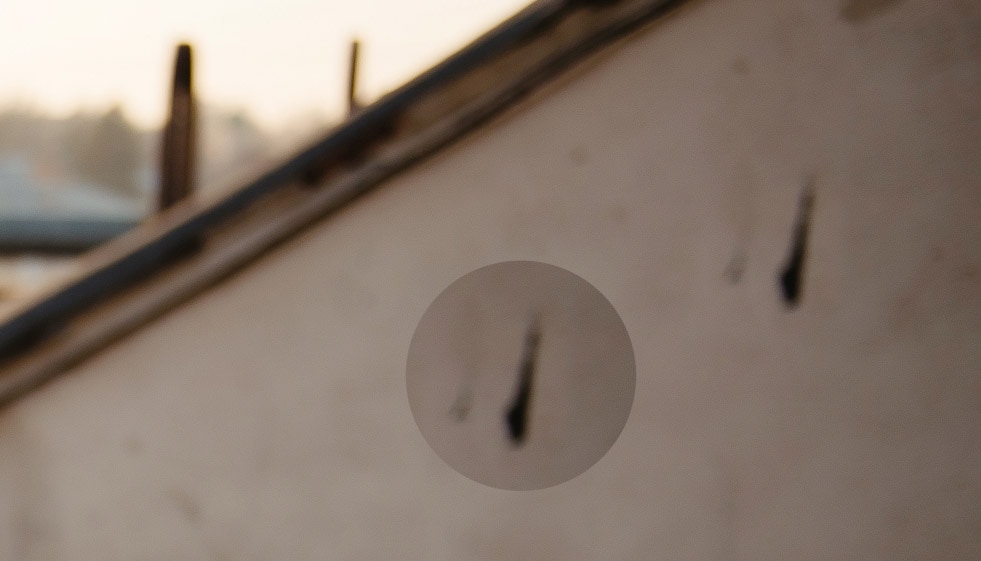
You must adjust the brush size according to the size of the area you want to clone/remove. You can change the brush size using the Size slider or press [ to decrease and ] to increase the size.

In the example below, let’s say I want to duplicate an object that looks like an electrical wire. Then, I set my brush size to 48 px. The circular icon represents the brush.
When sampling a small area, press Control + + (Win) or Command + + to zoom in on the image. Press Control + 0 (Win) or Command + 0 (Mac) to return to the regular image size view mode.

When sampling pixels, you can choose either a bigger brush than the object you are sampling or a smaller brush than the object. A smaller brush will allow you to copy fewer pixels at a time, which will give you greater precision. As a general rule, making your brush slightly larger than the object you want to remove is your best bet.
Setting brush hardness to a low value makes the pixels you sample blend smoothly with pixels from the area they will be painted into. A high hardness value, on the other hand, creates well-defined edges.



In most cases, it’s better to set the hardness to a low value. However, there are times when it is necessary to increase the hardness such as when cloning near the edge of something in your photo.
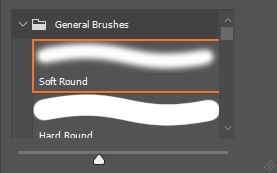
For type, you can pick any brush you want. But for best results, I recommend you choose a soft round or a hard round brush. The soft round brush applies a slight blur/feather to pixels. The hard round brush, on the other hand, samples and paints pixels with a defined outer edge to the brush.
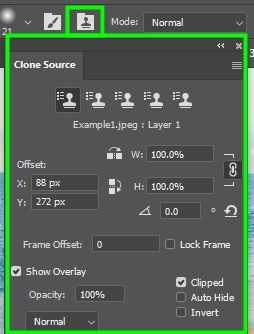
3. Clone Source

In the Clone Source panel, you can change many additional clone stamp tool settings. For example, you can rescale the area you cloned, change its orientation, and much more.
4. Mode

In Mode, you can alter the clone stamp tool blending modes. The blending modes available for the clone stamp tool are the same as those available for layers.
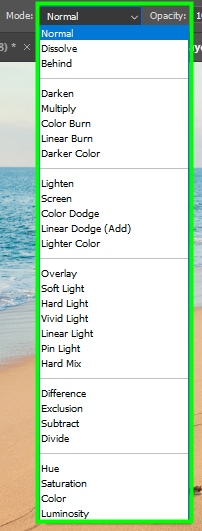
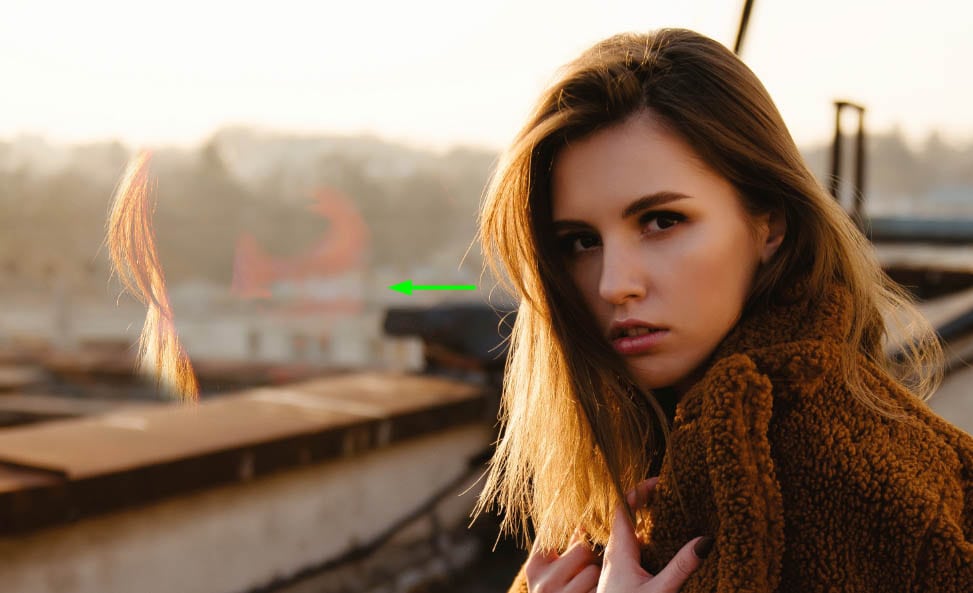
When changing the blending mode to Lighten, for example, the clone stamp tool will blend its sampled area differently into the photo.
5. Opacity

Opacity changes the visibility of pixels.

6. Brush Pressure – Opacity

This option only works with drawing tablets. Opacity changes according to the pressure you put on a pen while drawing on a tablet.
7. Flow

When you decrease flow, you will need to paint over the target area more than once to apply the sampled pixels completely. This gives you more precision when removing objects against a more complex background.
8. Airbrush
By enabling this option, the clone stamp tool will behave like an airbrush, rather than a regular brush.

9. Brush Angle

Changing brush angles can be useful for selecting difficult areas or when using a shaped brush other than a round brush.
10. Aligned

The Aligned option acts in sync with the movement of your cursor when you clone pixels. It does this by supplying you with new pixels when you continue painting over the target area.
For example, I cloned the model from the image below in two ways to highlight how the aligned setting works.

The first time I left Aligned checked and got this result.

I sampled the pixels from the model’s face (source area). When I painted over the target area (on the left), the face of the model appeared. As I continued painting over the area, the clone stamp tool supplied me with pixels from the model’s body since the source area moves in sync with my clone stamp brush.
Even when I released the mouse and got back to cloning the area a second time, the pixels that were sampled were a continuation of the previous pixels.
However, when I unchecked Aligned and took a sample from the model’s face again, the clone stamp tool duplicated the exact pixels I sampled initially. That’s because when aligned is unchecked, the sample area stays in the exact same position, regardless of where your cursor goes. In the below example, the source stayed on the subject’s face, while my cursor moved around the image.

For most cases, you will want to leave Aligned checked, since it often makes your job easier. But if you want to clone pixels from a single source repeatedly, leaving Aligned unchecked is ideal.
11. Sample

In Sample, you determine which layers will be affected by the clone stamp tool.

If you choose Current Layer, the clone stamp tool will affect your active layer only.
If you choose Current & Below, the tool will affect the active layer and the one below it. This option is ideal for when you create a blank layer to make edits and are using an image layer as the source of your cloning.
If you choose All layers, all layers in the Layers panel will be affected, regardless of their position in the layer stack.
12. Ignore Adjustment Layers When Cloning

By enabling this option, you sample raw pixels, with no effects applied to them by adjustment layers.
13. Brush Pressure – Size

This option is only useful when you’re using a drawing tablet. When you enable it, brush size will change according to the pressure you put on the pen while painting with the tablet.
Additional Settings In The Clone Source Panel
Beyond the settings available in the Options Bar, you can find additional settings for the clone stamp tool in its dedicated panel. Here are the most useful Clone Source panel settings.
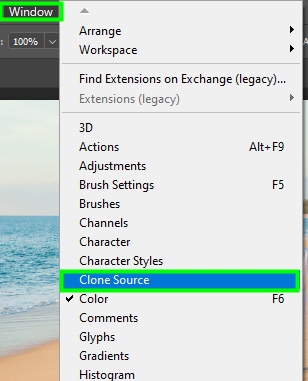
To access the clone source panel, go to Window > Clone Source.
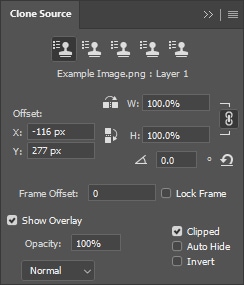
The stamp icons at the top of the panel indicate the source of cloned pixels. You can choose up to five pixel sources. These pixels can come from the same image you are working with or any other image opened in your workspace.

The next section is Transform.

This section lets you adjust the scale, orientation, and angle of a source object. To rescale the object, click the chain icon and enter a lower or higher value than 100% in the Width or Height fields.
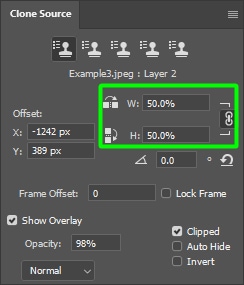
You can also flip your cloned object horizontally or vertically. To do this, deselect the chain icon and click on the Flip Horizontally or Flip Vertically icon. These options are useful when you want to copy an object, but don’t want them to be pasted in its original orientation.

To change the cloned object angle, enter a degree value between 0 and 360 in the angle box.

To undo the changes made in the Transform section, click the undo icon, next to the angle option.

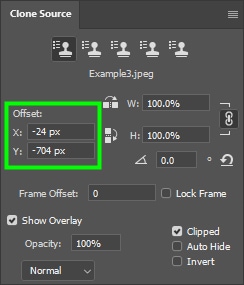
The Offset section displays the distance between your brush and the source area. To change the offset value, type in any value in its horizontal (X) or vertical (Y) boxes.
Photoshop creates an overlay layer every time you clone an object. You can activate the overlay layer view mode by clicking on Show Overlay. This helps to see what lies beneath your cloned area as you work.

You can also adjust the opacity of that layer. As a result, it will be easier to keep track of the pixels you clone. You can also change the position of the cloned area. To do this, drag the overlay layer with the Move tool (V).
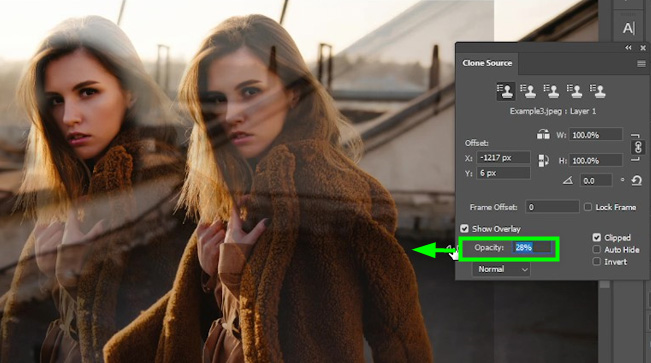
The last setting that is worth enabling is Clipped. When it is enabled, you can see the preview of cloned pixels within your brush.

How To Use The Clone Stamp Tool To Remove Objects In Photoshop
Now that you know all the clone stamp tool settings it’s time to see how this tool works. For this example, let’s remove some footprints from the beach to make it look a bit more pristine.
Step 1: Create A New Layer
Creating a new layer for your clone stamp edits is the best way to use such a tool. This way, you don’t risk affecting the original image layer.
To create a new layer, bring the desired image to Photoshop. Then, click the plus sign icon at the bottom of the Layers panel.
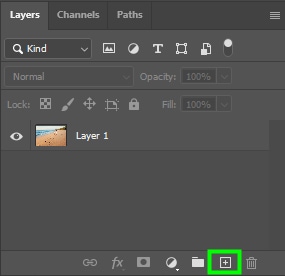
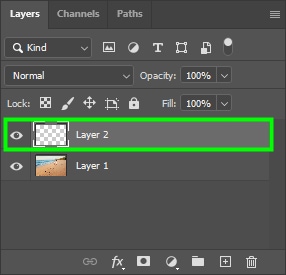
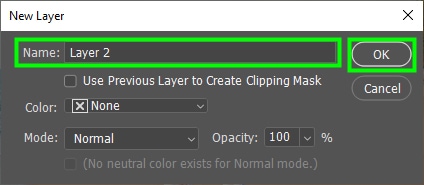
Alternatively, press Control + Shift + N (Win) or Command + Shift + N (Mac). Then, name the new layer and click ok to confirm the action.
Step 2: Decide What Pixels To Remove
Before you use the clone stamp tool, you want to consider what you need to remove, and what areas could be used to cover it up.

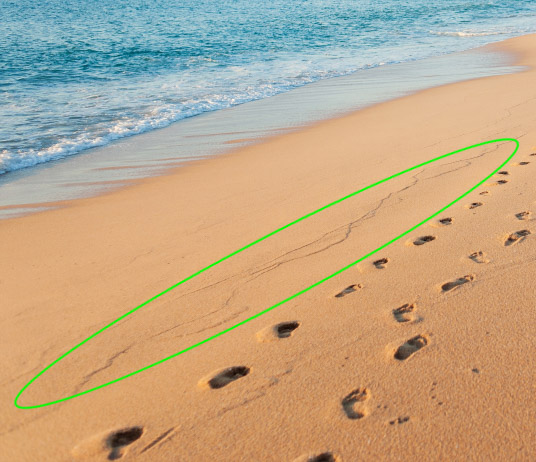
For example, there are some patterns from waves on the beach, extra footprints on the right corner of the image, and signs near the trees.
As it’s impossible to eliminate all unwanted elements at once with the clone stamp tool, you need to define a starting point and work through each section one by one. My starting point was the lines on the left side of the image.
Step 3: Change The Settings In The Options Bar
As the lines on the beach I want to remove are thin, I’ll use a smaller brush size for my cloning.
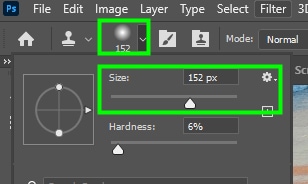
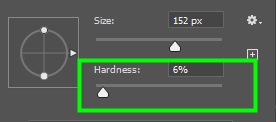
And since I don’t want the borders of the brushstrokes to look harsh, I reduced hardness to 6%.
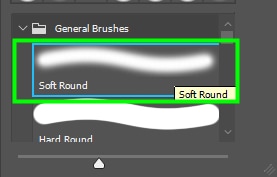
For the brush type, I chose a soft round brush. It makes the brushstrokes feathered so they blend better with the area they are painted on. This is useful when the area of the image you are working on is slightly out of focus or has a single texture or color.
As for Flow, I set it to 86%. This way, I could paint new pixels at a slower pace, making it easier to control how the clone adjustment appears.

Next, make sure Aligned is checked so that you don’t clone the same pixels when you paint over the target area.

Finally, make sure Sample is set to Current and Below. This way, the edits will be placed on the new layer you created, and the pixels to be cloned will come from your original image layer.

Step 4: Start Sampling The Source Area
Select pixels near the target object to serve as source pixels. This is because they are more likely to blend well with the area you will cover.
In my case, I sampled pixels near the beach sand lines.
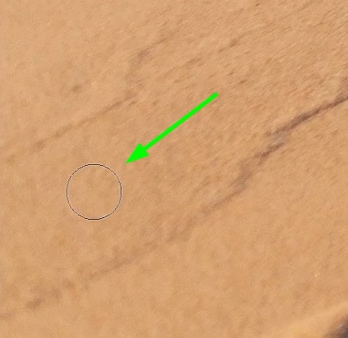
To set your sample, hold Alt (Win) or Option (Mac). When you do this, your cursor will turn into a target icon. Now click on the area you want to define as your clone source to set your sample.
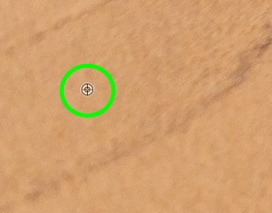
Now begin to paint over the areas you want to remove from the image.
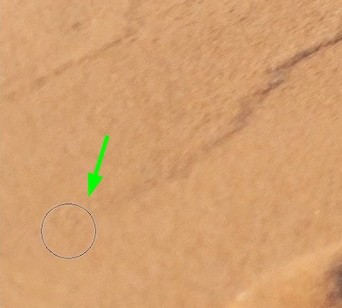
Step 5: Cover The Target Area
As you clone, you will also see a little cross icon positioned near the brush. This cross icon tells you what pixels are being sampled to cover the unwanted object. When Aligned is checked, this crosshair will move with the brush to sample new pixels as the brush moves around the image.
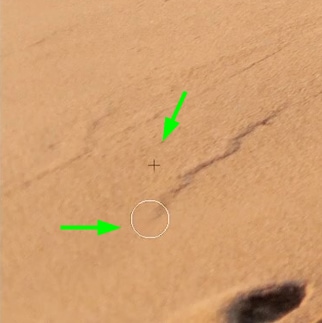
Depending on the image, your sample will only get you so far until it samples something you don’t want. In that case, once again hold alt or option and reset your sample before continuing your clone adjustments.
In the end, you will likely have to sample multiple sources to cover an unwanted object. In addition, depending on the complexity of the elements you want to remove, you will need to adjust brush hardness and opacity several times as you proceed. In the below example I followed the same steps from previously to remove all the unwanted elements in the photo.


Cloning Vs. Healing In Photoshop
The clone stamp tool copies the exact pixels in an area and pastes them in another region of the photo. For pixels from different sources to blend well, you will have to adjust the clone stamp tool settings such as the brush type, opacity, and flow.
On the other hand, the healing brush tool uses Photoshop artificial intelligence to blend pixels from different sources. Consequently, pixels tend to blend well after you apply such a tool, especially when it comes to tone and color. An easy way to think of this is that the clone stamp “copy and pastes” pixels, while the healing brush “blends” pixels.
Because of this, the healing brush tool is often inefficient for removing large objects. This is because large objects are often positioned against pixels of different textures, due to their size. Since the healing brush tries to blend your sampled pixels, you typically end up with undesirable results. However, for removing blemishes from skin or objects against a solid color background, this tool can work even better than the clone stamp tool.
To make life easy, here’s which situations you would opt to use the clone stamp tool or the healing brush tool:
Clone Stamp tool: for removing people and large objects, dealing with patterns, or removing objects near a defined edge such as a building or person.
Healing Brush Tool: For correcting textures with small imperfections, such as grass, rugs, and walls, treating minor skin problems such as acne, dark circles, and blemishes, and removing stains.
Learning how to use the clone stamp tool is one of the most useful skills you can have while editing photos in Photoshop. Now to help you better understand how the clone stamp tool can be used in a full photo editing process, check out this next tutorial I wrote on 10 easy steps to editing photos in Photoshop.
Happy Cloning!
